


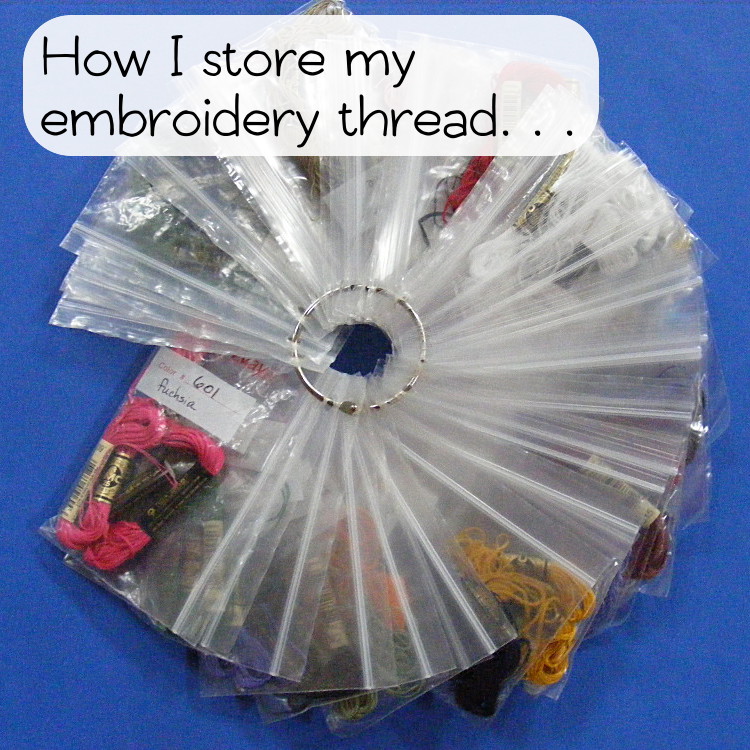
Way back in March I wrote a newsletter post and then a blog post about how I organize my embroidery thread. I had tried a few different methods – but none really gave me exactly what I was looking for so I asked you all for your advice. Wendi from Sew Cat Sew had a genius approach I had never tried before – and I pounced, with a tiny variation of my own because I couldn’t find the exact product she mentioned at any of the sewing or craft stores in my area.
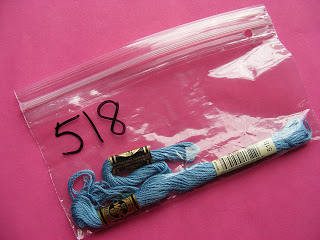
Each color thread goes in its own ziploc bag.
I couldn’t find the special bags Wendi used, so I just used snack-sized ziplocs from the grocery store. I punch a hole in the bag with a regular hole punch, then I write the DMC # on the bag with a fat Sharpie.
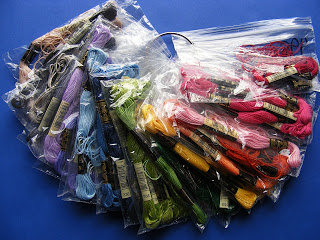
I put all the same colors together onto a binder ring (available at any office supply store). I have separate rings for red, orange, yellow, green, blue, purple, brown, white and off-white, black and gray. I dump all the bundles into a pretty basket. Easy peasy.
When I choose all the threads for a project, I pull them off their rings and create one ring with everything I need for that project. This makes it super-portable, which I love.
I realized I was constantly pulling off the same colors over and over again, so I took a good hard look at my enormous thread collection and created a ring with all my favorite lights, mediums, darks, and neutrals. Now I start here and only pull from the other rings when I need something outside my normal range. You can find some of my favorite embroidery thread and matching felt bundles in my shop!
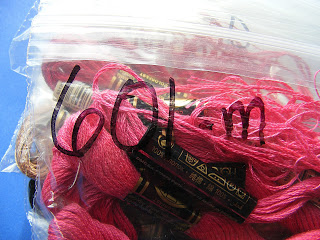
There was still one slightly annoying problem. Even though I wrote big, and with a nice fat black marker, the numbers on the baggies were sometimes difficult to read at a glance – especially if there were threads visible behind the number, which is usually the case when they’re all ringed together.
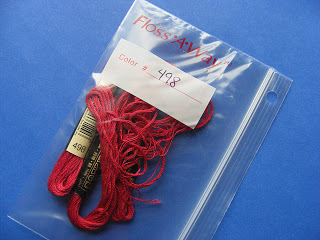
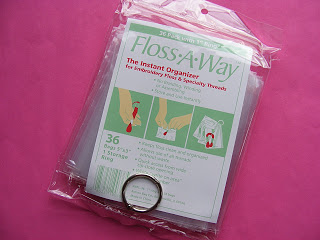
So I went back to Wendi’s note and found the baggies she used. Floss-A-Way. They have a handy little white area to write on. The bags are smaller (and therefore easier to schlepp around). And the holes are already punched. Handy!
Happy stitching!
Best,
Wendi
![]()
This sounds like a great idea. I would suggest hanging the bags on shower curtain hooks instead of the round rings. They are so much easier to remove.
You so shmart! Love the original and your take on the idea.
I use the nuts & bolt organizer from the hardware sections. i also use the bead organizer for my most popular colors!!
I used to use a nuts and bolts organizer, but the drawers to were too big to hold just one skein of thread and when I mixed skeins in a drawer I had trouble figuring out what color different scraps were. Plus it wasn’t as portable as I wanted. Now I use the nuts and bolts organizer for my beads – which is perfect.
I have used the Floss Away system for many years and I love it! It’s so easy to pull only the floss you need for a particular project and easy to save those leftover bits of thread that are too long to just toss out. I keep my bags in a Floss Away carrier but I don’t think they make them anymore. It’s a cardboard box with a handle and I file them by number. I’m sure with all the organizers out there an appropriate sized box could be located. Thanks for spotlighting such an awesome product!
I am using ziplock bags, I just stuck white labels on the front to enable me to see the numbers better.
Good idea!
Oh, my dear God!! Brilliant!! You can even take the baggie to the craft store to find the exact color you need. And to not waste thread….I NEED this!!!