


I’ve always wanted to make a sewing machine cover, but somehow never got around to it.
Until now.
As soon as I saw the Ed Emberley fabric collection from Cloud 9 I knew I wanted to use it to make a few things for my sewing room. . .
- a sewing machine cover
- some new pincushions
- a needle cushion
- some new pattern weights
- curtains
- a new ironing board cover
- a new shipping tote (which always hangs in my sewing room waiting to be filled with your lovely orders)
- a new lap quilt for those chilly mornings
Michelle at Cloud 9 was kind enough to send me some early cuts of the fabric and I’ve been sewing away with it. (If you’re also following along on Facebook you’ve seen photos of some of the work in progress.)
Now I’m starting to finish layout on some of the patterns – so be prepared for a slew of patterns to help you make stuff for your sewing room. All stitched up in Ed Emberley awesomeness.
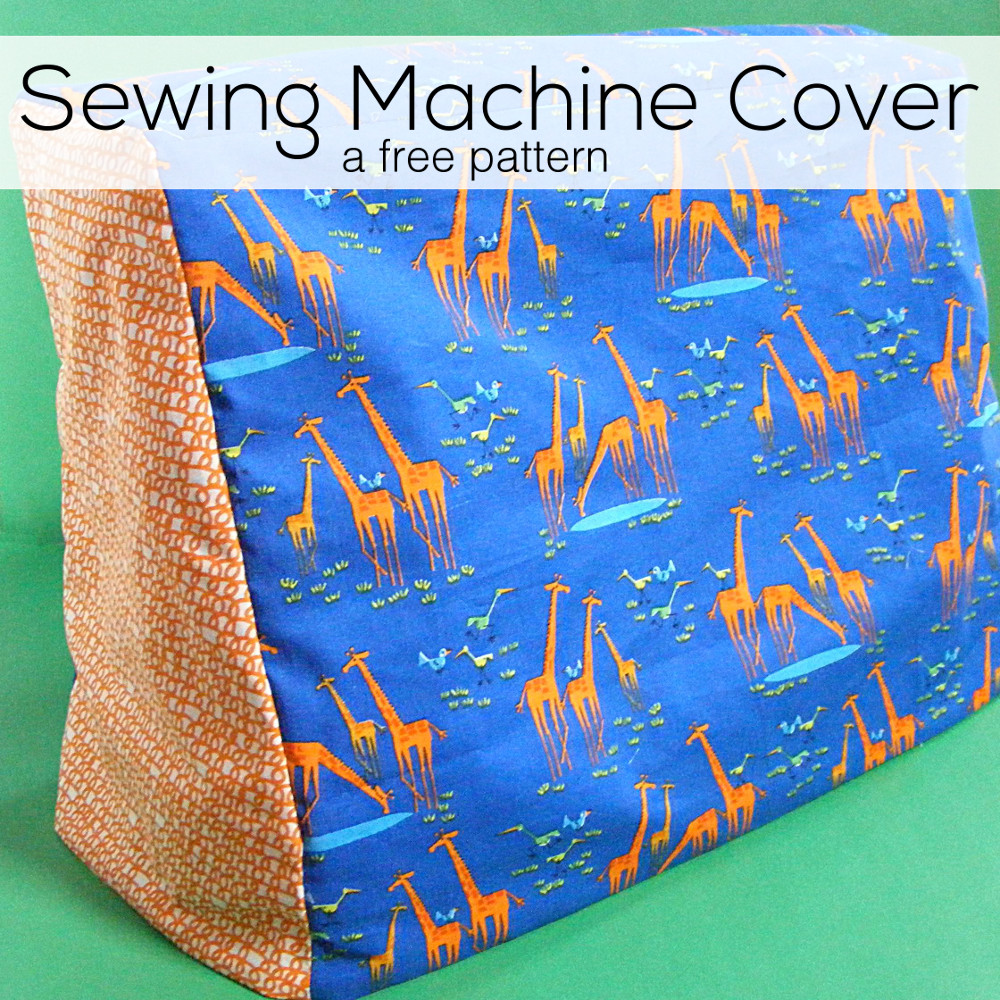
First up – a reversible sewing machine cover. Why reversible? Well – I wanted to make it in the giraffes fabric, but I also wanted to show you how you could use the basic pattern and really have fun with the front panel. You can piece it, applique it, embroider it, bedazzle it – play with it any way you like. (My daughter just got a Bedazzler. I have rhinestones on the brain.)
Making it reversible also gives the cover some heft without having to use interfacing. Nice! Plus it allows me to change my mind about which color I want to see. Here’s the reverse.
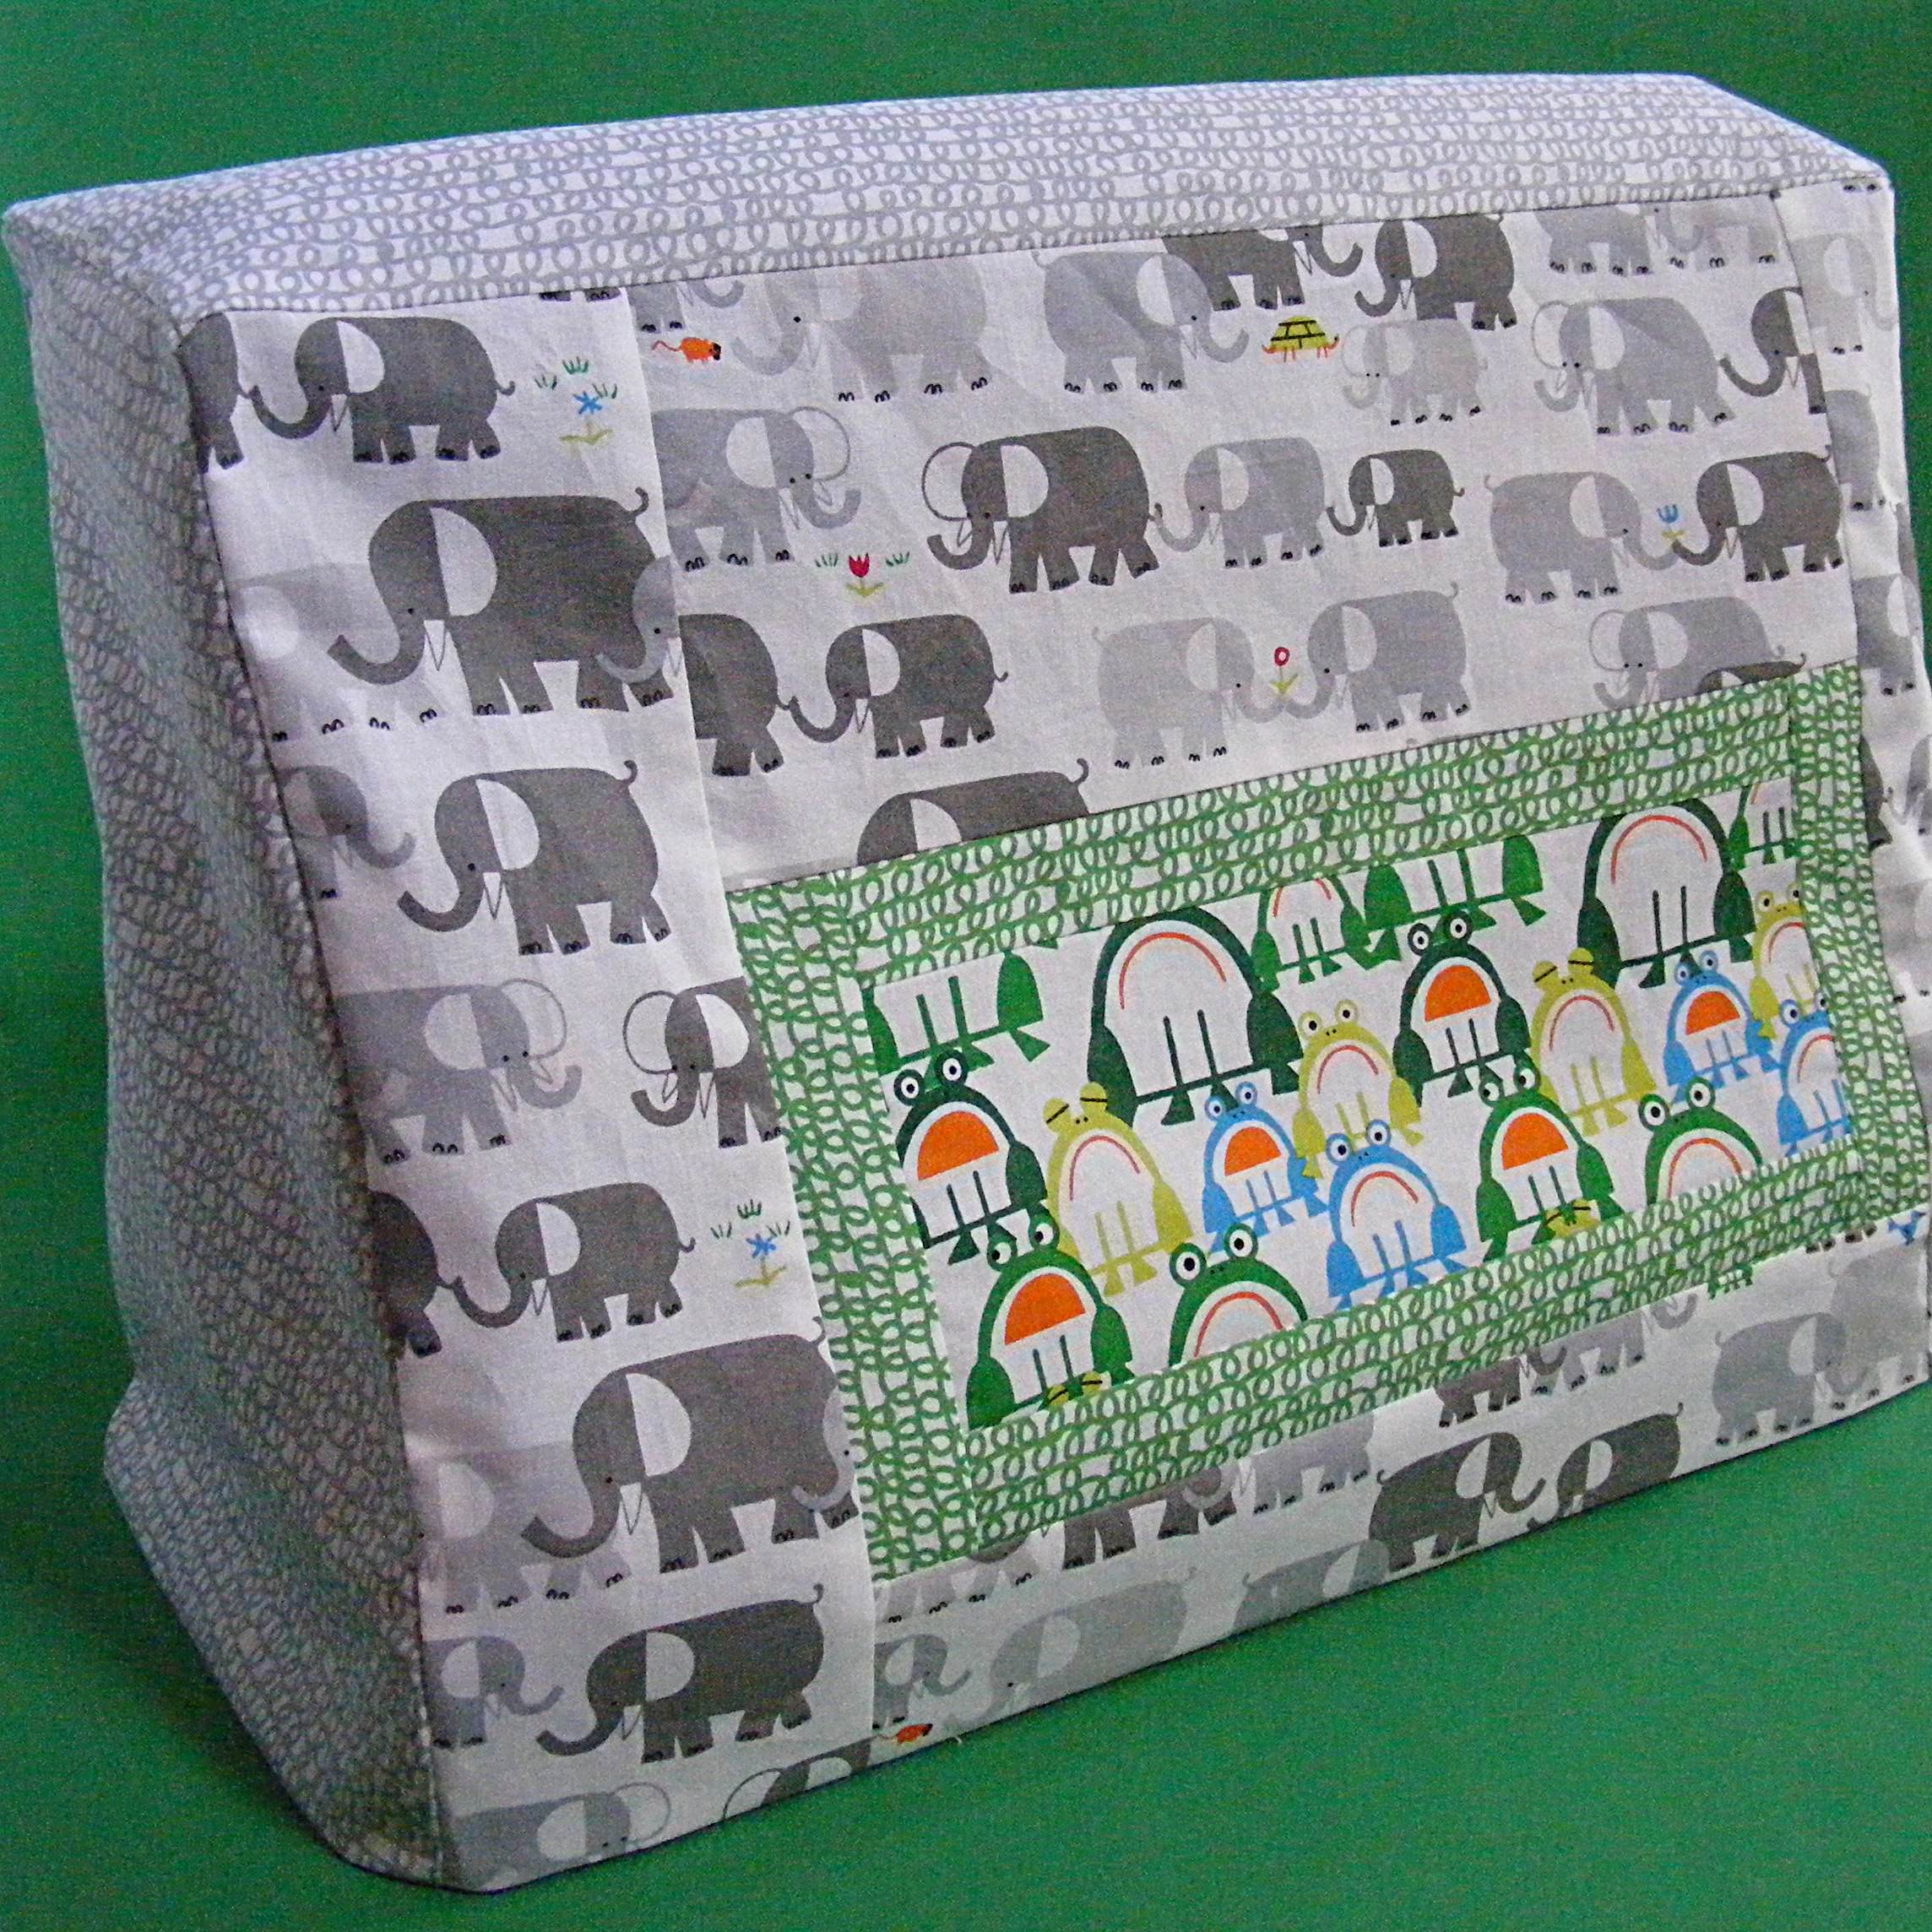
See? A totally different look. 🙂
Anyway – most sewing machine cover patterns are essentially boxes, but I show you how to make this slightly fitted. See how the top is a bit narrower than the bottom? It’s an easy extra step that makes the whole thing look nicer. Totally worth doing and still easy enough to be a beginner pattern.
Ready to make your own?
Materials you’ll need
- depends on your design, but roughly 1/2 yard fabric for front and back, and 1/4 yard fabric for the sides
- sewing machine, thread, basic sewing tools
Step 1
Measure your machine.
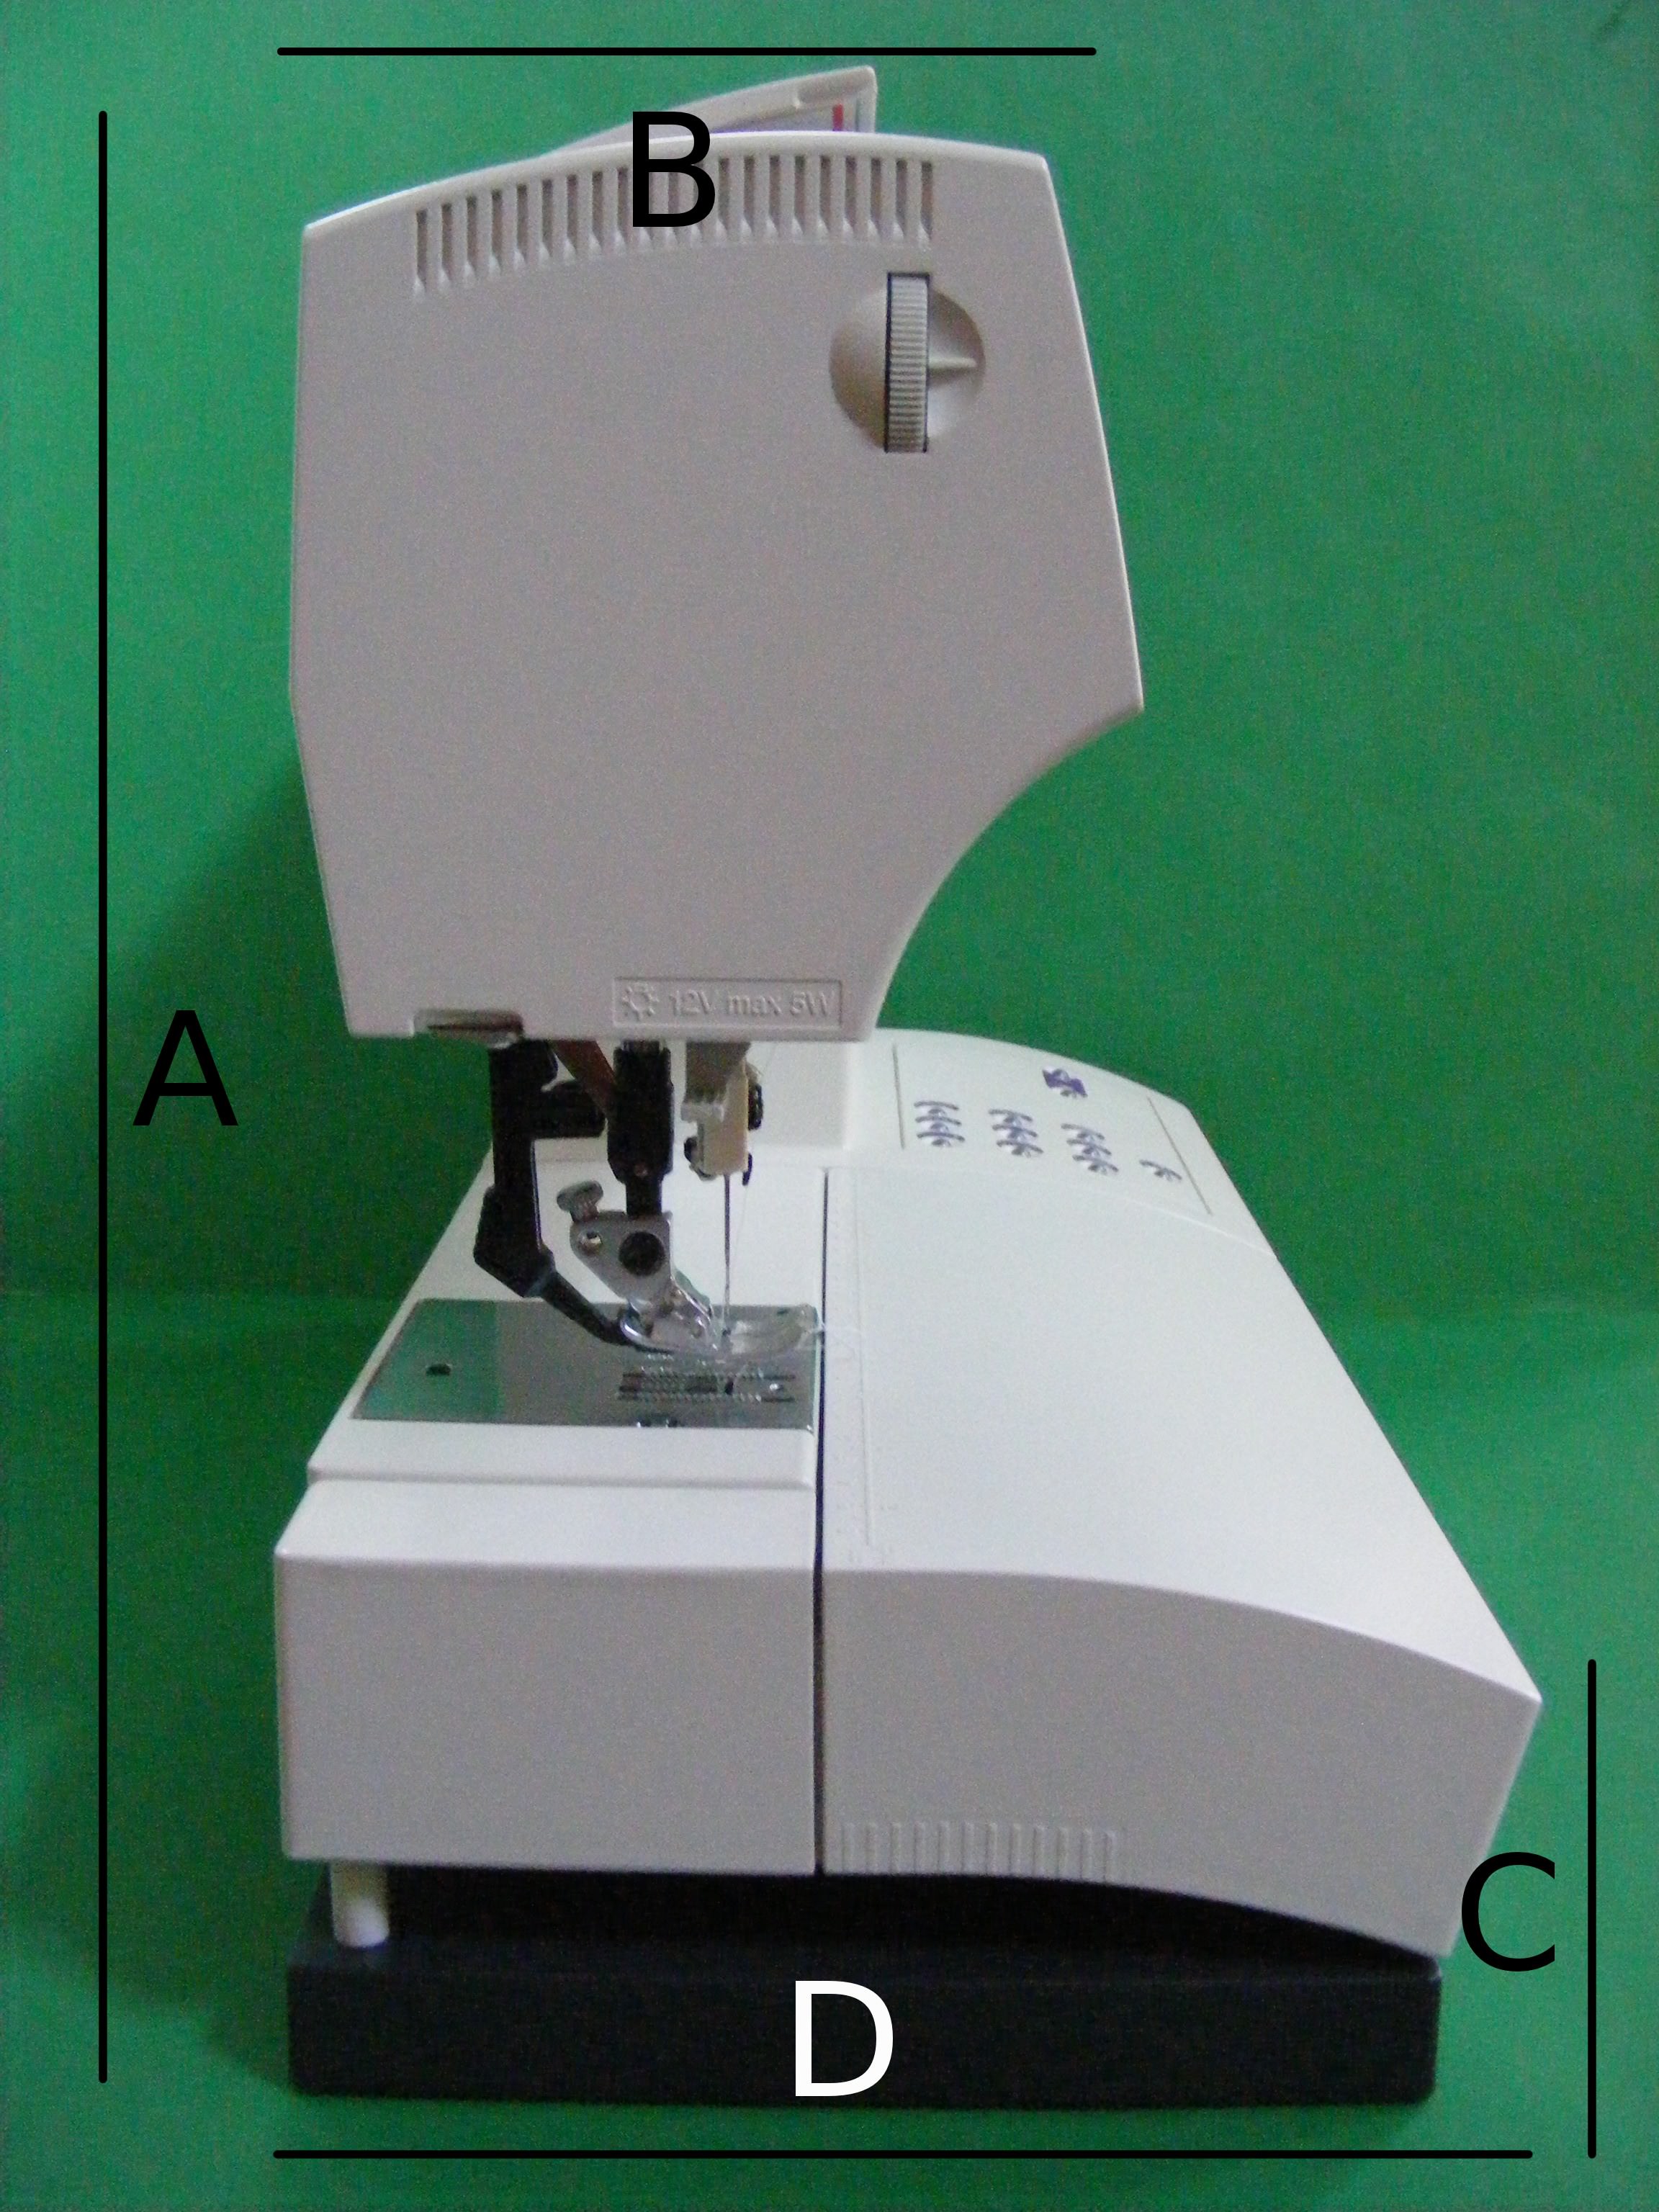
A __________ total height
B __________ depth of the top
C __________ height of the front D __________ depth of the bottom
E __________ total width (Not labeled – but be sure to include the wheel that controls the presser foot)
Step 2
Calculate the size of your pattern pieces.
Front and Back Pieces = E + 1 inch (seam allowance and ease) x A + 1 inch (seam allowance and ease)
Top Piece = E + 1 inch x B + 1 inch
Sides = A + 1 inch x D + 1 inch (you’ll cut the angle out of the front later)
Now you have some decisions to make. . .
You can cut your fabric to the dimensions in step 2 and skip ahead to step 8.
You can get fancy with any of these pieces. I’m going to go on and give you instructions for piecing the front panel, but you can really do anything you like. Piece it. Applique on it. Embroider it. Bedazzle it. Just make sure that when you’re done, the finished dimensions of your creation are what you calculated in step 2.
Whatever you choose, you’ll need a front, a back, a top and two sides for each version of your cover. Remember – this is a reversible cover so you’re really making two. Make them coordinate or make them wildly different. It’s totally up to you.
If you want to piece your cover like my elephants and frogs, move on to step 3. If you’re using solid fabric or doing your own thing, skip ahead to step 8.
Step 3
I’m going to have to give you some general directions here, because the measurements of individual pieces will vary from machine to machine.
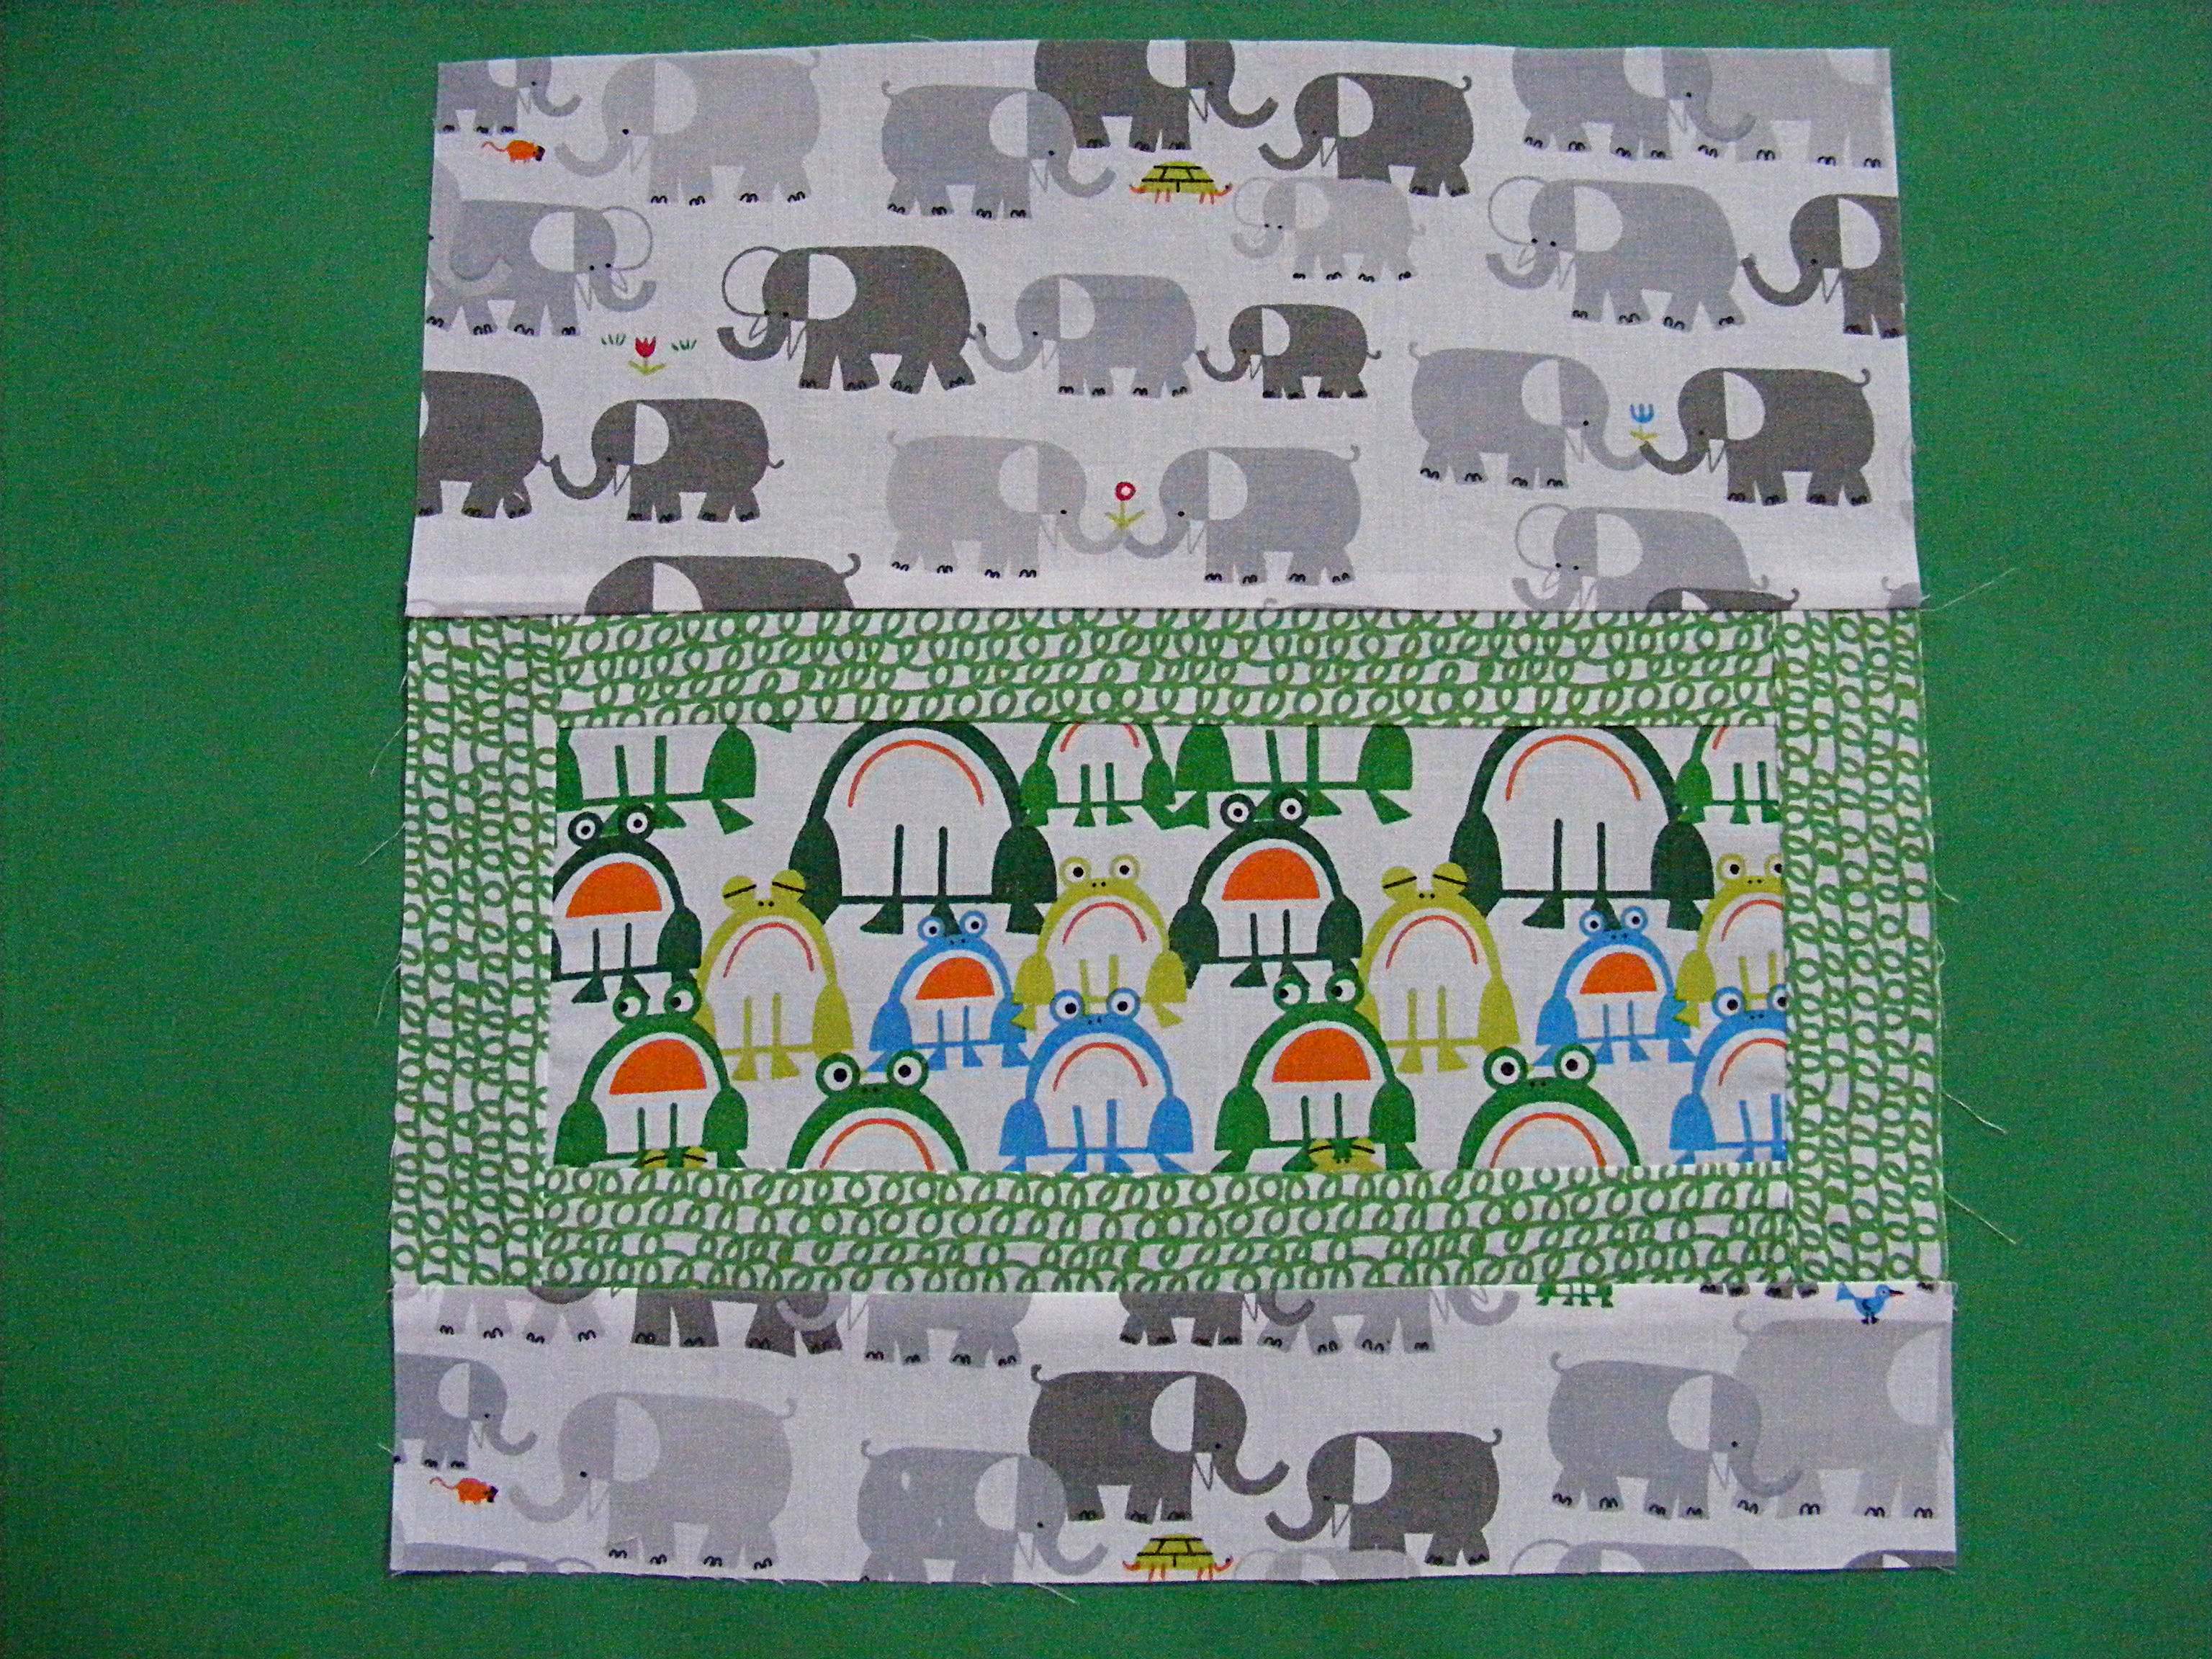
If you look at the finished pattern cover you’ll see a froggy rectangle surrounded by a thin frame of green scribbles, surrounded by elephants. Cut your inner rectangle (the froggy piece) 10 inches wide and 4 inches tall.
Cut 2 strips of frame fabric 10 inches long and 1 1/2 inches wide.
Cut 2 more strips of frame fabric 6 inches long and 1 1/2 inches wide. Don’t cut the final (elephant) pieces yet.
Step 4
Sew the long framing strips to the top and bottom of the center rectangle. Use 1/4 inch seam allowance.
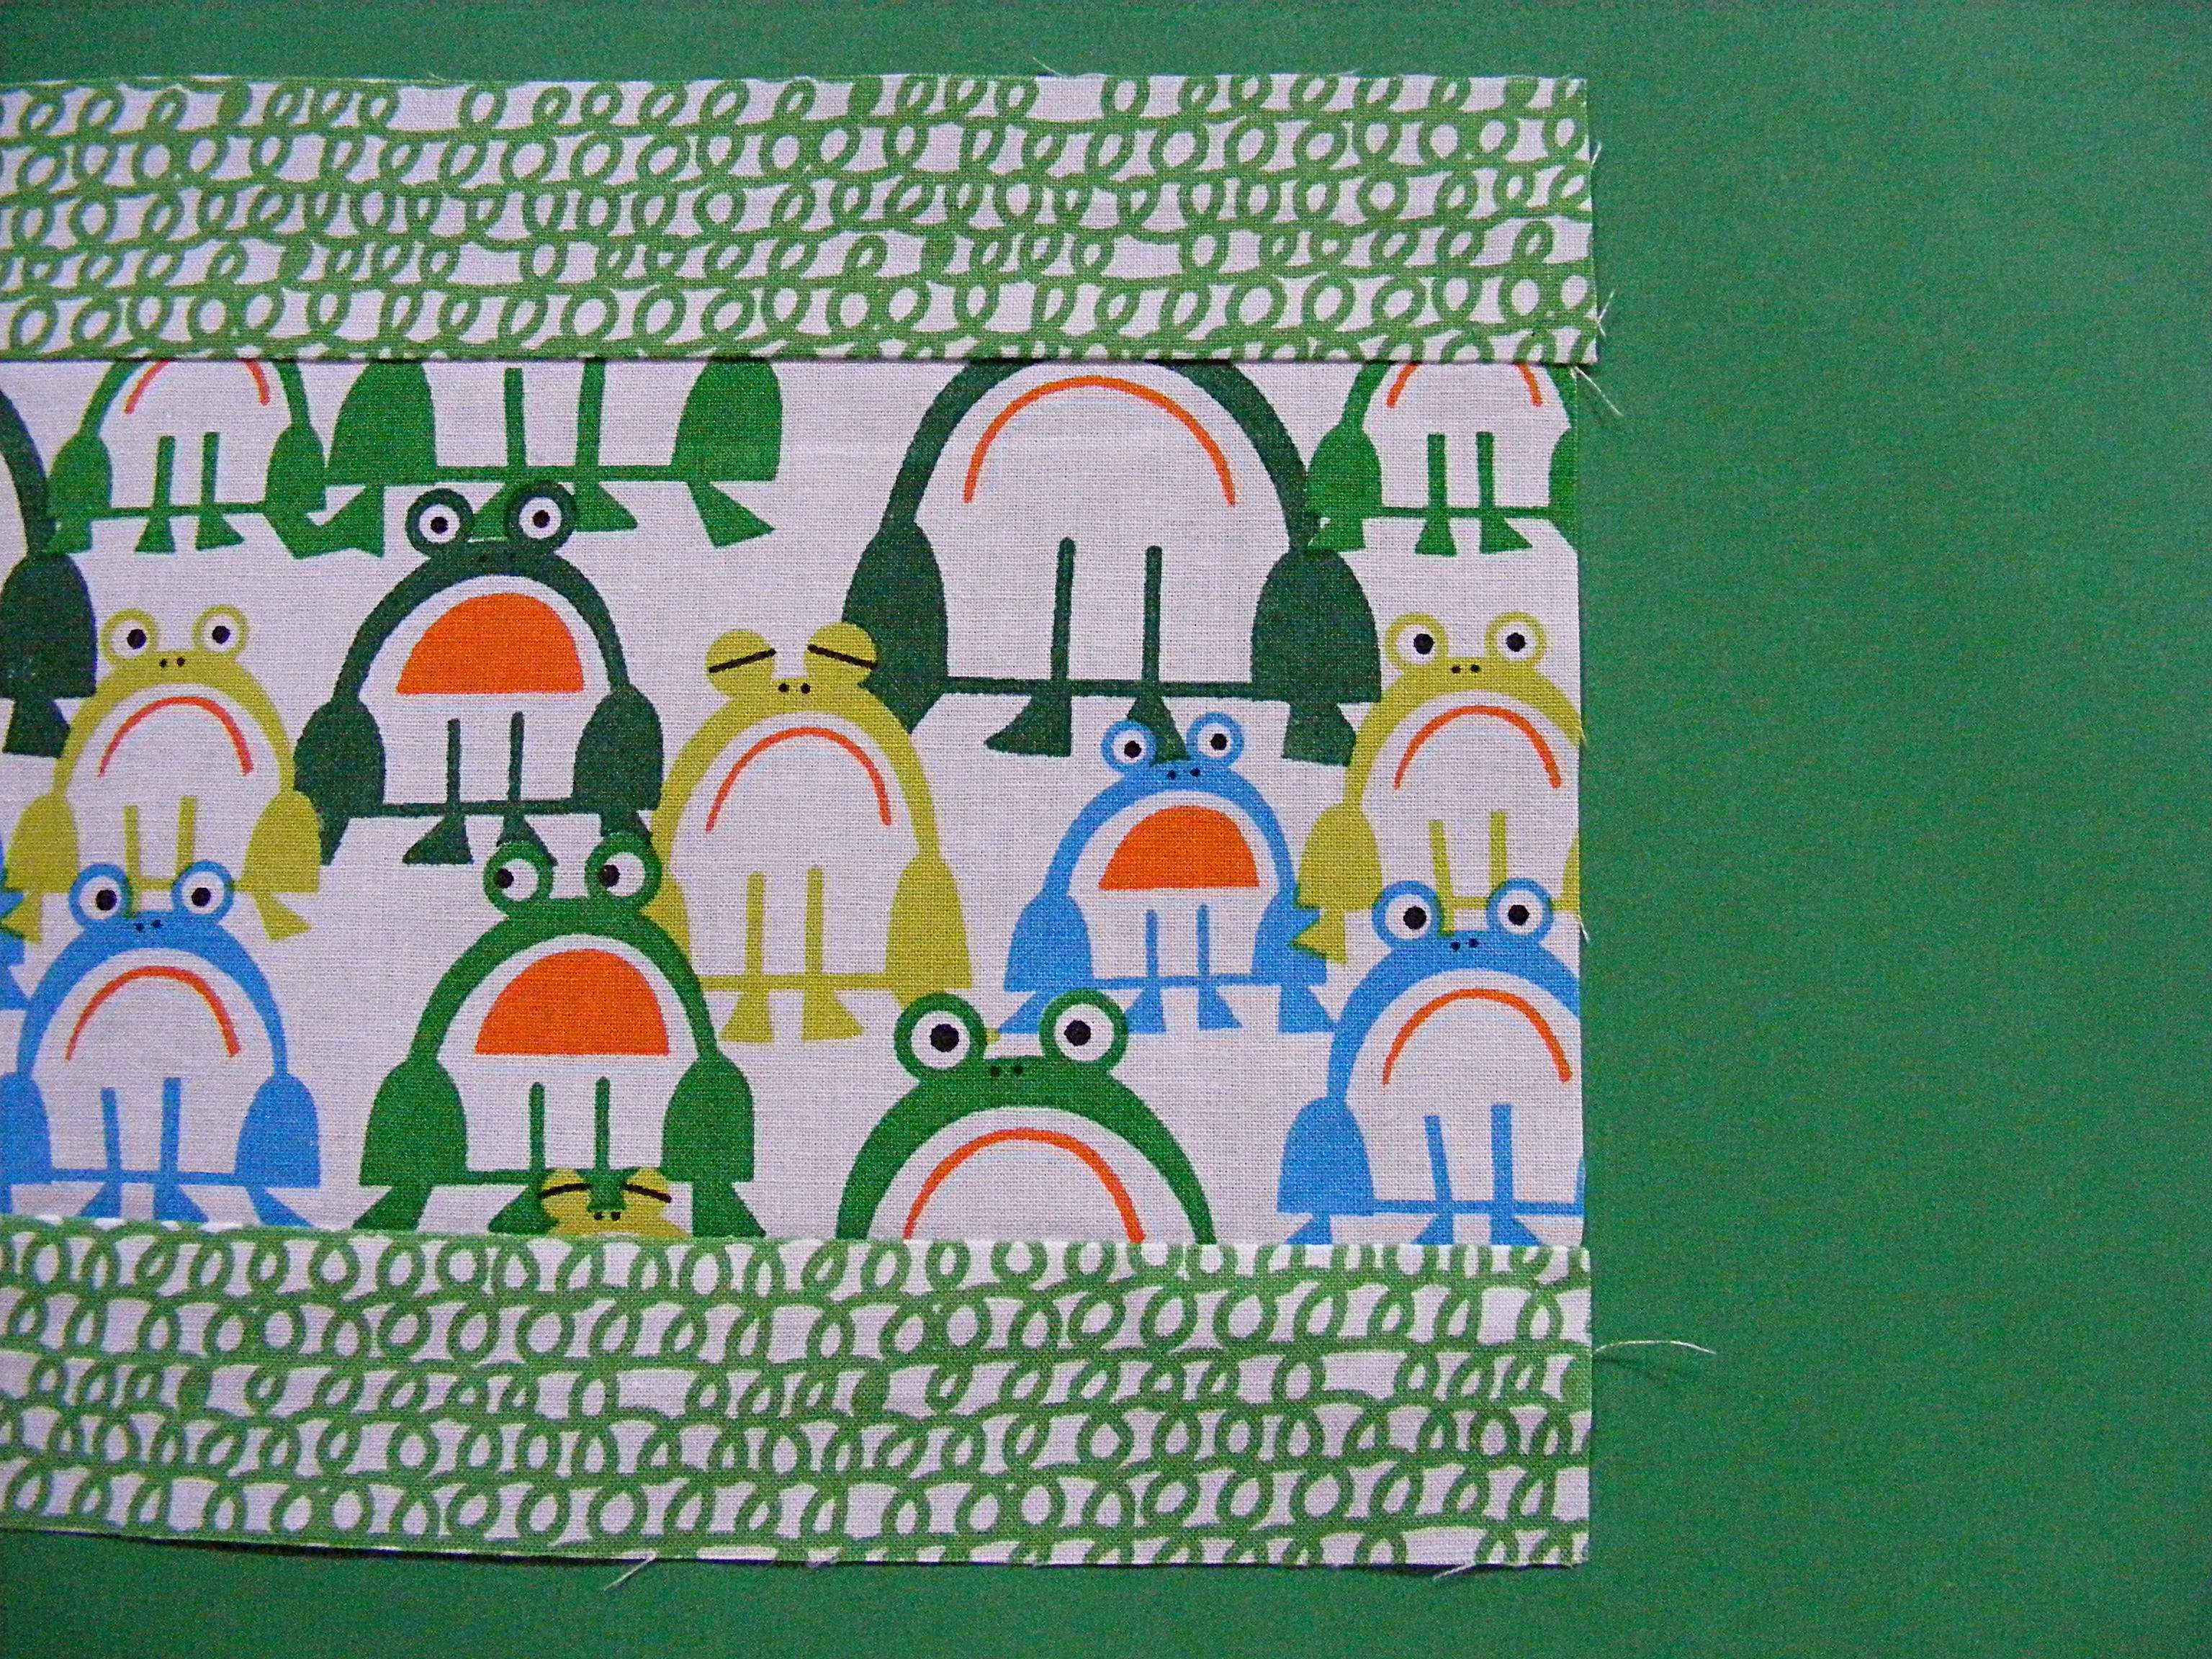
Press your seam allowance toward the darker color.
Step 5
Sew the short framing strips to the sides.
If your seam allowances in step 4 were exactly 1/4 inch, the strips should fit perfectly. If not, trim off the extra bits to even things up.

Press seam allowances to the darker color.
Step 6
Now you’re going to need to do a little math to make this fit your machine. Add strips to the top and bottom of your inner rectangle to make it equal the total height of your machine + 1 inch for seam allowance and ease.
Notice that I didn’t add the same amount to the top and the bottom. I wanted the inset panel to sit a little lower than the center of the front.
Step 7
Now add strips to the sides to make the total width equal to the width of your machine + 1 inch for seam allowance and ease.
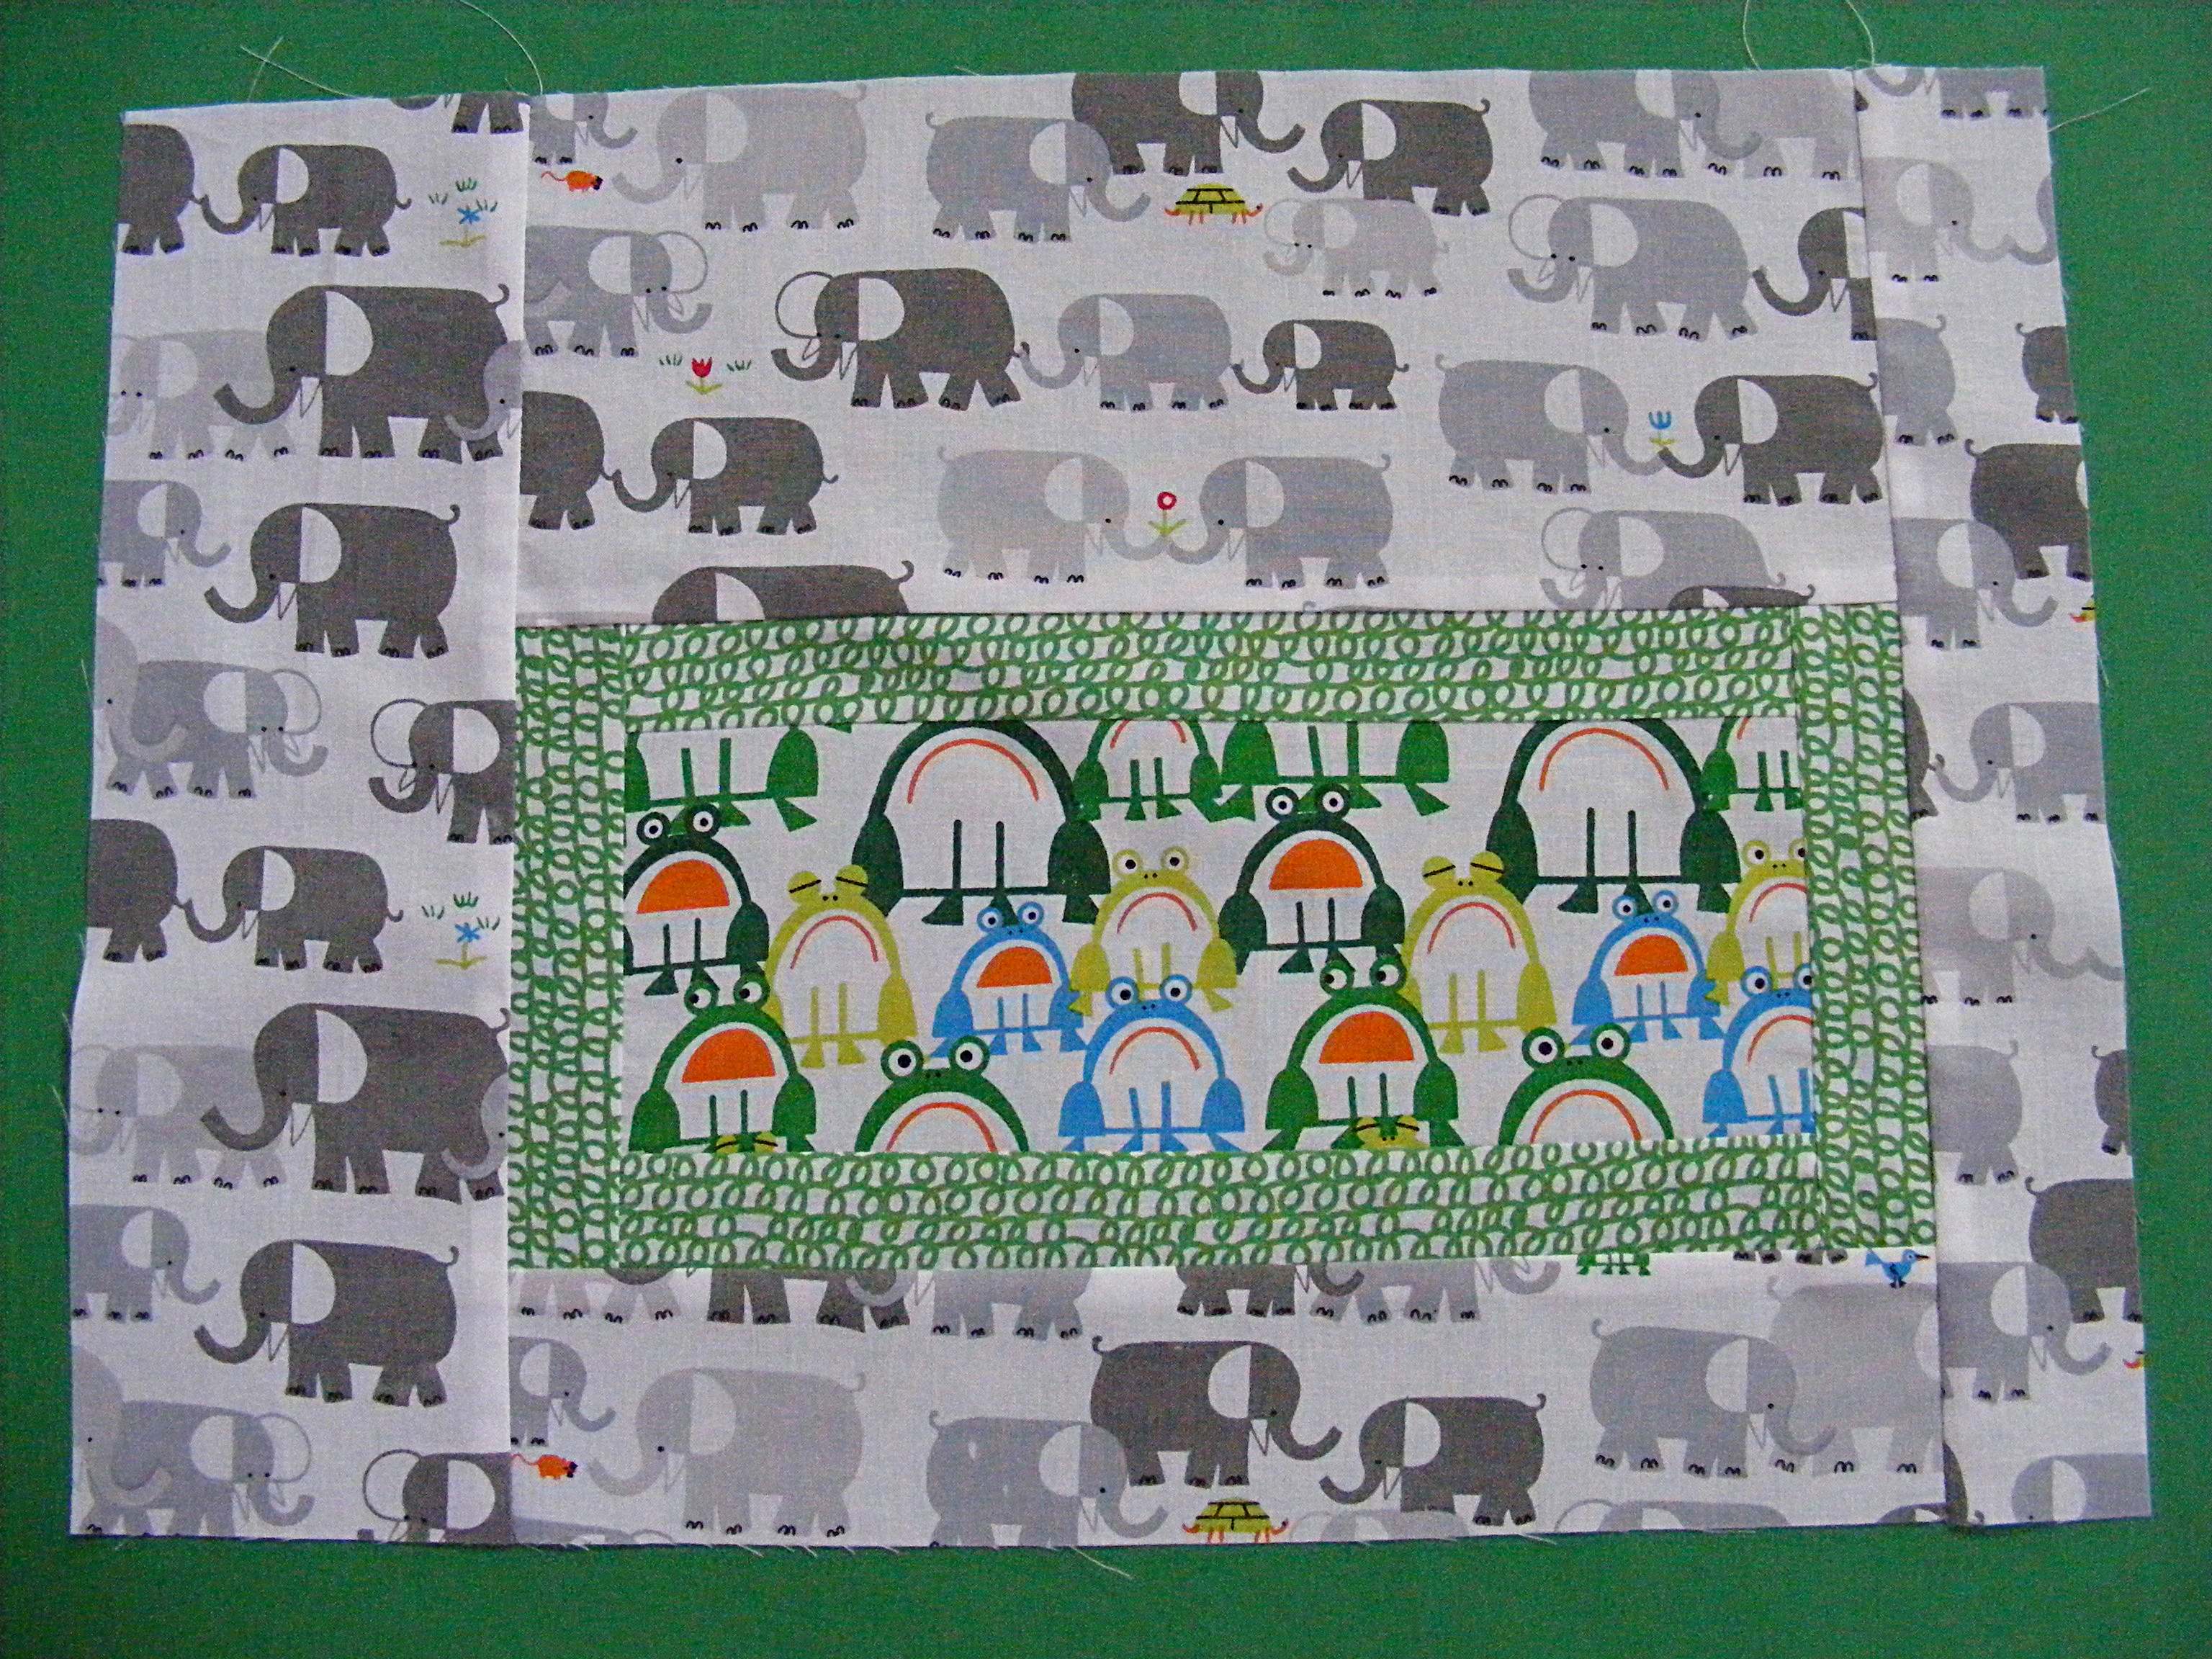
Again – I didn’t add the same width to each side. I wanted the inner panel to sit toward the lower right corner. Play with this and have fun.
You might want to add extra-wide strips in steps 6 and 7 and then cut it down to size, playing with the placement of the panel.
Step 8
One more piece to prep and then you’re ready to put it all together.
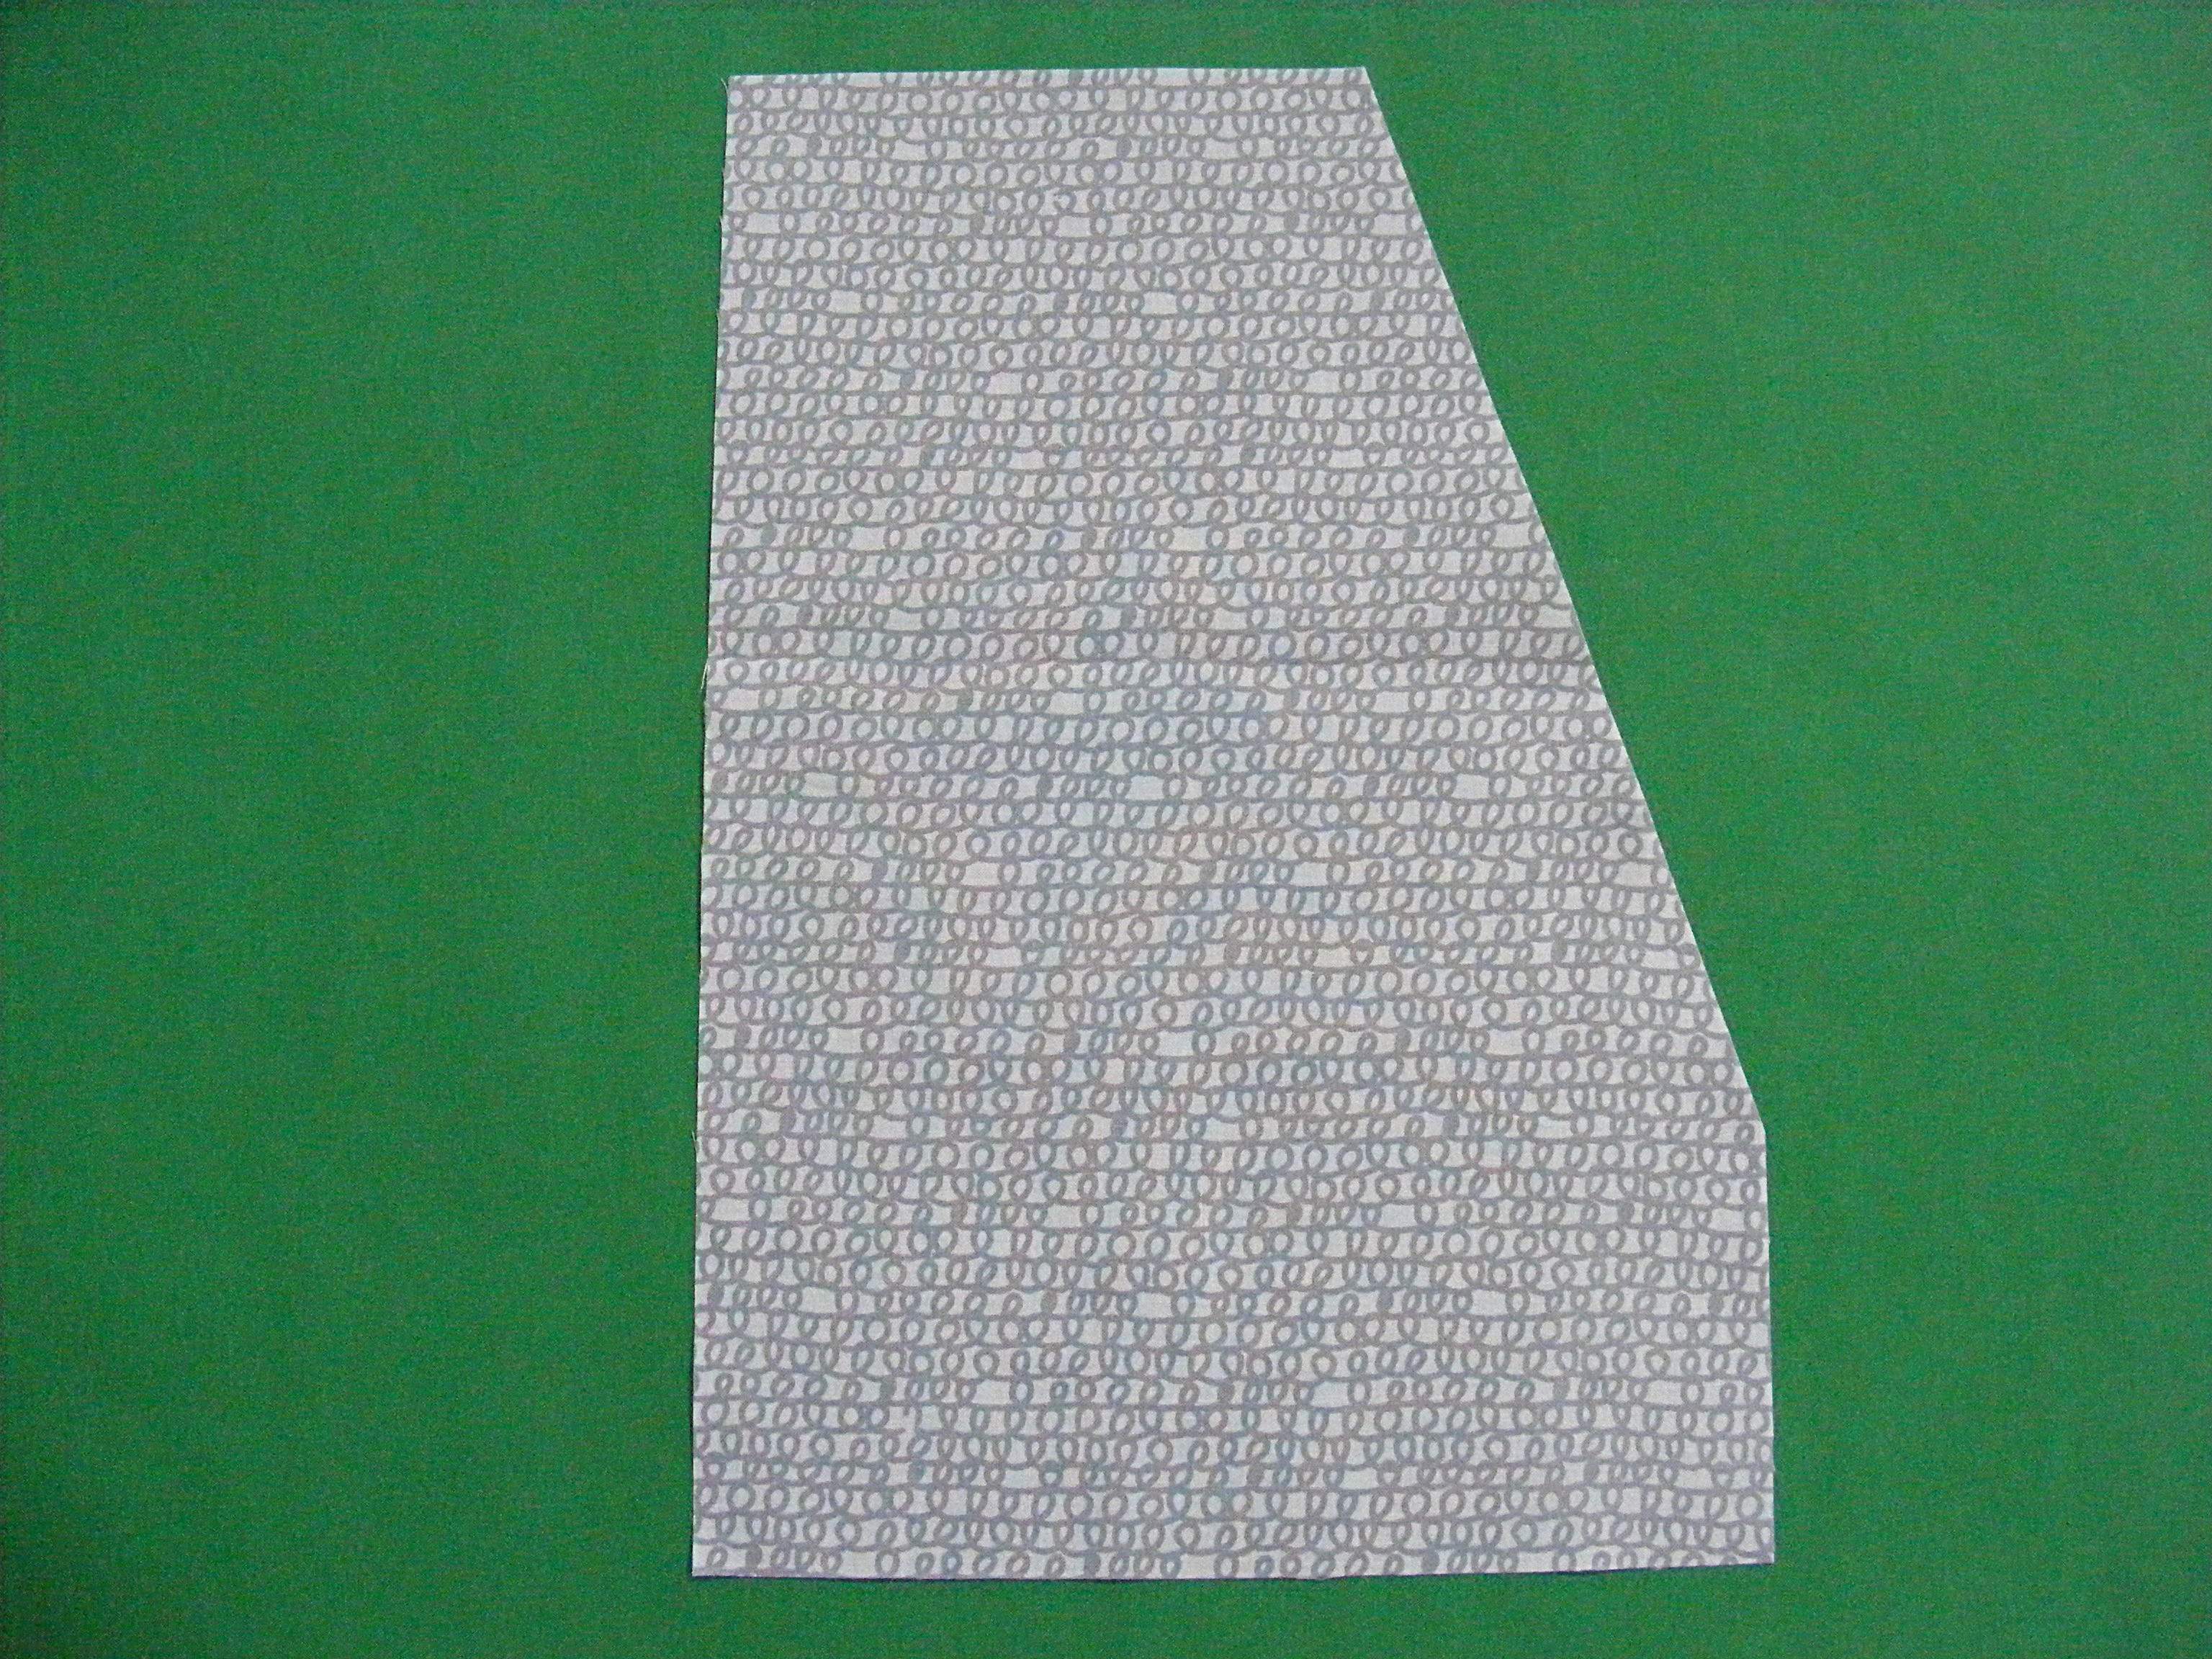
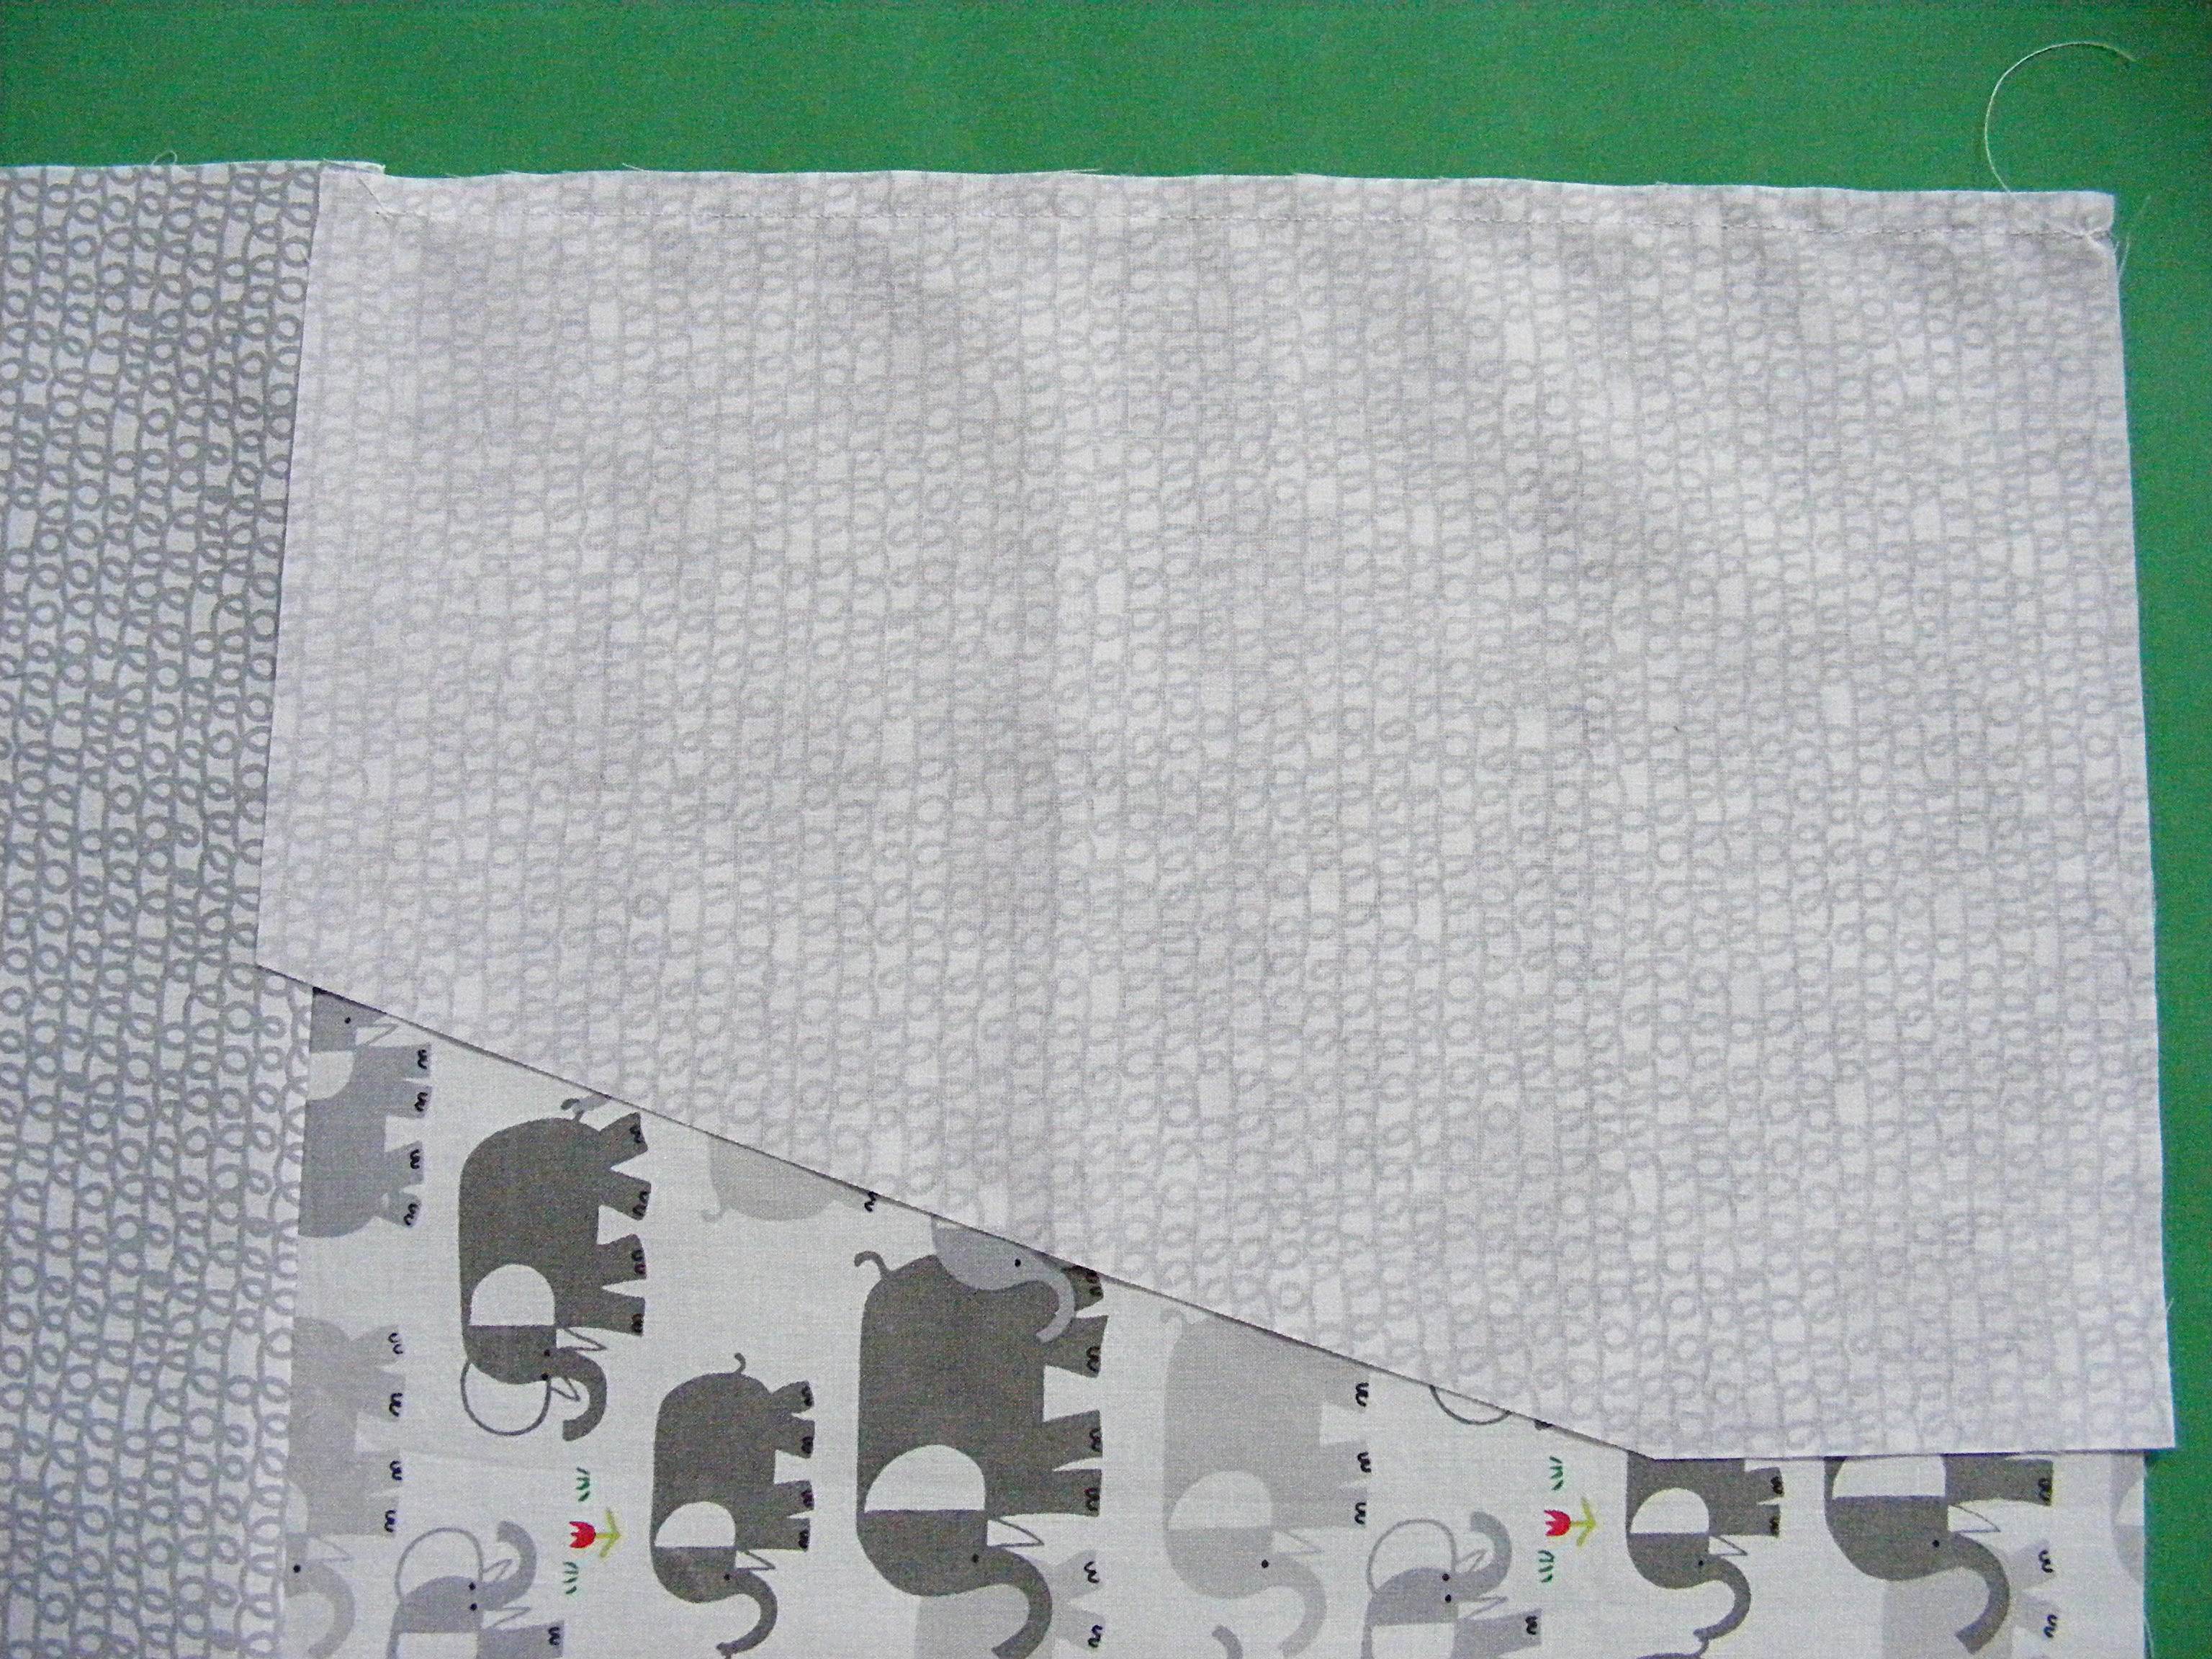
Put the side pieces face to face. From the top left corner measure over the depth of the top of your machine (B) + 1 inch.
From the lower right corner, measure up the height of the front of your machine (C) + 1 inch.
Connect those two points and cut the resulting triangle out of the top right corner of your side pieces.
Step 9
Using 1/4 inch seam allowance, sew the front and back pieces to the top piece. If your fabric only works in one direction (like these elephants) make sure you’re sewing the top of the panel to the top piece, so that the elephants are right side up on the finished cover.
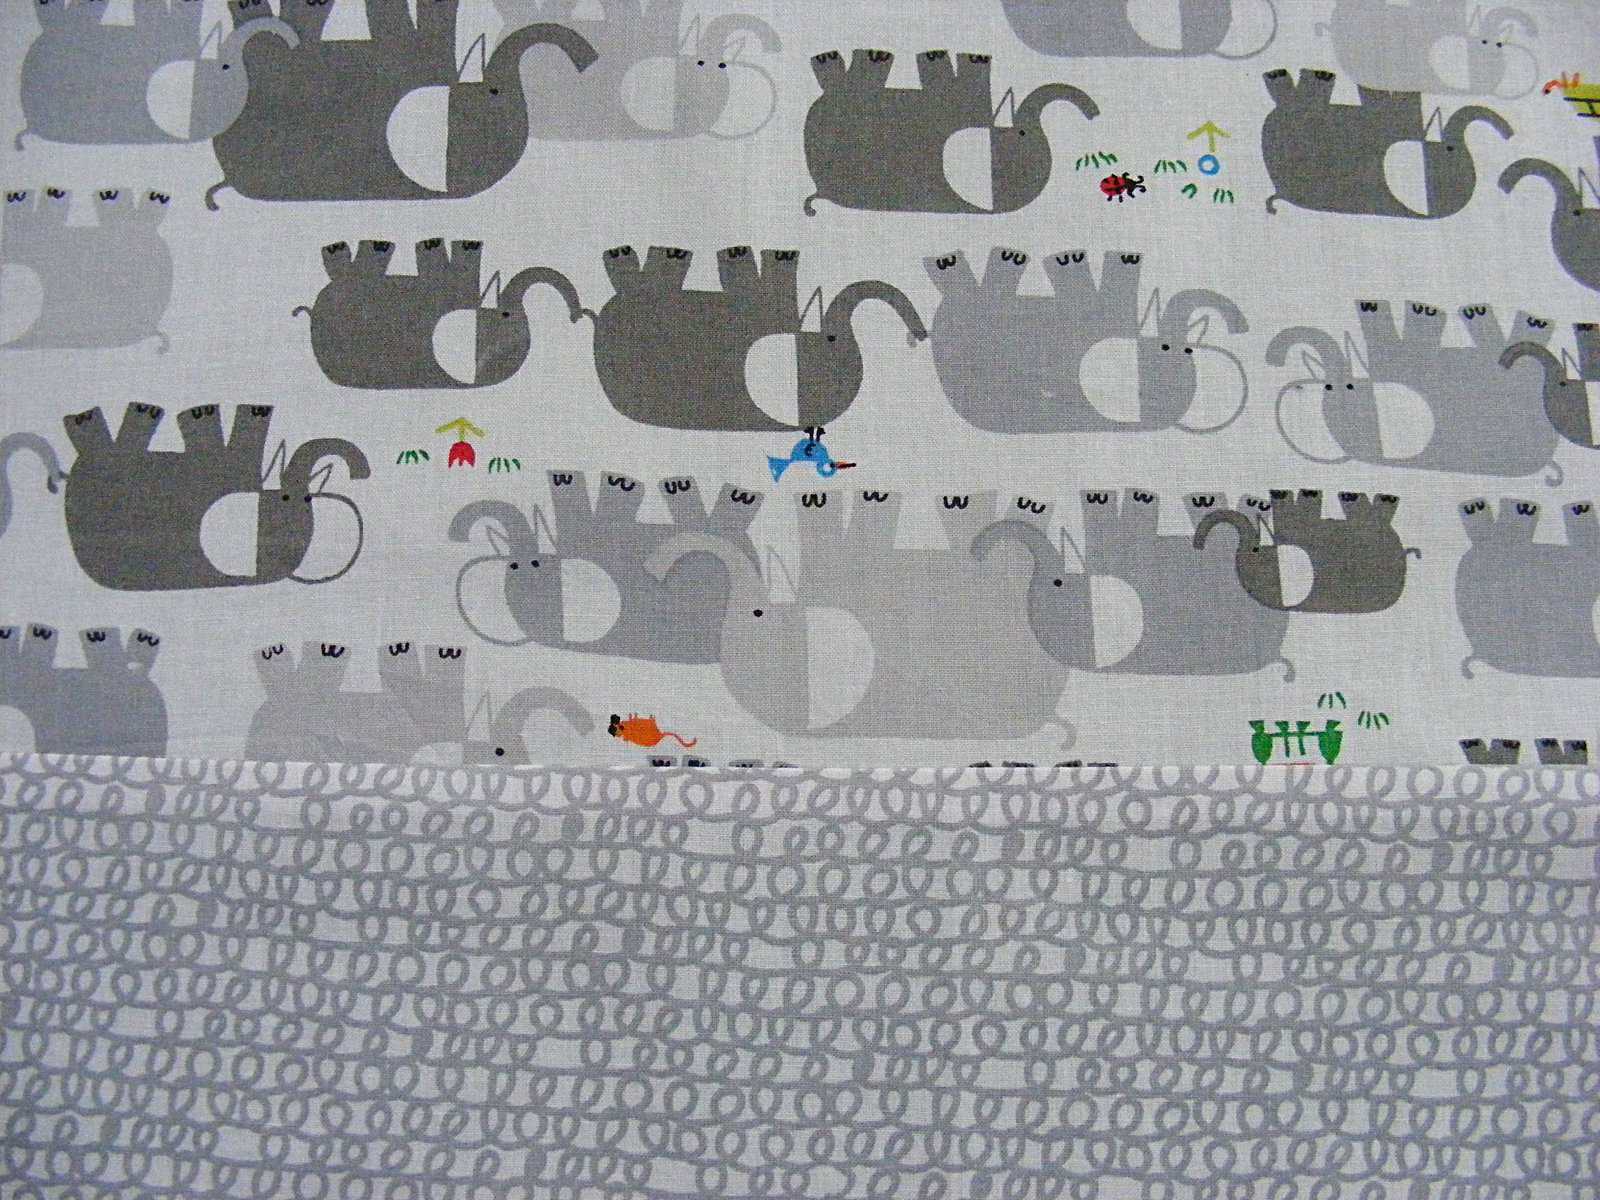
Press seam allowances toward the darker color.
Step 10
Lay the side panel face down on the back panel, so that the long edge of the side panel is lined up with the short edge of the back panel.
Step 11
Using 1/4 inch seam allowance, sew the side panel to the back panel. Stop sewing 1/4 inch from the end of the side panel (this will be at the seam between the back and top panels). Backstitch and remove from the machine.
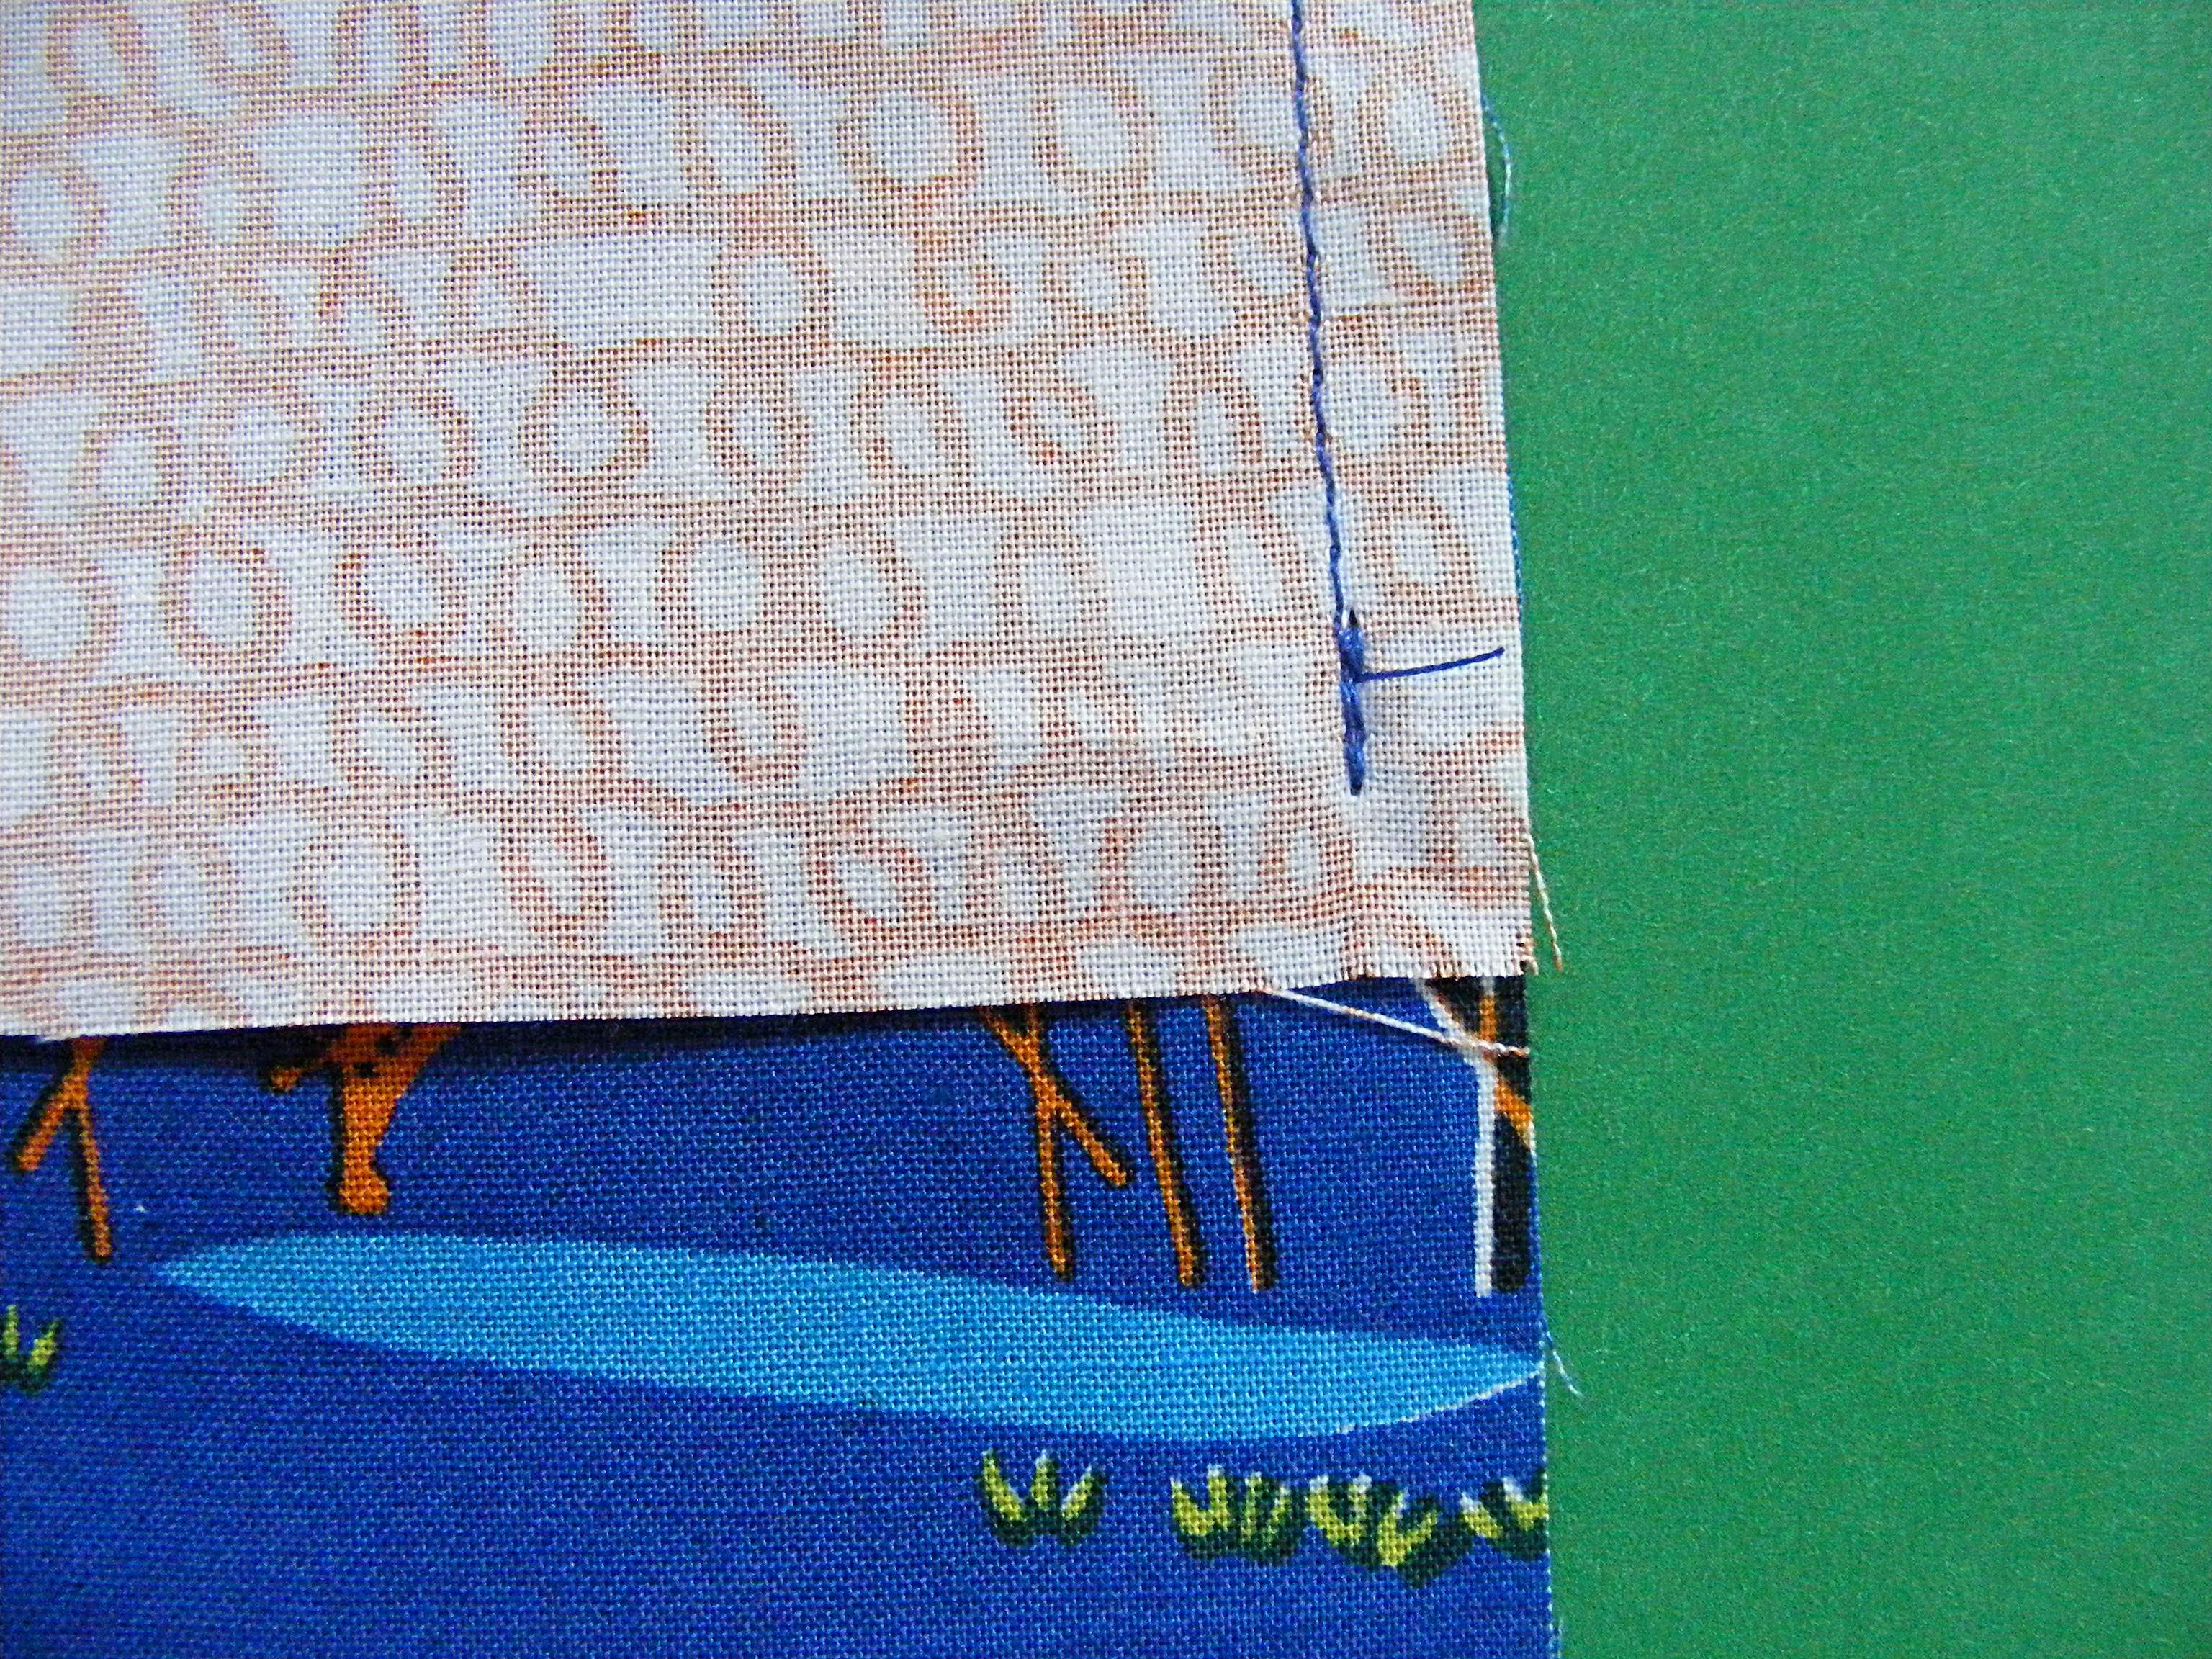
(I changed fabrics here because the colors worked better for showing the stitching line.)
Step 12
Flip your fabrics around so that the short edge of the side panels is lined up with the short (raw) edge of the top panel.
Start sewing where the previous stitching left off. Stop sewing 1/4 inch from the edge, just as you did in step 11.
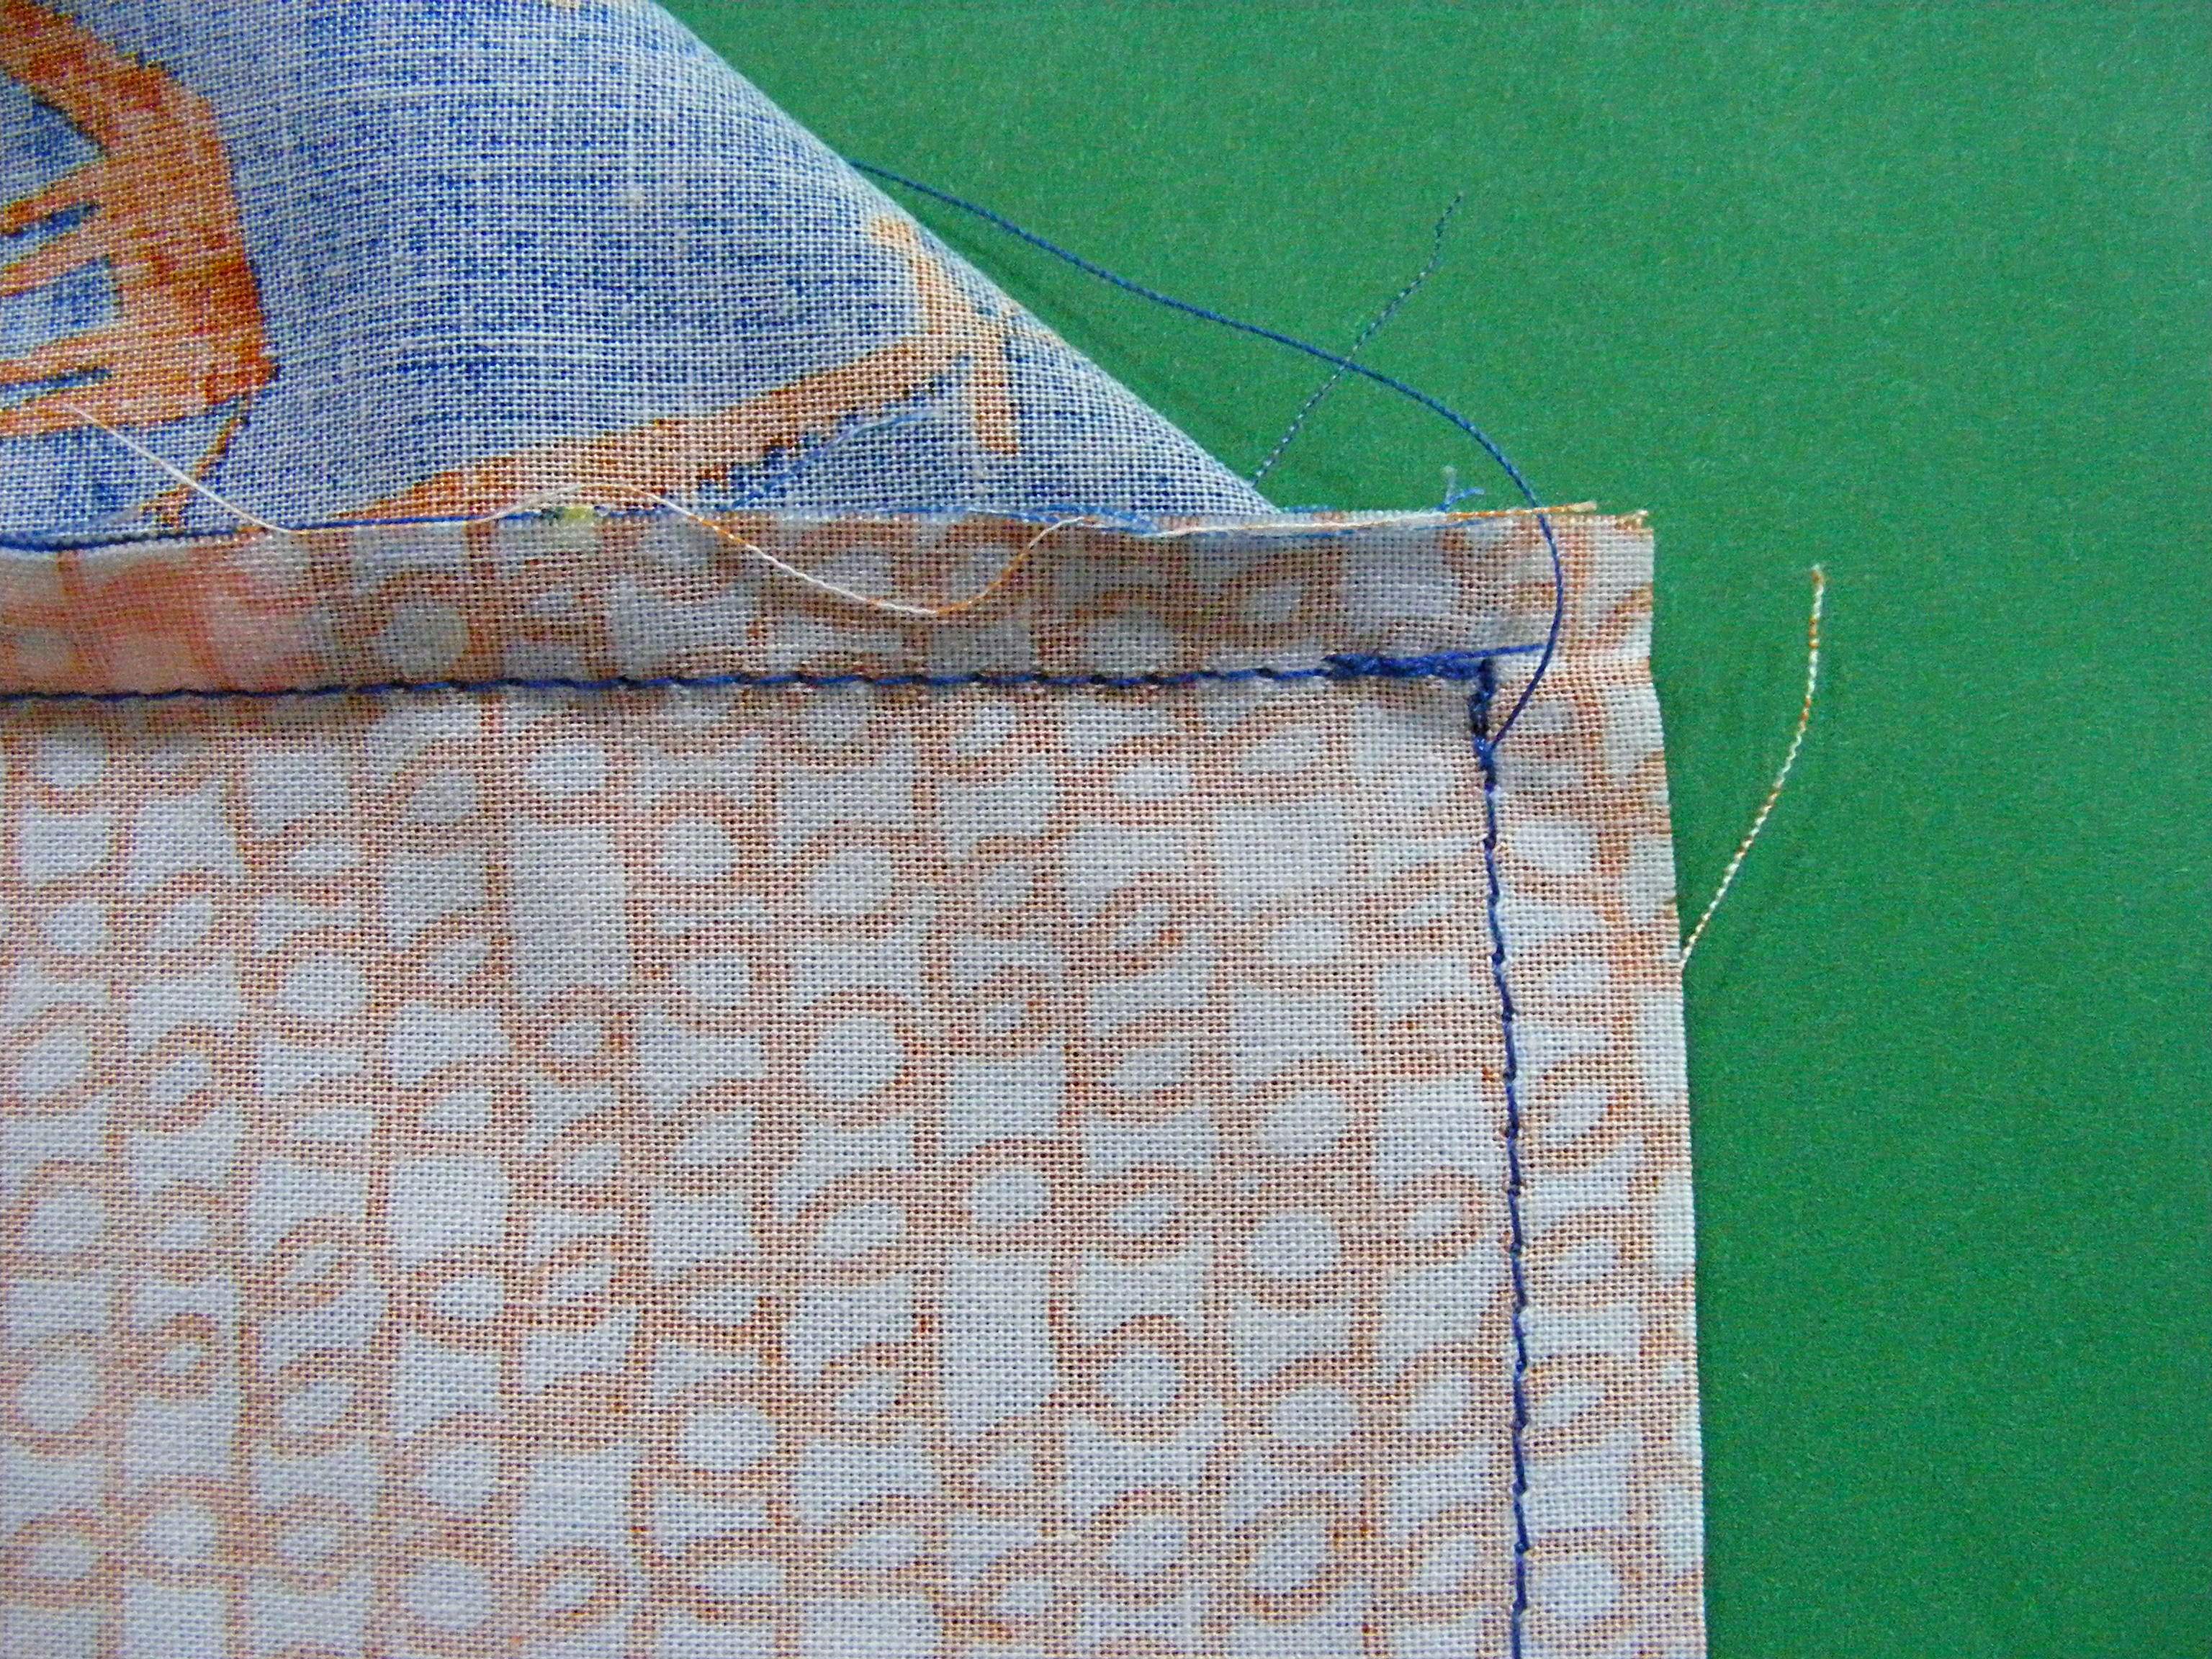
Basically, you’re avoiding stitching in the seam allowances. This will let you get nice crisp points when you turn the whole thing right side out.
Step 13
Repeat steps 11 and 12 at the corners as you stitch across the top, along the angled front piece, and down the short bit at the bottom.
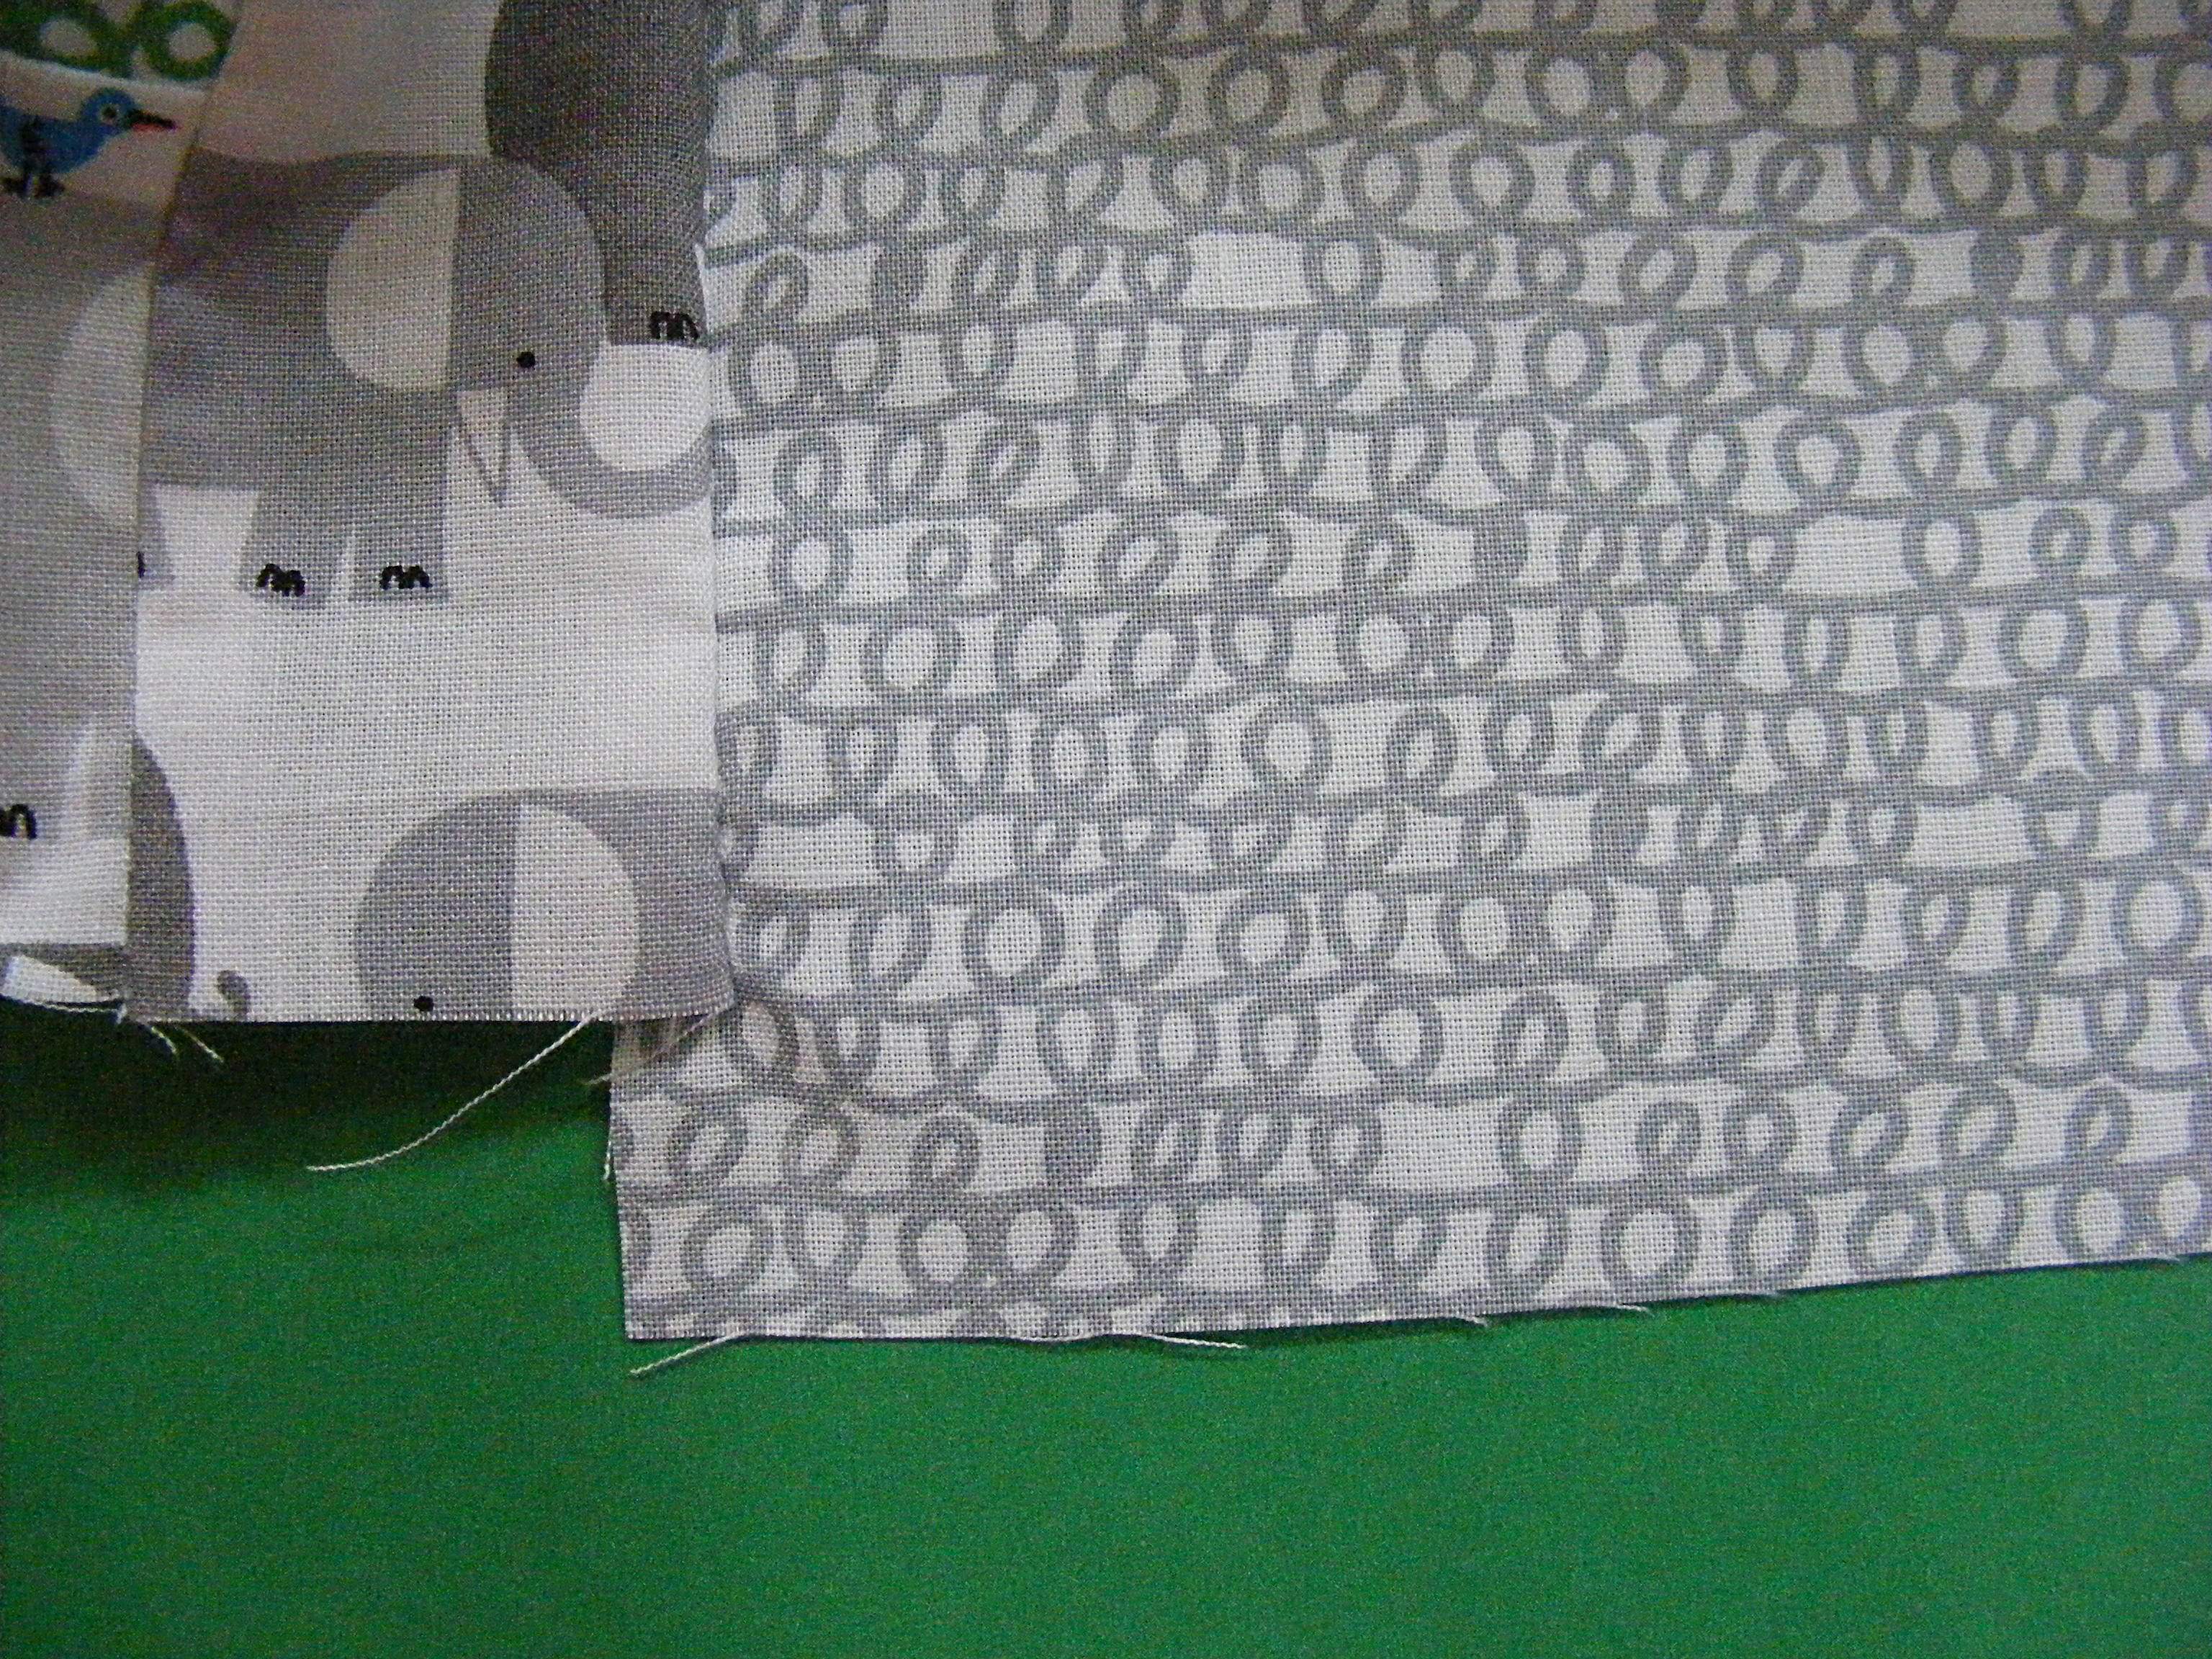
Your side panel will end up a little longer than your front panel (the amount of extra fabric depends on the angle that you cut into the side panel in step 8). Just use a pair of scissors to trim off the excess on the side panel and even things up.
Step 14
Repeat steps 10 – 13 for the other side panel.
Boom! You’re done with the outside of your cover.
Now repeat steps 9 – 14 to make another cover.
Everything should be finished on both covers except the bottom edge.
Step 15
Turn the inside cover right side out. Turn the outside cover inside out. Put the inside cover inside the outside cover so that their right sides are facing each other. Make sure the front panels are facing each other.
Line up the raw edges of the two covers, matching the seams all the way around. Pin.
Using 1/4 inch seam allowance, sew the two covers together at the bottom edge, almost all the way around. Leave about 4 inches open so you can turn everything right side out.
Step 16
Turn the whole thing right side out and flip things around so that the inner cover is the liner of the outer cover. Work at the bottom seam allowance and press it nice and flat.
Either hand sew the opening closed or topstitch all the way around the bottom edge to close it and stabilize the edge.
Step 17
Put it on your machine. Admire it. Reverse the cover and admire it some more. You’re awesome!

Here are handy links to all the posts about quilting tools and supplies.
Sewing Machine
- My Sewing Machine and Why I Love It
- How to Choose a Sewing Machine for a Beginner
- My Favorite Sewing Machine Feet
- Basic Sewing Machine Maintenance
Iron
Rotary Cutting Tools
- My Favorite Rotary Cutting Tools
- How to Use a Rotary Cutter and Ruler
- How to Clean a Fuzzy Cutting Mat
Scissors
Other General Sewing Room Supplies
- Easy Pattern Weights (a free pattern)
- Pincushion (a free pattern)
- Needle Cushion (a free pattern)
- Sewing Machine Cover (a free pattern)
- How to Make a Design Wall
- How to Make a DIY Cutting Table
One More Hugely Popular Post that Seems to Fit Here Better than Anywhere Else
Return to the Let’s Make a Quilt main Table of Contents.
Move on to the posts about choosing your quilt pattern.
Happy sewing!

Thanks for sharing the pattern!
And Lucky You!! Michelle sent you early cuts of her fabric!!?!!!? It’s so beautiful but not in my budget. One day…
i tried to download 2 times and two times my computer blocked it coz serious virus has been detected :/
I’m sorry you’re having problems with the download. I had a few people check it for me and no other problems reported, so I’m not sure where your virus message is coming from. 🙁
I couldn’t use the link, but was able to go to the website by doing a google search. Kinda funky but I got there. No viruses! =)
Very nice little shop. Cool website. I love the tut also! As soon as I’m home!! I have this fabric waiting for me. I’m chomping at the bit to get home and dive in!!!!! lol.
This is absolutely brilliant! I bought two different lots of material to make a sewing machine cover [I won’t admit to buying one piece and forgetting that I had something special already put aside ;)] and then I couldn’t decide which to use…now I don’t have to make any decision- I’ll just use both!!!
Eeek!!! I’ve been so busy. I just noticed this. I’m sooo excited! I need a cover desperately for my machine. bookmarking this as I HAVE to get other projects done first. Lurve it! and Lurve the picture you finally went with to advertise 😀 Fun fun!
Can you please show how to make a washing machine cover and a desktop cover. please please please
i cannot seem to download the pattern for sewing machine cover got all the way to print but copy of pattern never showed. HELP-HELP
thank-you bmoyer44@charter.net
A couple of people have run into this problem – but it’s an easy fix. The problem is that Adobe made a couple of recent changes that are making SOME versions of SOME browsers incompatible with SOME PDF versions. So we’re going to bypass the browser. Don’t worry – it’s easy.
Instead of clicking on the link like you normally would (with the left button on your mouse), right-click on it instead. That will pull up a little menu. Choose the option to SAVE the item (or the target, or the link – different browsers say different things, but it will be clear that you are SAVING, not opening). It might give you an option to choose where you want it saved. I usually just choose the desktop, because that makes it easy for me to find it.
AFTER you’ve saved it, THEN open it by clicking the link on your computer instead of the one in the post. It should open right up.
I’m so sorry about the hassle. Please let me know if you continue to have any problems.
Wendi, Just wanted to say thank you for the shop mention! We’ve had a number of folks note that they found us through your blog and we are grateful. Happy New Year and can’t wait to see what you make in 2013! Warmly, Virginia
You’re welcome. 🙂
I use an iPad, and the first printing attempt produced a page that was blank except for a notation at the bottom of the page identifying the document as a Google Drive file. I logged in to my alternate gmail address and was permitted to download it from there an went on to open it in Adobe Reader. Only then was the print able to complete.
Hope this might light up a bulb for someone!
Best,
Thanks! I’m slowly moving all my free patterns out of Google Drive and that will eliminate problems like this in the future.
Thanks for the instructions. I made one and love it. I was just wondering now that it’s made, I realized that it’s too cute not to show off. Do you have any suggestions for the best way to cut a hole in the top so I can tote my machine around using the handle?
It really depends on the way your machine is made. On some you could cut a slit in the top where the handle is and just bind around the cut edge. My machine’s handle goes all the way across, so cutting a slit for it would just make the cover fall off. 🙂
Pingback: 20 Free DIY Sewing Machine Cover Patterns - SheLoves2Sew.com
I love this idea. Simple and perfect. Of course, I plan to make it harder on myself by trying to figure out if I can make it with French seams., just because I don’t like unfinished edges and because I’ve just learned how to do a French seam., so I want to make all the seams French. Wish me luck. I may be getting in over my head, lol!
Hi, I, too, just learned how to make french seams. Let me know how you did it when you finish, and I’d love to see pictures! Thanks,
Bev