


The Dress Up Bunch dolls now have a quick and easy skirt pattern you can make.
And it’s FREE!
Psst! I designed the skirt especially to fit all the dolls in The Dress Up Bunch collection – but it’ll also fit a ton of other dolls. It fits the American Girl dolls really well, and I guarantee it’ll also fit a bunch of random teddy bears and softies piled on any kid’s bed.
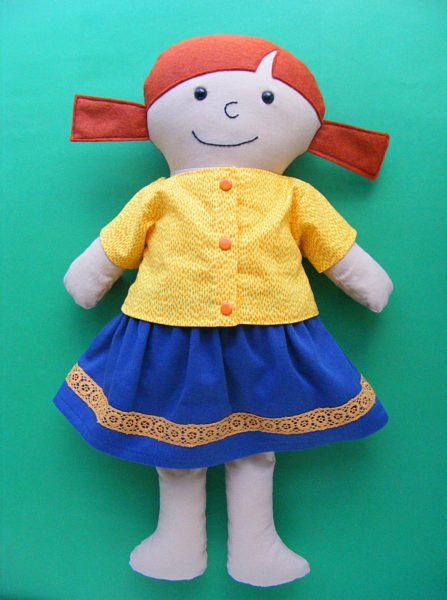
It pairs really well with the shirt from the free Play Clothes pattern.
So. The skirt. IT’S SO EASY!

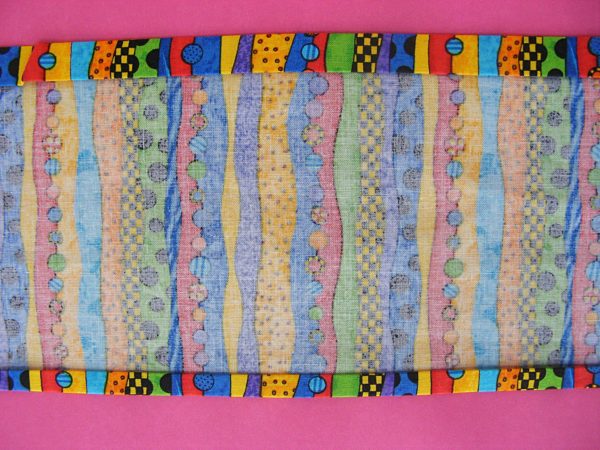
You can make it super basic – with no trim. That’s what Bean is wearing here on the right. Just choose a fabulous fabric and you’re done.
Poppy’s skirt – the one you see on the cover – is made from mid-weight cotton twill and has a band of trim added above the hem. That’s a great way to add flat trims, like lace or rickrack or pretty ribbon. The pattern includes instructions for adding these. Of course.
The pattern also includes instructions for adding trim to the hem at the bottom of the skirt. That’s where you’d add any dangly trims, like fringe, tassels, pompoms, or these pretty beads.

I love the shiny blue beads with these tiny flamingos. Very beachy and fun.
Of course, like all my doll clothing patterns, there are instructions for leaving a tail opening for the critters in the collection. They like to have their waggin’ room!
Ready to make a fun skirt? They’re so easy – I bet you can’t make just one! 🙂
Materials
- less than 1/4 yard fabric
- 12 inches 3/8″ elastic
- 24 inches fancy trim (optional)
Step 1
Cut a rectangle 7 inches tall x 24 inches wide.
Step 2
Prep the top and bottom edges for hemming.
Turn the top edge down 1/2″ and press. Turn it down another 1/2″ and press. Turn the bottom edge up 1/4″ and press. Turn it up another 1/4″ and press.
Don’t stitch the hems down yet - it’s just easiest to do all the pressing while it’s one flat piece.
Step 3
If you want to add trim to the middle of the skirt (like Poppy’s on the cover) now is the time to add it.
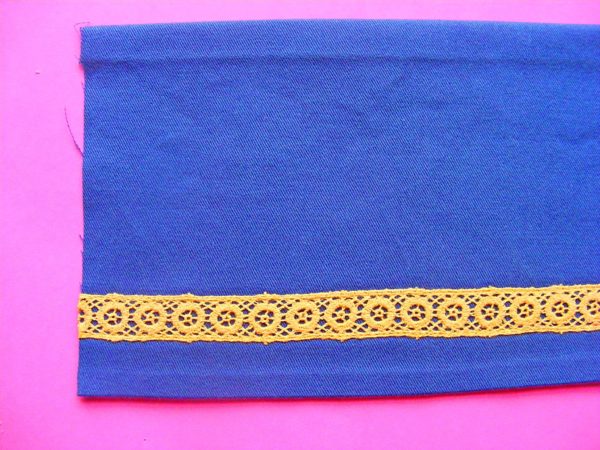
Sew it in place all along the 24 inches of the skirt. For wider trim like this, stitch it down at the top and the bottom. For something like rickrack I might use a zigzag stitch down the middle. It depends on the trim and the size. Use your best judgment.
Step 4
Unfold the creases you made in Step 2.
Sew up the center back seam of the skirt using 1/4″ seam allowance.
If you’re not leaving an opening for a tail, just sew the whole edge.
If you’re leaving a tail opening for critters, sew as shown in the photo.
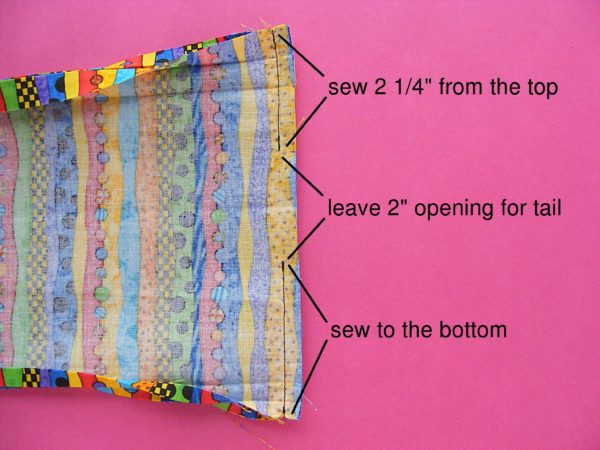
Make sure to backstitch at the top and bottom of the tail opening so it’s nice and strong and holds up to lots of dressing and undressing. :-)
Step 5
Press the center back seam open.
If you are leaving a tail opening, stitch a box around the opening to stabilize it.
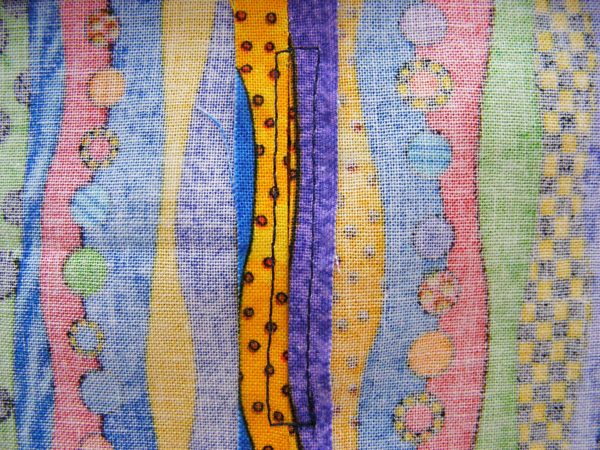
Here’s that boxed-in tail opening from the outside.

You’ll probably use a matching thread color I just wanted to make sure you could see the stitching. 🙂
Step 6
Refold the creases.
Stitch the hem down all the way around the skirt. If you’re adding trim to the bottom of the skirt, now is the time to add it.
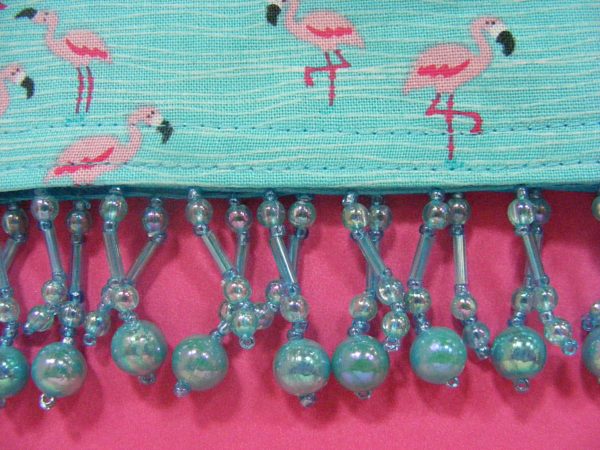
I sewed this beaded fringe in place as I stitched down the hem. The beads are attached to a ribbon. I just laid the ribbon down over the folded hem and stitched through all the layers at once.
Here it is from the inside.
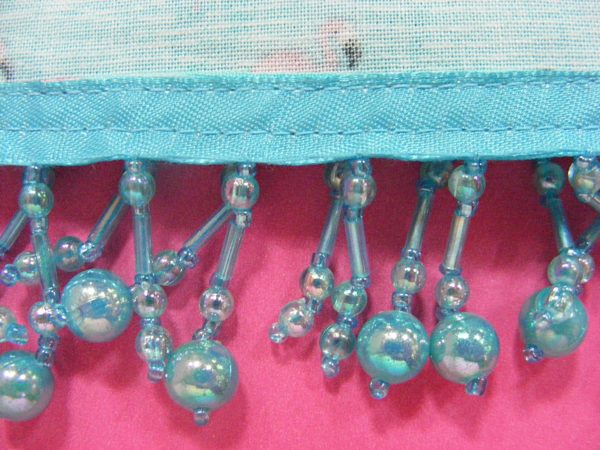
I stitched along the top and the bottom of the ribbon. I needed to use a zipper foot to stitch along the bottom of the ribbon, so I could get that close to the beads.
I could have sewed it so the ribbon was on the outside of the skirt. Use your best judgment based on the trim you’re using.
Step 7
Sew the casing at the top of the skirt.
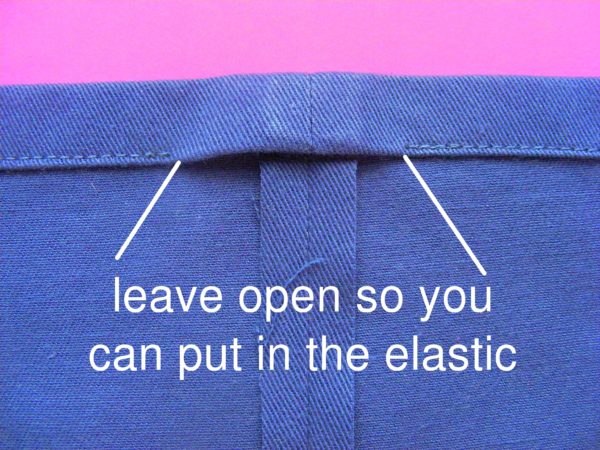
Leave a couple of inches open at the top - at the back seam - so you can put in the elastic.
Step 8
Cut a 12″ piece of 3/8″ elastic and thread it through the casing. (This bodkin is SO MUCH EASIER than the safety-pin method I used to use!)
Overlap the ends of the elastic 1 inch and sew them together. Slip the stitched elastic up into the casing and finish sewing the casing closed.
Watch this video for more info on using elastic in a waistband.
Done! Press everything neatly, turn the skirt right side out and try it on.
With trim or without, these skirts are so quick and easy to make!
Need that shirt pattern? There’s a free pattern for the shirt (and a pair of shorts) here.
Have fun! And happy stitching!
Best,
Wendi
Hi Wendi,
When I downloaded this free pattern I got the instructions but no pattern. Can you please help resolve this problem?
Thank you,
Karen
The pattern piece is just a rectangle, so the instructions give you the dimensions to cut.
Yes I have that problem too.
Sorry I didn’t understand how to do the step 3.
Step 3 is optional. If you want to add trim, that’s the time to do it. How you add it depends on the trim, but for most you just lay it in place and stitch it down.
Thanks so much, Wendi. It would have helped if I’d taken the trouble to read Step 1!
I’m just in the process of repairing the felt hair on the Emily doll I made for my granddaughter’s 5th birthday last year. She decided to brush it and enthusiastically made a large hole in the felt on the back of her head. I have cut a new back piece of felt and am going to hand stitch it cover the entire back of the head. I can’t think of any other solution without remaking it completely and that seems the wrong thing to do when she has been so thoroughly loved.
Thank you so much for your delightful designs.
Karen
I love patched up, well-loved dolls. 🙂
These are awesome and so helpful! Thank you!!