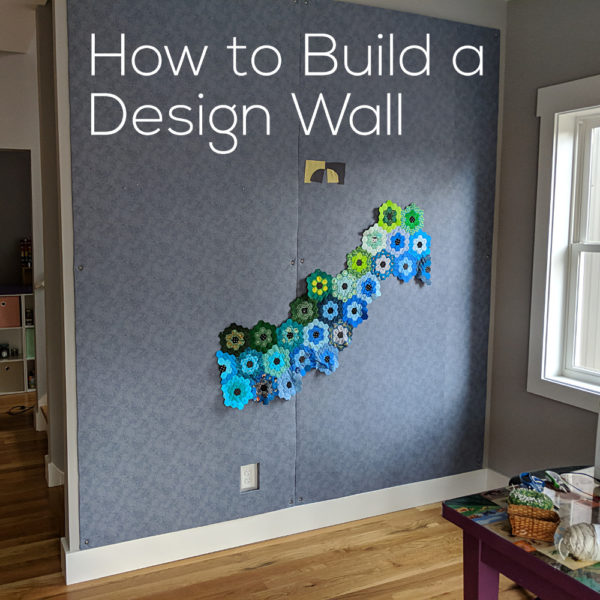
I finally have a quilt design wall in my new house and I’m so excited! There really is nothing like being able to step back and see an entire quilt like this!
And I’m going to show you (in excruciating detail) how I built mine – including the specific materials I used. I’ll also show you a bulletin board I made for my husband using the same method. I’ll even show you how to do that little cutout around the electrical outlet.
Ready?
Here we go!
To start with – I like to use foam insulation board. Styrofoam sheets are less expensive – but pinning into styrofoam gives me the willies. It’s a real nails-on-the-chalboard reaction so I don’t do it. Look for the 4 ft x 8 ft sheets of foam insulation board at your home improvement store. I like the ones that have a metallic foil material on one side.
I covered my board with flannel because I want to have both options – being able to pin into it but also being able to just smooth blocks up there and let them cling to the flannel.
Click through so you can see the flannel print close up. It’s a nice tone on tone print that looks interesting when there’s nothing on the board, but is subtle enough not to distract me from any design I’m working on up there. Later I’ll show you a different kind of option.
For my last quilt design wall I glued the fabric to the board – but that meant I couldn’t wash it, or easily change it if it got faded. This time I did the whole thing with pins.
Start out by piecing together enough fabric to completely cover your board, and wrap around each side with a couple of inches to spare. Press everything nice and smooth.
Lay your insulation board foil side up and cover it with the fabric – getting the fabric as centered as possible.
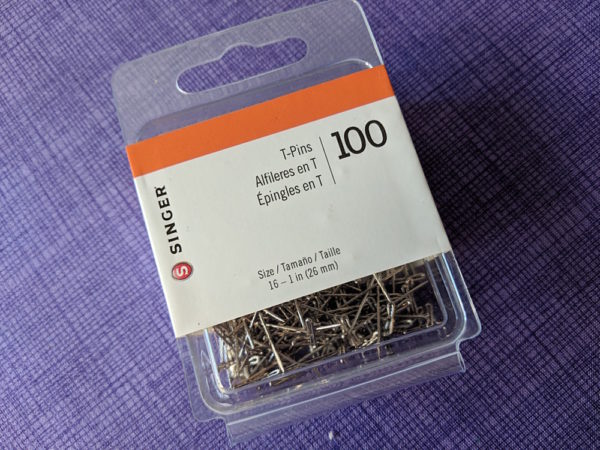
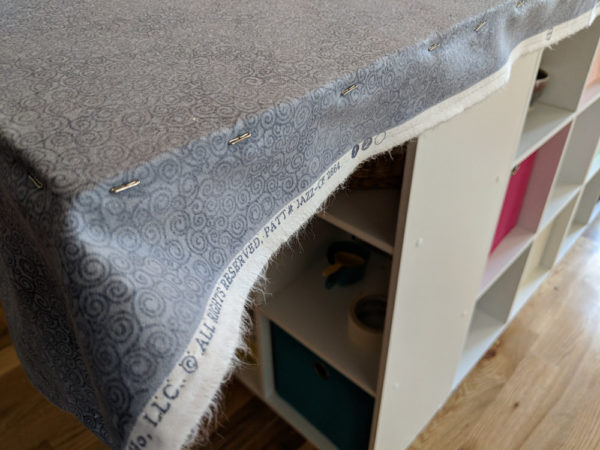
Start pinning your fabric into the sides of the insulation board. I used these 1-inch T-pins.
Basically – I used the exact same method I use to prepare fabric for framing – just on a larger scale. You can watch that video here.
Keep adding pins, pulling the fabric smooth but not stretching it, until you have pins all the way around your board every 1-2 inches.
Flip your board over so you’re working from the back.
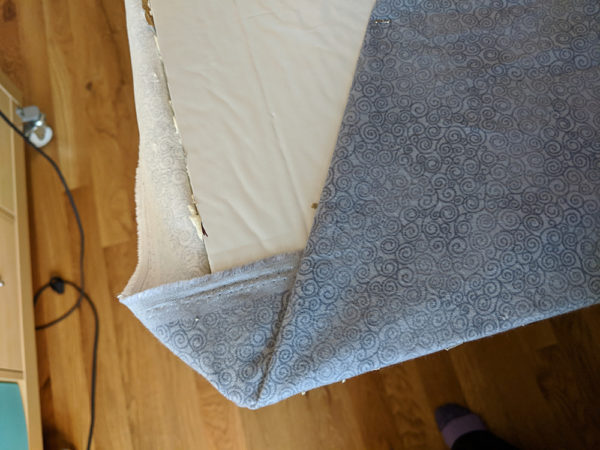
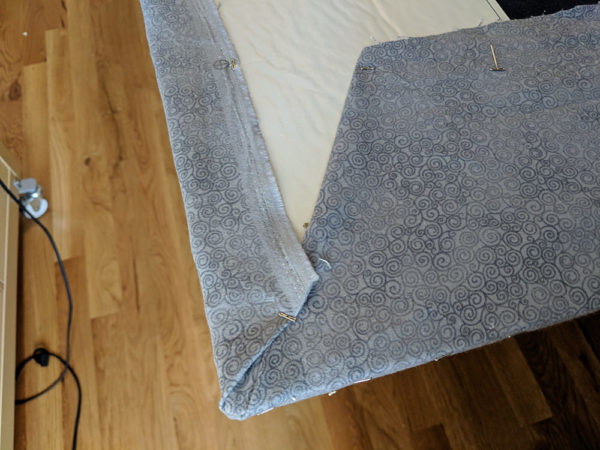
Fold in one corner, then fold in one side. Insert some of the T-pins at an angle so they hold the fabric flaps in place, but don’t poke through the front.
Fold in the other side. Now your corner is nice and neat!
(See how pretty that tone-on-tone Jazz print is?)
Continue around the back of the board, securing the excess fabric with T-pins inserted at a slant. Remember – the side pins are the ones really holding the fabric in place on the front of the board. These are only holding the excess fabric in place, so you only need a pin every 8-12 inches or so.
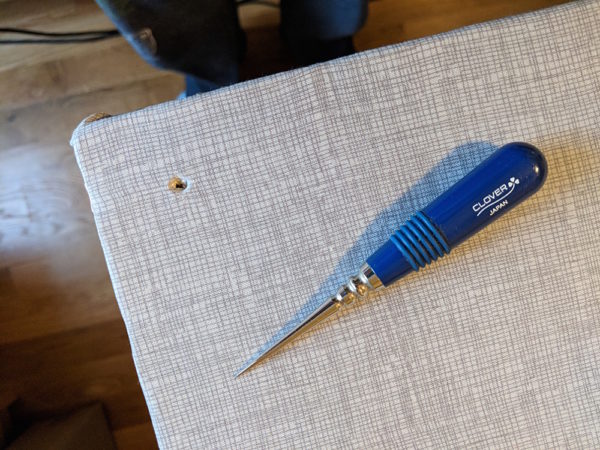
Use an awl or other sharp tool to poke a hole in each corner of the board (mine is 1 inch in from each edge) and one more in the middle of the longest edge.
This step is important! Don’t think you can just screw right through the fabric. The bit or the screw will catch the fabric and yank it into an awful twist, ruining all that work you did getting everything nice and smooth.
Hold the board just where you want it on the wall and mark through each of those holes with a pencil. Take the board away and insert a wall anchor at each of those spots.
Now screw the board into those wall anchors!
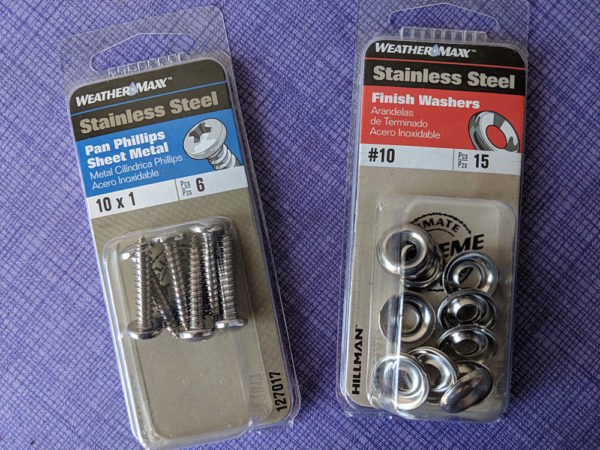
I used these nice stainless steel screws and washers.
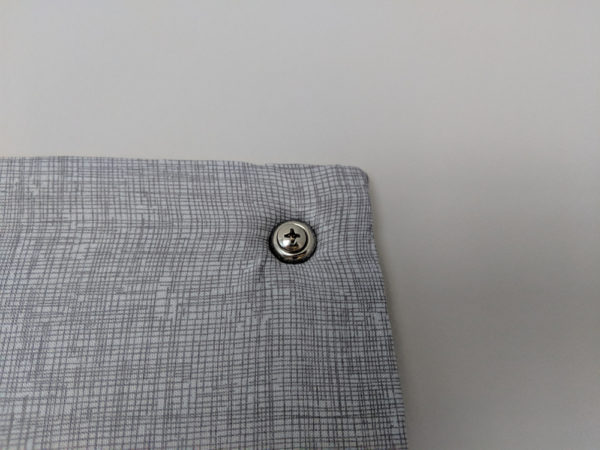
You definitely need to use some kind of washer so that over time the head of the screw doesn’t just pull through the soft foam. See how nice these look?
I like to screw it in tight enough that it kind of dimples into the surface of the foam. That way I can skim quilt blocks right over the screws if I want to.
What About Electrical Outlets?
So my first board of my quilt design wall was easy – but the second one was going to go right over an electrical outlet. I wanted to be able to continue to use that outlet, so I needed to cut a hole in the board and finish those edges.
Don’t worry – it’s not hard!
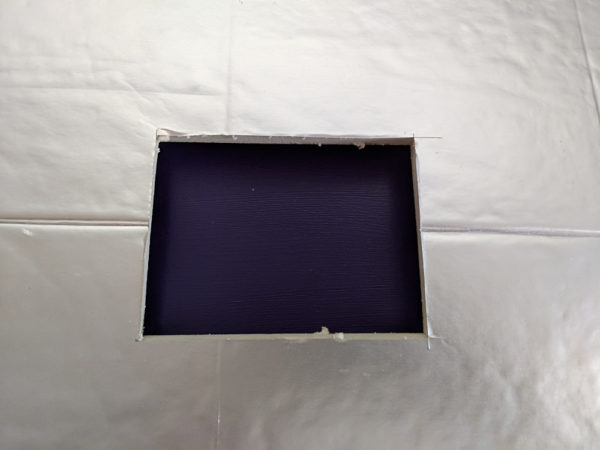
Measure your space and cut a hole in your board just a little bit bigger than your outlet cover.
This stuff is easy to cut with a simple X-acto blade.
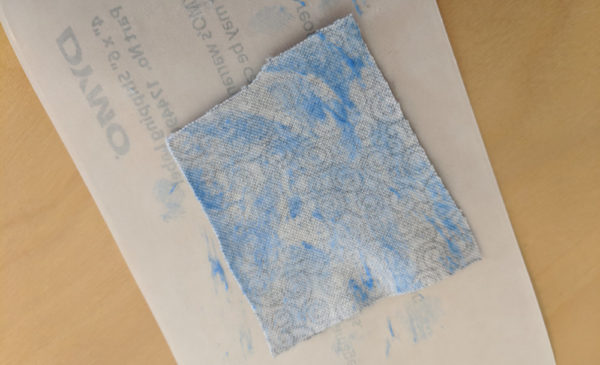
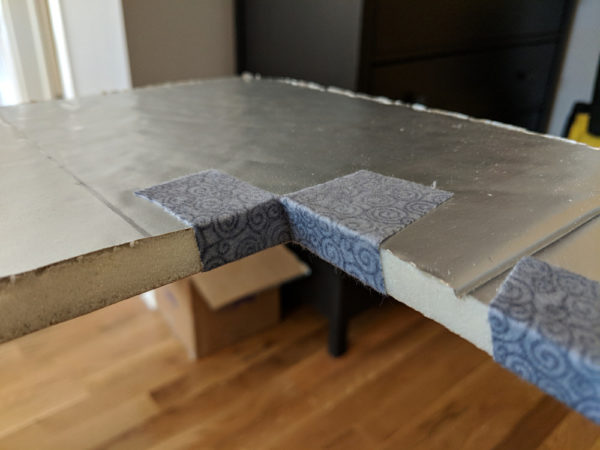
Now cut four squares of fabric roughly 2-3 inches square. It doesn’t not have to be exact – or even especially neat, as you can see with mine.
Cover the back of one square of fabric with glue.
I used a Uhu glue stick – not my fabric glue stick. I wanted a permanent hold here.
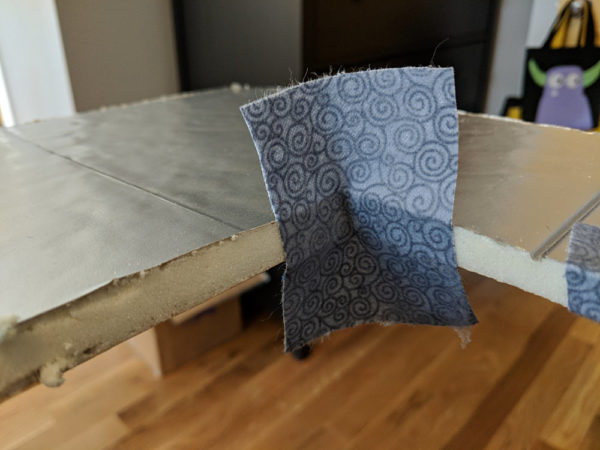
Stick the square right into one corner of your cutout and press it in place, as shown.
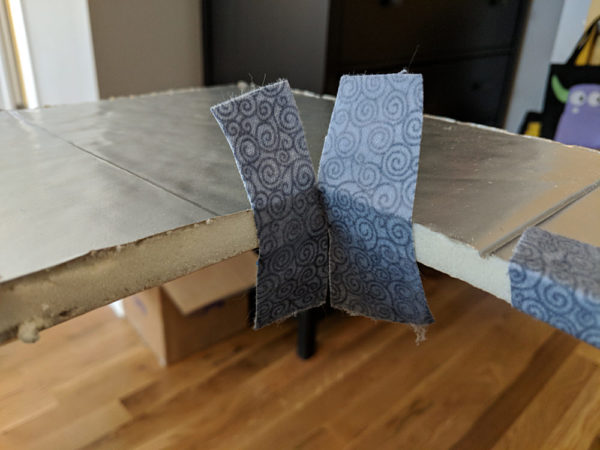
Now use a sharp pair of scissors to snip down from the top and up from the bottom – right on the fold created.
You want to cut very close to the surface of the board – with just a few threads to spare.
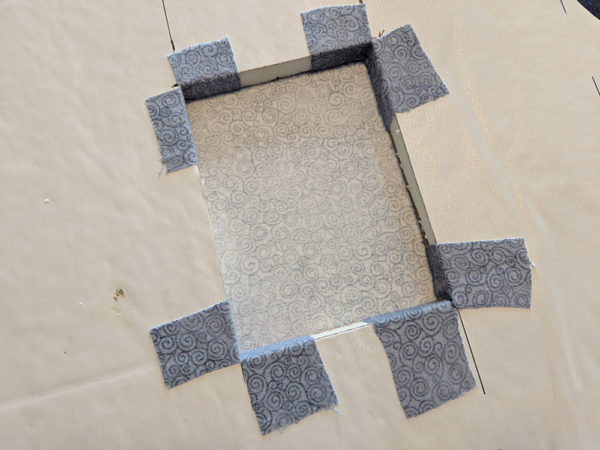
Now folds those flaps down and smooth them onto the front and back of the board.
Repeat for the other three corners.
Now just cover your board like a showed in the first part of the tutorial. Pretend that hole isn’t even there.
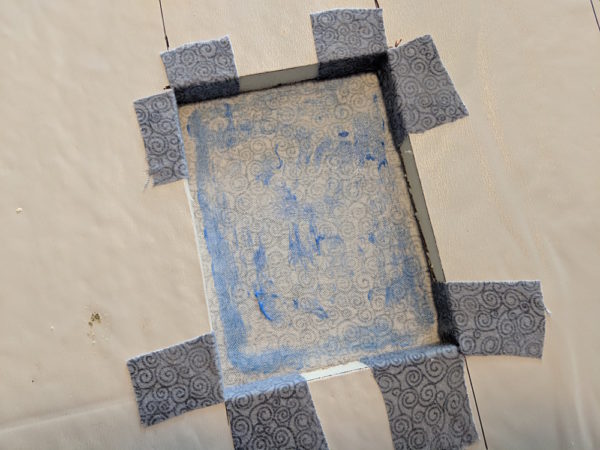
When you flip your board over, you’ll see the back of that fabric through the hole.
Make sure the board is on a flat surface (so you have something to press against) and coat all the fabric inside the cutout with glue.
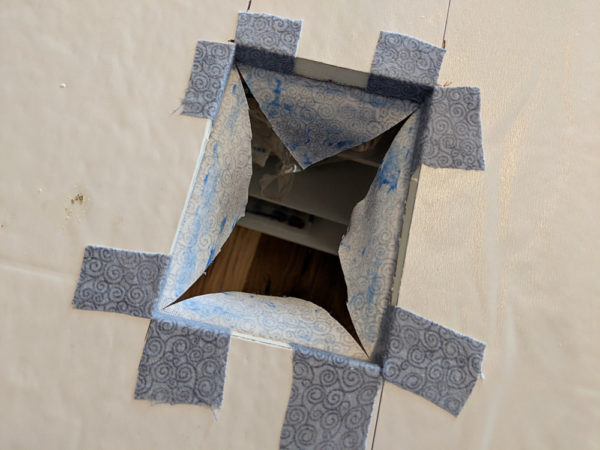
Now use a pair of sharp scissors to cut an X in that fabric from corner to corner.
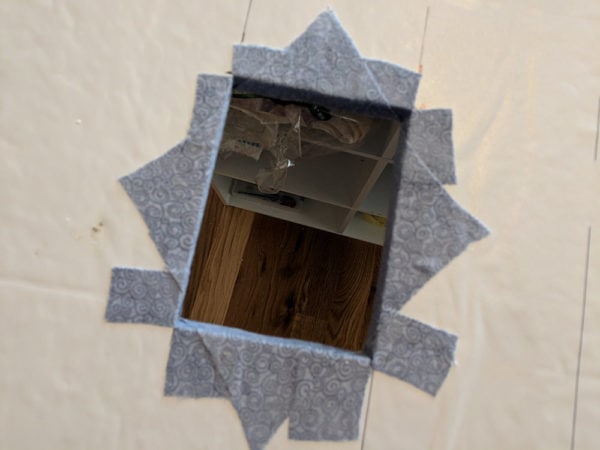
Pull those triangle flaps to the back side of the board and smooth them in place.
Sorry – I was using my camera’s autofocus and it focused on what it could see through the hole, instead of the fabric treatment around the hole. But I think you can still see what I did, blurry as it is. 😛
That’s it! This board is ready to hang, just like the first one.
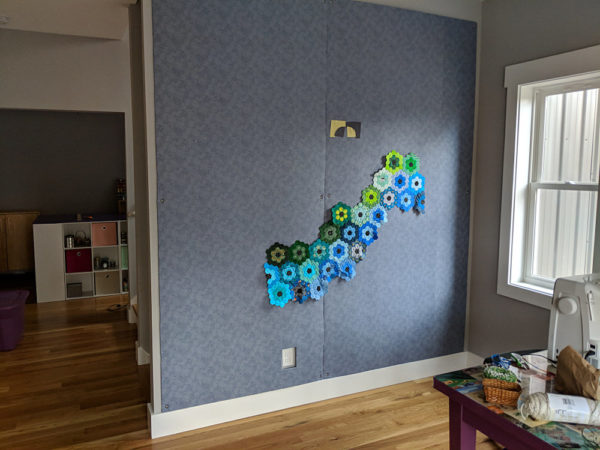
Ta da! I have a quilt design wall!
Pieced Bulletin Board
I needed my board to be pretty simple so it wouldn’t distract from whatever I’m designing on it.
But my husband wanted a similar board to outline his next book on – and he wanted it to have a bit of design. Nothing too fancy – but just a little extra pizzazz.
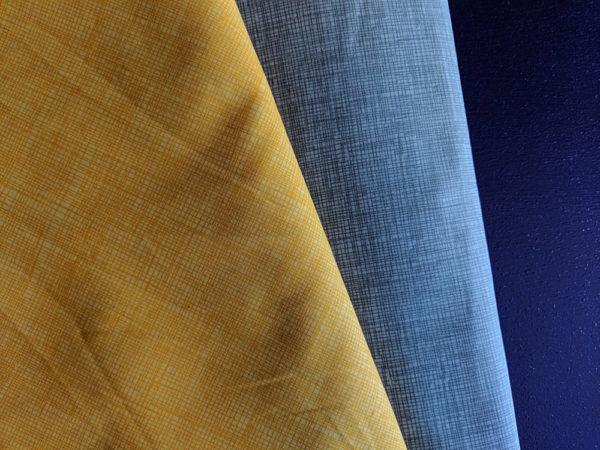
Here are the fabrics he chose.
He doesn’t need fabric to cling to his board, so I just used regular quilting cotton instead of flannel.
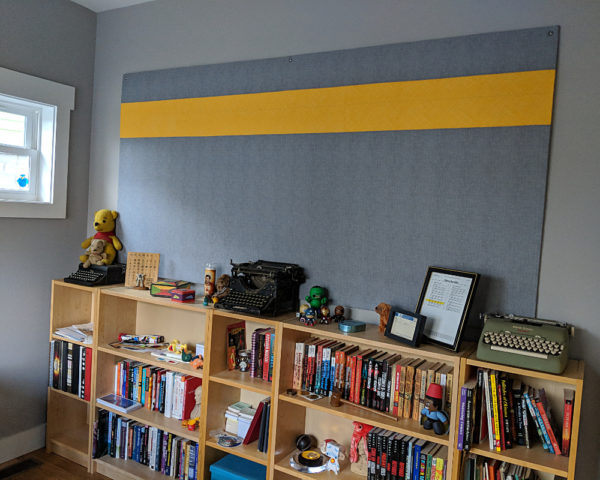
And here’s his finished bulletin board.
It’s all ready for him to start hatching his next novel!
I love having a quilt design wall again! It makes it so much easier to really SEE the layout of a quilt in progress.

Here are handy links to all the posts about quilting tools and supplies.
Sewing Machine
- My Sewing Machine and Why I Love It
- How to Choose a Sewing Machine for a Beginner
- My Favorite Sewing Machine Feet
- Basic Sewing Machine Maintenance
Iron
Rotary Cutting Tools
- My Favorite Rotary Cutting Tools
- How to Use a Rotary Cutter and Ruler
- How to Clean a Fuzzy Cutting Mat
Scissors
Other General Sewing Room Supplies
- Easy Pattern Weights (a free pattern)
- Pincushion (a free pattern)
- Needle Cushion (a free pattern)
- Sewing Machine Cover (a free pattern)
- How to Make a Design Wall
- How to Make a DIY Cutting Table
One More Hugely Popular Post that Seems to Fit Here Better than Anywhere Else
Return to the Let’s Make a Quilt main Table of Contents.
Move on to the posts about choosing your quilt pattern.
Happy stitching!



i have large and small design walls. because i don’t have an actual wall with a big enough surface (due to tall book shelves etc) to mount them, they are portable. i made them with batting covering that poster-board-with-foam-between-smooth-paper-covering (can’t think what that is called). anyway i then had to make a frame on the big one to stop bending corners etc.
but here’s my problem the pins stick out the back making a prickly cactus.
my question is, what pins do you use and how thick is your insulation material? i may have to redo mine. i’ve thought of push pins but they seem to be too thick making a hole in the fabric.
i’ve also been thinking i could make it doublesided by just attaching another batting covered mat board to the frame in back. but the pins stick out too far.
I think you’re right about the push pins. I use 1 inch T-pins on mine (and also regular pins when I want the more visible heads to mark off areas, for example). Try looking for applique pins. They are VERY short – designed to catch the thread less when you’re doing needle-turned applique. And maybe put them in at an angle so they don’t come out the back as much?
Thanks, Wendy,
Very helpful tutorial, when I tried to make my own board, I used an old folding door and leaned it up against my wall, and of course that didn’t work because the weight of the material ended up tipping it forward, lol! Now I can see how to attach it permanently…
I’m glad it was helpful!
PS… I went to the Timeless Treasures website, but it isn’t for the regular consumer, did not give prices, etc.
I’ve found that when I link to a particular supplier, that link is outdated and/or broken very quickly – often because the fabric is sold out. I link to the manufacturer so you can see good images of the fabric and the official name. For shopping your best bet is to Google the name of the manufacturer, the name of the collection, and the name of the color. So for the background fabric I used on my design wall I’d Google Timeless Treasures Jazz flannel smoke. That search is most likely to bring up shops selling online who actually have the fabric in stock.
Very nice, both of them.
Thanks for the very detailed instructions.
You’re welcome! 🙂
This is wonderful! Thank you so much for the detailed instructions too. I am definitely going to do this! I already use insulation boards for my design wall, but I prop them up rather than mount them to the wall. So they always seem in the way and are falling over if my cats get behind them. Mounting them to the wall makes sooo much more sense! lol
Thanks again for a great idea and a wonderful tutorial.
I love this thank you for the step-by-step instructions. Unfortunately I don’t have a whole wall in my craft room to even do that but maybe some day. For now I could make a smaller movable one. I like the foam insulation idea. Right now I’m obsessed with Big Stitch quilting so that’s what I spend my free time on right now thank you for showing us how to do that as well I love your site and i have referred a lot of people to you lately. Can’t wait to see you what you come up with next.
wonderful tutorial Wendy! I am moving into a new house in July and will surely build myself a design wall there with your detailed steps!
This is Awesome. Thank you so very much for all of the pictures and details. My daughter recently moved out and I am reorganizing. This design wall is perfect for me. I love all of your tutorials.
I just redid my basement and will be having a large design wall that I am using your foam insulation board idea on. How much flannel do you think I should get to cover one board. I will be having to cover five 4 x 8 sheets so I don’t want to buy too much. Thanks for any info you can give me.
Sorry – you’ll need to do some math to get an exact measurement. Look at how wide the fabric is that you want to use, whether it has a print on it that needs to run a particular direction, etc. I find it helpful to draw out a quick sketch showing where the seams will need to be on each board – that makes it easier to calculate the side needed. Remember that it only needs to wrap a couple of inches around each side to the back.
How thick is the board you used? It comes in 1/4″ to 2″ thick.
My home improvement store only stocked one thickness – 1/2 inch thick.
That was a great tutorial. I’ve heard that copying someone is the highest form of flattery. Well, since that is true, I’m about to flatter you. Thank you.
Pingback: TTMT #658 – Finale, Starring Dipper (sewing room makeover #5) – TTMT – Talk To Me Tuesday
I want to use the board for laying crochet squares to design a quilt look. Would this type of board work?
I turned one of our bedrooms into my sewing room. The closet doors are 3 mirror panels that slide. I did the same idea with the installation board and flannel. We turned the mirrors so they were facing inside the closet, then cut the installation board to fit the recess of the backside of the doors, (now facing out). I used double-sided tape to secure it. Now I have a great design board and the ugly mirror doors are hidden.
Pingback: TTMT #460 – jewells68 – March 28, 2023 – Design Wall Progress – TTMT – Talk To Me Tuesday
Wendi, thank you for your website! I learn so much from you every time I visit. I made the sloth quilt and added in a few other of your designs and it turned out beautifully. I would never have tried applique without you! Just yesterday I asked Lisa at Sewendipitous quilt shop here in Rock Hill, SC how she built her design board and the directions are almost the same! Seeing the process makes the directions so much simpler. She did use a king-sized grey flannel sheet to make hers. I mention the shop specifically because Sewendipitous just won the grand prize Local Quilt Shop in the lqscontest.com. I like the look of your husband’s pin board even better. I might just add a stripe to my design board.