The 100 Day Project 2021 – 100 Birds

black-capped chickadee applique pattern

For the last few years I’ve participated in the 100 Day Project. Last year was the first year I actually finished it. 🙂

The 100 Day project is awesome. Participants decide on any creative activity they want to pursue for 100 days. It can be ANYTHING! A few that I remember off the top of my head are a jeweler who made 100 pairs of earrings, a potter who came up with 100 different handles, a baker who made 100 different pies, and an artist who designed 100 different alphabet fonts – the sky’s the limit!

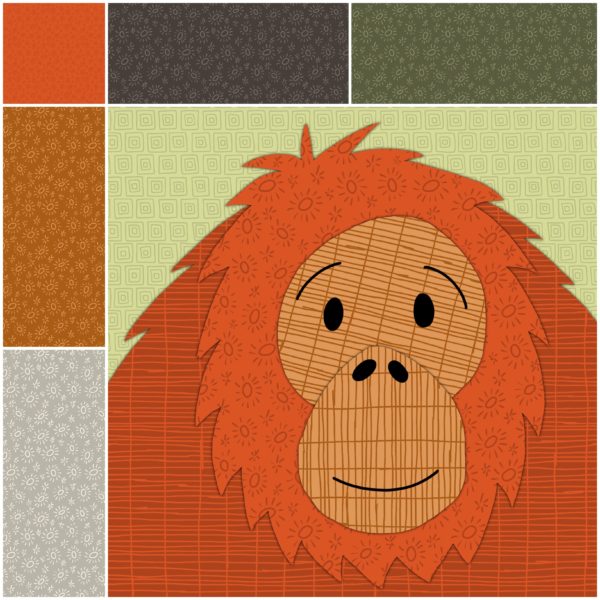
Last year I designed a different repeat pattern every day – AND I used that pattern to mock-up a new applique design. Here’s just one example.

illustrated orangutan - cute

I hoped to have a fabric collection come out of it, but I got something else instead. SO MANY QUILT BLOCK IDEAS!

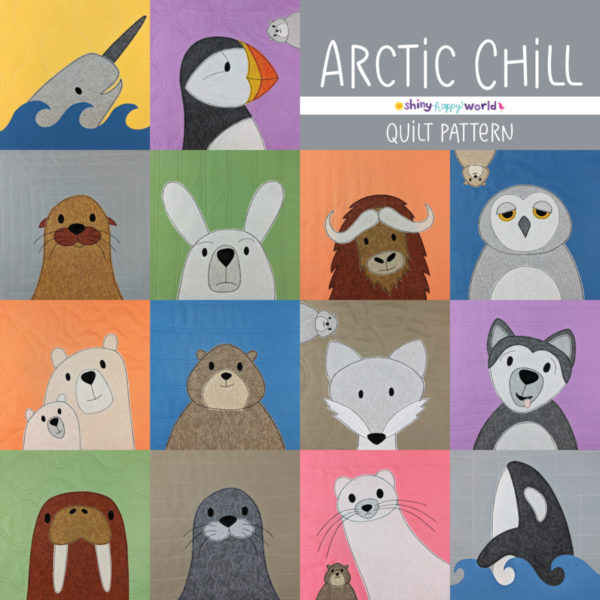
I’ve already designed a quilt pattern using the arctic animals I mocked up.

arctic chill applique quilt pattern cover

I love how it turned out – but it was relatively easy. Just design all the blocks, make a sample, record the video tutorials, and write the pattern!

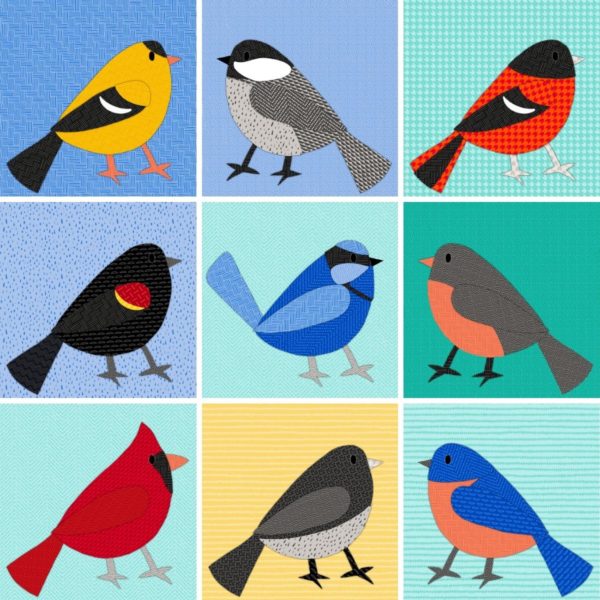
But one of the ideas that the project sparked last year was a Mix & Match Backyard Birds pattern. As I was drawing some of the birds I see at my feeder, I realized that a lot of the basic parts are pretty much the same. I wondered if I could create some basic templates that could be used to applique just about any of those classic feeder birds. I noodled around with the idea for ten of my hundred days, and it seemed like it would work!

backyard birds applique pattern design process

I’ve taken the months since then to draw up a bunch of templates and now I’m finally ready to test them – just in time for a new 100 Day Project!

The new tests won’t be mock-ups. They’re actually appliqued blocks that I’ll be able to join into a quilt. So exciting!

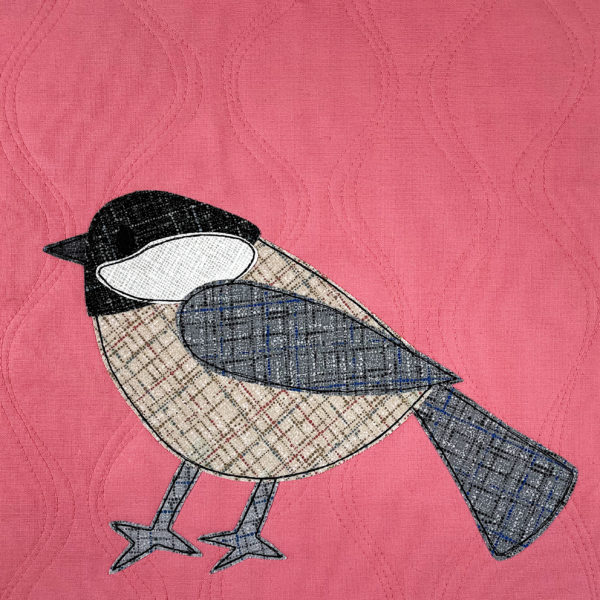
Here’s Day 1 – a black-capped chickadee, one of my favorite birds.

black-capped chickadee applique pattern

Will I be able to make 100 different recognizable birds using just a few pages of templates? We’re about to find out. 🙂

You can follow along with my progress on Instagram. And the applique pattern will be available at the end of the project – maybe even sooner if the testing goes smoothly and I don’t need to design too many additional templates. 🙂

Update! The project is finished and you can find the pattern here!

Want to join in the 100 Day Project? There’s more info here.

Happy stitching!

A New Version of the Noisy Farm Quilt!

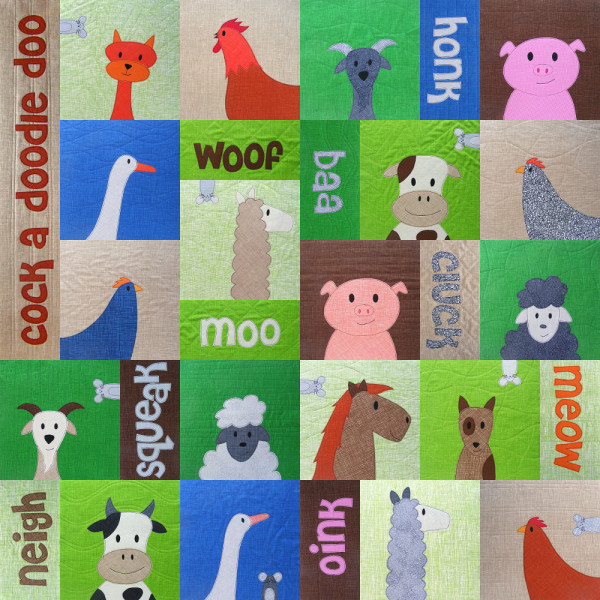
Noisy Farm Quilt pattern from Shiny Happy World

I’ve gotten a lot of questions lately asking for suggestions for the background colors of the Noisy Farm quilt pattern.

The cover sample you see above is from before I had fabric bundles in my shop, and most of the fabrics I used are no longer available.

One of the things I love about the way I do fabric bundles now is that you can use any bundle for any quilt. Here’s an example of three quilts that all use the Warm Neutrals fat quarter bundle for the animals – but different bundles for the background colors.

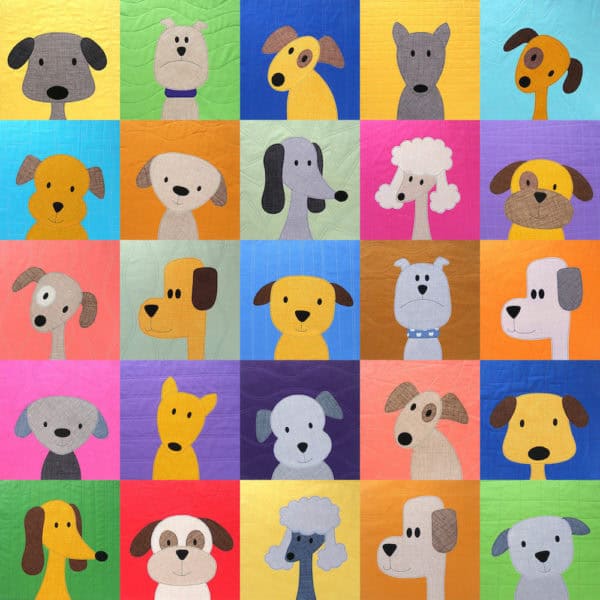
Here are the Playful Puppies made with Solid Rainbow for the background blocks.

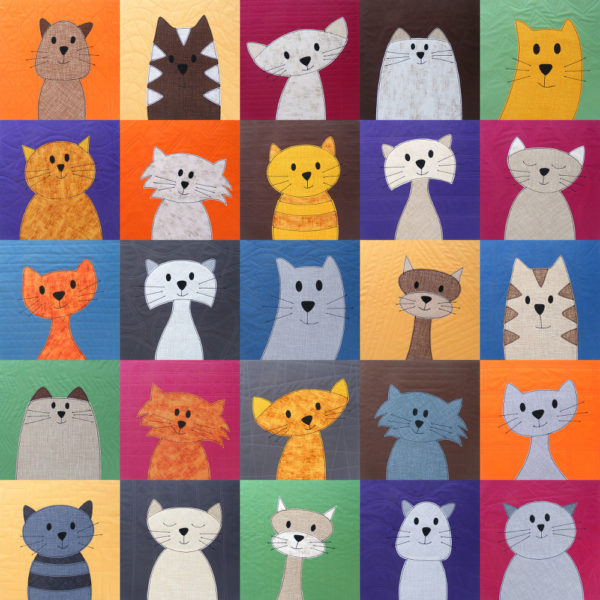
And here are the Cuddly Cats with the slightly-more-grownup-but-still-colorful Box of Crayons for the background blocks.

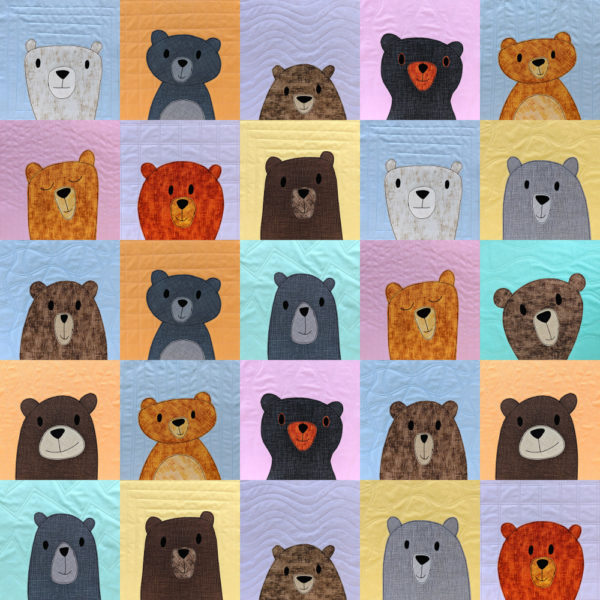
And here is the Bunches of Bears pattern made with the Rainbow Sherbet bundle for the background blocks.

See what a difference?

Changing just the background colors really changes the whole feel of the quilt – and I love them all!

So when people ask for suggestions for background colors for the Noisy Farm pattern – I want to tell them they can use anything! Go totally bright with the Solid Rainbow! Go a little more subdued with Box of Crayons! Go baby sweet with Rainbow Sherbet! Go natural with Green Batiks! Want even more suggestions? Go to the Noisy Farm pattern listing and look at the additional photos. There are a bunch showing finished quilts that other people have made with different fabrics than my samples.

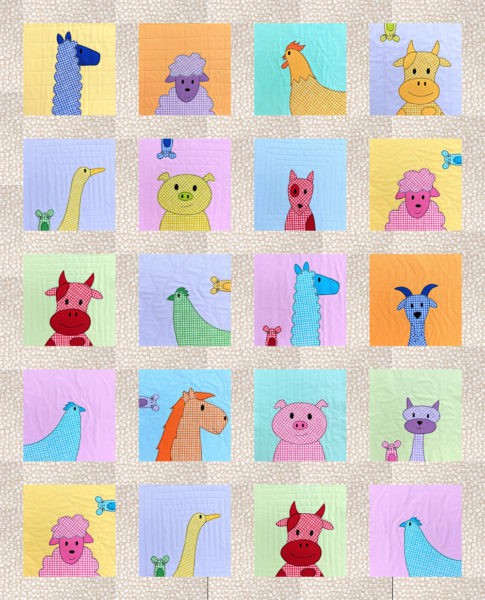
For my new version of the Noisy Farm quilt I used Rainbow Sherbet for the background blocks. I went totally wild with the animals and using the Gingham Play fat quarter bundle. Gingham always says “farm” to me and I can’t wait to make the animals in fantasy colors.

Pastel version of the Noisy Farm quilt pattern

One more change – I made this one a silent farm. 🙂 I left off the half-blocks with animal sounds and added sashing. I get a lot of requests about adding sashing to a Quilt As You Go quilt. There’s a tutorial here showing how you can reset (almost) any of my quilt patterns with added sashing. I even did the math for you for all the sizes. 🙂

If you’ve made any of my quilt patterns using a different color scheme – please share! Seeing all the different versions of my patterns makes me Muppet-arms-flailing happy – and it’s a great resource for your fellow makers out there to see different options. 🙂

Happy stitching!

Best,
Wendi

Color Theory: Neutrals + Pop of Color!

You know that I love color.

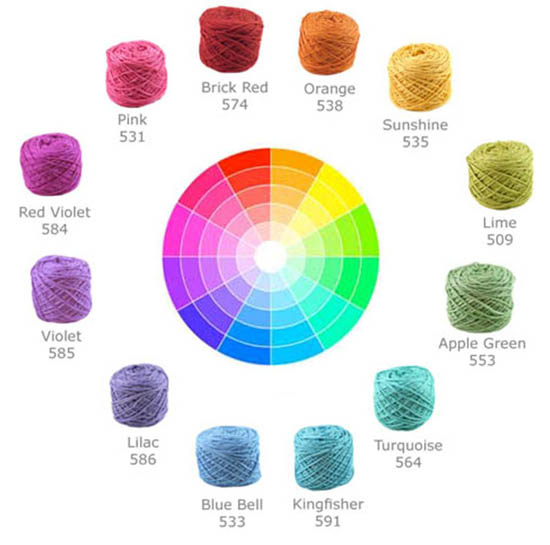
In fact, one of my most popular blog posts is this one where I talk about putting colors together.

But maybe you’re not into wearing lots of different colors. I have another great color combo for you: a neutral + a pop of color!

How to do it

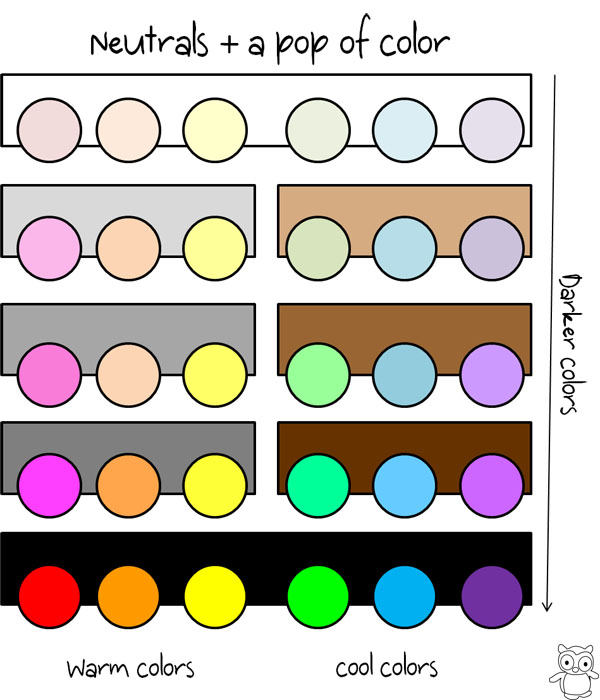
My philosophy for mixing neutrals and color is to mix warmth, but keep the darkness the same. For example, I mix a warm color with a cool neutral… but keep them about the same lightness.

Here’s a little chart showing some ideas:
mixing neutrals and color from freshstitches

See it in action!

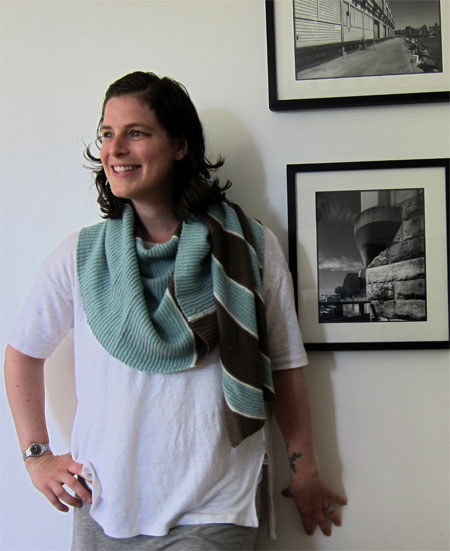
I just finished knitting Dromos (well… actually, I finished knitting it a long time ago, but I just finished weaving in the ends!), and I just love it. It combines a medium brown with a soft blue.

Dromos knit by Freshstitches

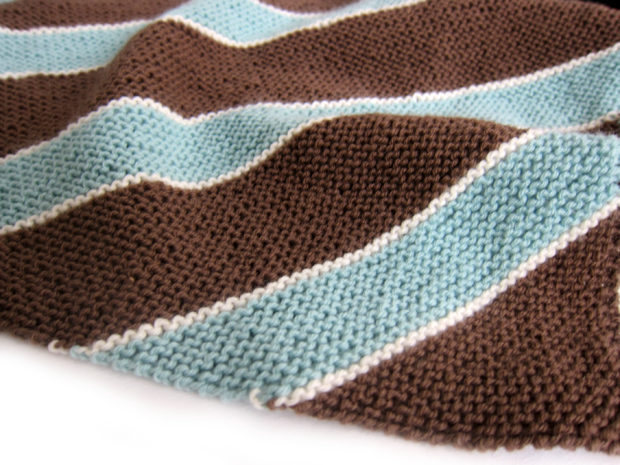
Here’s a close up:
close up

Yummy, right? It’s a warm brown mixed with a cool blue, and they’re both similar darkness and a similar muted tone.

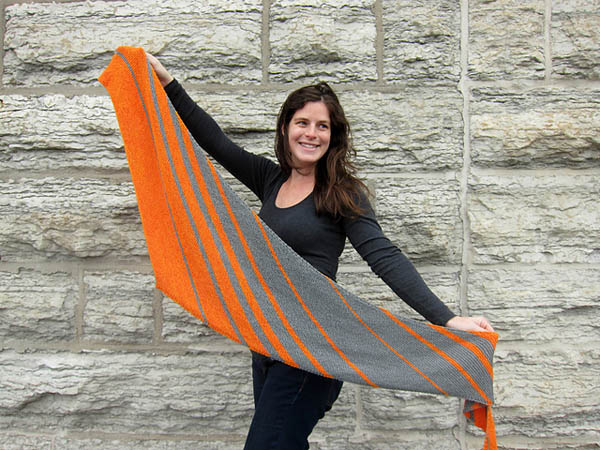
And do you remember Phi?

Phi Shawl

A cool grey plus a warm orange… both fairly dark. Delicious!

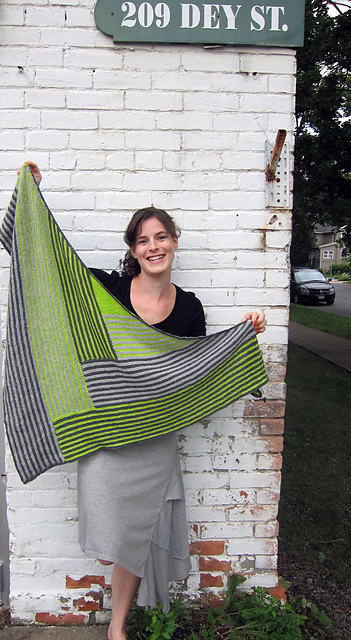
Dark grey and lime green? Oh, yeah.
Derecho
Bonus: whenever you use different colors in a project, it’s an opportunity to stash-bust and use up some odd skeins you might have on hand! Stripes are a stash-busters best friend!

Have you done this before? What’s your favorite color combination?

The Evolution of a Sleeping Bag

Evolution of a Sleeping Bag - a process post

The sleeping bag I designed for the Dress Up Bunch dolls involved a bit of engineering, so I thought I’d share something about my process here.

My initial thought was to make a sleeping bag almost exactly like a “real” one. The zipper was going to go down the side and across the bottom, so that you could open up the sleeping bag entirely. Here’s my first prototype. . .

Evolution of a Sleeping Bag - a process post

And here it is zipped up. . .

Evolution of a Sleeping Bag - a process post

Looks pretty good, right?

I loved the look of it – but sewing the zipper around the corner was not fun. Like – really, really unfun.

I try to make my patterns as easy and fun as possible – so I wanted to fix that.

I tried rounding the corner more and more, through a few different tries, but it was still pretty dang hard to wrangle. And it was starting to look ugly and not as sleeping-bag-ish.

Back to the drawing board.

Sewing a zipper around a corner was out, so I tried just a zipper going down the side.

My first attempt at sewing it inside out was kind of a mess because I didn’t use a separating zipper and I needed to sew it in a tube and it was hard to sew from top to bottom that way.

Next I tried a separating zipper so I could sew the two sides separately.

Much, MUCH easier!

I sewed it flat and sewed all the way around (leaving a little opening for turning) and it looked awesome. And then I zipped it up and realized I had made a nicely finished tube. 🙂 The bottom wasn’t closed!

Forehead smack.

I picked the bottom open and realized now I could sew the top and sides without needing any hand-sewing. The whole bottom became the turning opening.

Score!

I folded the sleeping bag closed and sewed up the bottom.

Terrific!

But then I realized it was impossible to zip it up. With the sleeping bag sewn up it was pretty much impossible to start the separating zipper. Just about impossible for me – definitely impossible for any kids trying to work it.

Aaargh.

Oooh – but then I realized that I could zip it closed first and then sew up the bottom. Now the zipper is together and it can’t come apart – a terrific bonus because separating zippers can be tricky for some little kids. I had planned to hand stitch the zipper permanently together as the final construction step, but now that wasn’t necessary!

Done! (Almost.)

Dress Up Bunch Camping Set

I added a couple of elastic loops so it could be rolled up and secured without having to tie anything, and the design is finished!

Sometimes I get a design right on the first prototype, but usually it works like this – a series of attempts and revisions that get closer and closer to the final design – one that looks good AND is easy to make. 🙂

Get the pattern here.

Happy sewing!

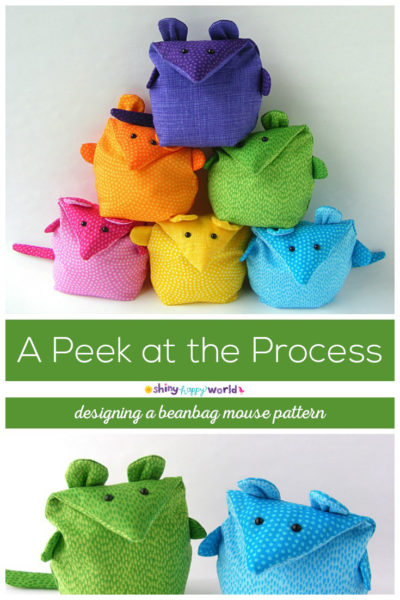
Evolution of a Mouse – a Peek at the Design Process

I designed a cute little mouse pattern, and I thought I’d share a bit of the design process with you.

The Head

I knew that I wanted to have his head be part of the body structure, just folded over. The original inspiration was this owl.

Orville the Owl softie pattern from Shiny Happy World

I designed it especially for quick and easy sewing (I need to make them with twenty kids at a Harry Potter Camp I was teaching – you can see all the details here).

When I was playing with that design I noticed that sometimes the bit folded over for the top of his head looked kind of mouse-like. If I stuffed it before folding it over it just might work – and I filed that thought away for later.

Well – now was later!

The Bottom

I also knew I wanted his body to be fat – so that his feet would disappear when he sat up on his back legs. (He actually has no feet – but the shape of his body makes them look like they’re just hidden.)

Usually if I want a fat bottom I design a flat pattern piece for the base and set it in, but that can be fussy sewing on a softie this small – and I avoid fussy sewing whenever possible. 🙂

I decided to use a technique that I use on all my tote bags. You’ll see it too in pillow corners – to give the pillow more fatness. It’s a way of boxing in the corners to add depth. I’ve used it before on these monsters and it was really easy to sew, so I decided to try it here. The final result looks like this.

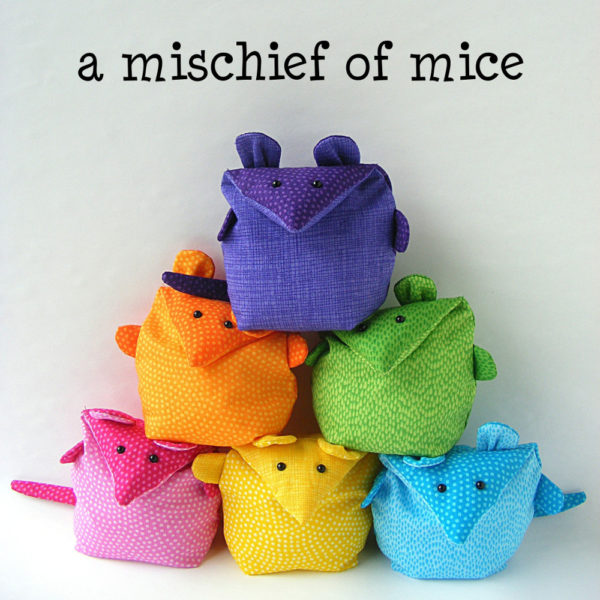
Mischief of Mice - softie sewing pattern from Shiny Happy World

He’s not dead – he’s just lying on his back so we can see his bottom. 🙂

See how the “corners” of the body are boxed in? This is very easy to sew.

The Ugly Part of the Design Process

So – that was two design decisions made. Time to start some prototypes.

I sew these out of a yucky white sheet with whatever thread I happen to have in my sewing machine. They’re not pretty, but they let me work out the details of the pattern pieces.

Three Mice - prototypes of the Mischief of Mice softie pattern by Shiny Happy World

Sometimes the very first prototype is just right, but usually I have to try at least a few variations before things get good. I lost track of the number of prototypes I tried for this “simple” mouse – but these were the three still sitting on my table when I was done. Sometimes I take out the stuffing and resew a couple of seams – like to take in the sides a bit – instead of starting a whole new prototype.

The proportions on the first one were pretty good. I would have done a second round to make his body a little wider – but overall he was just too big.

The second one was better size-wise. But when I stuffed him properly he was just too tall, and when I took out some of the stuffing to make him shorter, he just looked hunchbacked.

The third one was just about right.

Time to add some details – ears, paws and a tail. I usually leave them off in the first round so I can just focus on the basic body shape.

The Details

When I start to add all the other bits and pieces, I usually cut them out of paper first and pin them to the softie. That’s a quick and easy way to check proportion and placement. Then I use those as pattern pieces and make up another prototype all from fabric.

It usually takes a bit of tweaking to get things just right – the size of the ears, the length of the paws, the thickness of the tail. In this case my original tail was too skinny to turn right side out. I had to redesign it so these turning tubes would fit inside. 🙂

Mouse prototype - one step in the design process at Shiny Happy WorldI’m picky about eyes – I’ve written about my obsession with eye placement here and here. The main thing to remember is that the shape of the face can change a lot after stuffing – so I always just draw the eyes on a stuffed prototype. Usually I’ll also poke holes and try out a few different eye sizes. I pick the final prototype apart and trace that eye placement onto the final pattern pieces.

Cuteness!

The final step, of course, is to make him out of cute fabric. 🙂

I knew that I wanted him to be made of quilting cotton, because I wanted to use colorful, patterned fabric.

I couldn’t choose a color, and I couldn’t stop at one. I made a whole mischief of mice in a rainbow of colors – and I love them!

Mischief of Mice - an easy sewing pattern from Shiny Happy World

Finished!

So now you’ve seen the ugliness behind the scenes in the design process. 🙂

You can get the finished pattern here.

Happy sewing!

Best,
Wendi
That's me!

Made with Love? Or Made with Stress, Swearing and Sweat?

I make quilts for the people I love.The next time you’re making something – a quilt, a stuffed animal, a dress – and you’re stressing out about a place where your seams don’t line up, or a little pucker in the sewing, or eyes that aren’t exactly level, stop.

Stop and take a deep breath.

Remember why you’re making what you’re making.

If it’s for a show and you really, really, really want to win a ribbon – well, you really do need to stress about those tiny details. Sorry. (I don’t do that any more and that decision makes me happy every day.)

If it’s for any other reason – relax.

No one else will ever look at your work as critically as you do.

Not only will your best friend not care that that seam intersection is off by 1/8″ – she won’t even notice. She’ll be touched that you put so much time and love into something made especially for her. Look! You used all of her favorite colors! Even orange, and she knows you hate orange.

Your granddaughter will not notice that there’s a little pucker where you attached the sleeve to the dress for her doll. It’s under the doll’s arm, for Pete’s sake! And she’s too busy putting the dress on and taking it off for the hundredth time.

Your son will not notice that the eyes on his new teddy bear are a little crooked. He’ll be too busy hugging it close.

So really think about all the “mistakes” you see.

Will it interfere with all the love the recipient wants to give it?

If you wobbled and have a spot where there’s practically no seam allowance on your quilt and you’re worried the seam will pop the first time it’s washed – fix it. If you used the wrong seam allowance sewing the doll dress and now the sleeves won’t fit over the hands – fix it. If an eyeball is loose on the teddy bear and in danger of popping off and inspiring nightmares – fix it.

If it’s anything else – all those little things only you will notice – then let it go.

Which would you rather receive? A gift made with love? Or a gift made with stress, swearing and sweat?

I thought so. 🙂

Happy Wednesday!

Best,
Wendi
Wendi_Gratz_Shiny_Happy_World

Designing a Rag Doll – a Peek at the Design Process

Designing a Rag Doll - a Peek at My ProcessToday’s post is part of the Let’s Talk Process Blog Hop! Eight different designers are each choosing a recent project and talking about the process of designing that project. Our approaches are all likely to be really different – and all inspiring! I love peeking behind the scenes at the process that goes into a finished design – and I always come away with some ideas I apply to my own work.

I’ll be writing about the new Dress Up Bunch rag dolls. Years ago – back when Shiny Happy World was about selling finished dolls and softies instead of patterns – I had the idea to design a dressable rag doll. I already had a rag doll that sold well, but I wanted one that was designed to be easier to dress, with a large wardrobe of possible clothing patterns. It wouldn’t hurt if she was easier (and faster) to make, too. 🙂

That idea sat on the back burner for a long time while I transitioned to selling patterns and  teaching, but a few months ago I finally got serious and designed what would become The Dress Up Bunch.
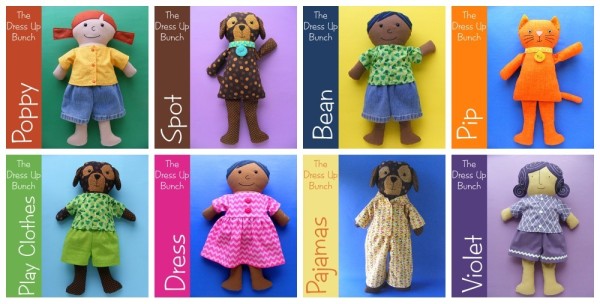
dress up bunch collage

The Dress Up Bunch – so far

I had a LOT of time to think about what I wanted from this pattern collection.

  1. Very easy to make.
  2. Arms and legs that would go in any direction for easy dressing.
  3. Cute, playable and fun.

Any time you design something, even something simple (especially something simple) there are countless small decisions to make along the way.

In many cases there are several good options – but one is the best choice for that particular project. I like to start with a list like this that I can use as a reminder to keep myself on track.

The Old Rag Doll Pattern

Abigail Darcy full

Usually I start with a blank page – but this time I had a successful rag doll pattern that I could use as a jumping off point.

This is Abigail Darcy. I think she’s adorable and the pattern had been a strong seller for me. I love her gangly coltishness, her subtle asymmetry, her cartoony face, her striped tights, her changeable skirt.

But she’s not Very Easy to Make.

She’s more of an advanced beginner pattern and I wanted something that would also work for people who are still getting acquainted with their sewing machines.

The way her arms are attached also greatly limits their movement – making her harder to dress and play with.

Very Easy to Make

The number one problem I see with handmade softies is that people don’t put enough stuffing in them. On some designs it doesn’t really matter, but with dolls it can matter quite a lot because less stuffing makes the necks go floppy very quickly. I gave the Dress Up Bunch dolls wider heads, wider bodies – and especially wider necks – so they would be forgiving of being too lightly stuffed.

If you don’t add enough stuffing, this doll still looks good and functions well.

The wider body also solved another problem.

There is a point in the original rag doll pattern where she looks like this.

17 an unholy mess

Her body is so skinny that it won’t hold all the arms and legs and they have to hang out the stuffing hole while sewing up the outside.

It looks worse than it is, but it’s definitely not fun and I want every step of my new pattern to be easy and fun.

The same stage in the Dress Up Bunch rag doll pattern looks like this.

16 pin back

See how neatly (and easily) all the parts fit inside the body?

In addition to making the head, neck and body wider, I also made the arms and legs shorter so they’d fit more easily inside the doll. The arms, in particular, are quite short. In real life a human’s head is much narrower than the shoulders, the neck is much narrower than the head, and hands hang down past the hips.

I decided against anatomical accuracy in favor of a body type that was easier to make.

One more detail you can see in this photo is the center back seam. Most rag doll patterns don’t have that, but I added it for two reasons. One – a stuffing opening in a nice straight seam like this makes the final handsewing a snap. I find it significantly easier than sewing up a seam in the side of the body – especially if that body is well-stuffed. Two – it provides a great seam where makers can easily and securely attach a waggy tail to the animal bodies.

Usually more seams means more complicated, but this is a case where adding a seam actually made the construction easier – in two ways!

Finally – I made the Dress Up Bunch doll pattern symmetrical. I love the casual charm of a little bit of asymmetry, but skin colored fabrics and felt have no easily identifiable front or back. It was very easy for pattern pieces to get flipped over during construction so they didn’t all match up at the end.

For this pattern – where Very Easy to Make was my #1 guideline – I was happy to sacrifice quirky asymmetry for ease of construction.

Super Flexible Arms and Legs

Pip - a kitty cat doll softie pattern for The Dress Up Bunch

On the old rag doll pattern you can see that her arms are attached at an angle. That’s pretty typical of rag dolls – but it definitely limits the flexibility of those arms. It’s hard to raise them over the doll’s head and the seams have a tendency to tear under the arms. It also makes them hard to dress.

Now look at Pip over there on the left. I left the tops of his arms completely unstuffed and attached them at a right angle to the side of the body. Bingo! Arms that can go in any direction – making for fun play and easy dressing. They don’t look as neat and tidy as the typical angled arm attachment of a rag doll, but they function much better.

Neat and tidy was not on my list. Easy dressing and playing was.

I originally tried sewing elbow and knee joints into the arms and legs (like on the legs of the old rag doll) but my daughter said they looked ugly – like sausages. I tried them unjointed, but very lightly stuffed and with some plastic pellets added to give them good flop. She pronounced that version “very huggable and soft, good for playing, and not ugly.” Success. 🙂

Playability

Spot in jammies back

This was a big one for me. I’ve watched kids play with my dolls for years and I’ve seen how they interact with them. They want to carry them around by the arm (another reason the arms need to be flexible). They want to cuddle them. They want to sit them up and have them stay sitting. They want their arms and legs to bend. And if they have tails – they want to wag them. 🙂

A lot of dressable animal dolls have no tails – or they have applique tails that are covered by the clothing. I wanted actual waggable tails.

It added an extra few steps to the construction of the critter dolls – and their pants – but it adds a ton to the playability. It’s always a balancing act.

In this case I was happy to add a tiny bit of difficulty to the construction in order to have a doll that would be a lot more fun to play with.

The Process is Never Done

Old Violet - a Dress Up Bunch doll from Shiny Happy World

The first human doll in The Dress Up Bunch was Violet. Here she is.

I love her purple curls, but when I got ready to make the second doll in the collection I realized that the face still needed some work.

The new, wider body shape was chunky and cute, but she still had the smaller/finer features of the original rag dolls. They didn’t go together.

I played around so much with the face for the second doll!

(I have a whole post here about how I test faces on my prototypes).

I drew and erased and drew and erased and drew and erased until the face was a yucky grey mess. Then I flipped it over and did the same thing with the back of the head.

Spot - Dress Up Bunch Dog Softie Pattern

I had a nose and mouth I liked – but the eyes were killing me. No matter what I did they were too small. I tried pinning on some felt eyes, but I wasn’t happy with any of them. I had used plastic safety eyes for Spot – and I loved them – but I had it stuck in my head that they would look bug-eyed and goofy on a human doll.

Finally – in desperation – I grabbed a seam ripper, poked a hole where the prototype’s eye should go, and stuck in a safety eye to test it out.

The whole face suddenly came to life.

Poppy face

It didn’t look bug-eyed or goofy! The larger size looked friendly and young. And the shiny half-domes had a sparkle to them that I hadn’t gotten with felt eyes. I loved them!

So this is the new face of The Dress Up Bunch.

Try everything – even things you’re pretty sure will fail.

I redesigned Violet so she would have the younger, cuter face that the newer dolls have.
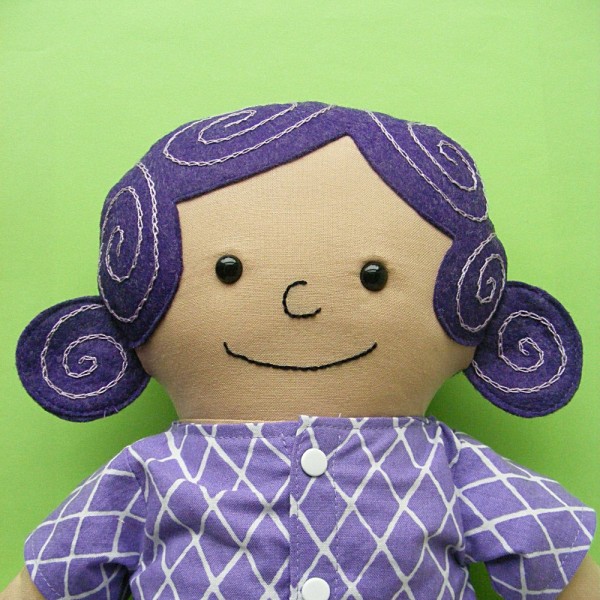
New_Violet_Rag_Doll_Face

One More Bit of Advice

I do all my prototyping with white muslin.

  • It’s cheap and easy to find.
  • It’s the least forgiving fabric I could possibly sew with – pieces that could be stretched to fit with fleece will not match up with muslin. I’ll know there’s a problem that needs fixing.
  • You can draw and write on it – like I do when I’m designing faces.
  • Every mistake will show. My daughter might not have noticed sausage-looking arms on a patterned fabric, but she sure hated them on the white prototype.

If your project looks good in white muslin it will look good in any fabric. 🙂

Let's Talk Process blog hop
I hope you enjoyed this look at the design decisions that went into a single project. Ready to see the approaches of some other designers? Take a look at the other posts in today’s hop and gather up enough tips and inspiration to keep you designing for weeks.

Happy stitching!

Best,
Wendi
Applique Wendi (with fabulous hat)

How I Design Softie Faces

How I Design Softie Faces

Time for a process post – showing a bit behind the scenes of how I do some of my design work.

Today we’re talking faces.

I think the face is one of the most important parts of any softie. It’s where the personality really shines through!

I want to make it easy for you to get the face just right in any pattern you’re making. But sometimes just right isn’t clear until after the softie has been stuffed.

Stuffing changes the curve of the surface, so eyes that looked great when it was flat might now look too far apart. Or a smile that was clearly visible is now kind of hidden under the curve of the chin.

What to do?

Well – I usually work through several prototypes of each softie – getting the shape of the body right – before I even start on the face.

Then I draw the face on the already stuffed prototype.

Caterpillar Phil face in progressI usually sew my prototypes from plain white cotton. It’s easy to draw on that with a soft pencil. I can even erase and redraw it several times until I like what I see – though the surface gets a bit grubby after a few erasings. For Caterpillar Phil I tried features positioned very high on the face (to make him look chubby), very low (to make him look younger), and centered (even though I almost never like plain centered). I finally settled on something just a bit below the center line. (If you want to learn how to draw faces read Ed Emberley’s Drawing Book of Faces. It’s awesome.)

Caterpillar Phil face in progressAfter I’m happy with the face I go over it with a black marker, Then I unpick all my stitches to remove the face piece(s) from the prototype. I iron it flat again and trace the face onto my final pattern piece. That way you’re getting the pattern and the placement exactly like what I worked up in my sample.

Update – I wrote a post here showing my favorite way to transfer those pattern markings to your fabric.

Caterpillar softie pattern

That’s how I do all my faces – even if it’s just placing a couple of safety eyes.

Are you curious about any other part of my design process? Leave a comment and I’ll add it to the list for a future post.

Happy sewing!

Best,
Wendi
How I designed 10 monsters (without getting bored)!

Do you want to know the question I’m asked most often?

No kidding. Almost everyone asks me this. It was actually the only downside that my husband brought up when I began designing. “Aren’t you going to run out?”

In fact, the inverse is true: the more I design, the more ideas I get!

The key: flourish in the constraints

Do you watch Project Runway? Most of the time, the participating clothing designers are given difficult constraints: like designing a garment using $250 of candy.

And what challenge to contestants usually say is hardest? The one with the least constraints. While you might think it’s freeing to be able to do whatever you want… it’s actually debilitating. How do you know what to do? What criteria do you use to make your choices?

In my designs, I set a lot of constraints:

  • The yarns must be commercially available and easily substituted.
  • There can be no more than one technically complicated stitch (for example, the loop or bobble stitch)
  • Overall, the design must be accessible to a crocheter who has accomplished one simple amigurumi, and is open to learning a new skill.
  • Any new technique that I use must be accompanied by a video/descriptive blog post to assist my customers.

Why do I do this? I began placing these constraints so that my customer would receive the best possible pattern. With these constraints in place, my customers are guaranteed that:

  • they won’t get lost in a pattern due to insufficient photos/videos/help.
  • the quality of the finished product isn’t dependent on non-quantifiable artistic skills (because I have none!). If they follow the directions (attach to round 25), then their finished product will look lovely!
  • the pattern is accessible to their skill level and fun (uh… no color changes with a loop stitch and attaching felt pieces at the same time!)

This makes customers happy. But, over time, I discovered… the constraints make my designing happy!

The tale of 10 monsters

A few months ago, I was asked by Knitting Fever (the distributor of Ella Rae Classic, a yarn I frequently use in my designs) to design 10 monsters for distribution on their site.

Now… you get to ask that gem of a question: how do you design 10 monsters without getting bored?!? And, how do you come up with 10 different monsters?

I’m not going to fib… the number 10 even had me a little worried. After all, I’ve taught a course on designing your own monsters (which included patterns for about 7 monsters), and I couldn’t repeat any of those!

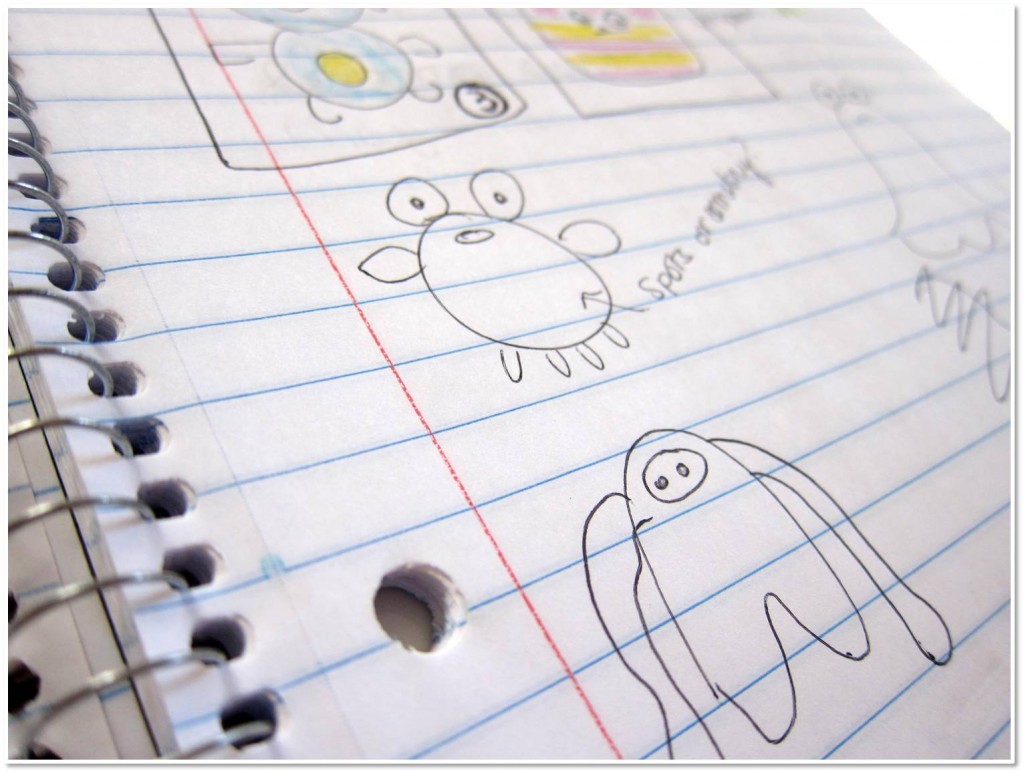
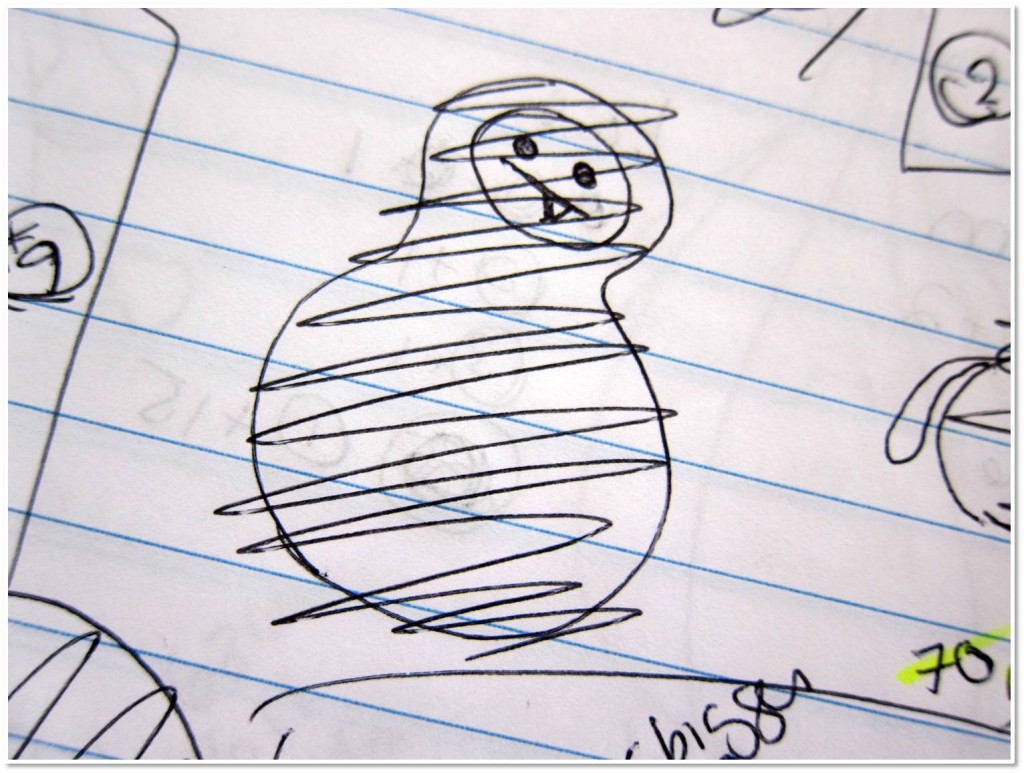
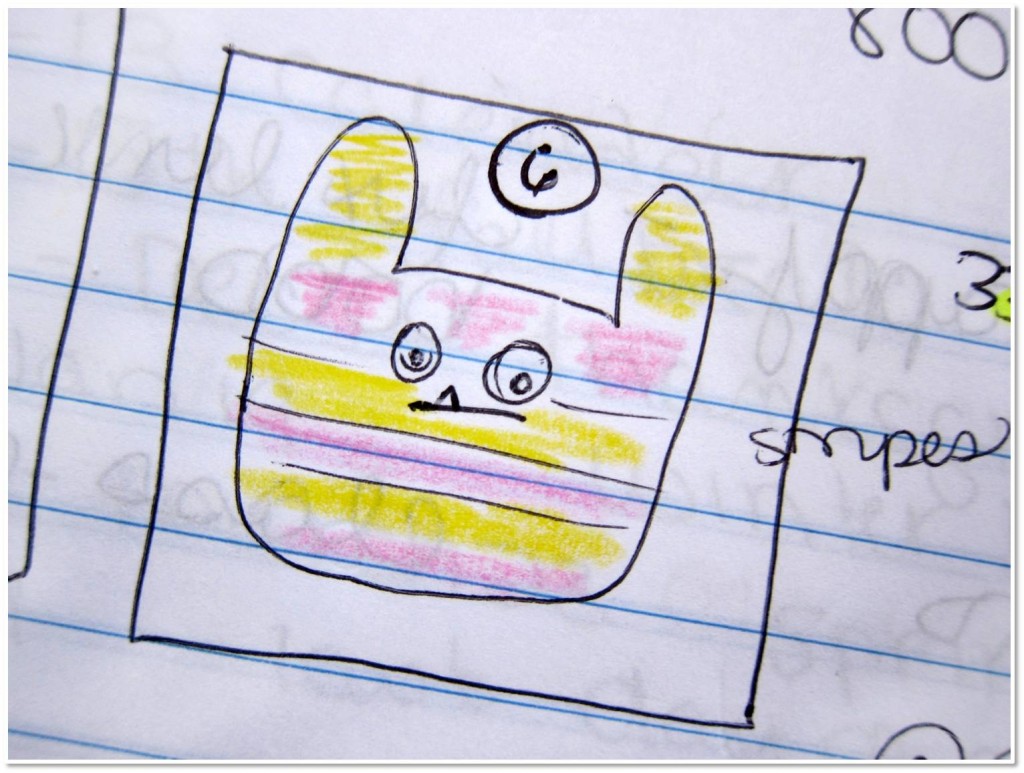
I started sketching…

As I was sketching, I knew it was not only important that I didn’t feel bored with my monsters, but that a customer would really want to crochet all 10… and love every minute of it! That meant that every monster needed a purpose: a novel shape or technique. And what’s that? More constraints!

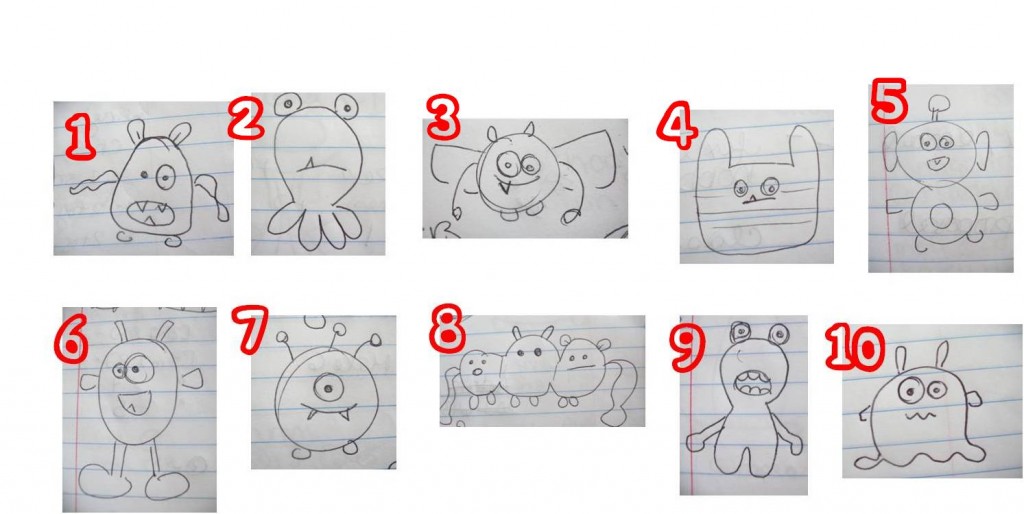
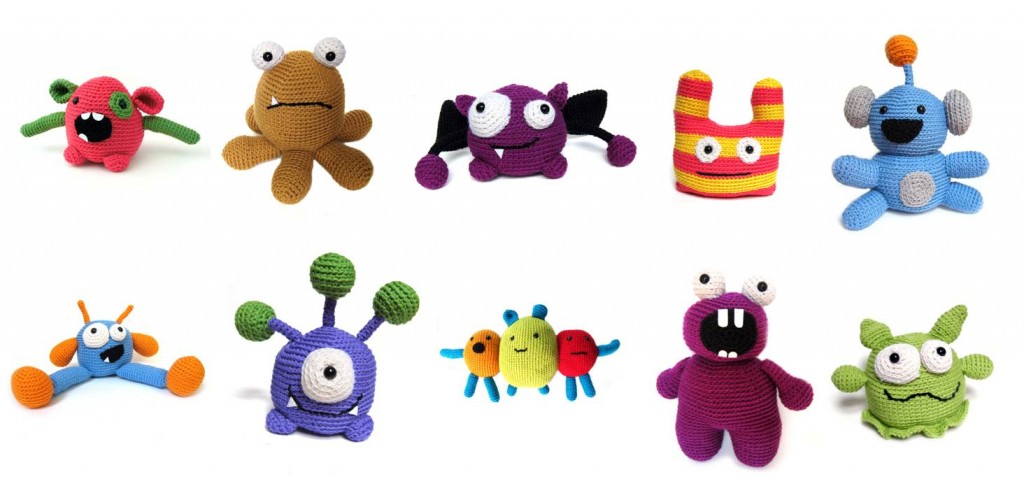
In the end, I came up with 10 that I really loved:

And some that didn’t make the cut:

Among the winners were some great techniques, shapes and skills that I new customers would be excited about:

  • Legs that are joined as you crochet, instead of the usual stitch-them-on-afterwards
  • A ruffle!
  • Stripes that make use of stranding as you change colors
  • A fun rectangular-shape that uses working the bottom side of the foundation chain to begin
  • A monster that begins with a long chain: and not the standard circle
  • Funny antennae that make use of pipe cleaners for structure
  • Crocheted-on mouths with (simple triangle) felt teeth

All of these features (at least I hoped!) would make the crocheting exciting, but also teach the crocheter a skill that they could apply to other animals. Don’t like the mouth on a pattern? Now you’ll know how to crochet a smile and stick on a felt tooth!

Once I had my faves, I colored in my sketches so I could figure out which colors of yarn I’d like to use:

So does this mean that I could design another 10 monsters? I don’t know… maybe! But I can say that what helped me is coming up with specific goals (aka constraints) that I wanted each design to accomplish.

The finished monsters

Here’s the whole gang… do you like them?

I hope you do!

And you can have them all!

All 10 of these patterns are available as free downloads from Knitting Fever! Isn’t that awesome?

I really hope that you grab them and enjoy the process of crocheting these fun monsters!

Thanks for stopping by and reading!

If you want to see more great finished items… make sure to visit Tami’s Amis blog, the organizer of this great FO Friday theme!

I hope you have an awesome and craft-filled weekend!