


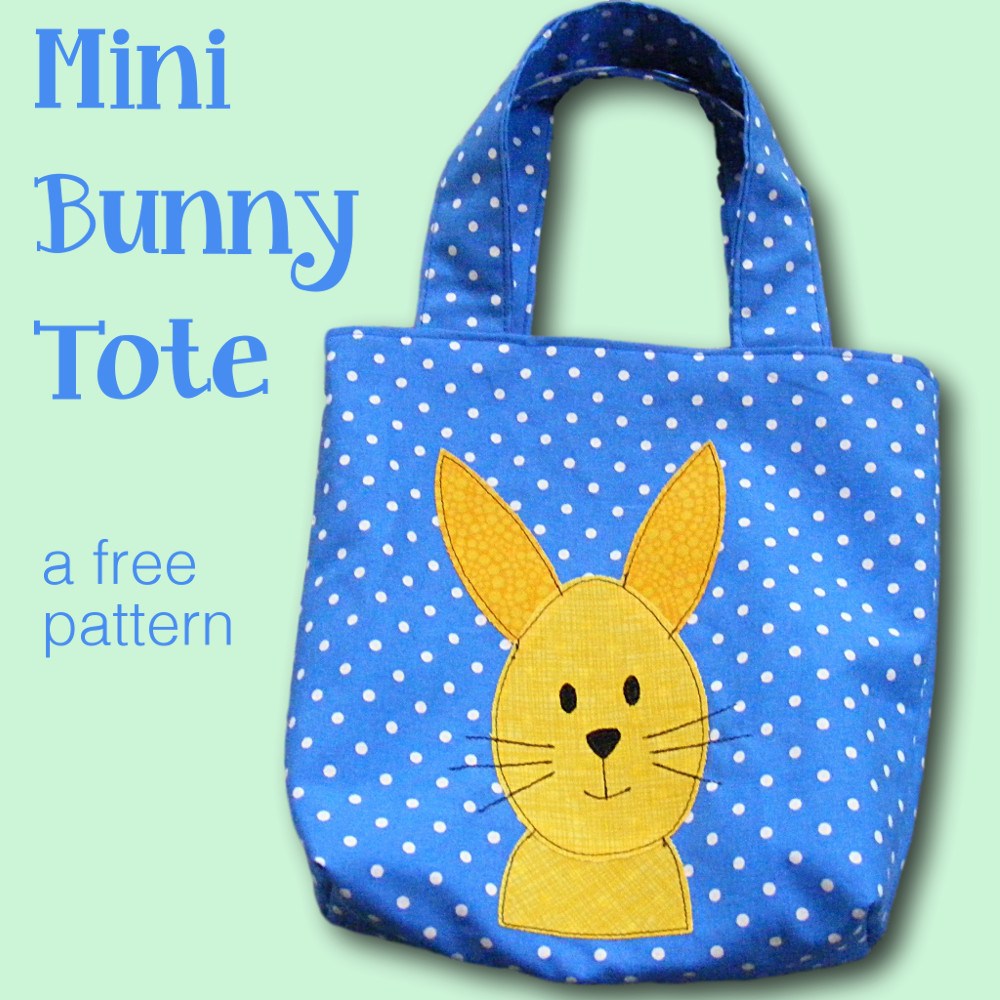
Here’s a free tote bag pattern!
This mini tote bag measures 6 inches wide x 7 inches tall x 2 inches deep.
It’s the perfect size for packing your lunch, carrying a few books, or toting some toys.
And it’s easy to make!
You can decorate your bag any way you like. For that adorable bunny bag (perfect for Easter egg hunting) I used one of the blocks from this Woodland Critters quilt pattern, with the size reduced.
If you’re looking for free bunnies, I’ve got those too. Click here for the free Mix & Match Bunny applique pattern with several super cute bunny appliques. For all of these you’ll need to print the pattern pages at 60% to get the right size for the bag.
If you’re using a different pattern or your own design (or maybe a child’s drawing for an extra special bag) just make sure that the image is no more than 5 inches wide and 6 inches tall.
On the sample bag I used for the step-by-step photos below, I embroidered one of my favorite birds from this Bird Sampler pattern onto a solid fabric before sewing it up in Step 3. You’ll see the pretty bird in the final step. 🙂
You could also use a fabulous print that needs no extra fancification.
Choose a fun coordinating color for the lining and you’re ready to sew!
It’s a totally versatile tote bag pattern that you can use in so many different ways. Have fun with it!
What You’ll Need
- one fat quarter of the main fabric
- one fat quarter (or less) for the lining fabric
- any additional materials you want for optional embellishing
Step 1
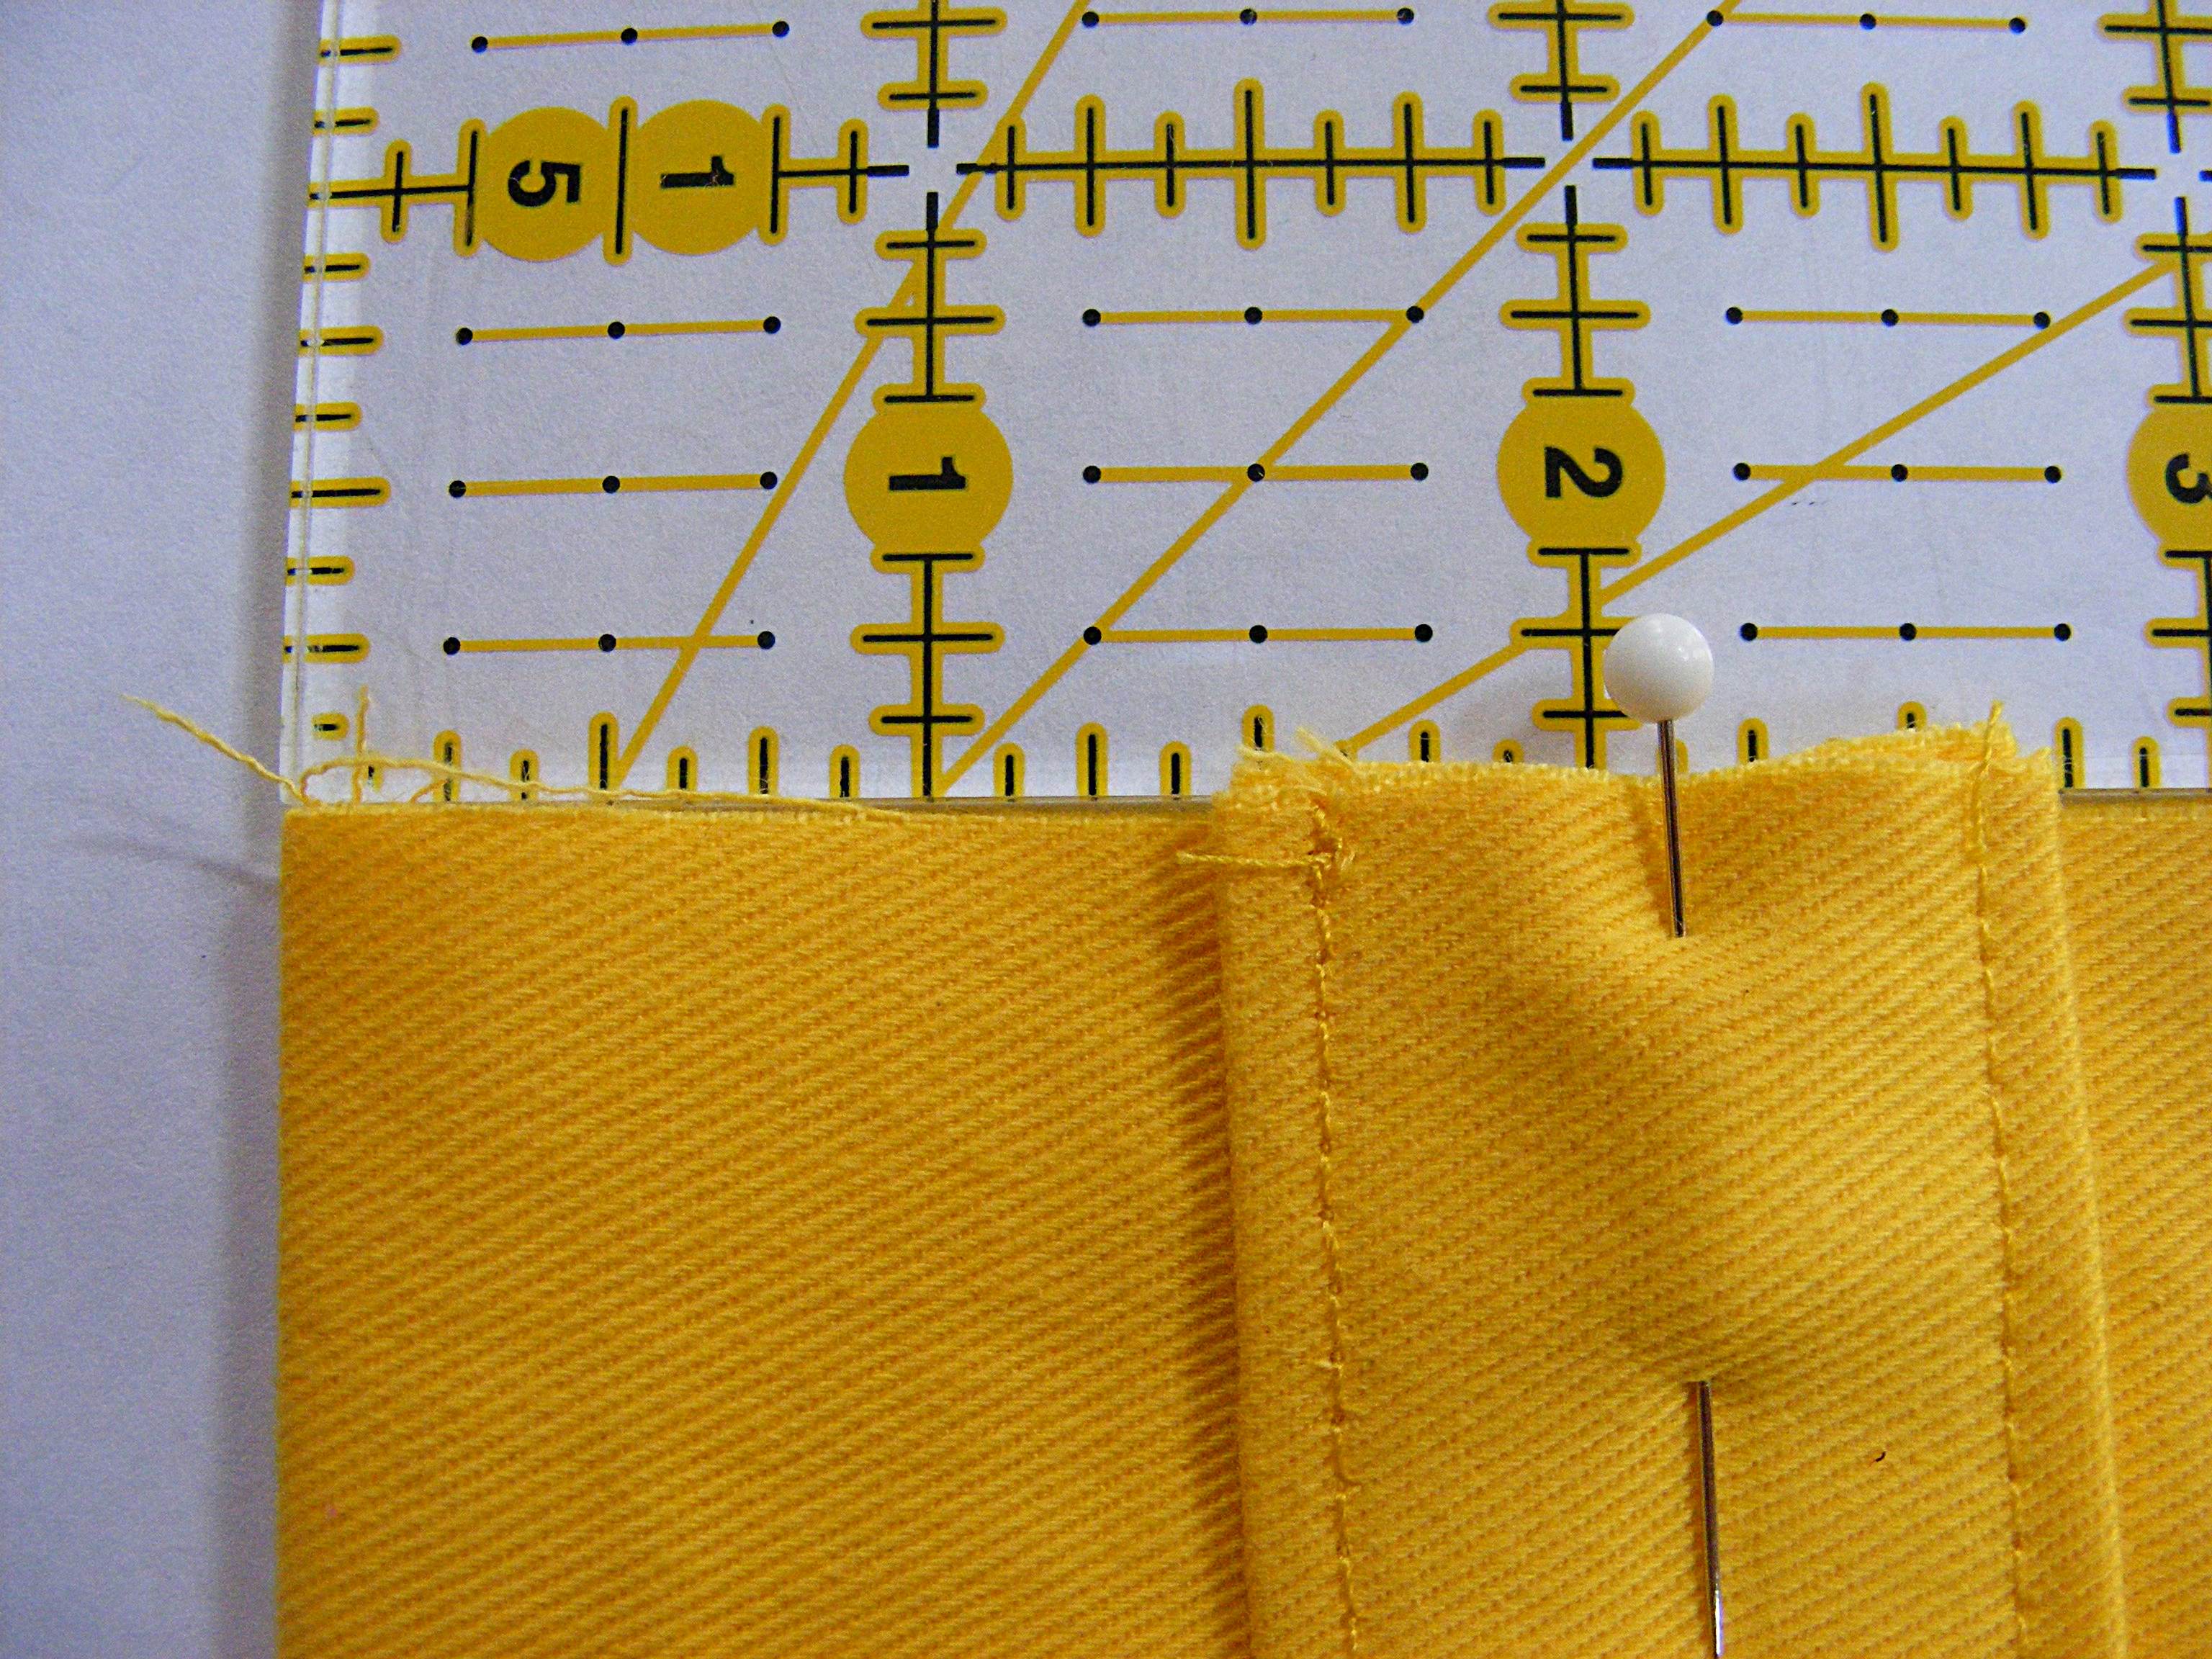
We’ll start with the handles. Cut two strips of the main fabric, each 5 x 12 inches. Fold one of the fabric strips in half the long way, right sides facing out. Press. Open the strip back up and fold each long edge in toward the center fold. Press.
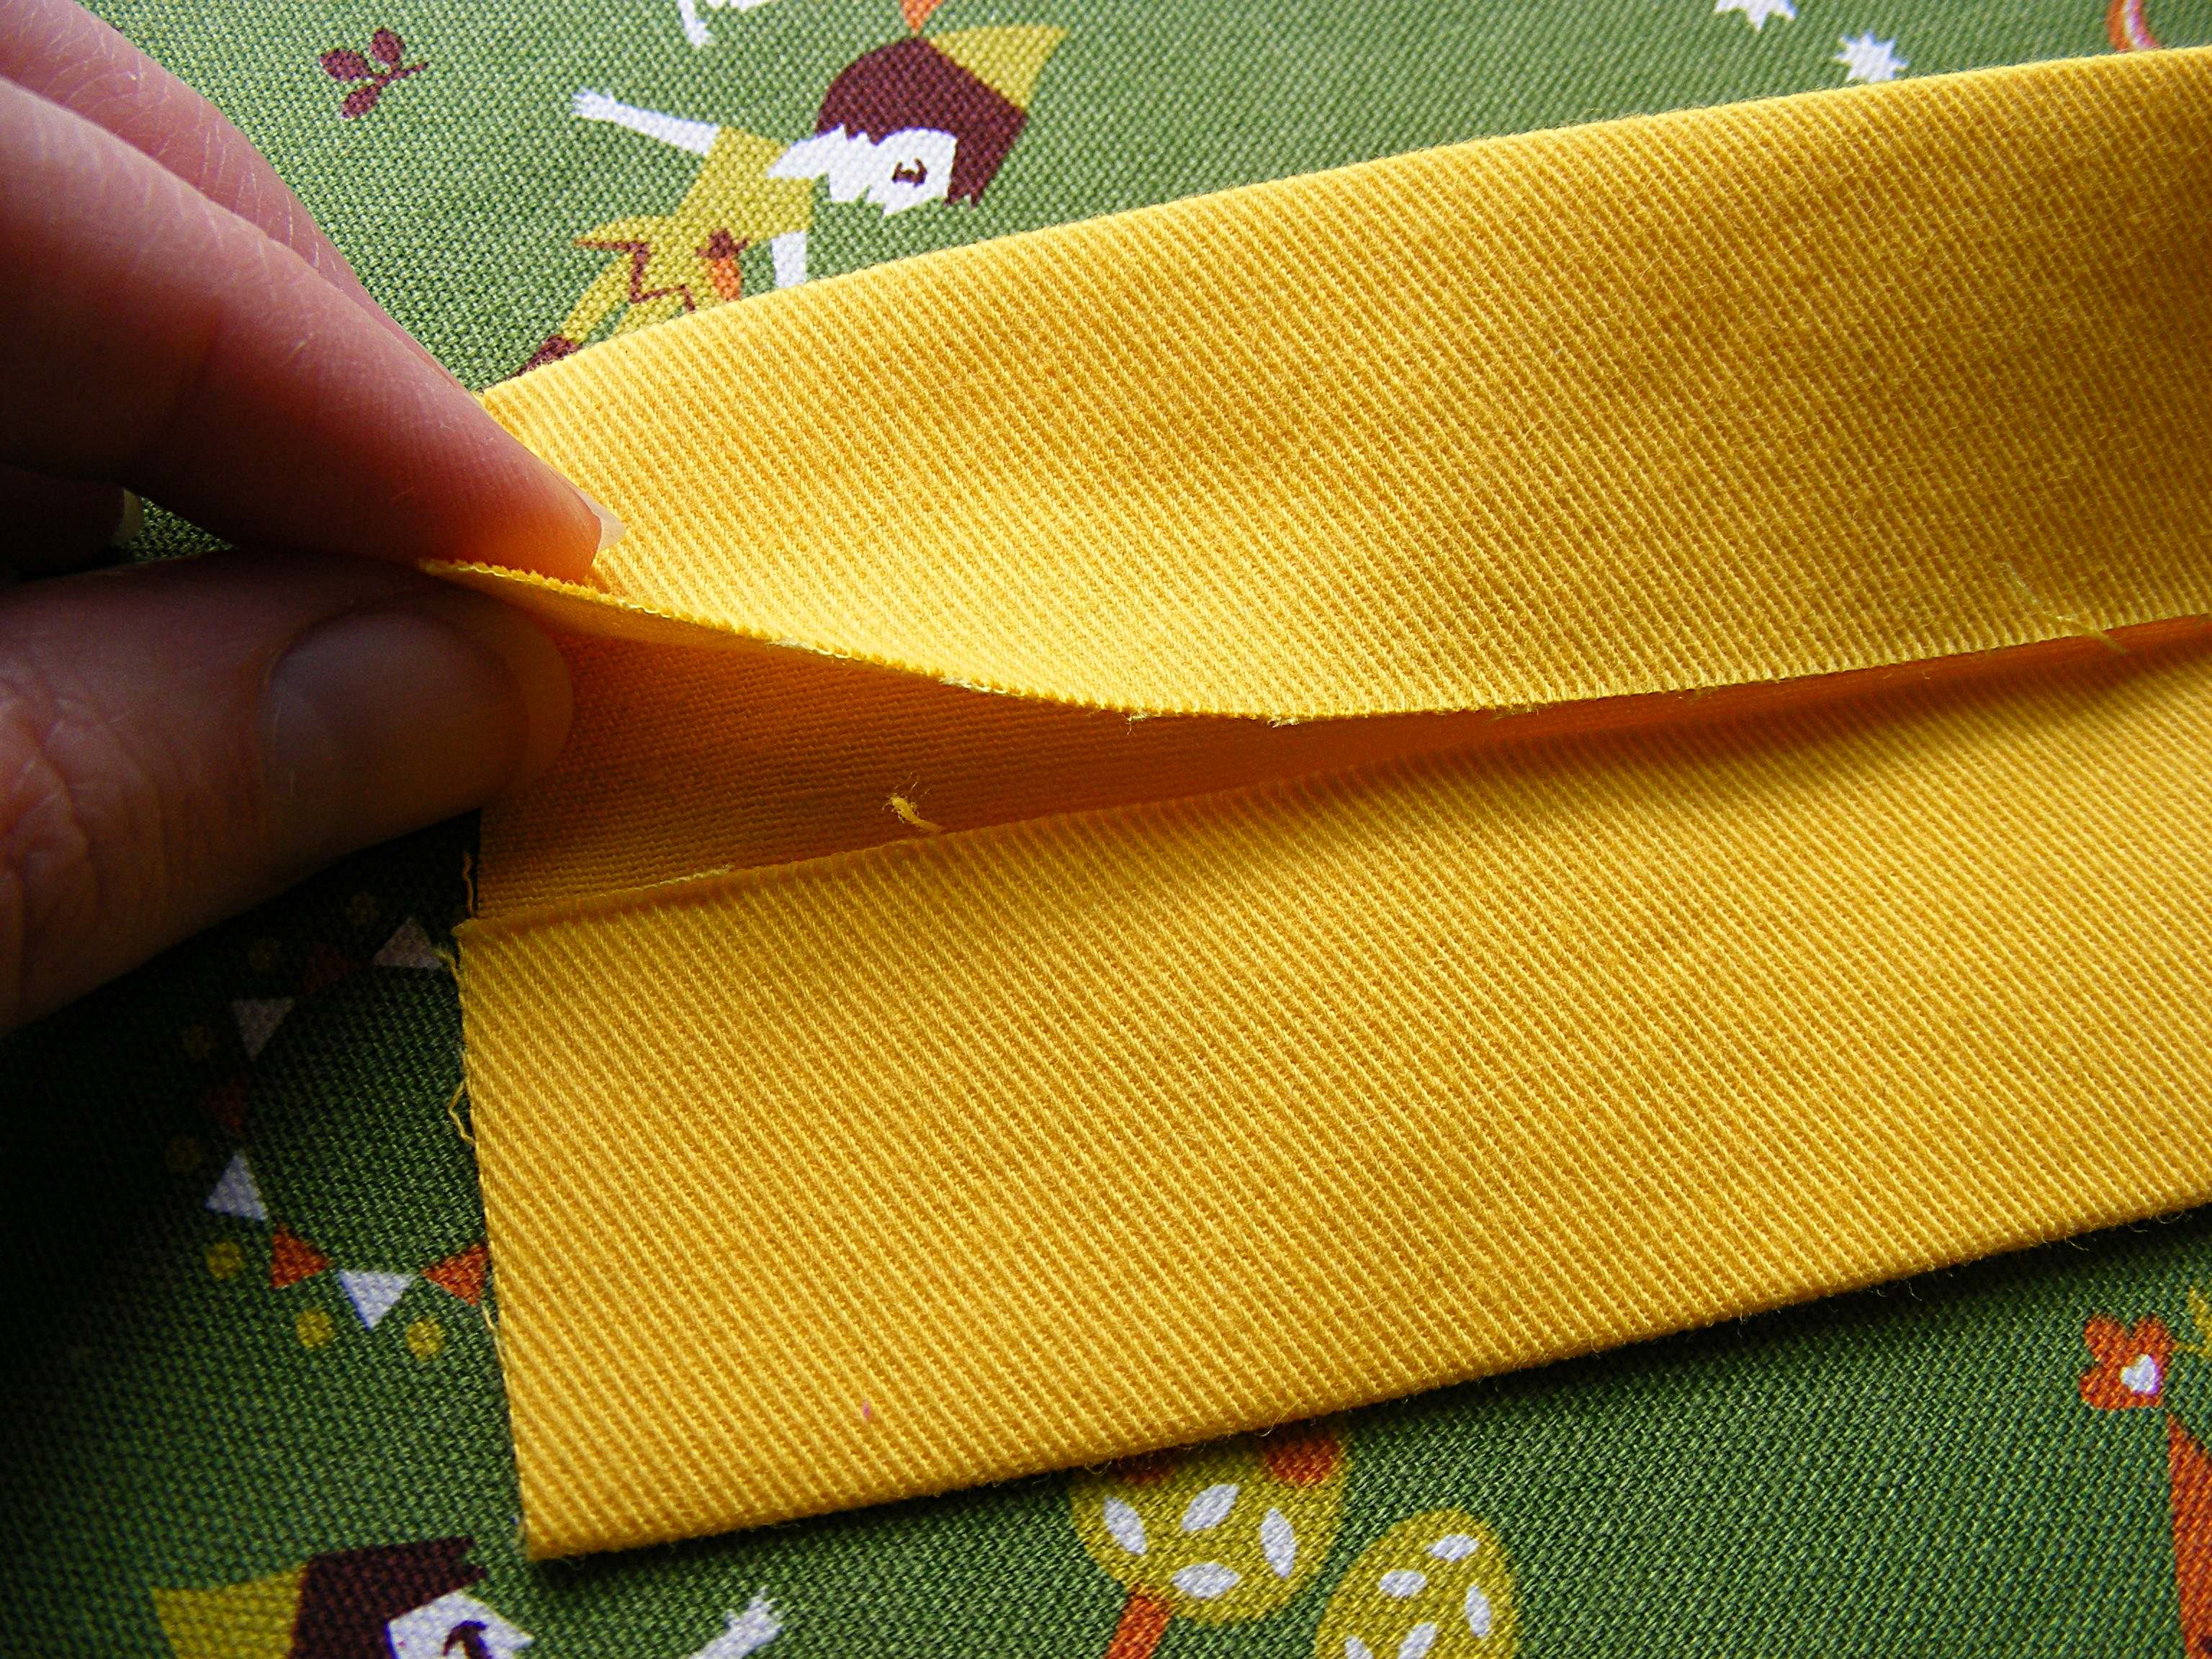
There’s a video showing how to make doublefold bias tape here. And if you’re new to rotary cutting, there’s a video here that will get you started.
Step 2
Fold in half again along the center fold so that you have one long strip, four layers of fabric thick. This makes a nice, sturdy strap. Press.
Topstitch along both long edges, about 1/8 inch from the edge.
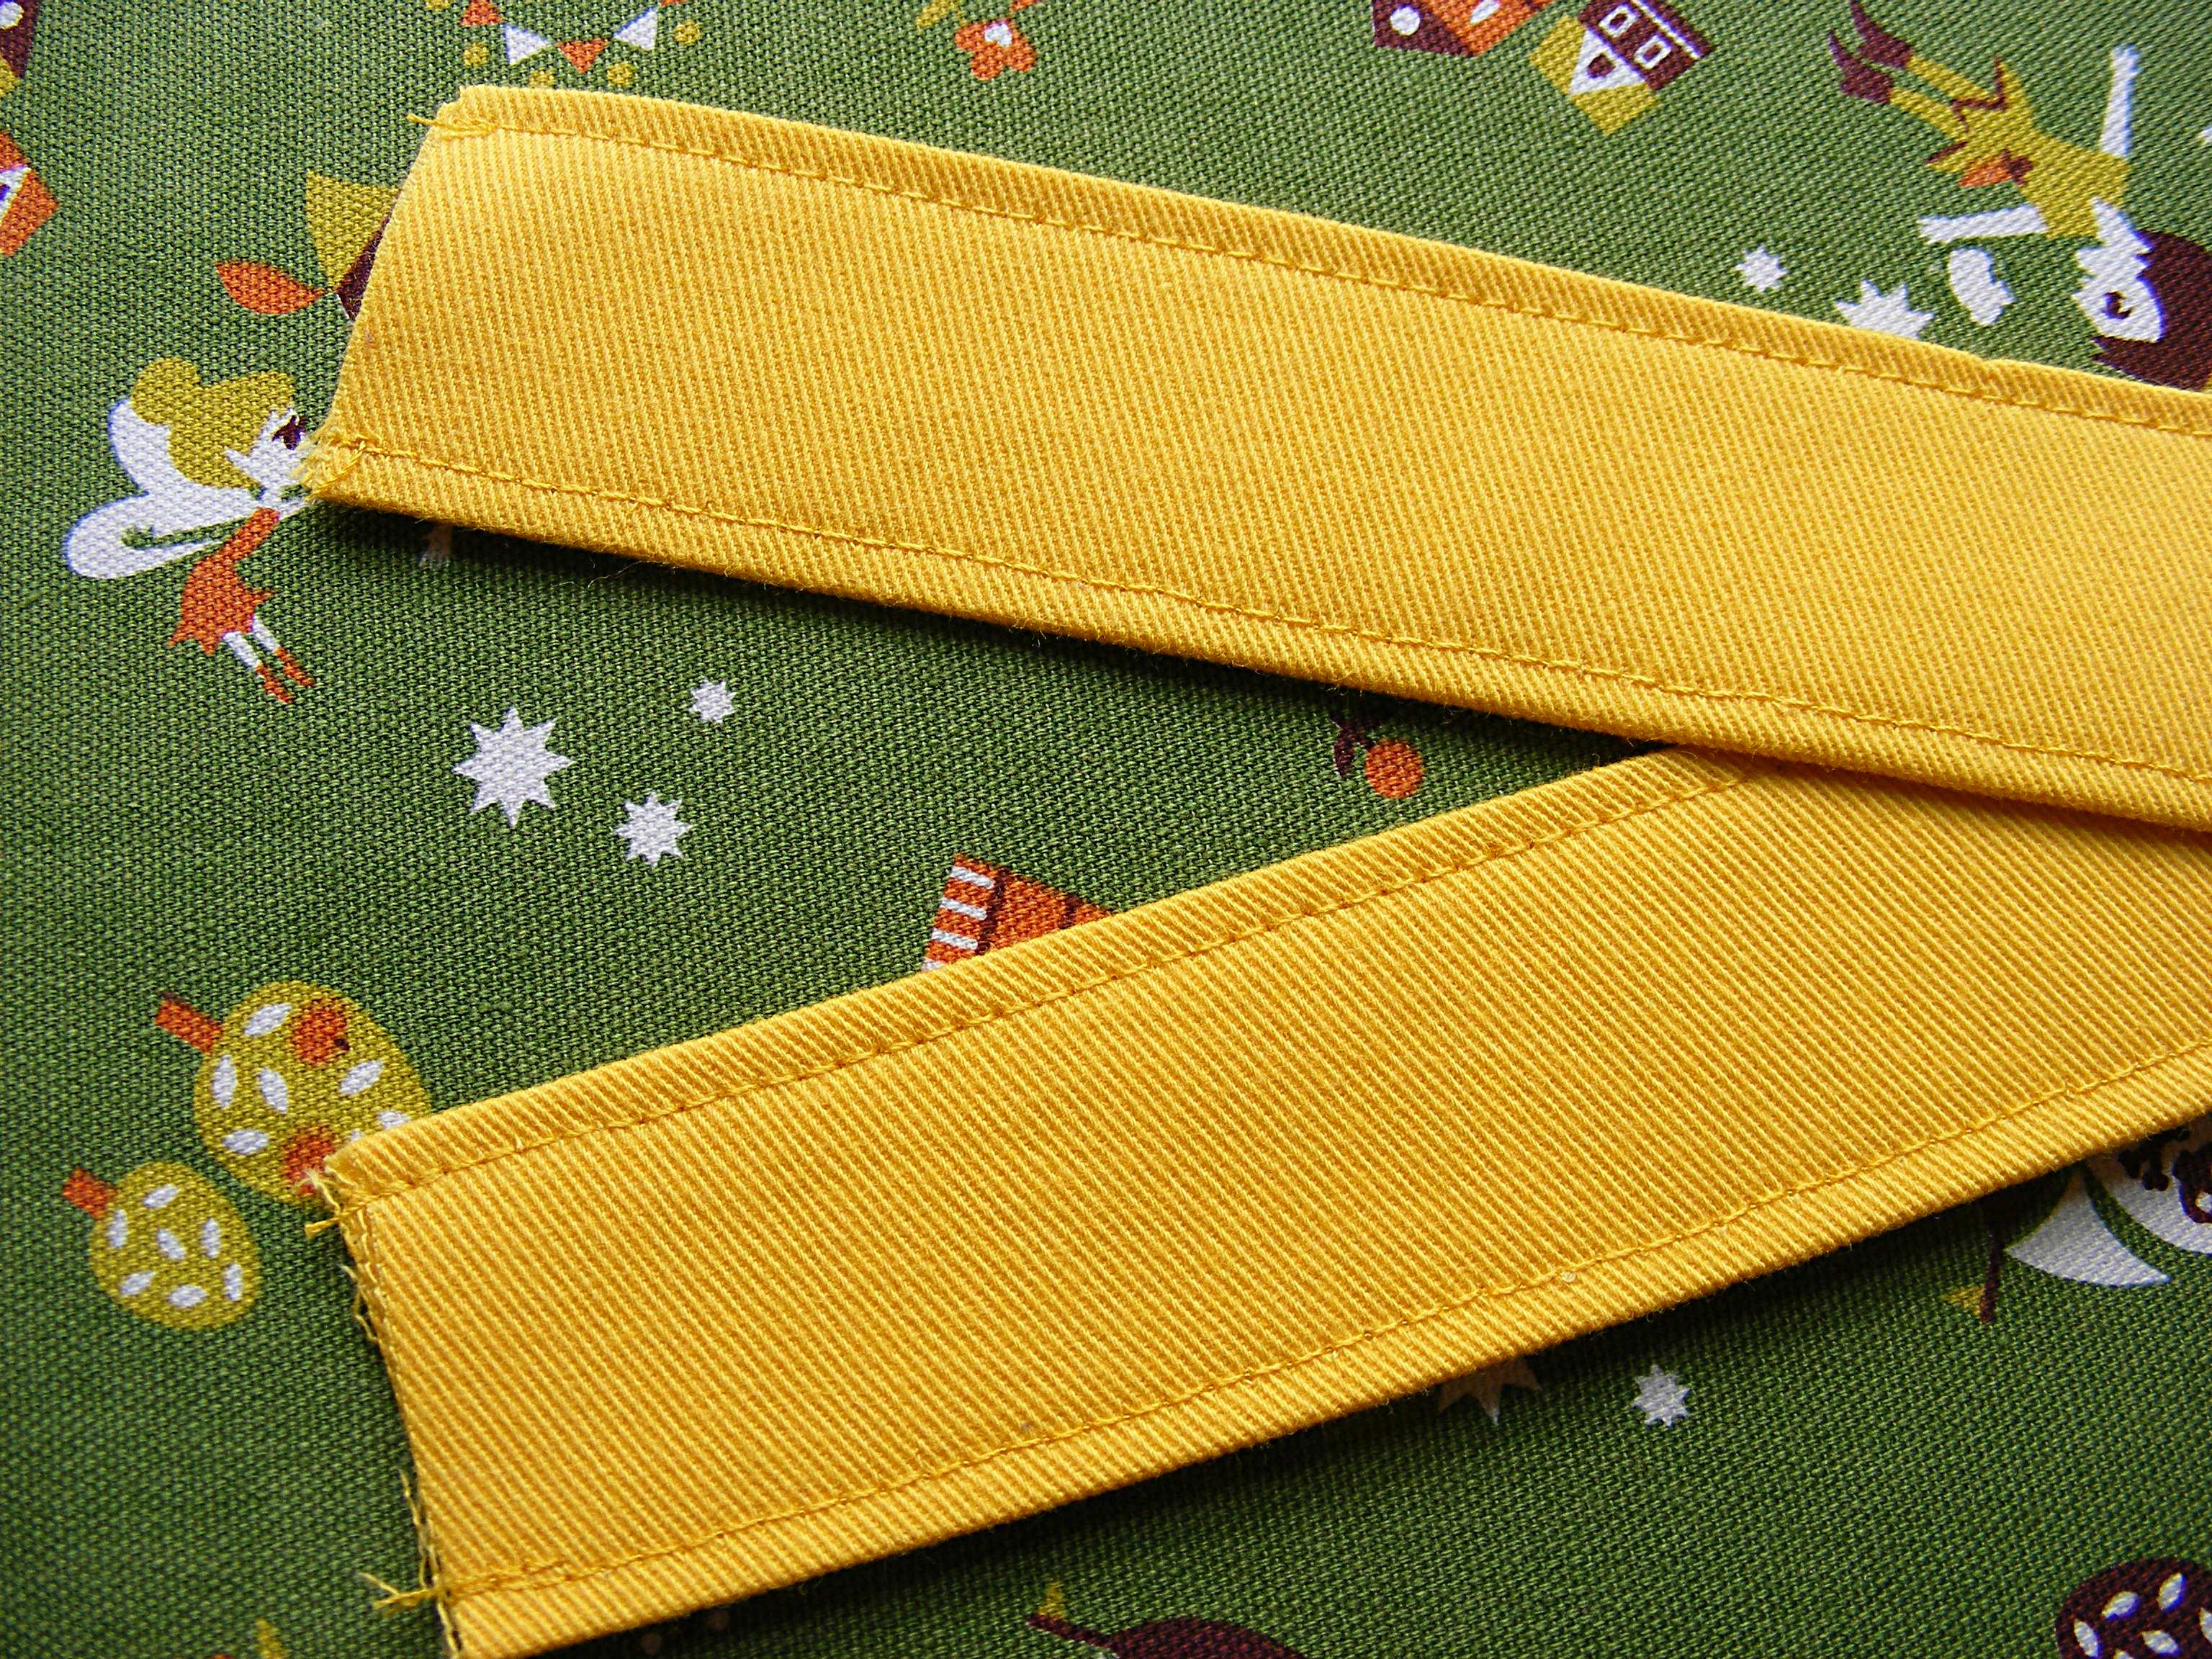
Repeat for the second handle.
Step 3
Now for the bag. Cut two 9 inch squares from the main fabric, and two from the lining fabric. If you’re going to embroider your bag (or embellish it in any other way) do this now before you sew the pieces together.
Pin the two main fabric squares right sides together. Using 1/4 inch seam allowance, stitch around both sides and the bottom of the bag.
Is this your first sewing machine project? This video will show you how to sew straight lines and turn corners. 🙂
Repeat for the lining pieces.
Step 4
Open out one bottom corner of the bag so that the side seam and center bottom seam line up, and the corner of the bag makes a point. Measure up one inch from the tip of the stitching (NOT the tip of the fabric triangle) and stitch a line perpendicular to the side seam.
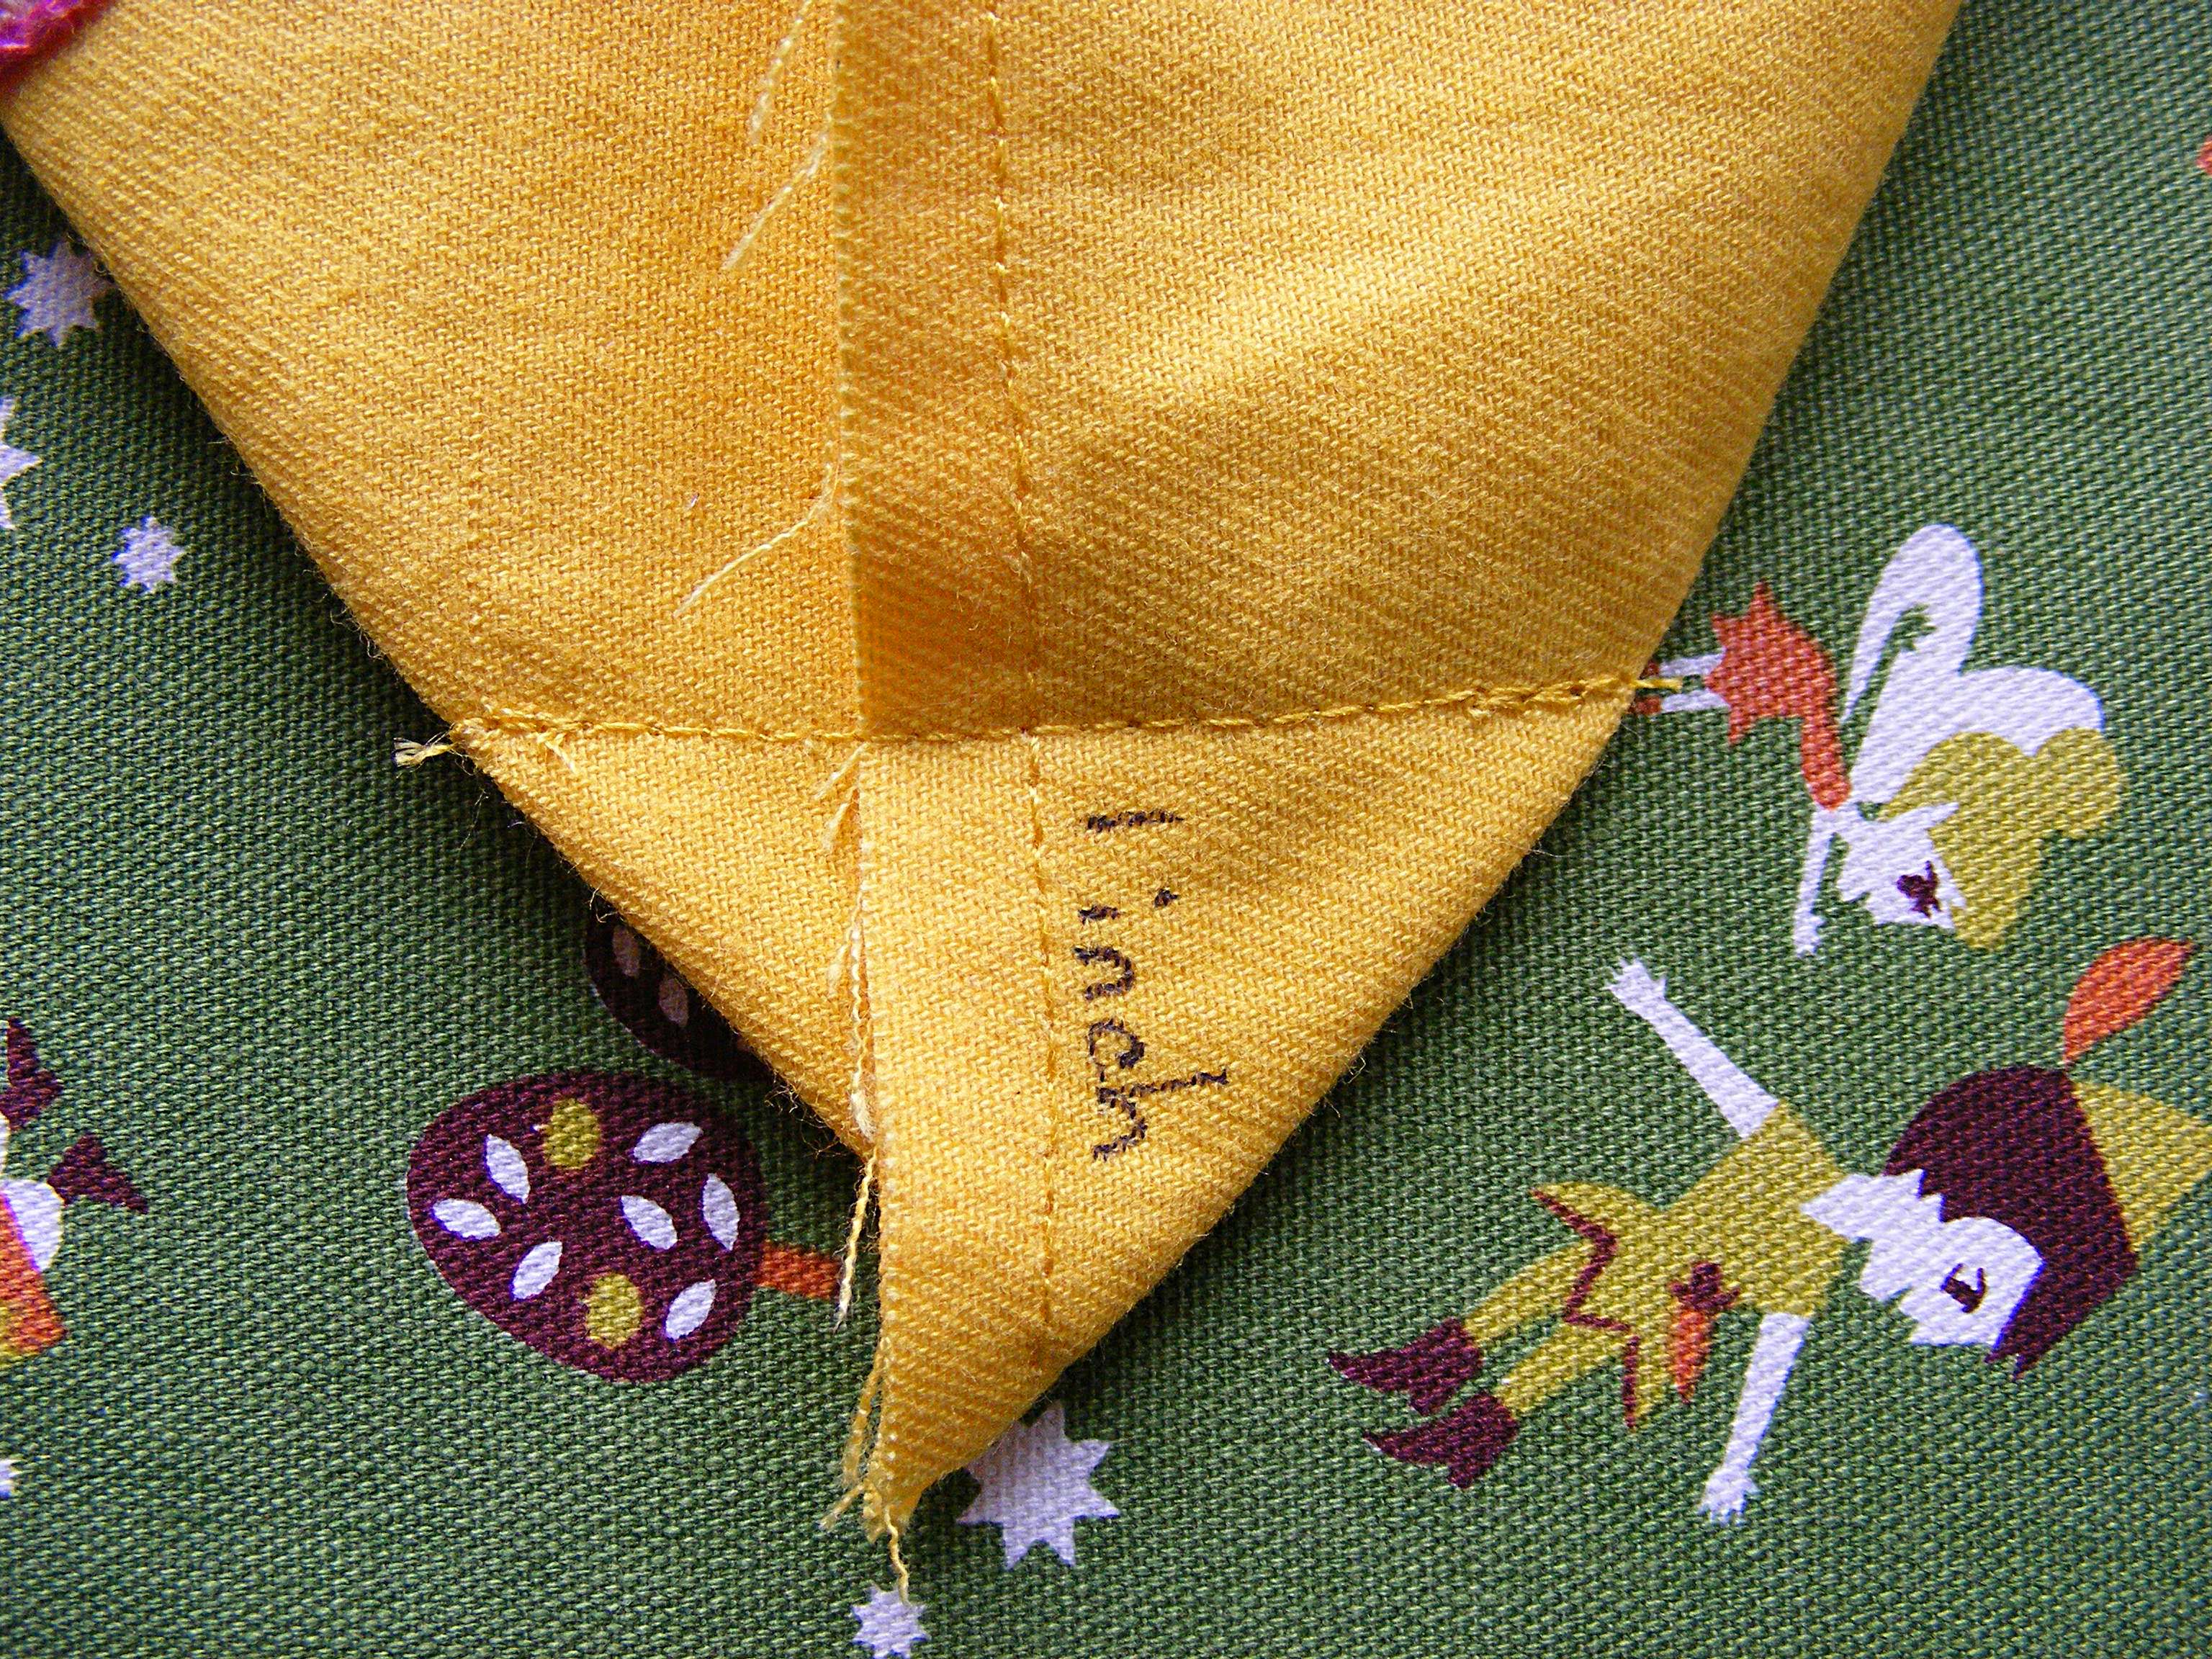
Repeat for the other corner.
Repeat for the lining.
There’s a video showing how to box corners here.
Step 5
Turn the main bag right side out. Leave the lining inside out.
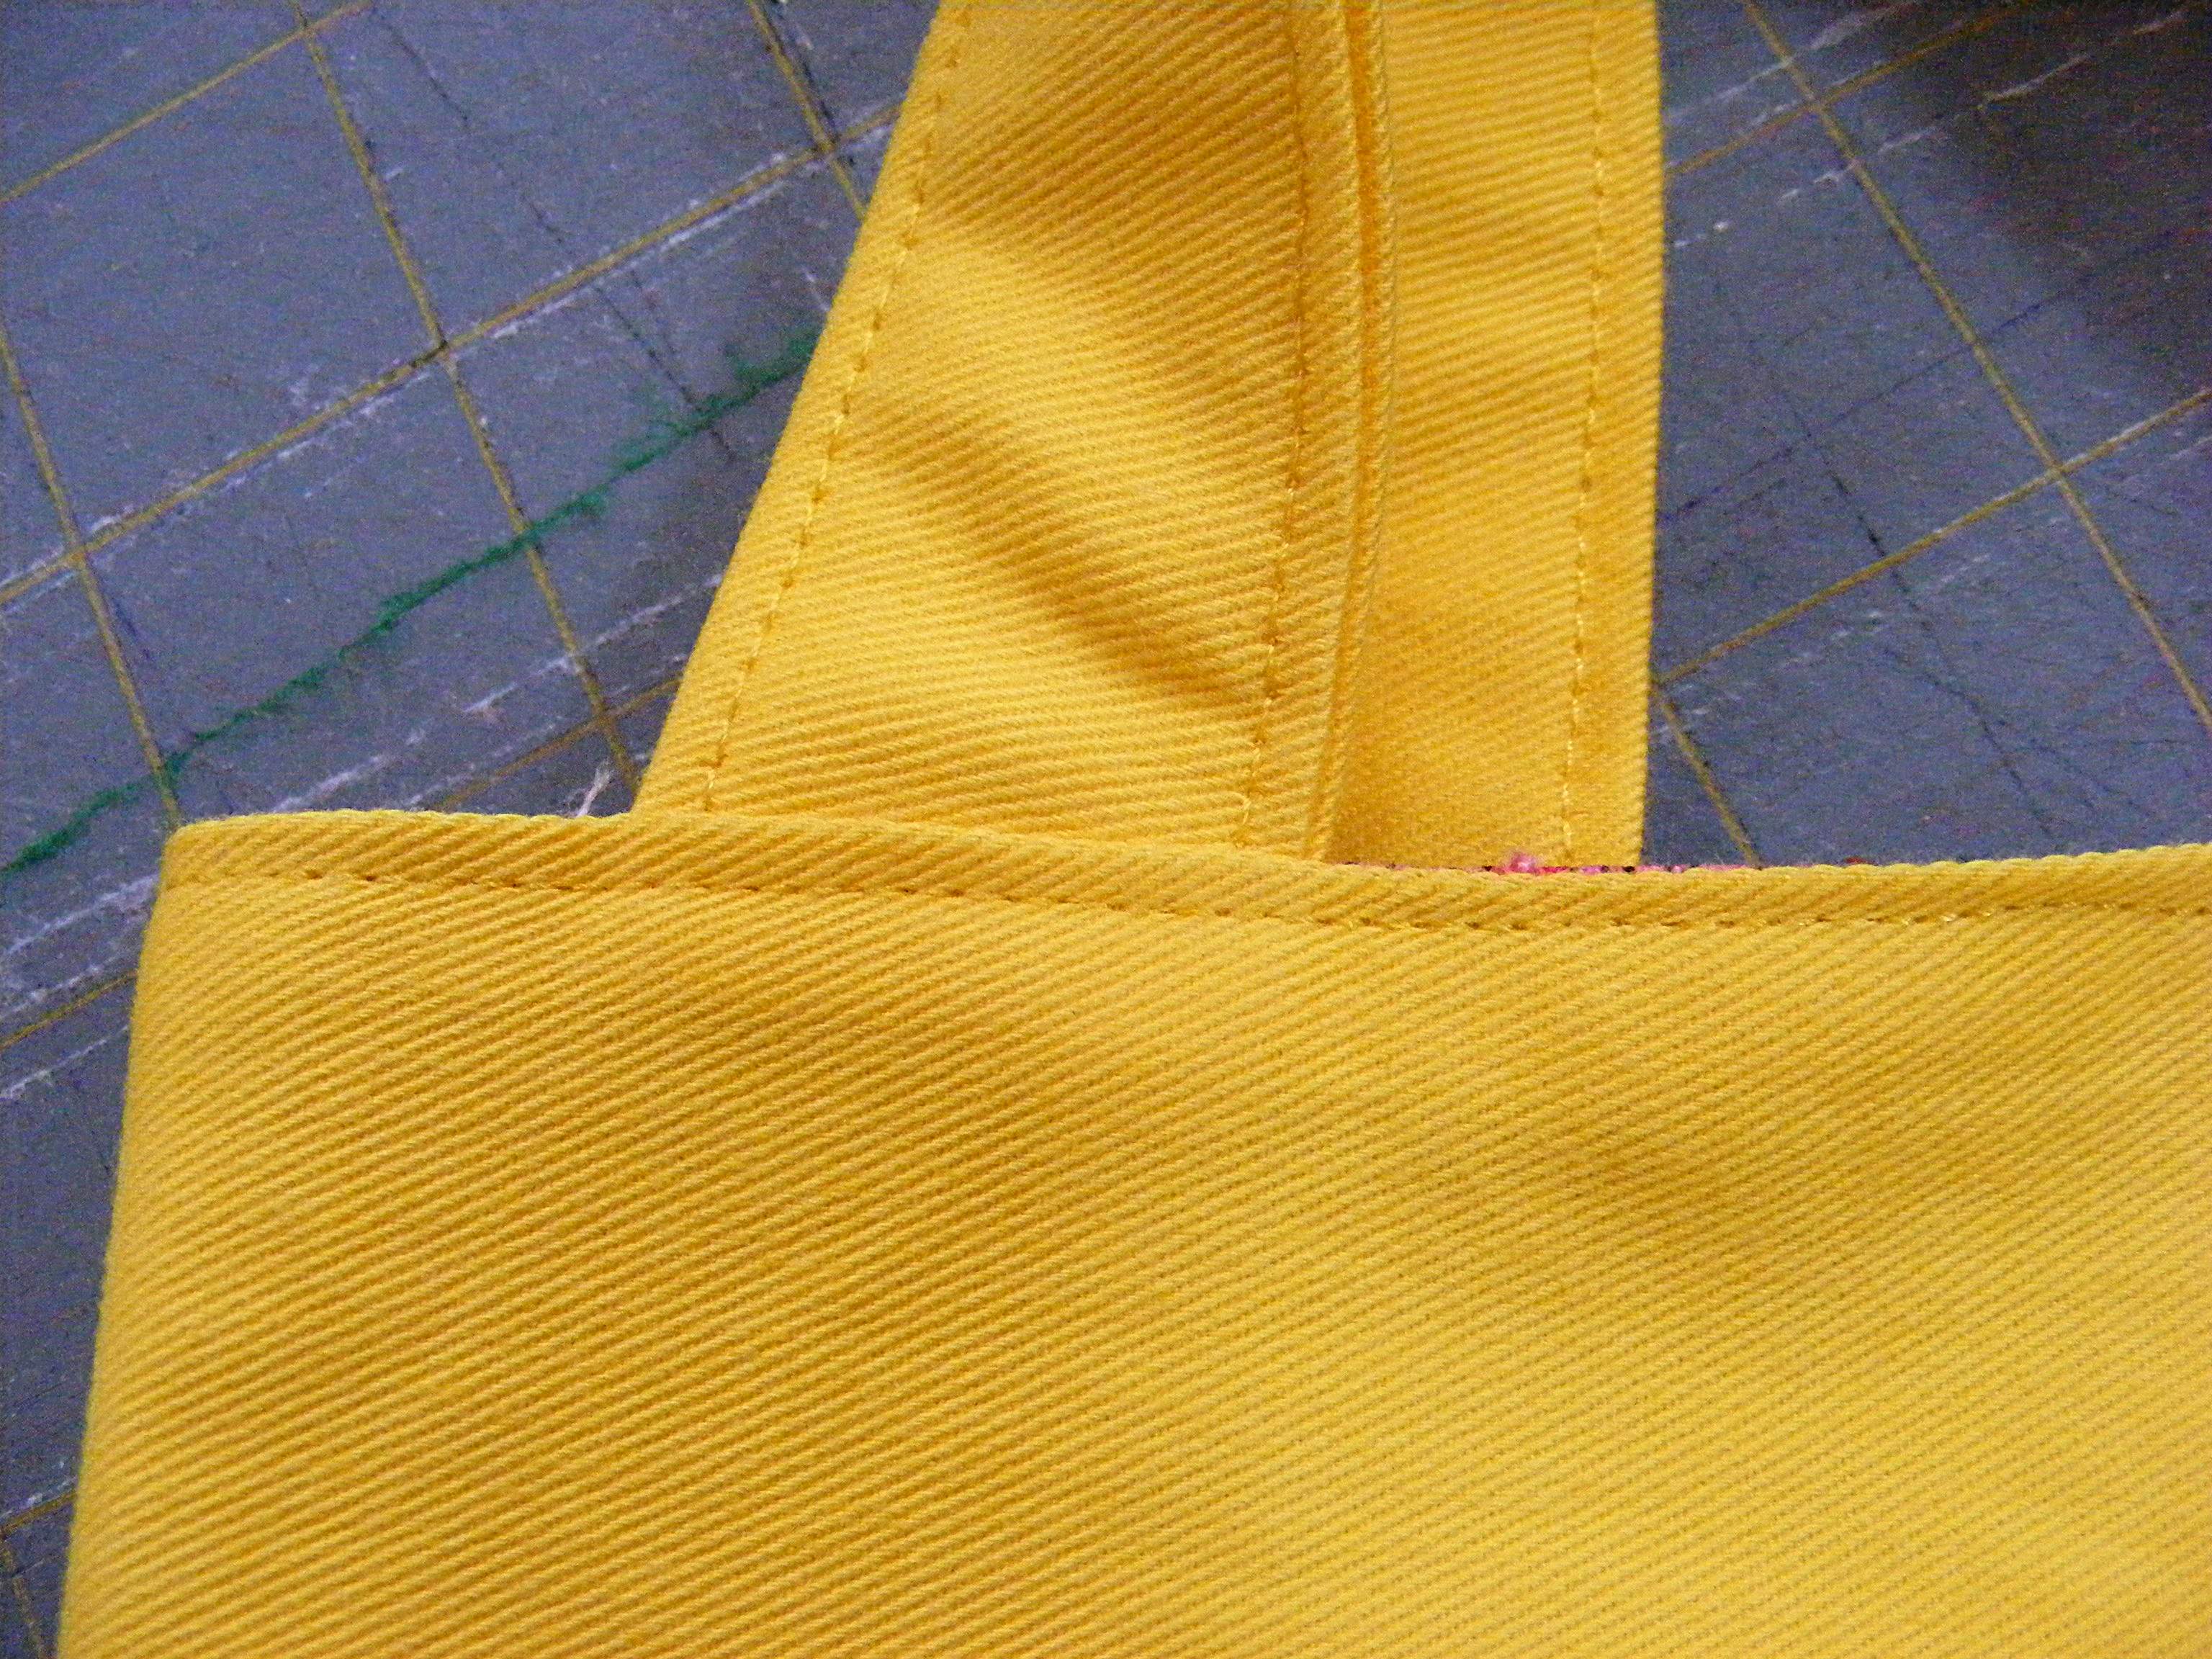
Pin the edge of one strap to the top edge of the bag, 1 1/2 inches in from the side seam.
Repeat for the other end of the strap.
Repeat with the second strap on the other side of the bag.
Step 6
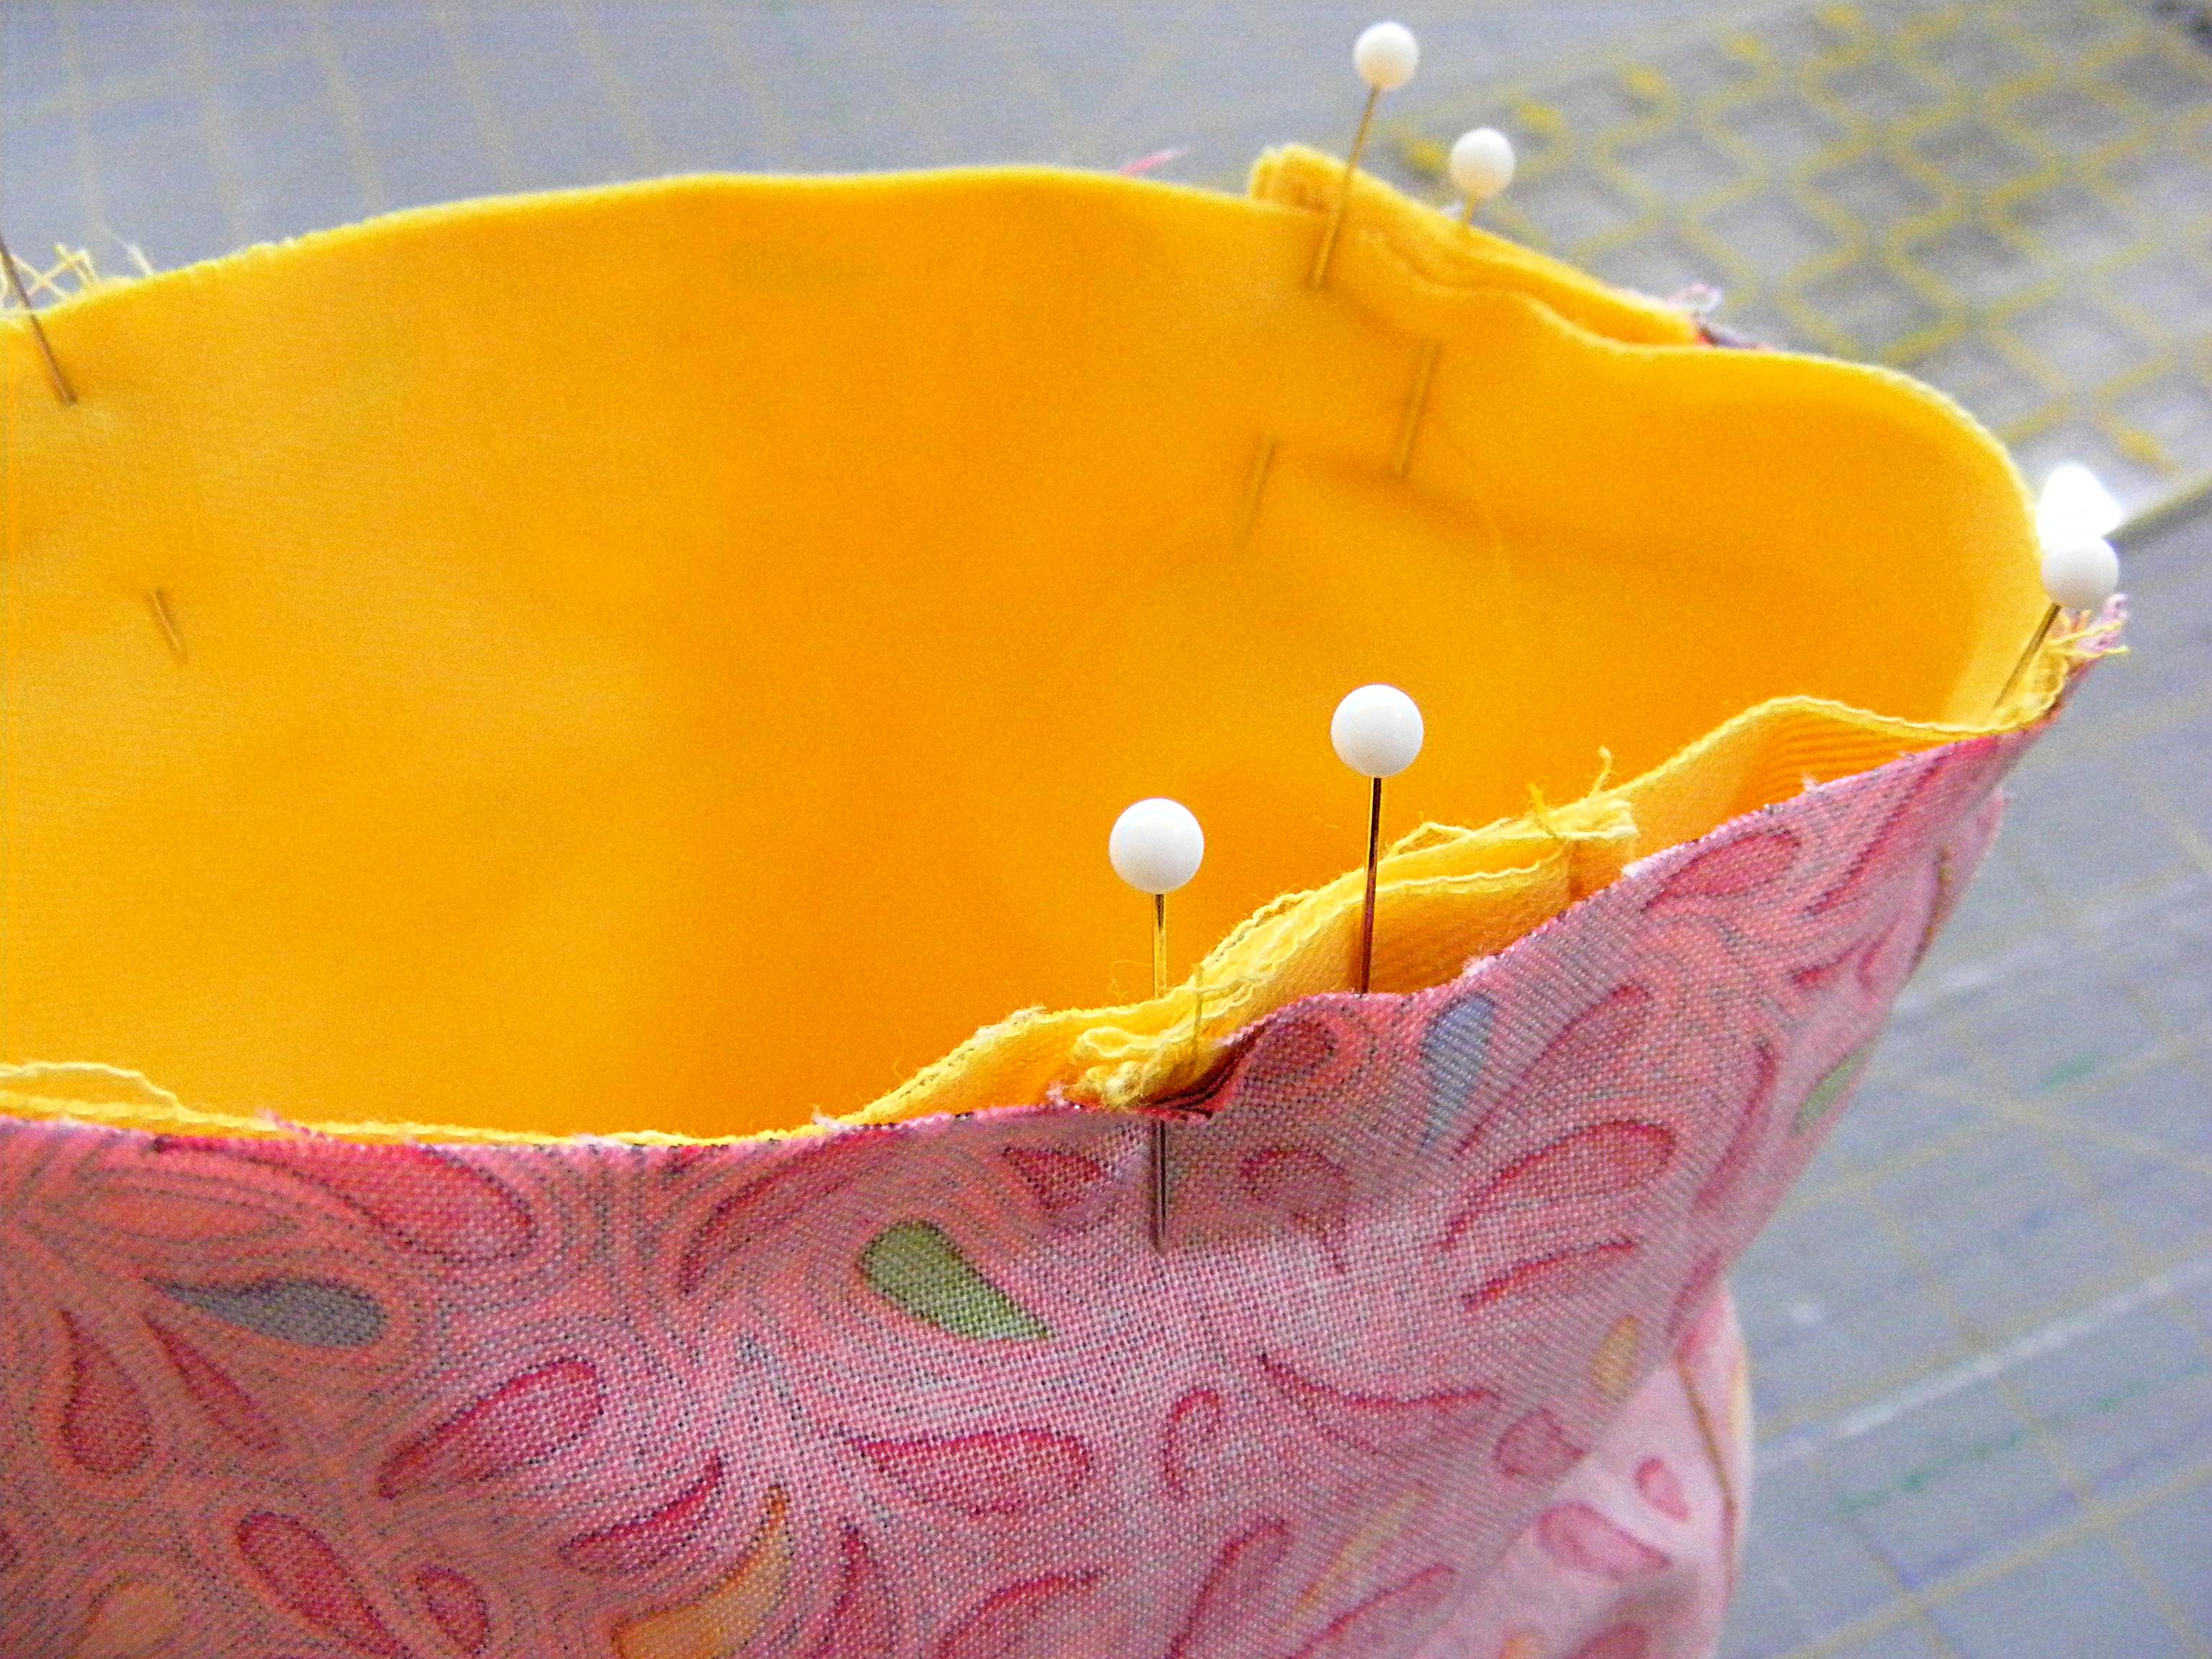
Put the main bag (right side out) inside the lining (wrong side out), with the straps sandwiched between the two layers.
The bag and lining should be right sides together.
Line up the side seams and pin the layers together around the top edge of the bag.
Step 7
Using 1/4 inch seam allowance, stitch almost all the way around the top edge of the bag. Leave the space between the two ends of one handle unstitched, so you can pull the bag through the opening.
The easiest way to do this is to start sewing right at the inside edge of one handle. Sew through that handle, around the side seam, through both handles on the other side, around the second side seam, and through the last handle. Stop as soon as you sew over the last handle.
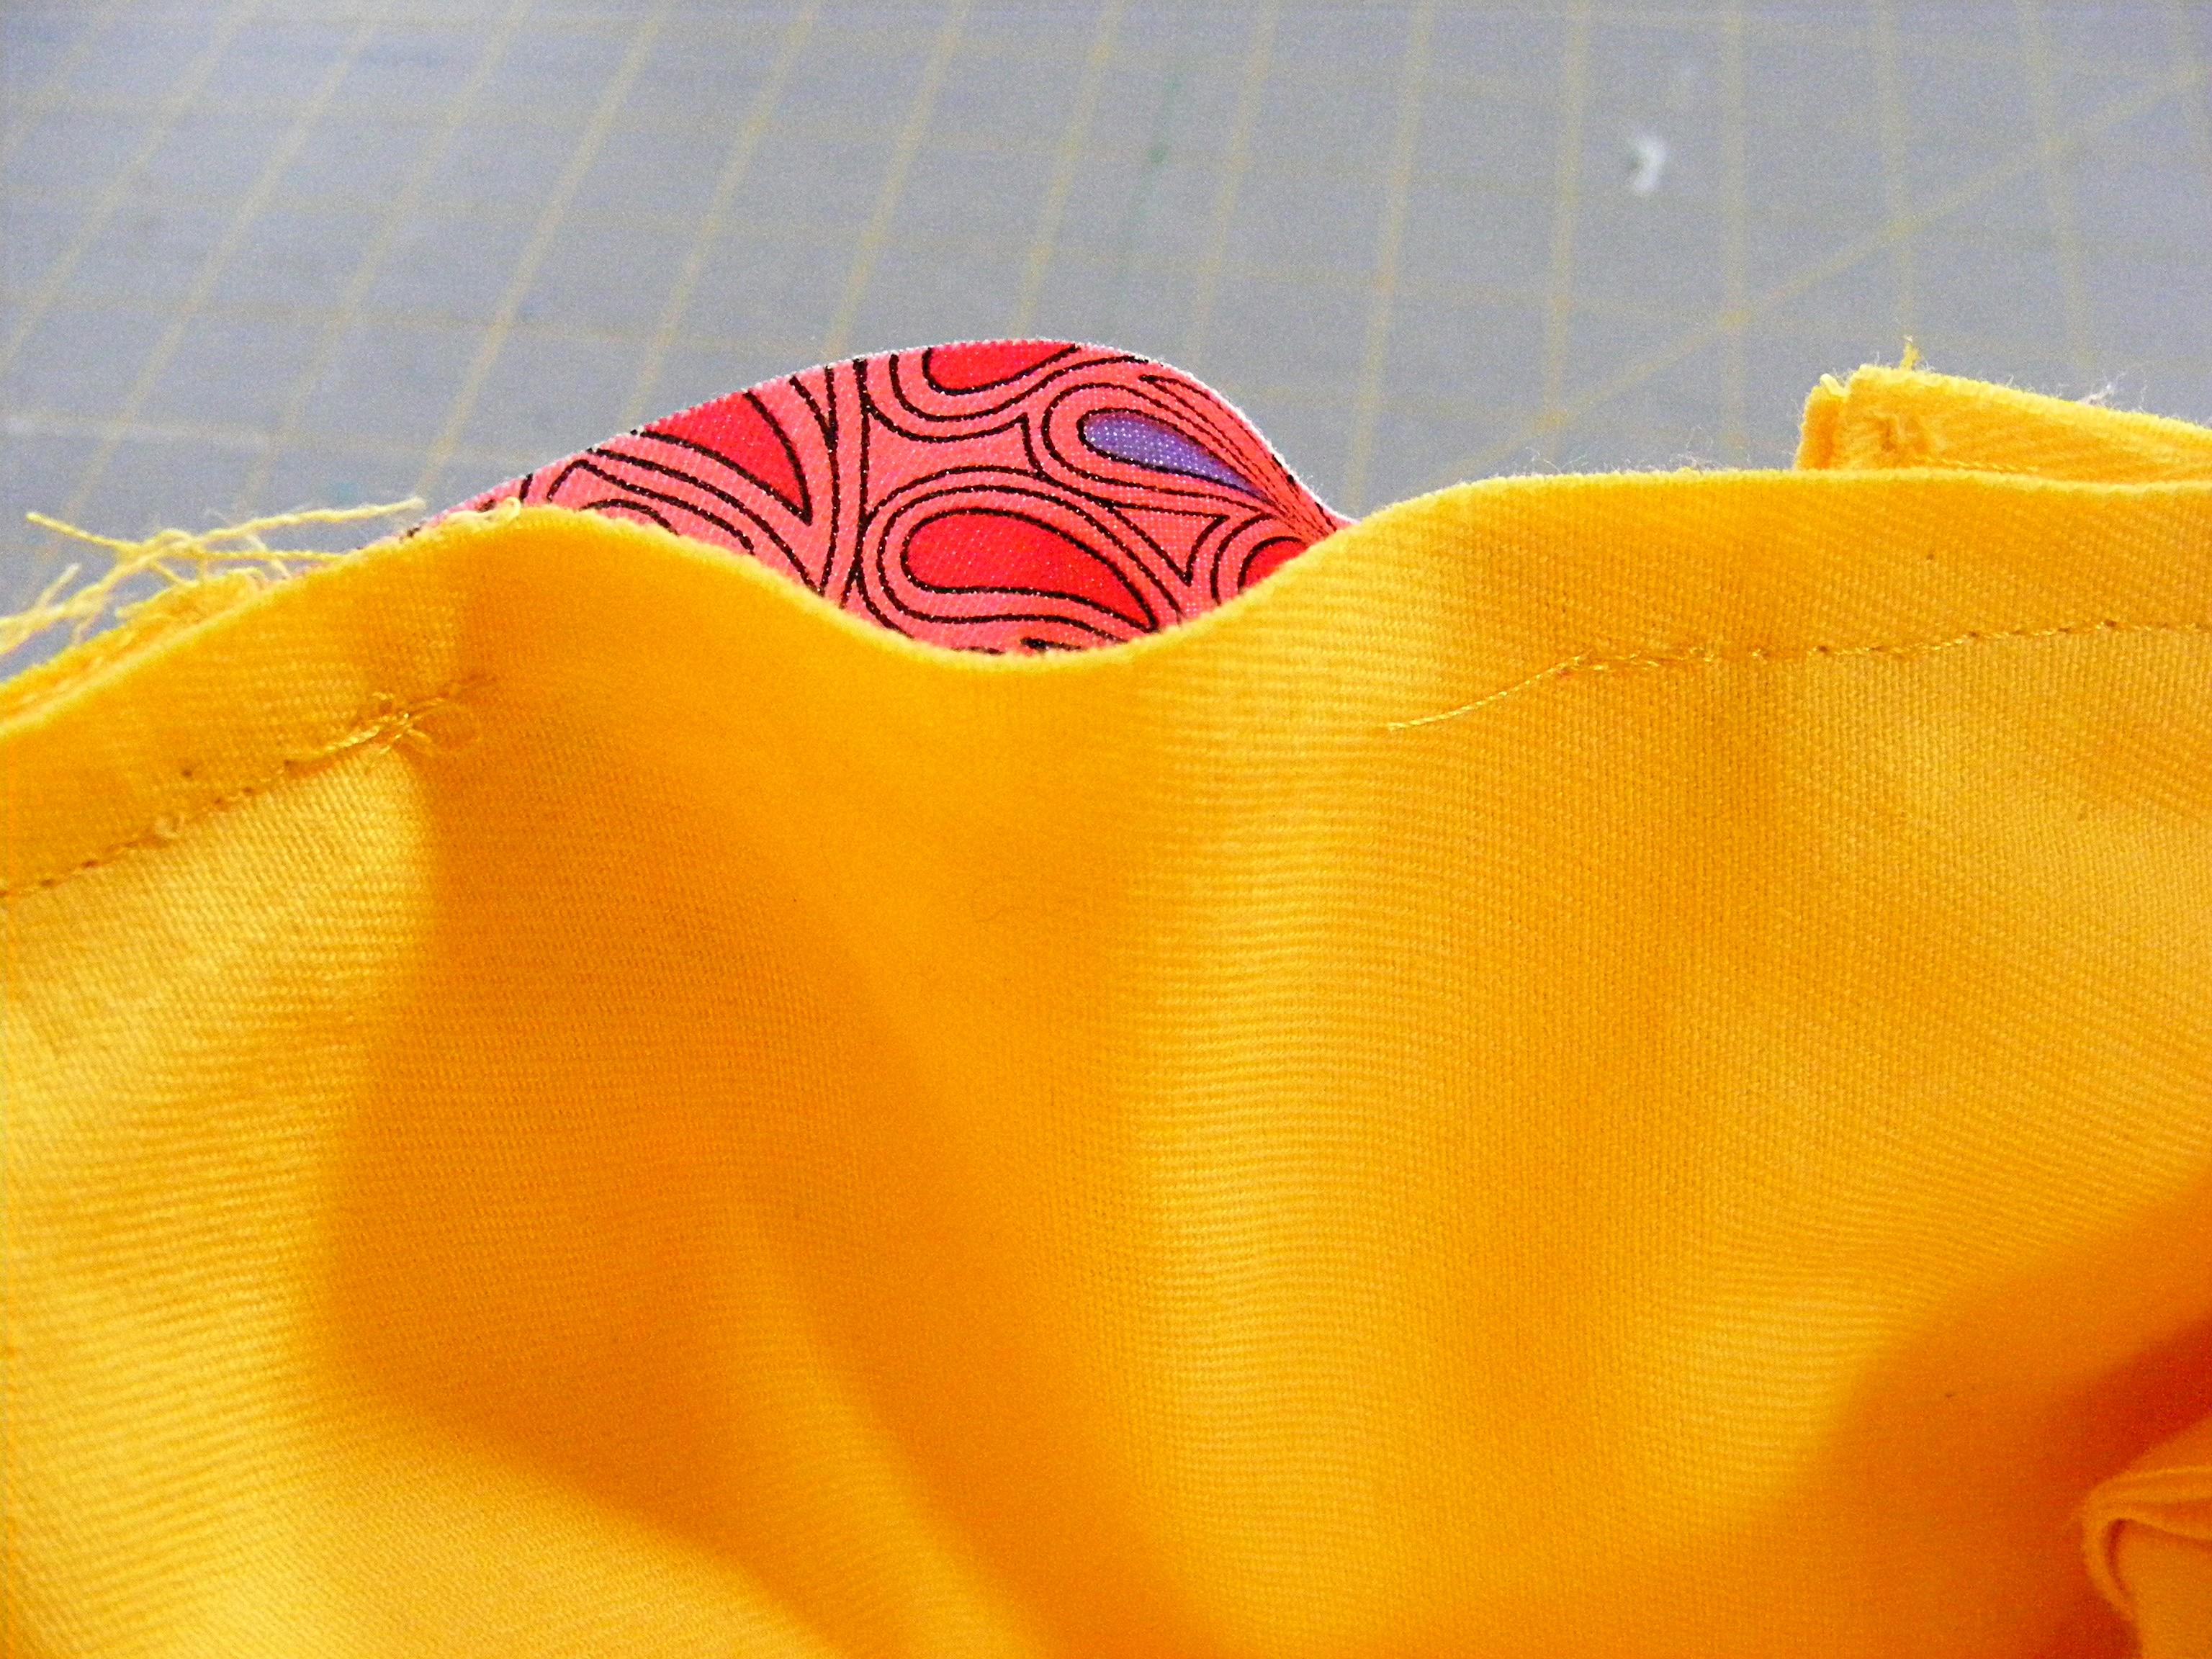
Be sure to backstitch at the beginning and end of your stitching. This is a pretty small opening and there will be some pressure on the edges as you pull the bag through.
Step 8
Reach into the opening and pull the main bag through. Pull through the handles, then pull the lining right side out and tuck it into the bag.
Press around the top edge, being especially careful to press the open edges evenly.
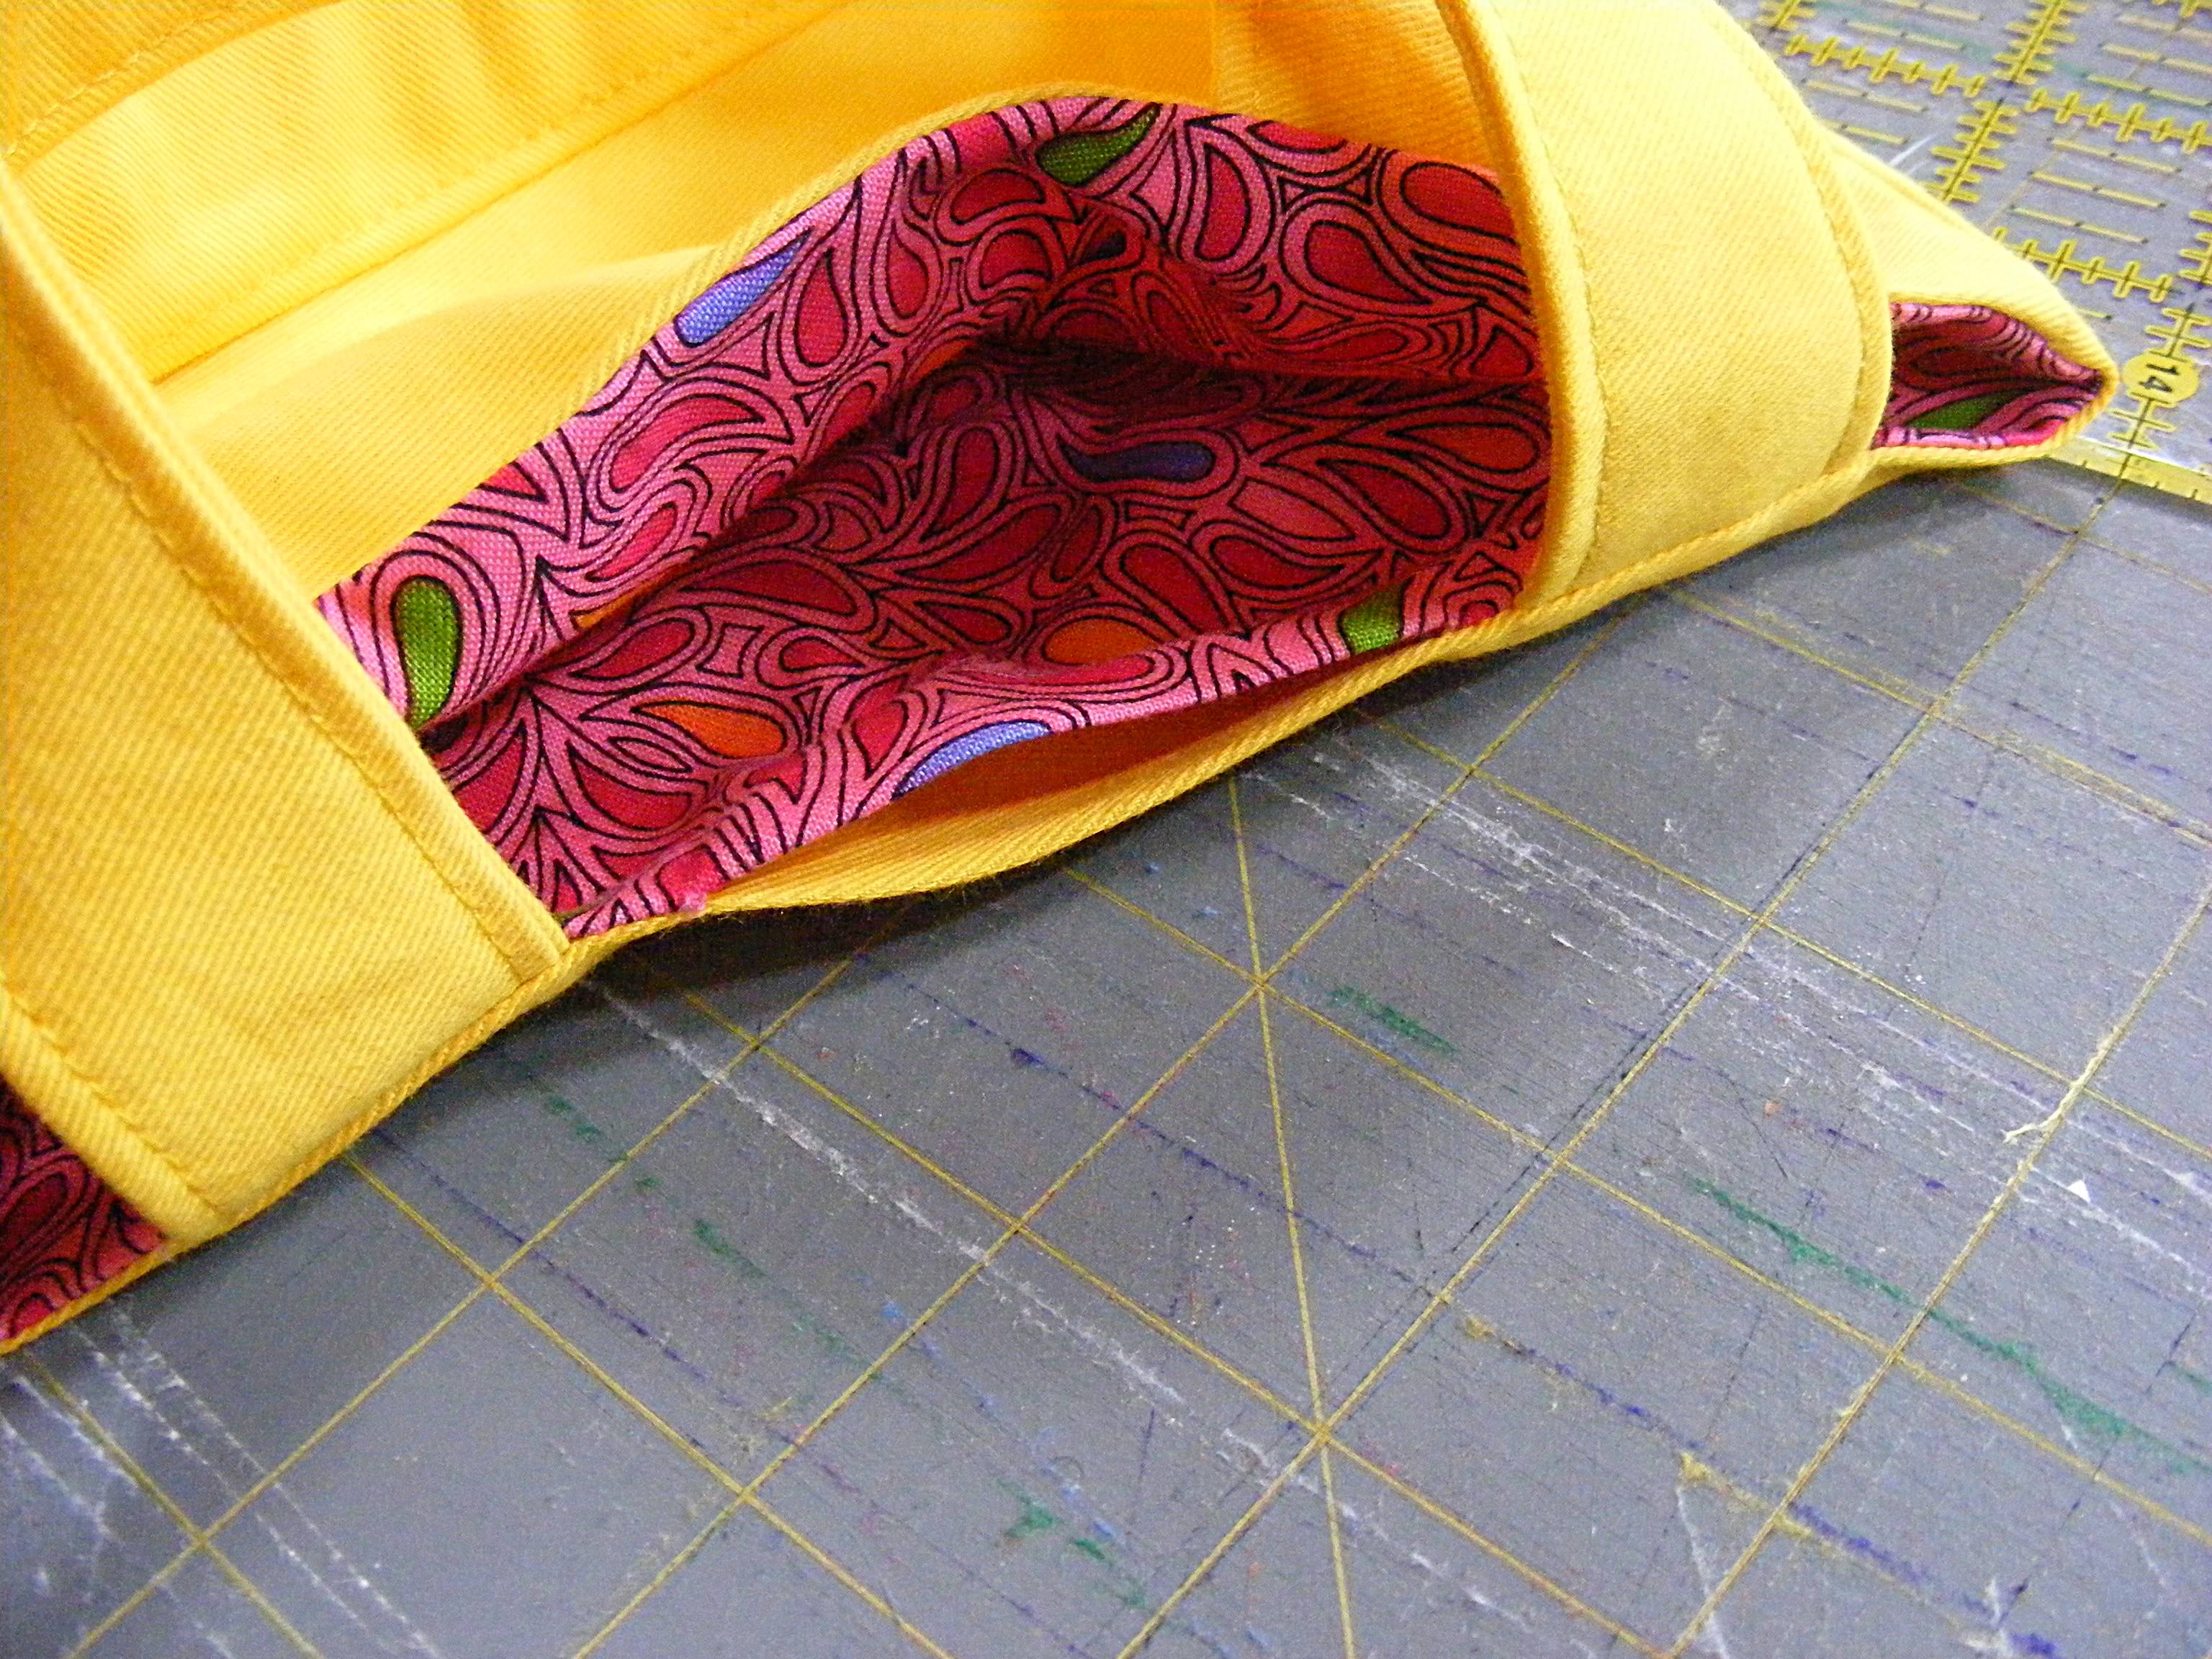
Step 9
Topstitch around the bag, about 1/8 inch from the top edge.
Be sure that the folded edges of the opening you used for turning are lined up and that you catch both layers in the topstitching to hold them together. No hand stitching needed. 🙂
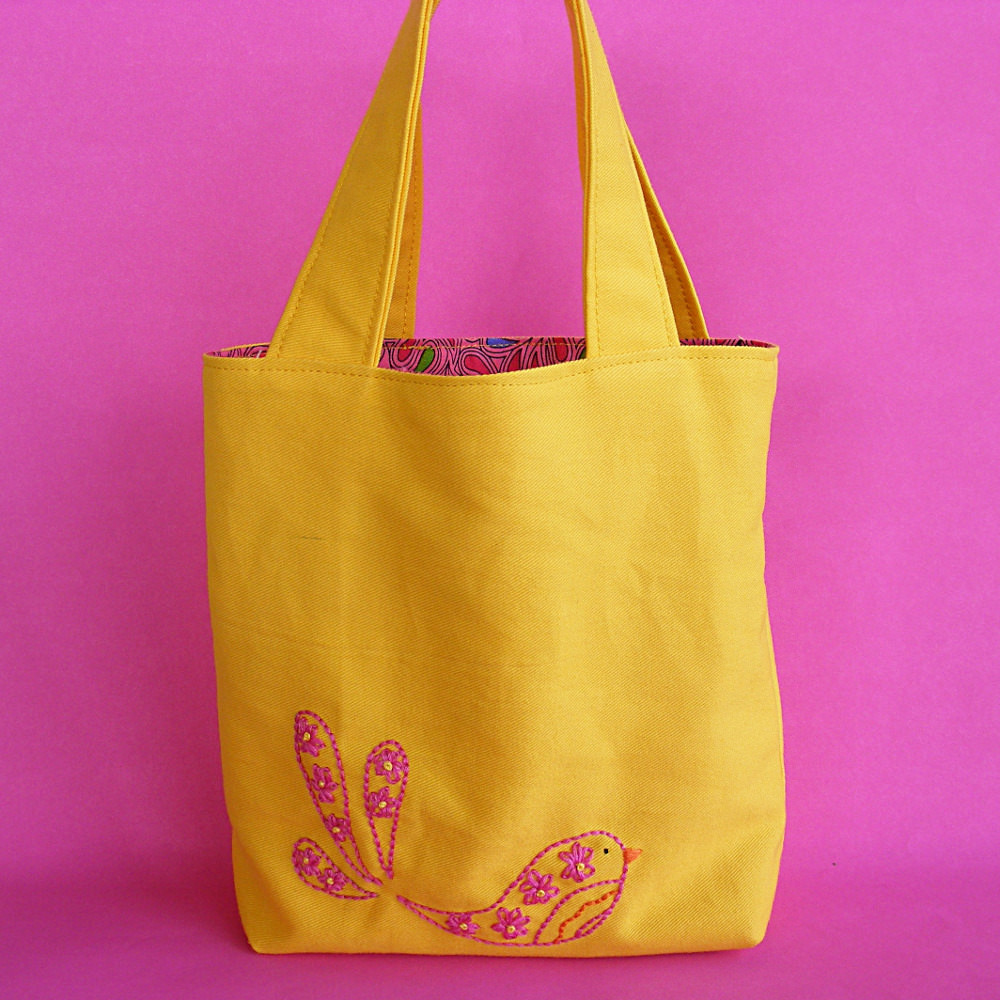
Finished!

Here are several free patterns that work with my basic 10-inch applique squares – no resizing needed!
- Make a Wall Hanging with a Wonky Churn Dash Frame
- Trick or Treat Bag (medium tote bag)
- Quilted Tablet Cover
- How to Turn Any Quilt Block into a Pillow
- Fast and Easy Placemats
- Fancy Felt Frame
- Receiving Blanket
Here are several free patterns that work with just some simple resizing. This post about making coasters has info about resizing an applique pattern that can be applied to any of these projects.
- Free Bib Pattern
- Simple Christmas Stocking
- Mini Bunny Tote Bag
- Turn Any Quilt Block Patterns into Cute Coasters
- Cozy Bear Coasters
- The Big Bag (applique on the pocket)
- Cloth Book for Babies
Return to the main Let’s Make a Quilt Table of Contents.
Happy sewing!

Too cute Wendi! Thanks for sharing!
Enjoy!
Thank you for sharing! It’s really very nice 🙂
Enjoy!
Hi Wendi, thanks for free pattern. I just make a little tote and it turned out fab 🙂
I’m glad it turned out well. Please post a photo to the Flickr group! I love to see what people make!
I put two photos up last night. Thanks again.
They look great! Love the pocket on the outside!
Wendi, you’re a genius! This was really easy and it turned out so cute! The straps are awesome and the tucks in the bottom to give the tote more width are magnificent. And best of all-no hand sewing!
I’m glad you liked it! I used that same “tucks in the bottom” technique in my most recent softie pattern to give them a flat bottom without having to set in a bottom piece. 🙂
Thank you for the free pattern. I found it on Craftsy. I can’t wait to get started. It would be the perfect work in progress bag for my crochet projects <3
Have fun with the pattern! 🙂
Just love getting this on a Monday ~ your colours are SO enticing!
Hi Wendi! Thank you so much for sharing,, This is so cute and I almost everytime I wanna go somewhere I use this bag. I am a 6th Grader and In My School there is thus crafts club and Every Once a month Each of us have to show our creations and teach the others how to make it. This month I am willing to show this bag and the patterns and stuff. But I will only do it if I have your permission to use this.
Thanks!
Of course! Have fun. 🙂
Awesome pattern. Could I make the body one piece instead of 2 so I don’t have a seam on the bottom? Thanks for posting the pattern!
You could – but only if you’re using a non-directional fabric. If you make it with one piece and the fabric has a right and wrong direction – one side will be upside down. 🙂 You might also want to press a crease in the bottom fold. That can replace the bottom seam in helping you line things up when you box the corners.
Didn’t even think of directional fabric. thanks for the advice!
Pingback: How to Sew Boxed Corners – handcraft
Happy Birthday, Wendi! Wow that cheesecake makes my mouth water. But I have no cheese and no eggs 😾. Haven’t been to the store in a long time. However, I am healthy!! Take care.
Hi Windy, I just made the little tote bag for my 4 yr. old granddaughter. It turned out really nice. The instructions were easy to follow. Wasn’t quite sure how to turn the handles when I pinned them on but figured it out. Thanks for the tutorial!
Always so clear with your instructions. You have guiding me in taking my projects to a new level. Thank you for sharing your talent!
This is just too sweet! Thanks so much for sharing.
Such a cute pattern – thank you! I have sewn patch pockets – one for the lining (inside of the bag), and one on the outside. I can’t seem to wrap my head around the idea of how to nest my lining and outside so that the pockets are on opposite sides of the bag once it is right side out. Please help!
When you layer your pieces, make sure the no-pocket side of the liner is paired (right sides together) with the pocket side of the bag.