


So. Let’s say you really like one of my quilt patterns, but you’ve never made a quilt before and you’re kind of freaked out about making the whole thing.
Start with one block. You can make one single block, right? Of course you can! And you can turn that fun quilt block into a pillow. Here’s how.
Make a quilt block.
Any block from any pattern.
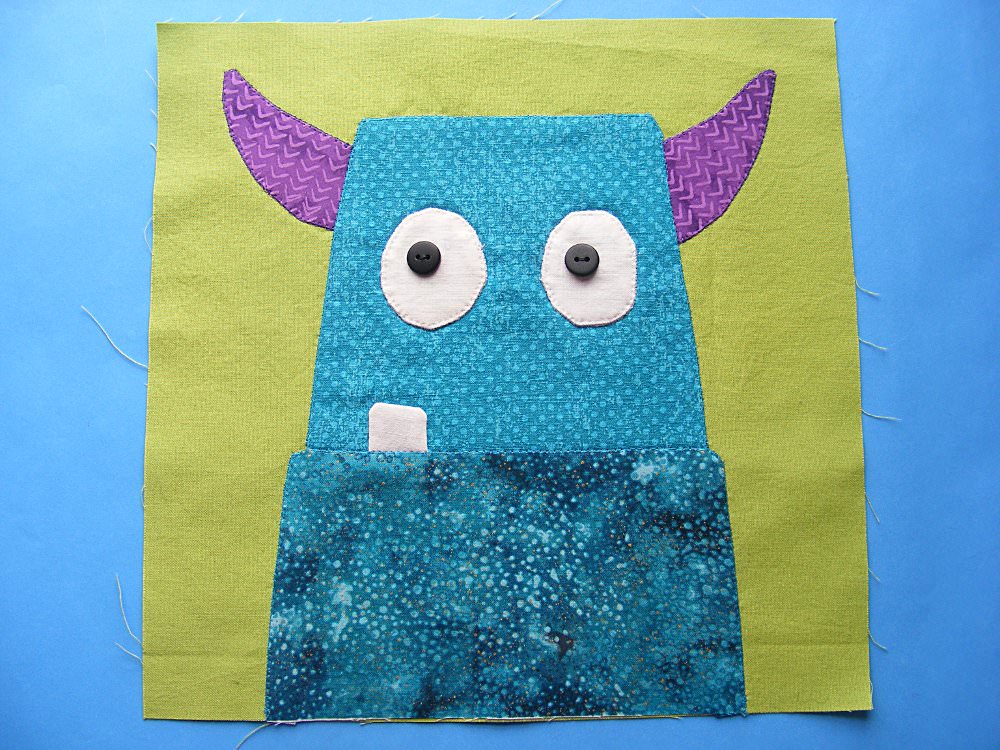
I made this monster block exactly as the pattern specified. It’s a 10 1/2 inch square. Almost all of my applique quilt patterns are 10 1/2″ squares.You could always enlarge the pattern so it fits on the pillow form you want to cover – but depending on the size you’re enlarging it to, that could make things a little tricky. I’ve got a class (Think BIG!) showing how to do giant applique. For now let’s keep things simple and just add some framing to enlarge the block.
Add Frames
My pillow form is 18″ square. That means I need the front of the pillow cover to be 18″ square. (I like my pillow covers to be just a little bit smaller than the pillows so they have a nice snug fit.)
My block is 10 1/2″ square. That means it will finish at 10″ square when I take up the seam allowances. I want it to end up 18 inches square, so I need to add 4 inches on each side of the block.
I could add 4″ frames all the way around, but I want a narrow frame inside a slightly wider frame. So I’m going to add a 1″ frame all the way around, and then a 3″ frame all the way around that. That will add up to the 4″ frame all around.
Start with the sides.
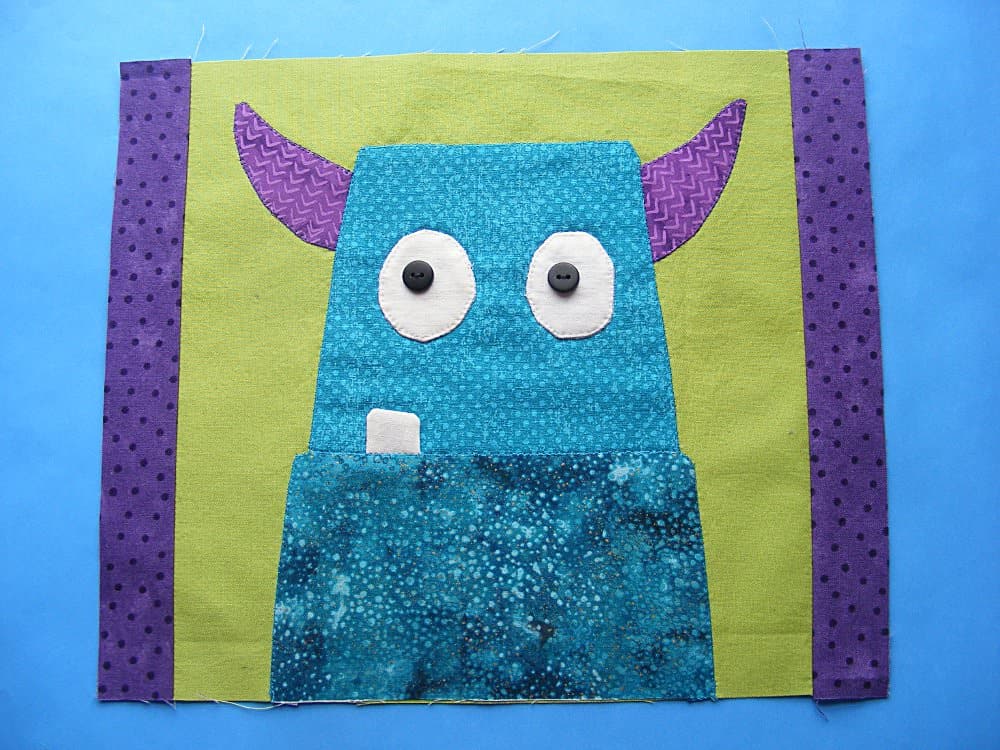
Cut strips 1 1/2″ wide. (Remember – if you want a 1″ frame you need to cut your strips 1 1/2″ so seam allowance is included.) Sew a strip to each side of your block using 1/4″ seam allowances. Press them flat.
Sew strips to the top and bottom. Press them flat.
The inner frame is done. Now your block is 12 1/2″ square.
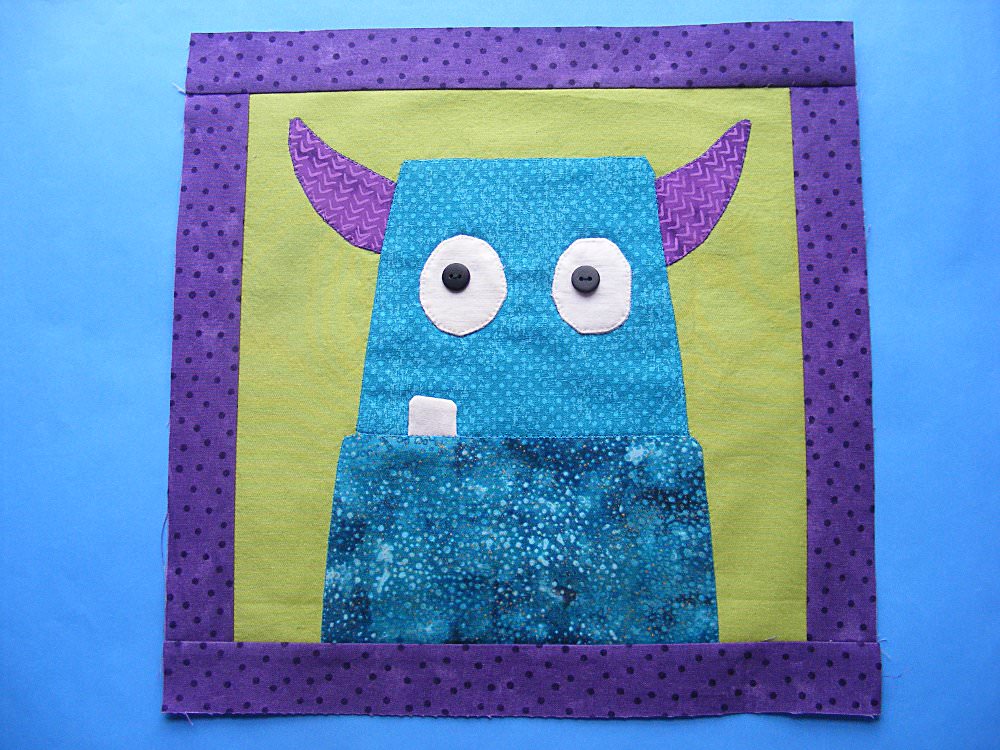
Do the same thing for the outer frame, but use 3 1/4″ strips for a 3″ frame.
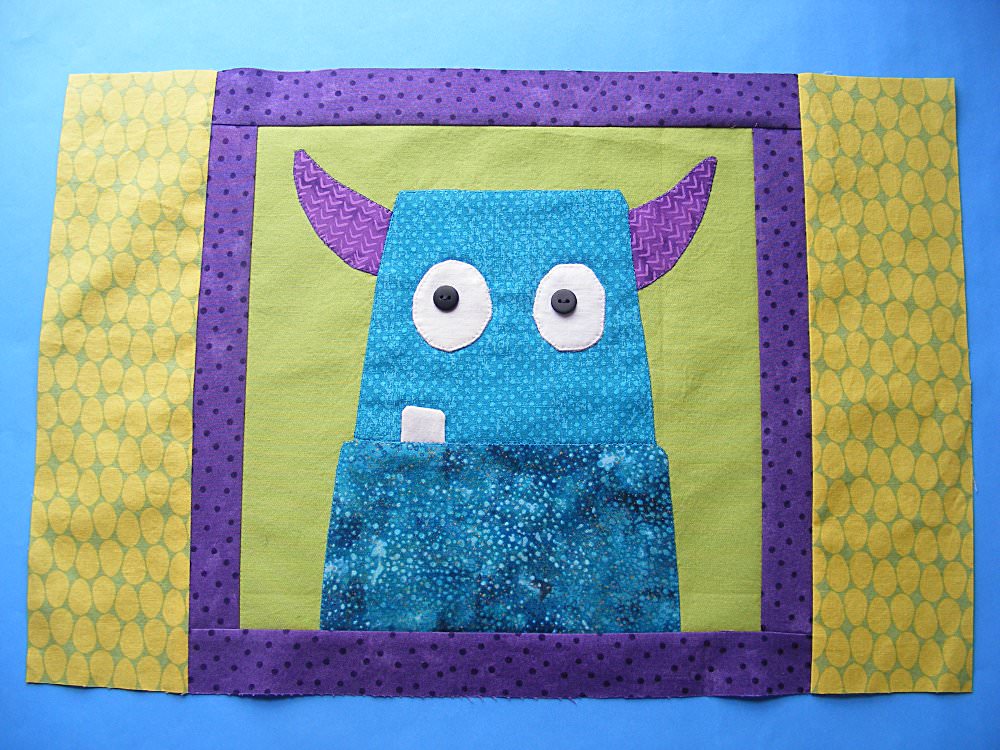
Once the outer frame is sewn on, your pillow cover front should be an 18″ square. Remember – that will finish at 17″ for a nice, snug fit for an 18″ pillow.
Make the Pillow Back
I like using zippers on my pillow covers so I can take them off for washing. You can add the zipper to the side seam where the front is sewn to the back, but I think that sometimes distorts the look of the pillow. I prefer to add it to the middle of the pillow back.

This video tutorial shows how to sew a zippered pillow back.
For this monster pillow you need to make a back that is 18 inches square.
Finish Your Pillow Cover
Unzip the zipper at least part way. Don’t forget to do this or you’ll be very sad!
Sew the pillow front to the pillow back, right sides together, all the way around the pillow, using 1/2″ seam allowance.
Turn it right side out through the zipper opening. (See why you left it unzipped a bit?) Slip your pillow form into the cover. Zip it up and toss it onto a chair.
Finished!
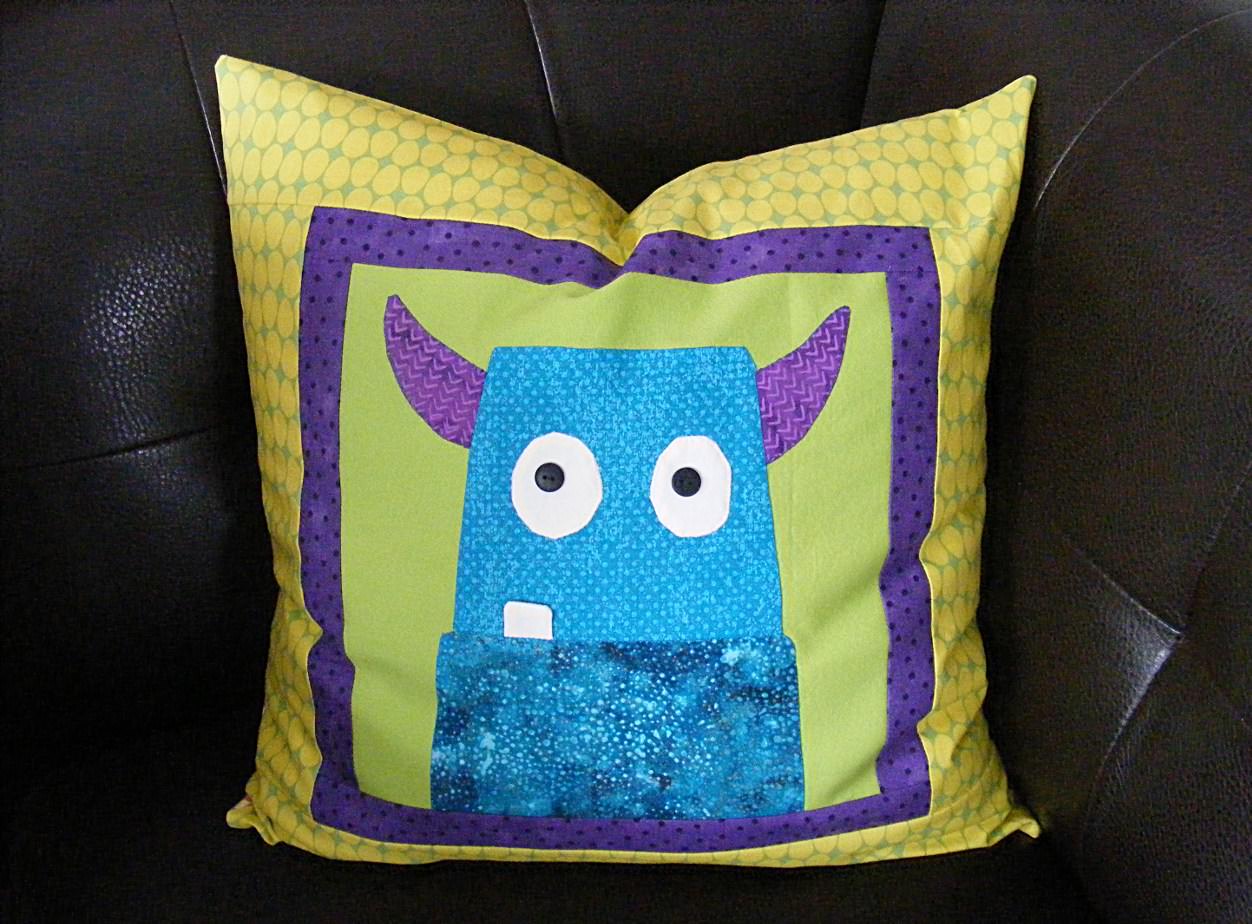
One silly monster quilt block made into a pillow. 🙂

Here are several free patterns that work with my basic 10-inch applique squares – no resizing needed!
- Make a Wall Hanging with a Wonky Churn Dash Frame
- Trick or Treat Bag (medium tote bag)
- Quilted Tablet Cover
- How to Turn Any Quilt Block into a Pillow
- Fast and Easy Placemats
- Fancy Felt Frame
- Receiving Blanket
Here are several free patterns that work with just some simple resizing. This post about making coasters has info about resizing an applique pattern that can be applied to any of these projects.
- Free Bib Pattern
- Simple Christmas Stocking
- Mini Bunny Tote Bag
- Turn Any Quilt Block Patterns into Cute Coasters
- Cozy Bear Coasters
- The Big Bag (applique on the pocket)
- Cloth Book for Babies
Return to the main Let’s Make a Quilt Table of Contents.
Happy sewing!

Your creativity were eye catching and it also helped me a bit .I tried making the pillow back exactly how you made it.It was really very nice.Thank you so much.
Just in time with the zipper insert! My granddaughter wants some pillows for her bed. As I have only ever made envelope closures, this tutorial gives me the confidence to make the apperceive closures! Thanks, Wendi!
Zipper closures….dang auto correct…lol!
Pingback: How to Turn a Quilt Block Into a Pillow – Quilting
Pingback: How to Turn a Quilt Block Into a Pillow - DIY GALAXY
I’m trying to figure out if I should quilt the front panel of the cover. I feel like, if I don’t, there is more of a chance for the seams to fray when I wash the cover. Could I get some thoughts on this, please? Thanks.
I’ve done pillow covers both quilted and unquilted. I like the “heft” of quilted covers best, but I’ve never had durability issues with any of them.
The link to Fairfield pillow inserts didn’t show 18×18″ inserts. Do you think I could extend the sides in order to fit a 20×20″ pillow? I could add more strips. I’d need a longer zipper, right?
Yes – you can either add more strips or add wider strips – whichever gives you the look you like. And you probably don’t need a larger zipper – I often use one a few inches smaller than the pillow size. Pillows will squish right in. 🙂