


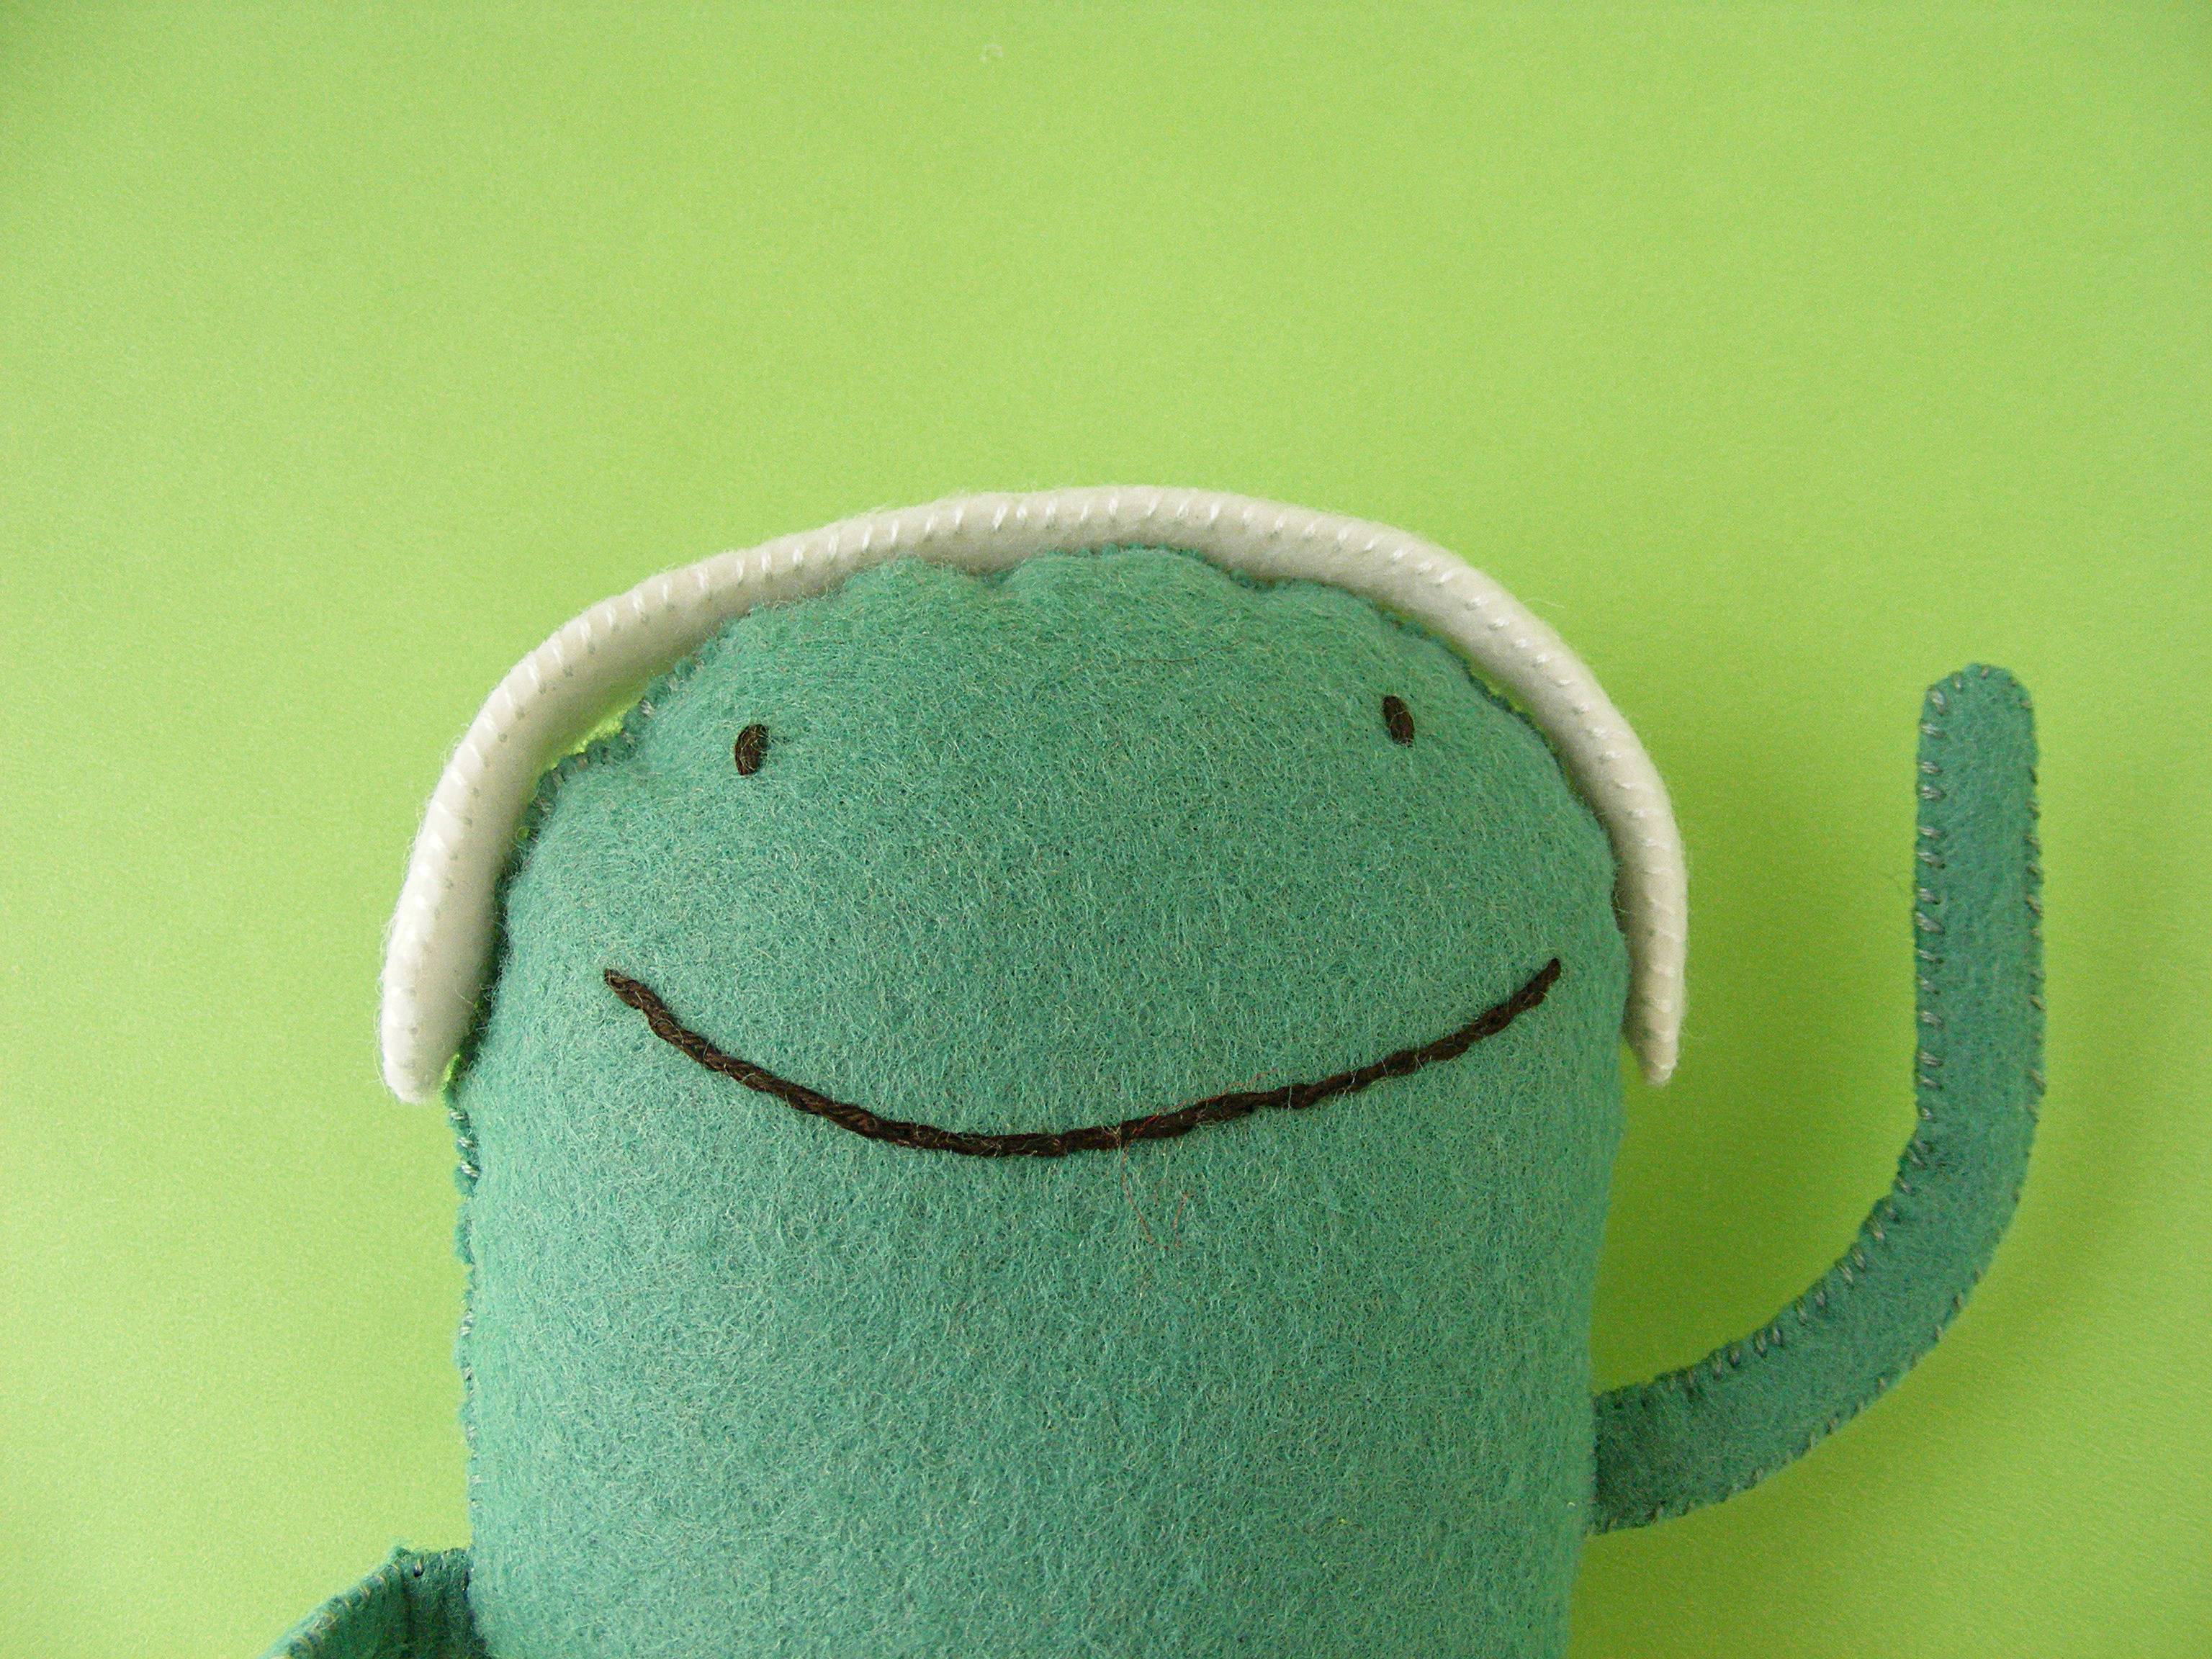
You know what your favorite toy needs for Easter? Adjustable bunny ears and a tiny embroidered egg!
I made these to fit The Oddballs – but guess what? They fit all kinds of things!
In a completely unscientific test, my daughter and I tried them on almost all the softies in the enormous pile on her bed.
(Seriously. I don’t know how she can sleep in there!)
They fit tons of random teddy bears and softies – including her old American Girl dolls. Look at Ivy in her cute bunny ears!
 wearing felt bunny ears made with a free pattern from Shiny Happy World")
Ignore the red splotches on her face. Jo was obsessed with diseases for a while and stuck clay dots all over Ivy’s face to give her smallpox.
FYI – red modeling clay will stain the skin of American Girl dolls.
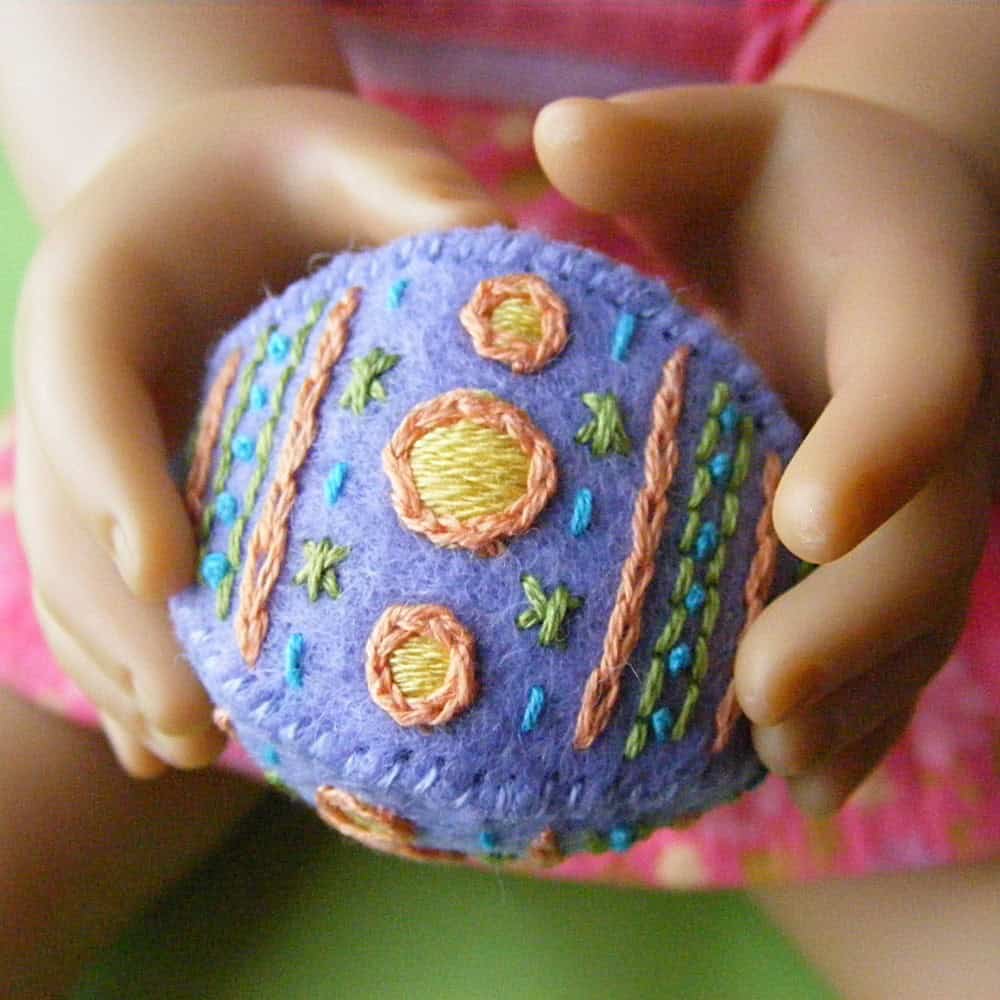
And here’s the egg in Ivy’s hands. It’s tiny – just 2 inches tall.
You can make bunny ears and eggs for your favorite toys. 🙂

Here’s how.
Download the template pieces here.
Make the Bunny Ears
You’ll need. . .
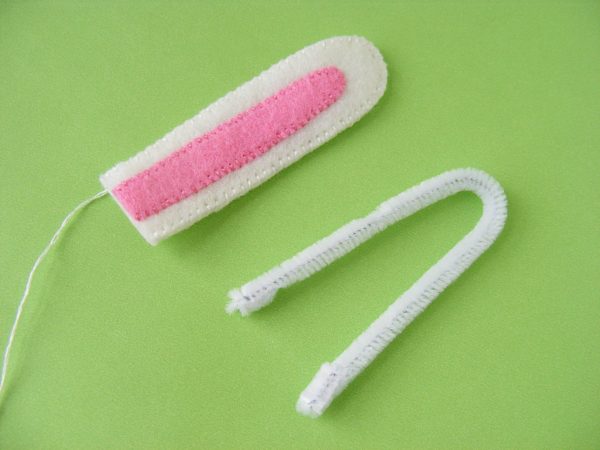
- scraps of wool felt in white and pink
- two 12 inch pipe cleaners
- matching embroidery thread
- freezer paper
You can find links to all my favorite tools and supplies here.
Step 1
Trace or print the ear and headband pieces onto some freezer paper. Fuse to the felt and cut out all the pieces. Cut right through the freezer paper and felt together, then peel the freezer paper away. It’s the easiest way to accurately cut small shapes like this.
Step 2
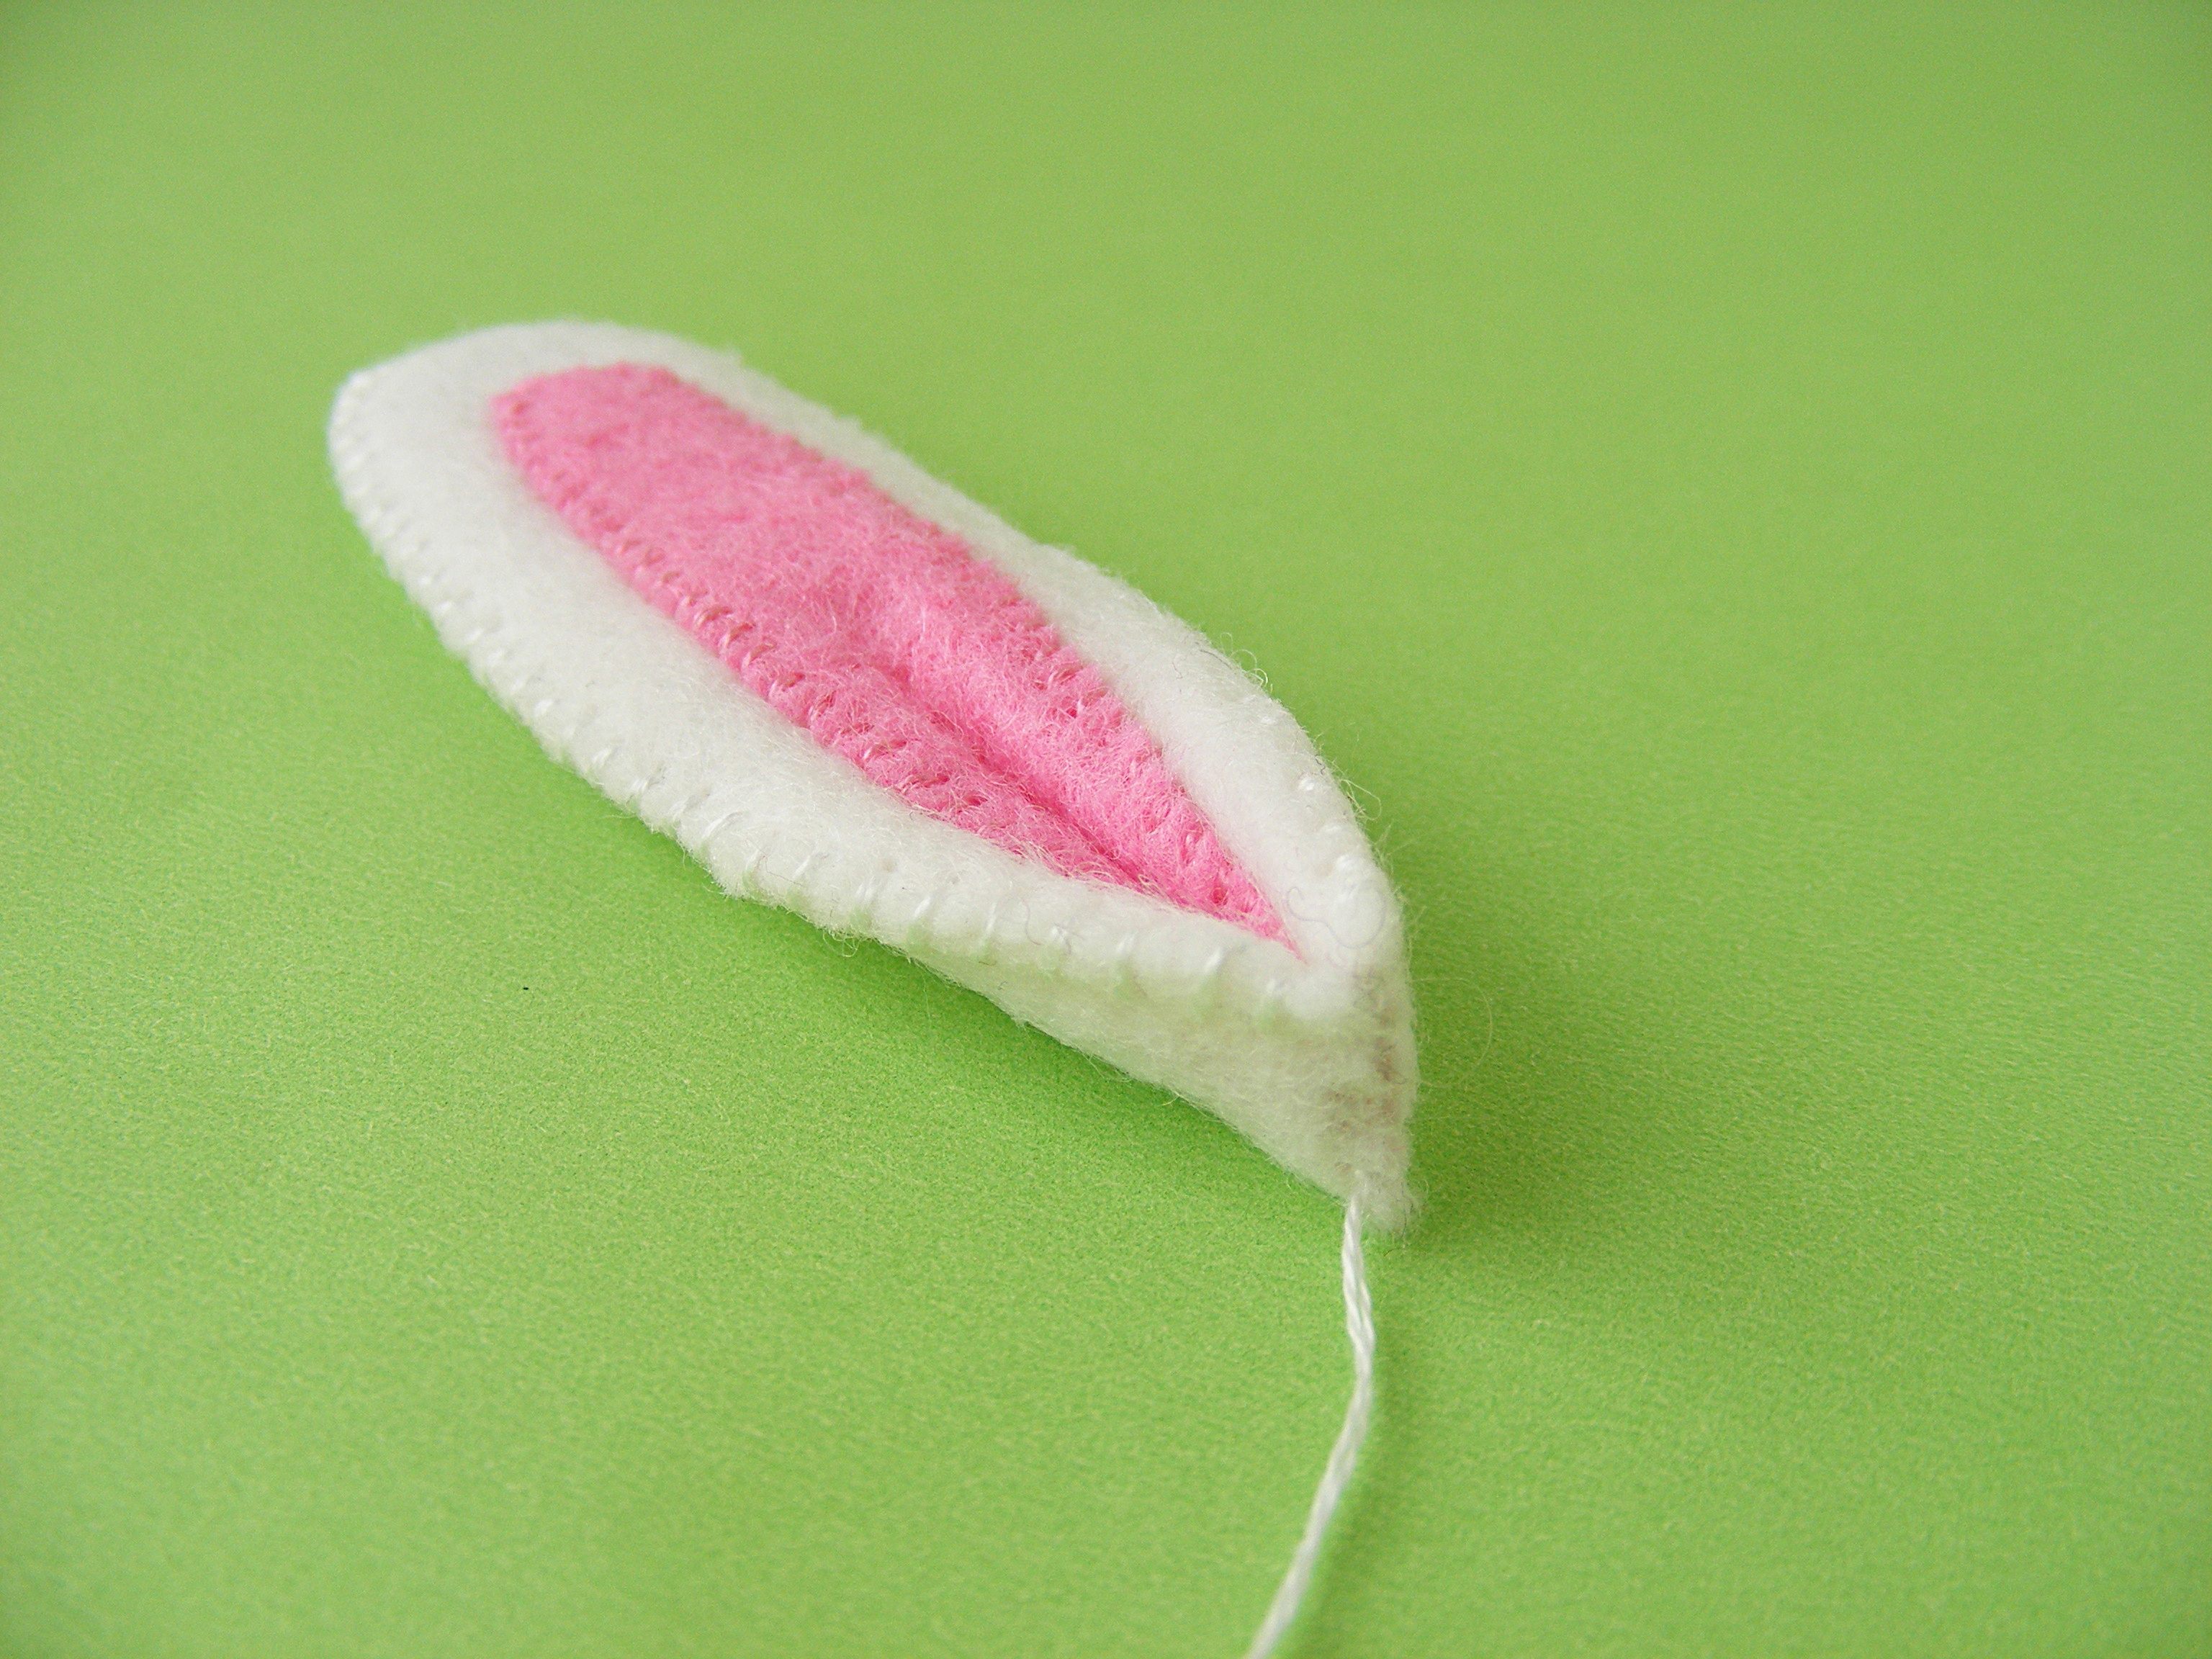
Whipstitch applique one inner ear to one larger ear piece using thread that matches the inner ear.
Whipstitch that piece to a second larger ear piece, leaving the bottom unstitched. Leave your thread tail attached.
(Whipstitch is slightly different from whipstitch applique – those links go to two different tutorials.)
Cut a pipecleaner in half. Bend it into a gentle curve and fold both cut ends down about 1/2 inch - short enough to just fit inside the ear.
Step 3
Slide the bent pipecleaner up into the ear. Fold the bottom of the ear in half and whipstitch it closed. Don’t cut off your thread yet.
Repeat Steps 2 and 3 for the second ear.
Step 3
Whipstitch the two headband pieces together, leaving the curve at one end unstitched.
Bend a pipecleaner in half. Measure it against the headband pieces and fold down the excess at the cut ends. Slide the pipecleaner into the headband and finish stitching the headband closed.
Fit the headband to whoever will be wearing it and mark where you want the ears to go.
Step 4
Stitch one ear to the headband. I used ladder stitch but you could also use whipstitch.
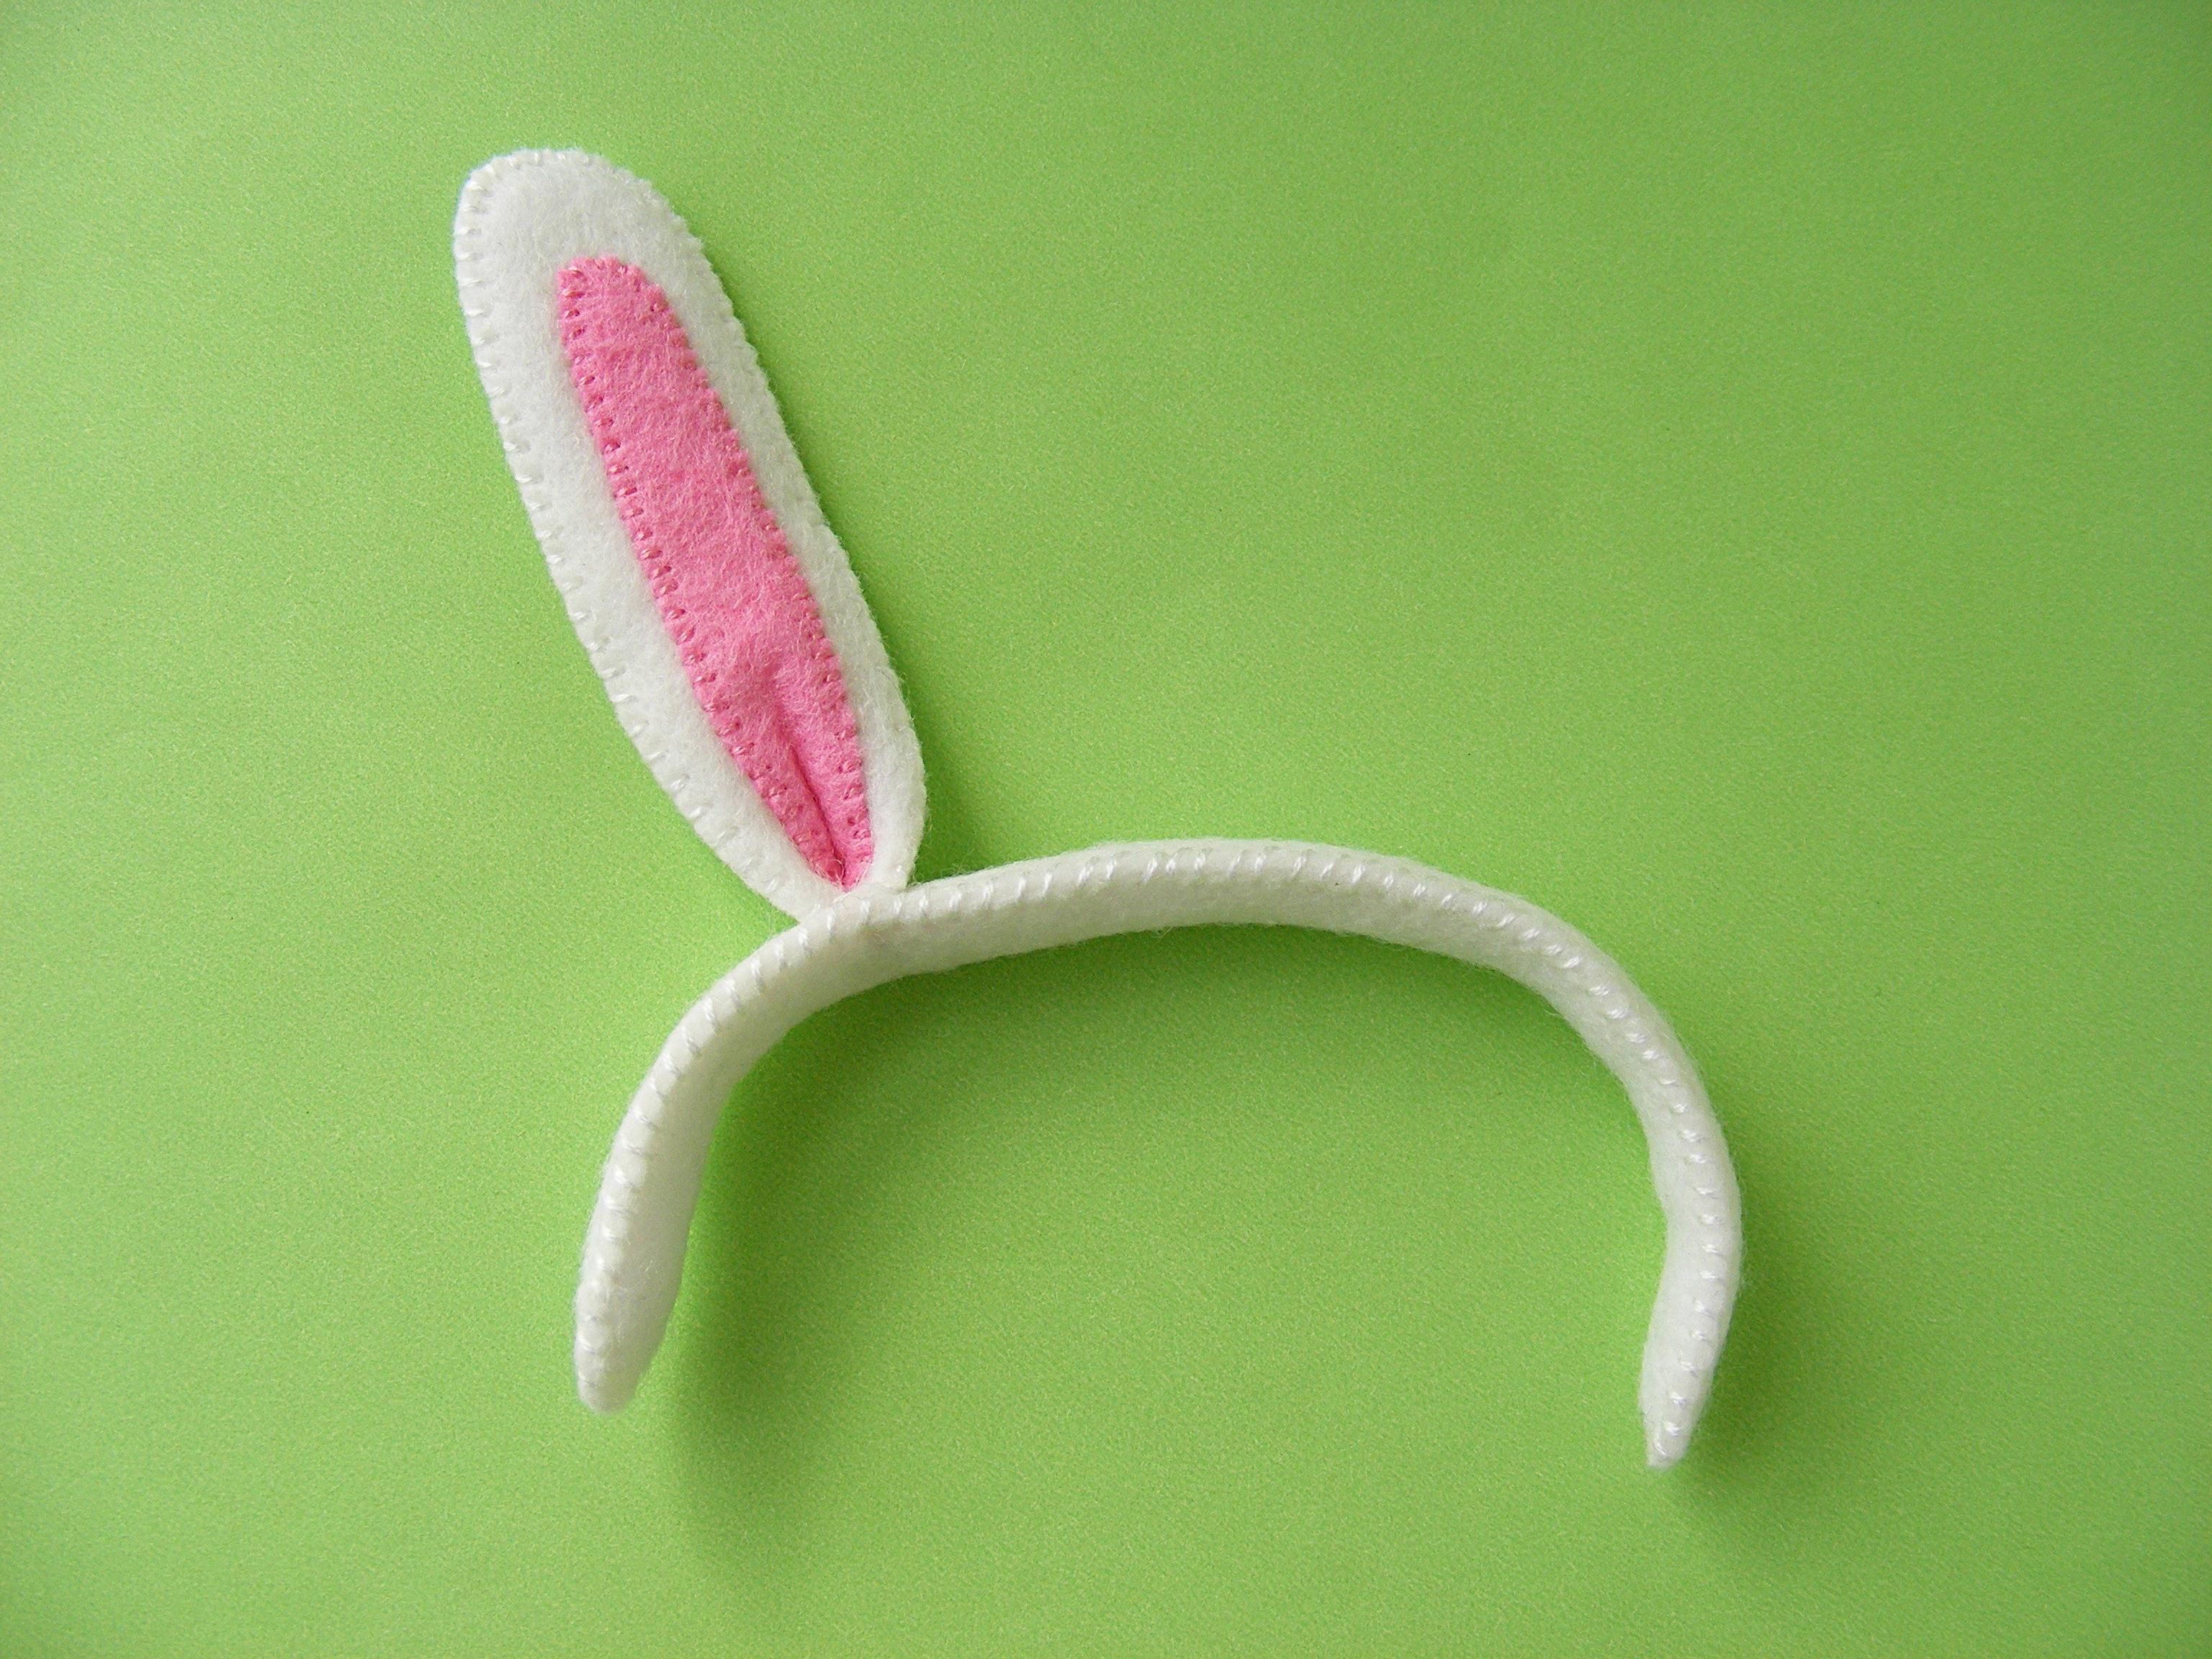
I went around the base of the ear twice to make sure it was attached securely.
Attach the second ear.
 wearing bunny ears made with the free Easter Eggstras pattern from Shiny Happy World")
Done!
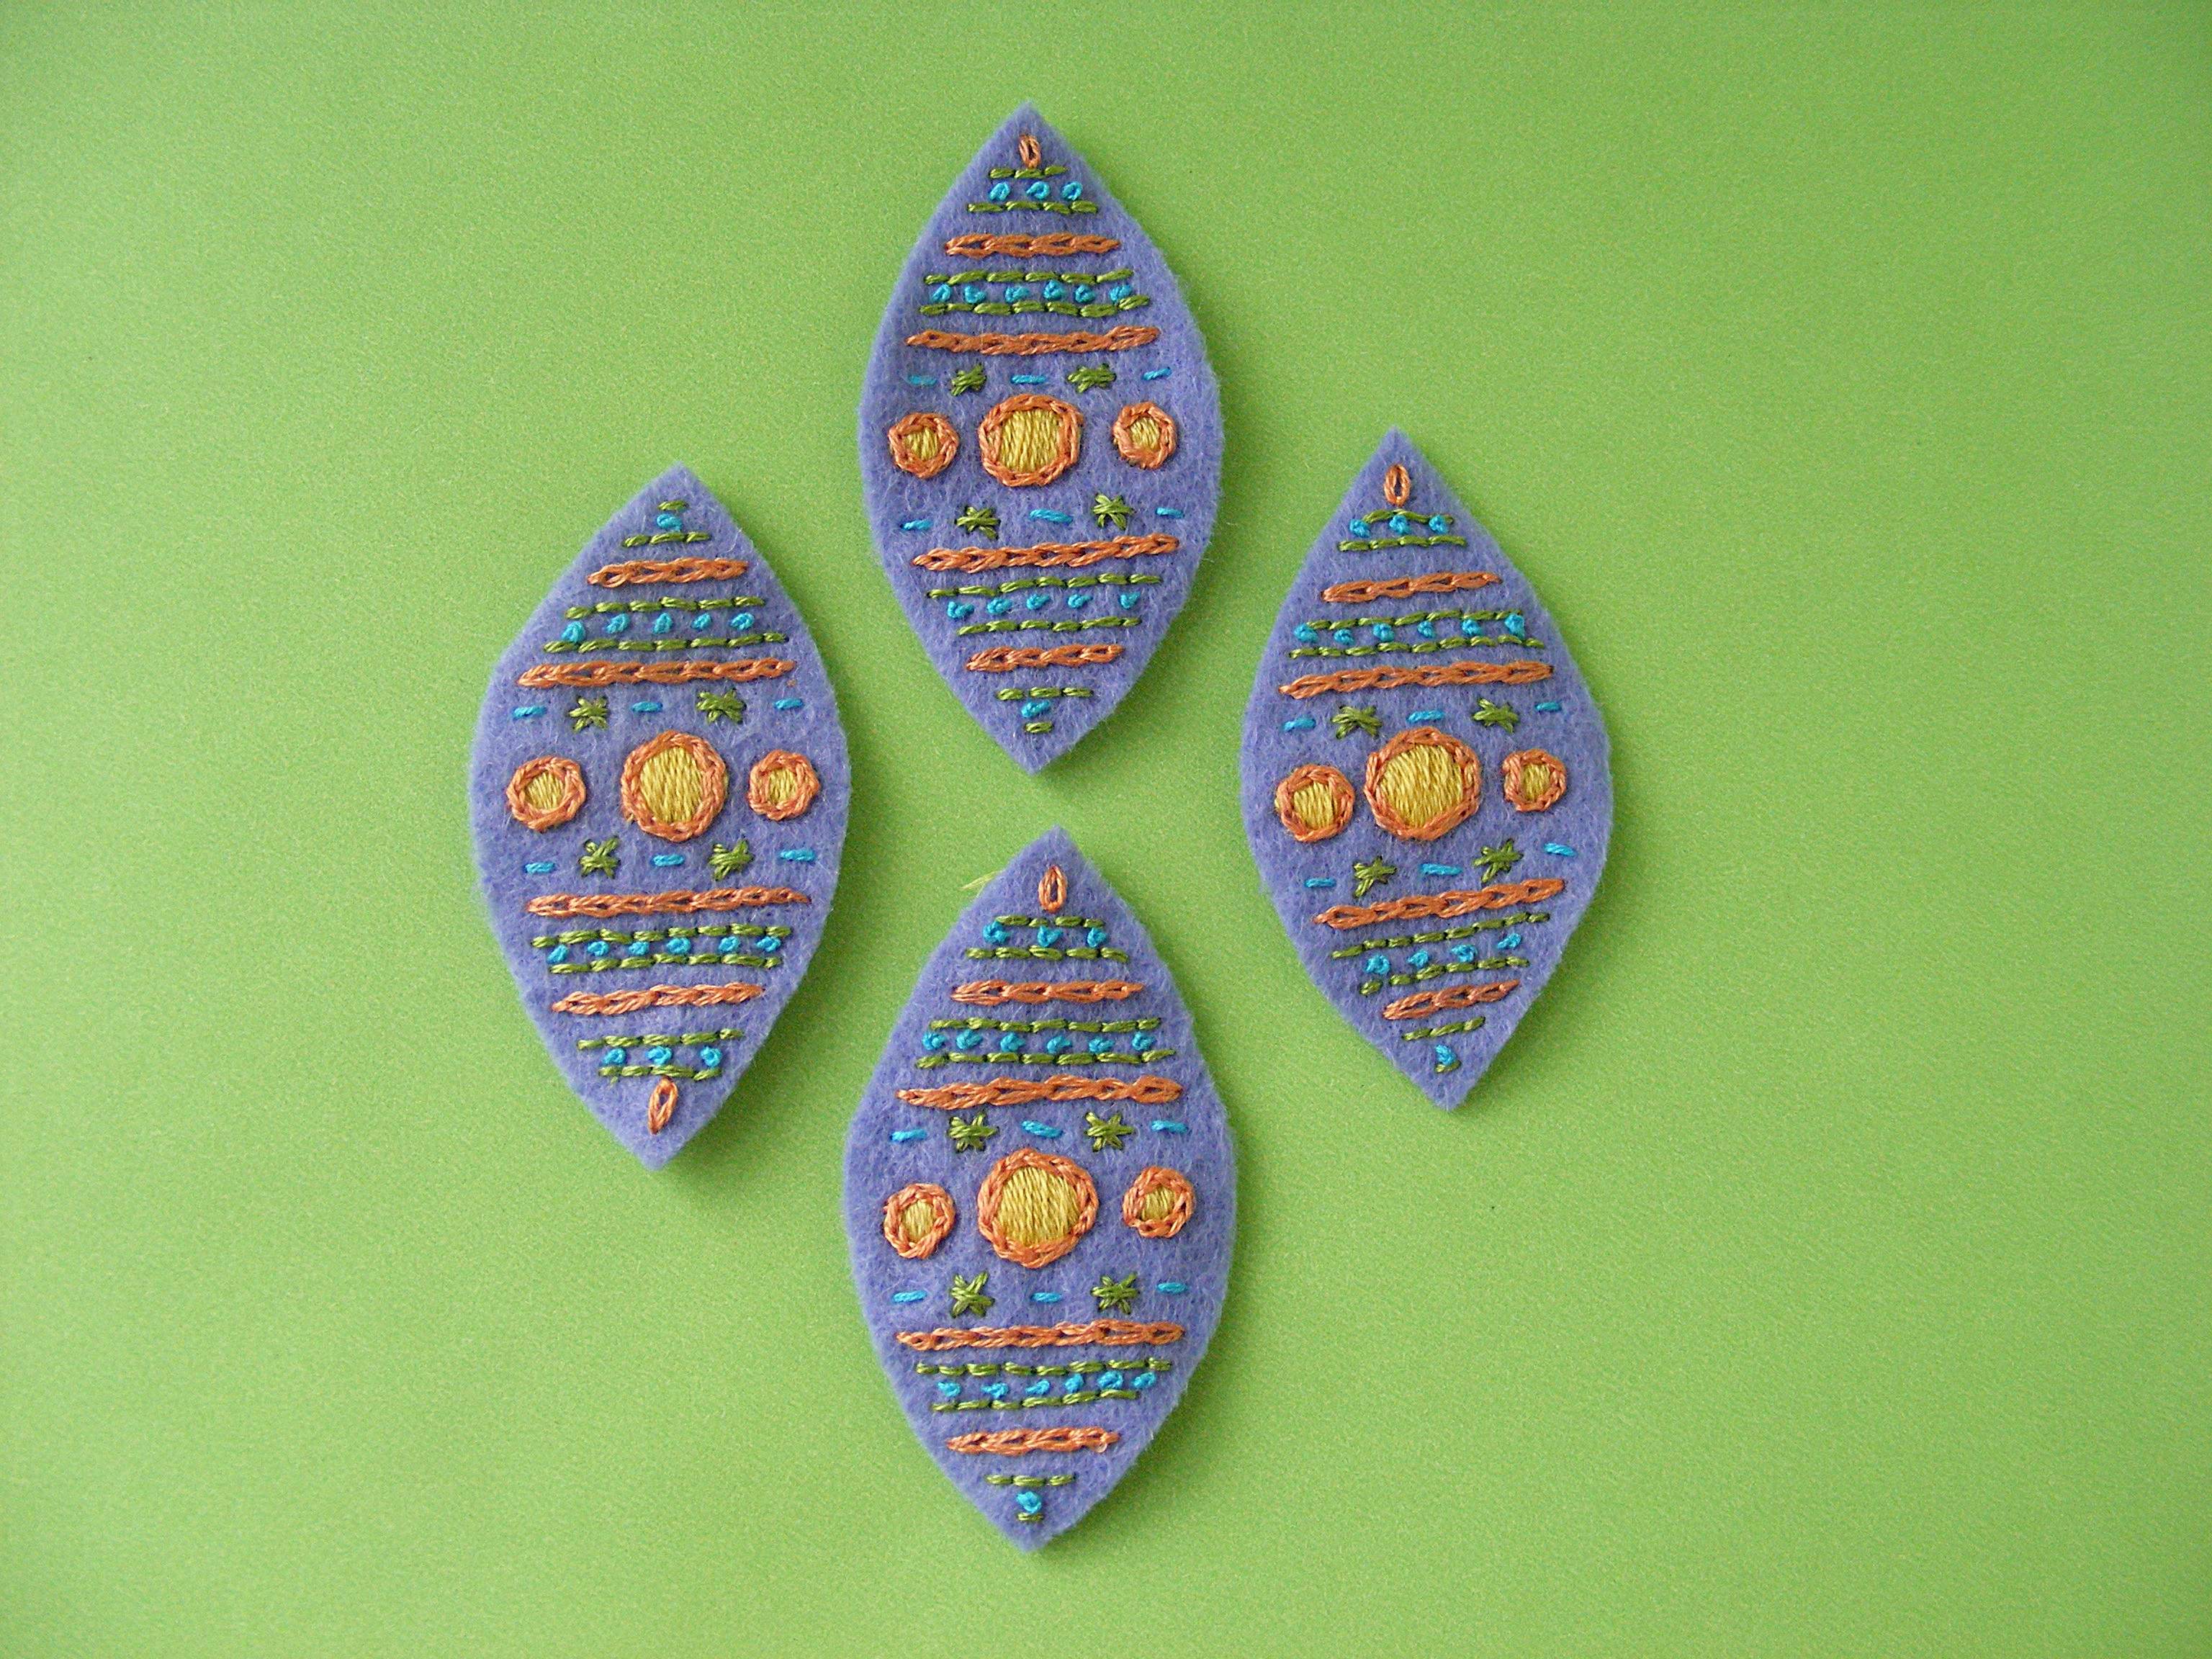
Now it’s time to make that fancy Easter egg.
You’ll need. . .
- scraps of wool felt
- matching embroidery thread
- contrasting embroidery thread
- small bit of fiberfill stuffing
- Sulky Sticky Fabri-solvy
I used Periwinkle felt for the egg and matching thread DMC #156 to sew the pieces together.
Step 1
Trace or print the Easter egg pattern to some Sulky Sticky Fabri-solvy and stitch. You’ll be stitching right through the stabilizer AND the felt.
These are the thread colors (two strands throughout) and stitches I used - you should use whatever makes YOU happy. :-) All links go to video tutorials teaching the stitches.
Satin stitch the large circles in DMC #726.
Chain stitch all fat lines (including around circles) with DMC #722.
Use the same color to stitch the lazy daisy at one end of the egg.
Backstitch narrow lines and stitch stars with DMC #704.
French knots and running stitches between stars with DMC #3845.
Step 2
Cut around the edges of the egg pieces, soak off the Sulky Sticky Fabri-solvy in cold water. I usually drop the pieces face down in a bowl of water, let them soak for 15 minutes or so (longer is just fine – I often forget about them and fish them out hours later) and then rinse off the soggy stabilizer under cold running water. If there are any stubborn bits, a quick hit with the kitchen sprayer usually does the trick.
Lay them out on a towel to dry. Don’t wring, twist, or even smoosh them. Just let them dry.
Step 3
Whipstitch all the pieces together. I like to sew two pieces together, then sew two more pieces together, then join the pairs as the final step.

I made the design slightly different at the top and bottom so you could easily tell them apart. 🙂 Make sure all the single French knots are together at the bottom of the egg and the single lazy daisies are together at the top.
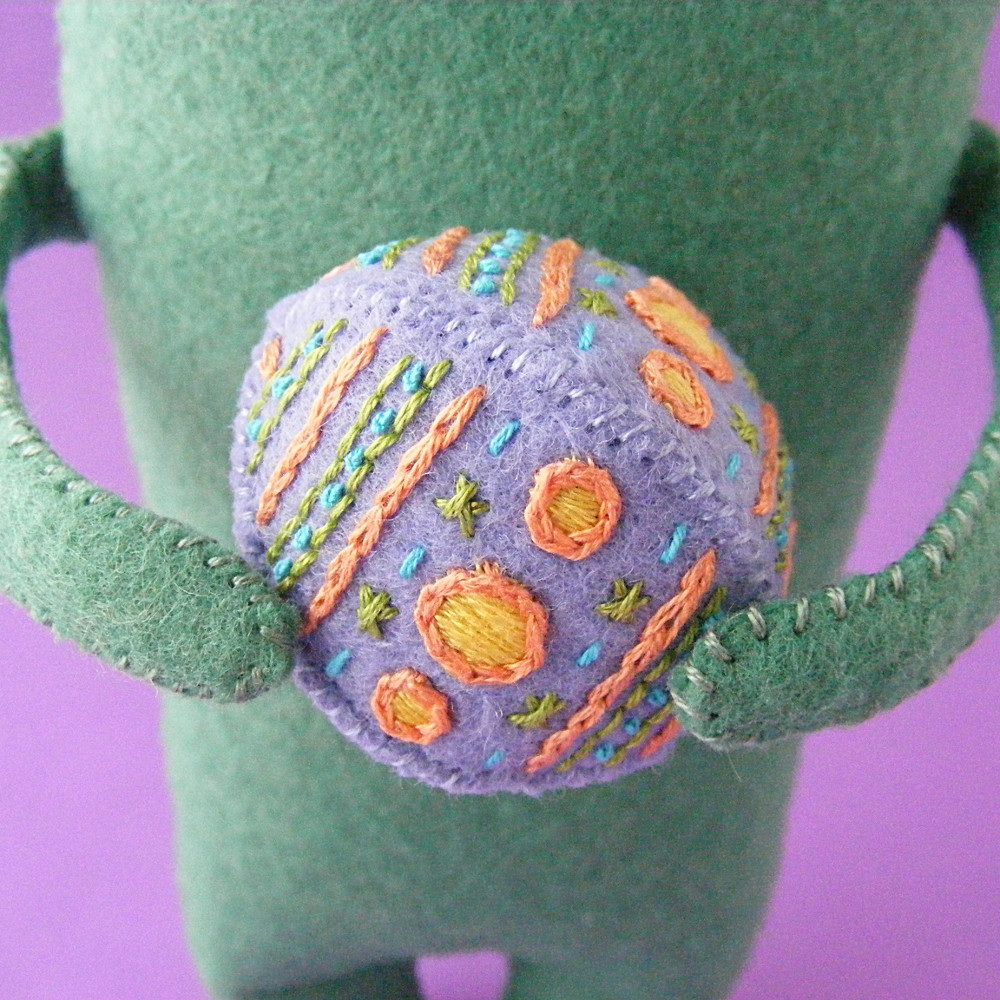
Done!
Even if you don’t play with dolls, it would be so pretty to make up a little basket and fill it with some of these tiny stitched eggs. 🙂
Happy stitching!


Play with some felt! Try the Oddballs – a fun pattern for silly monsters.
Your “oddball is so cute (with and without the bunny ears). Your “oddball” link is broken though. 🙁
Thanks so much for letting me know! I fixed it. 🙂
Simply beautiful. Thank you for sharing. You are a clever lady