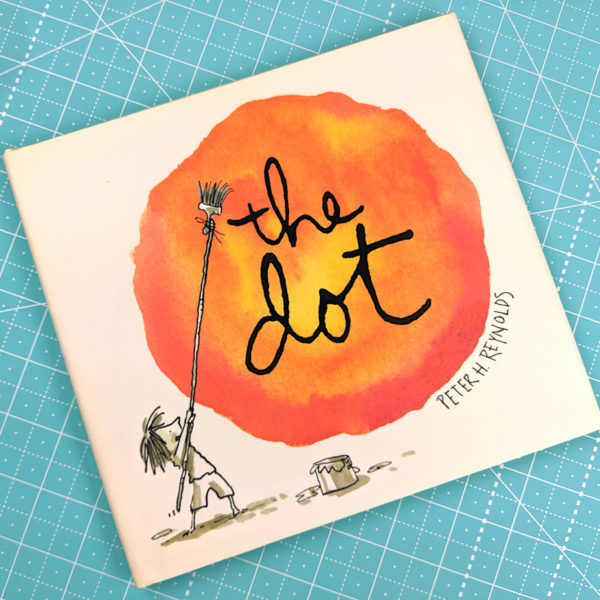
That’s one of my favorite lines from my very favorite book about creativity – THE DOT by Peter Reynolds. (That’s an affiliate link.)
It’s also the inspiration behind the start of my creative practice for the new year – and I’m inviting you to join me in this 31-day challenge.
Make a dot!
Make a dot every day in January and see where it takes you. Use a different medium every day – or use this as an opportunity to explore one medium you’ve always wanted to try (or get better at).
You can do anything! Crayons! Pastels! Paint! Collage! Embroider! Applique! Clay! Photography! Jewelry!
If you’re looking for some inspiration, here are a few links for you.
The Dot by Peter Reynolds – seriously my favorite book about one girl’s path from “I just can’t draw” to “I am an artist.” It makes me teary every time.
If you’re an Amazon Prime member you can watch a lovely animated version of the story here.
What the heck – get the whole “Creatrilogy” from Peter Reynolds – three books about creativity, the beauty of imperfection, and creative inspiration.
Start with a Dot – a guided journal with all kinds of fun prompts “whether you’re a timid beginner or a seasoned artist who needs a creative jolt to keep fresh and recharge.”
I have a Pinterest board here jam-packed full of gorgeous circles, ovals, and scallops.
I can’t wait to see what everyone makes. There are soooooo many possibilities in a simple dot!
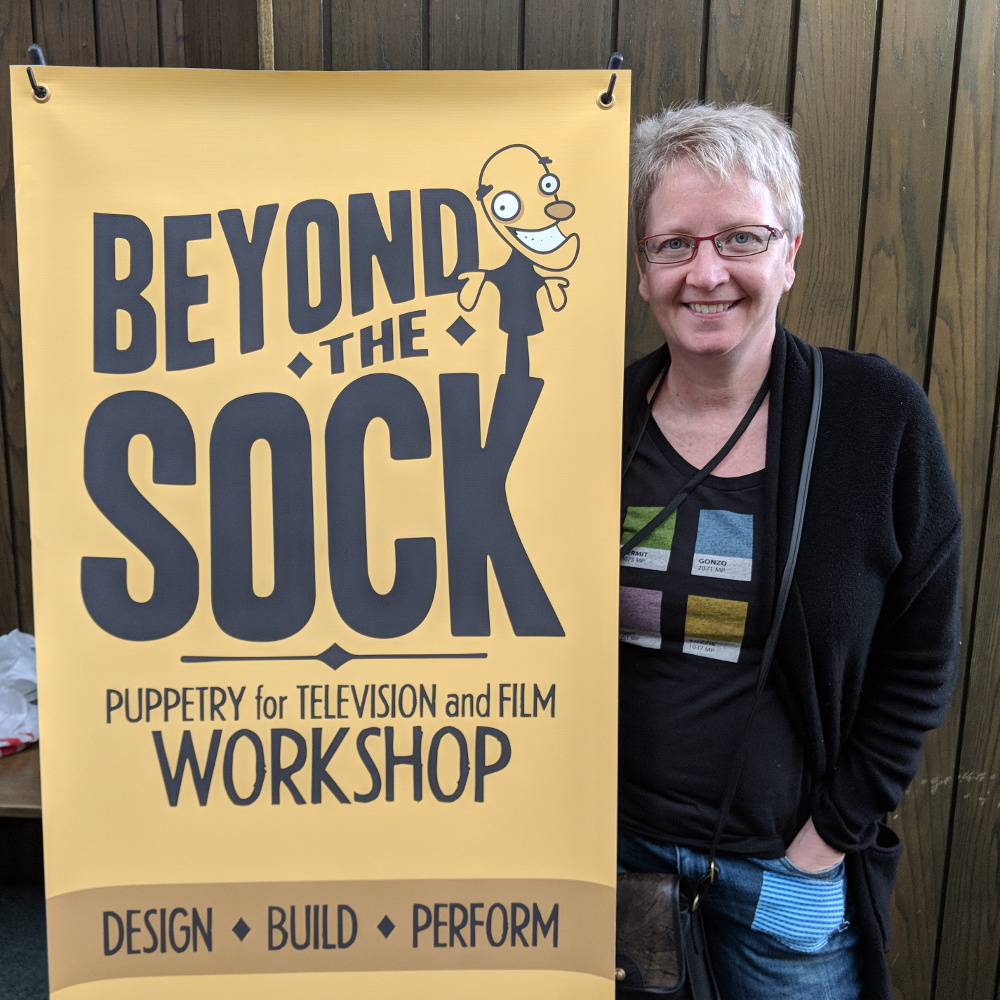
My husband and I went to the Beyond the Sock Puppetry Workshop where we spent a week learning how to make – and perform – hand and rod puppets.
So! Much! Fun!
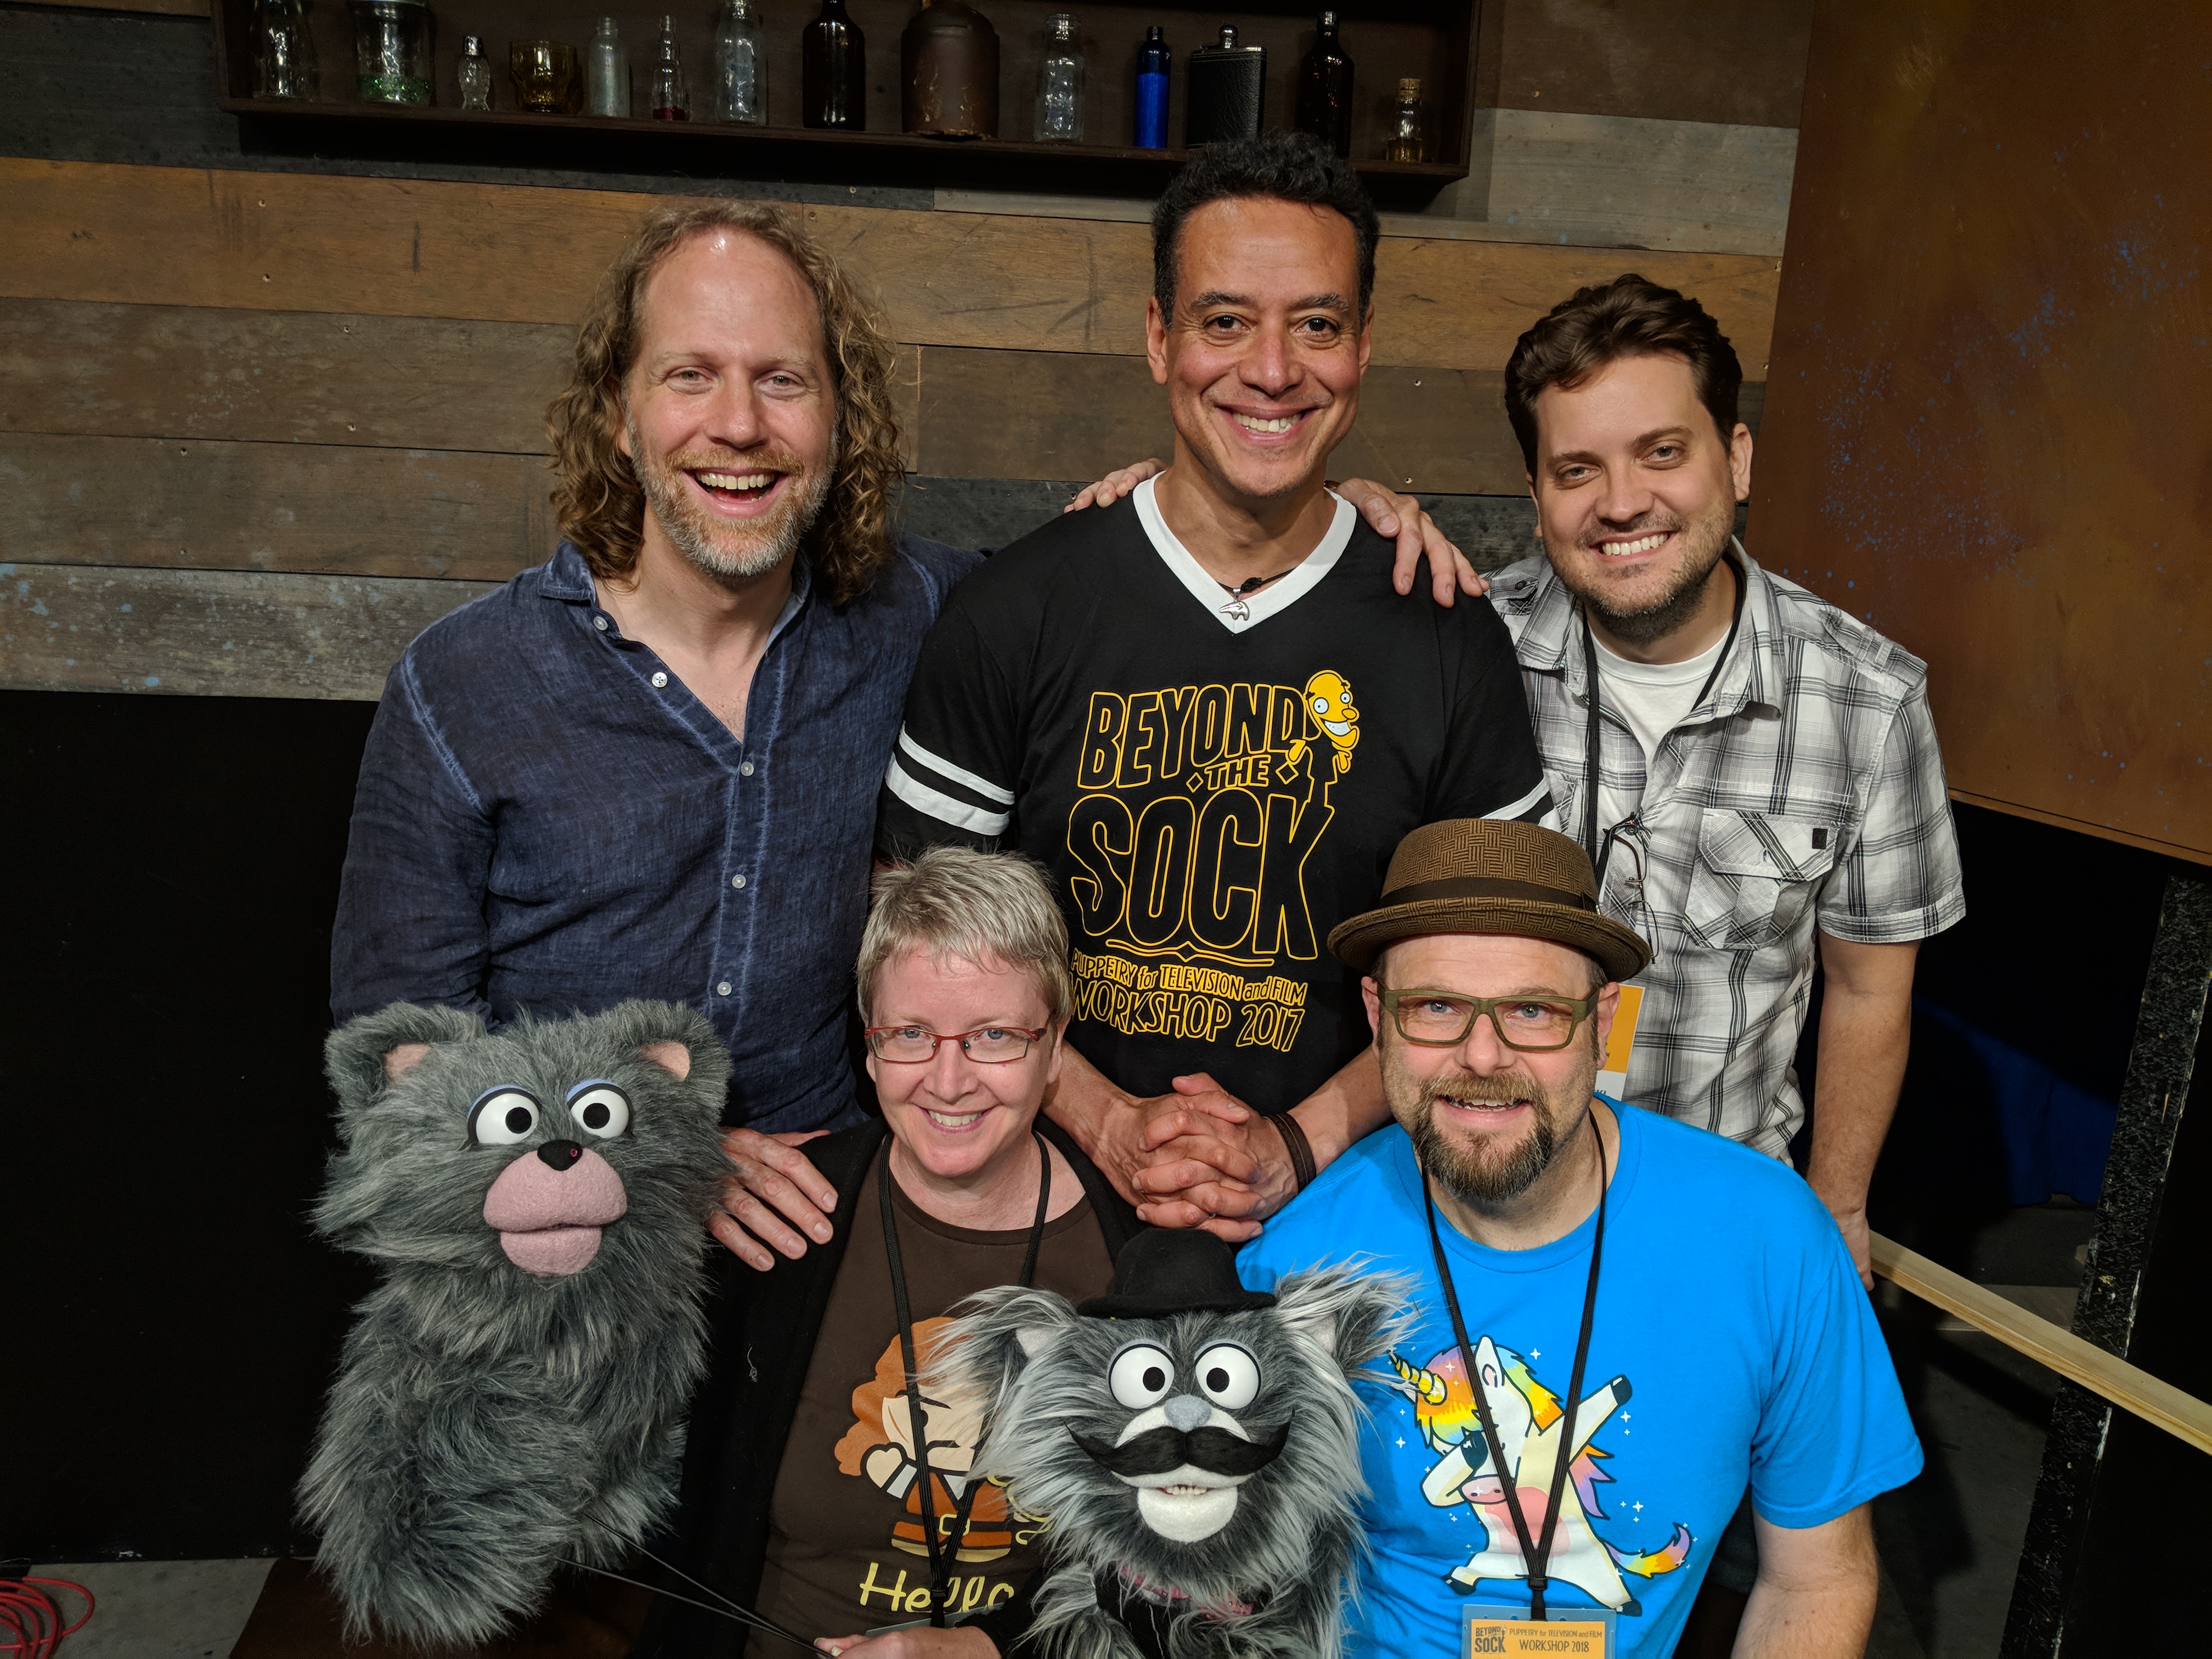
Here we are with our instructors (and our finished puppets).
From left to right that’s Peter Linz, Noel MacNeal (both puppeteers for Sesame Street and lots of other shows/movies) and Pasha Romanowski (puppet-builder and pattern-designer extraordinaire).
What an incredible week! We spent every morning working on our puppets, and every afternoon learning how to perform them.
I’ll start with the making – the part that was definitely my happy place. 🙂
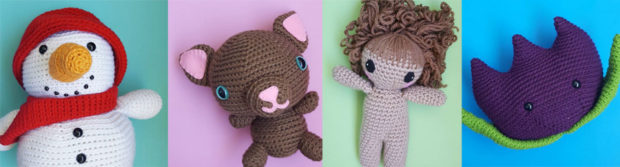
Everyone worked from the same pattern – which was a great way to learn. This year it was a cute cat. 🙂
Previous years have been rats, monkeys, chickens, penguins, and pirates.
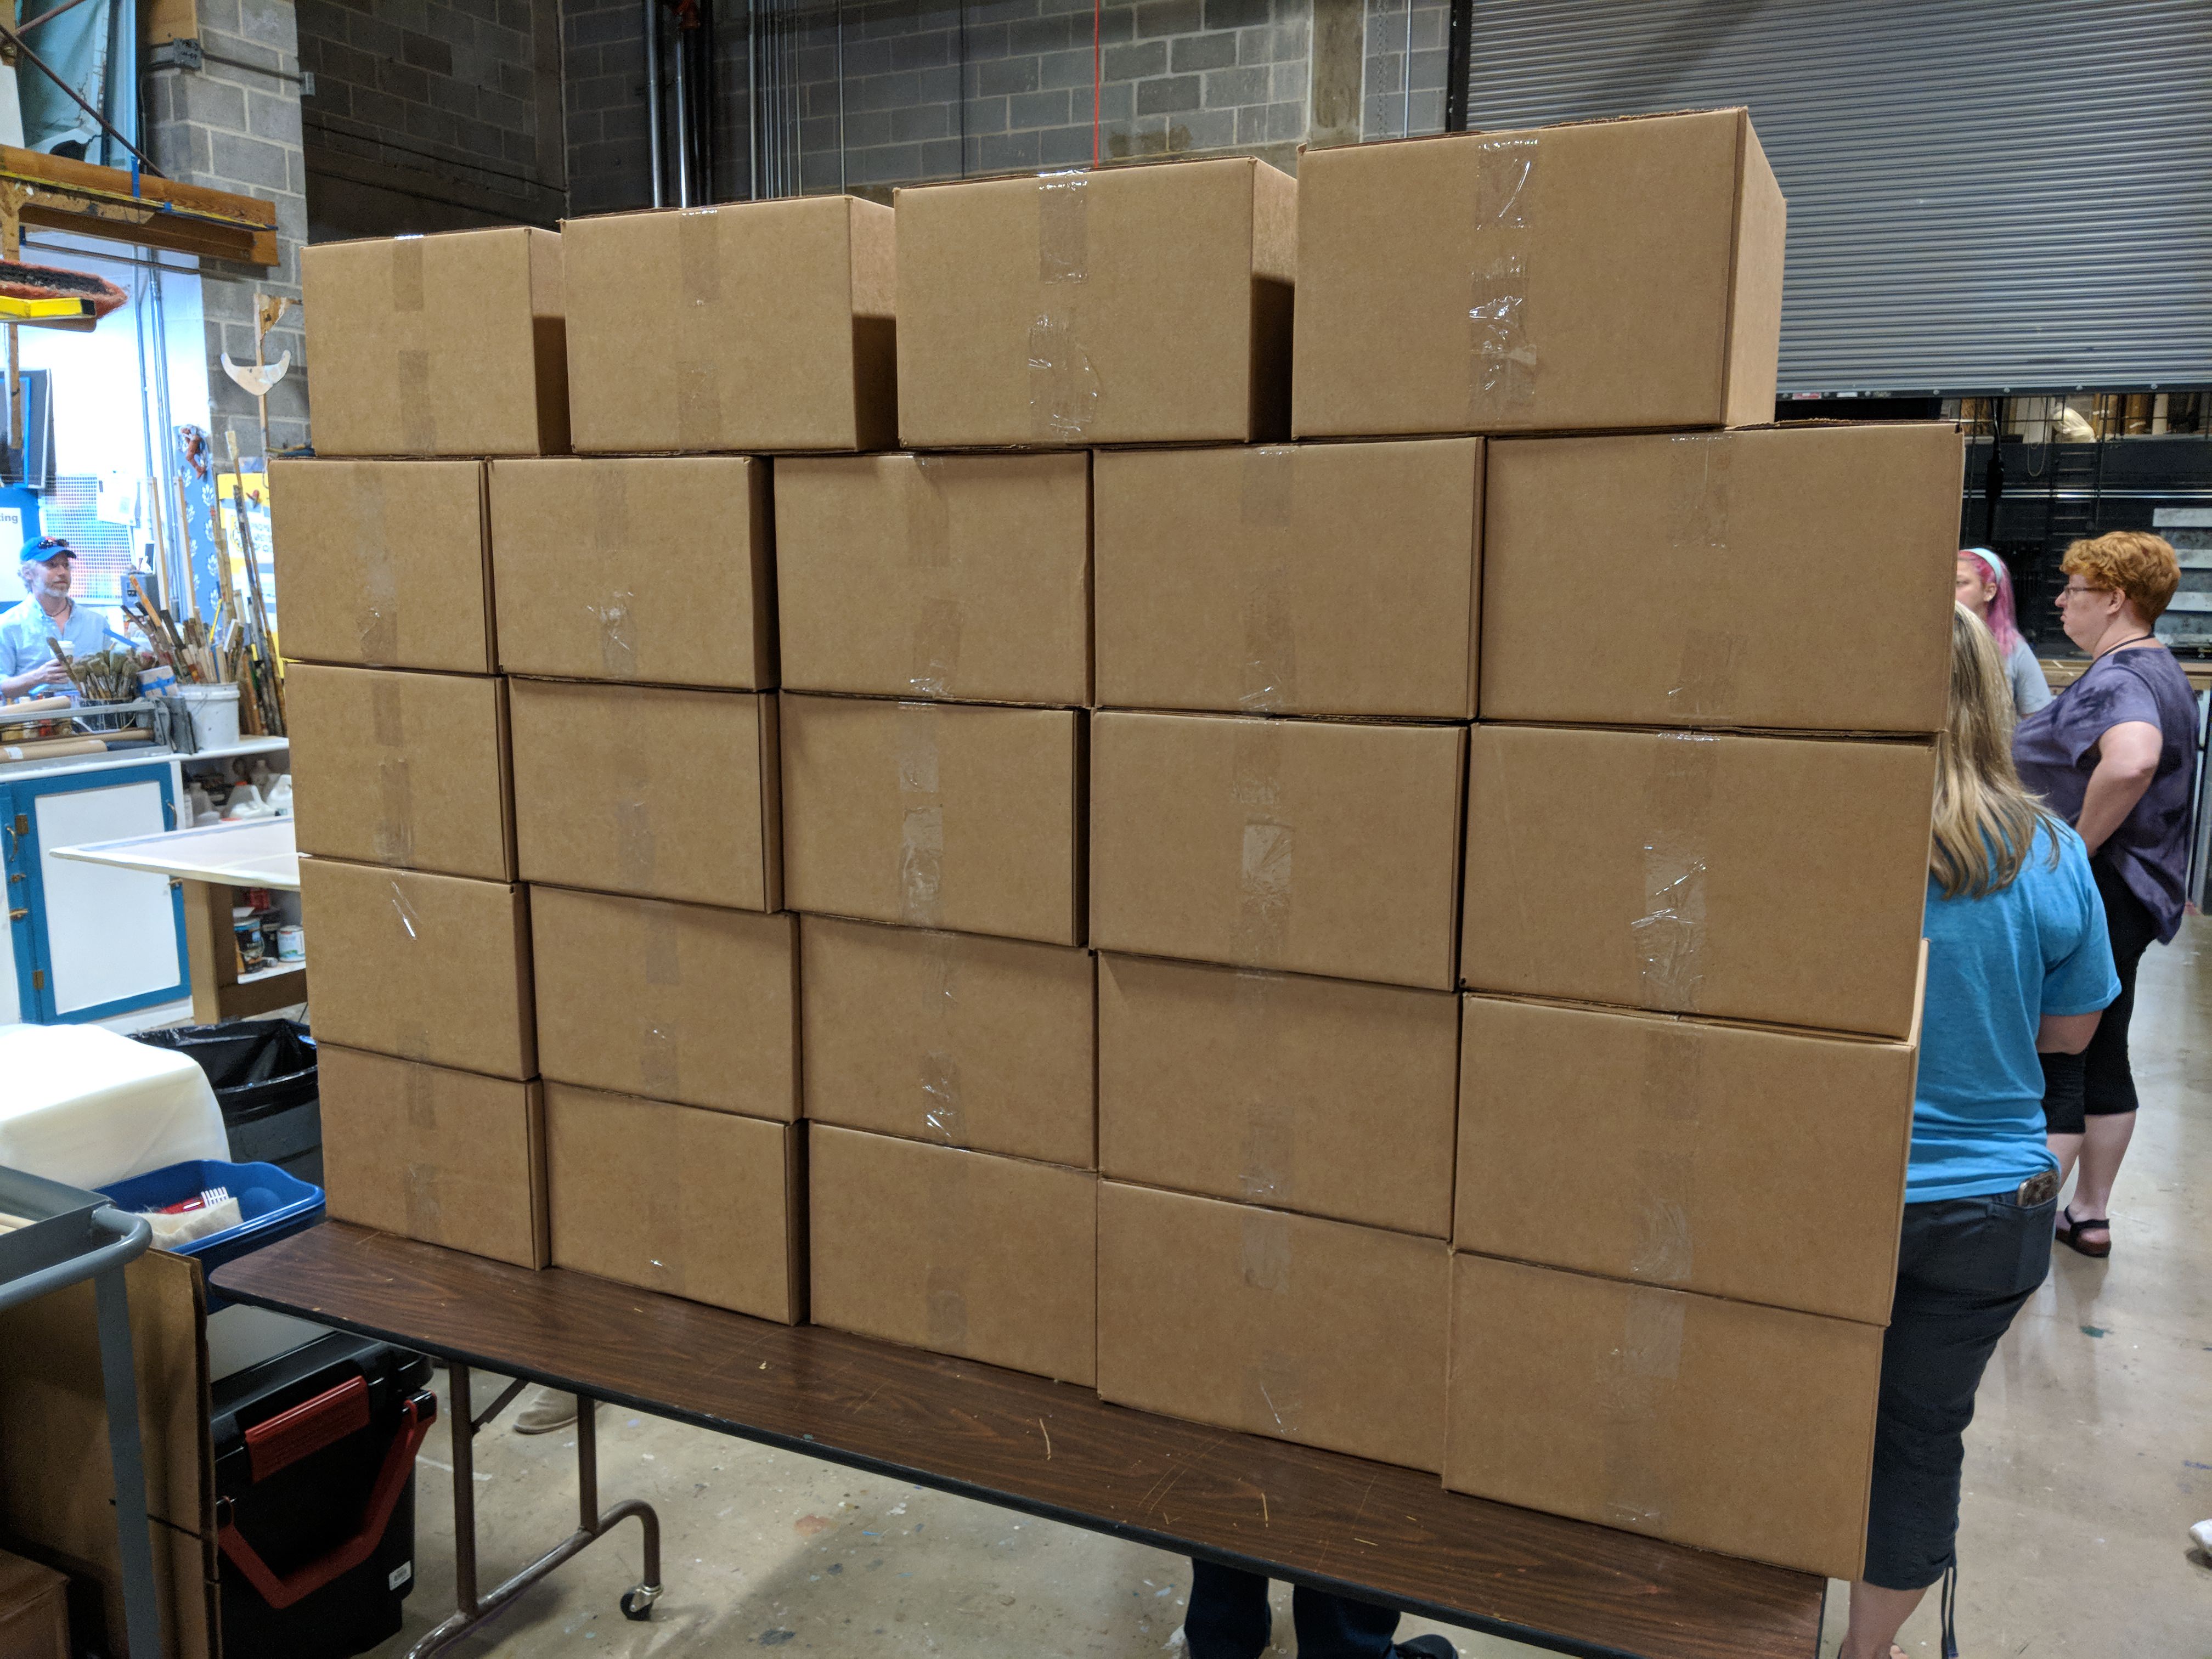
Even though we all worked from the same pattern, we all used different materials and ended up with wildly different puppets. And we didn’t get to choose our materials – we got mystery boxes like on Master Chef.
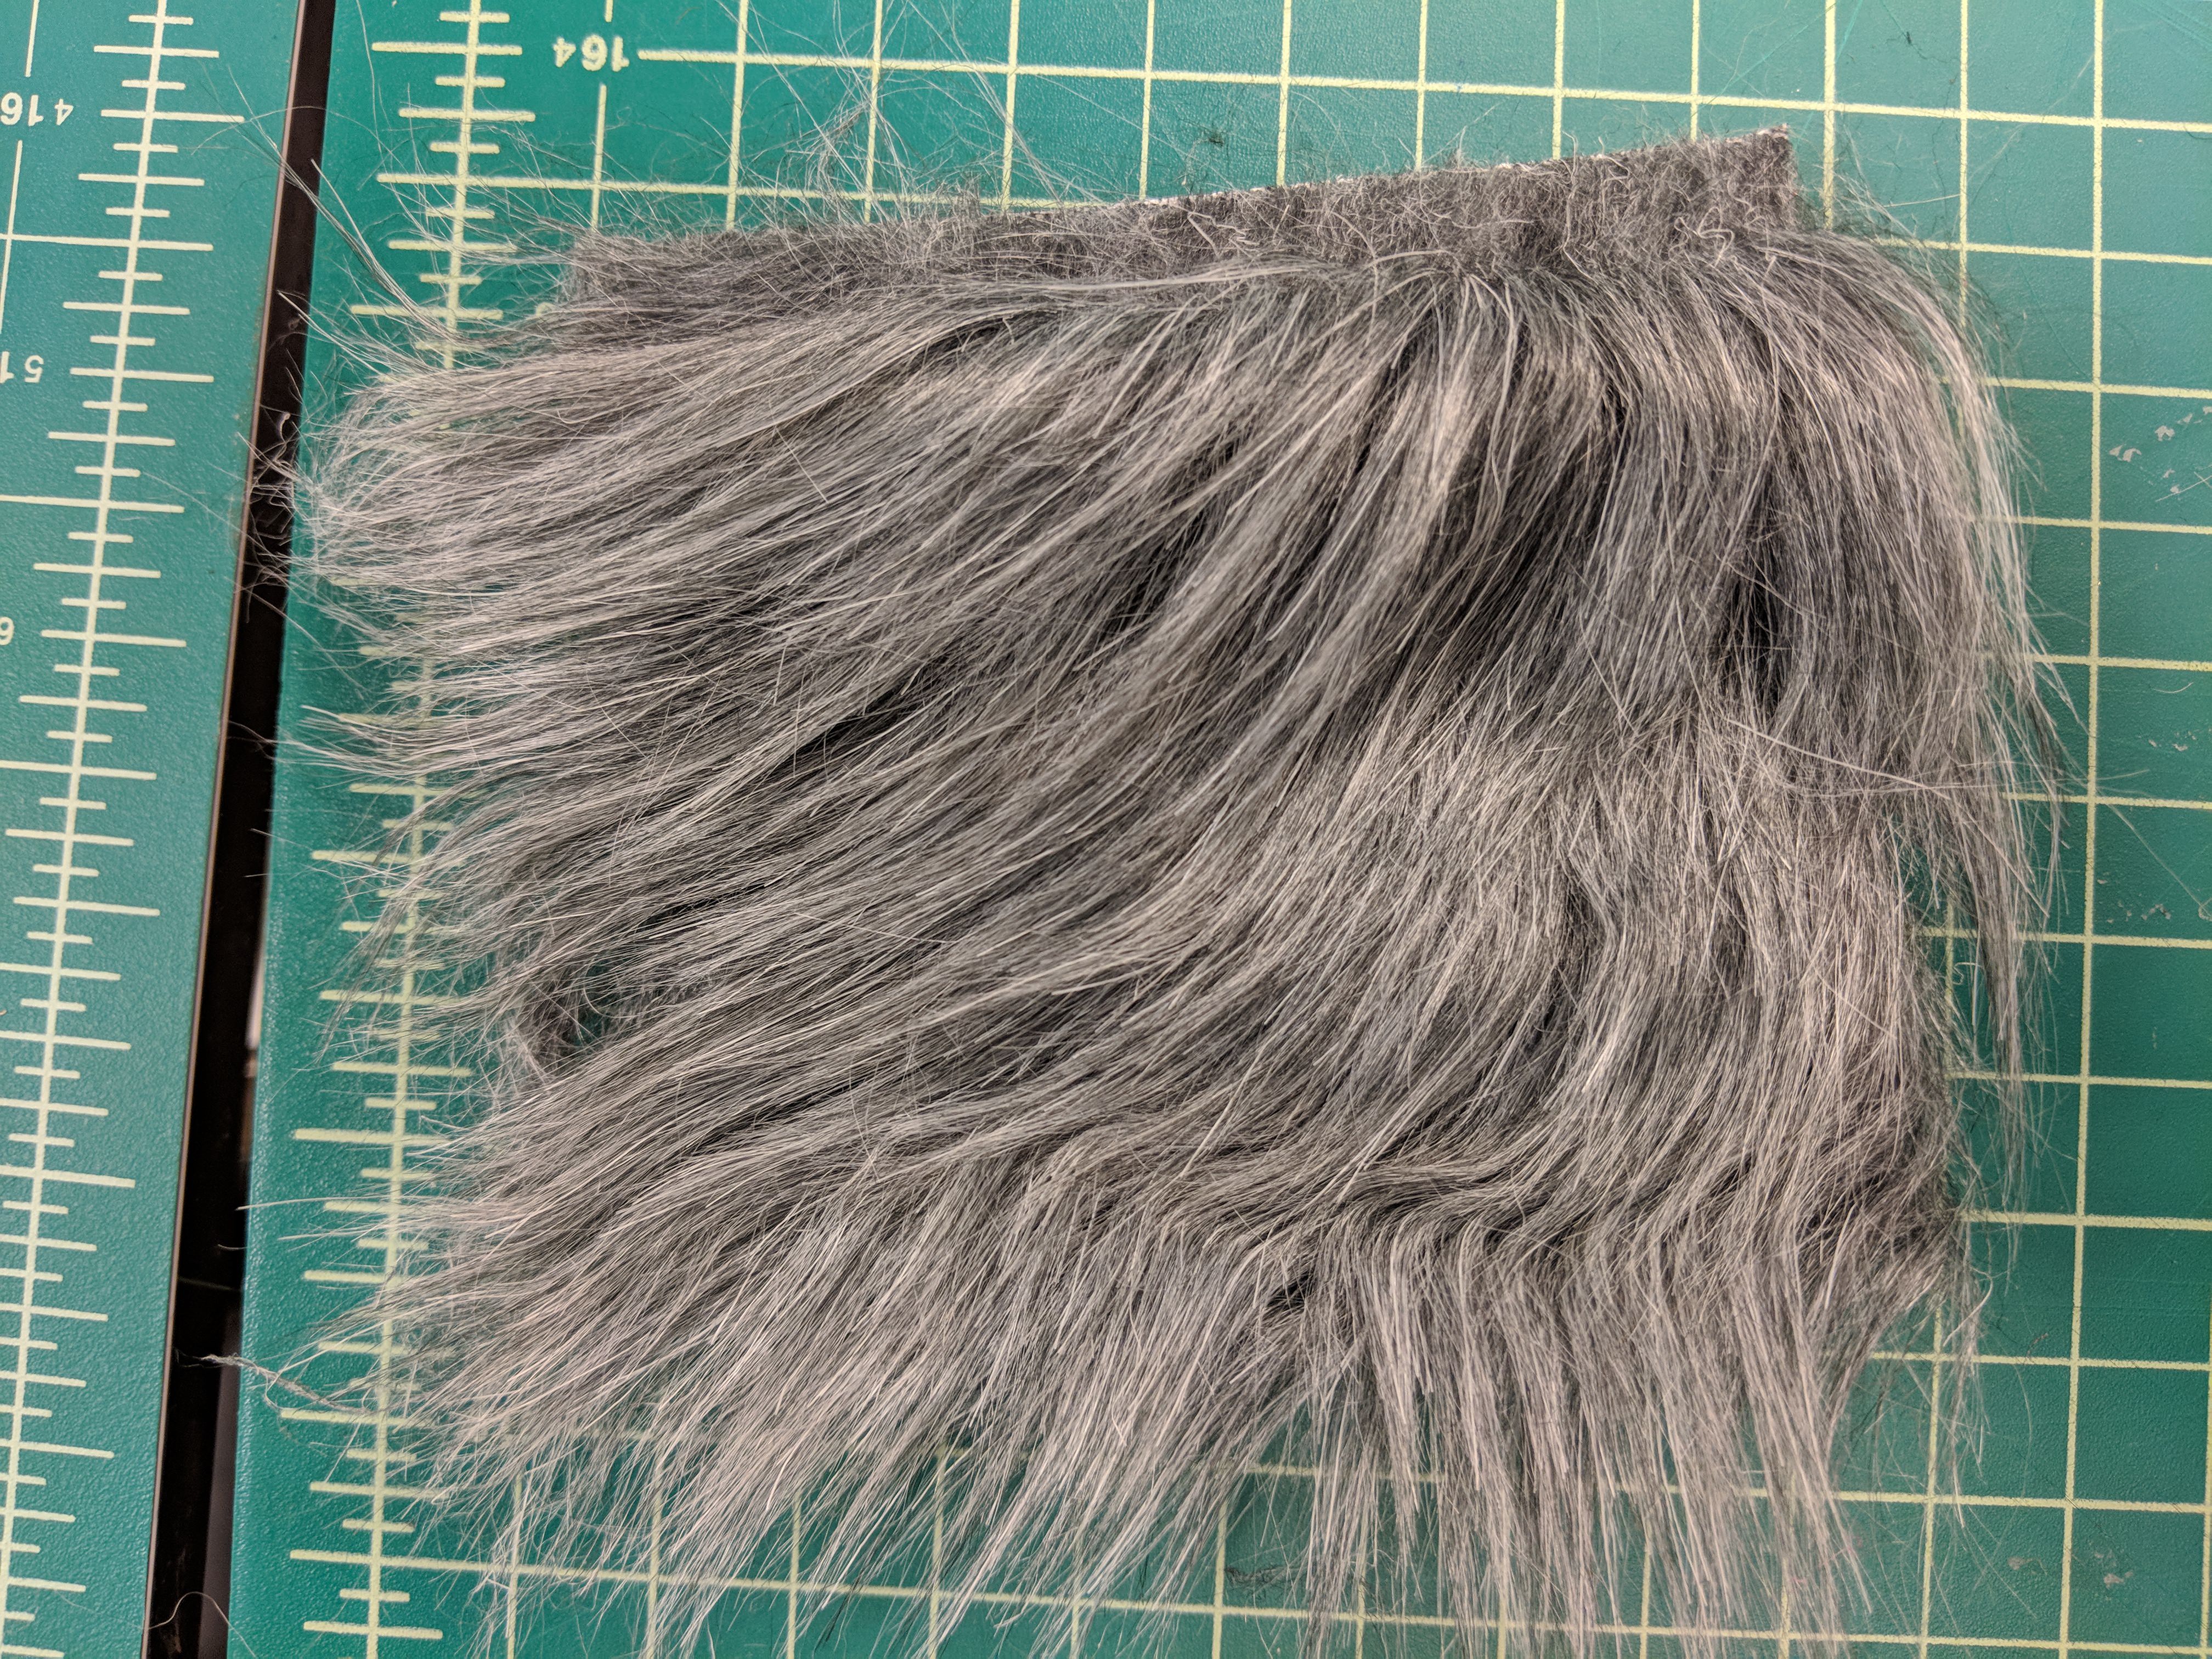
I got this really thick, lush, grey fur.
And the fur my husband got may look familiar to some of you!
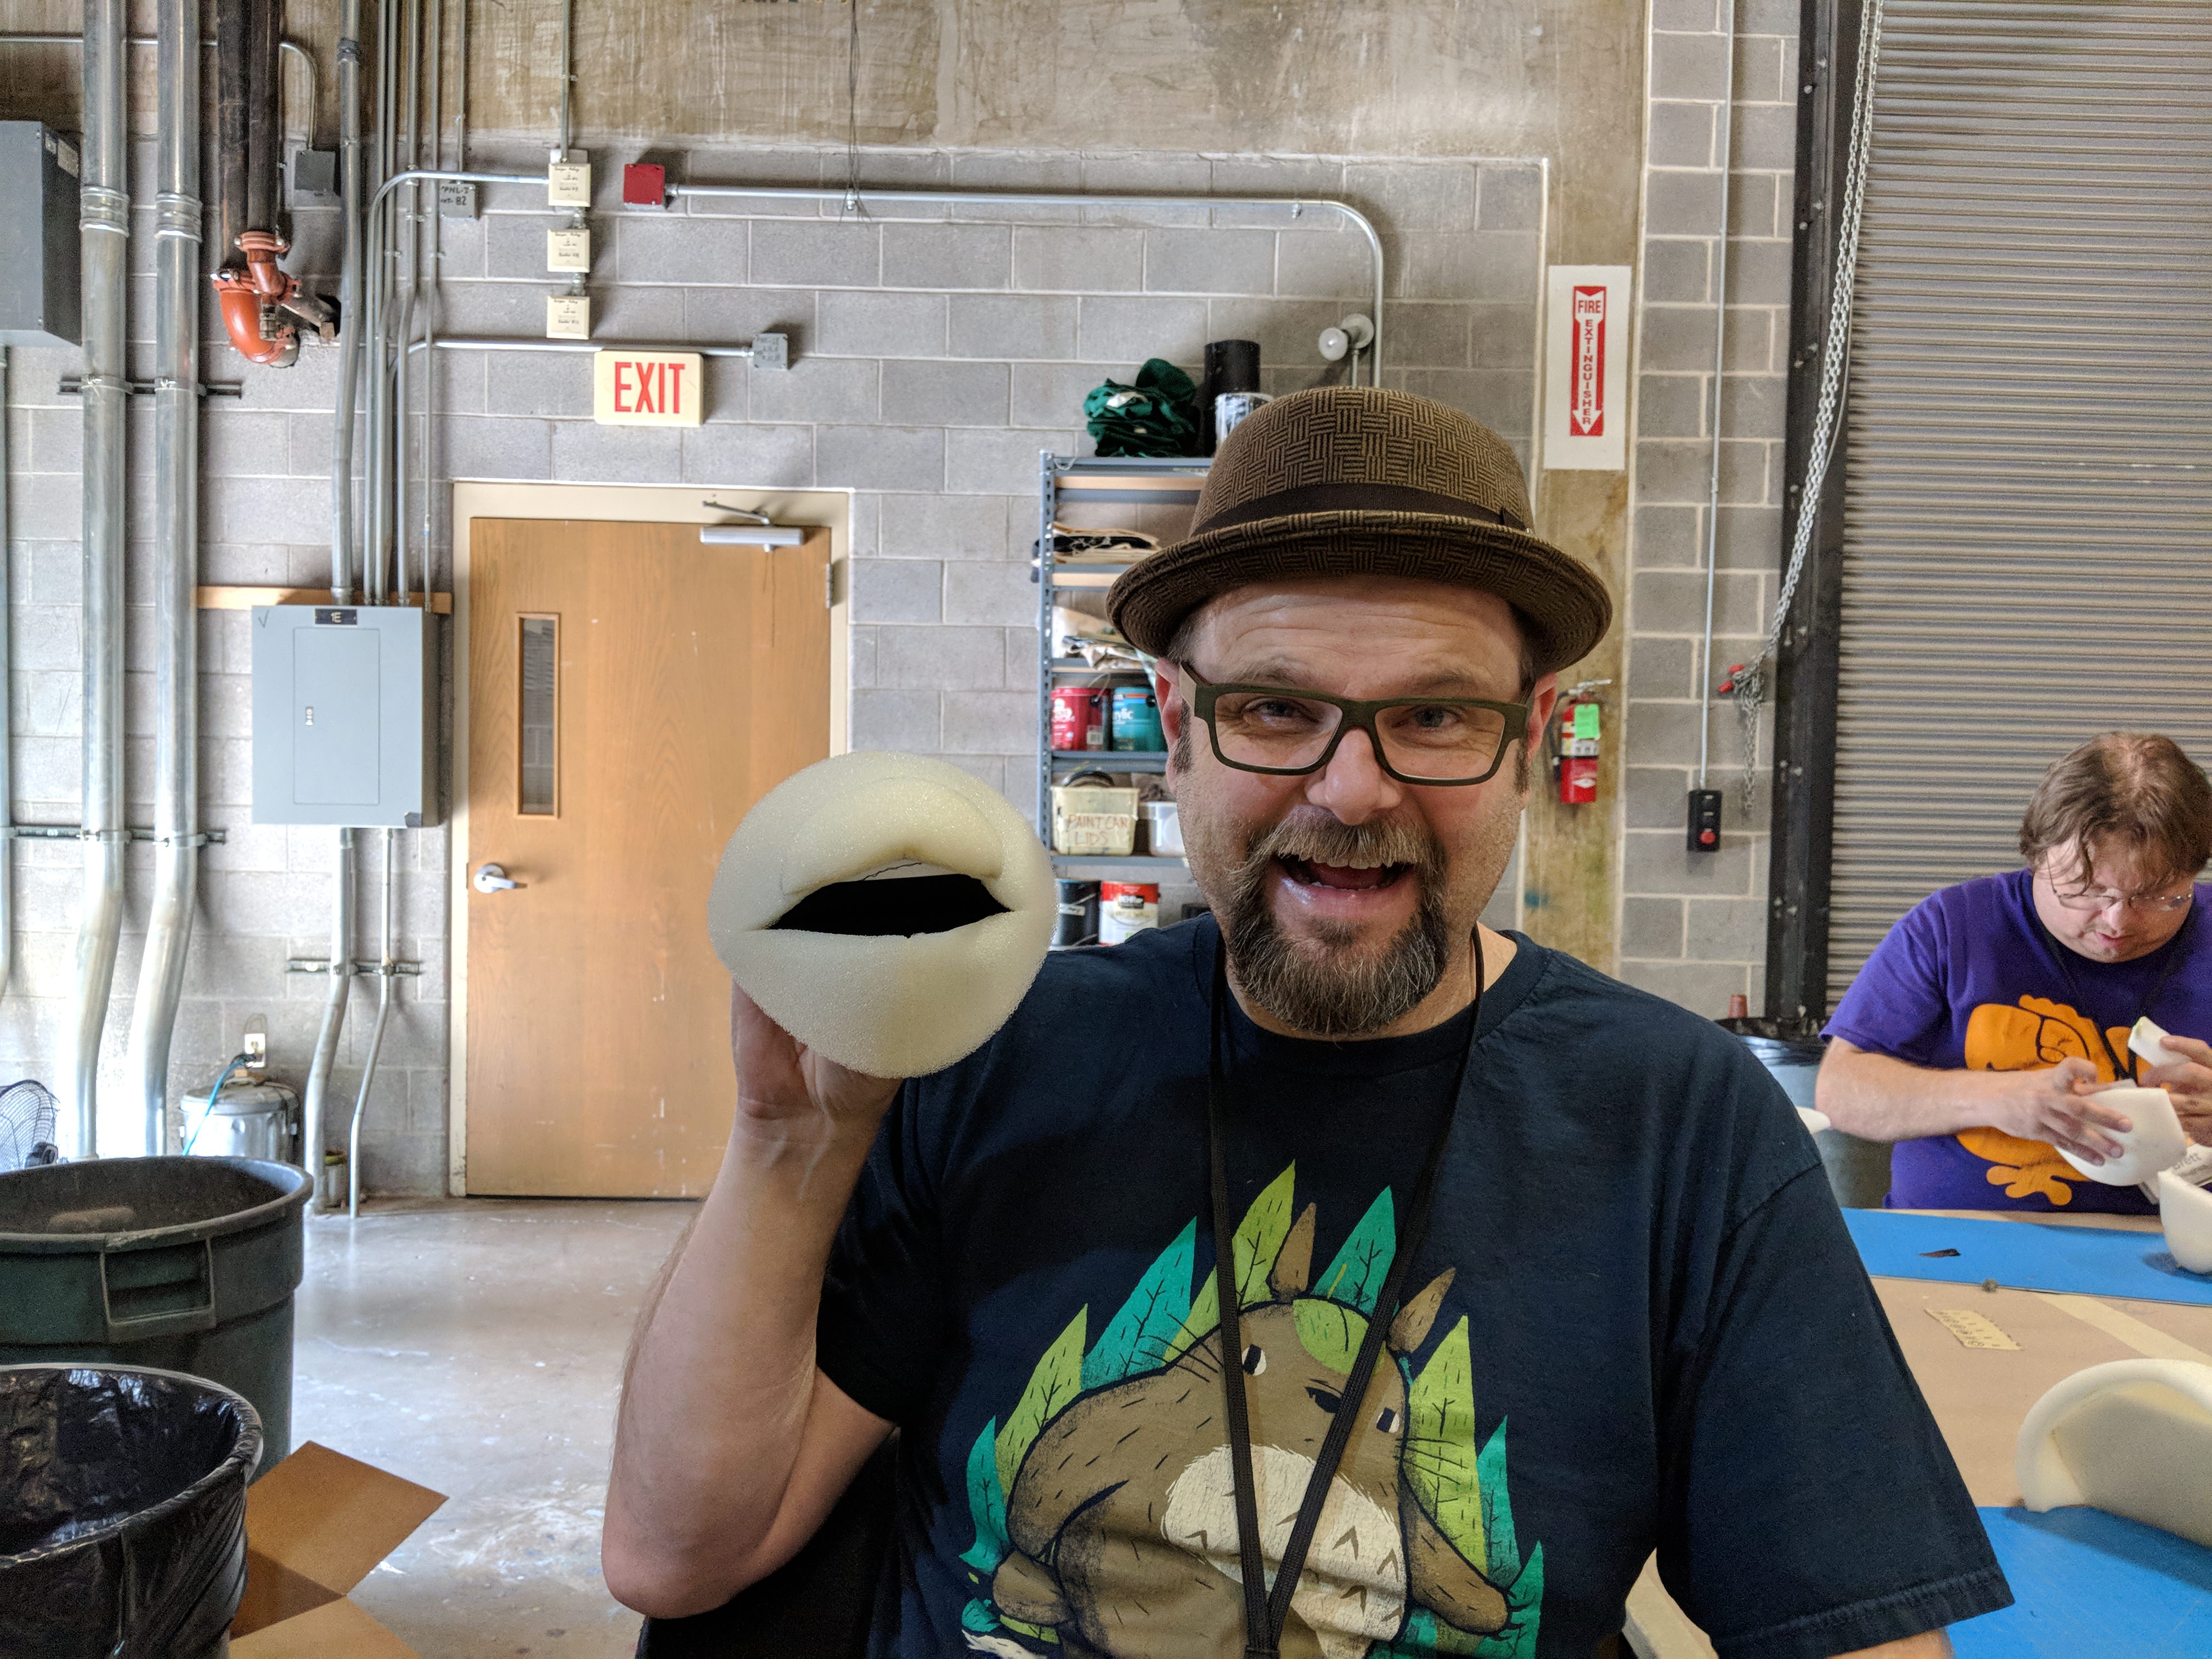
We built a foam structure, staring with the mouthplate and basically building out from there.
After the foam structure was finished, we sewed all the fur and everything into a skin and slipped it over the foam – a very tight fit!
Then it was time to add eyes and accessories and all that and I forgot to take pictures because I was totally engrossed. 😉
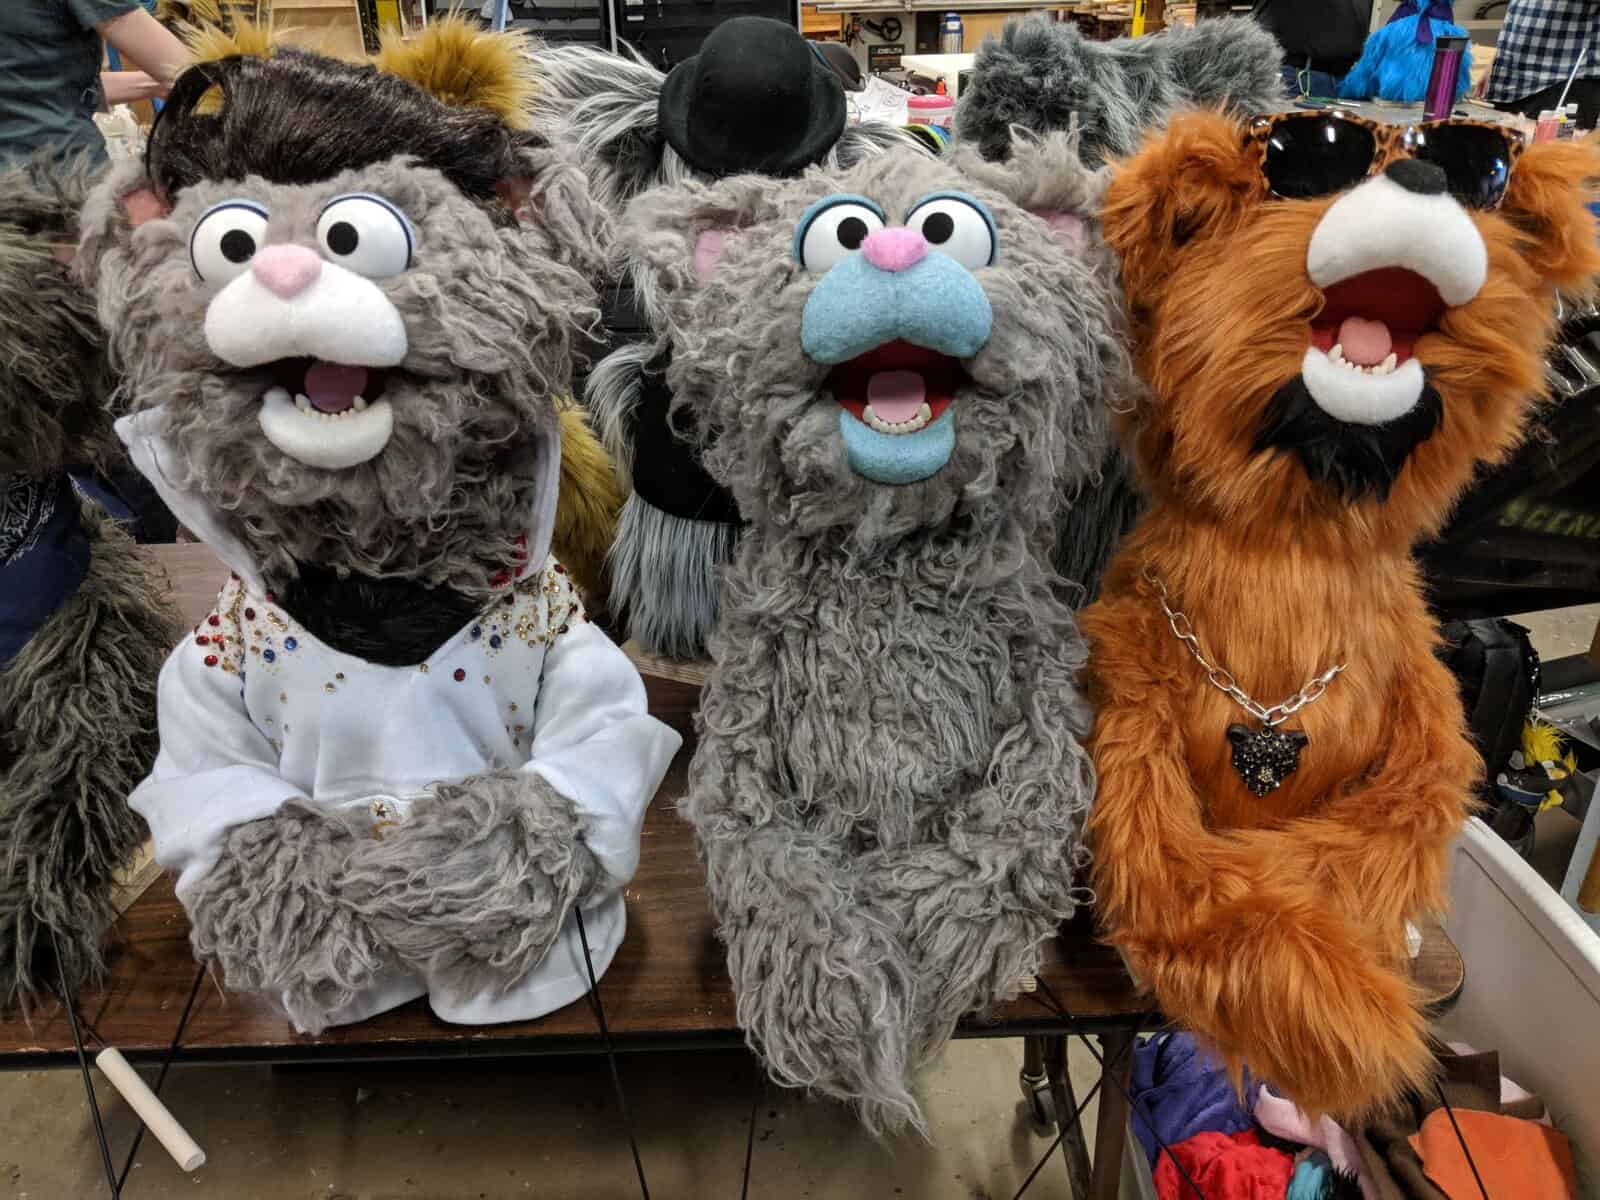
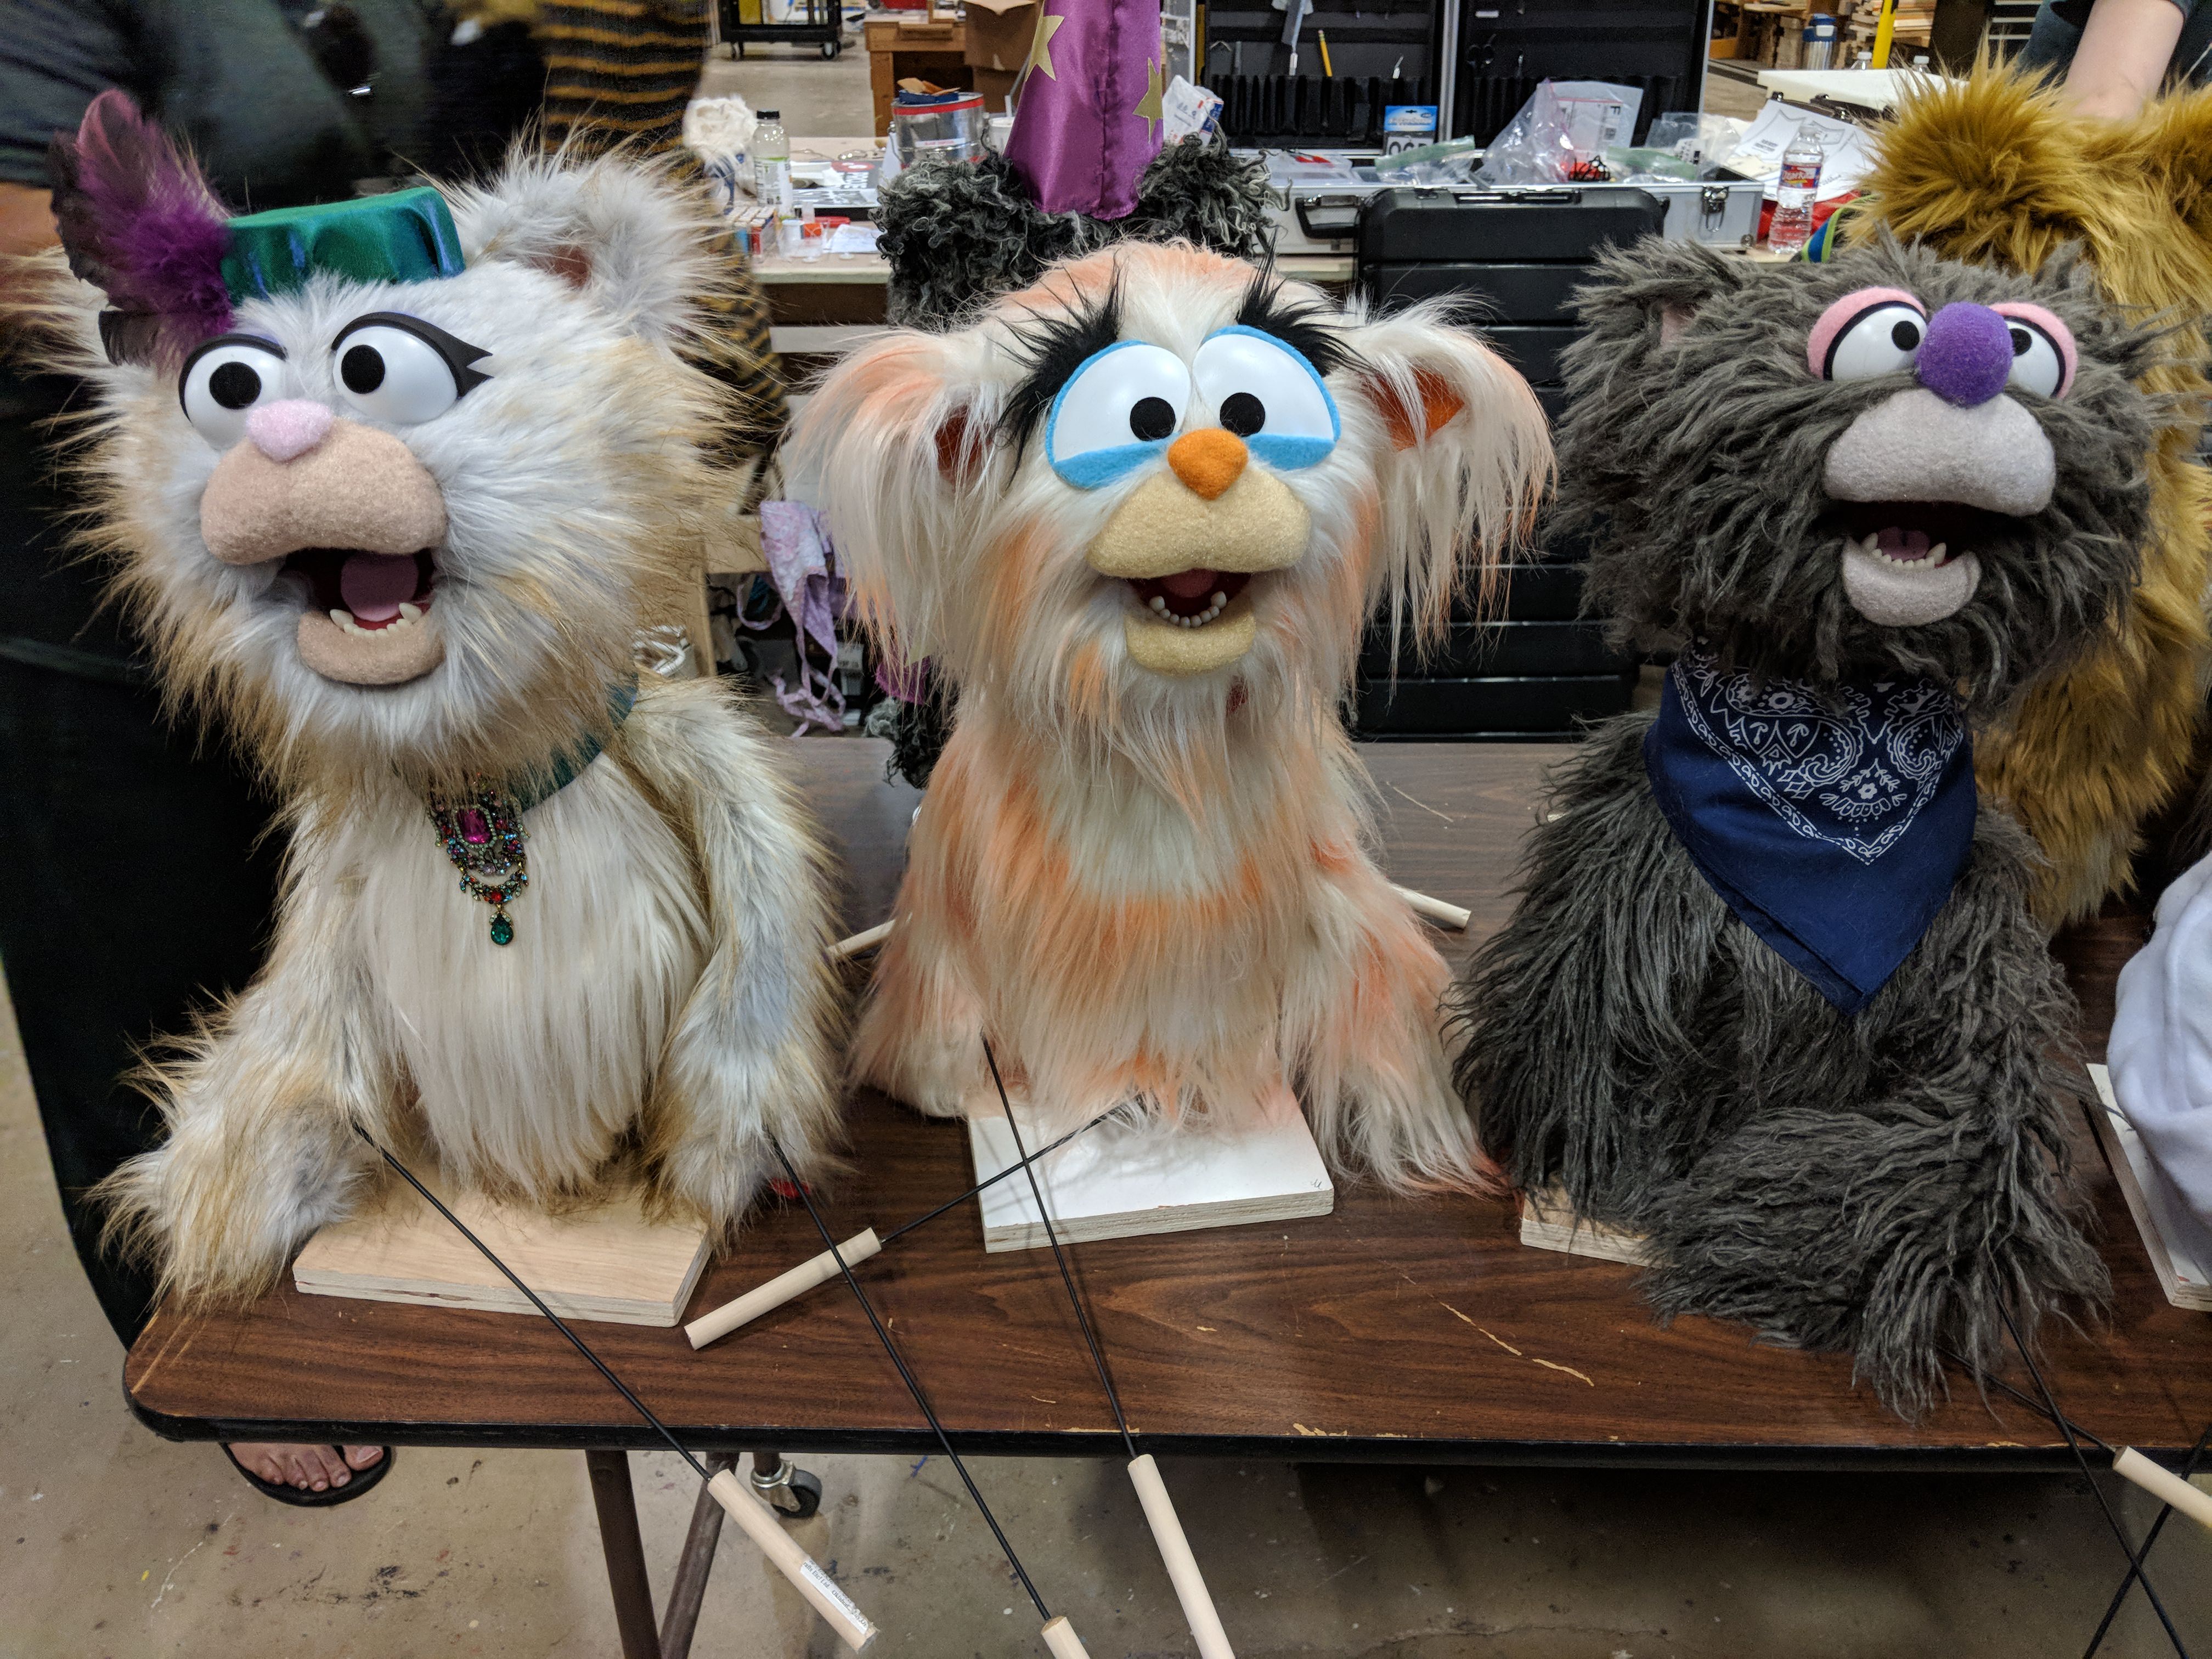
But take a look at some of the finished puppets!
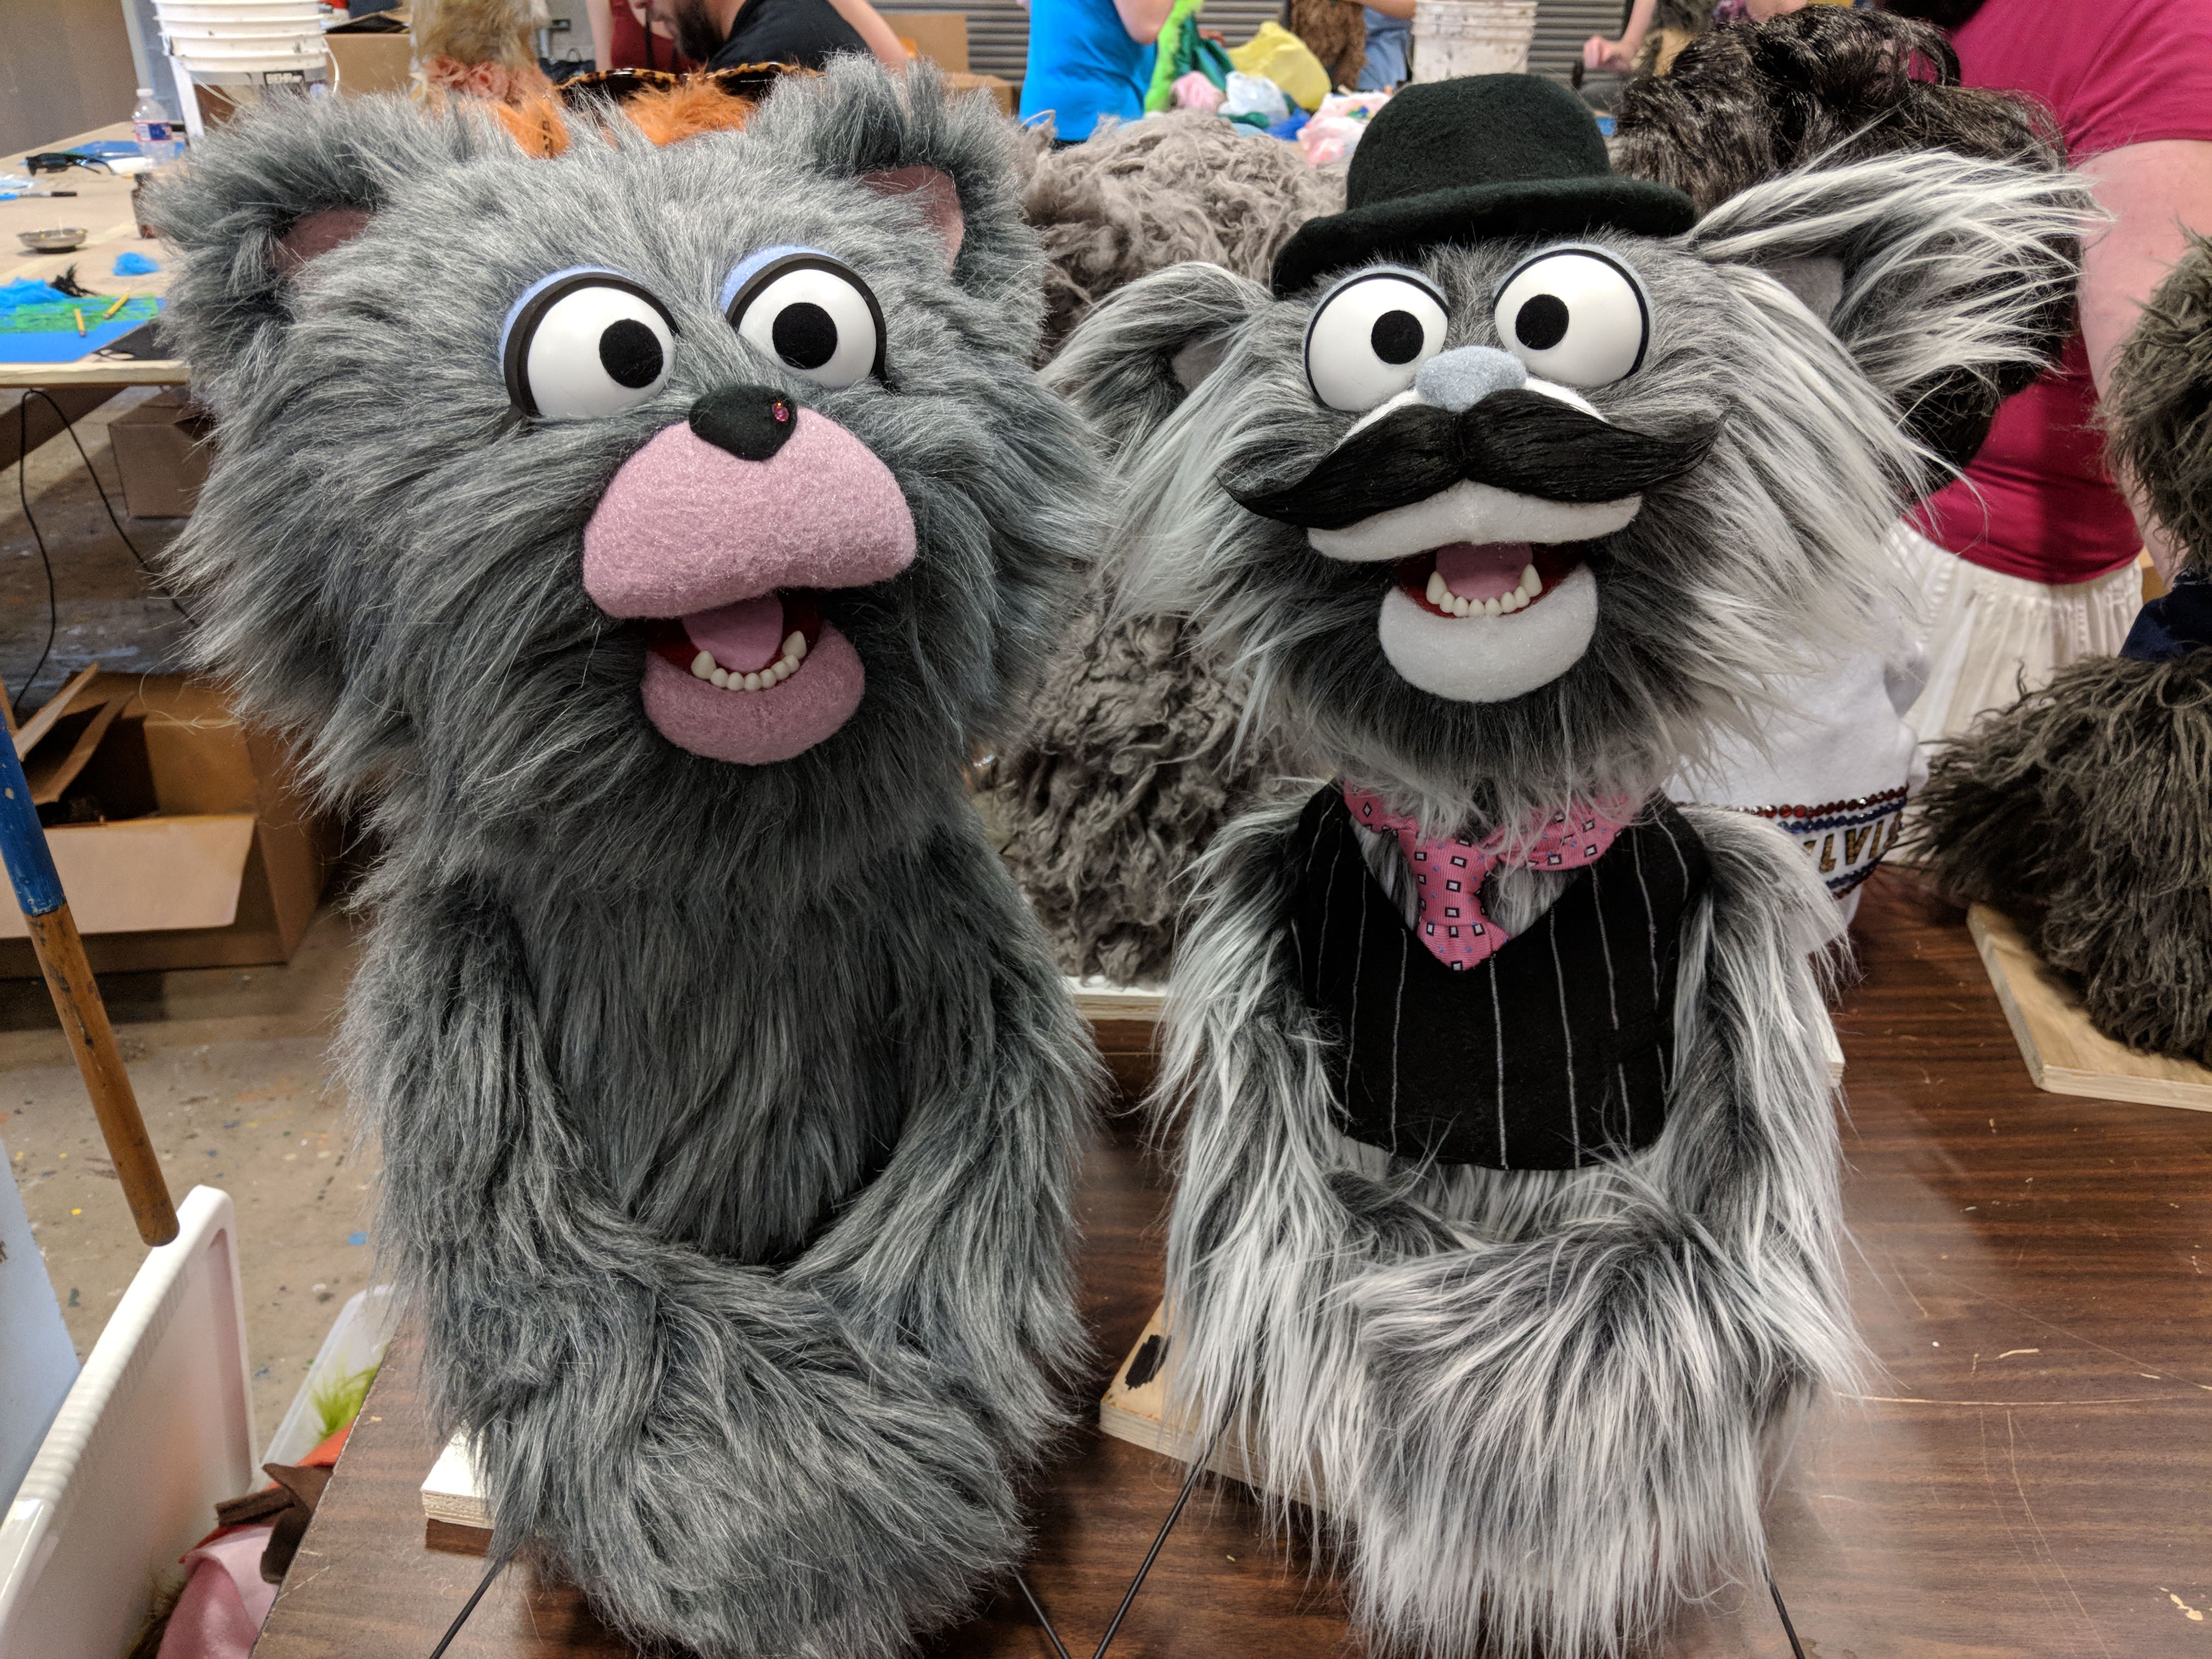
Here are mine and Alan’s.
I love his bowler hat and mustache!
Mine has a little gemstone stud in her nose and she was supposed to get purple feather streaks in her hair, but I ran out of time. I’ll add them later. 🙂
Here are some others. . .
Aren’t they awesome?
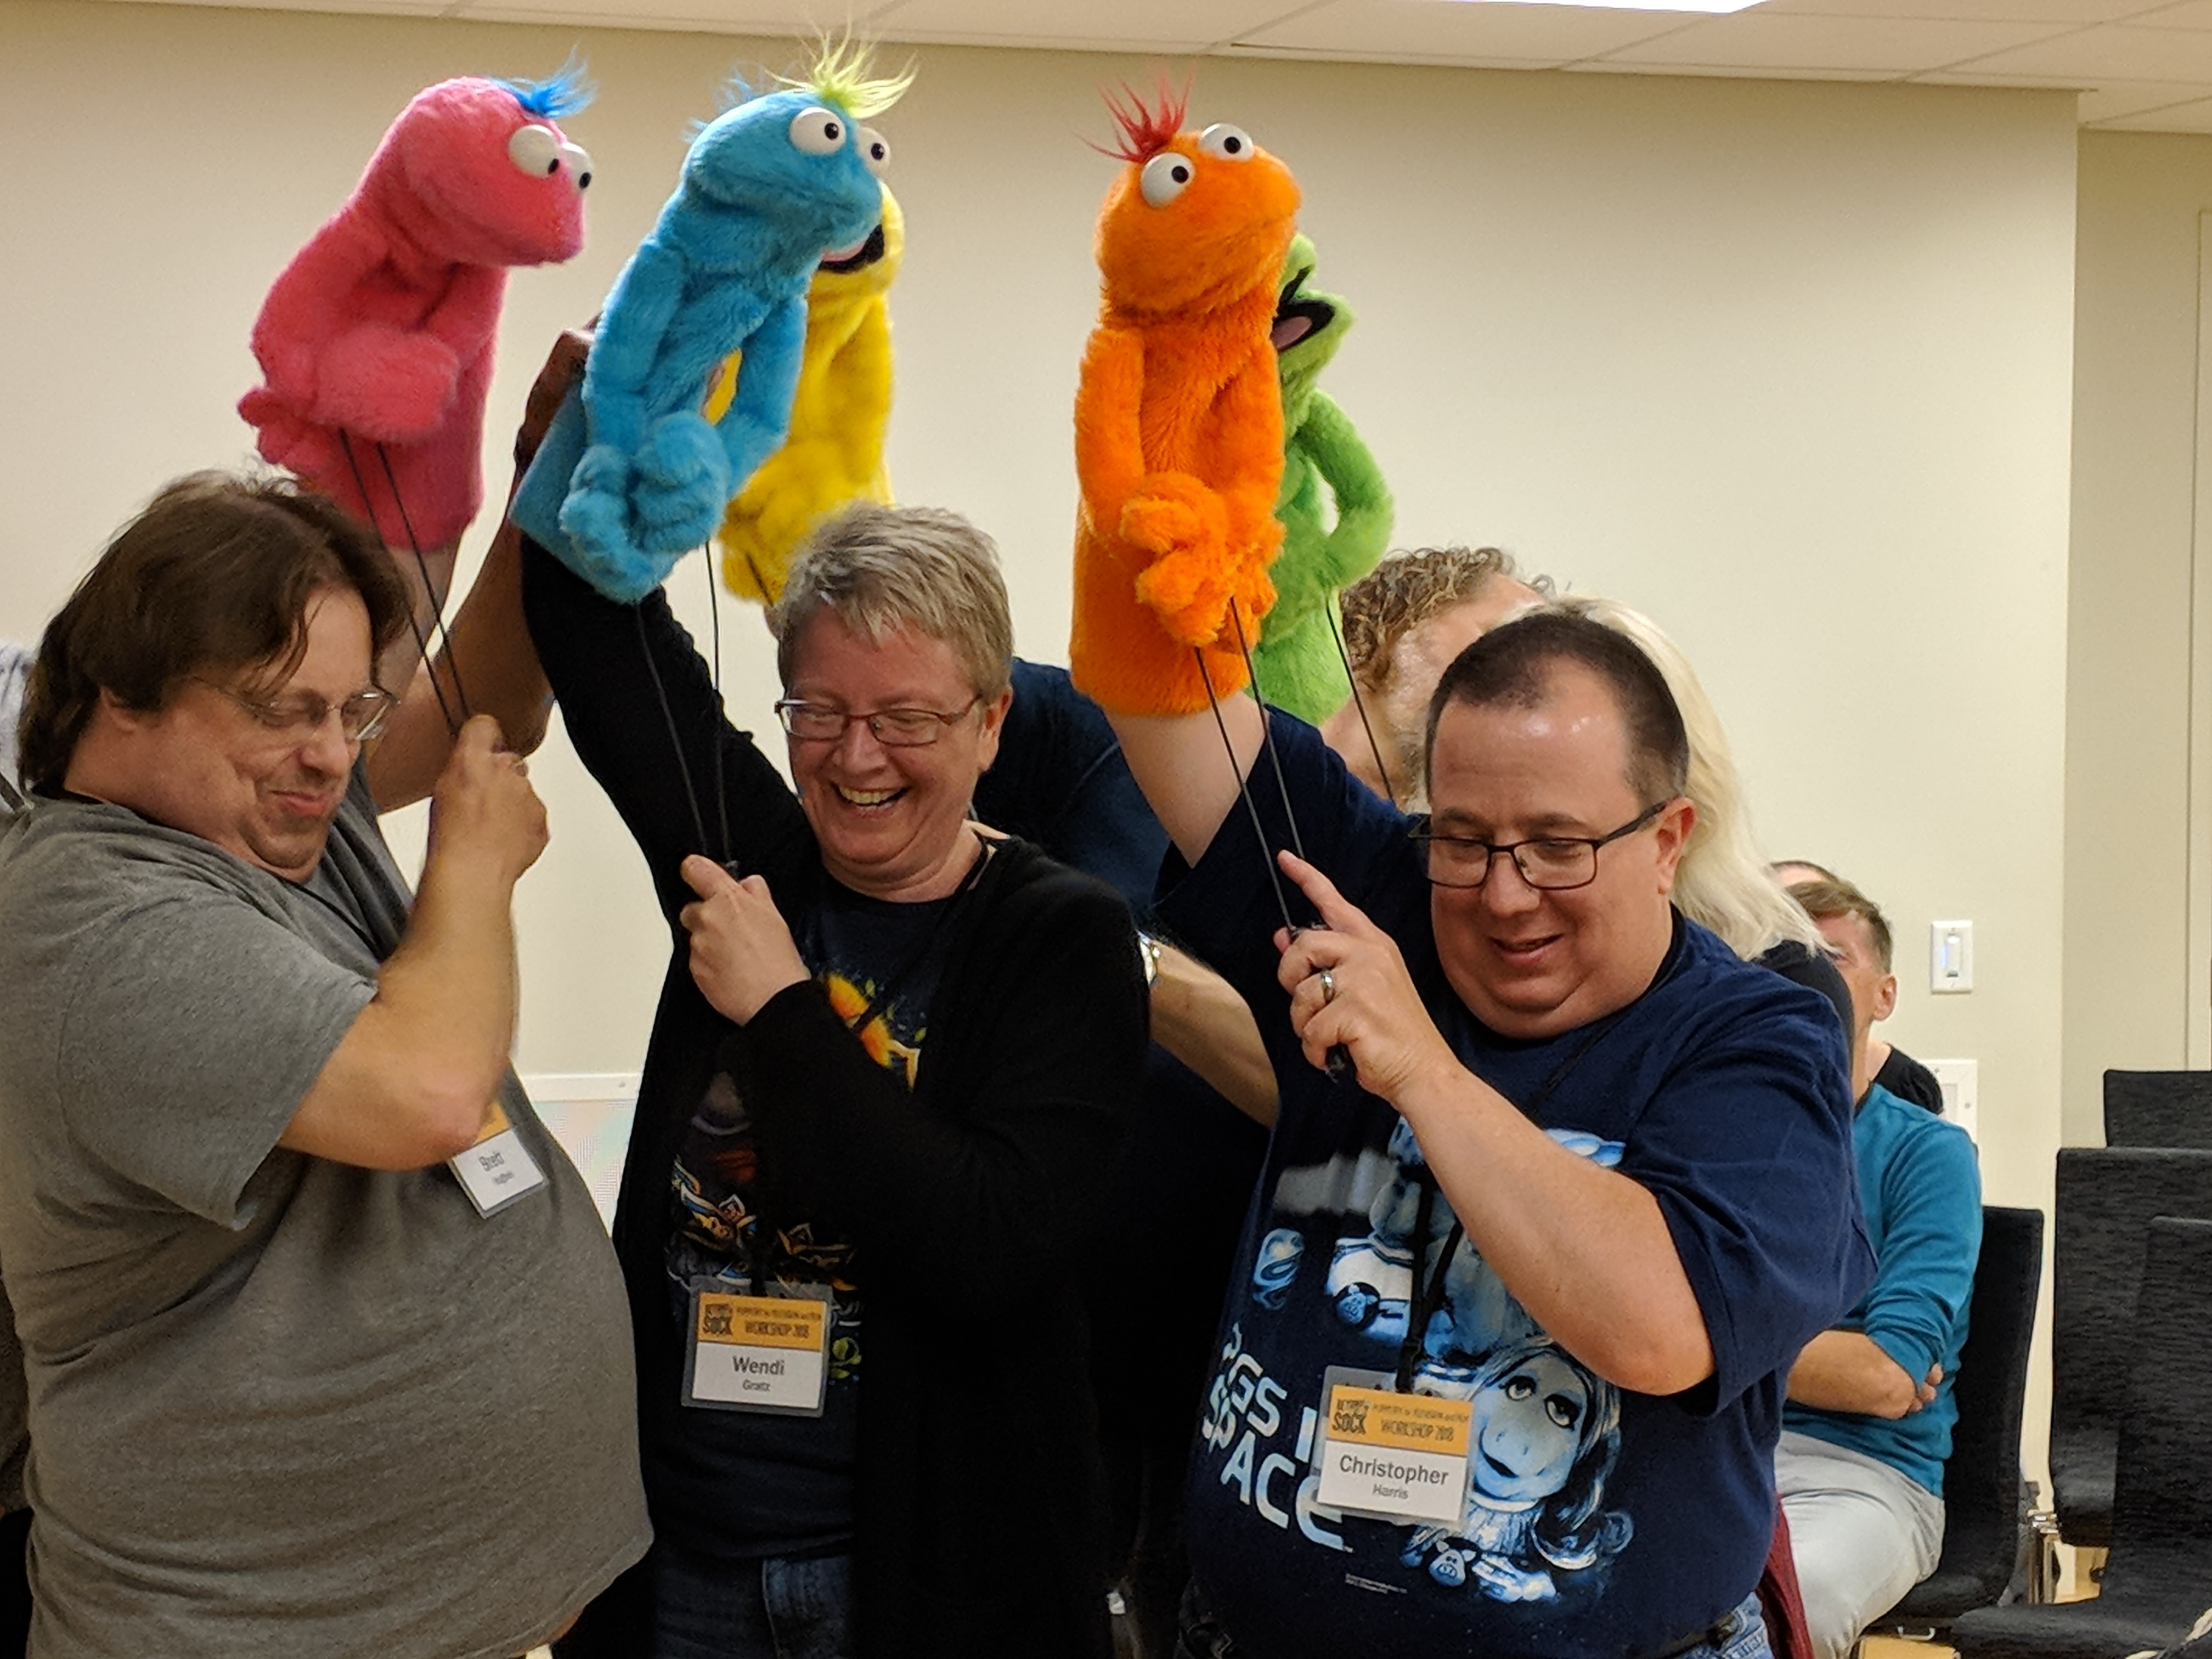
Now – the performing.
This was the part that was WAAAY out of my comfort zone – but I still loved it!
We were learning how to puppeteer on TV – not live – and that’s a very different thing. You have to make sure your puppet is standing up straight (a constant problem for me) and moving/looking in the right direction. For those of you who have watched my “welcome to the new month” videos where I show the new Ami Club pattern – you know I’m very directionally challenged when it comes to recording! 🙂
In that shot above, we’re trying to make all our puppets look in the same direction – which is surprisingly hard!
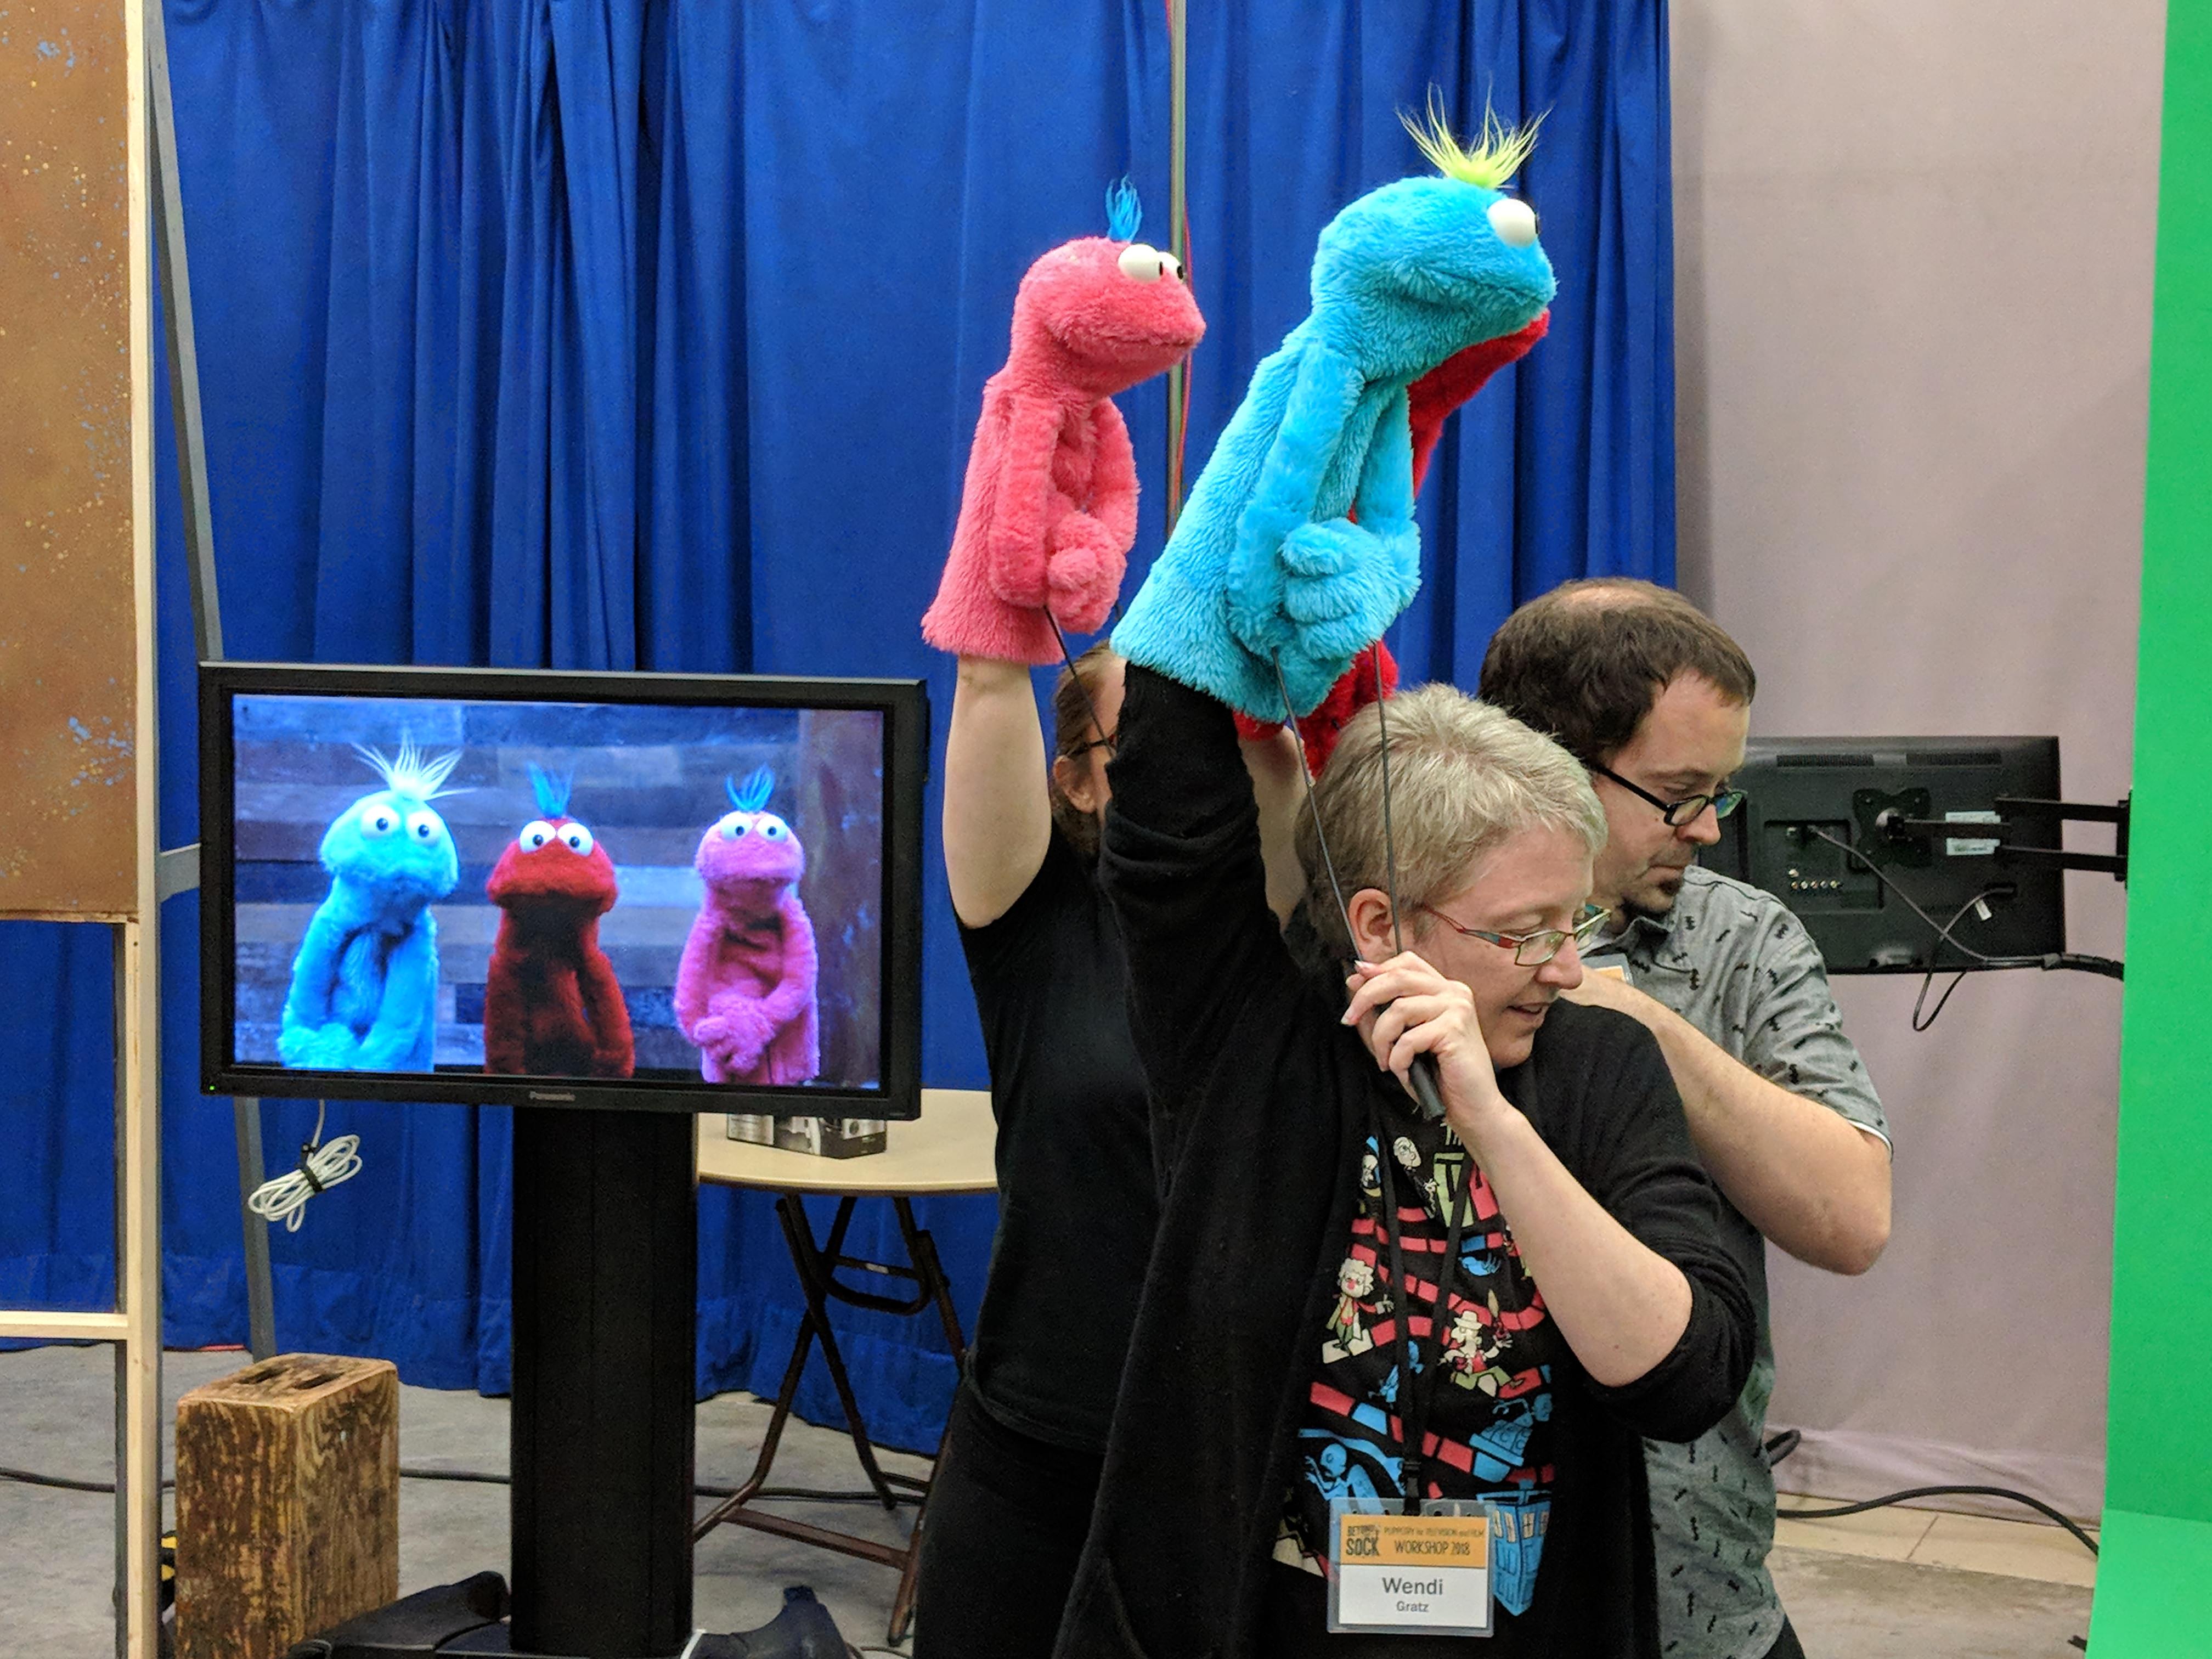
And in this one, you can see what we look like performing, and on the monitor.
We were trying to get our group of three centered on the screen, filling the screen, not showing our rods, and all looking at the camera. 🙂
And then they had us acting and lip synching and doing improv on top of all the puppeteering! So many things to remember!
We did a bunch of performances on the last night, including a big song and dance number that had over twenty of us packed into that space below our puppets. Crazy!
Really – it was a totally incredible week and we want to go back next year.
If any of you are interested in making puppets, Pasha has a terrific website with video tutorials and sells really well-designed patterns. It’s called Project Puppet and I can’t wait to make my next one!
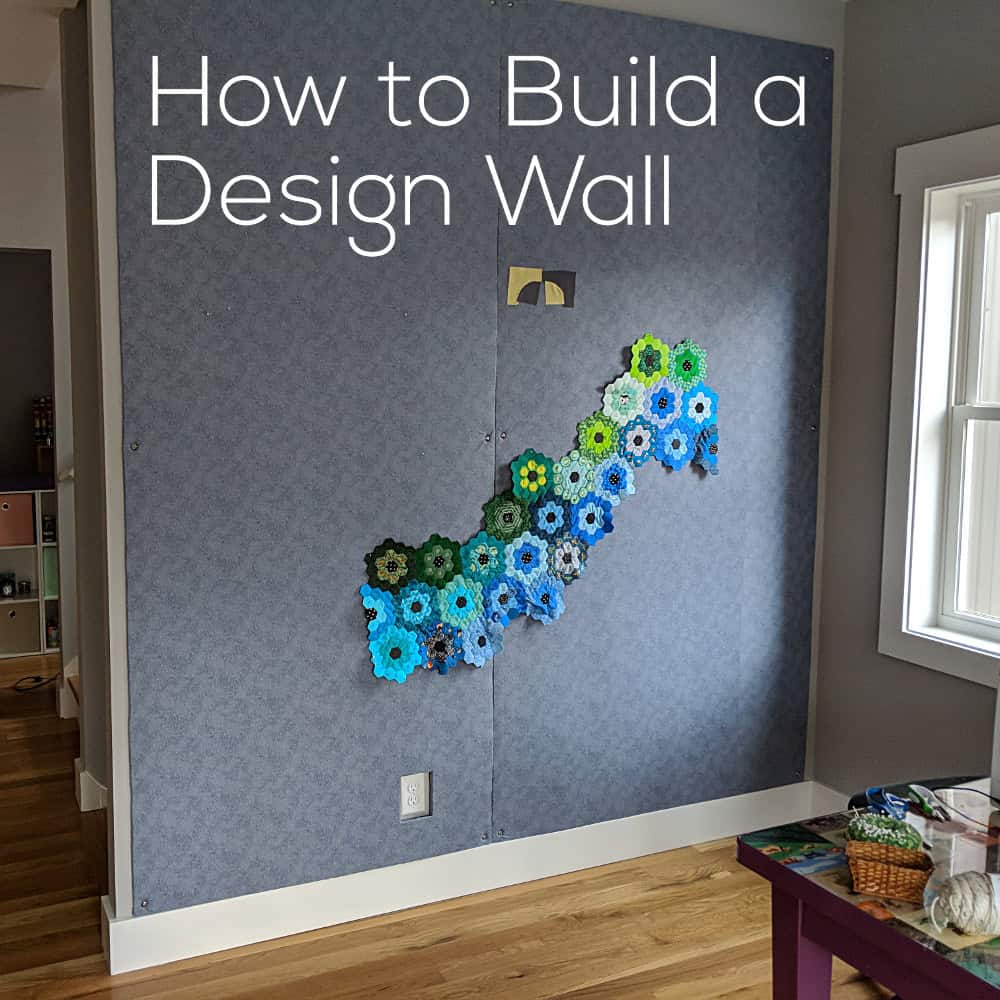
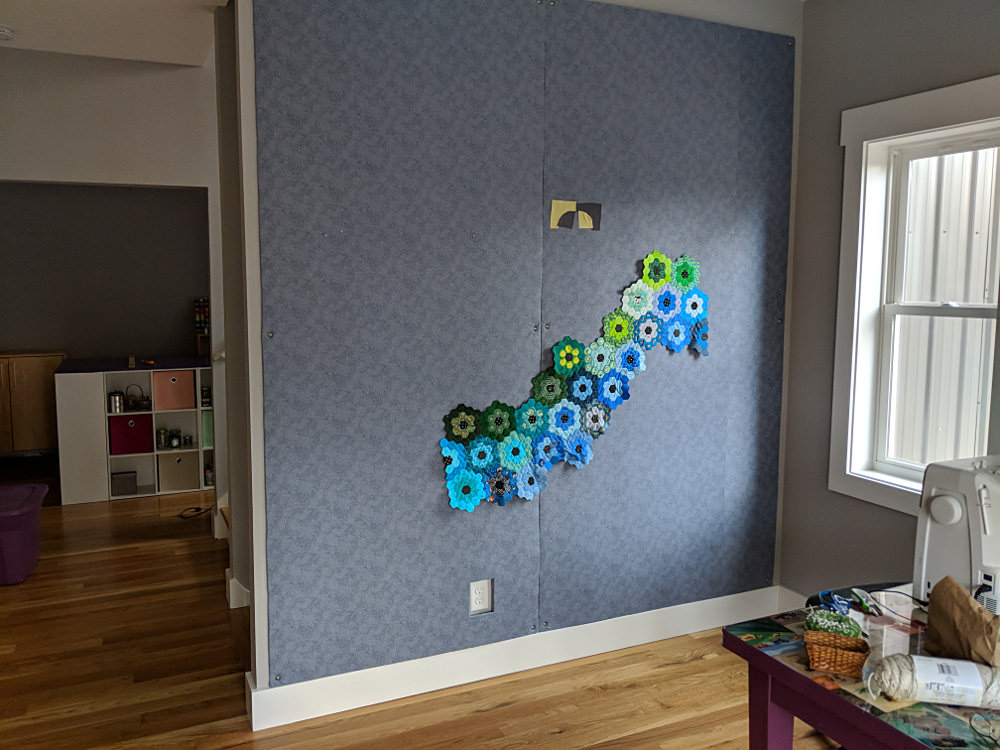
I finally have a quilt design wall in my new house and I’m so excited! There really is nothing like being able to step back and see an entire quilt like this!
And I’m going to show you (in excruciating detail) how I built mine – including the specific materials I used. I’ll also show you a bulletin board I made for my husband using the same method. I’ll even show you how to do that little cutout around the electrical outlet.
Ready?
Here we go!
To start with – I like to use foam insulation board. Styrofoam sheets are less expensive – but pinning into styrofoam gives me the willies. It’s a real nails-on-the-chalboard reaction so I don’t do it. Look for the 4 ft x 8 ft sheets of foam insulation board at your home improvement store. I like the ones that have a metallic foil material on one side.
I covered my board with flannel because I want to have both options – being able to pin into it but also being able to just smooth blocks up there and let them cling to the flannel.
Click through so you can see the flannel print close up. It’s a nice tone on tone print that looks interesting when there’s nothing on the board, but is subtle enough not to distract me from any design I’m working on up there. Later I’ll show you a different kind of option.
For my last quilt design wall I glued the fabric to the board – but that meant I couldn’t wash it, or easily change it if it got faded. This time I did the whole thing with pins.
Start out by piecing together enough fabric to completely cover your board, and wrap around each side with a couple of inches to spare. Press everything nice and smooth.
Lay your insulation board foil side up and cover it with the fabric – getting the fabric as centered as possible.
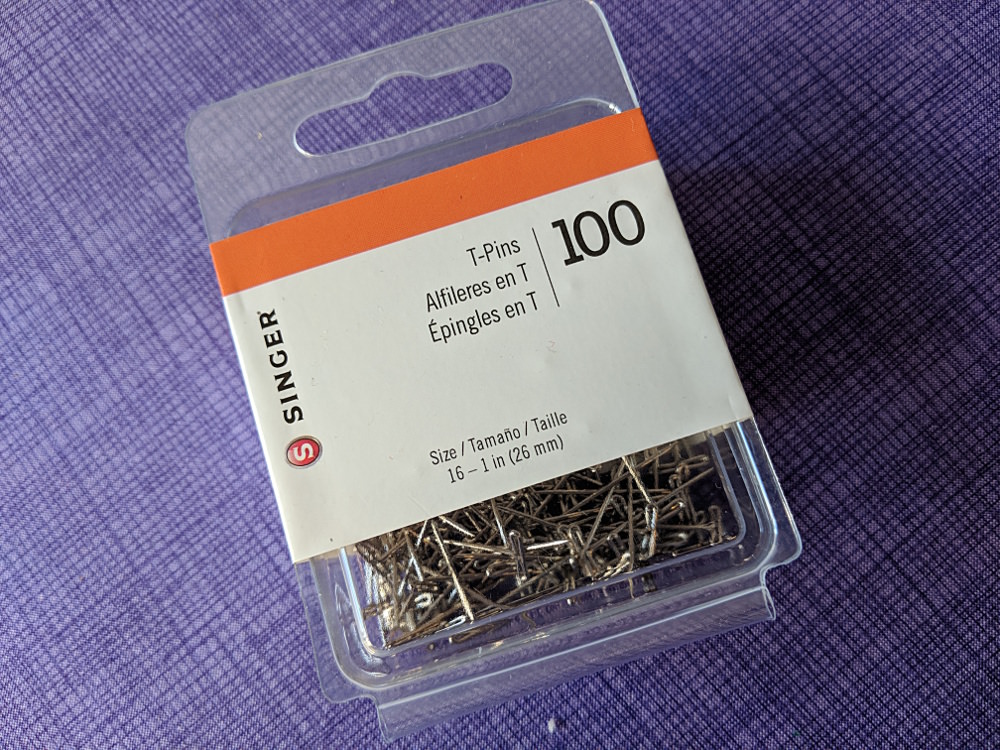
Start pinning your fabric into the sides of the insulation board. I used these 1-inch T-pins.
Basically – I used the exact same method I use to prepare fabric for framing – just on a larger scale. You can watch that video here.
Keep adding pins, pulling the fabric smooth but not stretching it, until you have pins all the way around your board every 1-2 inches.
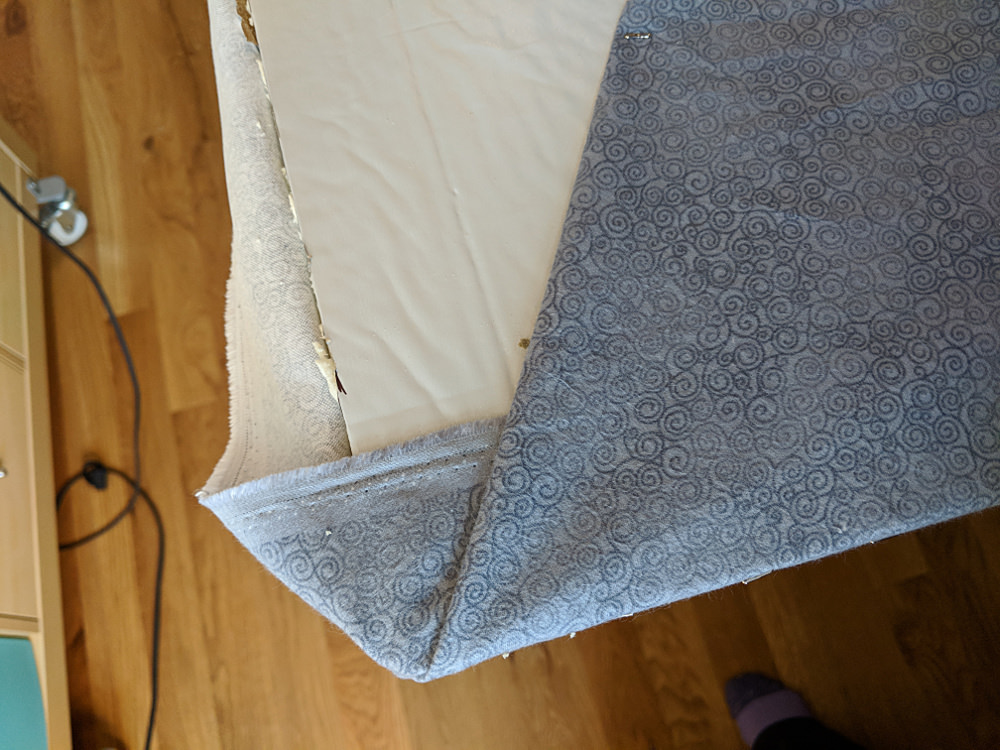
Flip your board over so you’re working from the back.
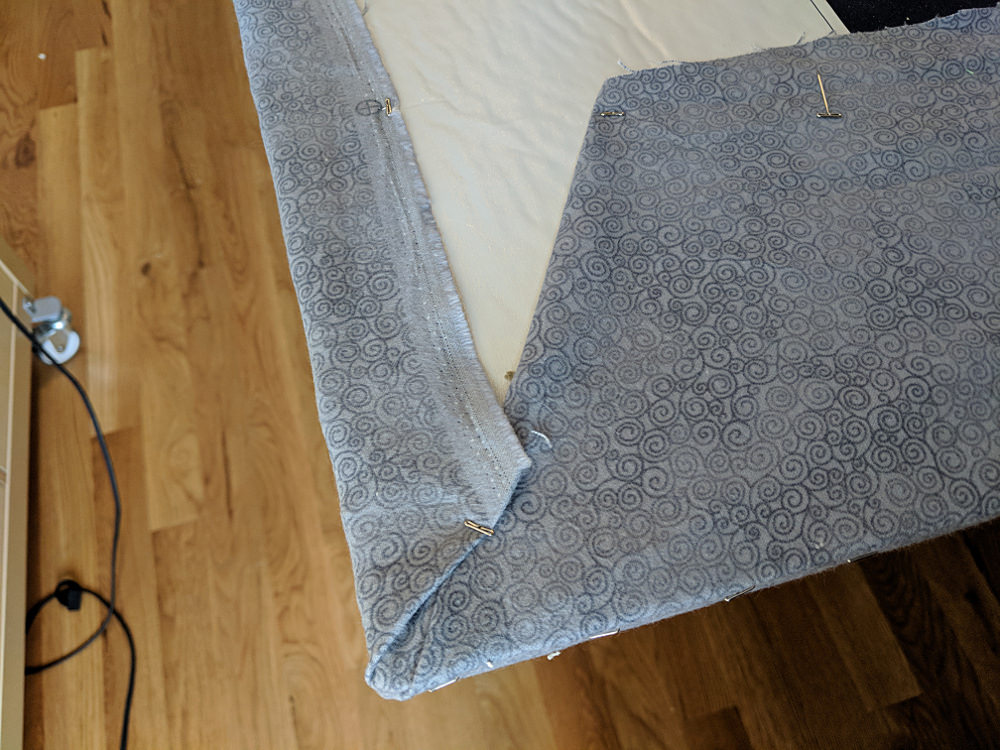
Fold in one corner, then fold in one side. Insert some of the T-pins at an angle so they hold the fabric flaps in place, but don’t poke through the front.
Fold in the other side. Now your corner is nice and neat!
(See how pretty that tone-on-tone Jazz print is?)
Continue around the back of the board, securing the excess fabric with T-pins inserted at a slant. Remember – the side pins are the ones really holding the fabric in place on the front of the board. These are only holding the excess fabric in place, so you only need a pin every 8-12 inches or so.
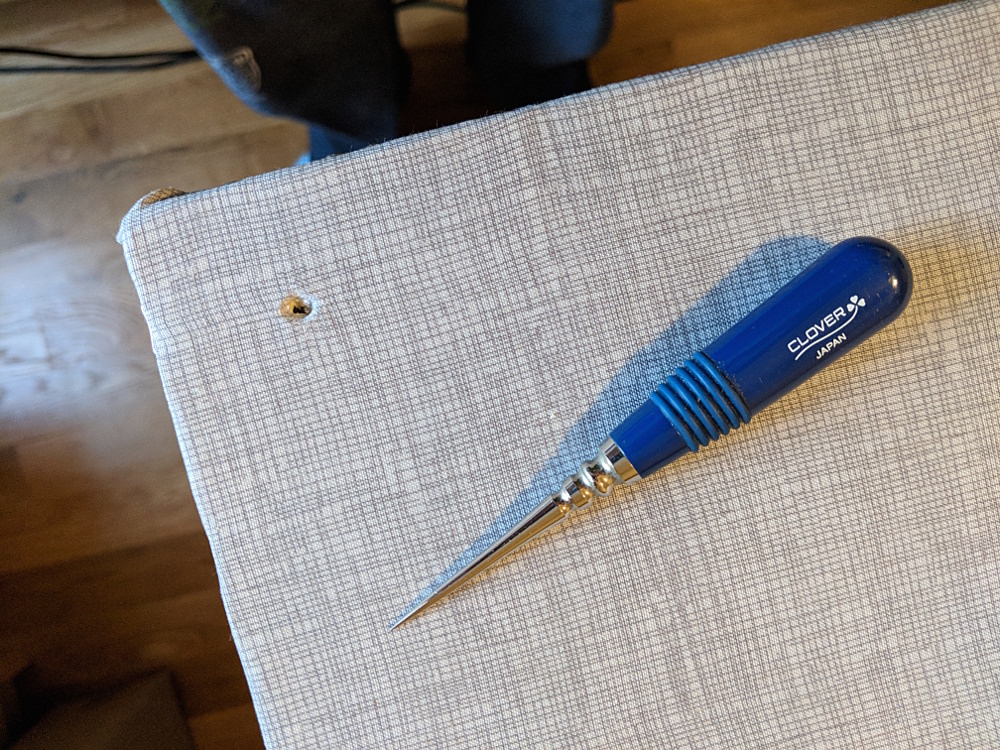
Use an awl or other sharp tool to poke a hole in each corner of the board (mine is 1 inch in from each edge) and one more in the middle of the longest edge.
This step is important! Don’t think you can just screw right through the fabric. The bit or the screw will catch the fabric and yank it into an awful twist, ruining all that work you did getting everything nice and smooth.
Hold the board just where you want it on the wall and mark through each of those holes with a pencil. Take the board away and insert a wall anchor at each of those spots.
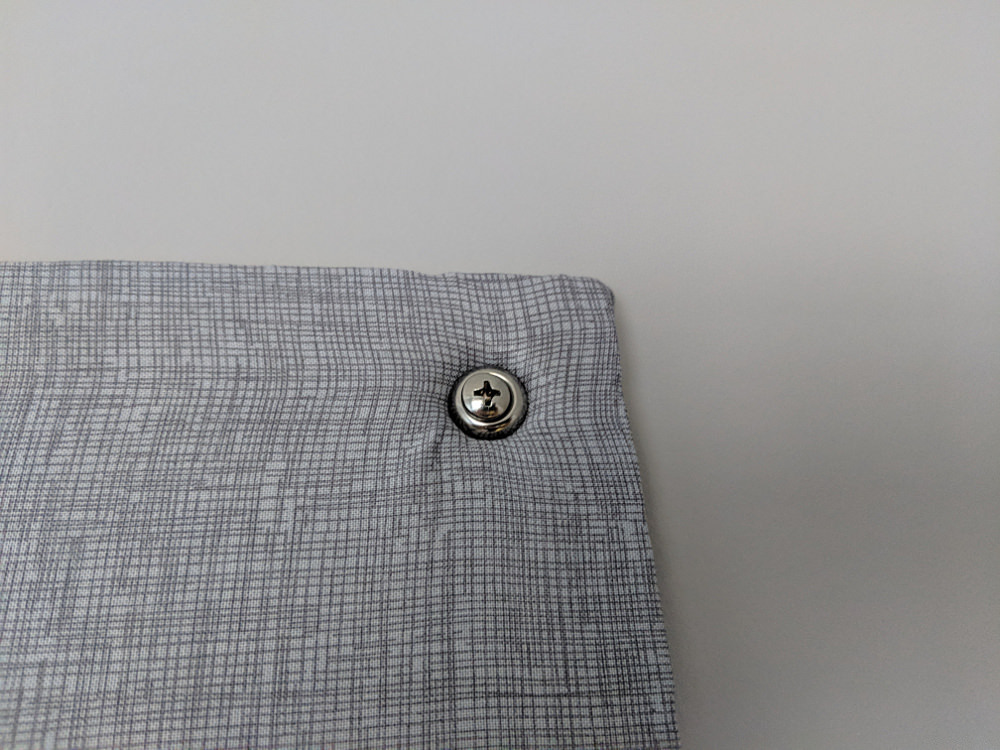
Now screw the board into those wall anchors!
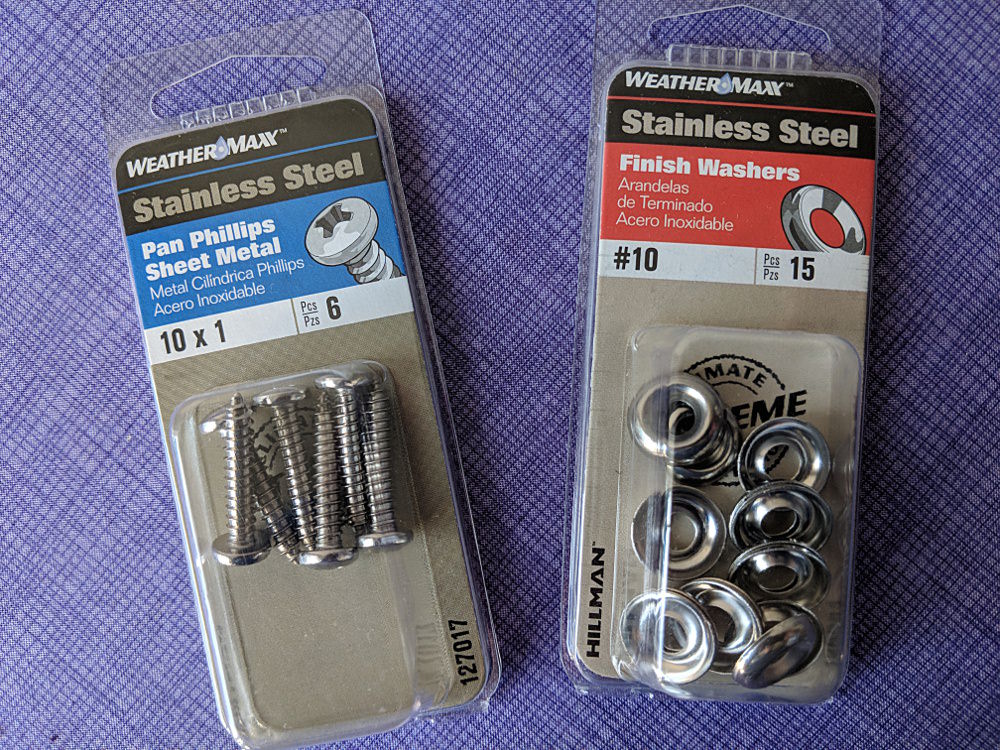
I used these nice stainless steel screws and washers.
You definitely need to use some kind of washer so that over time the head of the screw doesn’t just pull through the soft foam. See how nice these look?
I like to screw it in tight enough that it kind of dimples into the surface of the foam. That way I can skim quilt blocks right over the screws if I want to.
What About Electrical Outlets?
So my first board of my quilt design wall was easy – but the second one was going to go right over an electrical outlet. I wanted to be able to continue to use that outlet, so I needed to cut a hole in the board and finish those edges.
Don’t worry – it’s not hard!
Measure your space and cut a hole in your board just a little bit bigger than your outlet cover.
This stuff is easy to cut with a simple X-acto blade.
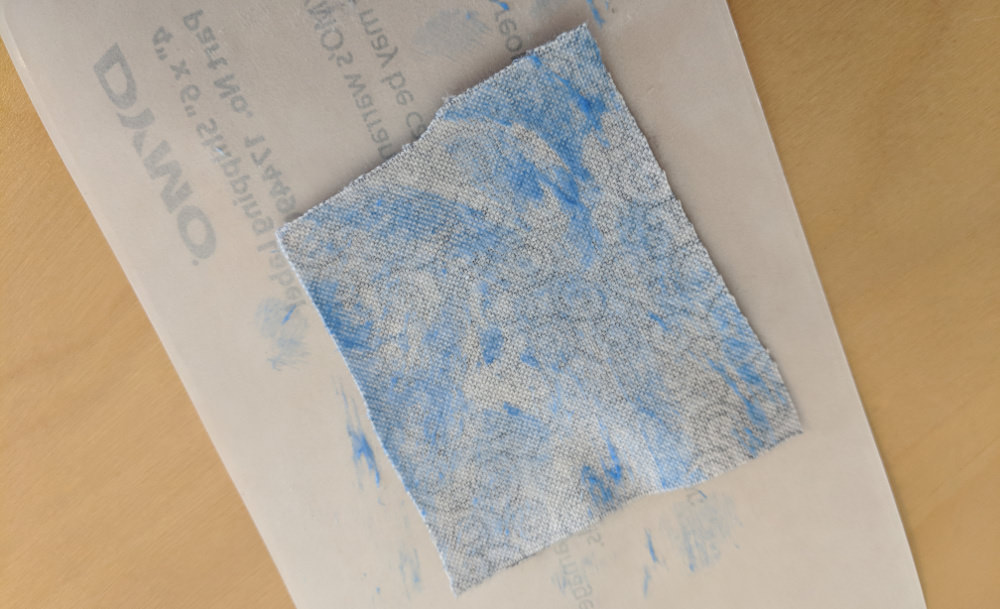
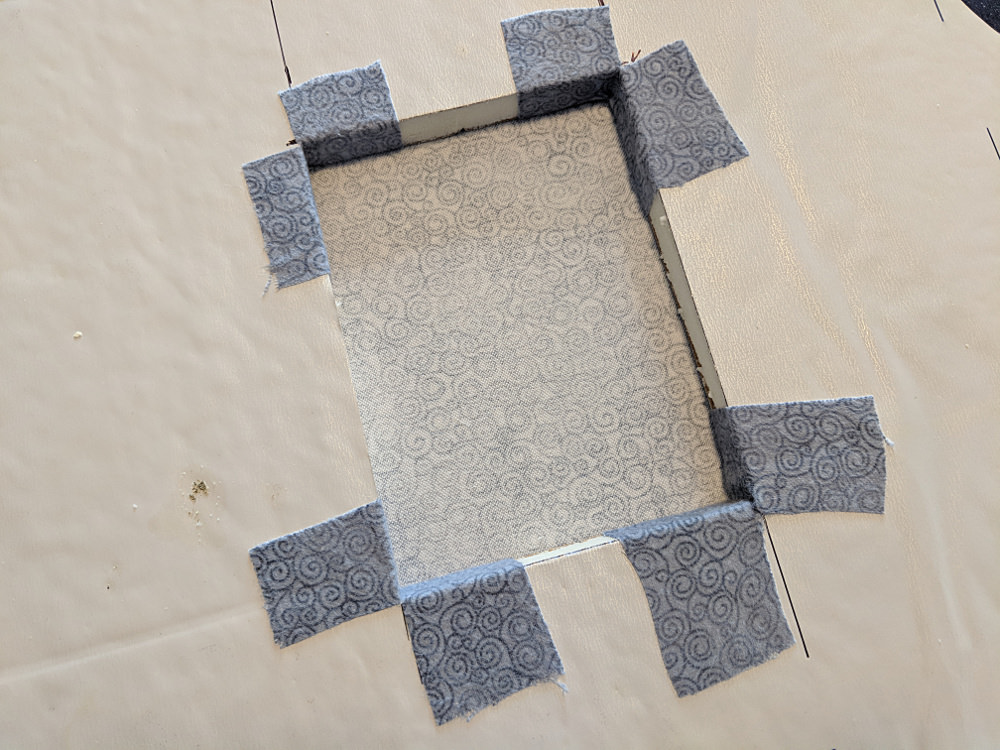
Now cut four squares of fabric roughly 2-3 inches square. It doesn’t not have to be exact – or even especially neat, as you can see with mine.
Cover the back of one square of fabric with glue.
I used a Uhu glue stick – not my fabric glue stick. I wanted a permanent hold here.
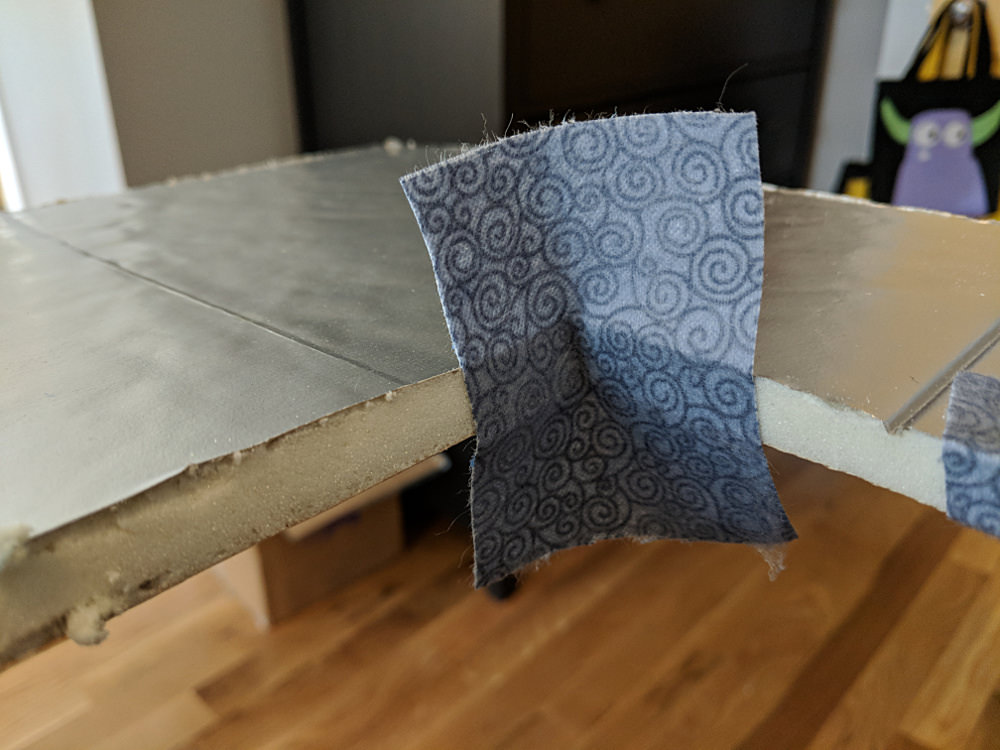
Stick the square right into one corner of your cutout and press it in place, as shown.
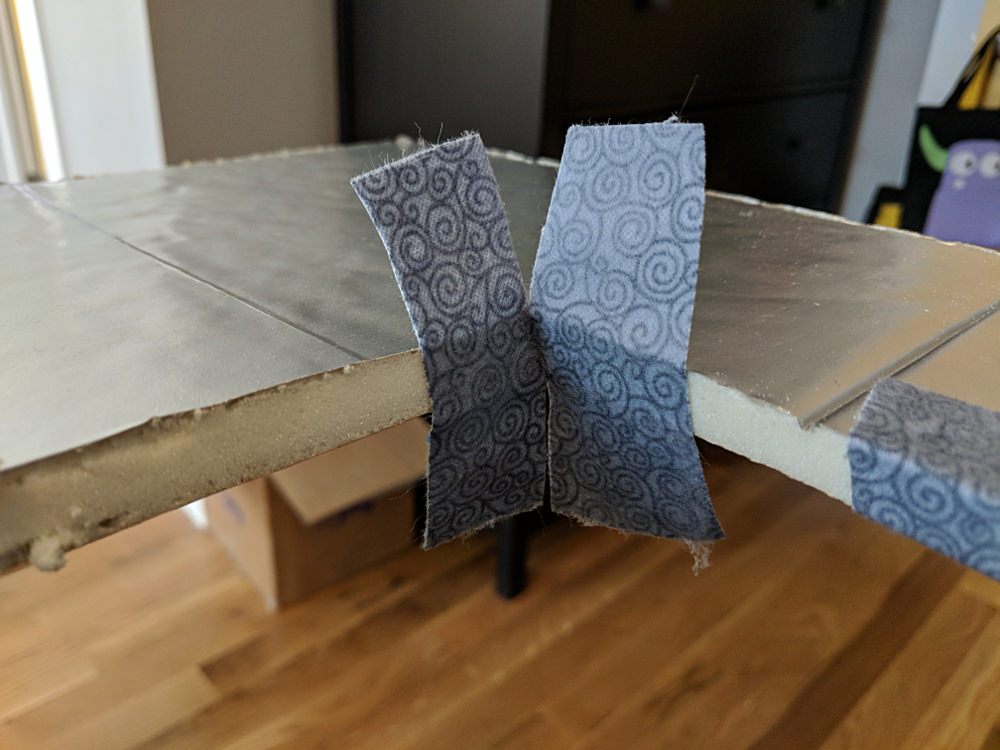
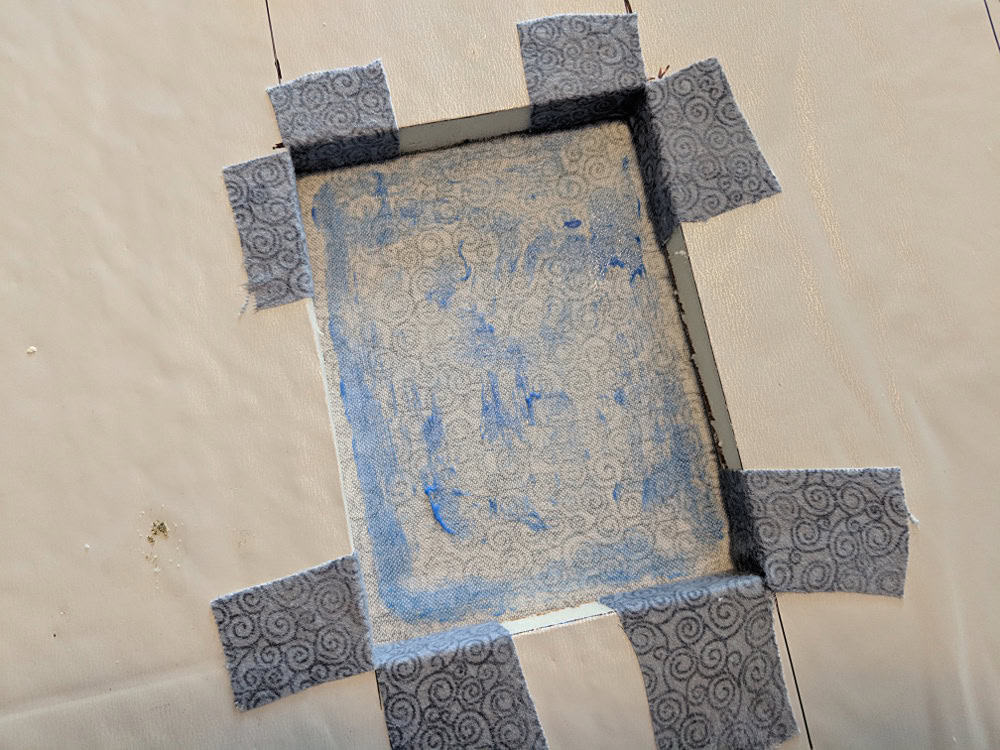
Now use a sharp pair of scissors to snip down from the top and up from the bottom – right on the fold created.
You want to cut very close to the surface of the board – with just a few threads to spare.
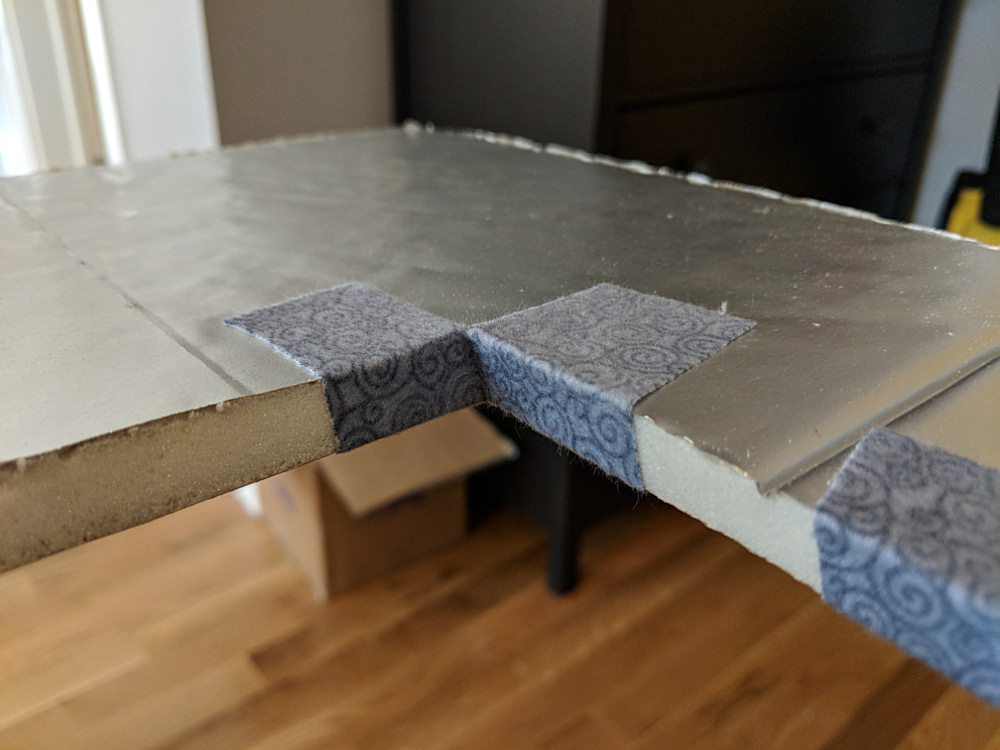
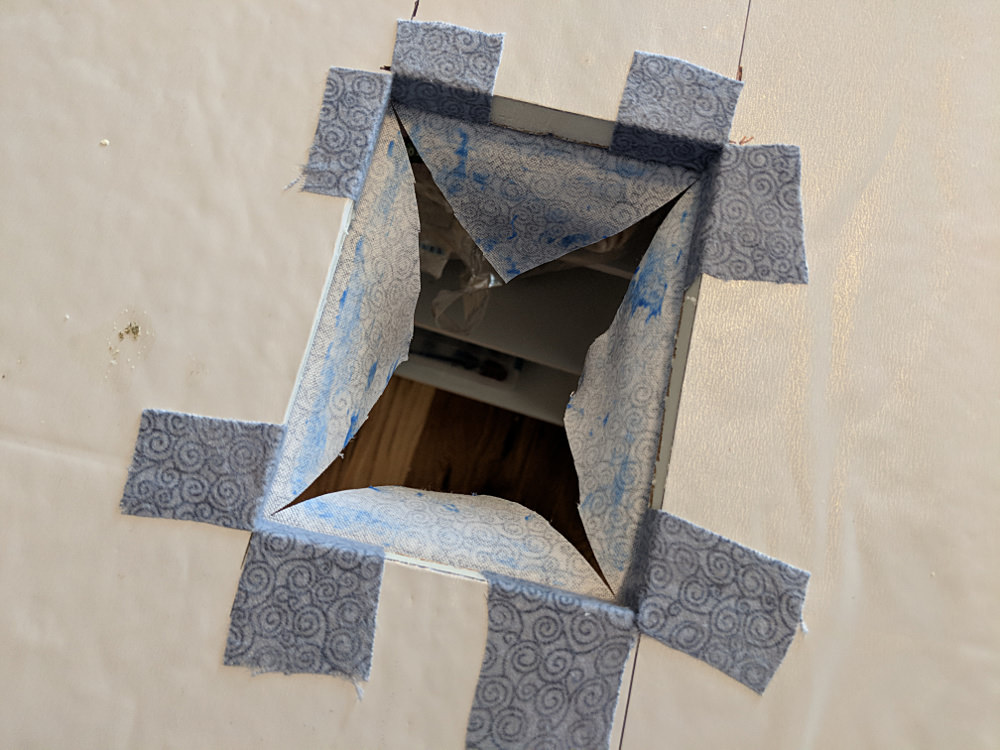
Now folds those flaps down and smooth them onto the front and back of the board.
Repeat for the other three corners.
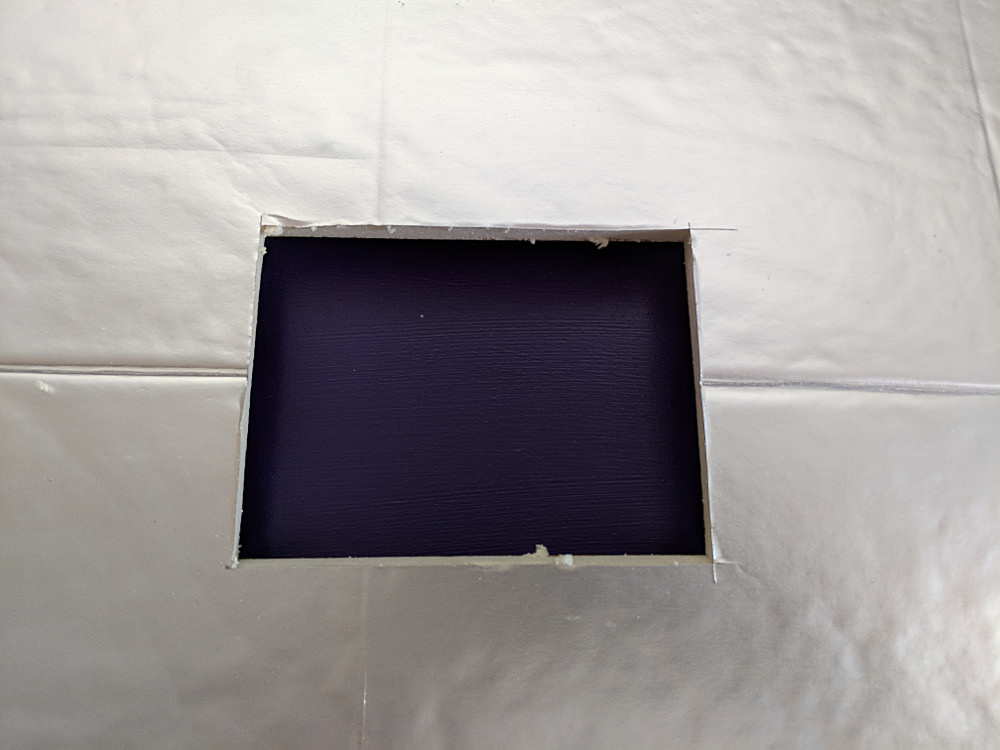
Now just cover your board like a showed in the first part of the tutorial. Pretend that hole isn’t even there.
When you flip your board over, you’ll see the back of that fabric through the hole.
Make sure the board is on a flat surface (so you have something to press against) and coat all the fabric inside the cutout with glue.
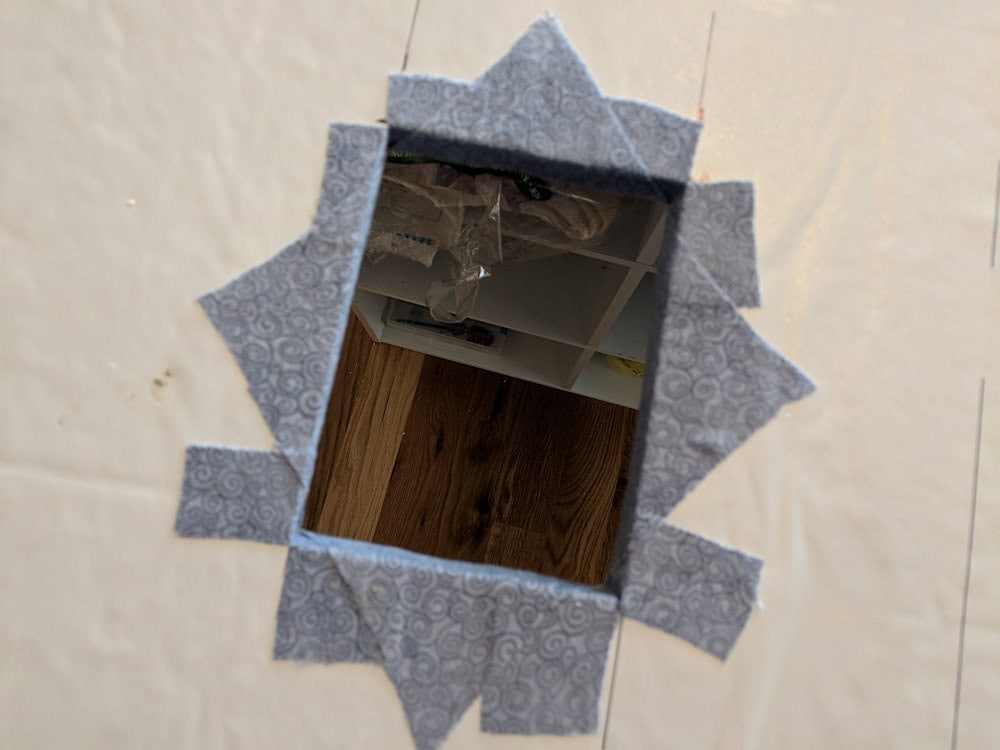
Now use a pair of sharp scissors to cut an X in that fabric from corner to corner.
Pull those triangle flaps to the back side of the board and smooth them in place.
Sorry – I was using my camera’s autofocus and it focused on what it could see through the hole, instead of the fabric treatment around the hole. But I think you can still see what I did, blurry as it is. 😛
That’s it! This board is ready to hang, just like the first one.
Ta da! I have a quilt design wall!
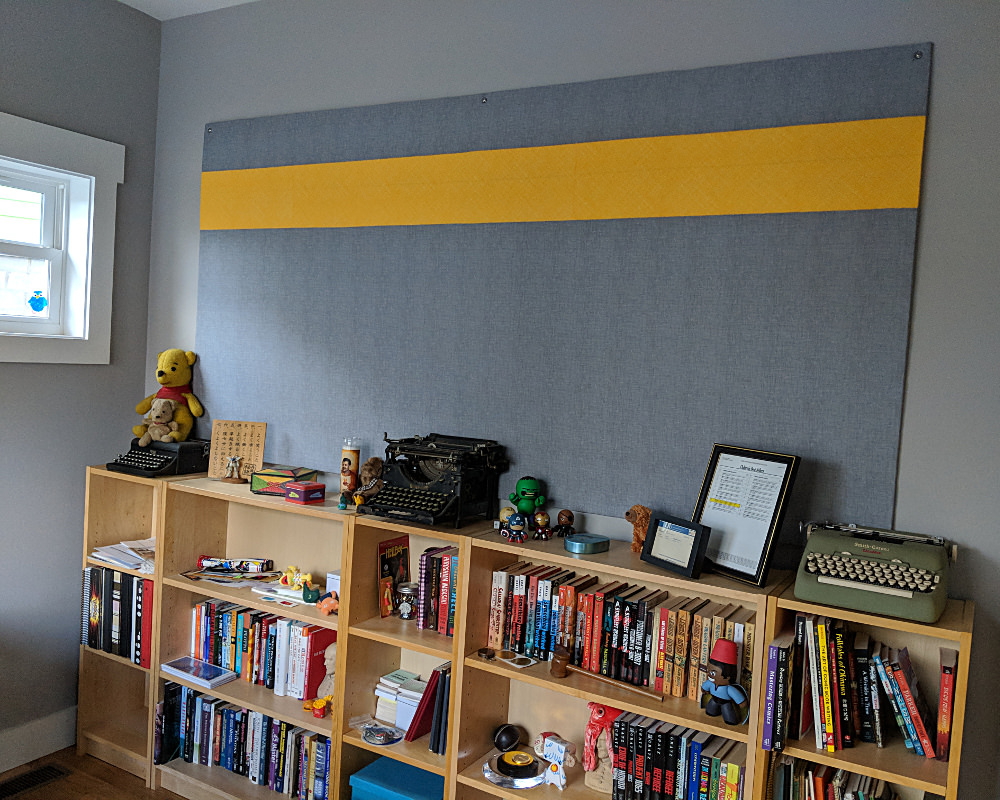
Pieced Bulletin Board
I needed my board to be pretty simple so it wouldn’t distract from whatever I’m designing on it.
But my husband wanted a similar board to outline his next book on – and he wanted it to have a bit of design. Nothing too fancy – but just a little extra pizzazz.
Here are the fabrics he chose.
He doesn’t need fabric to cling to his board, so I just used regular quilting cotton instead of flannel.
And here’s his finished bulletin board.
It’s all ready for him to start hatching his next novel!
I love having a quilt design wall again! It makes it so much easier to really SEE the layout of a quilt in progress.
Here are handy links to all the posts about quilting tools and supplies.
I cut a lot of fabric for bundles, so I really needed a large table at the right height for working while standing. Standing for hours at a dining table height surface will kill your back!
I used to have some good storage shelves that worked, but the bottoms of the legs got mangled in the move. The exact shelves weren’t made anymore (and the new version was much flimsier) so I needed to find something totally new.
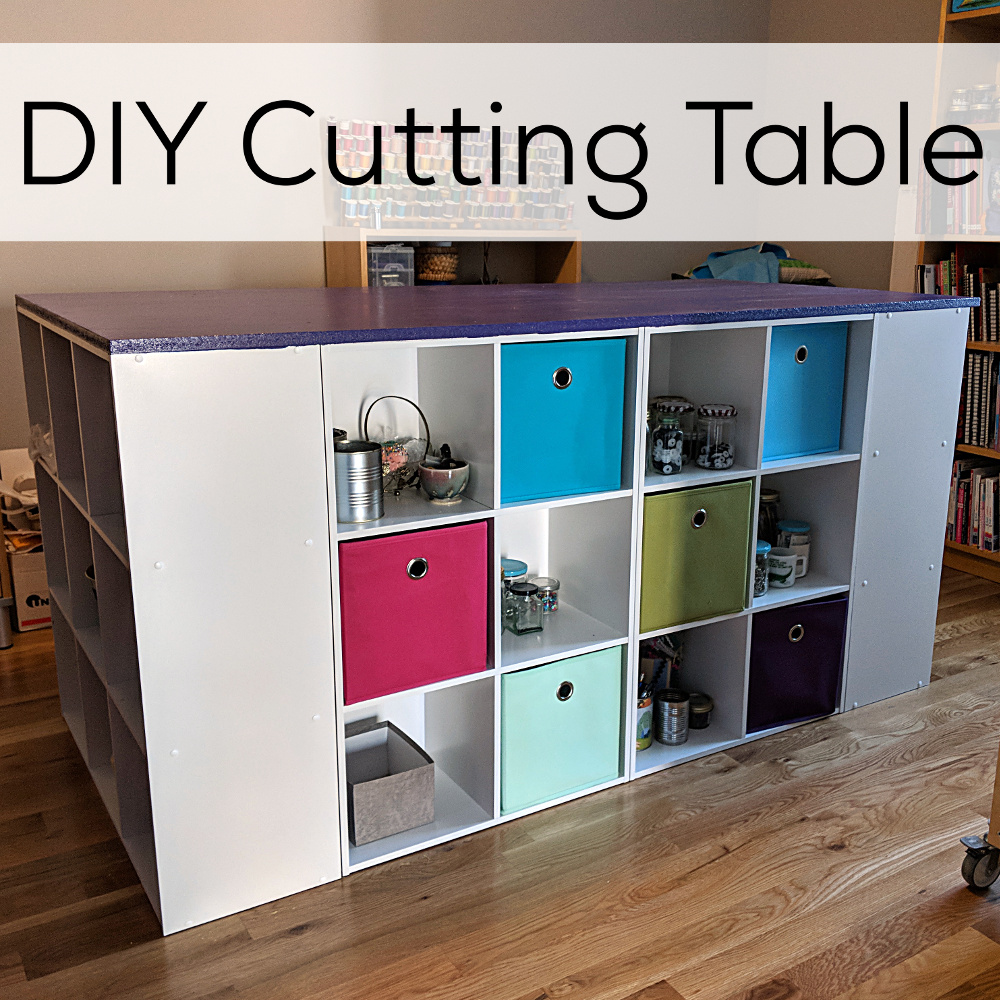
I liked the look of an Ikea Kallax hack, but the height wasn’t right for me standing. I was going to go for kitchen base cabinets with a laminate top – but that was way (WAY) out of my price range. So I was walking around Lowe’s to see if there was anything that might work, and I stumbled across Cubicals from ClosetMaid.
They’re similar in look to the Kallax pieces from Ikea (though admittedly not as sturdy-looking) but the size is different. A piece 3 cubes tall was just the right height for me standing – and they made that configuration!
1 – 3 ft. x 6 ft. sheet of medium density fiberboard (you’ll need to buy a 4×8 sheet, but you can ask the folks at Lowe’s to cut it down to size for you)
1 piece of trim 1 1/2 inches wide x 3 feet long x 3/8 inch thick (optional – for cutting guide)
2 elevator bolts to hold the cutting guide in place (optional)
Assemble all the Cubicals cabinets.
Stand them in a rectangle with the cubes facing out. The two 3×3 cabinets are on the ends. There are two 2×3 cabinets (standing tall, not wide) on each side between each of the end cabinets. There’s some empty space in the middle.
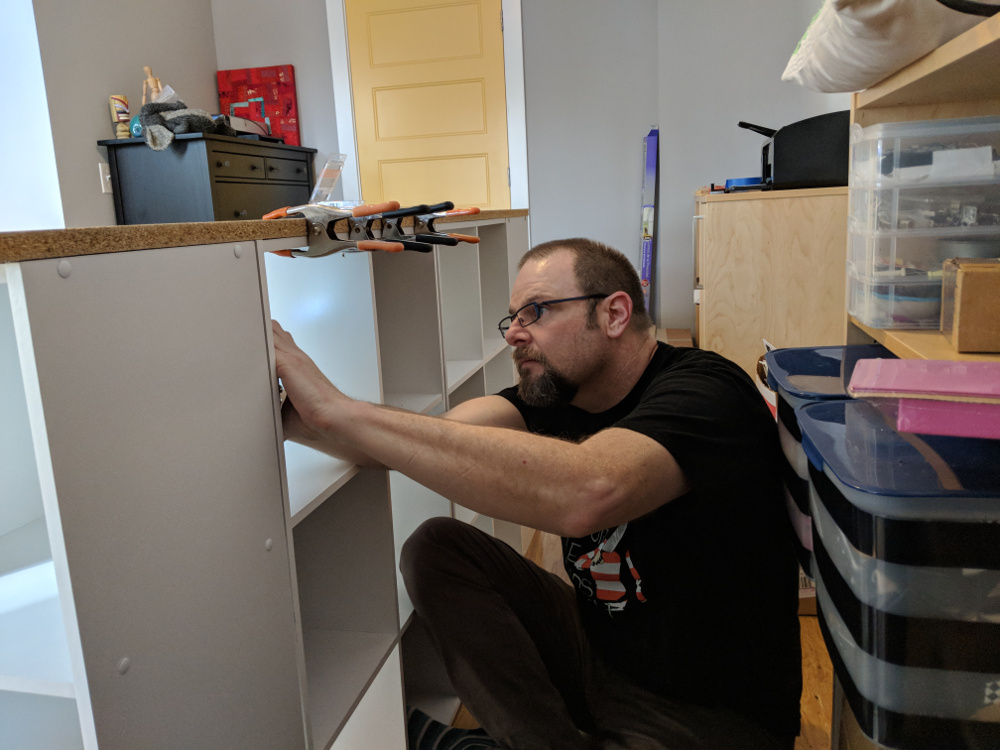
Get everything lined up neatly – exactly where you want it because this is NOT movable) and set the big MDF sheet on top. Drilling up from underneath the table (up through the top of the cabinets) screw the table top into place. We used 1 inch wood screws and put some tape on the drill bit to make sure we didn’t drill all the way through to the top of the table.
That’s pretty much it – except for a special feature I added to the top for cutting fabric bundles. I don’t know how many of you will need this feature – but you can see it in action in this video.
I sanded the sides and just barely rounded the top edge, and added several coats of pretty purple paint. Those colorful fabric drawers that fit right in the cubes are fun – but Lowe’s doesn’t carry many colors. You can find a bigger selection at Target.
One more thing. They make Cubicals with two different size cubes. These are the smaller ones (each cube is 11 inches). The cabinets with the larger cubes look and feel more sturdy (and more polished), but they won’t work for a table like this because they’ll end up way too tall for most humans. These smaller cubes feel a little less sturdy until they’re all assembled and now it seems pretty super strong.
Make sure you’re getting the right size. 🙂
Here are handy links to all the posts about quilting tools and supplies.
Planners are a big deal. They can get really fancy. And there are planner people to follow on instagram. Whoa.
It’s a little overwhelming!
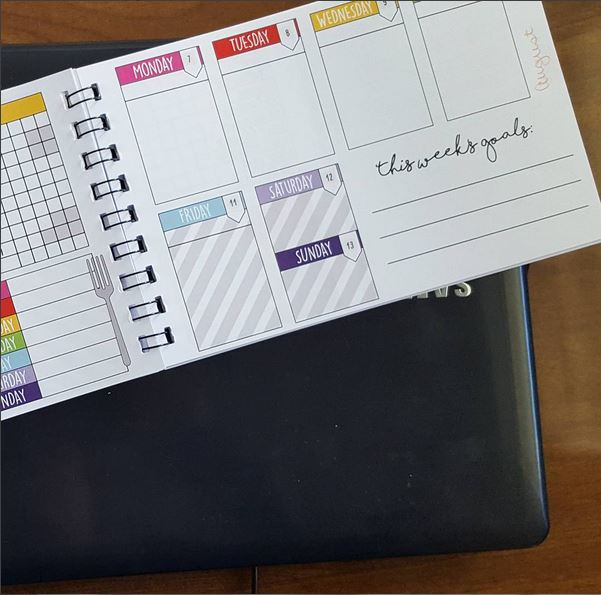
I’ve always struggled with finding the right planner for me. I love having a paper planner, but I always found it hard to find the right one. Some have a page for each day (I don’t have nearly enough going on!) and some are monthlies (I need more than an inch to write all my appointments for a day!). I just want a lovely, weekly planner. With room for a to-do list. And a way to separate those things I have to do on Tuesday from the things I have to do sometime this week.
So, I designed my own
I know! It’s such a Stacey-thing to do!
I posted a photo to instagram, and you guys LOVE it! And want to do it yourself! Sure, why not?
Download the Printable!
Now, I know this planner won’t be perfect for everyone. After all, I made it just for me!
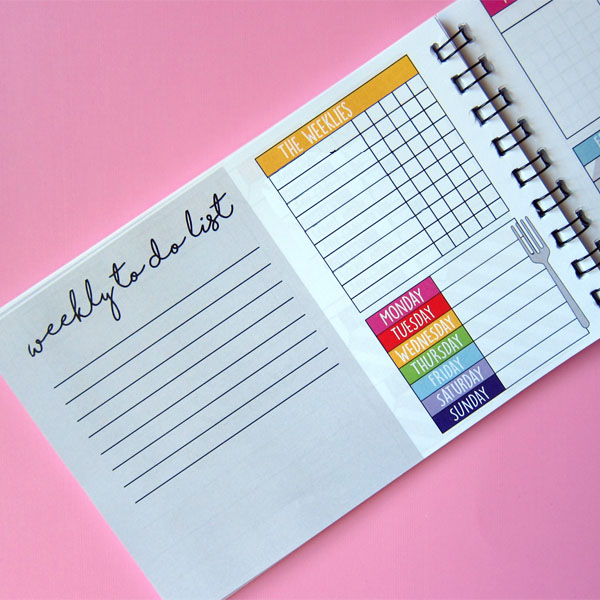
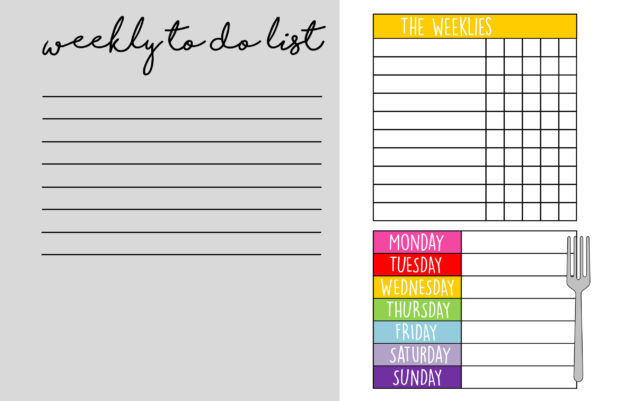
Let me tell you a bit about the features. One page is the ‘weeklies’, an overview of the week. I have a box for the weekly to-do list (things that I can do anytime, but need to get done that week), a checkbox task (things that need to be done every day, but it doesn’t matter when… like posting to facebook or checking email) and a meal planning area.
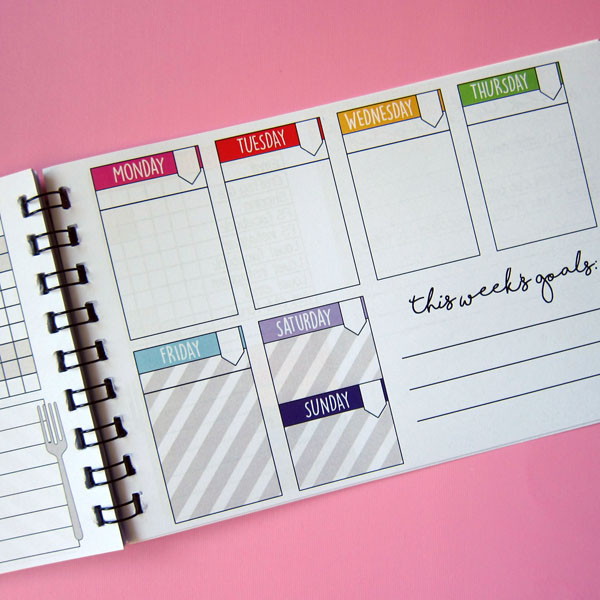
Then I have another page called the ‘Dailies’… things I schedule in for every day. You can see there is a blank space for the date, and a space to write a major task to work on each day. Below the date, I include appointments or items that have to be done that day (like 10am dentist appointment). I left a little space in the corner of the page for goals or mantras to keep in mind for the week. And I shaded out Friday and the weekends… a reminder not to schedule too many things for then!
To make your planner, simply print both of these pages on 8.5″ x 5.5″ paper and have it wire bound! It’s a convenient size! I used 20lb paper (which is quite thin), so the resulting book isn’t too thick even though I printed out through the rest of 2017.
The wire binding means it lays open nicely on the table and you can see both pages at a glance. If you want to get creative, you can throw in extra pages (like a monthly calendar) on your own! Google ‘calendar printables’ for oodles!
I went to QuiltCon for the first time and it was So Much Fun!
QuiltCon is a modern quilt show – so it was right up my alley. I didn’t get into any of the classes – but next time I’ll be more organized and I’ll be online the day those registrations open. They had a great slate of instructors there!
So for me it was a shopping and soaking up inspiration weekend. 🙂
The quilts in the show were amazing! Here are some of my favorites. . .
Bling by Kat Jones was the big show winner. I’m completely in awe of it. Isn’t it amazing? Abby Glassenberg recorded a podcast with Kat during the show and it was really interesting to listen to her talk about it. You can listen to that here.
Arches by Leah Pahlmeyer was inspired by her time in Alhambra, Spain. I just love the repetition of shapes, the solids, the simple quilting.
I loved Cursive by Paige Alexander – it made me look closer and closer. The quilting is like those practice pages of letters we used to do in grade school. 🙂
You all know I’m a sucker for stripes, so of course I loved Inner Monologue by Anne Sullivan. I love everything about this! Here’s a closer look at the stitching detail – a mix of machine and hand stitching.
Yum!
Speaking of big stitches – look at Mend by Melanie Tuazon! It makes me think of huge running stitches!
This is Moonie McMoonFace by Melissa Averinos. That title just makes me smile. 🙂 She does a lot of improv face quilts and this was her first attempt to make one that she could release a pattern for that people could reproduce. I love it!
My Cat Is a Jerk by Monica Solorio-Snow was made after she took one of Melissa’s improv face classes. I love it! And I think I really want to take one of these classes sometime. It would be loads of fun!
This one is completely different – Organic Mid-Century Mod by Laura Bennet. Beautiful!
Sunday Best by Michelle Wilkie really caught my eye. She made this in bits and pieces every Sunday over a period of months.
Vertigo by Elaine Poplin knocked my socks off and made me dizzy. If you look closely you’ll see that it’s four simple circles – but the way they’re offset and the angles of the squares that make up the rings make the whole thing spin. Wow.
There were more show quilts that I loved – but I accidentally took videos of a lot instead of photos. Oops!
Most of the quilt is quilted so densely that it makes the less-quilted parts really stand out. Just awesome!
Michael Miller makes the fabrics I used in my two newest fabric bundles – Box of Crayons and Dots.
And here’s my favorite purchase.
The fabrics are hand-dyed batiks from Malka Dubrawsky and the threads are gorgeous 8 wt. (that’s even thicker than 12 wt.) rayon threads from WonderFil. You’ll be seeing more of these soon. I can’t wait to play with them!
There are a lot of charities in the world doing really amazing work. I’ve written about how to donate stuffed animals, but frankly, most charities benefit from donations of cash. Large organizations are typically more efficient with cash, not only because they are able to better use the resources (for example, a charity that helps the homeless can usually purchase food at a better price than you as an individual can), but also because money avoids the cost required in shipping and transporting physical goods.
It’s why, for my most recent sample sale, I sold my stuffed animals and donated the money to Heifer International. The cash allowed Heifer to buy a dozen animals, a far greater gift than what they could have accomplished with some plushies!
Mirena recently organized a Craft Bazaar in her hometown, Athens Greece, to benefit Amimoni, an organization dedicated to children with vision impairments and developmental disabilities. It’s a cause close to Mirena’s heart, the organization helped her daughter see… taking her daughter’s vision from 0 to 5/10.
I thought the idea of organizing a craft fair with charity in mind was brilliant! So, I reached out to Mirena to ask if she had any tips to share with us in case you’d like to try this in your own community! A huge thanks to Mirena for chatting with us today!
Event success!
I organised the bazaar together with my friend Chistina Vaggele, who has been in the jewellery business for 30 years now. We raised almost 1000 euros for Amimoni, which is a huge success! Especially for our first fair!
We chose as venue a coffee shop located near our homes but not to the centre of the town so that our guests had easily-accessible parking. This way we were also offering coffee and wine. The coffee shop also provided for a very large table for the display of our goods.
For the promotion, we printed flyers that we gave to every single student of the school our children attend and to stores. We also printed posters and we put them to the school, to the coffee shop and to various stores. Of course we posted on our social media (Instagram, Facebook and Twitter) and Amimoni did too.
We also organized a side event: as we were anticipating that most or all of our guests would be women (given of the goods we were offering – jewelry and stuffed animals-), we called upon Irini Fthenaki of House of Color who did a mini seminar on what colors we are suggested to wear according to our complexion.
Tips for organizing a charity-focused Craft Bazaar
1) Pick your cause: Get in touch with them, tell them what you want to do. They won’t say no! They will probably provide assistance with the organisation of the event. Ask them for their logo to put on your promotional material. Ask them for help in the promotion of the event (they can put an announcement on their website, on their Facebook page, they can put flyers and posters to their offices etc). Decide if you are giving all or portion of the income.
2) Pick the date: Consider picking a date close to a holiday when people are likely to buy and bound to help! That’s why we picked a December date for this event.
3) Pick the venue: Where will you hold the bazaar? Consider:
is there enough room to display your goods?
is the parking easy for your guests?
are there passers-by or is it more secluded?
what is the fee for holding your event there?
4) The promotion: social media is your number 1 go-to place for the promotion of your event. You can also print posters and flyers. Don’t forget your acquaintances!
5) Plan for an extra side event that will attract more people to your bazaar: a mini seminar, live music… Find someone who would want to advertise themselves through your event.
6) Have plenty of goods to sell! This requires a lot of advance planning!
7) Don’t forget your packaging! Simply because it is a charity event it doesn’t mean it has to be sloppy! Maybe one of your guests is buying a gift and would like it wrapped.
Ideas for the Future
What I would change for next year in our bazaar? (Yes, we are doing it again!)
Have more stuffed animals available to sell (the truth is I had only 1.5 months to prepare the whole thing!)
Have a book with photos of the stuffed animals so that people can place custom orders
Select a venue where there are more passers-by
Organise a mini concert during the event
Thank you so much, Mirena!
Have you ever organized a charity fair? Any more tips to share?
Want to learn the basics of hand embroidery with an easy online workshop – totally free?
Sign up for Embroidery 101 here. You’ll learn how to get started, the tools and supplies you’ll need, the four most basic stitches, how to transfer your pattern and how to display your work.
If you already know the basics – sign up for Embroidery 201. It’s also free! You’ll learn how to stitch on specialty fabrics like felt and stretchy T-shirts. Plus you’ll learn lots and lots and LOTS more stitches – all my favorites!
You know how I talk ALL THE TIME about how much I love handwork because it’s so portable?
Would you like to see just what I keep in my handwork bag? I’ll show you what tools are inside and how I keep everything organized so I can pull out my work whenever – and wherever – I have a few minutes to stitch.
All right then!
I’m currently working on two projects – hand quilting the Controlled Chaos quilt (not portable – I do this on the sofa)
The quilt won’t fit in it 🙂 but the 7 inch hoop does. I work on both projects on the sofa – but I also carry the hoop with me for random moments of handwork.
I love having a metal tin so I can store sharp objects inside without fear of them poking me or poking through my bag. Here’s what’s inside the tin. . .
My bag is always packed and sitting at my sofa spot, ready to grab and take along in case I’m going anywhere I might have a few extra minutes for some handwork.
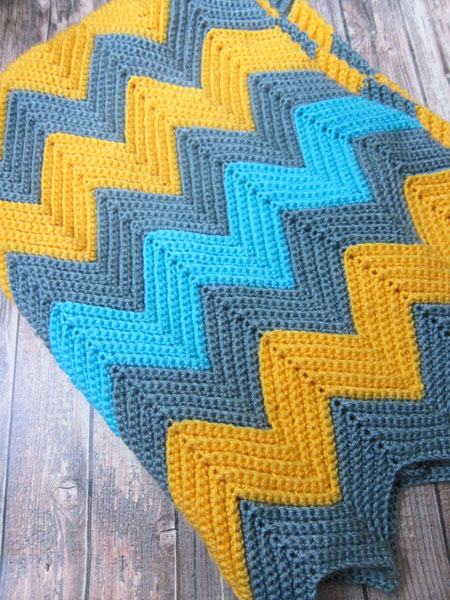
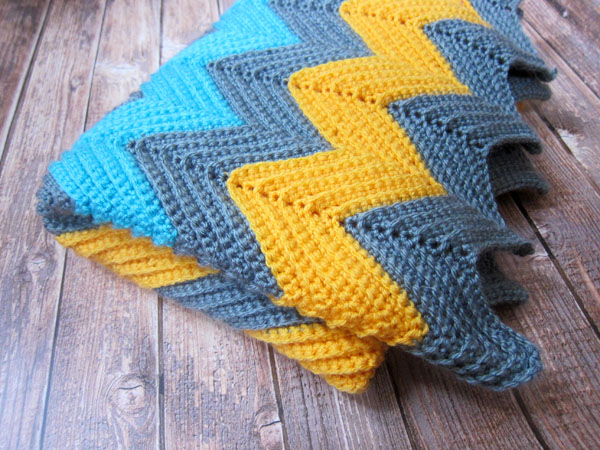
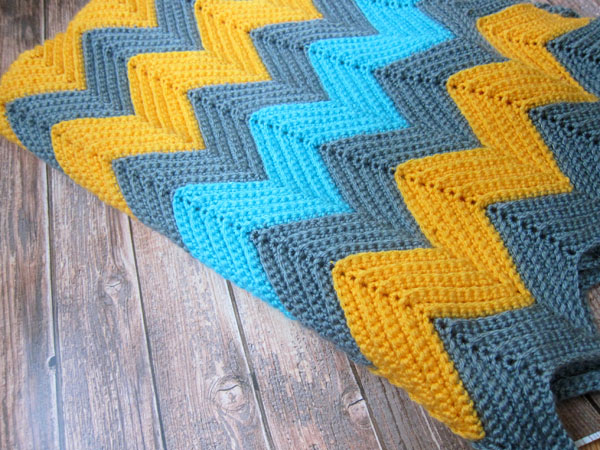
Have I shown you the beautiful afghan that my mom made Maddie?
I just love it! It’s in my favorite colors!
She used Knit Picks (either Brava or Comfy Worsted… I can’t tell because it looks like the aqua color has been discontinued!) and a size I hook. I bought her a Caspian Crochet hook (because she was wearing the paint off of her aluminum hook) and she loved it!
My mom doesn’t read crochet patterns (yes, I fully appreciate the irony in that- given that my job is to teach people to read crochet patterns!), but the stitch she used is very similar to the classic back loop ripple stitch.
There are lots more inspirational chevron photos on my Crochet Afghan Pinterest board… so many color combinations you can do with this stitch to get a great blanket!
Every once in a while I get an email from someone saying they love to make softies, but don’t have any children in their lives right now the right age to get them. They want some suggestions for where they can donate their creations.
There are so many wonderful places!
children’s hospitals
firefighters and police departments like to keep some on hand to give to traumatized children
homeless and family violence shelters
orphanages – both in the US and overseas
This is just a the tip of the iceberg! I put out a call in a recent newsletter asking readers where they give, and I got a bunch of great responses!
So let’s start with a few general guidelines and things to think about, and then move into the specific suggestions offered by readers.
The number one bit of advice I have is to ask first! Some organizations might have restrictions that you could never anticipate. Depending on the ward, some hospitals can only take toys that are made of hypoallergenic materials – they can give you a list of what is and isn’t allowed. One suggestion that surprised me (but made perfect sense) was to keep arms and legs minimal so there’s less to get hooked on tubes and wires.
My local shelter asked for toys to be small – they pointed out that each kid has a bed and a small shelf and that’s it – and when they leave they leave with a small bag. They can’t have a stuffed animal that takes up half the bag. They also asked for some teen-appropriate softies, saying the teens are often happy to have a softie to hug, but don’t want something that looks too babyish – a request that totally broke my heart. So contact the organization and ask first.
And remember – your favorite organization might prefer cash! I’ve lost count of the number of cat and dog quilts that have been made and auctioned off at shelter fundraisers! Every one of them makes me so happy!
Sarah of Dolls and Daydreams has some really great info about donating dolls abroad here.
And now – here are some responses from readers. . .
Lots and lots of people mentioned the Knit-a-Square organization. They collect knitted and crocheted squares to be joined into afghans, and also handmade stuffed animals and dolls – all going to AIDS orphans in Africa. Definitely take a look at their website – they have the infrastructure to distribute a LOT of love. 🙂
Julia writes. . .
I am about to send two quilts to Quilts For Kids, an organization that donates quilts for kids in hospitals. I have tons of baby-ish fabrics in my closet and feel great that they’re all going to a good cause.
After I found out about QFK heard a lovely story about a family that had premature twin babies in a NICU in New York–the NICU also had quilts and both parents commented on how comforting this was.
Beatrice writes. . .
Currently I am in the process of making lots of “Warrens” which will be donated to orphanages and cancer hospitals in Egypt. I have been living in this country for 18 years and donated lots of items and cash to help the poorest, which sadly are numerous. This time though, I feel really happy, because with every lovely bear finished I try to imagine a little girl or boy who will love what I have created.
Liz writes. . .
A local organization that I donate time, money, and material things to is Hope’s Door, in Dallas. It’s a shelter for battered women and their children. They do a wonderful job and are a great bunch of dedicated, insanely organized people. Throughout the year, Hope’s Door does everything from toy drives to fun runs to auctions. If you’re going to post a list, I’d love for you to mention them, and I know they would appreciate it, too! They always have needs because, sadly, they always have clients.
Cindy writes. . .
There is a woman who works with my husband who belongs to a small church that gives away bags of food once a month. For Christmas I donate lots of stuffed animals and dolls. And also at Easter I donate Easter things – bunnies and chicks, etc. I’m so grateful I have the time and money to do this.
Candy writes. . .
Here’s a suggestion of where to donate softies; local hospitals and local woman’s shelters. I have been making and donating for several years now to both. The shelters love the animals or dolls because lots of times the families are rushed away from their homes because of fear and abuse and don’t have time to grab things of love and importance so having something to cling to (softie) is sometimes a life saver. This goes for kids as well as the women. Hospitals love any type of donation, whether it be softies, knitted things for babies, sewn things for babies and blankies. I know there are lots of other places to donate but these are my favorite.
Laura writes. . .
Wildlife rescue groups sometimes request crochet artificial nests for orphaned birds, bunnies, possums etc. Your readers can see if they can find one locally that needs some.
I have seen cat and dog rescues that take handmade fleece blankets to shelters so the animals don’t have to sleep in those harsh metal cages without any protection and warmth they can receive from a blanket. Just make sure to contact rescue first to obtain size wanted.
An excellent charity is your local domestic violence shelter. These families have fled their homes with nothing. They can use new blankets and quilts ( I have donated many fleece blankets for infants and toddlers), new handmade softies for the kids, hats gloves and scarves in the winter. This is an extremely rewarding charity to donate!
Ann writes. . .
I donate softies and dolls at my local hospital pediatrics ward and in the Emergency Room waiting area where children often are waiting with adults. I also go to the local pediatric office, pediatric dentist office, the sheriff’s department and the fire department.
Joan writes. . .
We are a small group of ladies that gather once a month to sew to donate. Some of local items we have donated are fleece hats given to our pre-school. We used a pattern from Nancy’s Notions. They loved them. Kid capes were given to our local day care centers. We borrowed a doll from the pre-school and made doll clothes, diapers, blankets, a mattress for a crib, etc. for their room. This month we are making pillows for cancer patients. We are making a port pillow, heart shaped pillows, rectangle pillows. These are delivered to local hospitals that give cancer treatments. One month we did walker bags for a local nursing home. We did lap quilts for shut-ins. We have made burp cloths and receiving blankets and bibs for Northeast Nebraska Community Action Partnership.
We like to find local spots we can donate for we have found postage is soo expensive.
Finally – a couple of specific patterns.
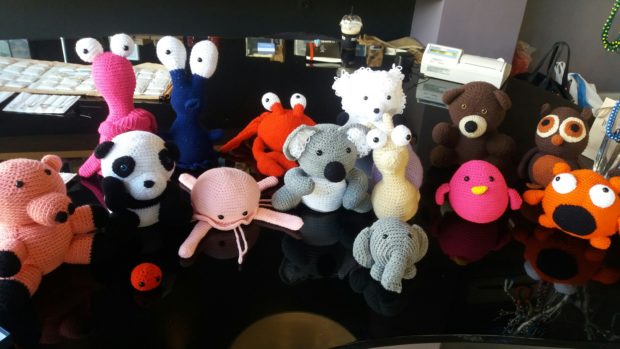
I designed Warren the Charity Bear especially for donations. He can be made out of any kind of fabric, with any kind of stuffing, and has lots of possible variations so you won’t get bored if you decide to make a lot of them – like Kathy and many others have done. 🙂
Kathy made the Warrens in this photo and Caroline made the ones in the top photo – both for Knit-a-Square.
I’ve also heard that Warren makes an excellent post-op cough pillow for kids. People who have had chest or abdominal surgery are taught to hug a pillow when they cough, to help support the incision and ease pain. Warren is just the right size and shape for this. 🙂