My Week at Puppet Fantasy Camp

Beyond the Sock puppetry workshop

I just got back from the best vacation ever.

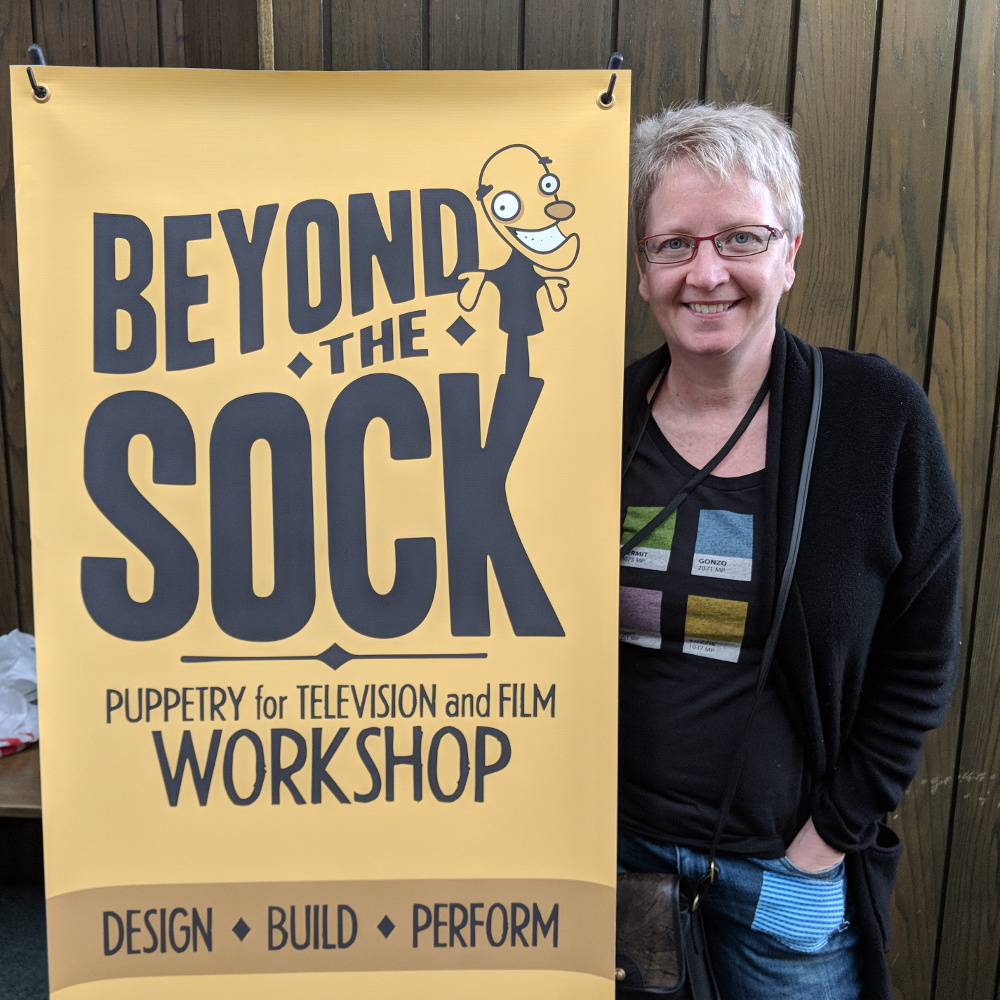
My husband and I went to the Beyond the Sock Puppetry Workshop where we spent a week learning how to make – and perform – hand and rod puppets.

So! Much! Fun!

Here we are with our instructors (and our finished puppets).

Beyond the Sock - our teachers

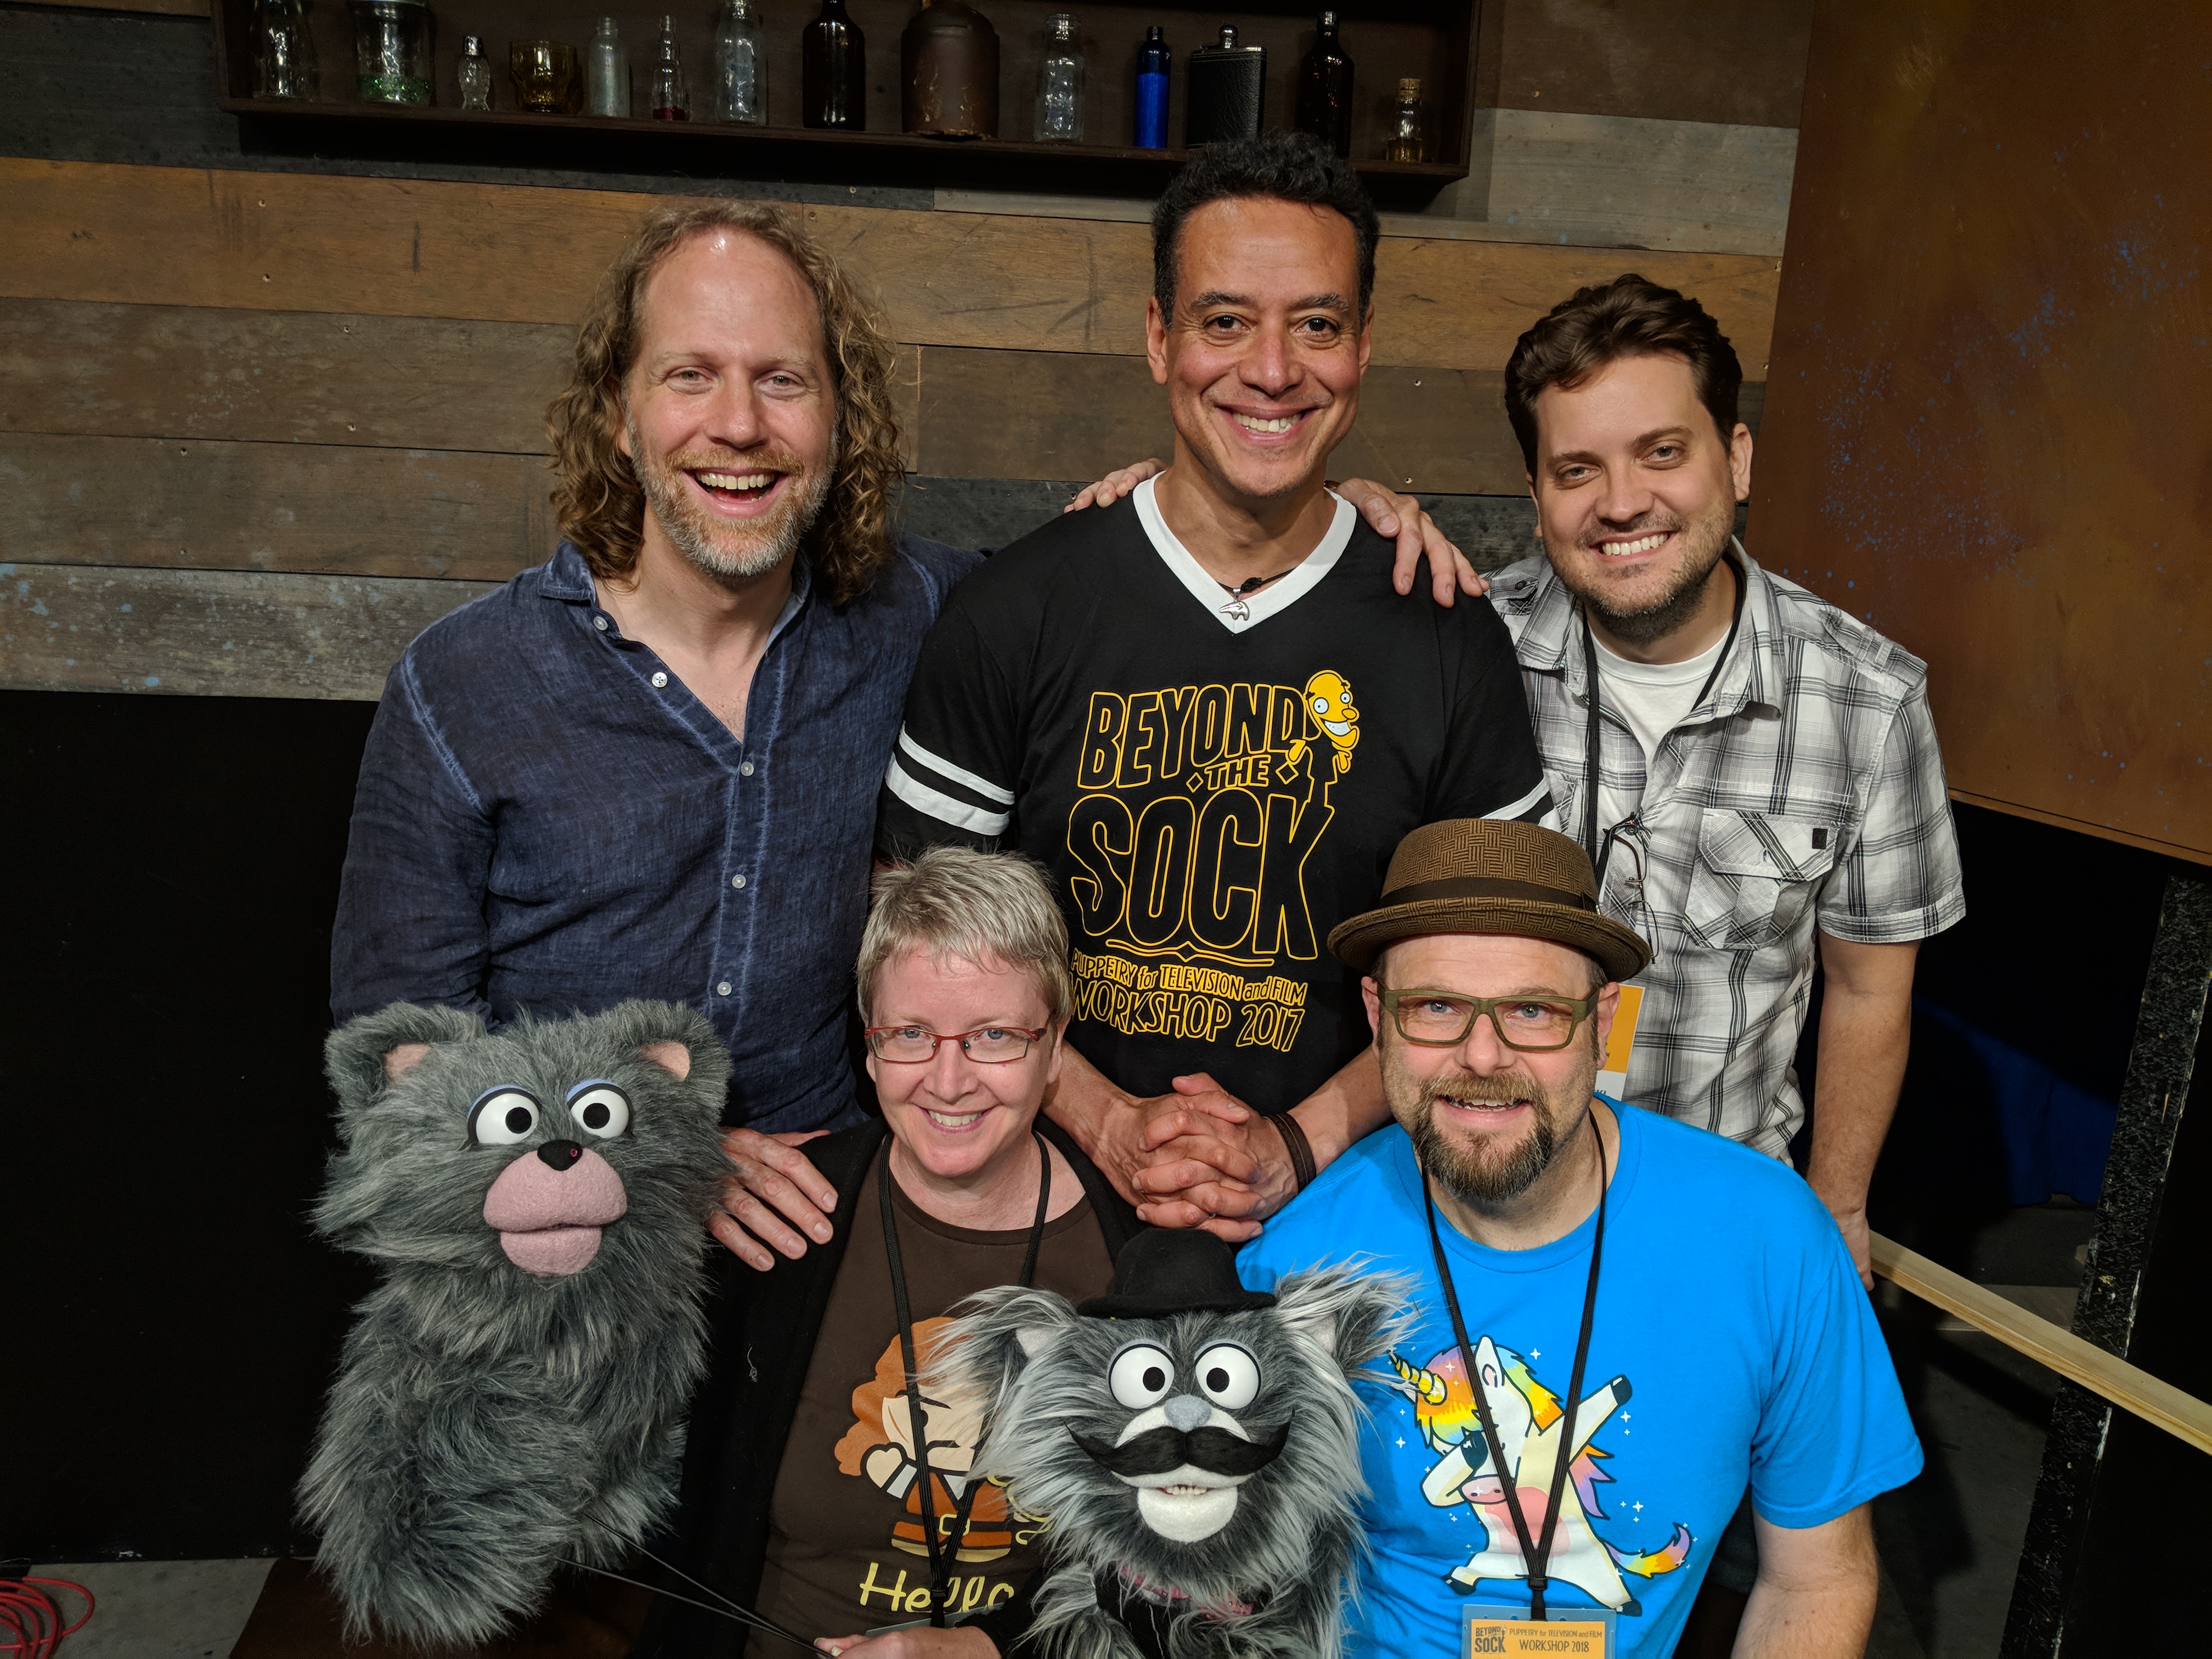
From left to right that’s Peter Linz, Noel MacNeal (both puppeteers for Sesame Street and lots of other shows/movies) and Pasha Romanowski (puppet-builder and pattern-designer extraordinaire).

What an incredible week! We spent every morning working on our puppets, and every afternoon learning how to perform them.

I’ll start with the making – the part that was definitely my happy place. 🙂

Everyone worked from the same pattern – which was a great way to learn. This year it was a cute cat. 🙂

Beyond the Sock 2018 - cat pattern

Previous years have been rats, monkeys, chickens, penguins, and pirates.

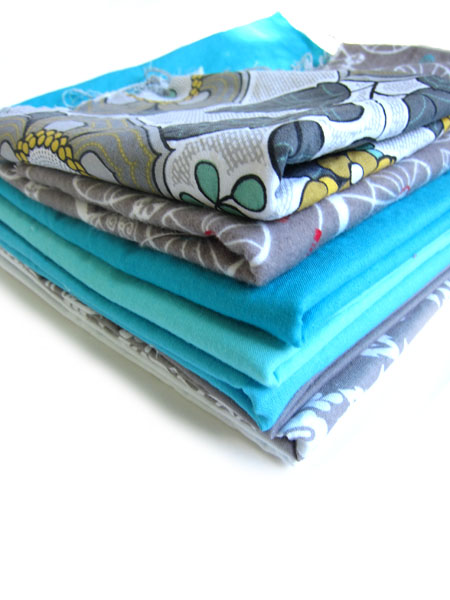
Even though we all worked from the same pattern, we all used different materials and ended up with wildly different puppets. And we didn’t get to choose our materials – we got mystery boxes like on Master Chef.

Beyond the Sock 2018 - mystery boxes

I got this really thick, lush, grey fur.

Beyond the Sock 2018 - my fur

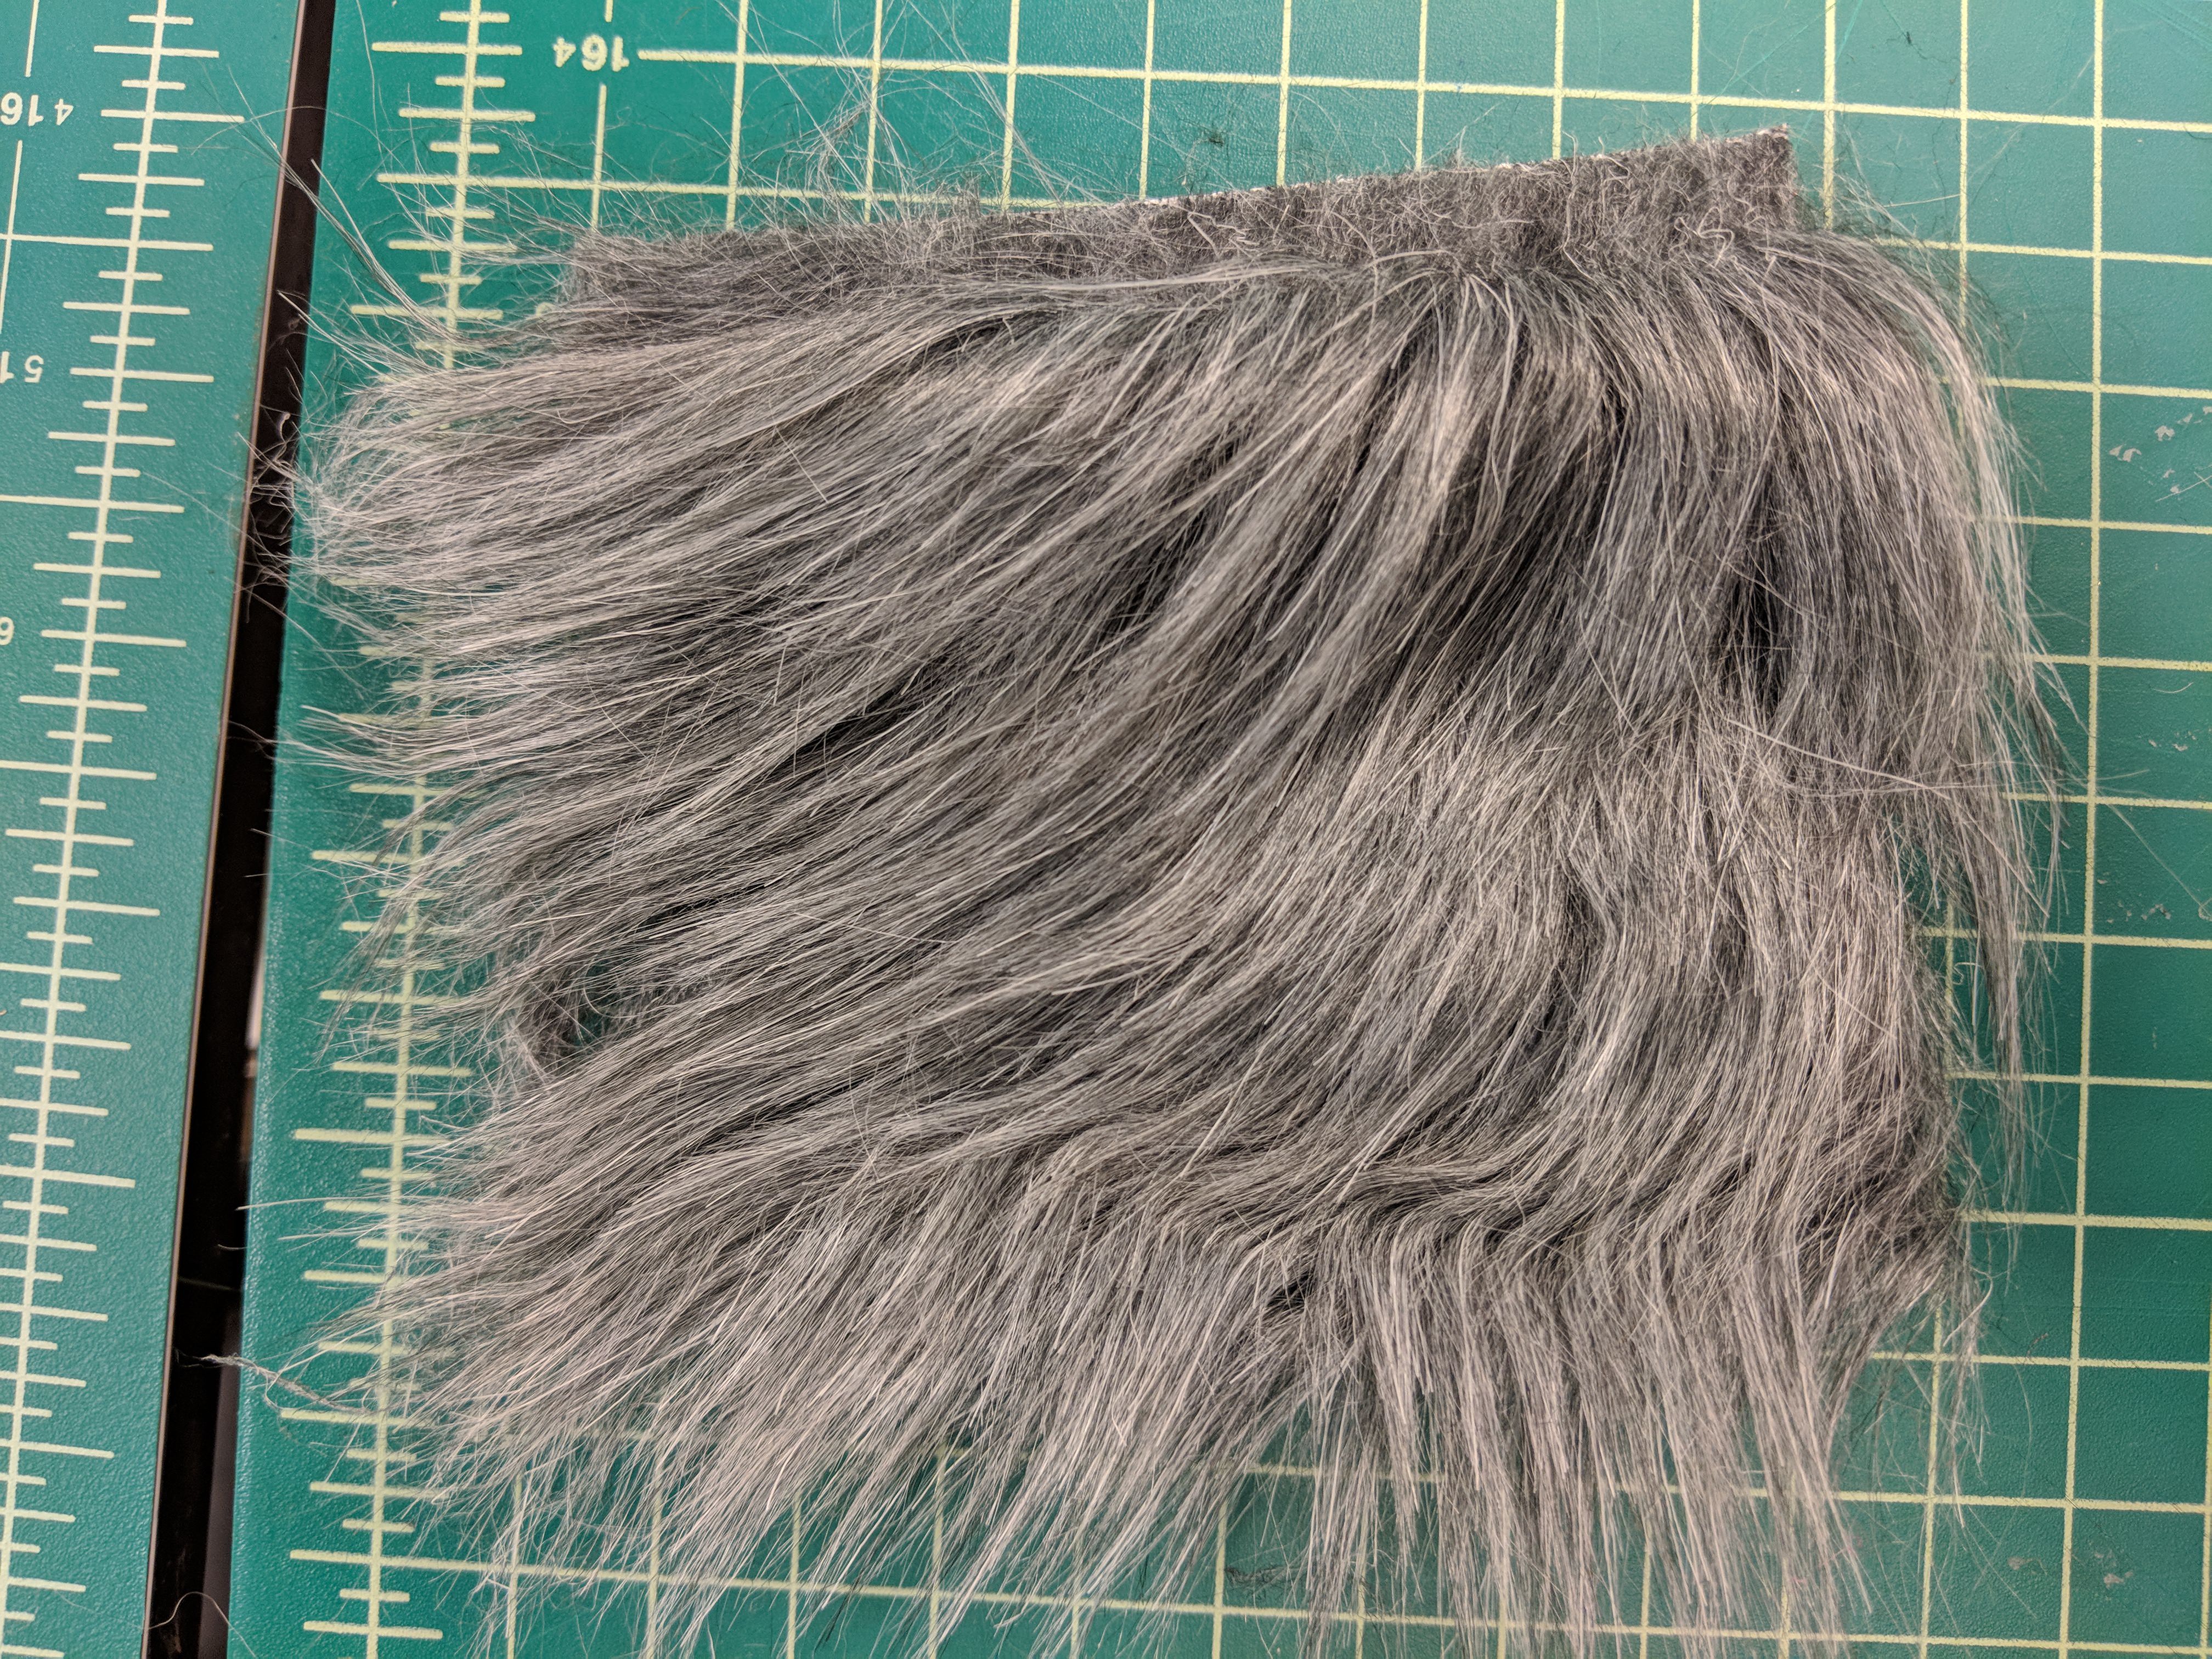
And the fur my husband got may look familiar to some of you!

Beyond the Sock 2018 - Alan's fur

I used it for one of these monsters and in this tutorial showing how to cut fur. It’s one of my favorites!

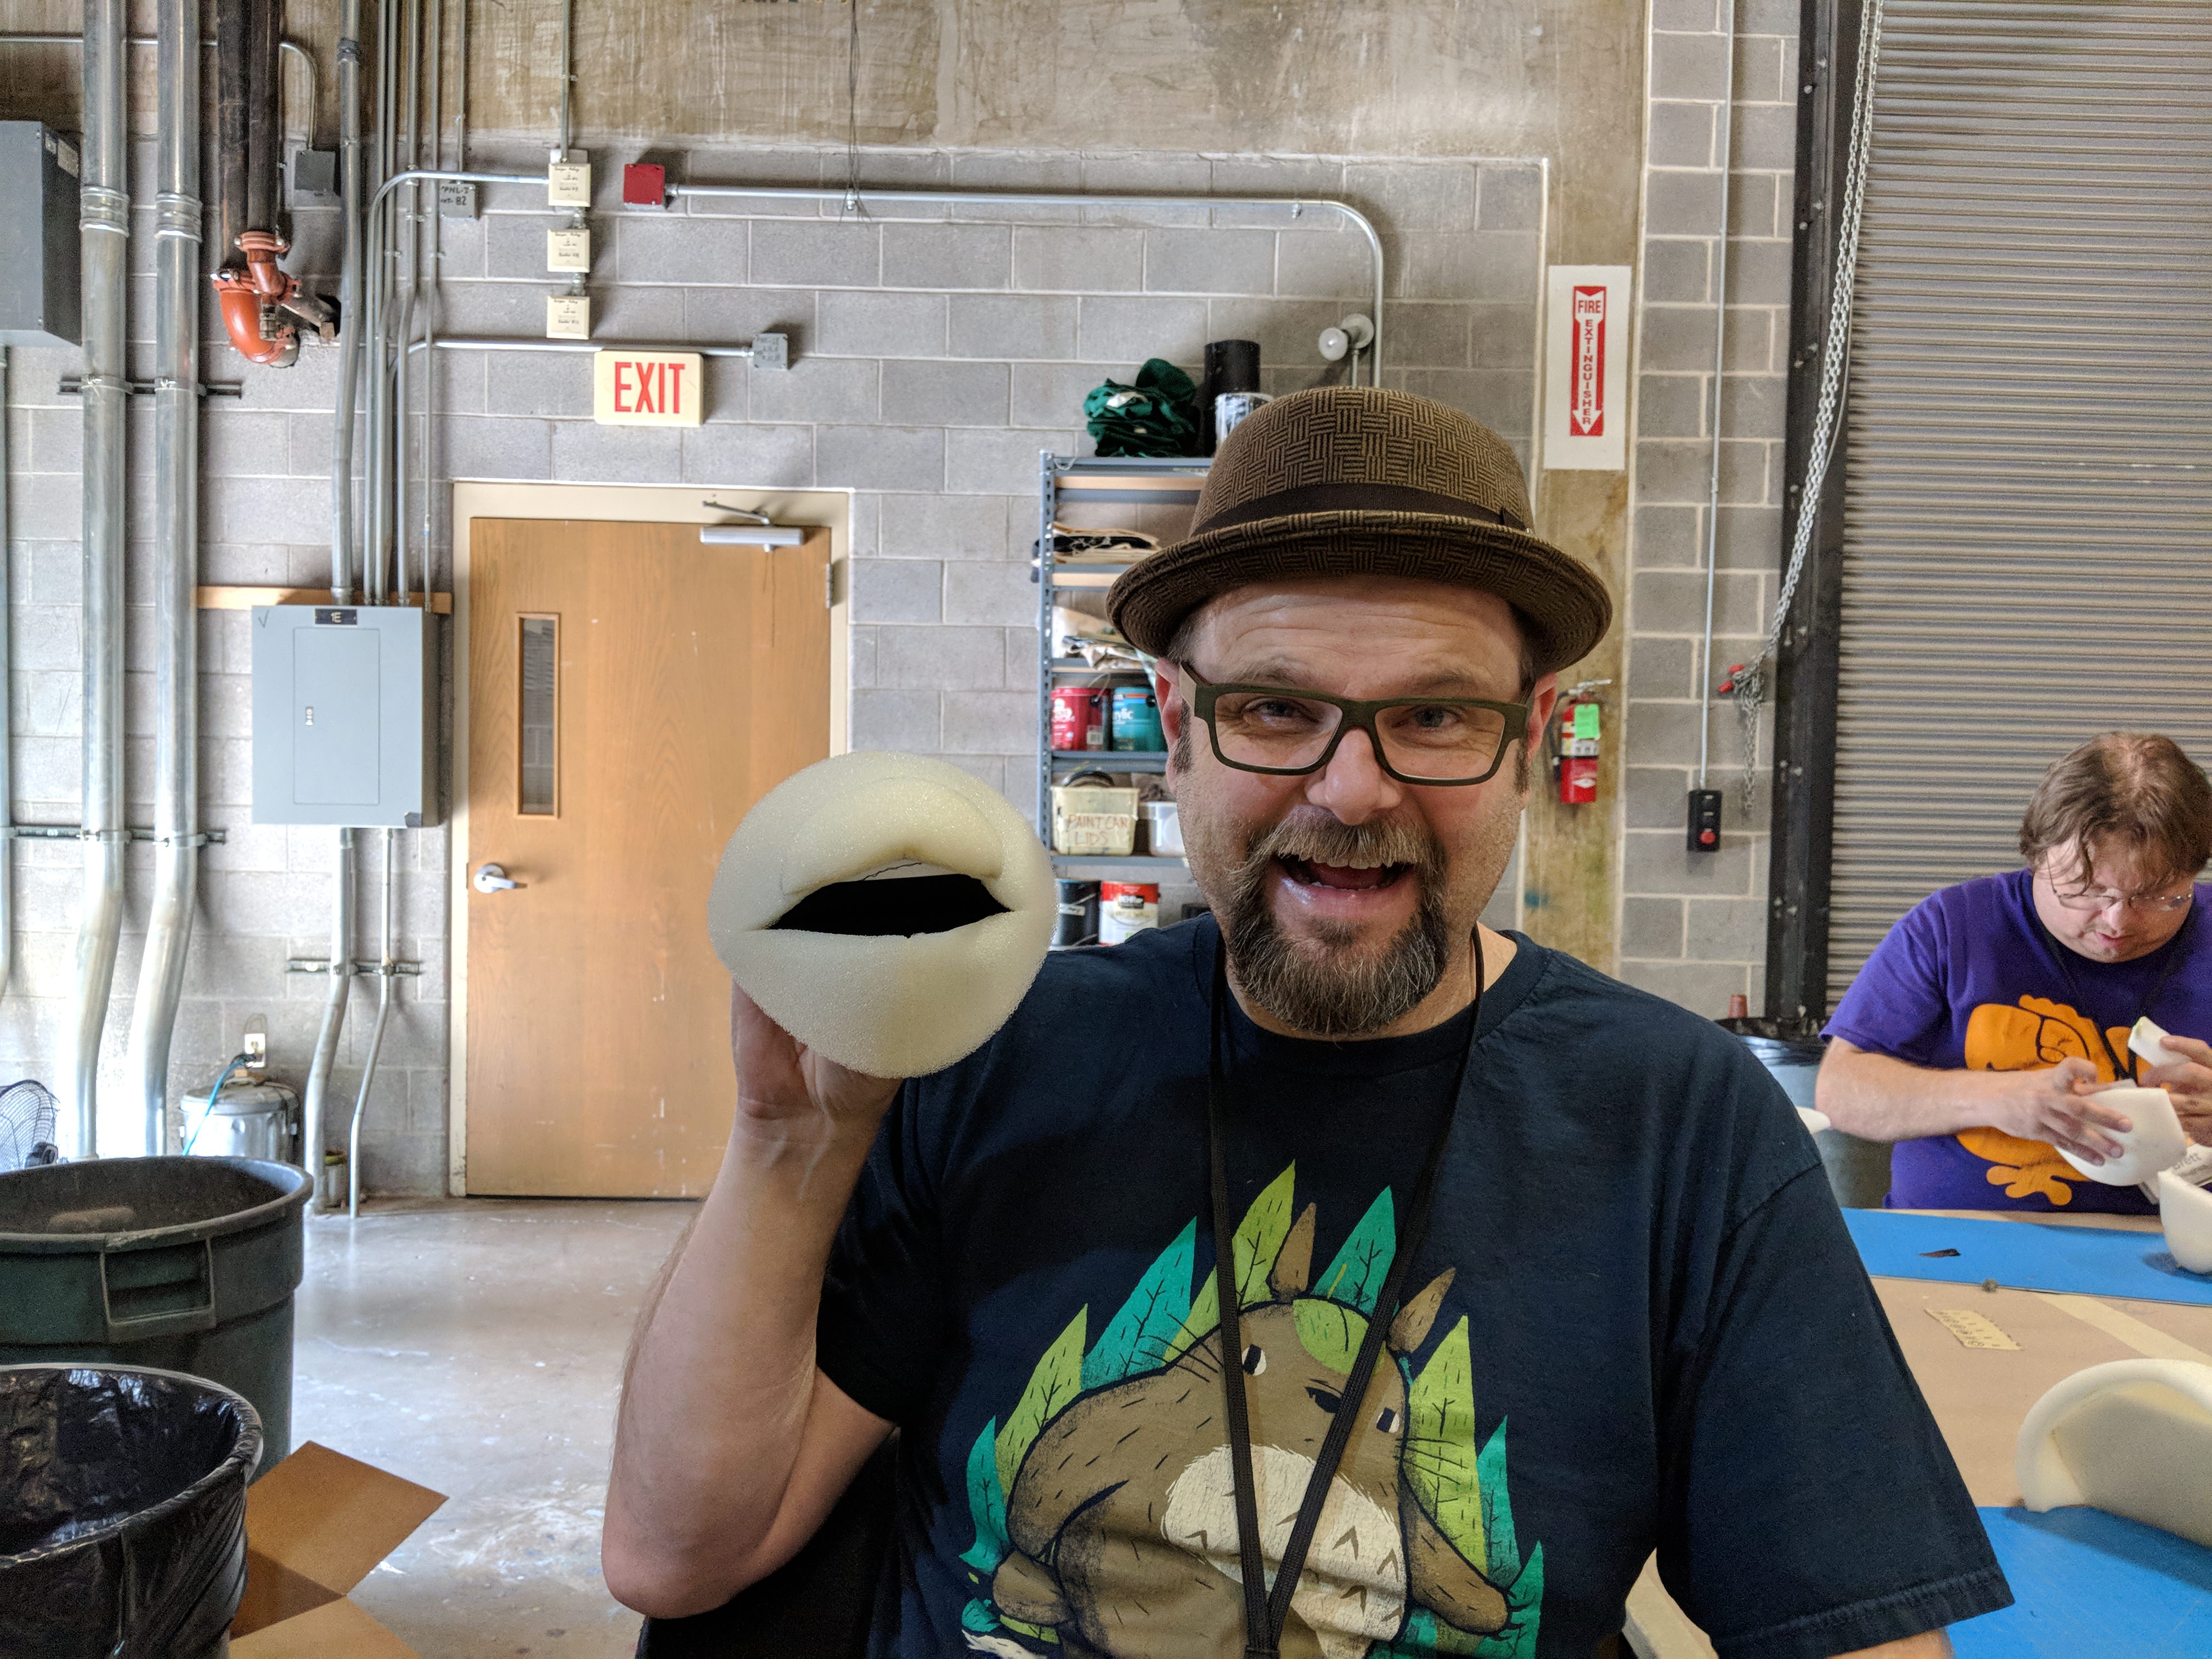
We built a foam structure, staring with the mouthplate and basically building out from there.

Beyond the Sock - building the mouthplate

After the foam structure was finished, we sewed all the fur and everything into a skin and slipped it over the foam – a very tight fit!

Then it was time to add eyes and accessories and all that and I forgot to take pictures because I was totally engrossed. 😉

But take a look at some of the finished puppets!

Here are mine and Alan’s.

Beyond the Sock - finished puppets

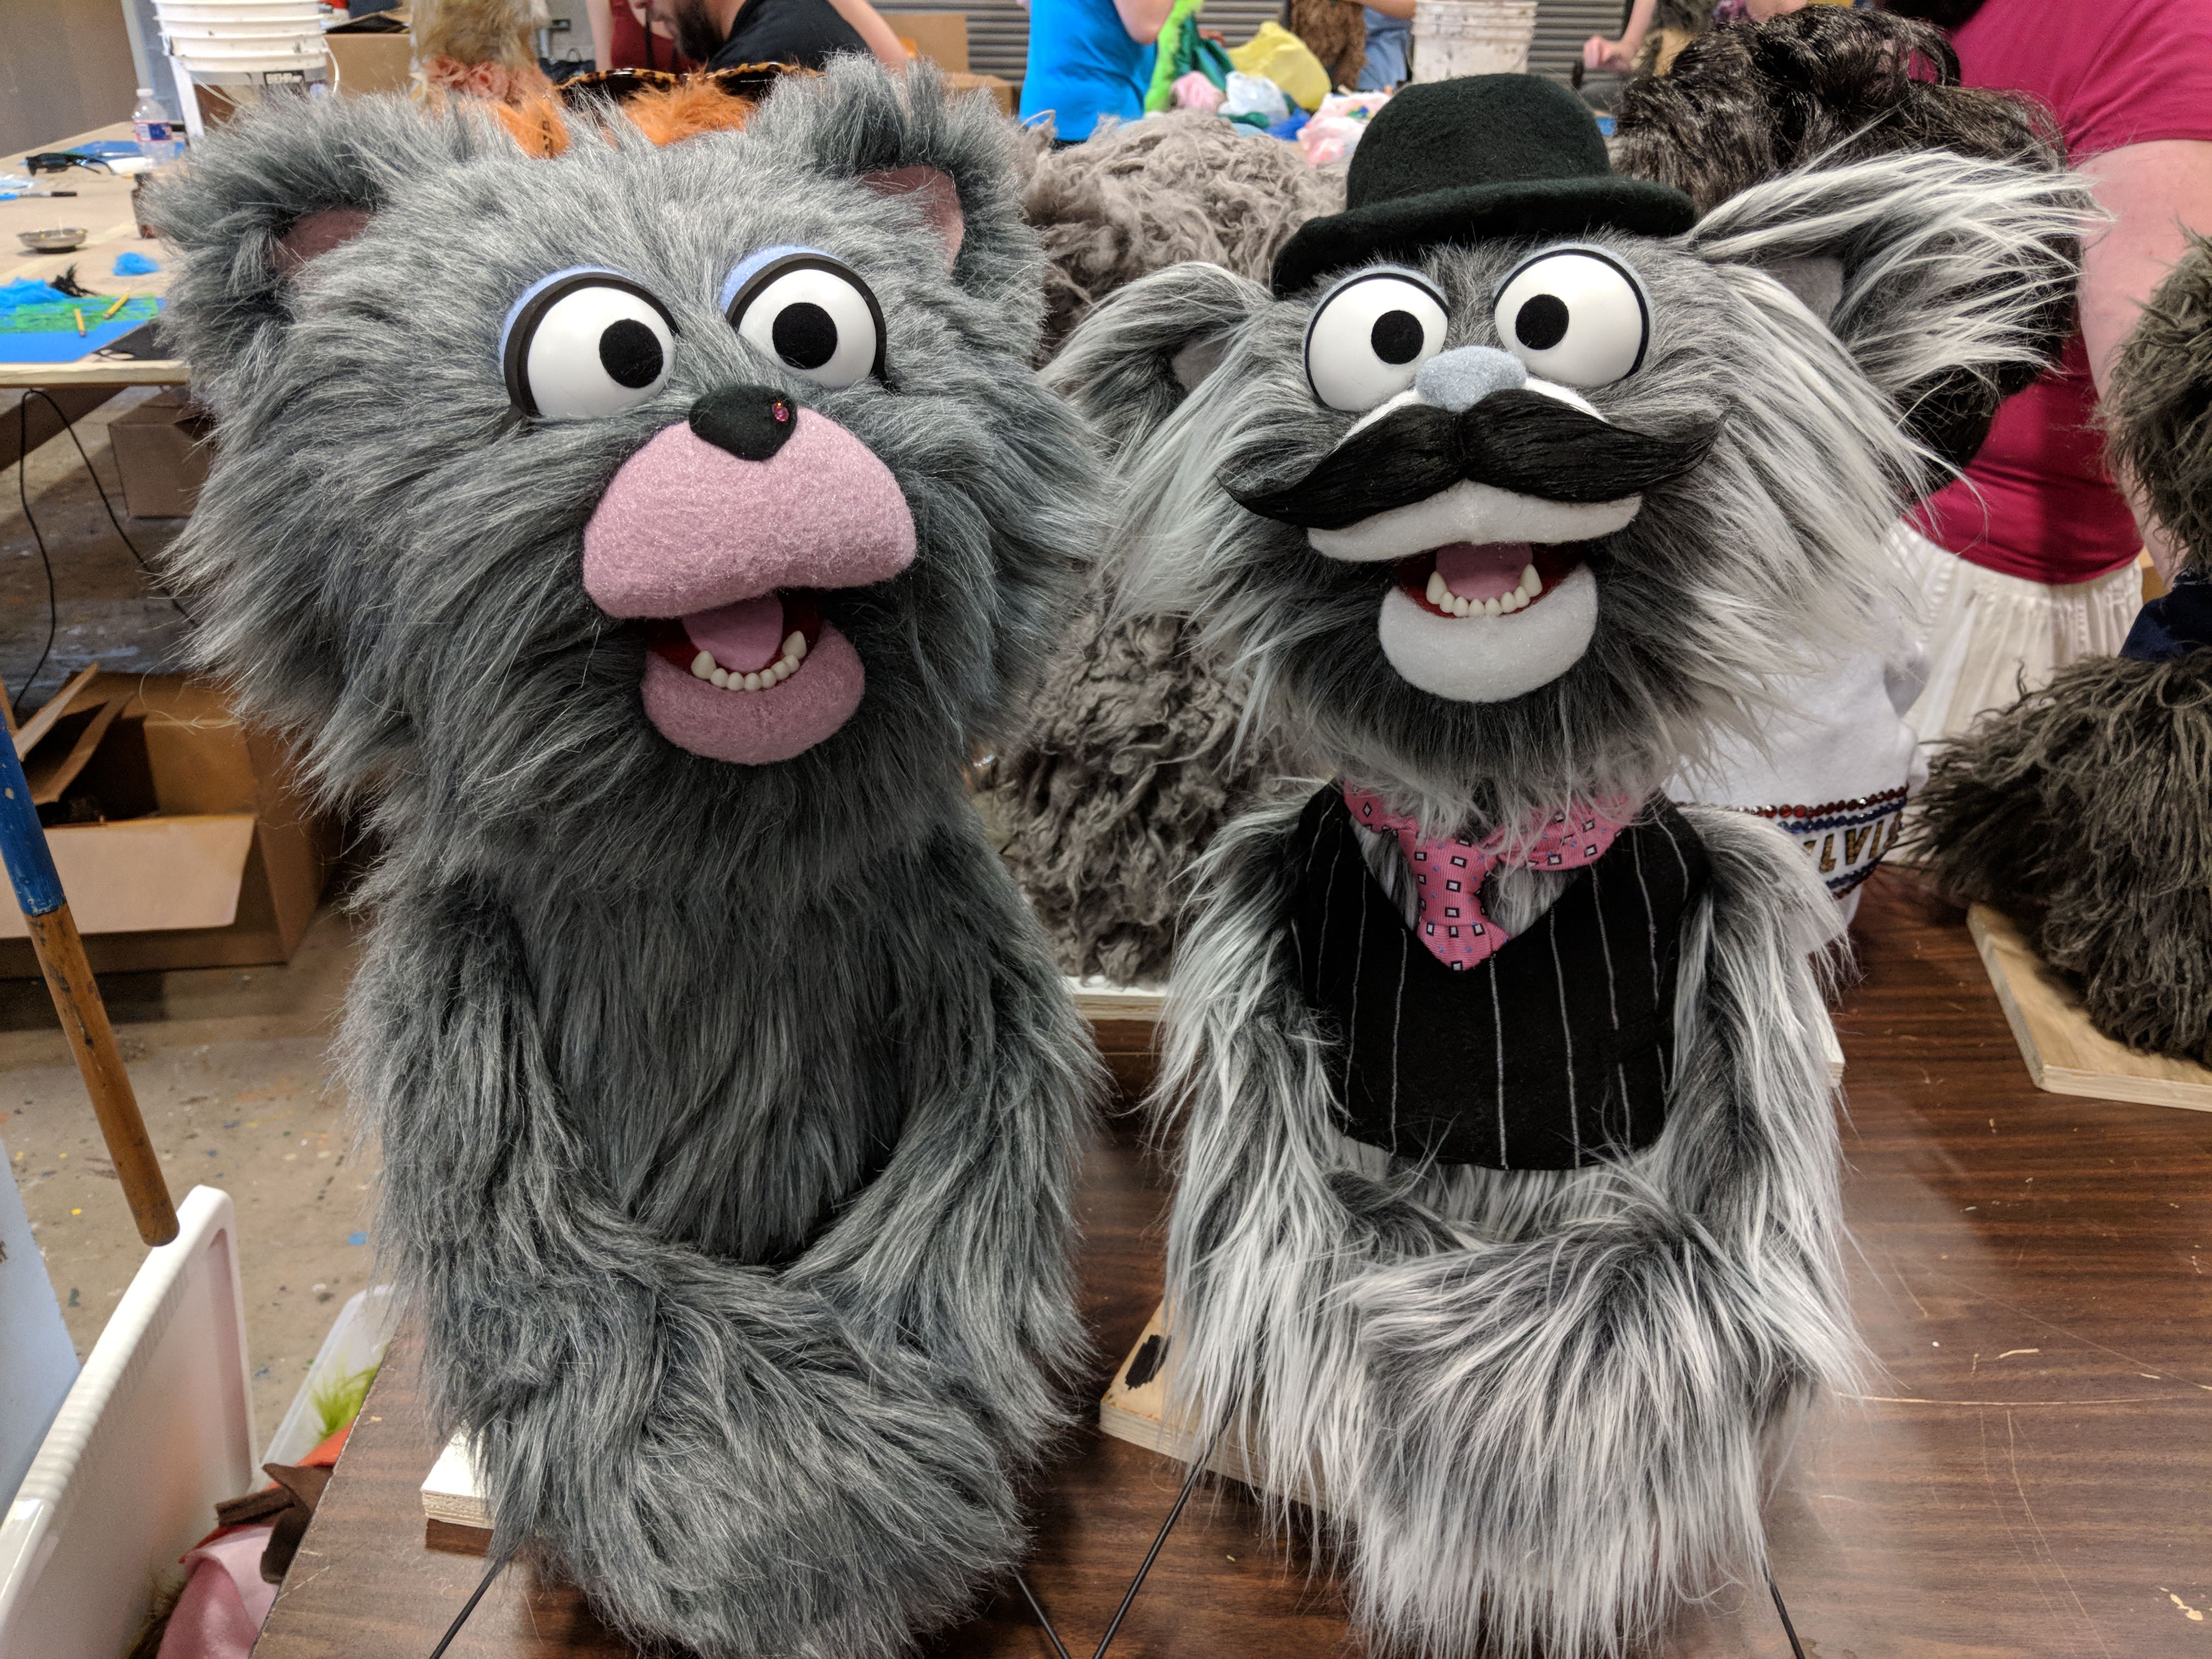
I love his bowler hat and mustache!

Mine has a little gemstone stud in her nose and she was supposed to get purple feather streaks in her hair, but I ran out of time. I’ll add them later. 🙂

Here are some others. . .

Beyond the Sock - finished puppets

Beyond the Sock - finished puppets

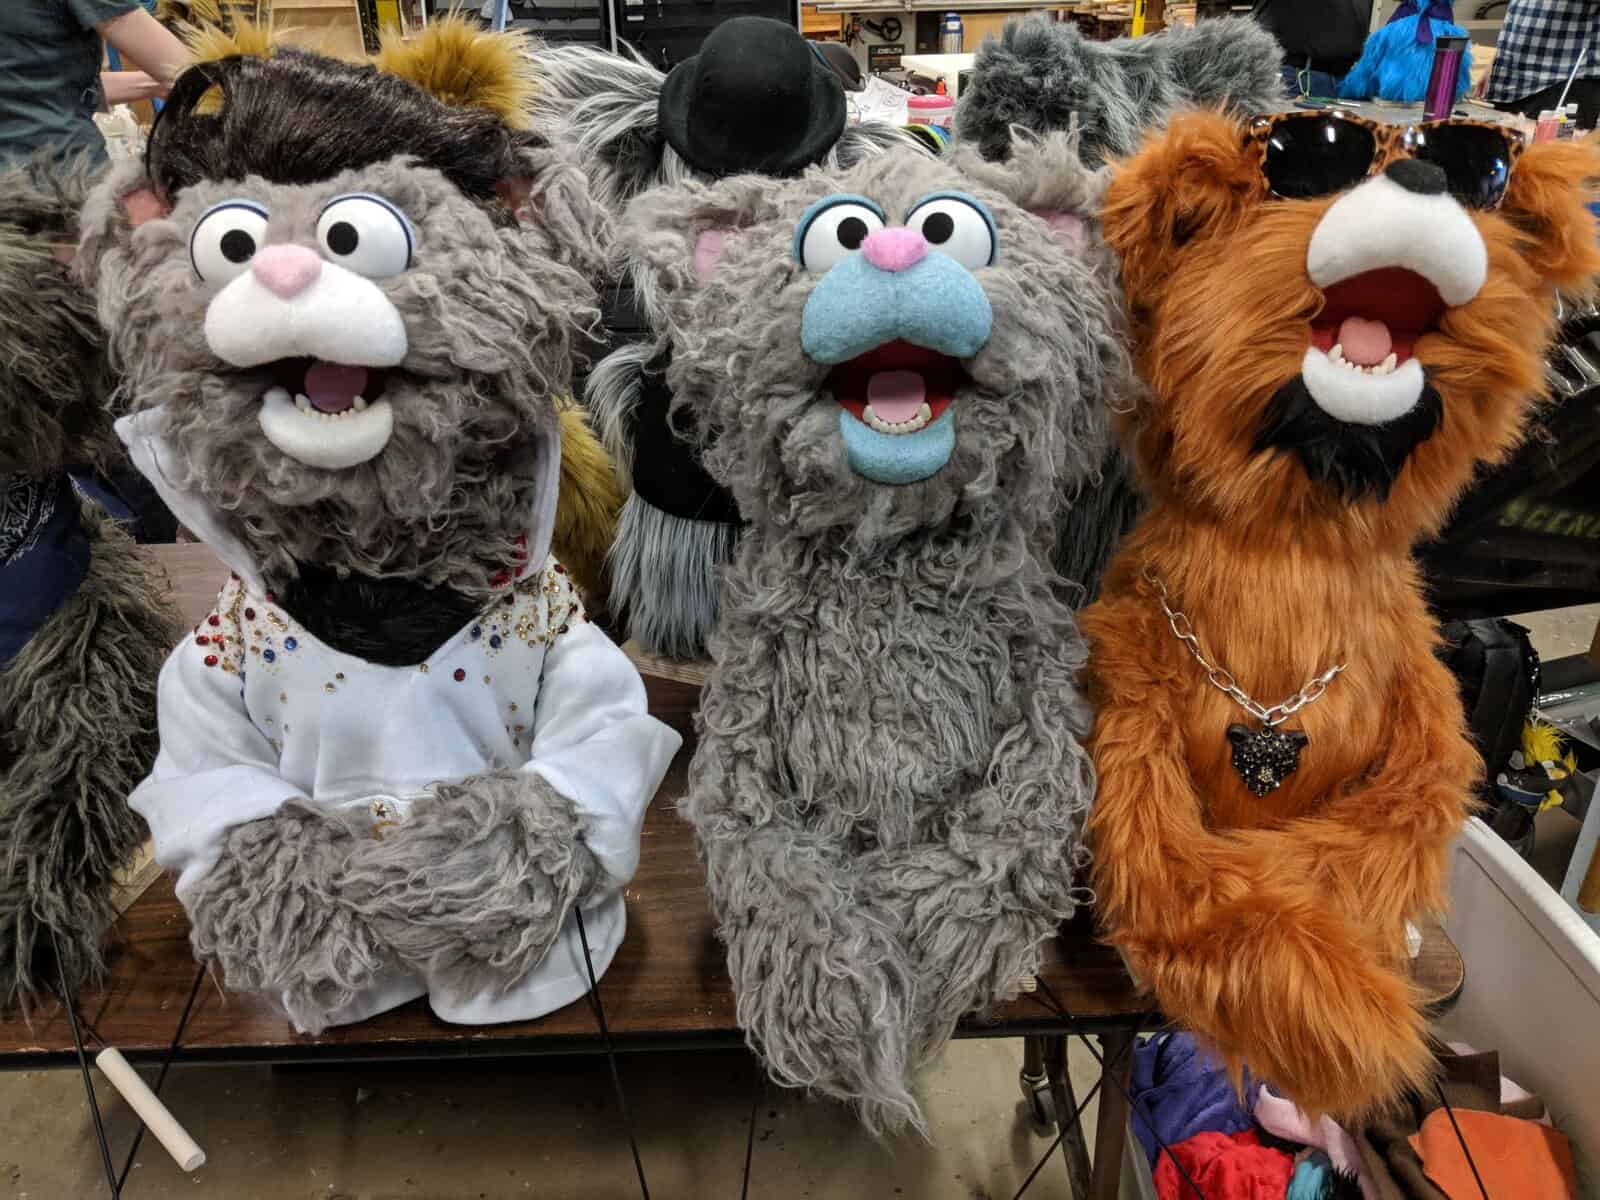
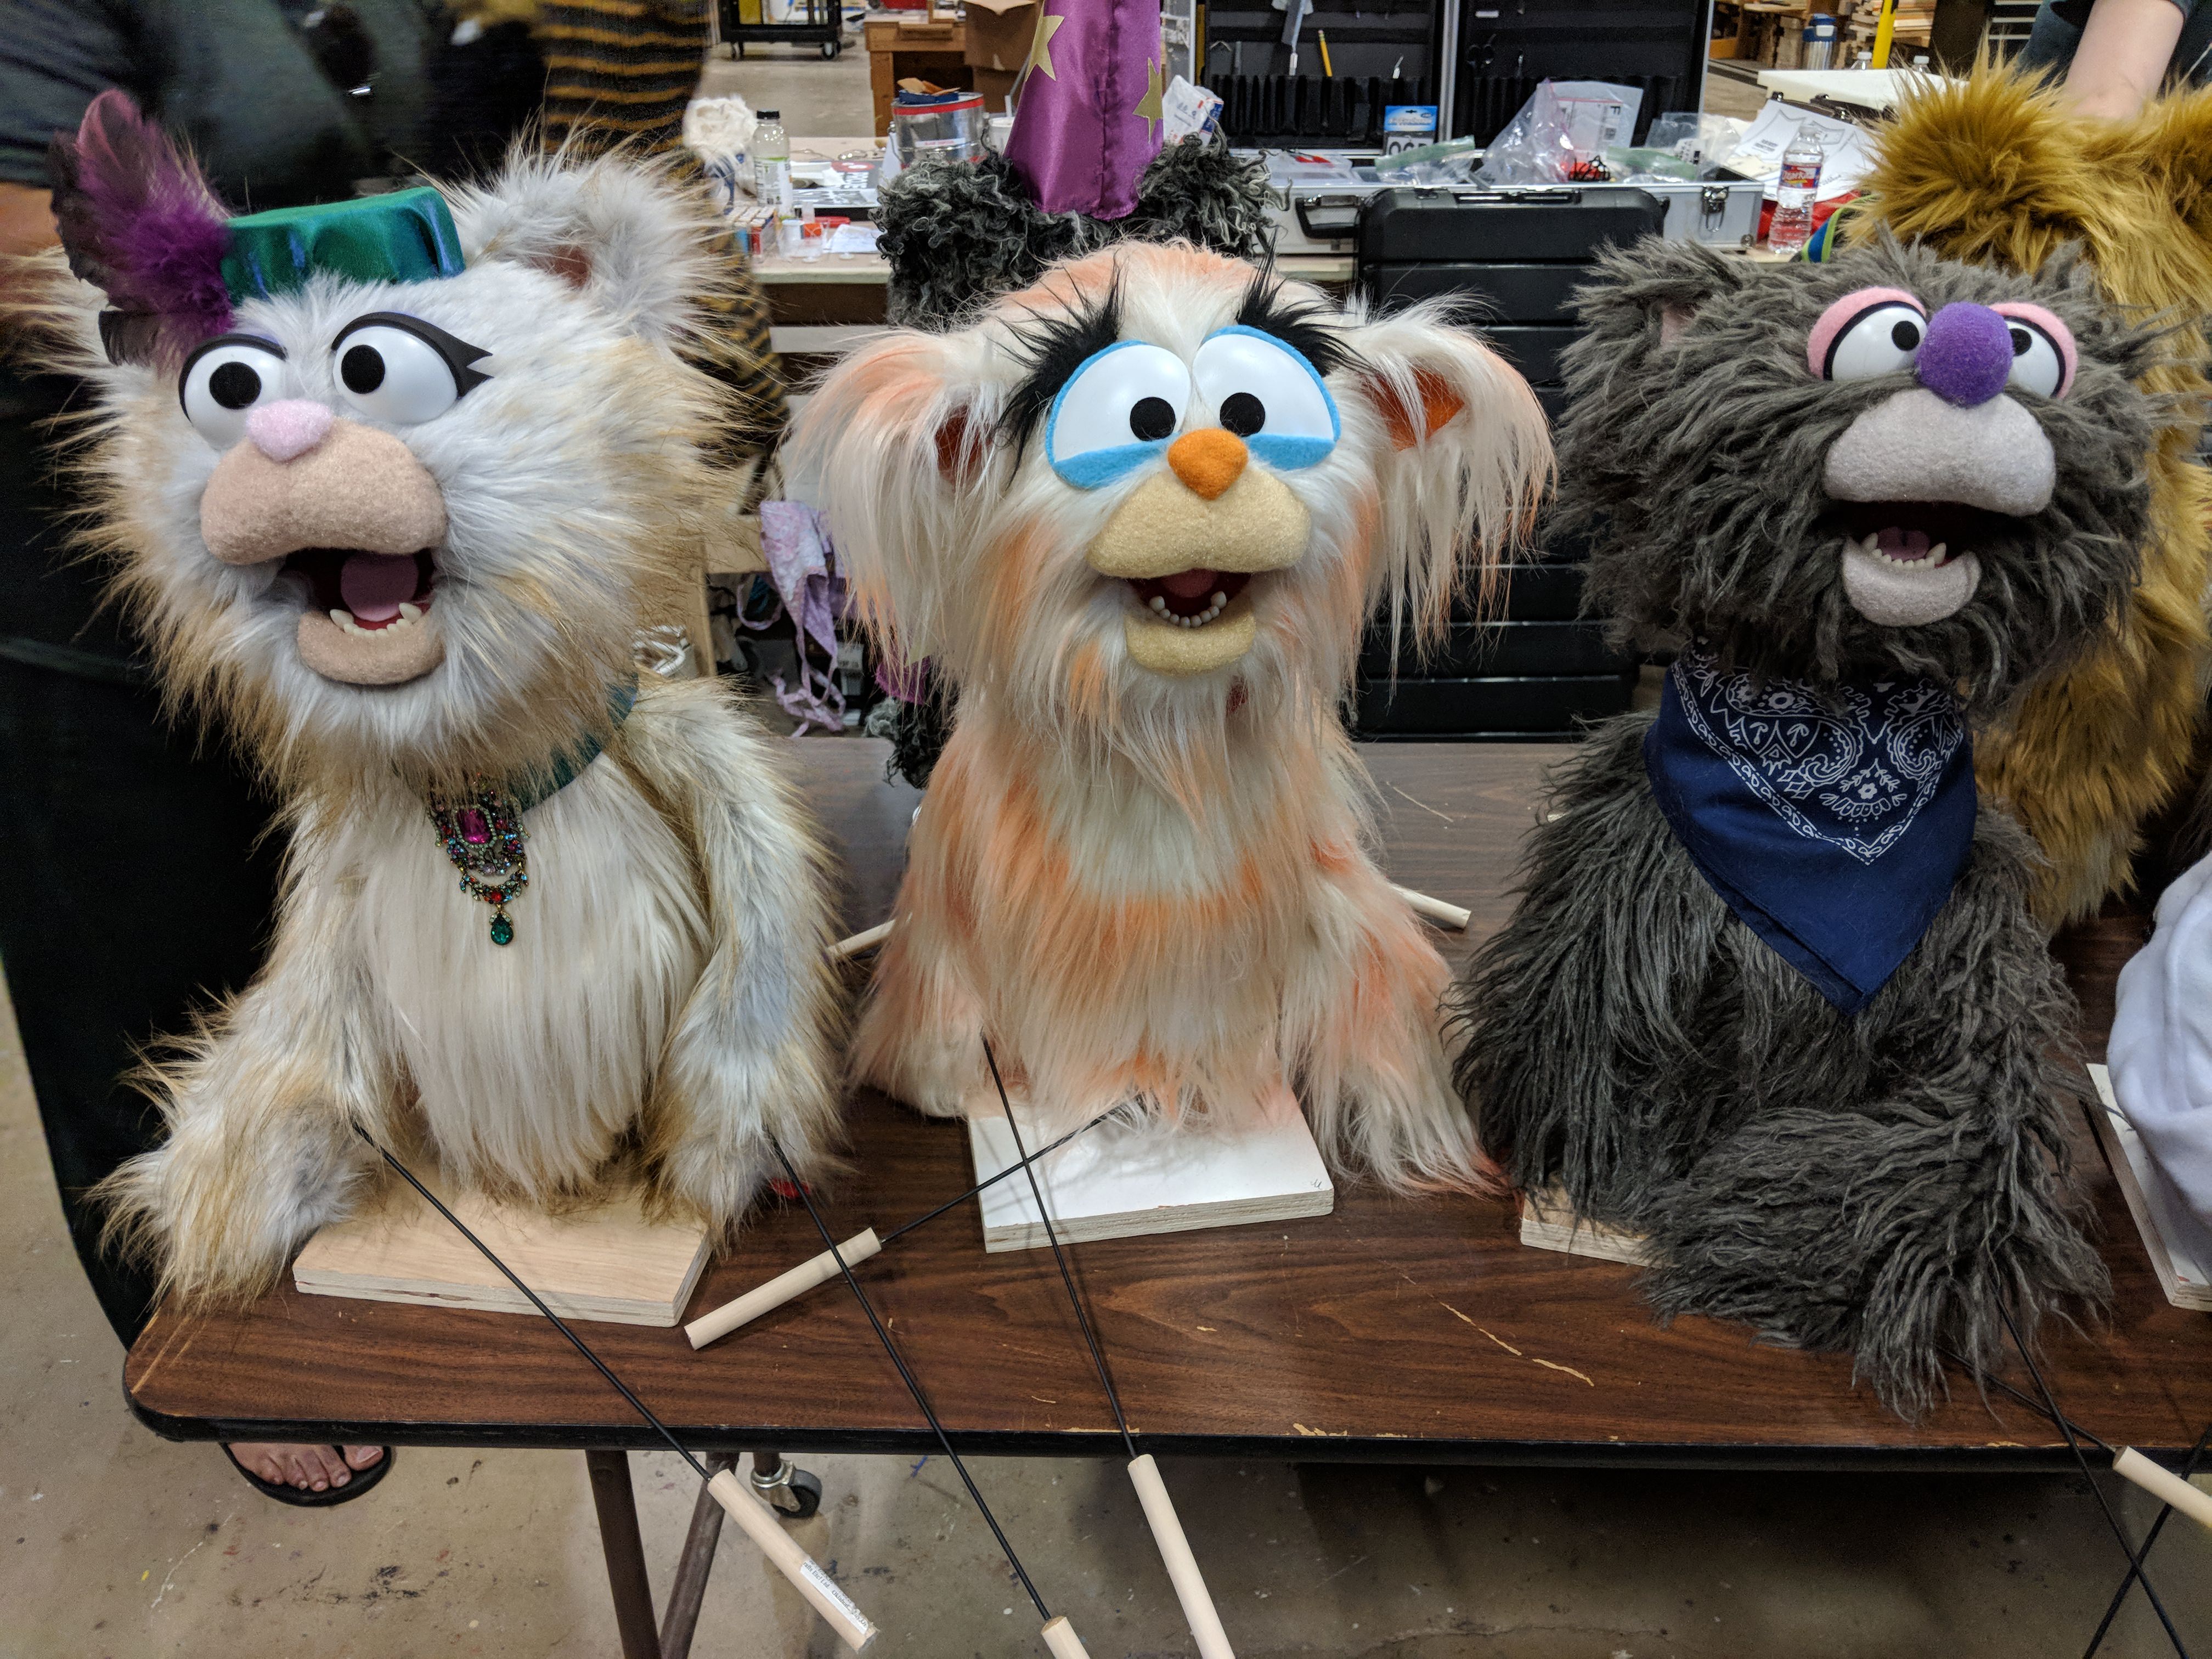
Aren’t they awesome?

Now – the performing.

This was the part that was WAAAY out of my comfort zone – but I still loved it!

Beyond the Sock - learning to puppeteer

We were learning how to puppeteer on TV – not live – and that’s a very different thing. You have to make sure your puppet is standing up straight (a constant problem for me) and moving/looking in the right direction. For those of you who have watched my “welcome to the new month” videos where I show the new Ami Club pattern – you know I’m very directionally challenged when it comes to recording! 🙂

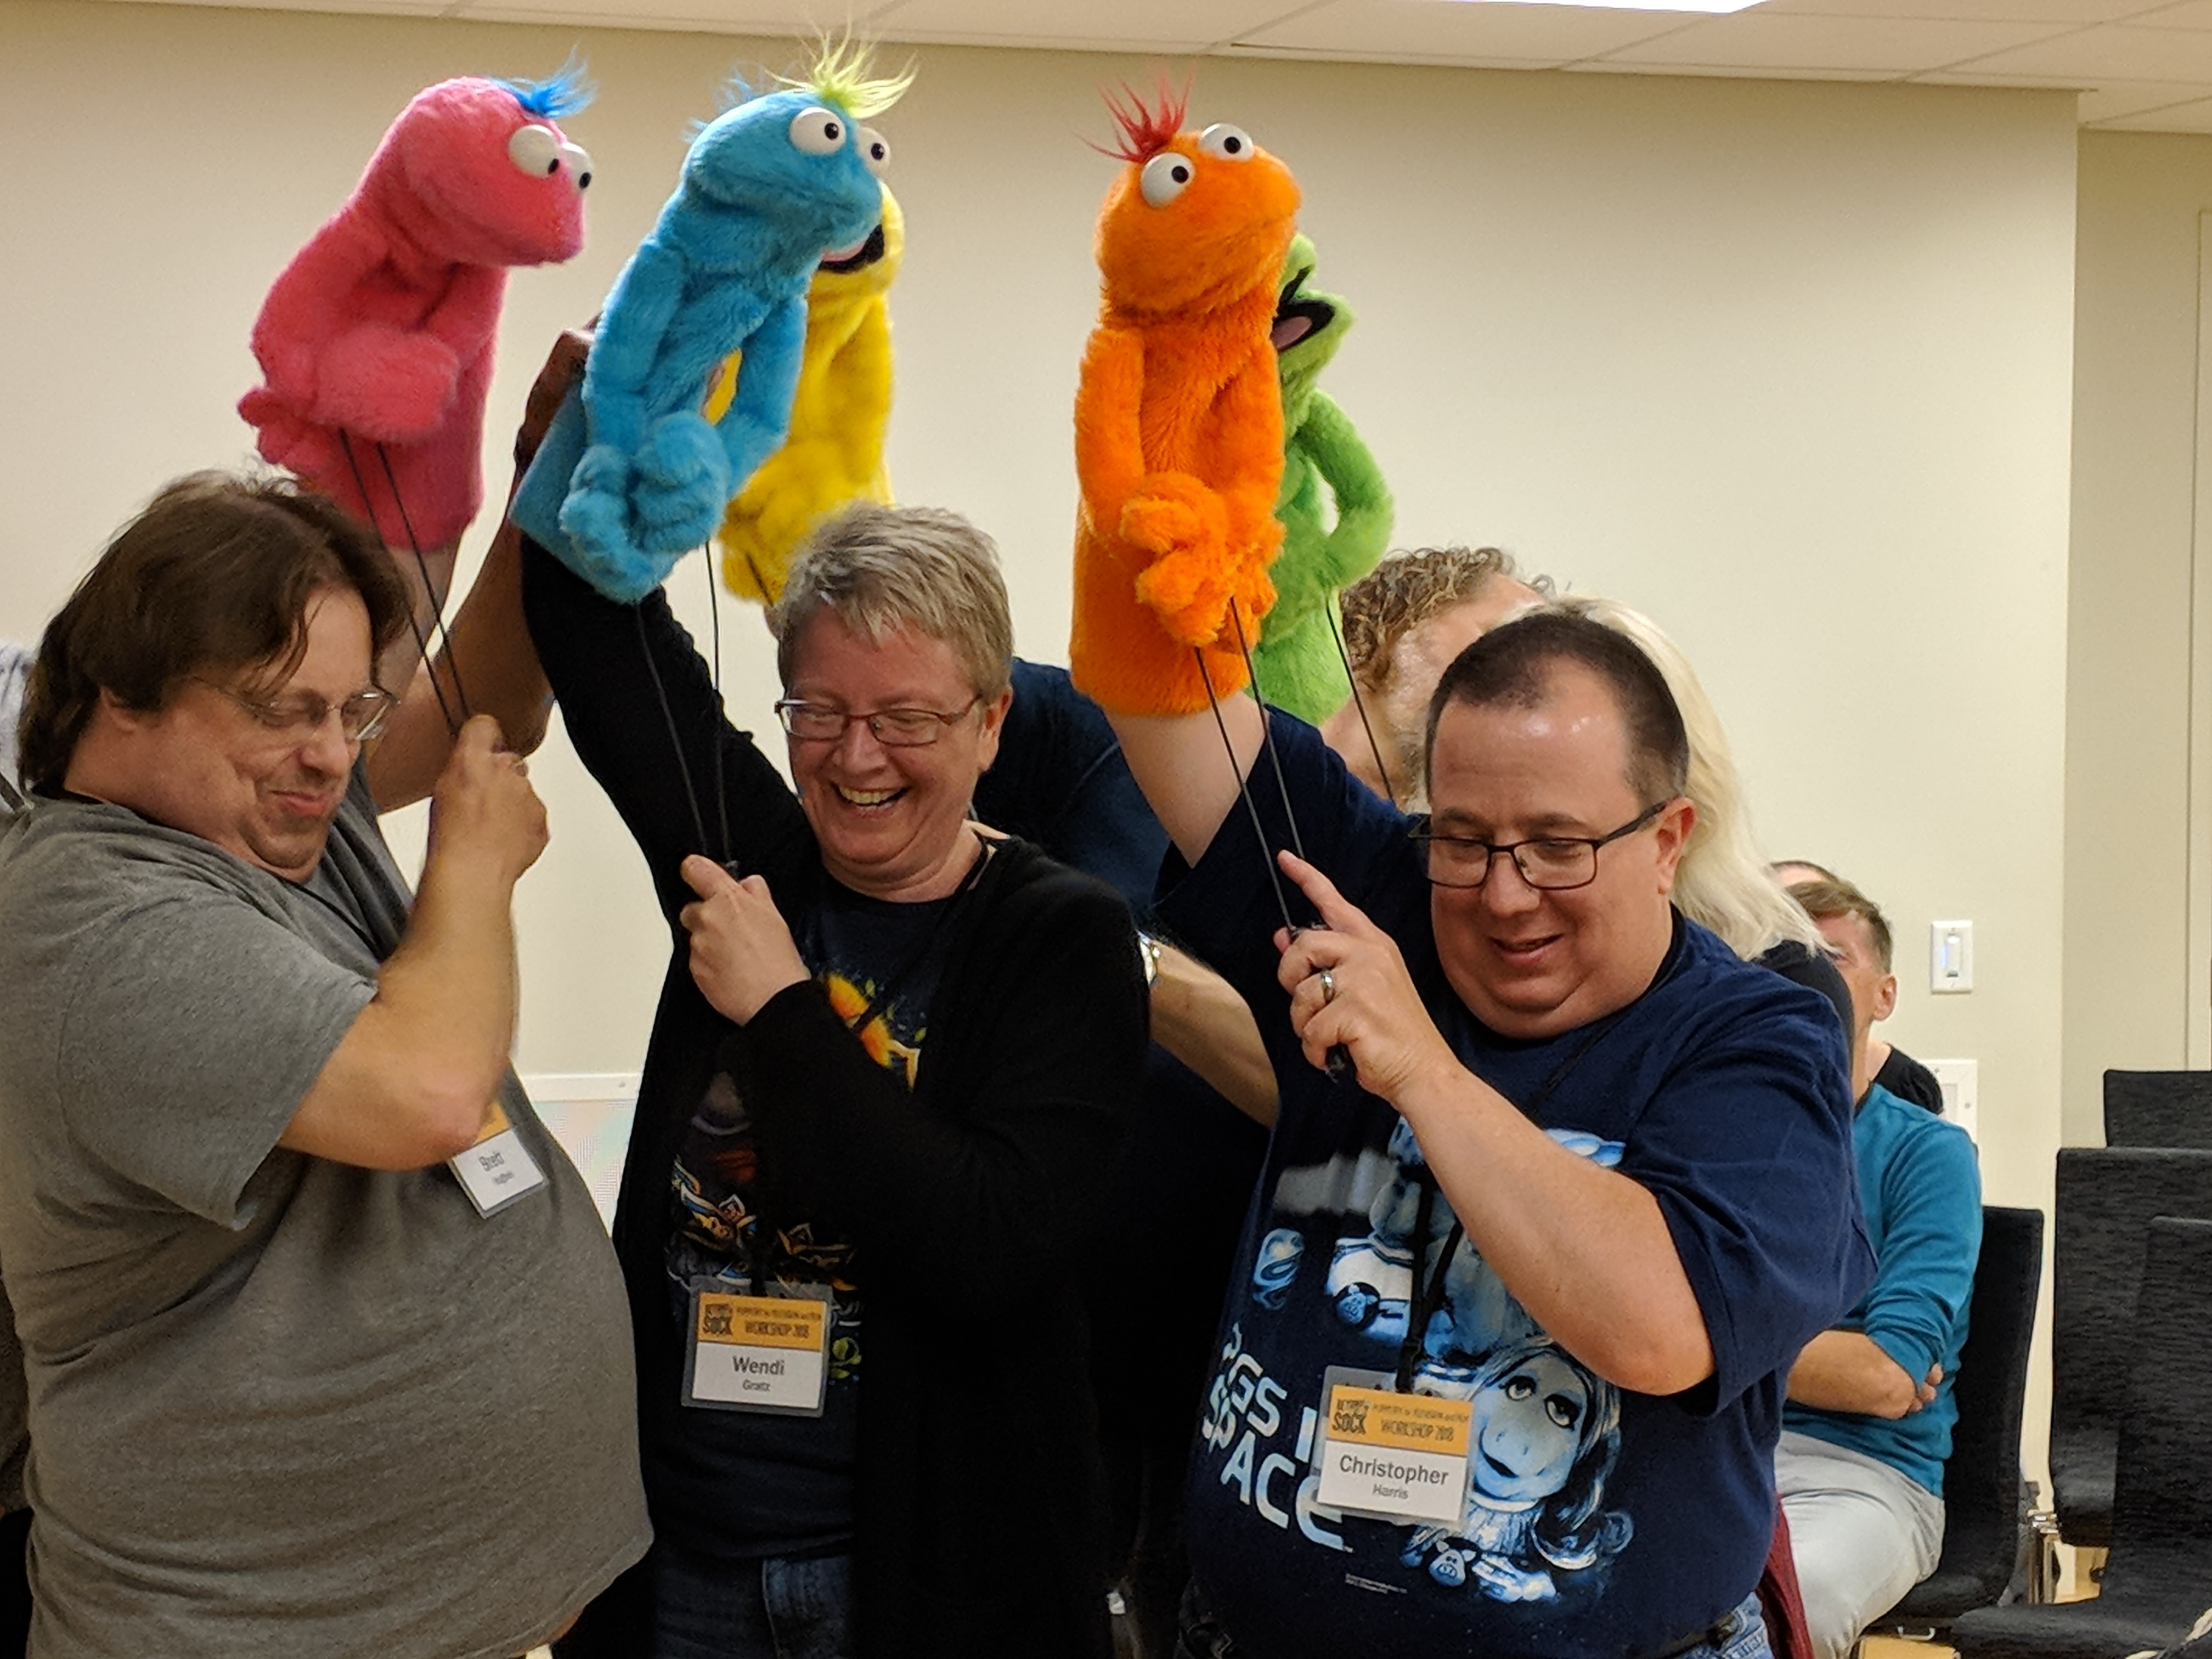
In that shot above, we’re trying to make all our puppets look in the same direction – which is surprisingly hard!

And in this one, you can see what we look like performing, and on the monitor.

Beyond the Sock - learning to puppeteer

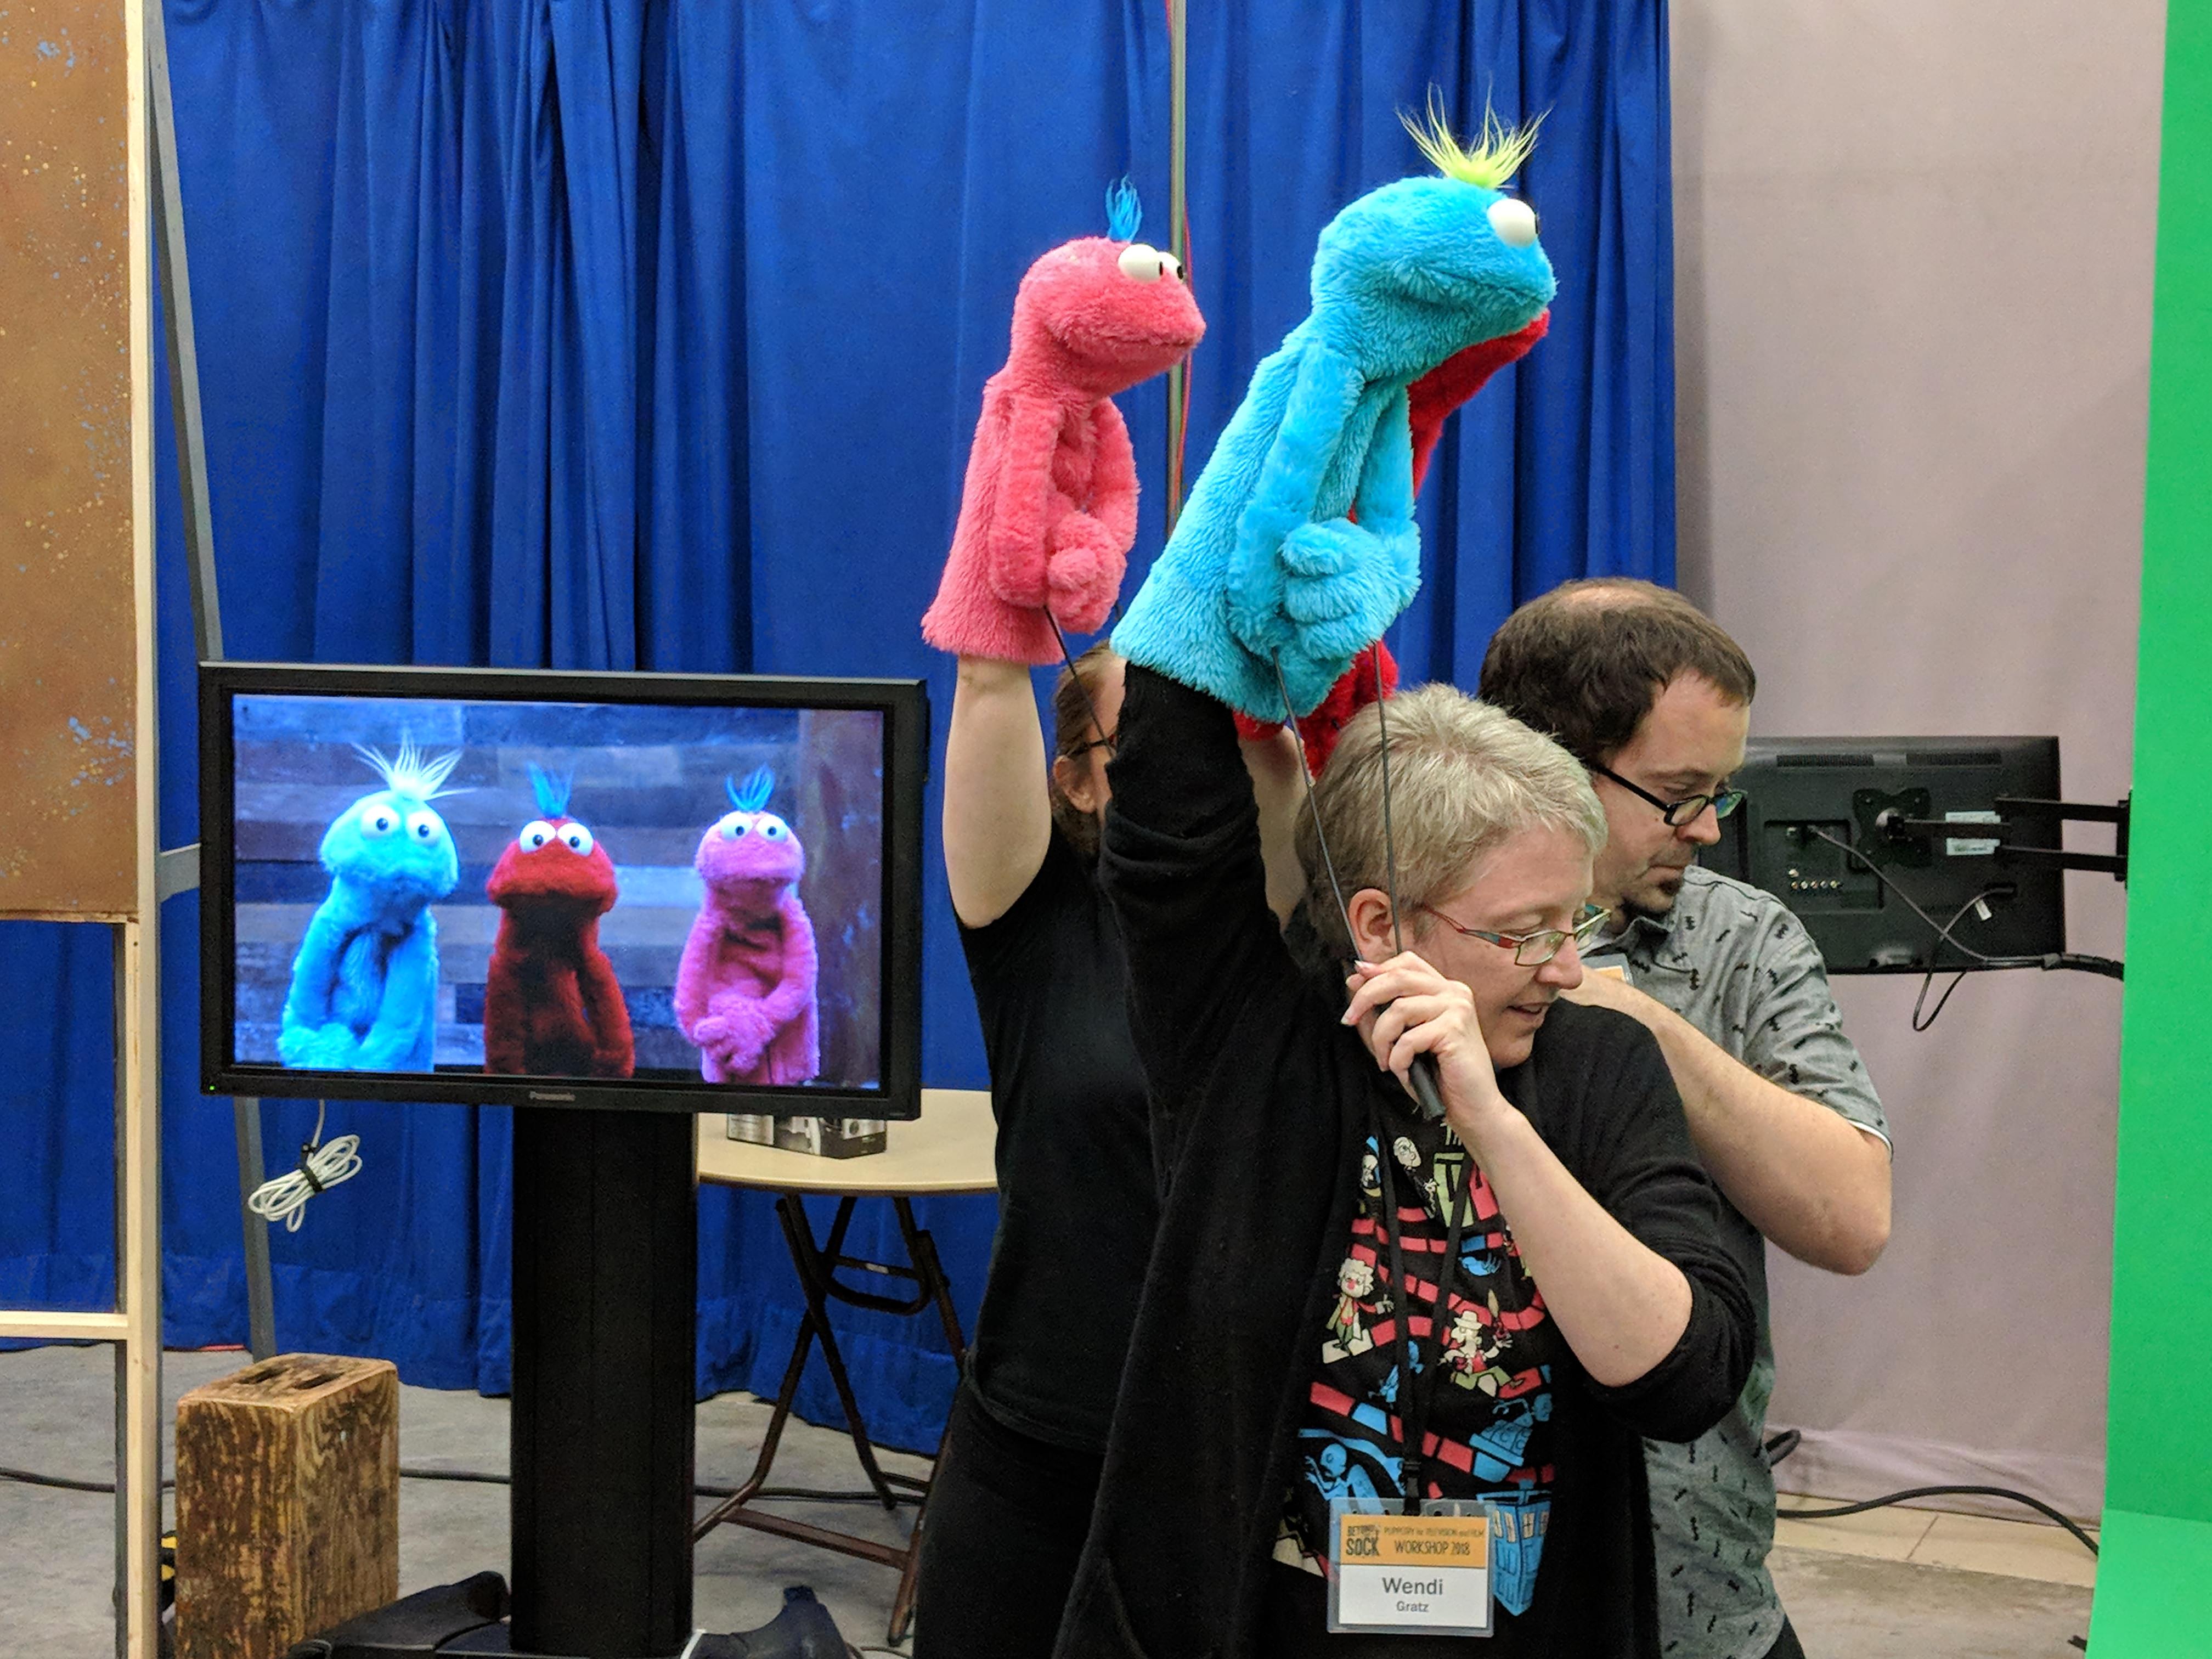
We were trying to get our group of three centered on the screen, filling the screen, not showing our rods, and all looking at the camera. 🙂

And then they had us acting and lip synching and doing improv on top of all the puppeteering! So many things to remember!

We did a bunch of performances on the last night, including a big song and dance number that had over twenty of us packed into that space below our puppets. Crazy!

Really – it was a totally incredible week and we want to go back next year.

If any of you are interested in making puppets, Pasha has a terrific website with video tutorials and sells really well-designed patterns. It’s called Project Puppet and I can’t wait to make my next one!

Happy stitching!

Best,
Wendi

Variegated Yarns: swatches in knitting, crocheting and weaving

It’s always so mysterious how a pretty little skein will work up, isn’t it? Especially with variegated yarn!

I dyed up a little (well, BIG) skein and made swatches in knitting, crocheting and weaving! And they’re SO different!

Here’s the skein I dyed (if you want to try it, check my tutorial on how to dye yarn with Wilton Icing Dye):

variegated skein dyed with Wilton icing dye

Knitted Swatch

Here’s my knitted swatch!

Variegated yarn in knitting

The factor that’s relevant in how variegated yarn will work up is how long each color repeat is and how much yarn each stitch uses. Although skeins vary, most are about 3-4 feet in circumference, and a variegated yarn will break this length up into a few colors. So, most color repeats are a few to several inches.

Here’s how to calculate how much yarn each stitch uses.

You can see here that each color lasts several stitches before switching to a new color.

Crocheting

Crochet stitches, in general, use more yarn than knitting stitches, so a color repeat will last over a fewer number of stitches.

Here’s my crochet swatch

Crochet swatch with variegated yarn

This swatch is done in single crochet, and most of the colors last for a few stitches before changing (as compared to several with knitting). This results in a ‘splotchier’ looking fabric.

You might be interested in reading about the latest craze of Planned Pooling.

Weaving

Totally different from knitting and crochet, because there isn’t a ‘stitch’, the color repeat goes for as long as it actually goes on the yarn. In most cases, a color lasted for an entire row on my scarf.

Also, weaving uses two directions of yarn, the warp and the weft.This results in a really lovely plaid-like fabric. Here’s my swatch:

weaving swatch with variegated yarn

All together now!

They’re all so different, right?

swatches: weaving crochet knitting

It just goes to show that when you find that dream variegated skein, you still have choices to make! You’ll want to select a project (and craft) that will result in the colors working up the way you want!

Best,
Stacey

Norah Gaughan’s Knitted Cable Sourcebook: Review

This book. Norah Gaughan’s Knitted Cable Sourcebook. Drool.

I saw it. And I bought it.

I don’t buy a lot of craft books. (Seriously, all of my books fit on one shelf!)

But I bought this one and love it. And I added my old cable stitch dictionary to my ‘Spring Cleaning’ pile. Because I don’t need it any more.

Norah Gaughan's Knitted cable sourcebook

(does this inside cover give you an idea of all of the amazingness inside?)

I had read a lot of amazing reviews about this book, but I’m a bit of a skeptic. I thought, ‘oh, they’re probably just saying nice stuff because Norah Gaughan is really famous’. (geesh, that makes me sound really awful, doesn’t it? It’s just that in my job, I see a lot of books.) And the cable on the cover is nice, but it didn’t make me pass out from the amazingness.

But once my book arrived I discovered that my skepticism was unwarranted. It actually IS really amazing.

The introduction isn’t very long, but it’s packed with pretty juicy information. The topics covered include:

  • Using a double point needle as a cable needle
  • Left vs. Right slants
  • How to slip stitches onto a needle & how to work the held stitches
  • Cable terminology
  • How to read cable charts
  • Tips for keeping your place on a chart
  • A full explanation of Norah’s own Stockinette Stitch Equivalent System (SSE), so you can swap different cable stitches into different patterns
  • How to fix a mistake in a cable
  • How to count cabled rows

I read the introduction and felt like, ‘Wow. That has everything I need to know.’

The cable designs (many not previously published) are just stunning. Look at this one.

Norah Gaughan's Knitted Cable Sourcebook

What?!?

Very few are this complicated… most of the stitch patterns are two notches above ‘simple’, but stunningly beautiful and hovering significantly below ‘crazily complex’. Which is exactly what you want in a stitch dictionary.

I fell in love with the Seed Rib Half Drop (#84 in the book) and cast on for a scarf immediately.

Seed Rib scarf from Norah Gaughan's Knitted Cable Sourcebook

Isn’t it gorgeous? (The cable pattern, I mean… not my knitting!) It was so enjoyable to knit… I felt like each cable was a little piece of knitter’s candy. I just kept wanting to get to the next one!

FreshStitches scarf cable pattern norah Gaughan's

The book also contains 15 projects, which are all quite lovely and creative projects using cables, in addition to the more than 150 stitch patterns in the book.

Pullover Norah Gaughan's Knitted Cable Sourcebook

Whoa. This book is just plain fabulous. Treat yourself.

Those links are affiliate links. That means I earn a tiny commission if you buy after clicking through. 🙂

How to Read a Bead Crochet Pattern

I love bead crochet!

I learned loads of techniques from the book Bead Crochet Jewelry, and I highly recommend it as a starting place for learning!

But what if you want to do more? Today I’m going to show you how to read bead crochet patterns, of the type you’ll find on Pinterest and online!

Chevron Bead Crochet necklace

Finding a Bead Crochet Pattern

Much of the bead crocheting comes out of Eastern Europe, so it’s a good thing that patterns don’t use a lot of words! If you search Pinterest for ‘bead crochet pattern’, you’ll find oodles! You can also search Etsy and you’ll discover a number of patterns.

They vary greatly in complexity and size, but don’t worry… I’ll talk about all of that!

Today, I’ll be using this pattern by Snow Mirna that I found on Pinterest. It’s the pattern I used to make this ombre chevron necklace:

ombre chevron bead crochet necklace by FreshStitches

The Anatomy of a Bead Crochet Pattern

If you’re familiar with regular crochet patterns, you’ll find a bead crochet pattern very short! They’re about a half of a page and look like this:

bead crochet overview

There are essentially 4 parts:

  1. A description of the pattern (top right)
  2. A list of the materials you will need (middle right)
  3. A sequence instructing how to place the beads on the string (bottom right)
  4. A view of how the pattern will look when crocheted (left)

I’ll explain each of these sections in turn!

How to select a pattern

All of the information you need about selecting a pattern is in the upper right hand corner:

bead crochet 1

One of the most important dimensions is the circumference. This tells you how many beads need to be in the circumference to get the required pattern. You’ll see that this pattern has 6. I personally like patterns with 4 or 6 beads. The larger the circumference, the larger thickness your finished piece will be. A larger circumference will give you more pattern options, but will produce that a thicker piece that may be difficult to find notions and findings for.

Purchasing Materials

Now, have a look at the middle right:

bead crochet 2

This tells you not only how many beads you need, but how many you need of each color.

This particular pattern uses equal amounts of beads, but other patterns will vary.

seed beads

You often purchase beads by the gram.

Stringing beads

The hardest part of following a pattern is stringing the beads in order!

bead crochet 3

Begin at the top left, and work your way down, stringing the number of specified beads for each color. You’ll see that this chart mostly instructs you to string one or two beads of each color, but that too, can vary.

You will repeat this chart according to how long you want your finished piece to be!

Then, crochet!

Once your beads are strung, the crocheting is the same no matter which pattern you’ve chosen to follow. The chart on the left will show you what your finished piece will look like:

bead crochet 4

The leftmost view is what the piece would look like flat, and the one on the right (which is optional) gives an idea of how the piece will look in the round.

Ready to try?

With such a variety of patterns, these simple tips will open up a whole new world of bead crochet to you!

bead crochet necklace by FreshStitches

Have fun!

Finished Rainbow Bead Crochet Necklace

I’ve been working on this project for a while: I started it in December, but got derailed until I found this nifty bead spinner to help me get that long strand done… and here it is!

rainbow bead crochet necklace

You can see how long that black strand is around the back. That’s a lot of beads!

I just love it! It’s a project from Bead Crochet Jewelry (a book I highly recommend!

rainbow bead crochet

I used size 6 beads for the rainbow links, and size 8 beads (slightly smaller) for the black chain around the back. That difference accentuates the rainbow, I think!

It’s a real statement piece, and I’m planning on wearing it while teaching at Stitches South. Am I going to see you there?

Best,
Stacey

How to string seed beads quickly and easily!

It’s a new Coffee with Stacey!

I got a really fun new toy: the Darice Bead Spinner*, which promises to speed up the stringing of seed beads.

review of the darice bead spinner by FreshStitches

I string a lot of beads for bead crocheting, so I just had to give it a try!

review of the darice bead spinner by FreshStitches

Watch the video to see me using it in action, as well as a little update about my current bead crochet project!

Other Links you might Love:

Best,
Stacey

Dye yarn with Wilton Icing Dye!

Did you know that you can dye your yarn using Wilton Icing Dyes?

Dyeing yarn with Wilton Icing dye from FreshStitches

You already know I’m a huge fan of dyeing with Kool Aid… but the colors can be a little limiting. So I had to try my hand with the Icing Dyes!

Advantages of Icing Dye

Icing dye, as the name suggests, is actually meant for dyeing. Granted, it’s usually food and not yarn… but it means that there are a wide range of colors that are really quite nice.

The dyes also have the property that you can mix them together with fairly predictable results, which isn’t necessarily true of Kool Aid.

The main disadvantage is that you’ll need to add vinegar to your dye bath to get the color to set. That’s not too big of a downside!

Wilton Icing Dye Color Card

For each color, my recipe was:

  • 8 yards of white worsted weight yarn
  • 1/8 tsp of Wilton Icing Dye
  • 2 T vinegar
  • 1/4 cup boiling water

And here’s how the colors look!

Wilton icing dyes and yarn freshstitches color chart

I’m so excited about the possibilities! These are the colors straight out of the jar… you can mix the colors to get even closer to what you want.

Notes on Dyeing

  • These colors were all produced with the same strength of dye. Experiment with adding less dye for more subtle colors.
  • Purple is notoriously difficult. It’s hard to tell from the photo, but the blue & red tones separated out quite a bit. I love the look, but you’ll want to always test swatches if you want a certain look.
  • A true black is very hard to achieve. I’ll play around with adding a higher intensity of dye.
  • Always do a test swatch! These 8 yard skeins were just perfect, you can wind them yourself for playing!

Have fun!

Here are handy links to all the posts about yarn. . .

Return to the main table of contents for Let’s Learn to Crochet Amigurumi.

Move on to the lessons for the basic crochet stitches.

Happy stitching!

Zoom Loom Review

I knit. I crochet. I spin. I’ve tatted. I’ve tried almost every needlecraft I’ve ever heard of… except for weaving.

Why the gap in my fiber experience? I’ve always thought weaving was a little bit scary. There’s a warp, a weft and a lot of technique. It all seemed really complicated. And looms are usually big and non-portable.

That’s why I was super excited when I got a chance to try the Zoom Loom.

Schacht Zoom loom

The Zoom Loom is a portable weaving loom. It’s fitted with pins that (along with the instruction manual) tell you exactly how to wind your yarn and where to do the weaving.

Zoom loom progress

Look at me, I’m weaving!

Why I love the Zoom Loom

The instruction booklet that comes with the Zoom Loom is easy to follow, and I was super excited to weave an adorable little square on my first try!

zoom loom finished weaving

Isn’t it pretty?

The great features about the loom are:

  • it is small
  • the pins on the loom show you exactly where/how to do the weaving
  • each square requires a precise amount of yarn, meaning you can wind small balls in advance
  • the instructions are very easy to follow!

But… it’s not a complete substitute for a full loom

I enjoyed making my small square, and The Woolery’s webpage has suggestions for turning these squares into bigger projects.

However, the Zoom Loom isn’t a substitute for a full loom. Some things I noticed:

  • because the pins are fixed, each ‘weave’ is a fixed space apart. My piece made with sock-weight yarn feels a little flimsy, and I suspect a bulky would not fit.
  • if you’re looking for a project to throw into your purse, you might be disappointed. Although more portable than a regular loom, you cannot simply stop in the middle of winding the warp and head out.
  • you are limited to 4″x4″ squares. Although there are project suggestions, every project is composed of small squares.

Get yours!

Sound fun?

Go forth and start weaving!


disclaimer

Tutorial: How to Frame Fabric (quick art!)


Happy Saturday!

Today I’m going to show you how to make a quick art-piece by framing fabric!

My favorite fabric

I took a trip to Finland in 2008, and I bought a yard of some amazing fabric from Marimekko.

Although I loved the fabric… it gave me anxiety: what should I do with it? What if I sewed something that didn’t fit?

I finally came up with the perfect solution… frame it!

How to frame fabric for quick art

How to Frame Fabric

You’ll need:

  • A frame (a lot of tutorials call for a canvas stretching frame… but I just grabbed an old wooden one from the curb!)
  • Enough fabric to cover your frame (plus a few inches on all sides)
  • A stapler

Materials for making fabric art

Step 1: Wash & iron your fabric

You can skip the ironing if your fabric comes out of the dryer nice and crisp!

Step 2: Place foundation staples

Lay your fabric face down, and place the frame on top.

how to frame fabric

Now, pull the fabric up and over the sides of the frame and place a staple at the center of each side. Be sure to tug so that the fabric is taut.

Do this for each side.

tutorial for framed fabric

Step 3: Finish Stapling, and do those corners!

Work your way around the frame, placing staples every couple inches or so.

Do the corners last, and when you get to them, take a little time to tuck the corners and staple them neatly.

Corner of framed fabric

Step 4: Enjoy!

That’s it! You now have beautiful fabric art!

fabric art

Take pride in the beautiful art you made and display your favorite fabric in your home!

SHARE THIS

Tips for Selecting Locker Hooking Materials

It’s Saturday! That means it’s time for me to share what I’m crafting… and some tips!

Today I’ll tell you about locker hooking, and give you some tips for picking your materials.

Locker Hooking

Right now, I’m working on locker hooking a bathroom rug.

You might be asking… what is locker hooking?

Locker hooking uses a crochet hook (or a special ‘locker hook‘, which is a crochet hook with an eye on the end), yarn, fabric strips and rug canvas to make fabric loops that are locked onto the backing with the yarn. It looks like this:

rainbow locker hooked mat

It’s fun! And it’s easy… especially for us crocheters who have the hang of using a hook!

Some tips for selecting your materials

To locker hook, you’ll need yards of fabric, 1″ thick. Check out my post on making yarn from fabric strips for details.

Here is the fabric I gathered:

blue and grey fabric

And here is my fabric ball… all those yarn strips cut and put together:

ball of fabric

Getting your fabric ready is almost as time-consuming as doing the actual locker hooking! But if you get into the right mindset, it’s a relaxing process. And it’s a fabulous way to use up cotton fabric!

Here are some of my tips for getting the right locker hooking materials:

  • Use 100% cotton. Not only does it tear into strips nicely (a big time-saver), but it also means your mat will dry quickly if it gets wet.
  • Focus more on the colors of the fabric than the design. When you cut the yarn into 1″ strips, you won’t see much of the design.
  • Aim for a varied palette. This way, if you run out of fabric, you can purchase more and it’ll fit right in!
  • Make sure your canvas is a few inches (in each direction) larger than you want your finished piece to be, since you will use some up in the border.
  • Go ahead and spring for a locker hook. They’re pretty inexpensive and will save you a lot of time!

I’ve started the actual locker hooking part… I’ll keep you posted as I go!

SHARE THIS