How to Make a Cloth Book

People call them cloth books, quiet books, soft books – whatever you call them they’re easy and fun to make and a great way to get extra use out of your patterns.

The instructions below are for a 12-page book, 8 inches square, with flannel “batting” to make the pages extra soft and snuggly.

Plan your Cloth Book

Download this worksheet to plan your pages.

Here’s what mine looked like after filling it out.

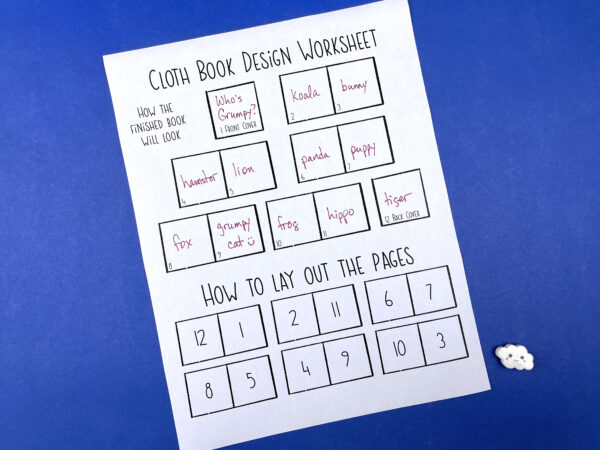
The top of the worksheet is your planning guide. It lays out what the pages will look like when you’re reading them.

I decided to call my book Who’s Grumpy? I put one face on each page, including mostly smiling faces but one very grumpy cat. I deliberately placed the cat on an odd-numbered page so when someone is flipping the pages, that’s the immediate “reveal.” I’m imagining a kid pointing and calling out,”He’s grumpy!” as soon as you turn that page. πŸ™‚

My book is a random collection of animals, but you can do anything!

  • Make a collection of a child’s favorite animals.
  • Make a souvenir of a visit to the zoo and the animals you saw there.
  • Make a collection of the animals native to your area.
  • Use this free ABC pattern to put an animal face on the even pages, and the sound that animal makes on the odd pages.
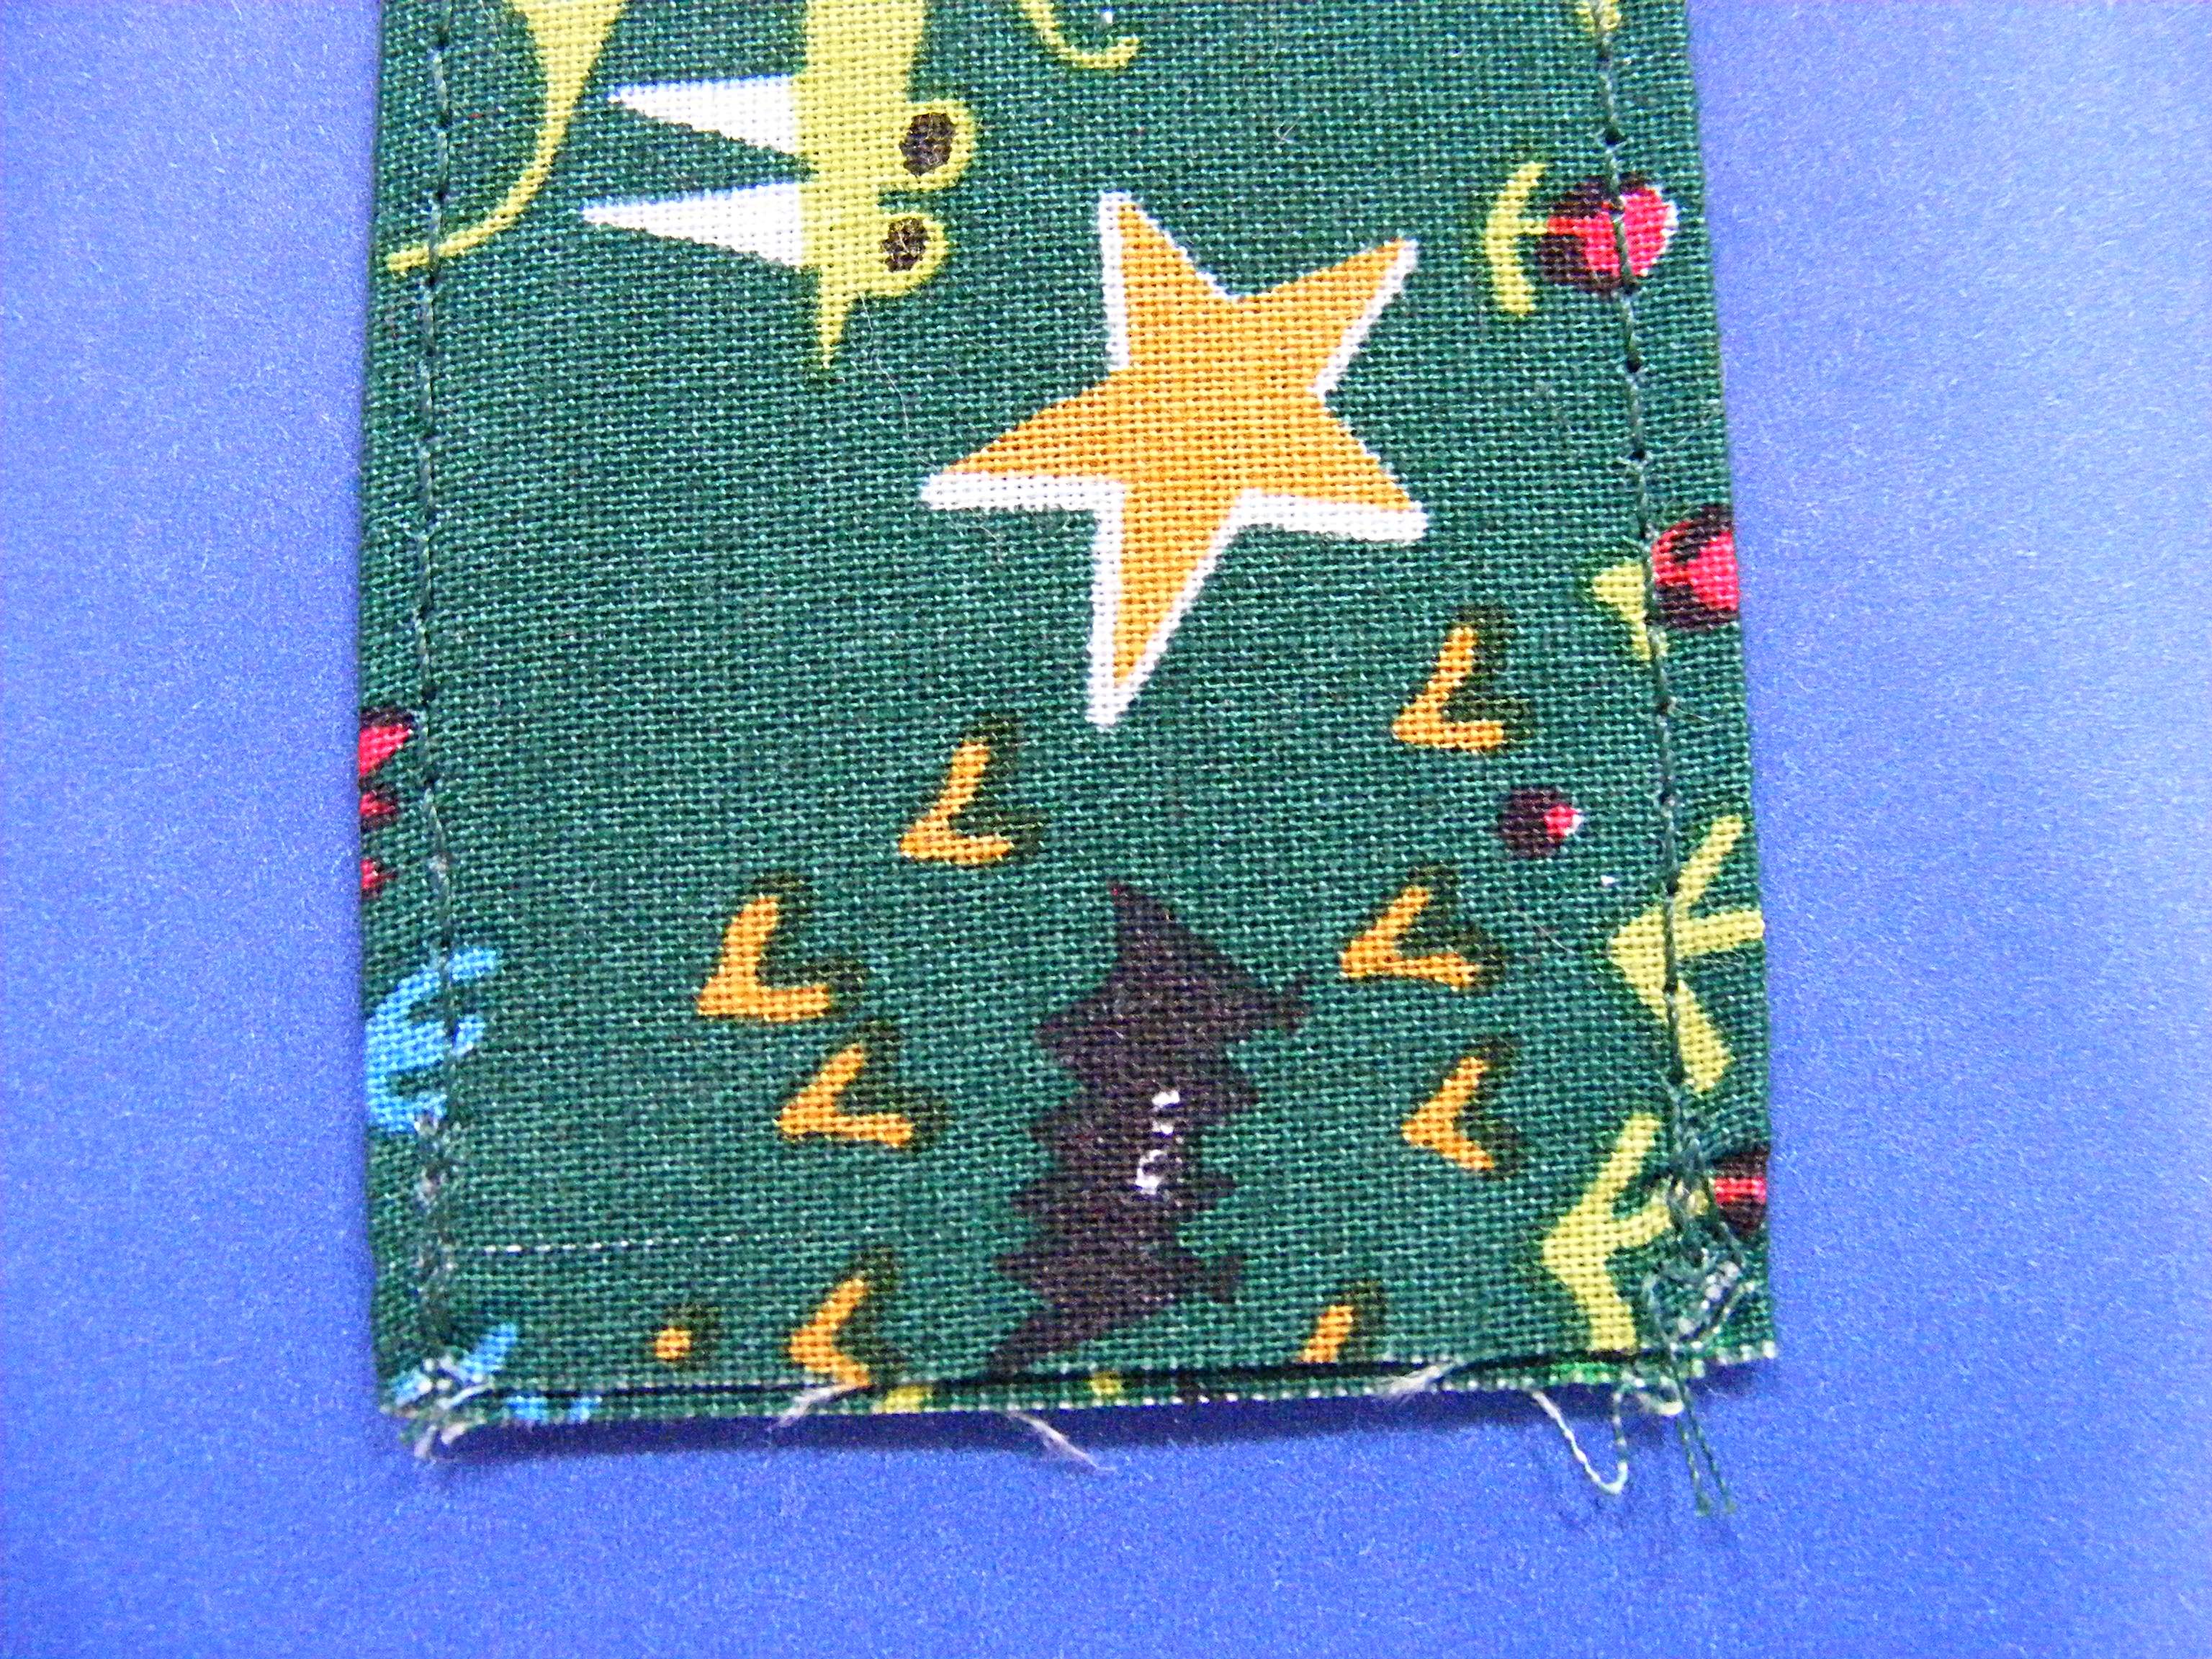
  • Make a Christmas book with the free patterns here.
  • Make male and female versions of all the birds that come to your backyard feeder.
  • Make books for different biomes.
  • It doesn’t have to be animals! Make a book of cars and trucks, or one filled with flowers.

Really – the sky is the limit! I can’t wait to see what you make! If you’re looking for inspiration, Kate has been sharing her amazing books in the Shiny Happy People group. Here’s one collection, and here’s another.

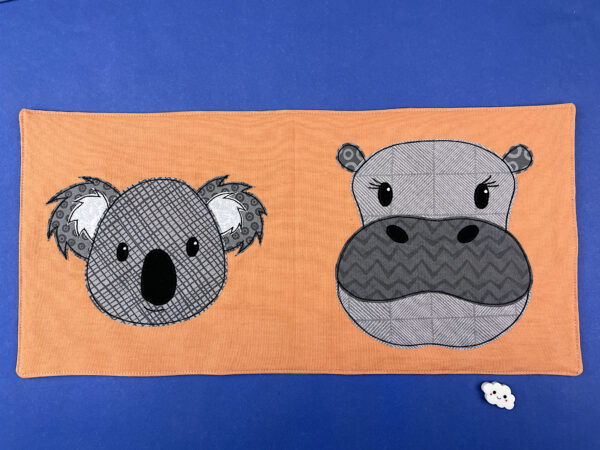
The bottom of the worksheet is your construction guide. It shows how you need to make the pages so that when you put them all together it reads like you planned in the top of the worksheet. So, for example, the animal for page two (the koala) needs to be on the same rectangle of fabric as the animal for page 11 (the hippo).

Materials

You’ll need 3/4 yard of fabric for your book, and 3/4 yard of flannel.

I recommend pre-washing both the fabric and the flannel, and I actually recommend washing and drying the flannel one extra time because that stuff has a tendency to shrink a lot.

You’ll also need fusible adhesive. I use Heat & Bond Lite for all my quilts.

Cutting Instructions and Applique Preparation

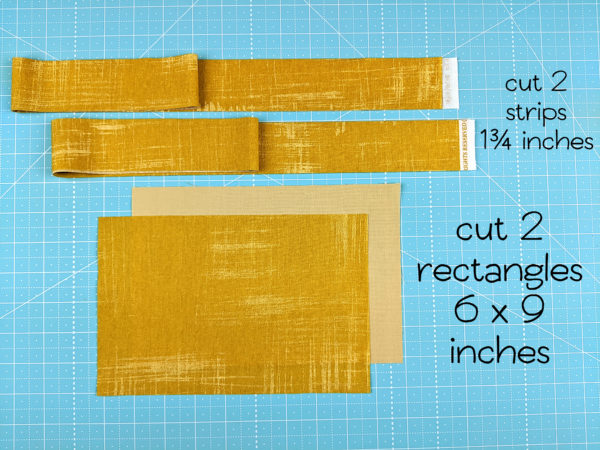
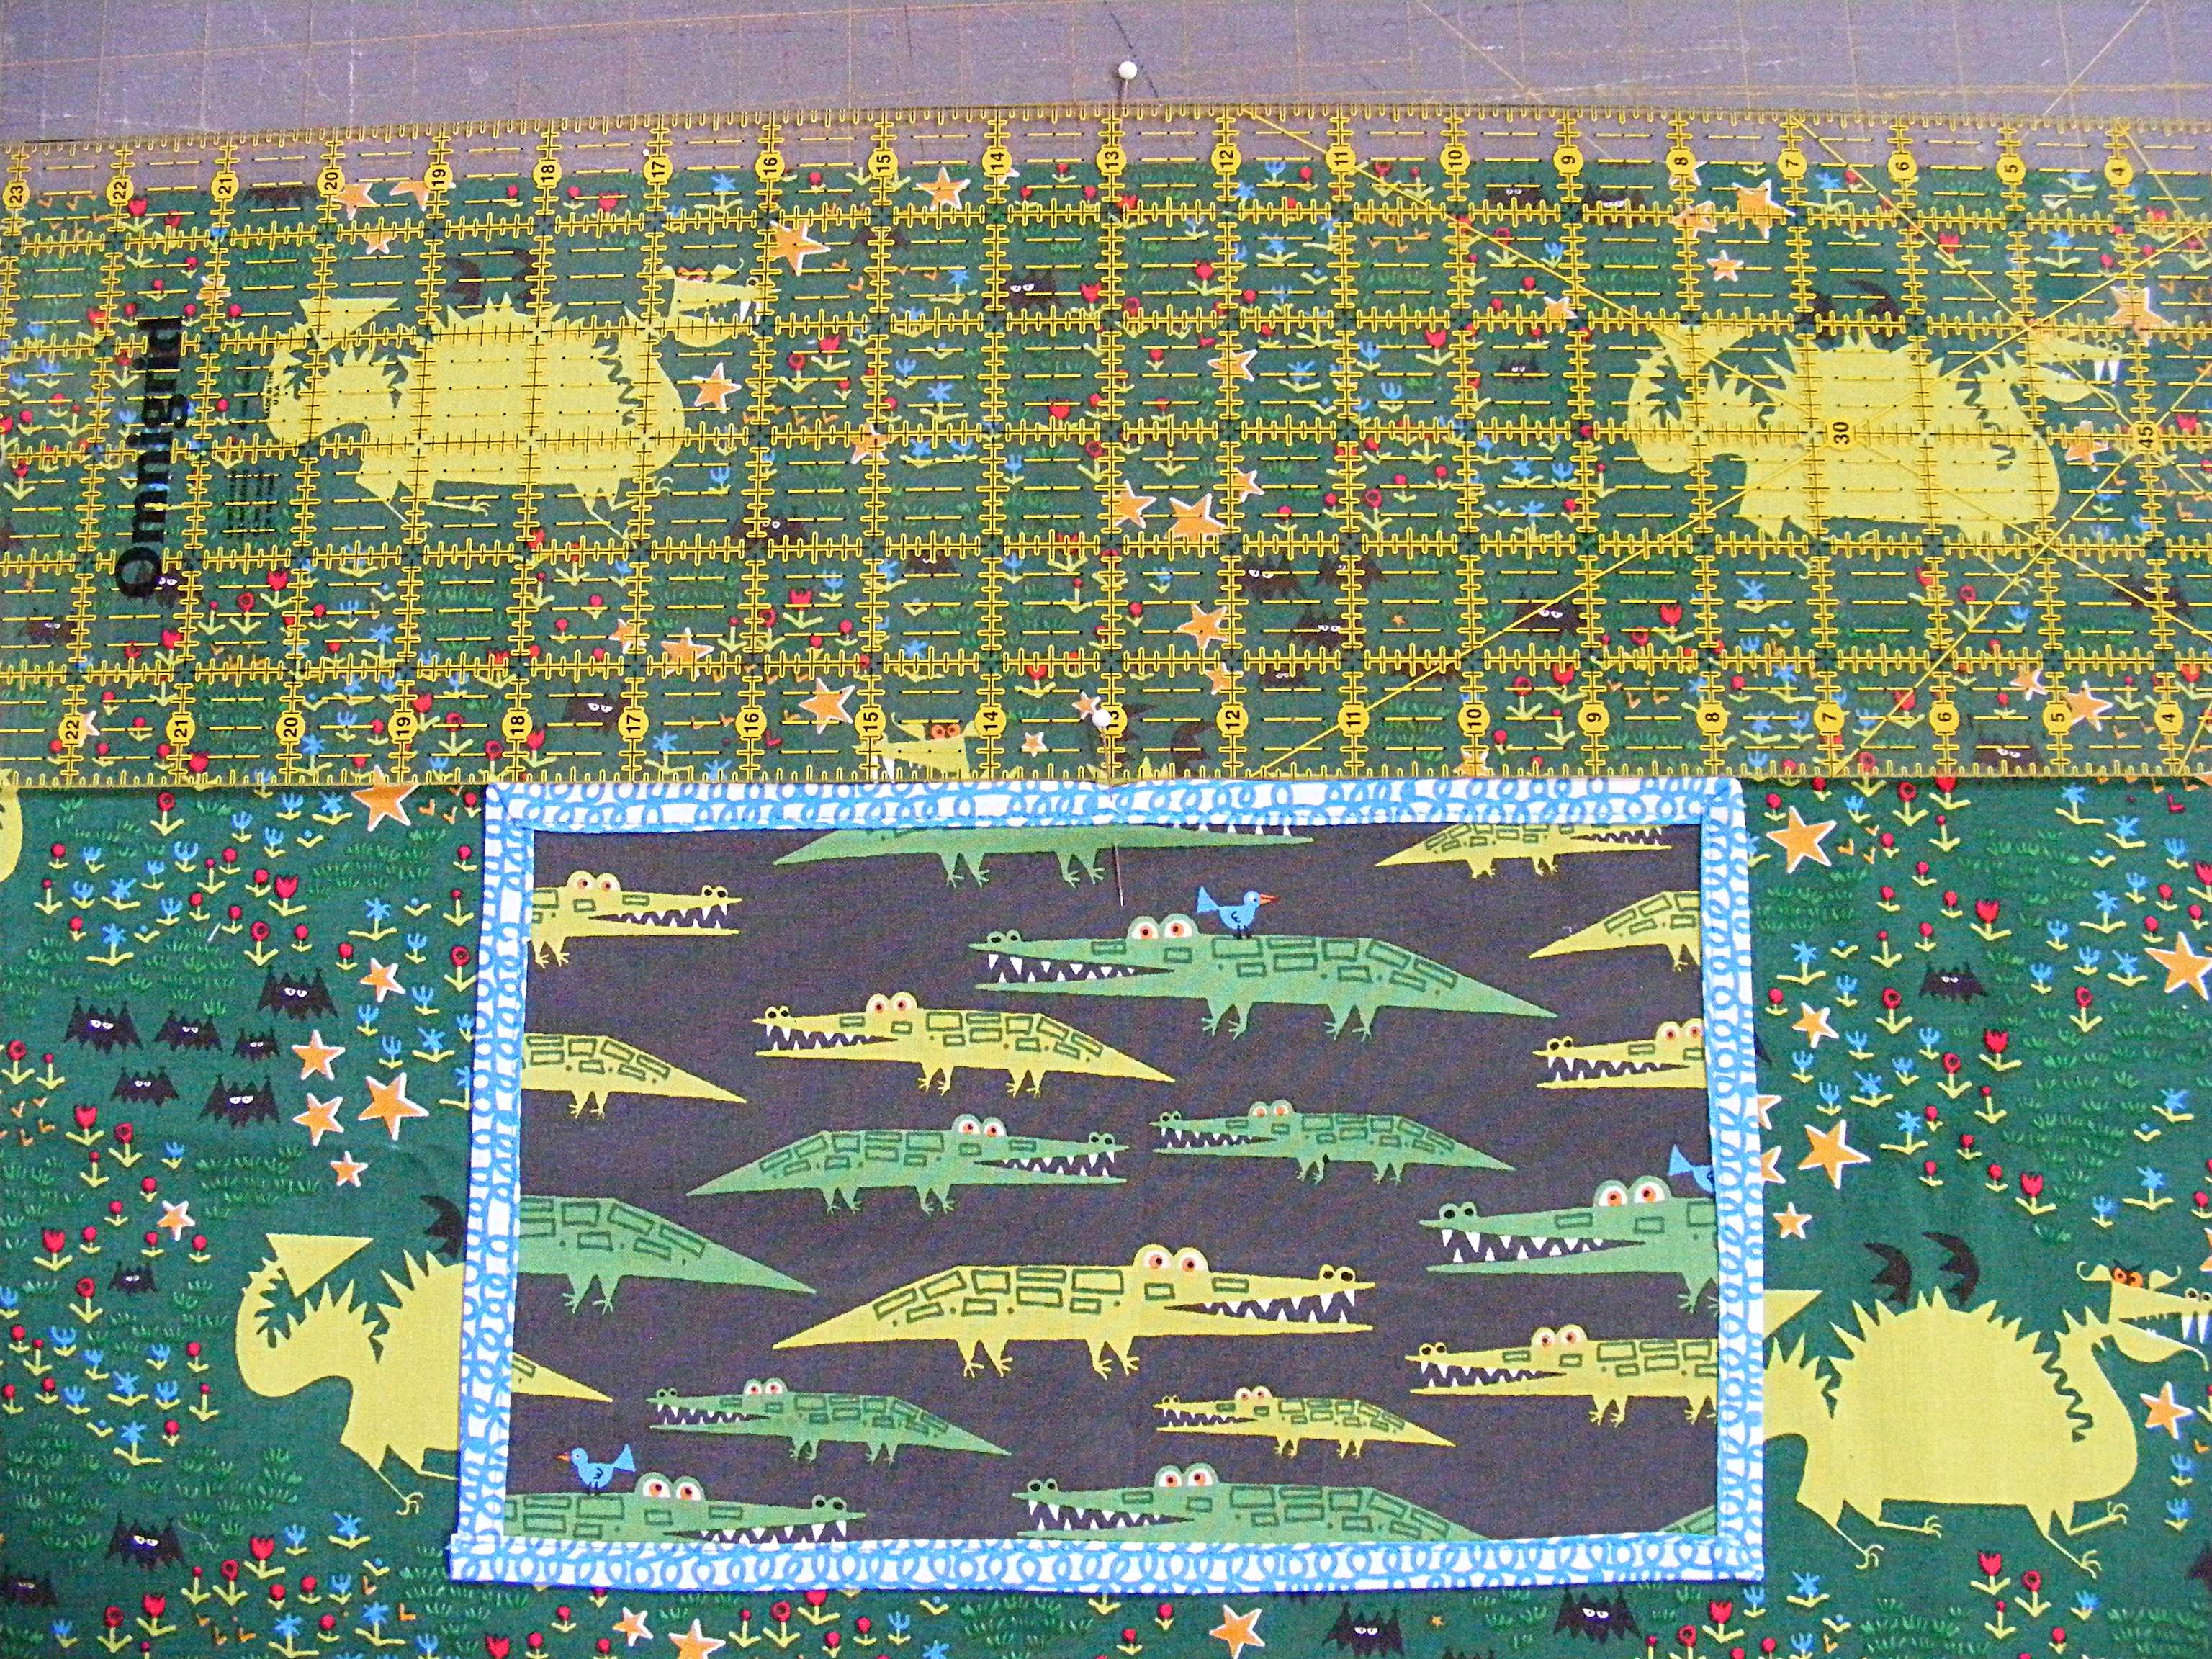
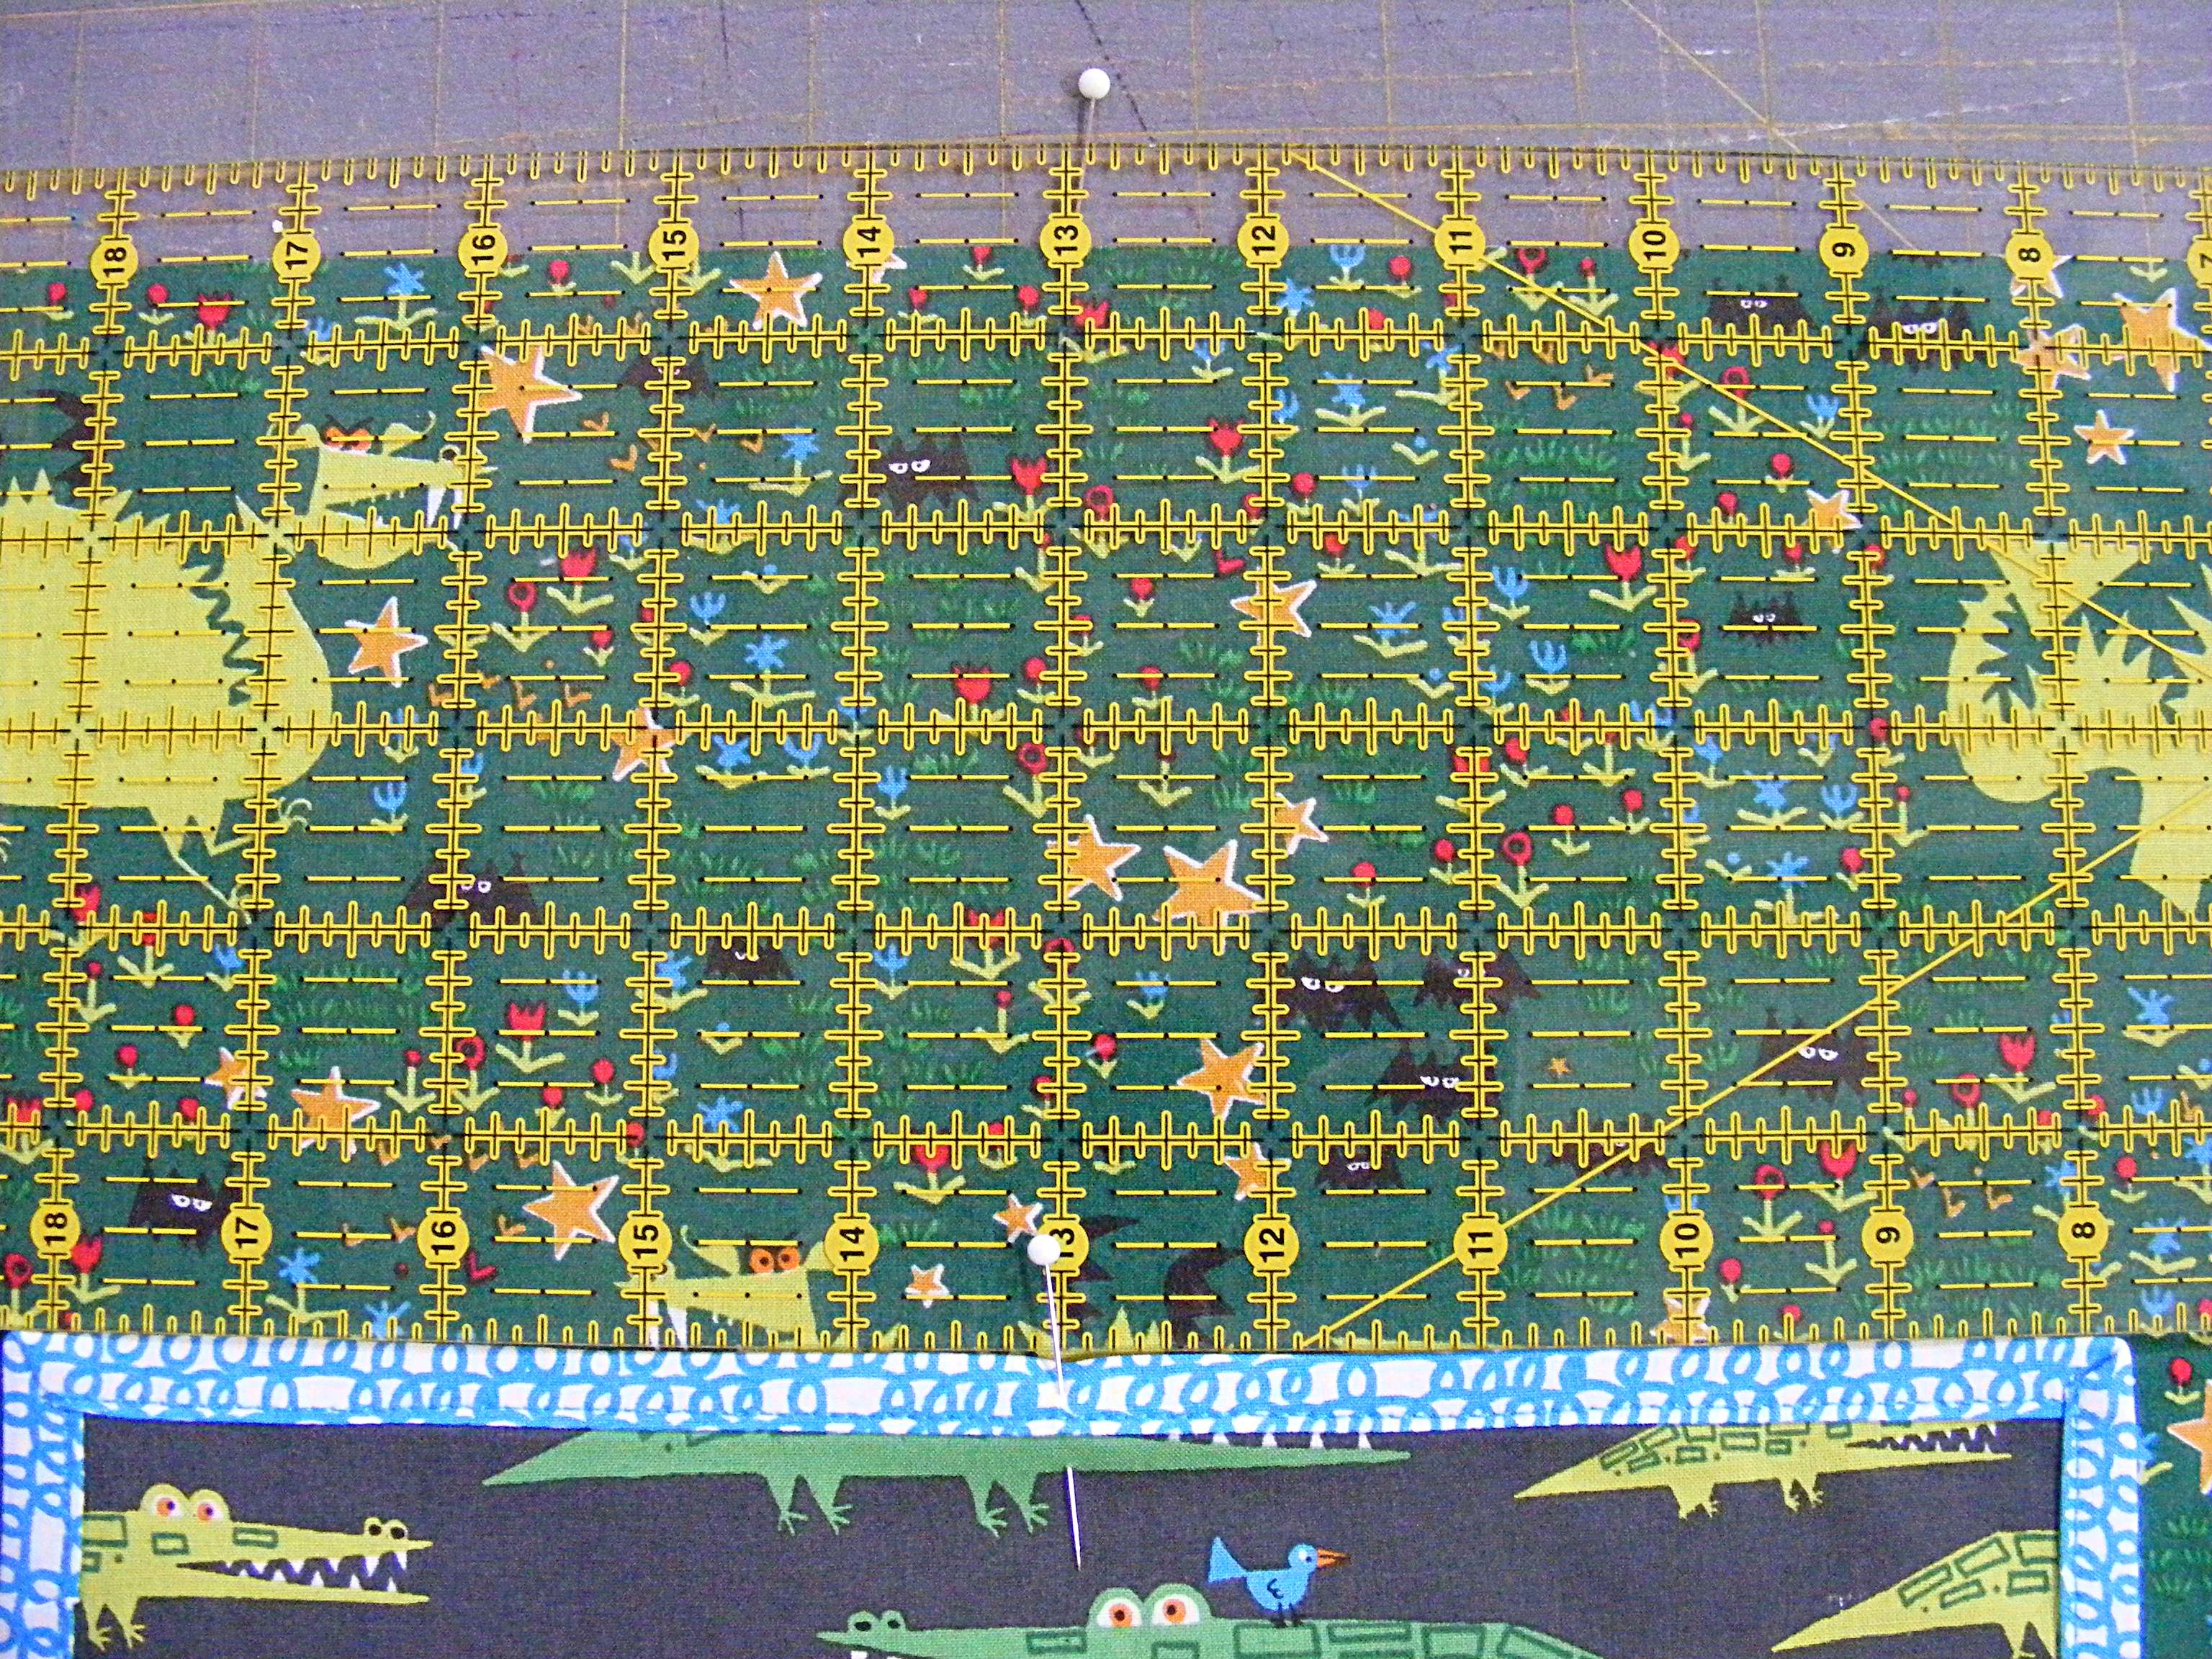
From the fabric, cut 6 rectangles each 8 1/2 inches x 17 inches.

From the flannel cut 6 rectangles each 8 inches x 16 1/2 inches.

Print or trace your applique templates. Since my book is 8 inches square and my patterns are all designed to fit in 10 inch squares, I printed all the template pages at 80% size. There’s more info about resizing patterns here.

Instructions

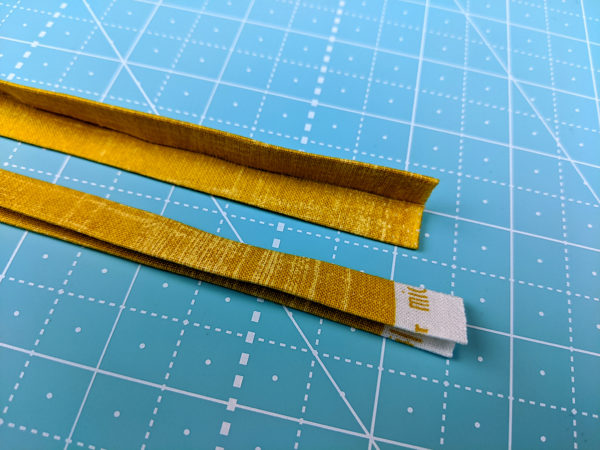
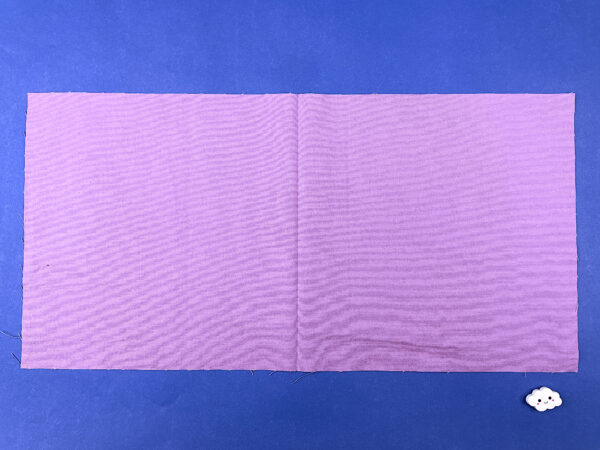
Fold your fabric rectangles in half and press the fold to mark what will be the spine of the book.

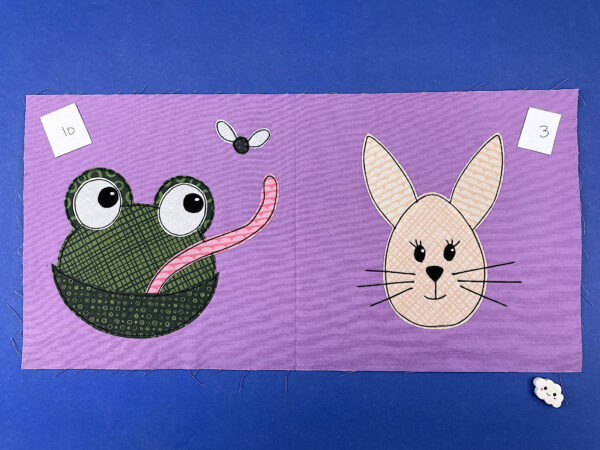
Fuse your appliques. (Those little cards with the numbers are my page numbers, just helping me to keep everything organized while I worked.)

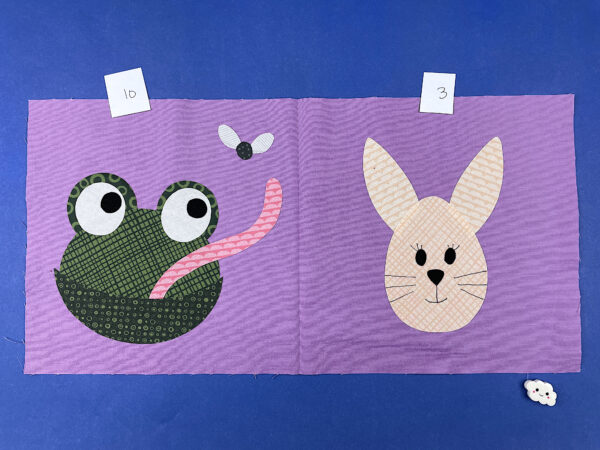
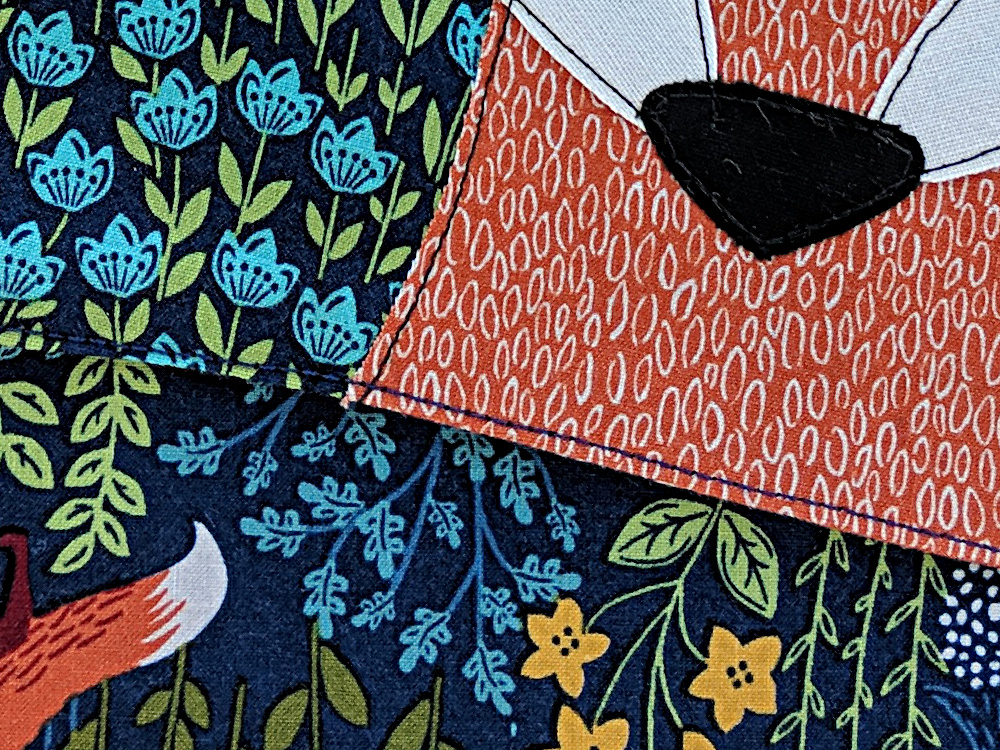
I usually make my quilt blocks “snapshot style.” By that I mean I imagine that I’ve snapped a photo of the animal, zoomed way in on its face. Here’s an example.

I’m trying to make it look like she has a lower body – it’s just cropped out of the photo – and I achieve that effect by lining the cut edge of the bottom of the applique like up with the raw edge at the bottom of my block. You can do this in your soft book exactly the same way. Just line up the straight edge at the bottom of the applique piece with the bottom edge of the page so both raw edges get included in the stitching when you finish the page edges.

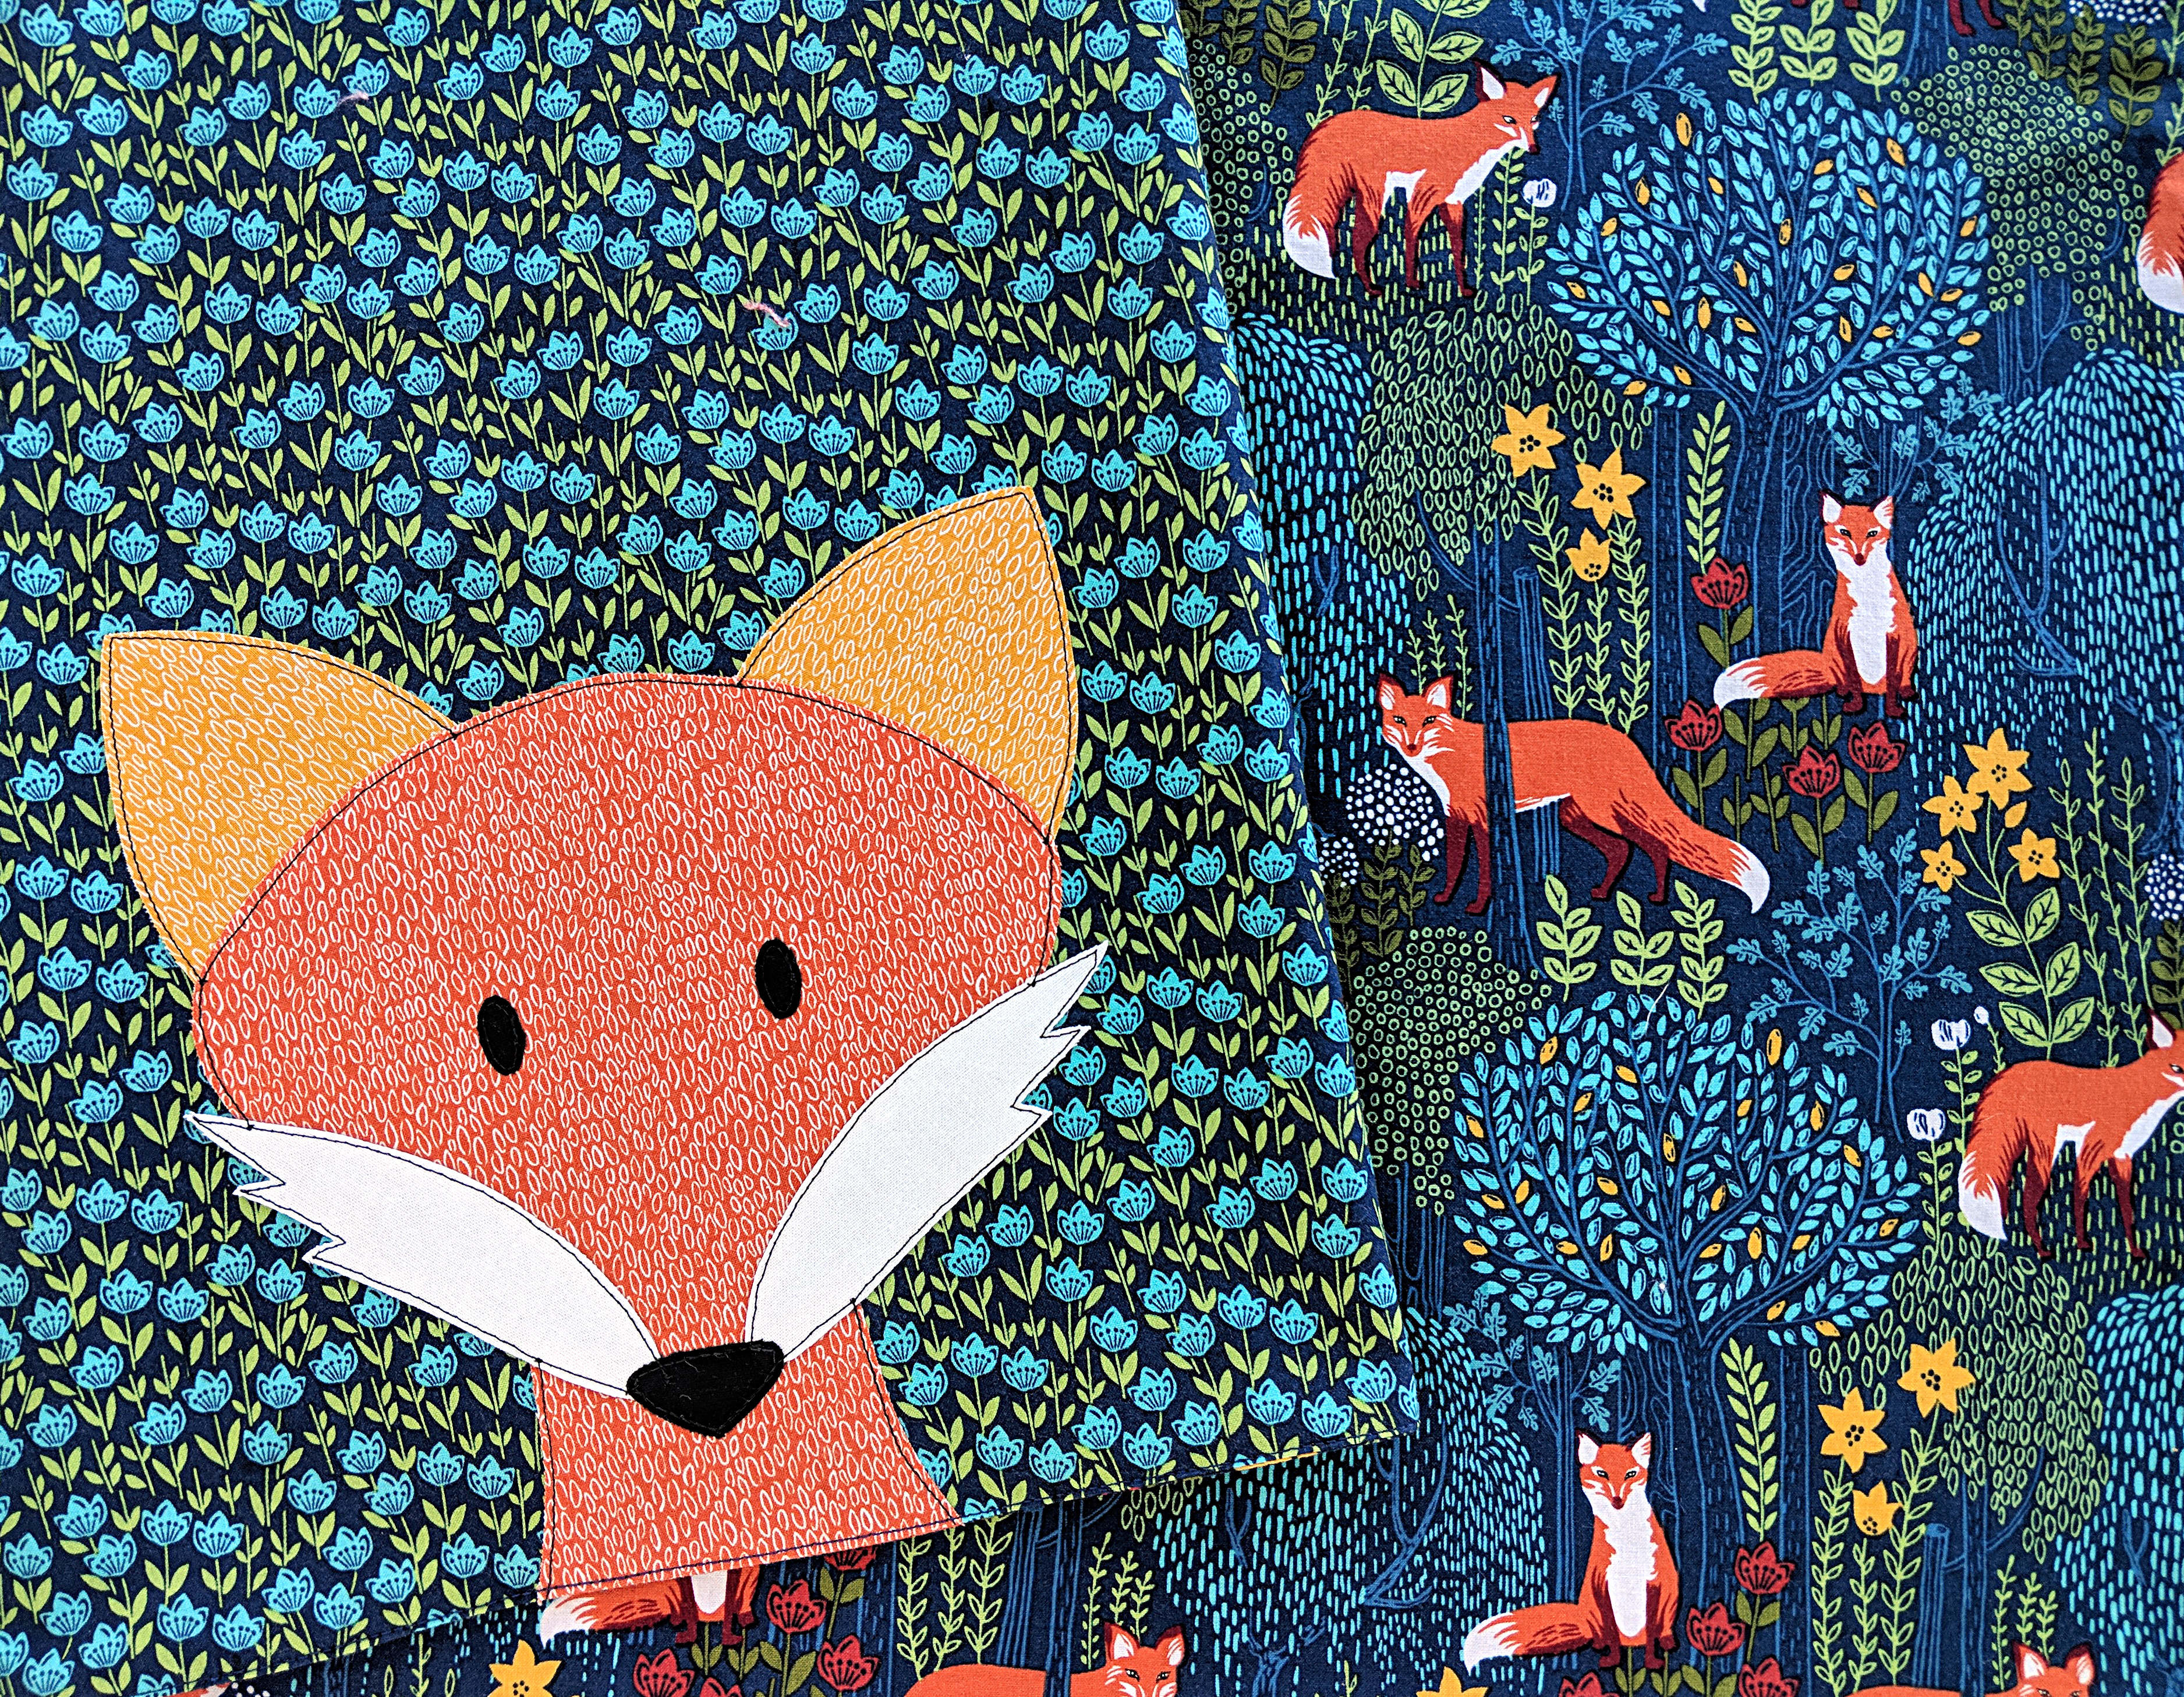
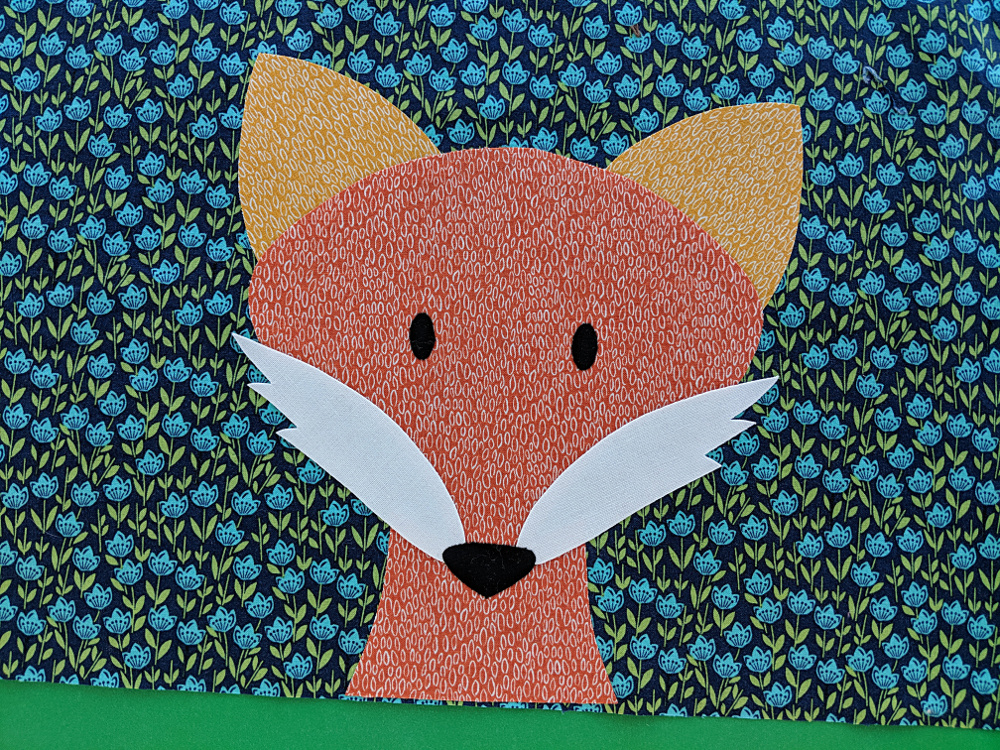
For my book I decided to float the heads in the middle of the block – what I call “emoji style.” When I do that, I just don’t use the shoulder or body pieces. That means I had to choose animals where the head and body are separate pieces, so I didn’t include anything like this bear.

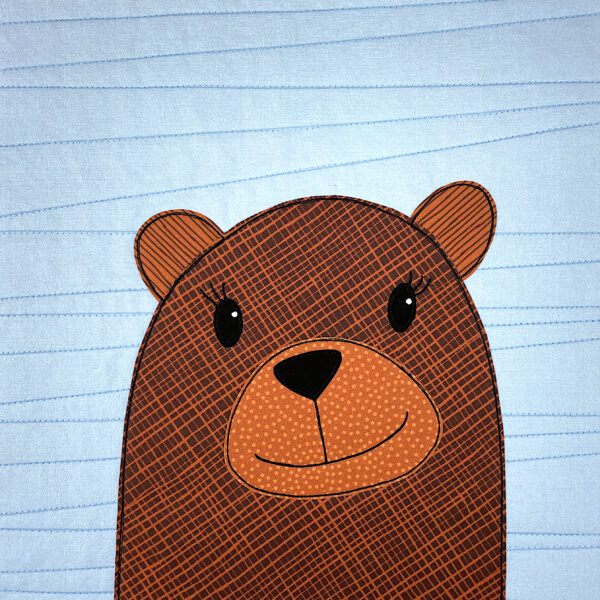
See? No way to separate the head from the body.

That was a little design digression. Now, back to the instructions. πŸ™‚

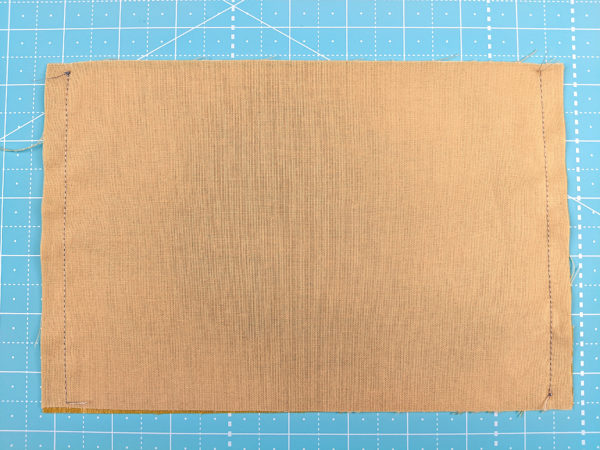
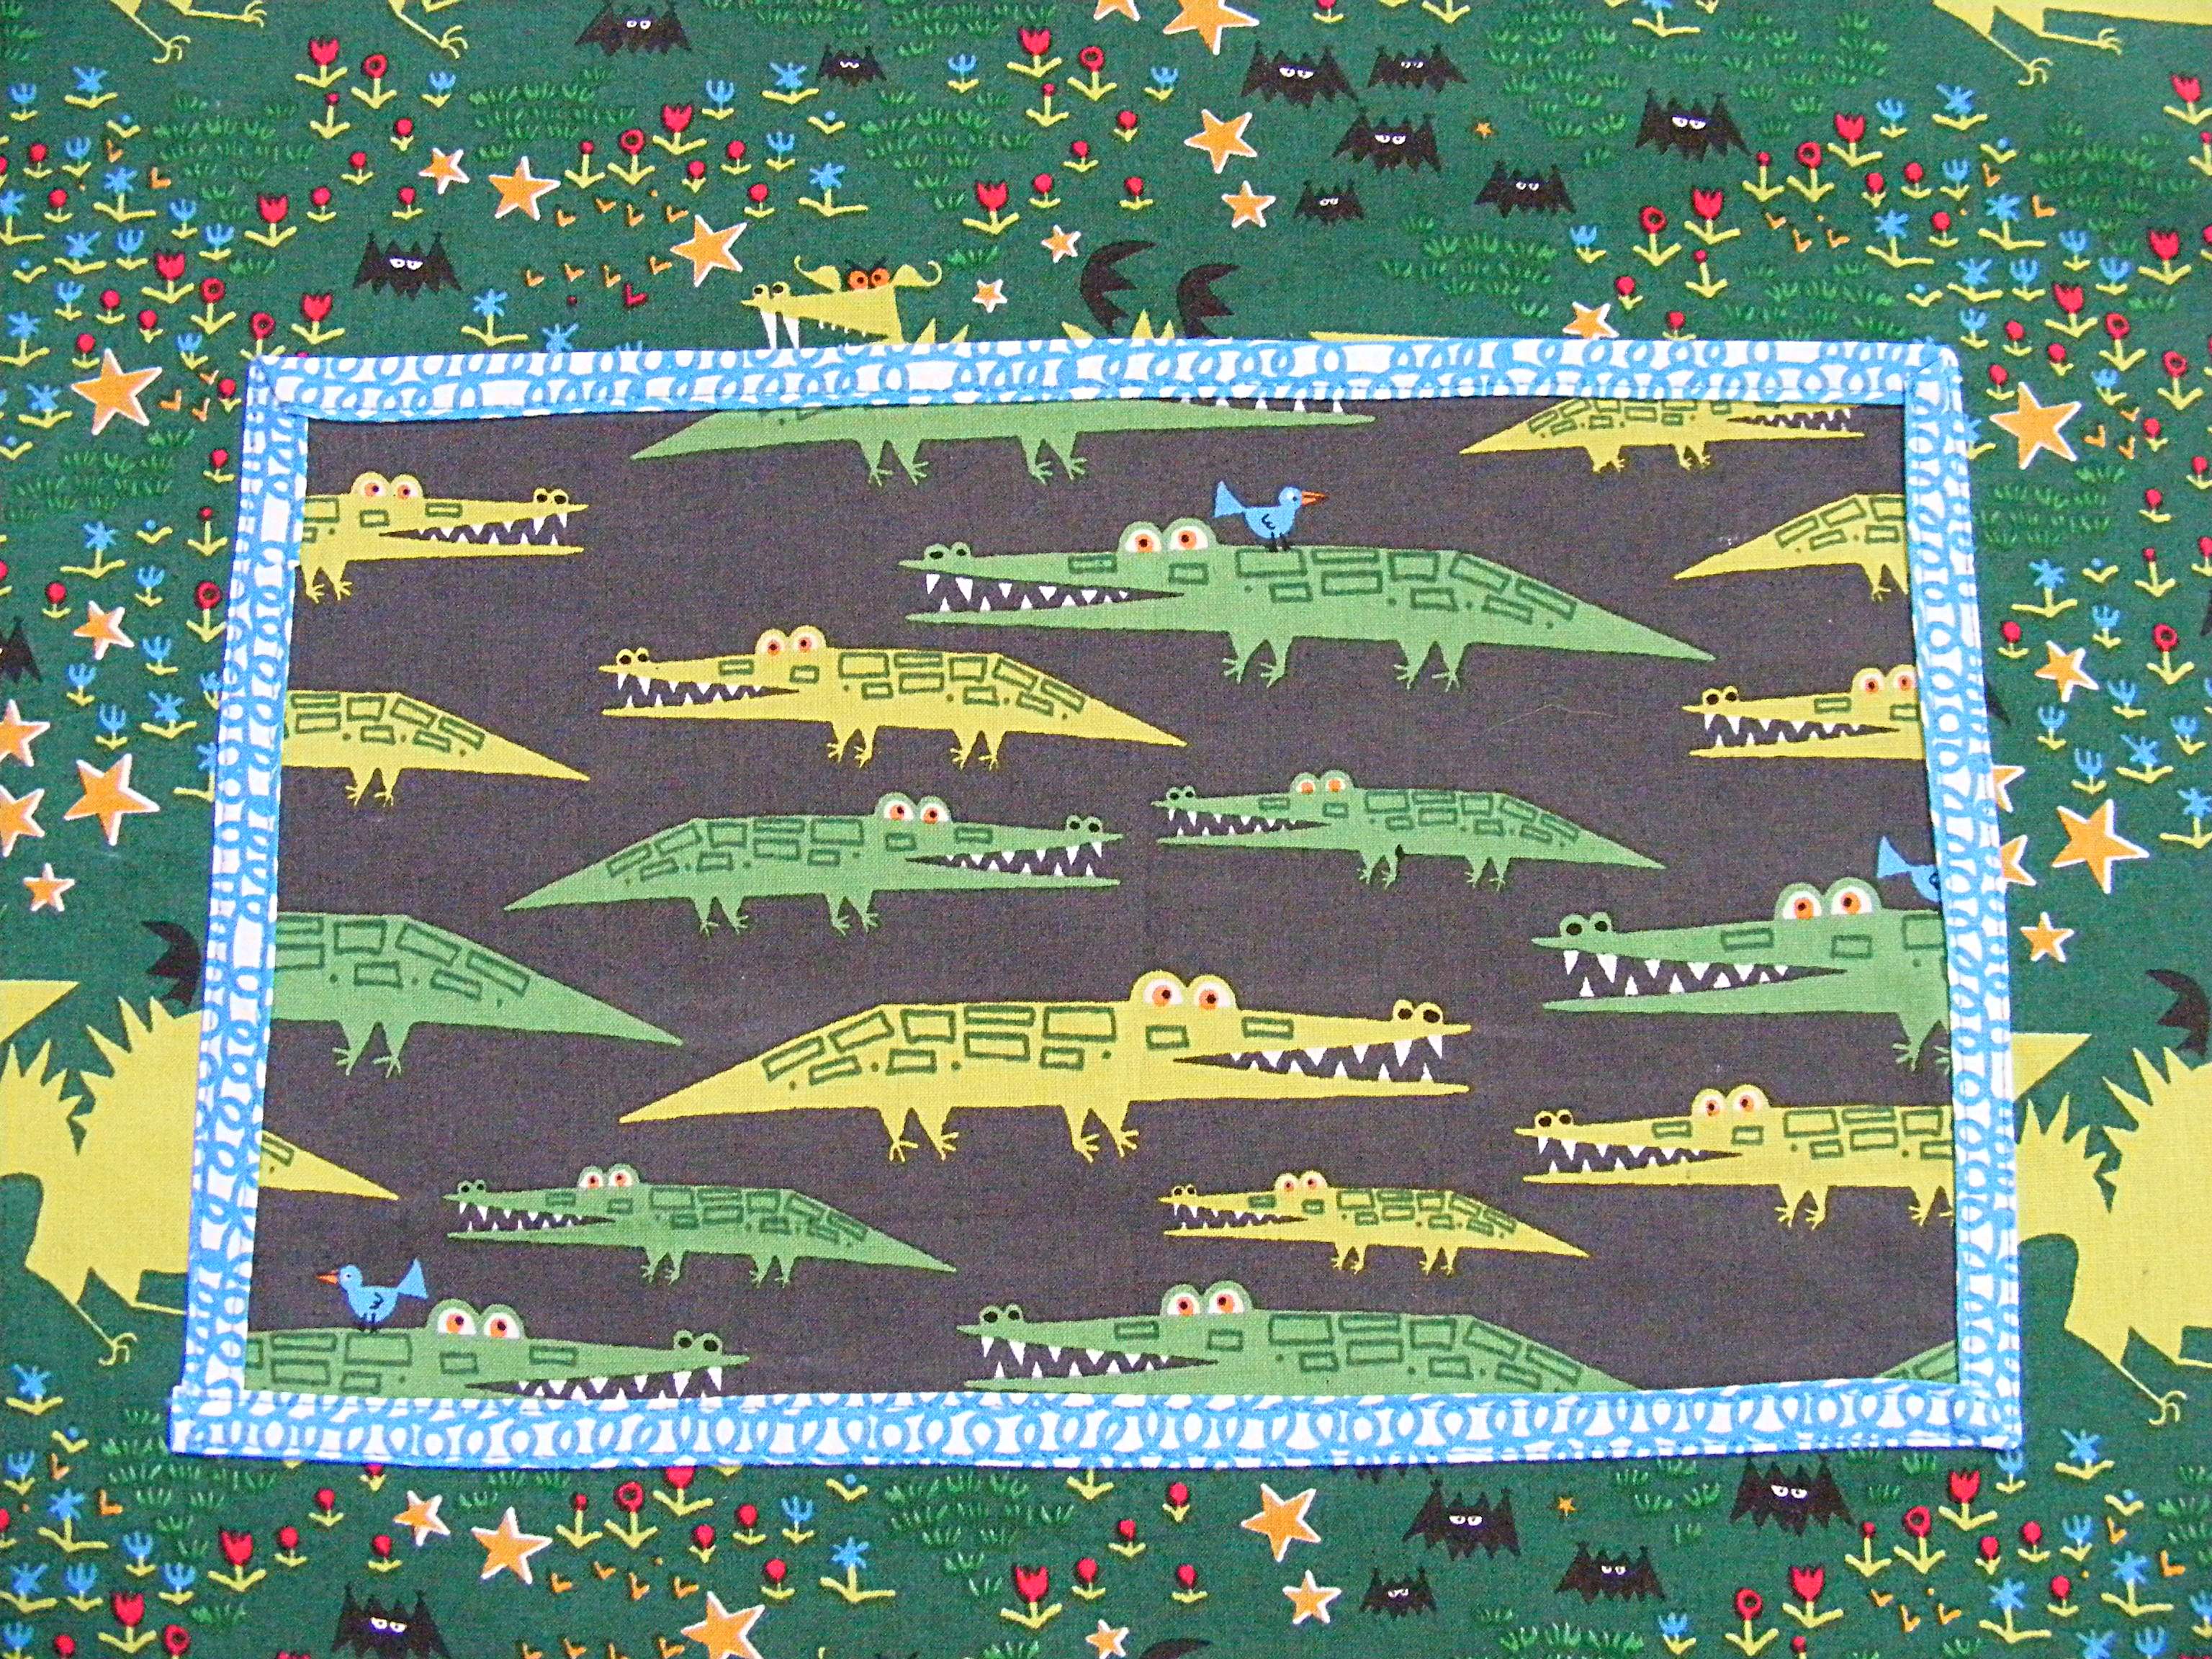
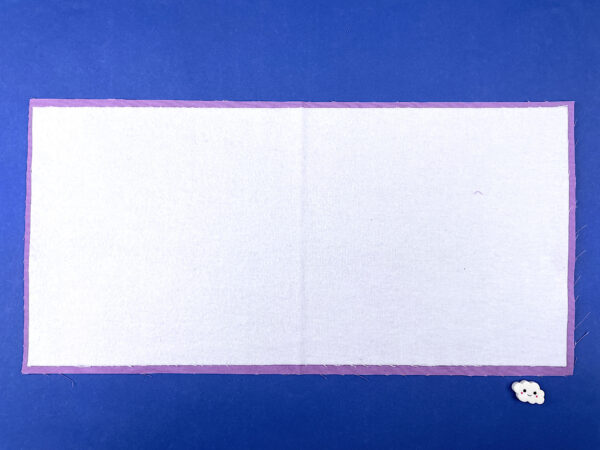
Center a flannel rectangle on the back of each page rectangle. I cut the flannel smaller than the fabric in order to de-bulk the edges of the pages.

I used spray adhesive because every few years I forget how much I hate it and I give it another try before swearing off it for another few years. It would have been a lot easier (and less messy) to just dab a little fabric glue stick in each corner and a swipe down the center. πŸ˜›

Outline the applique. I just use a simple straight stitch with black thread.

At this point I also used fabric paint to add some catchlights to my eyes.

Don’t do that. πŸ™‚

It all worked out fine, but since I used fabric paint for mine catchlights, it means for the rest of the process I had to be very careful not to iron over the eyes. It would have been easier to add the catchlights at the very end.

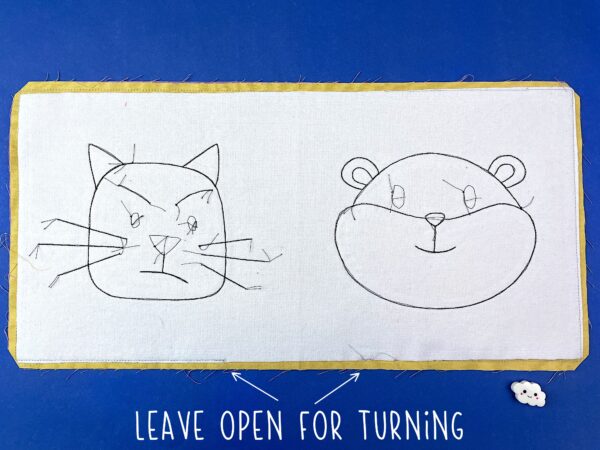
Now comes the fun part – finishing the pages.

Sew pages 12/1 to pages 2/11, right sides facing, using 1/4-inch seam allowance all around. Leave a 4-5 inch opening for turning.

Repeat with pages 6/7 and 8/5.

Repeat with pages 4/9 and 10/3.

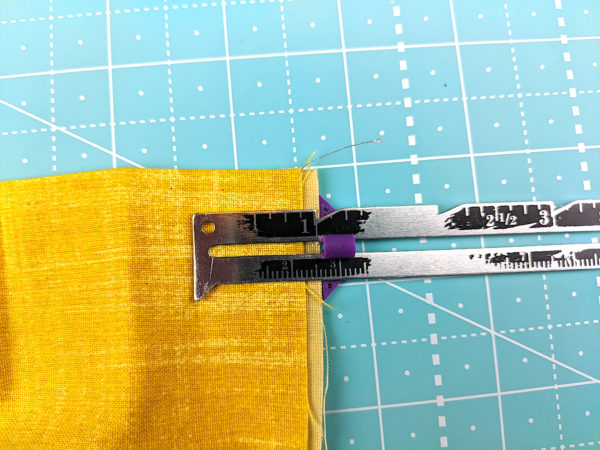
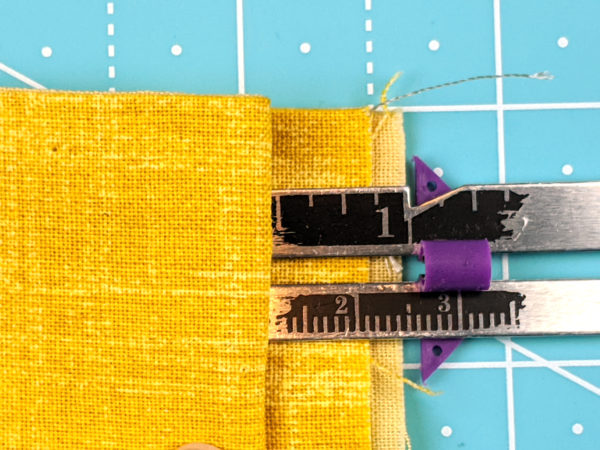
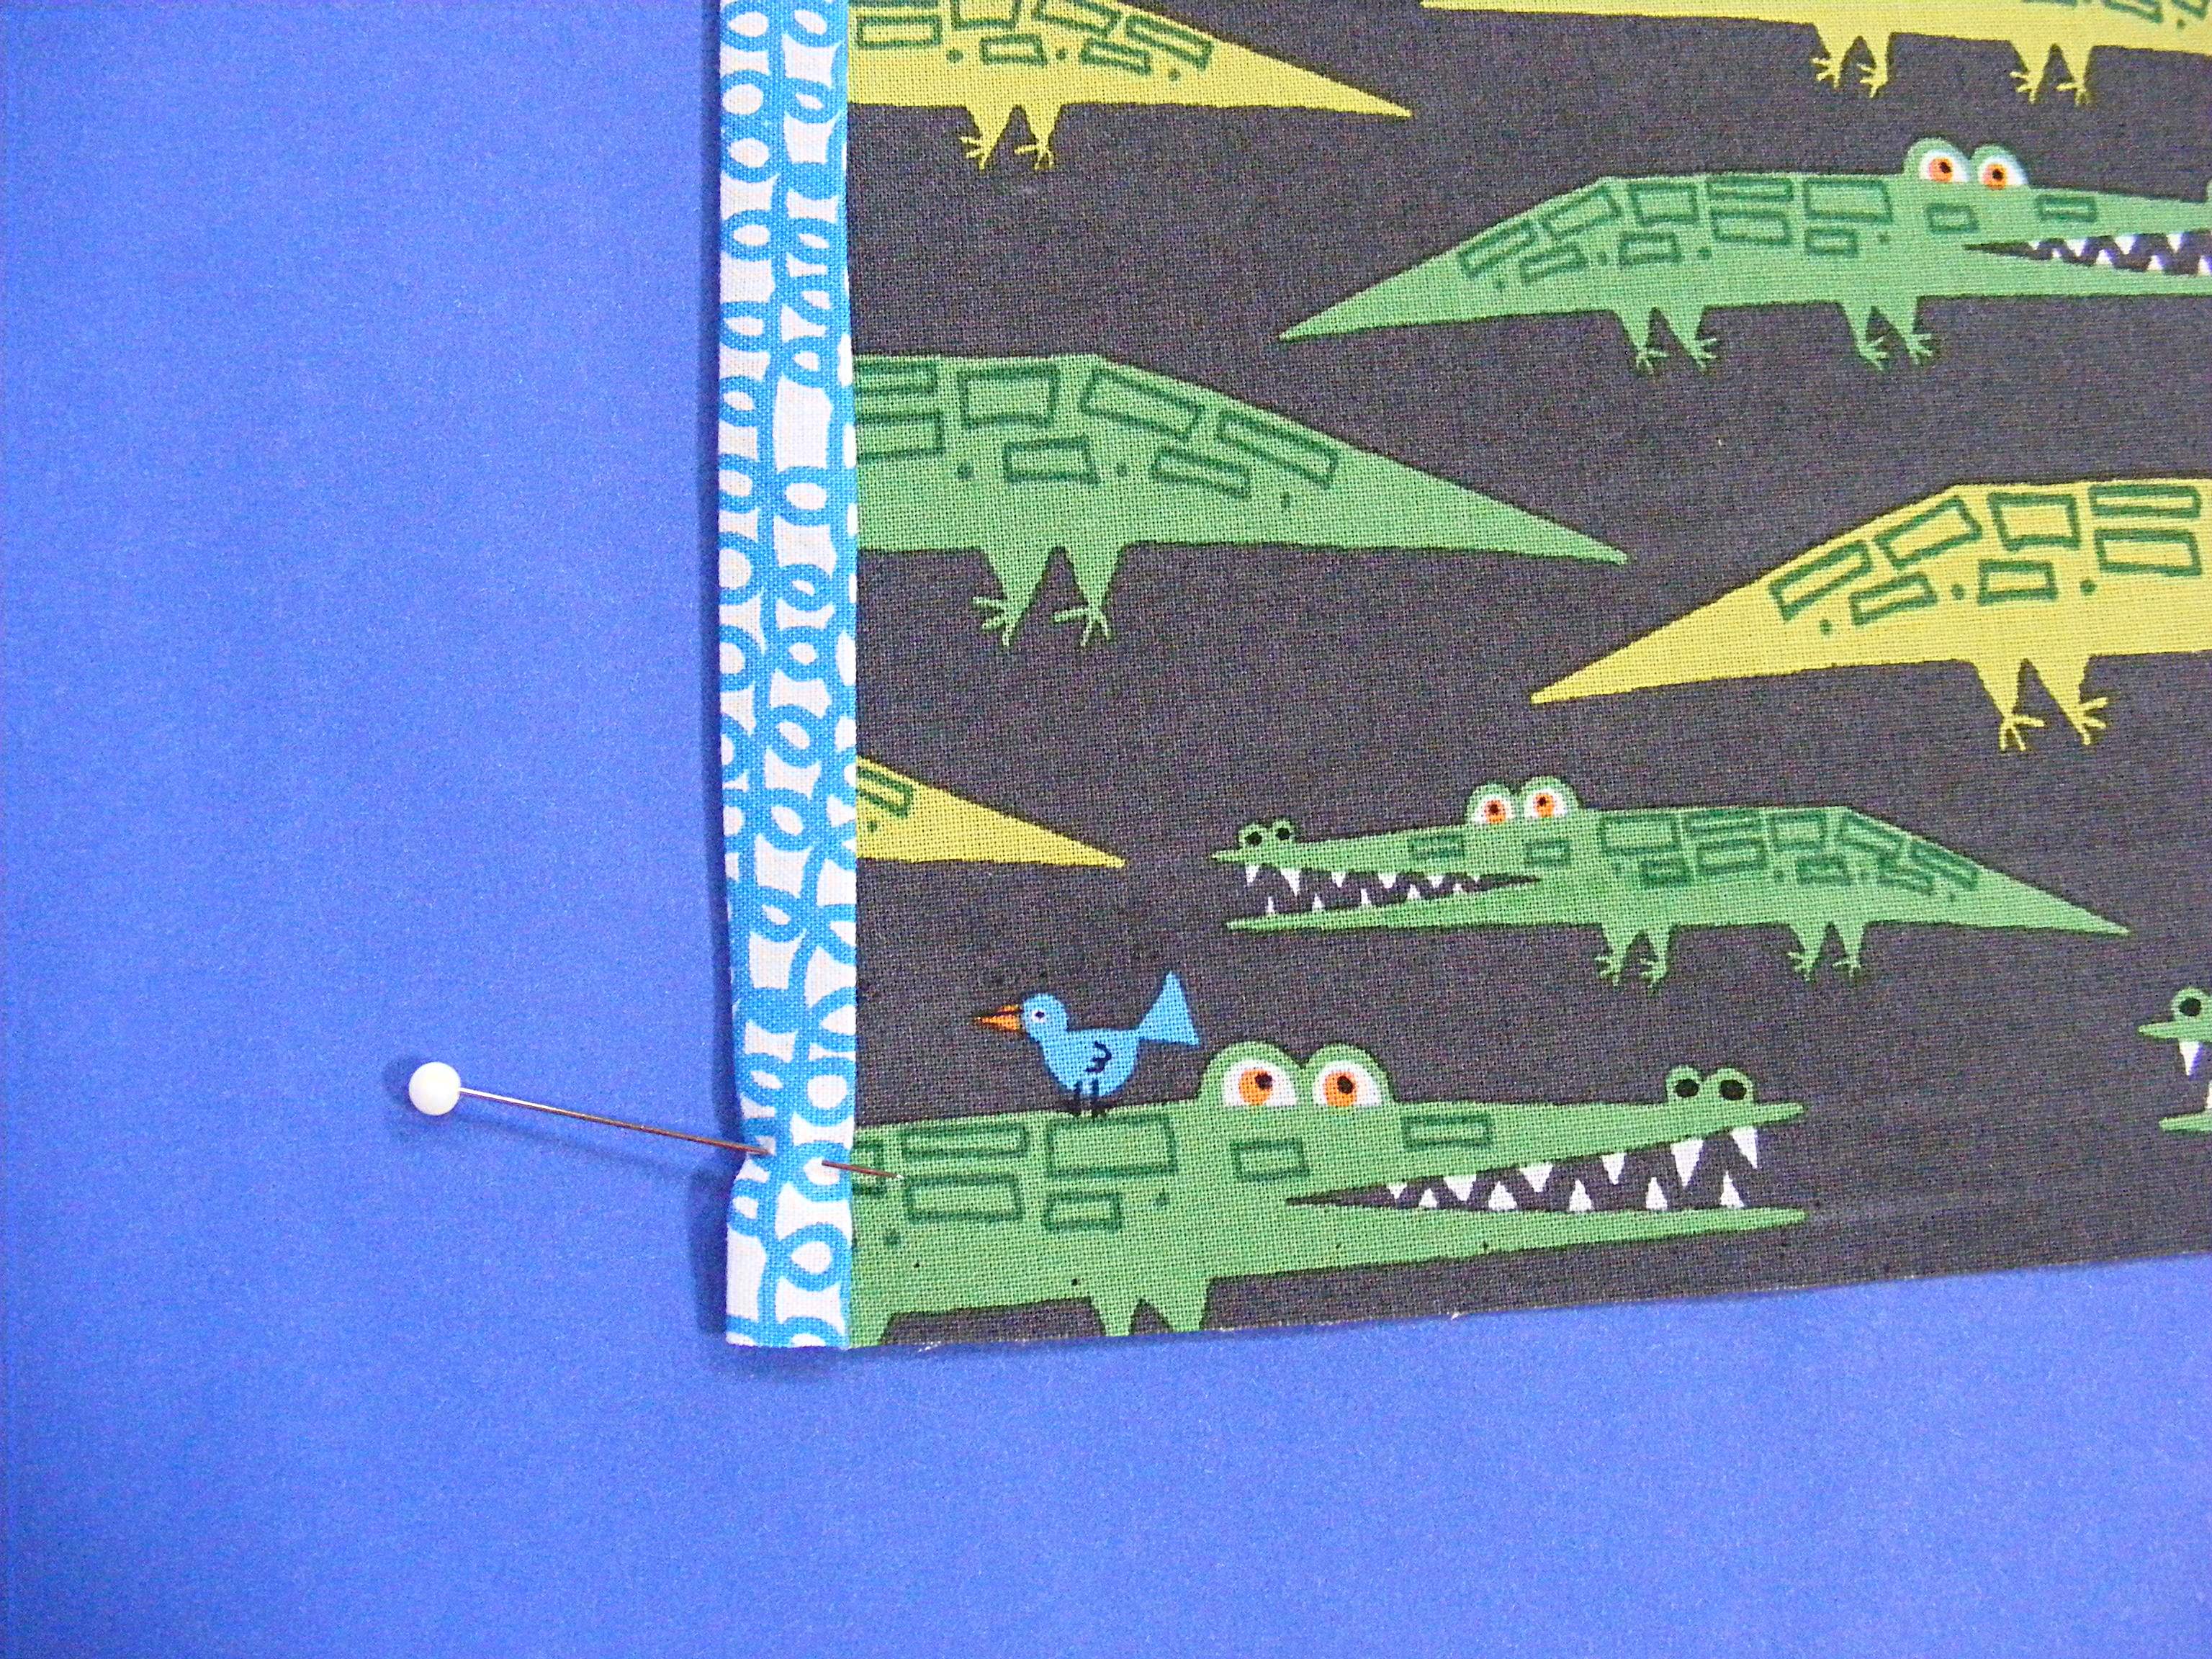
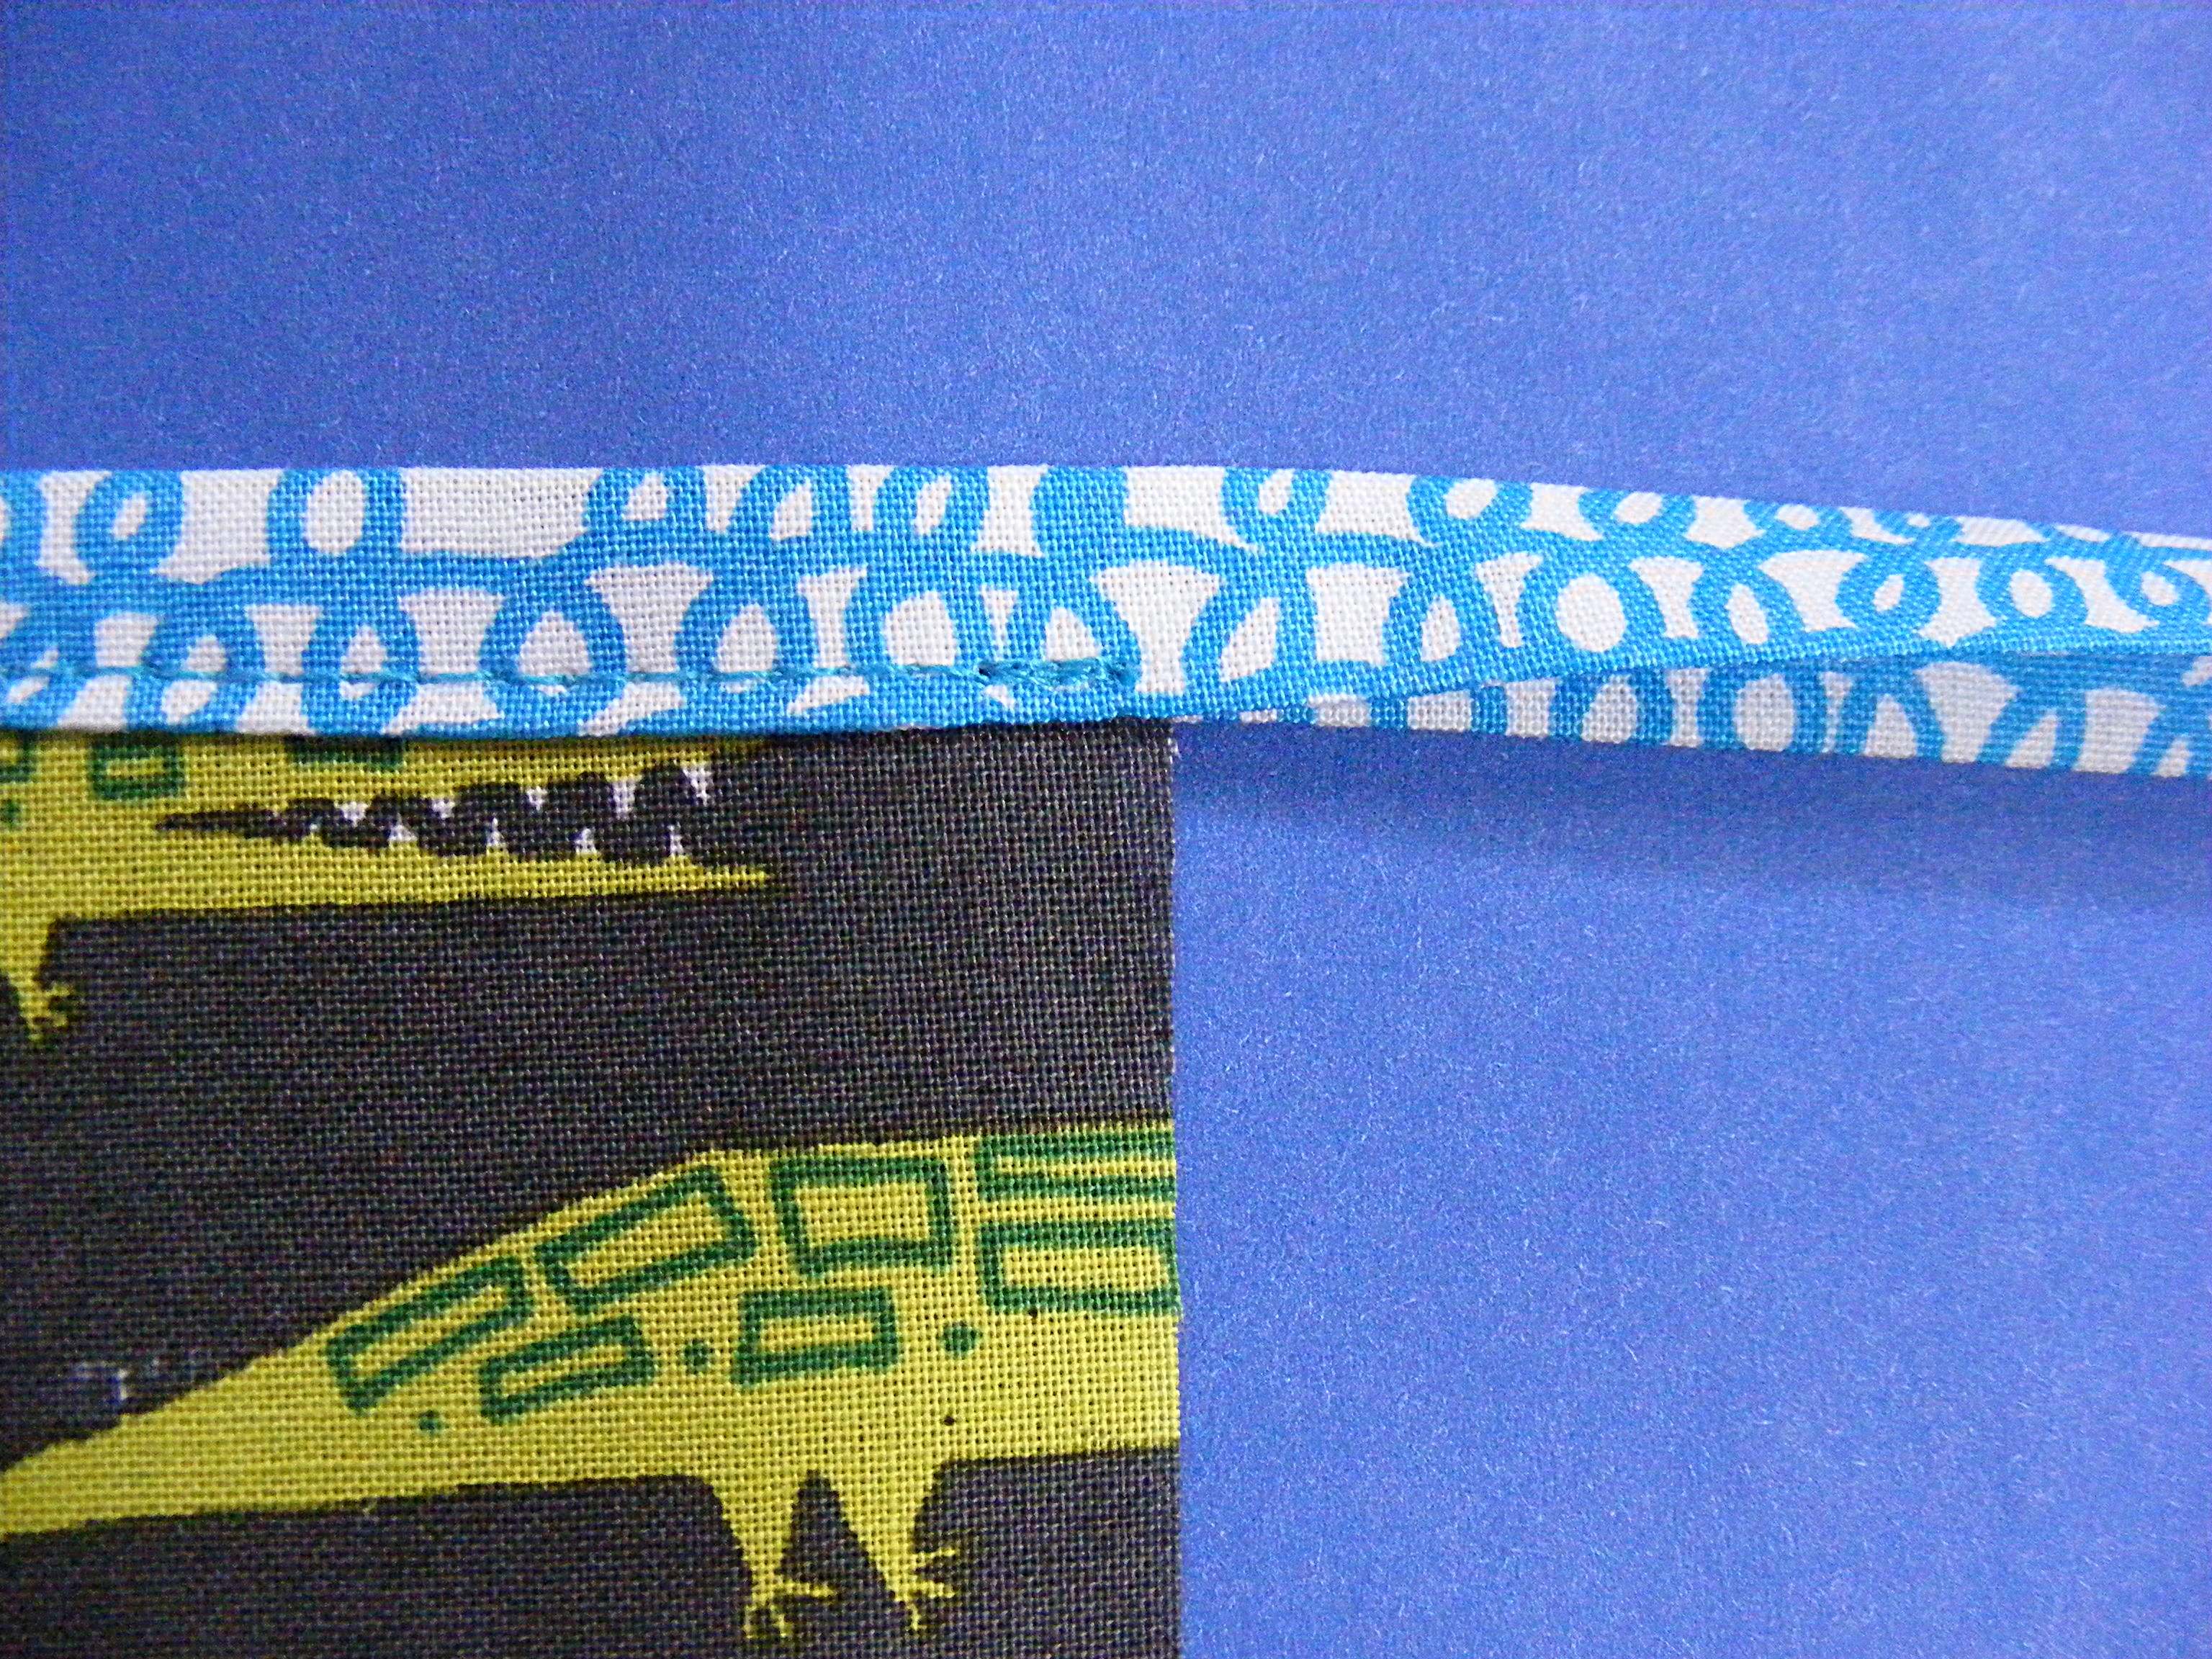
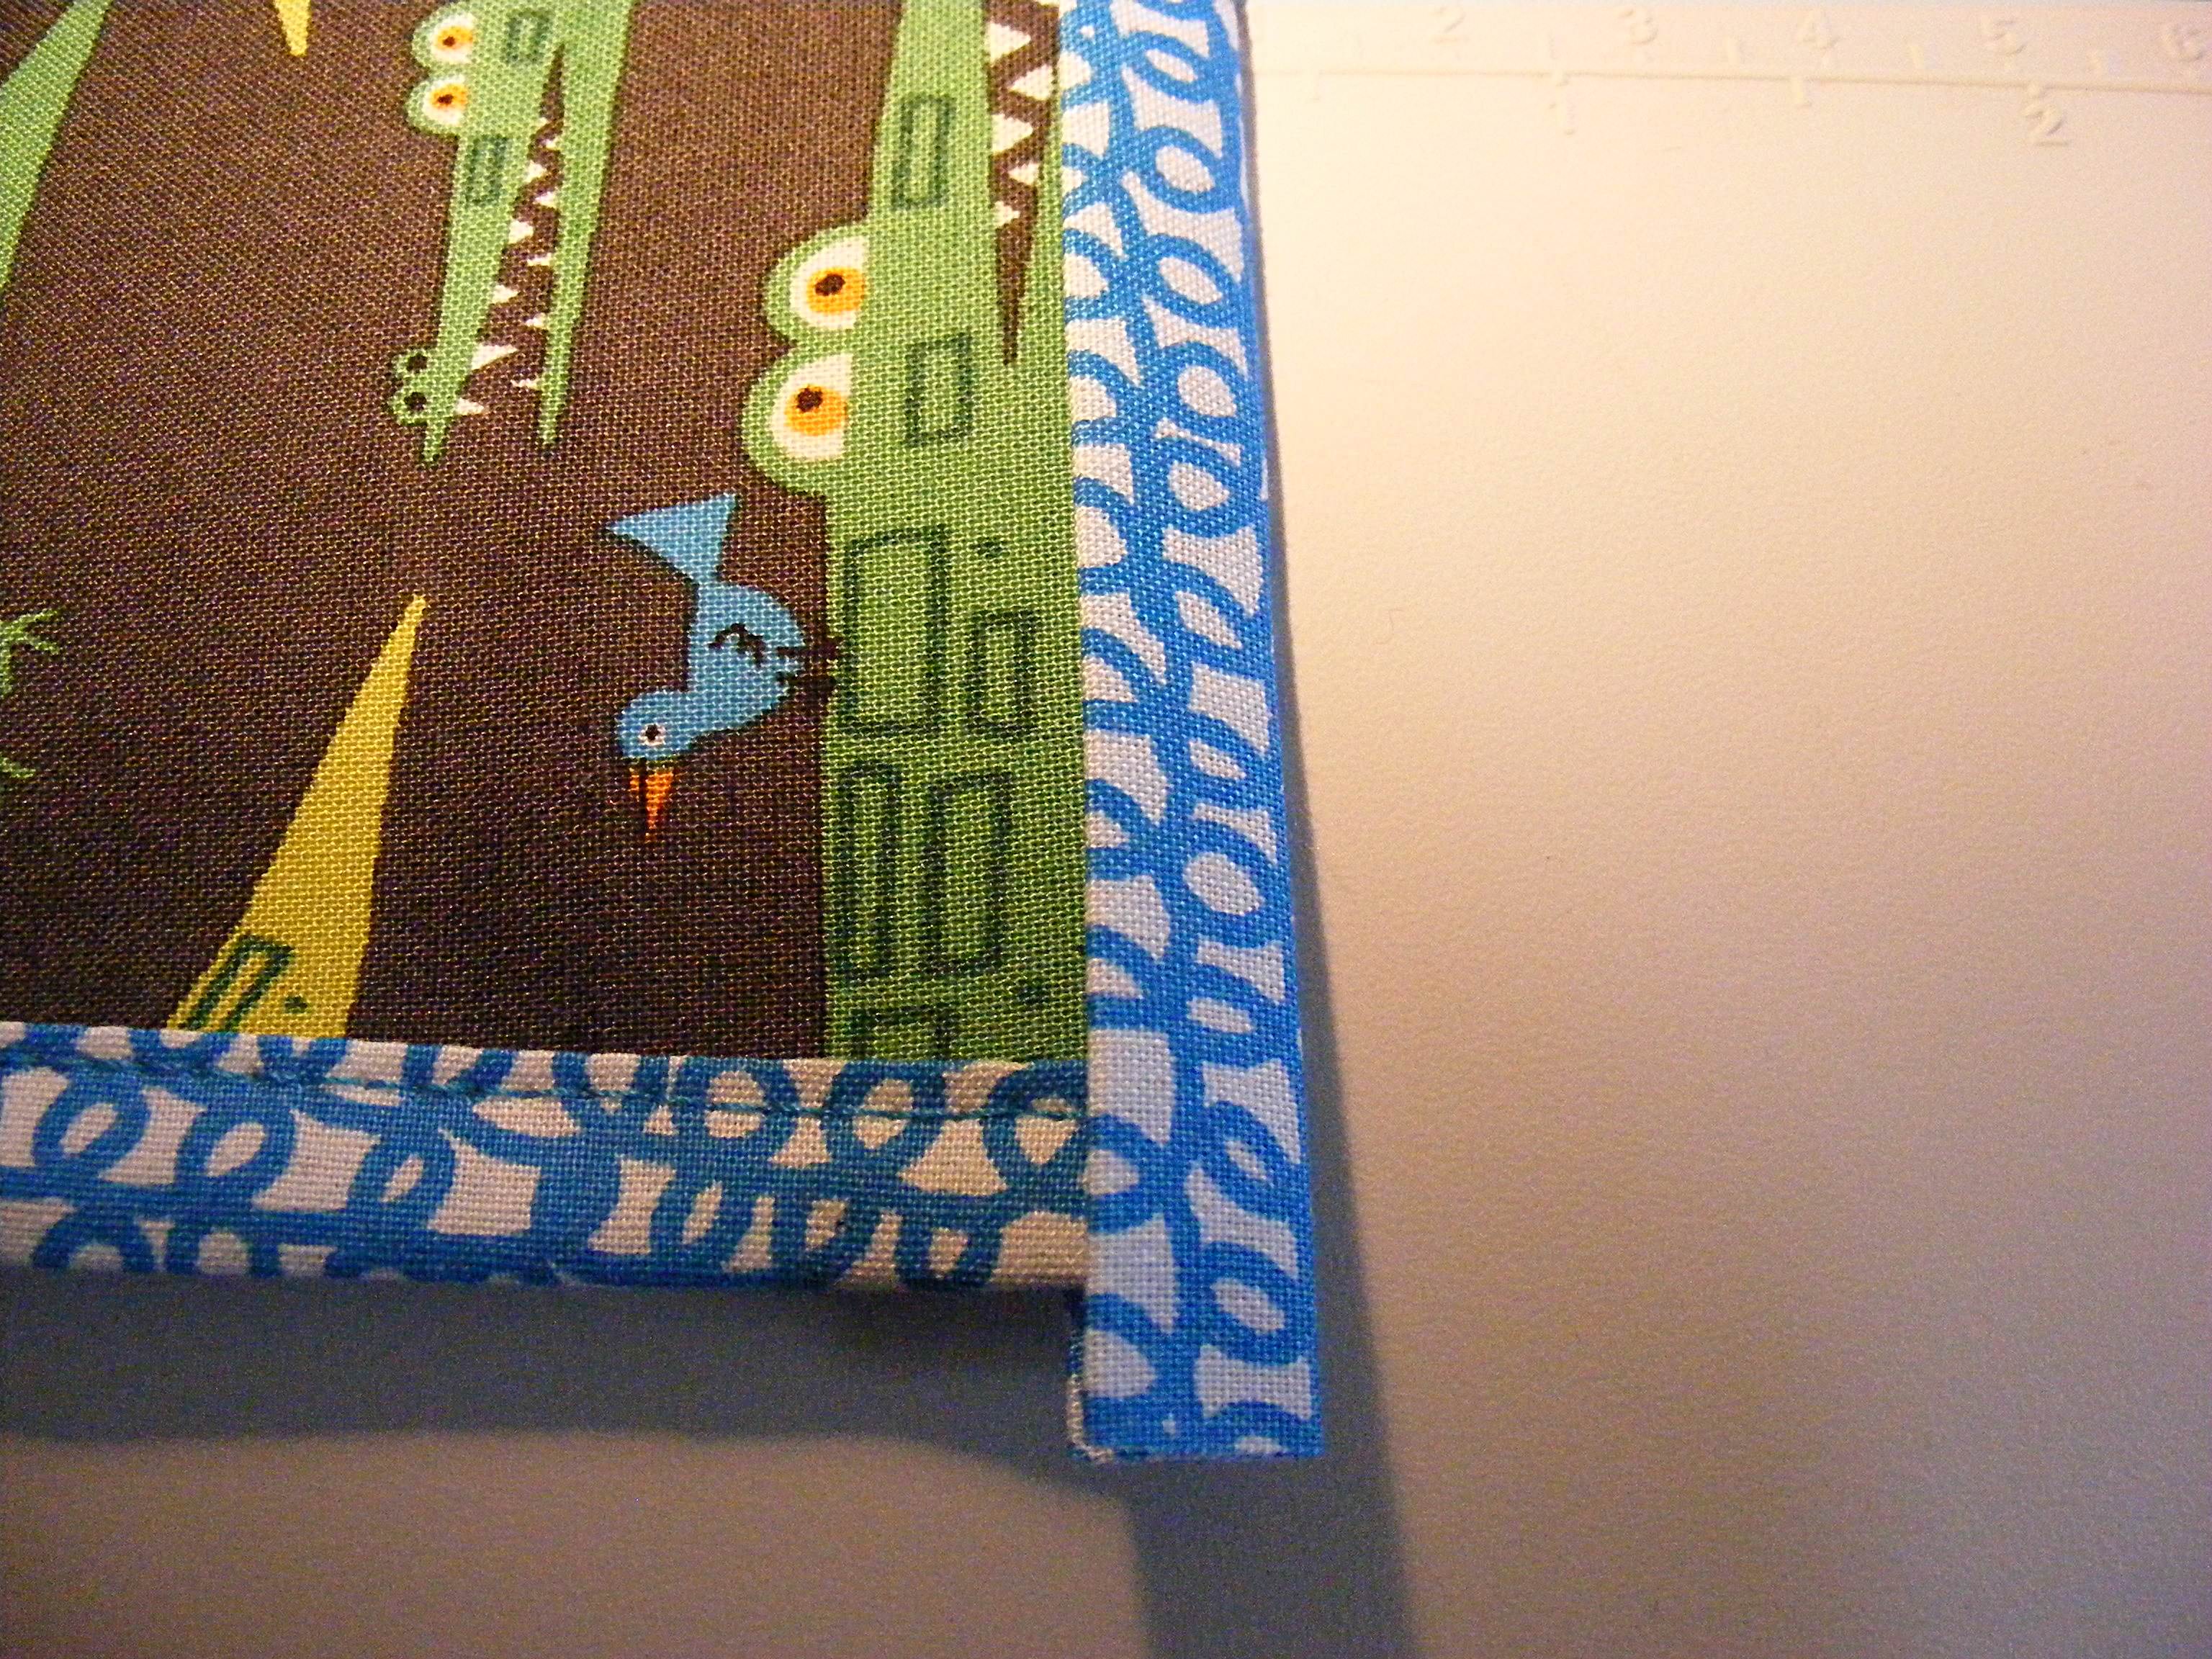
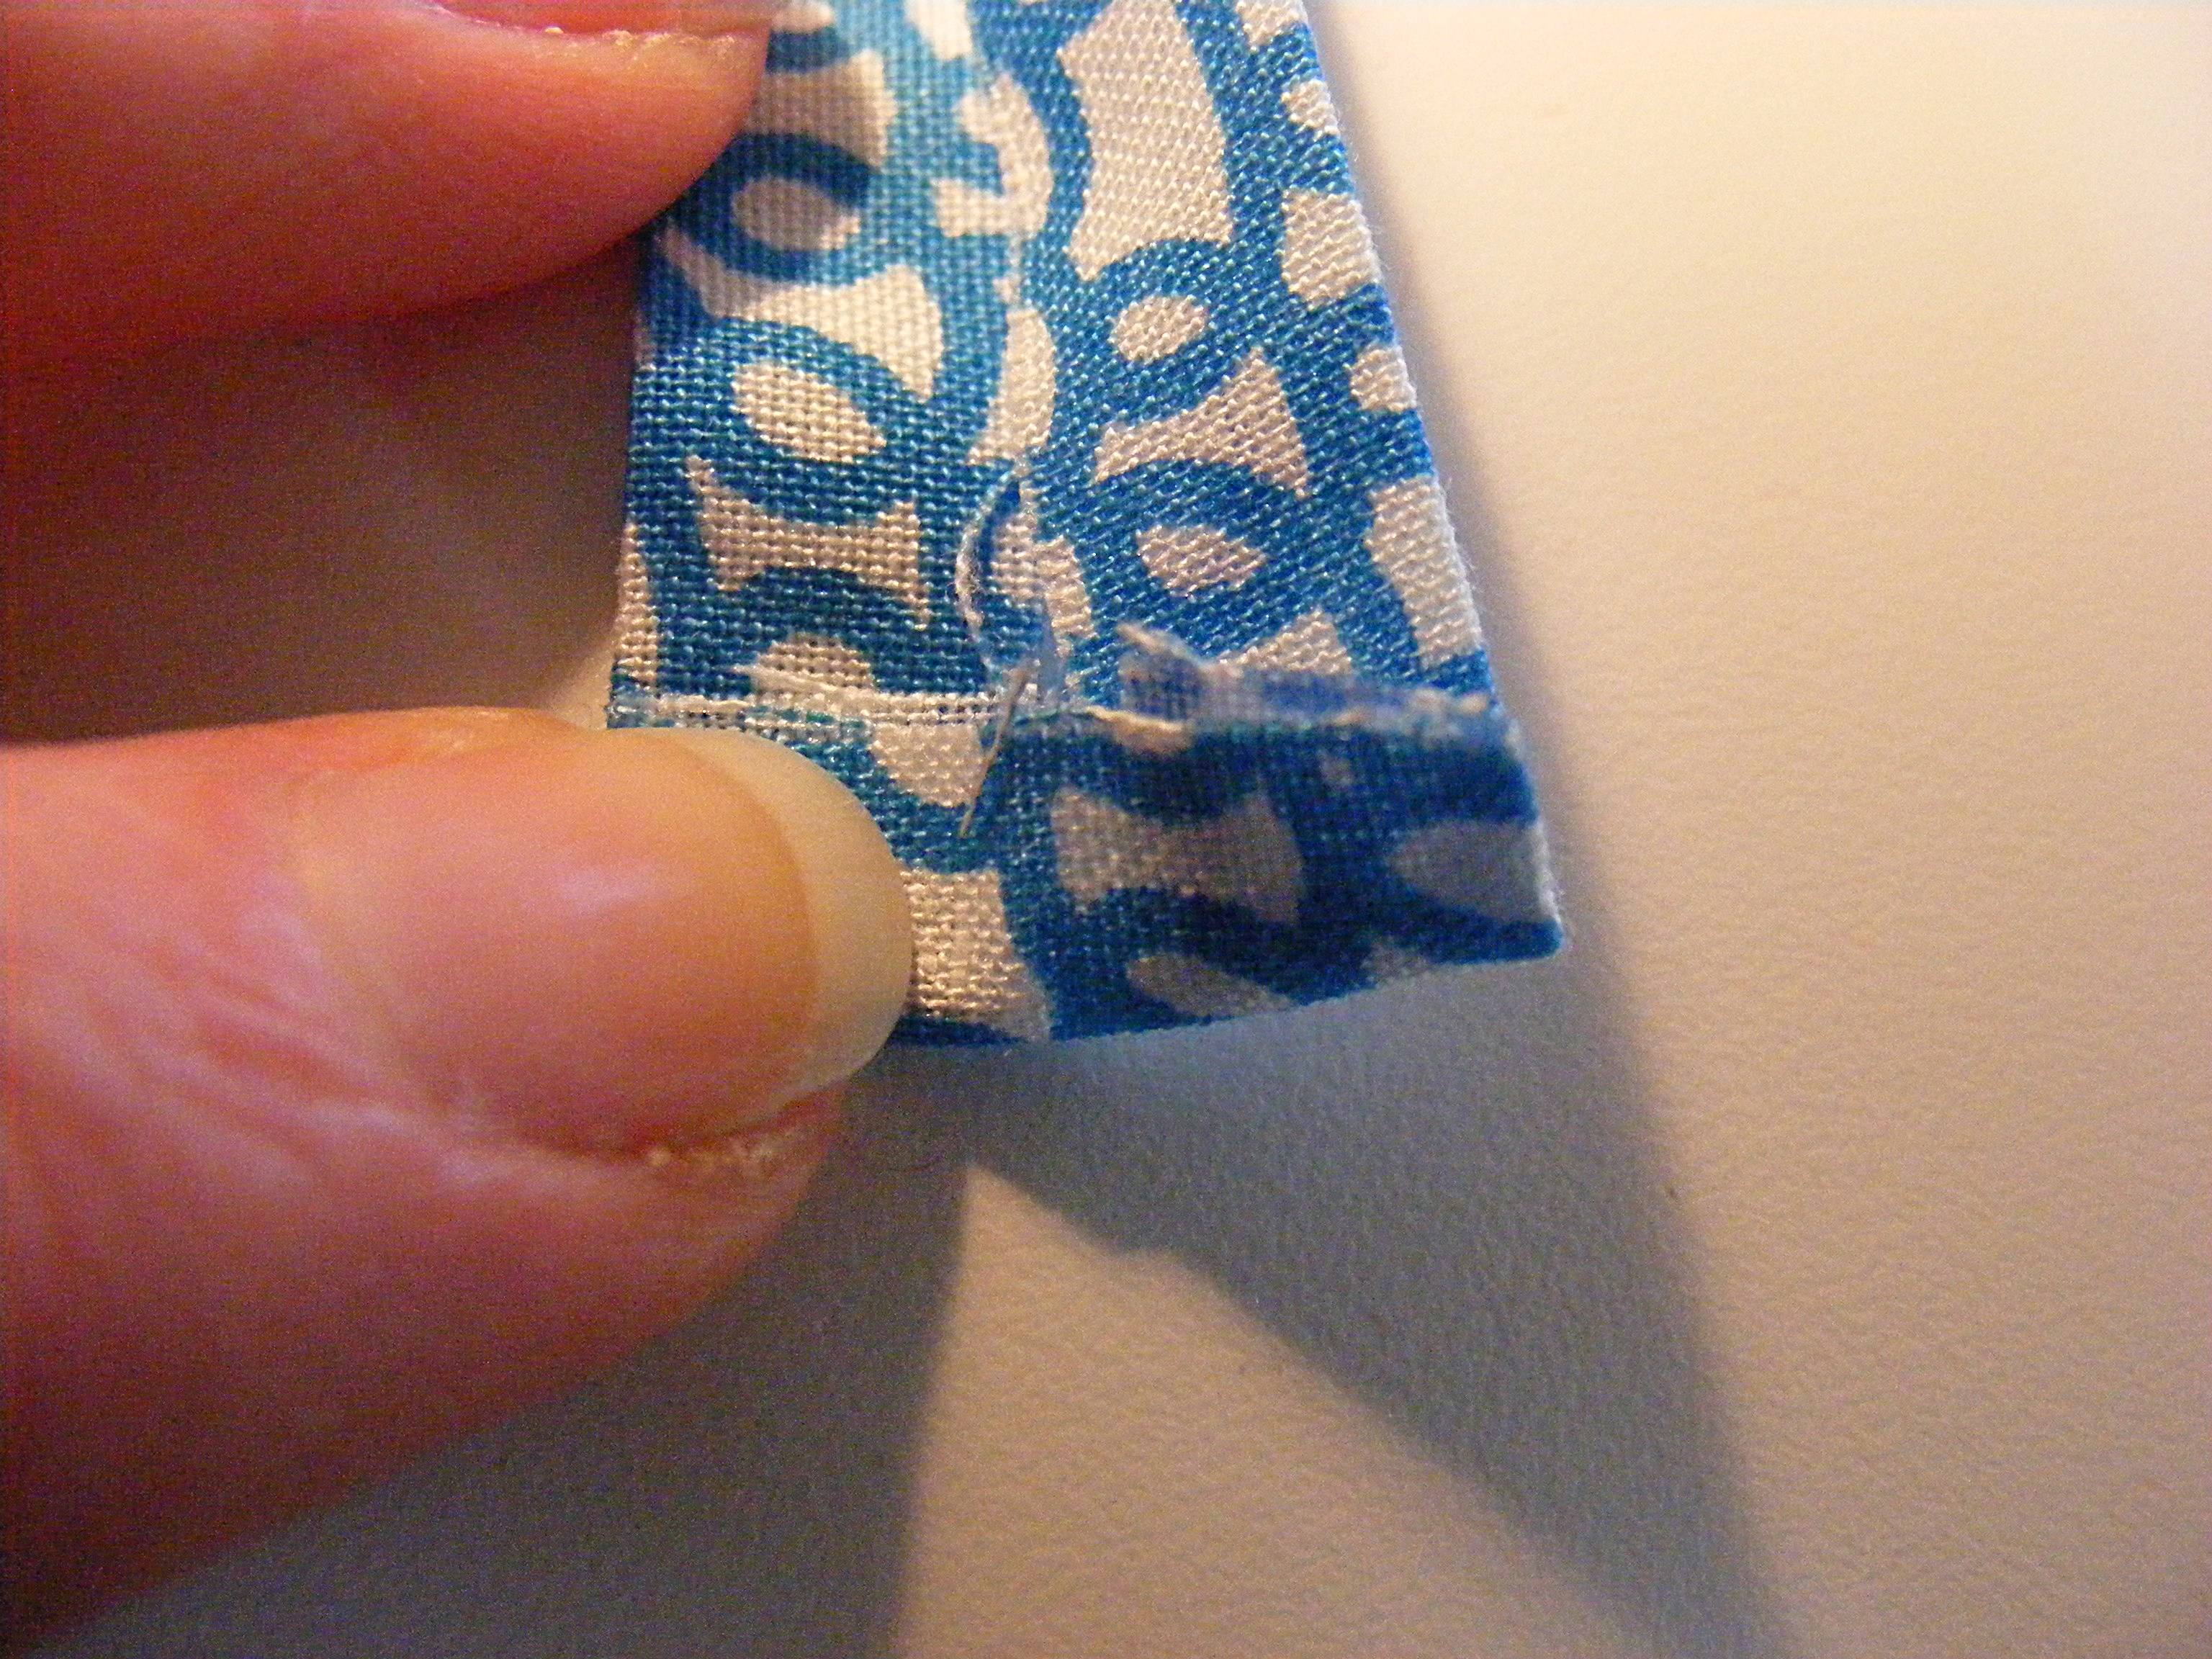
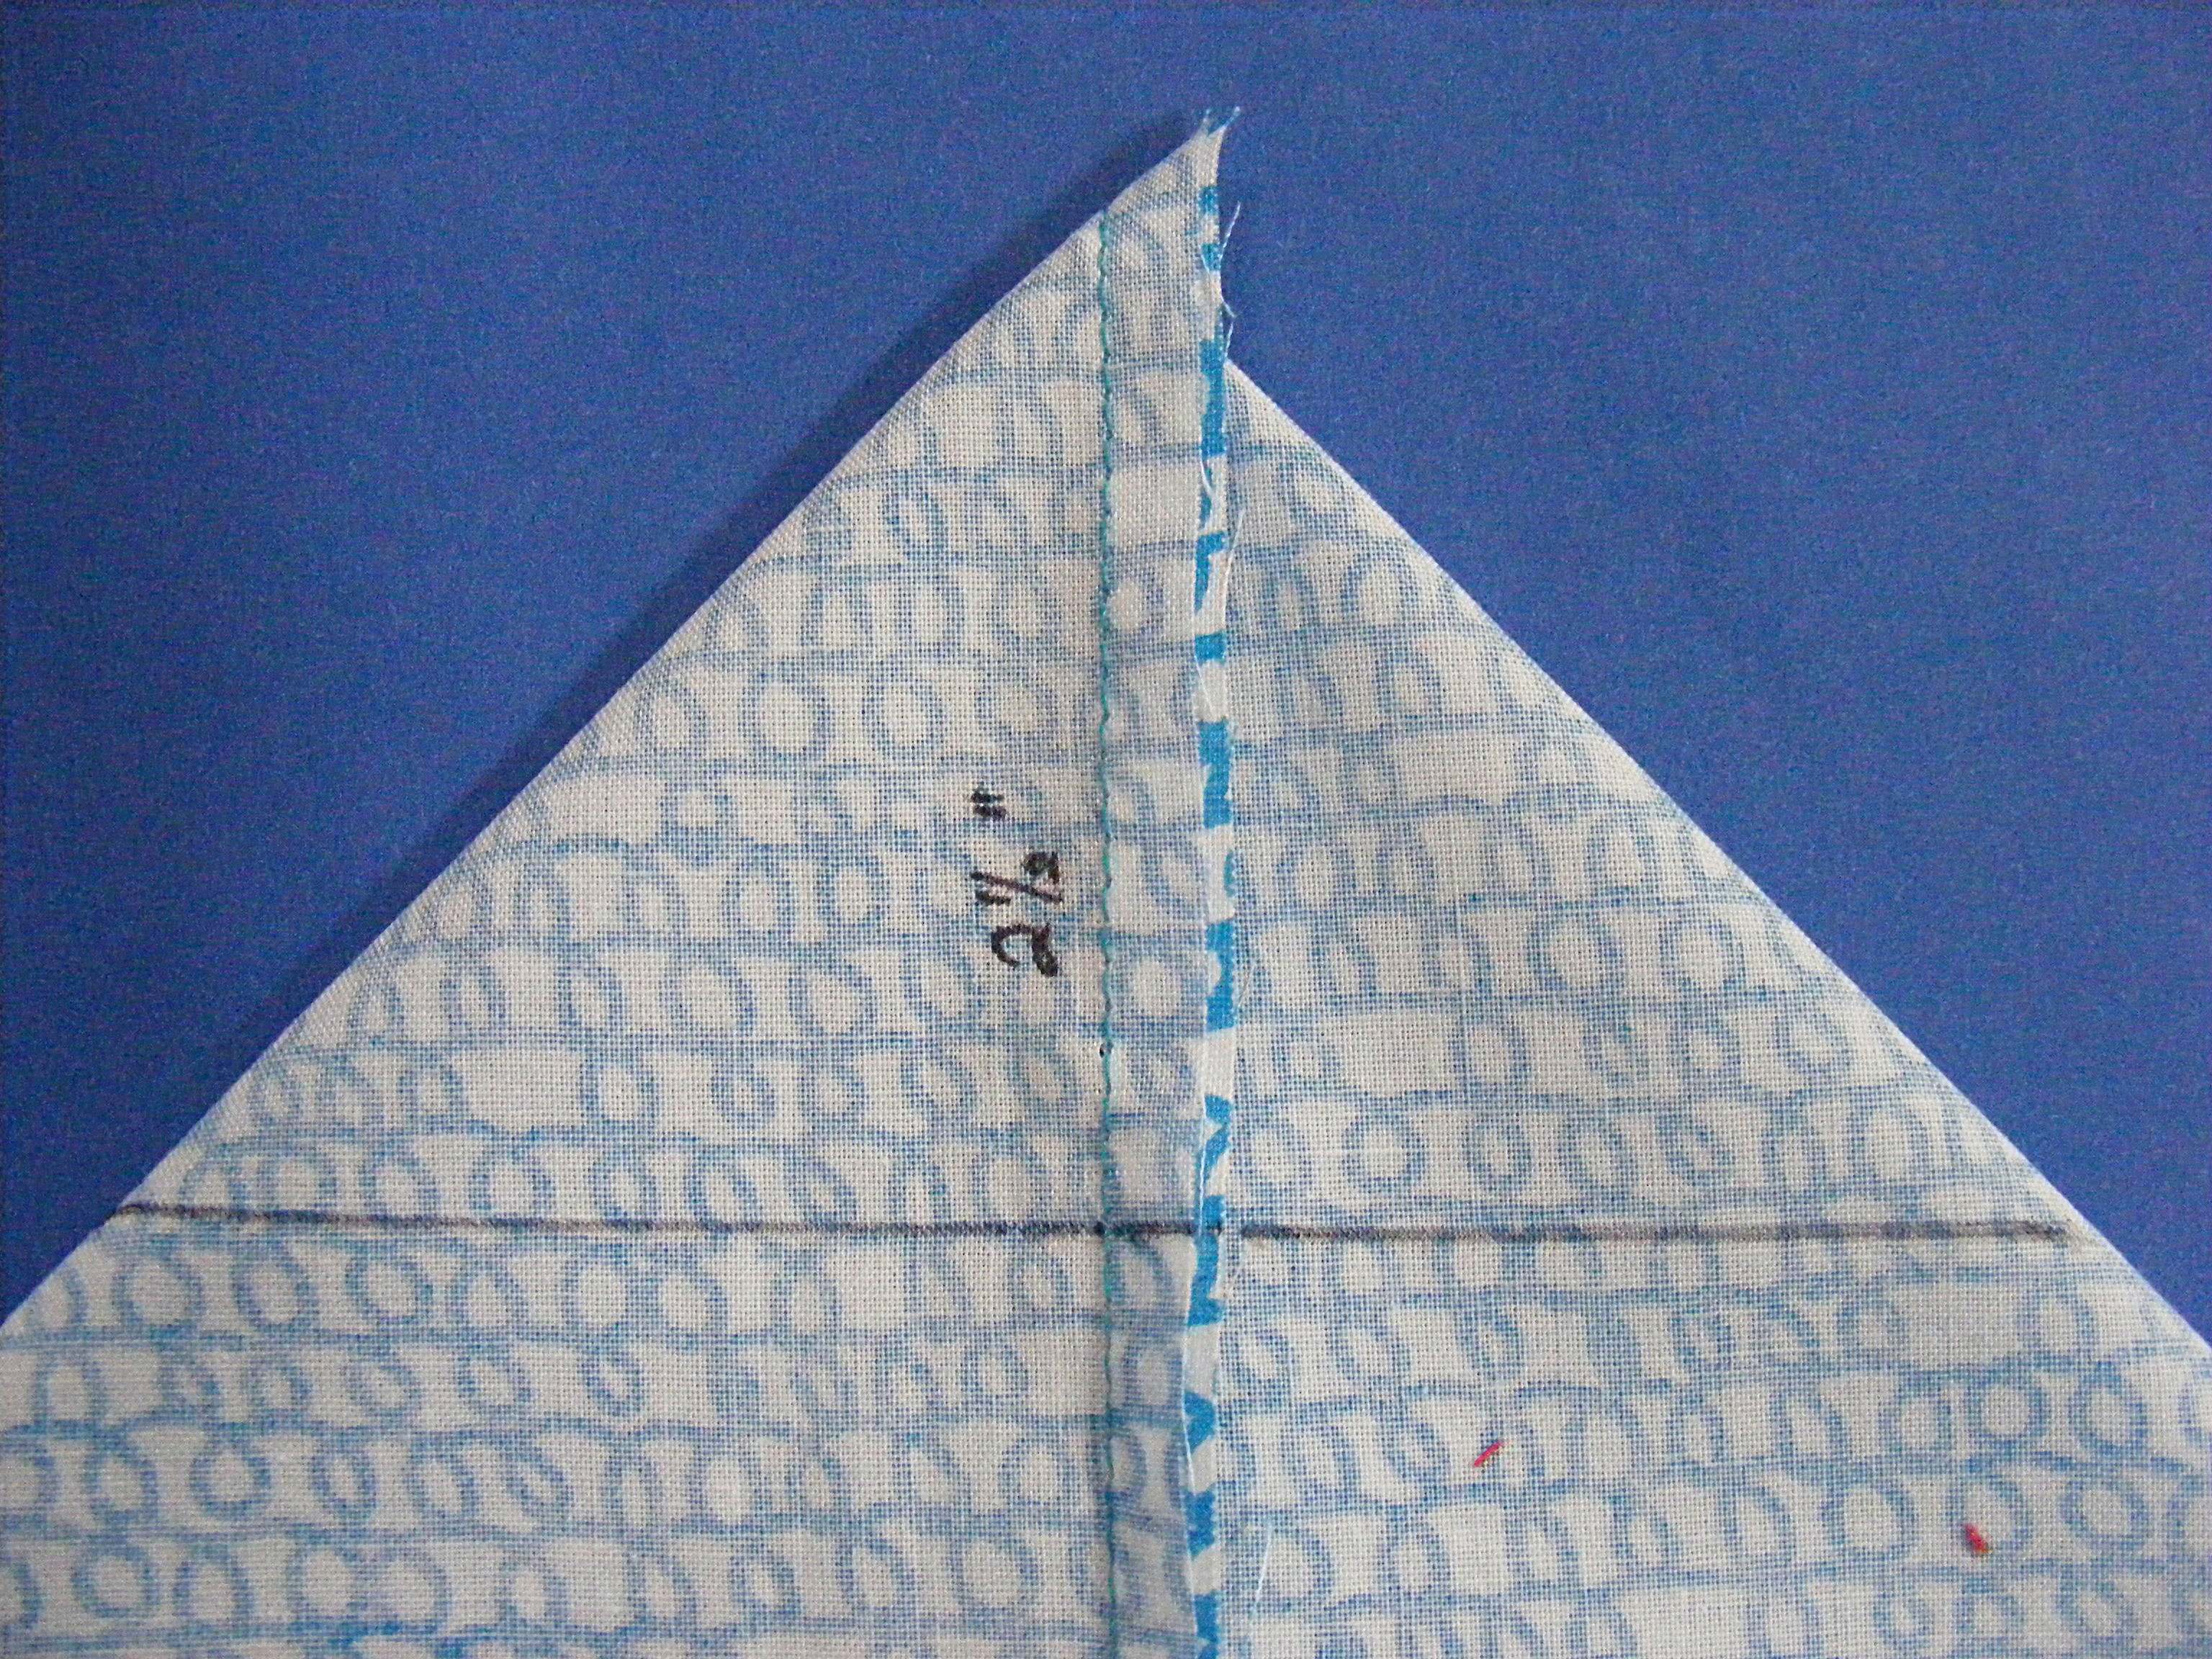
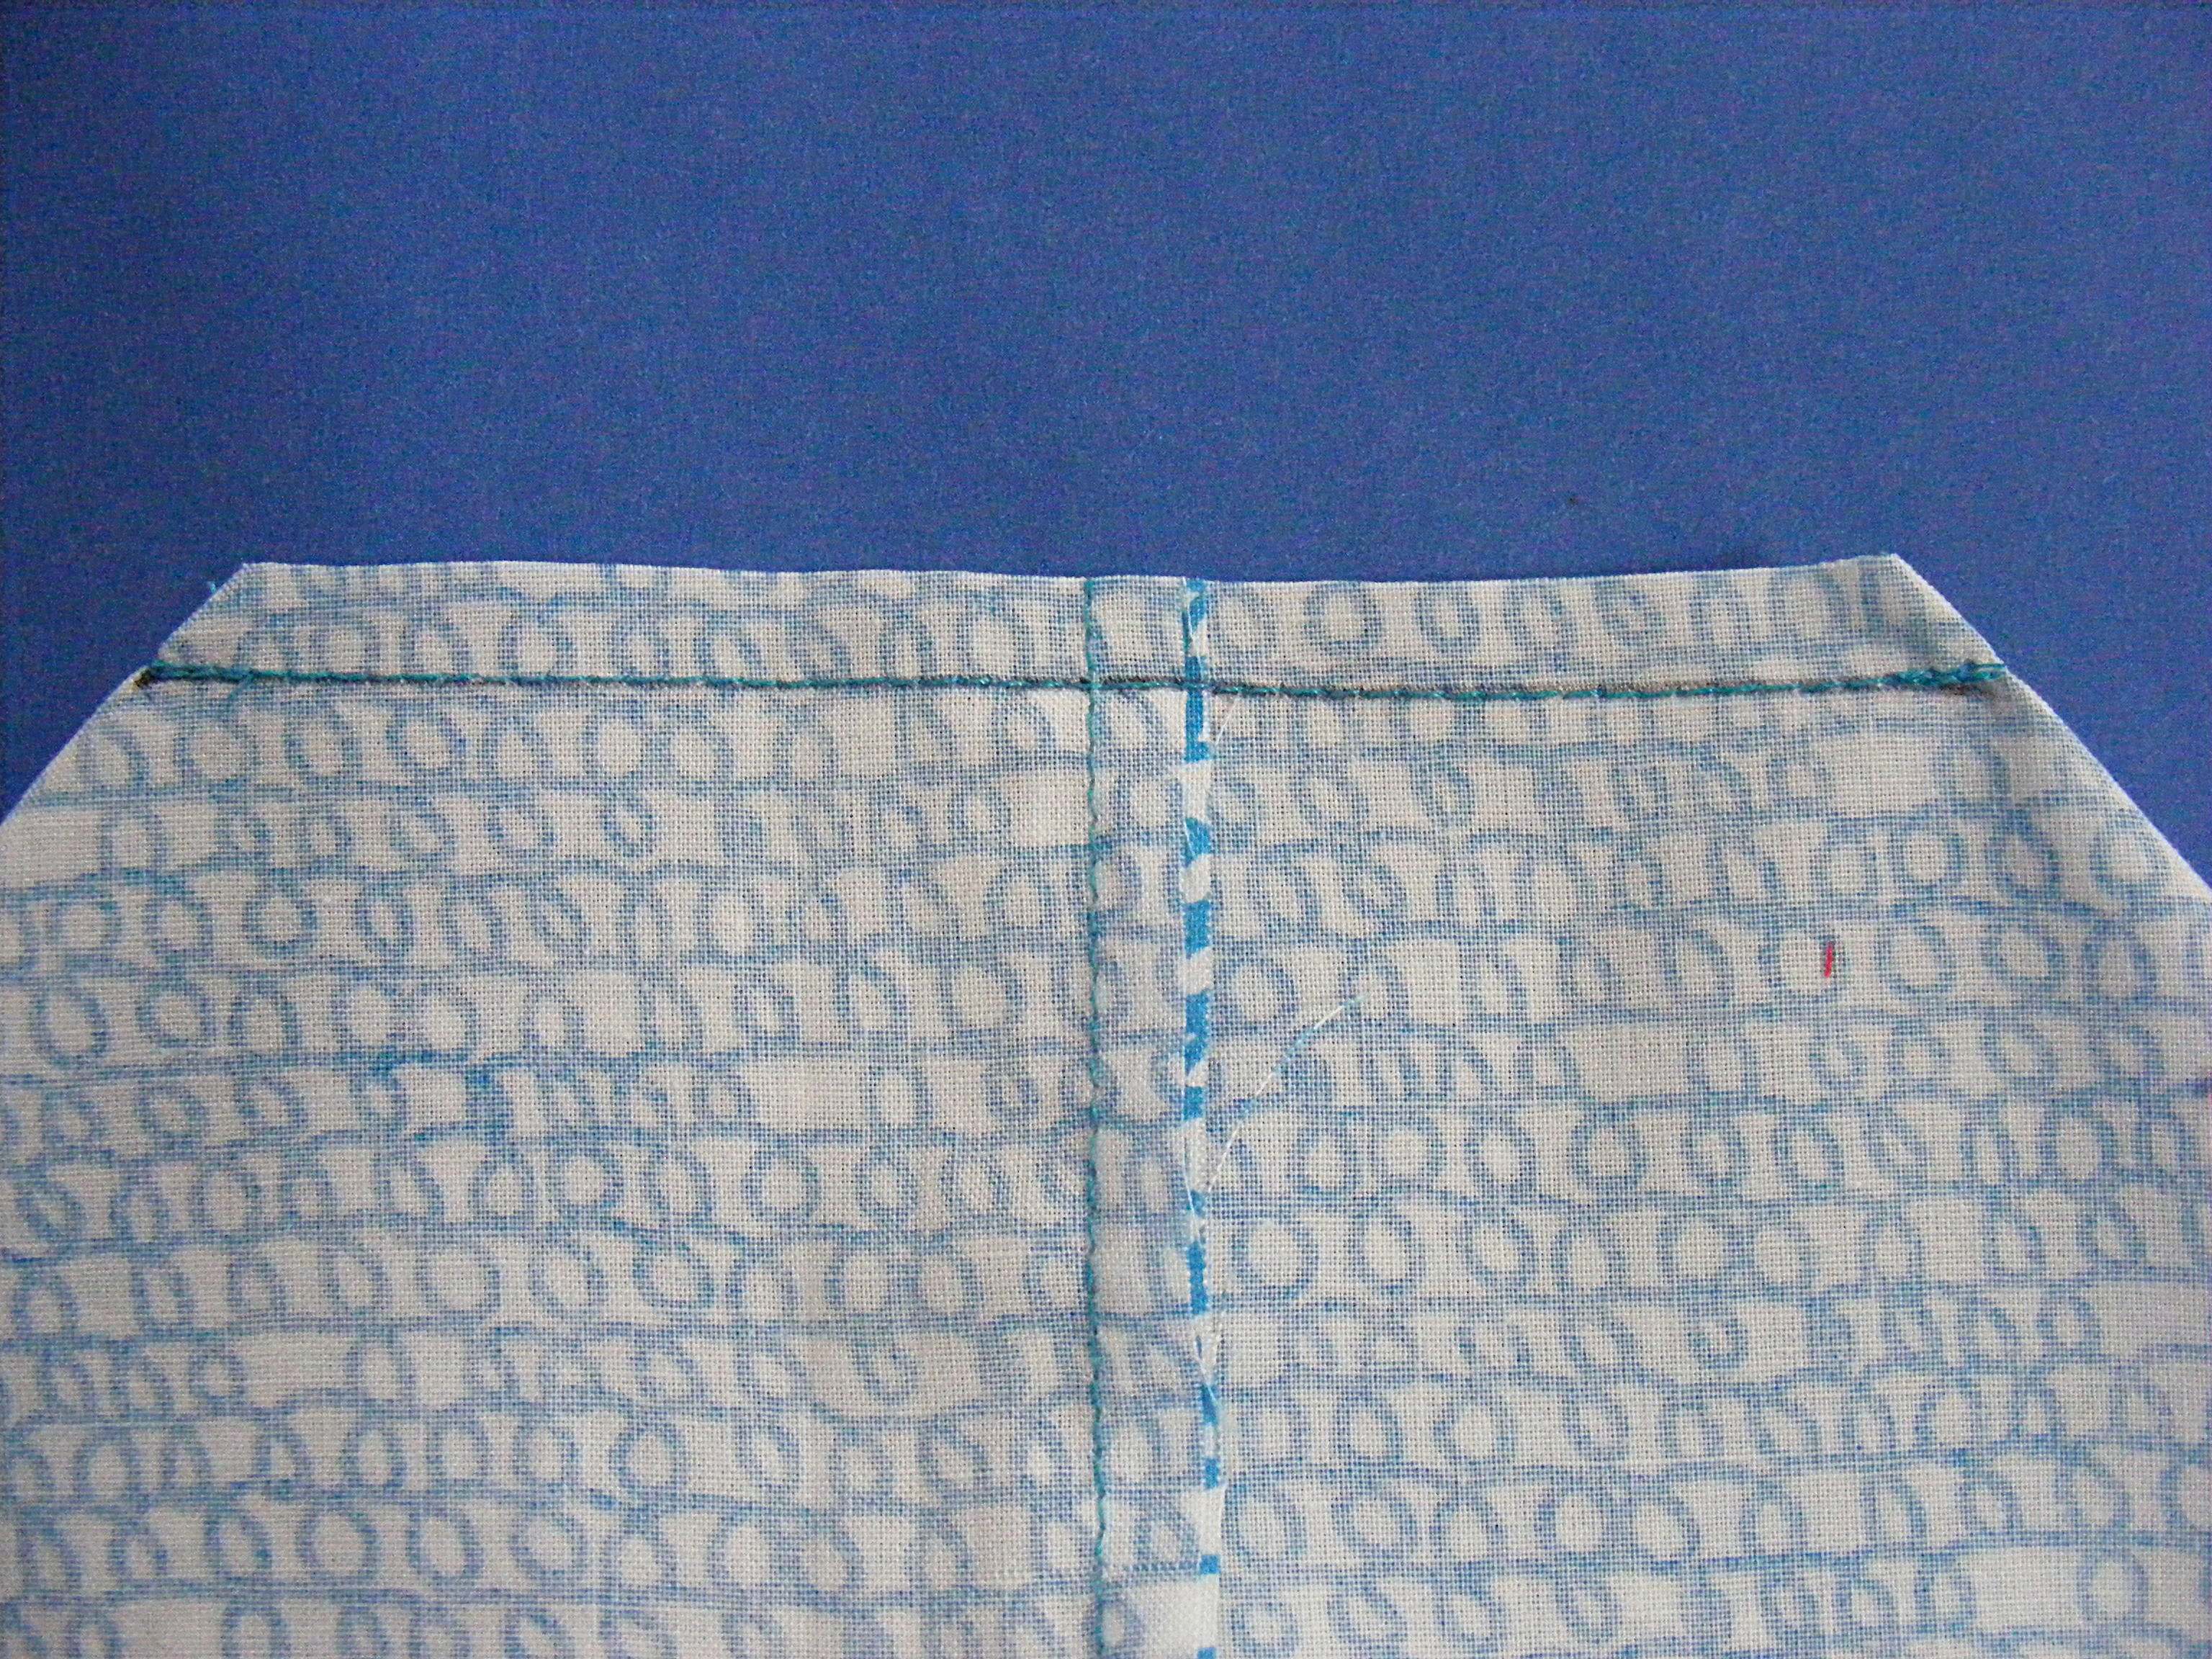
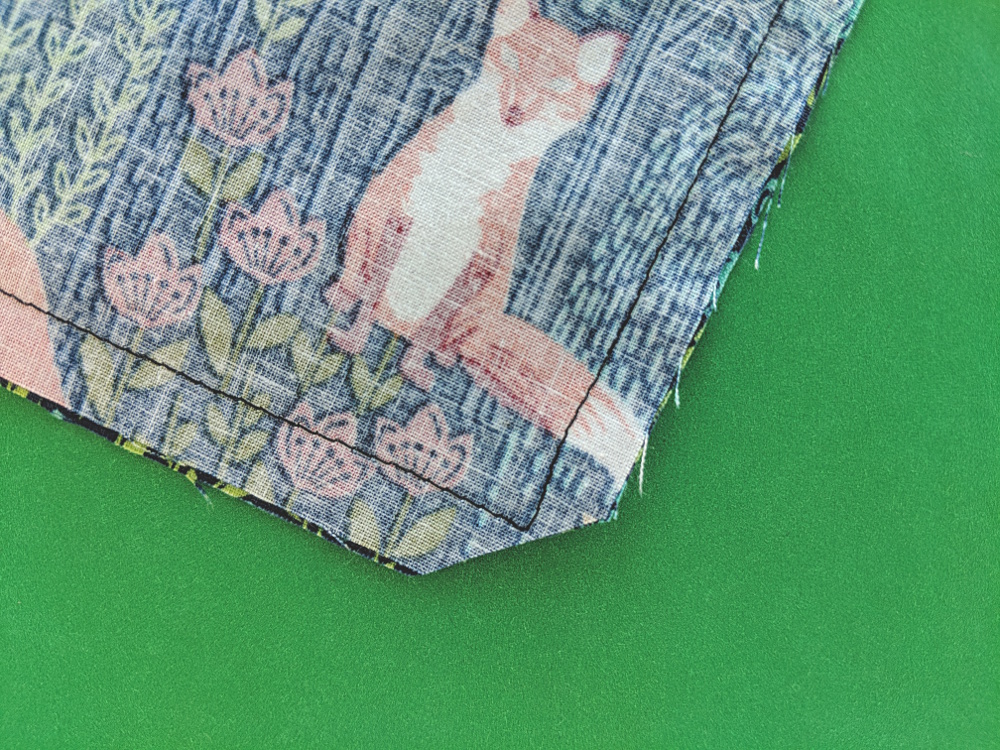
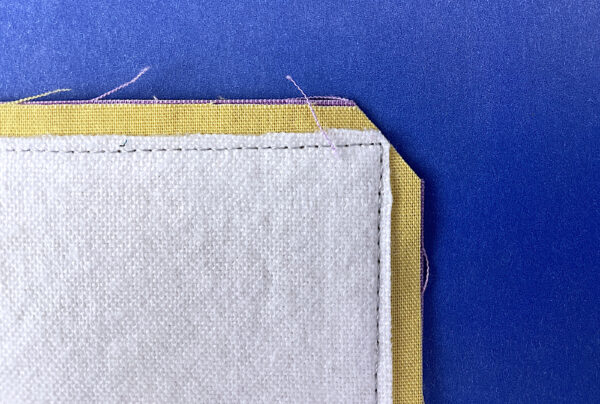
Clip the corners of each page and turn them right side out.

Here’s a close-up of the clipping. You want to get right up to the stitching without actually cutting the stitches.

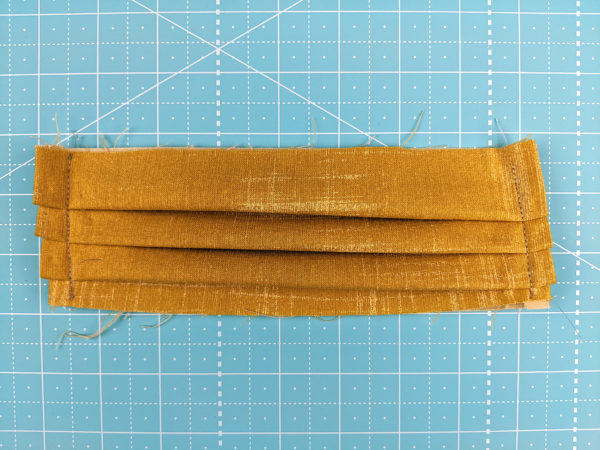
Smooth all the edges, tuck the seam allowance in at the turning opening, and give it a good press.

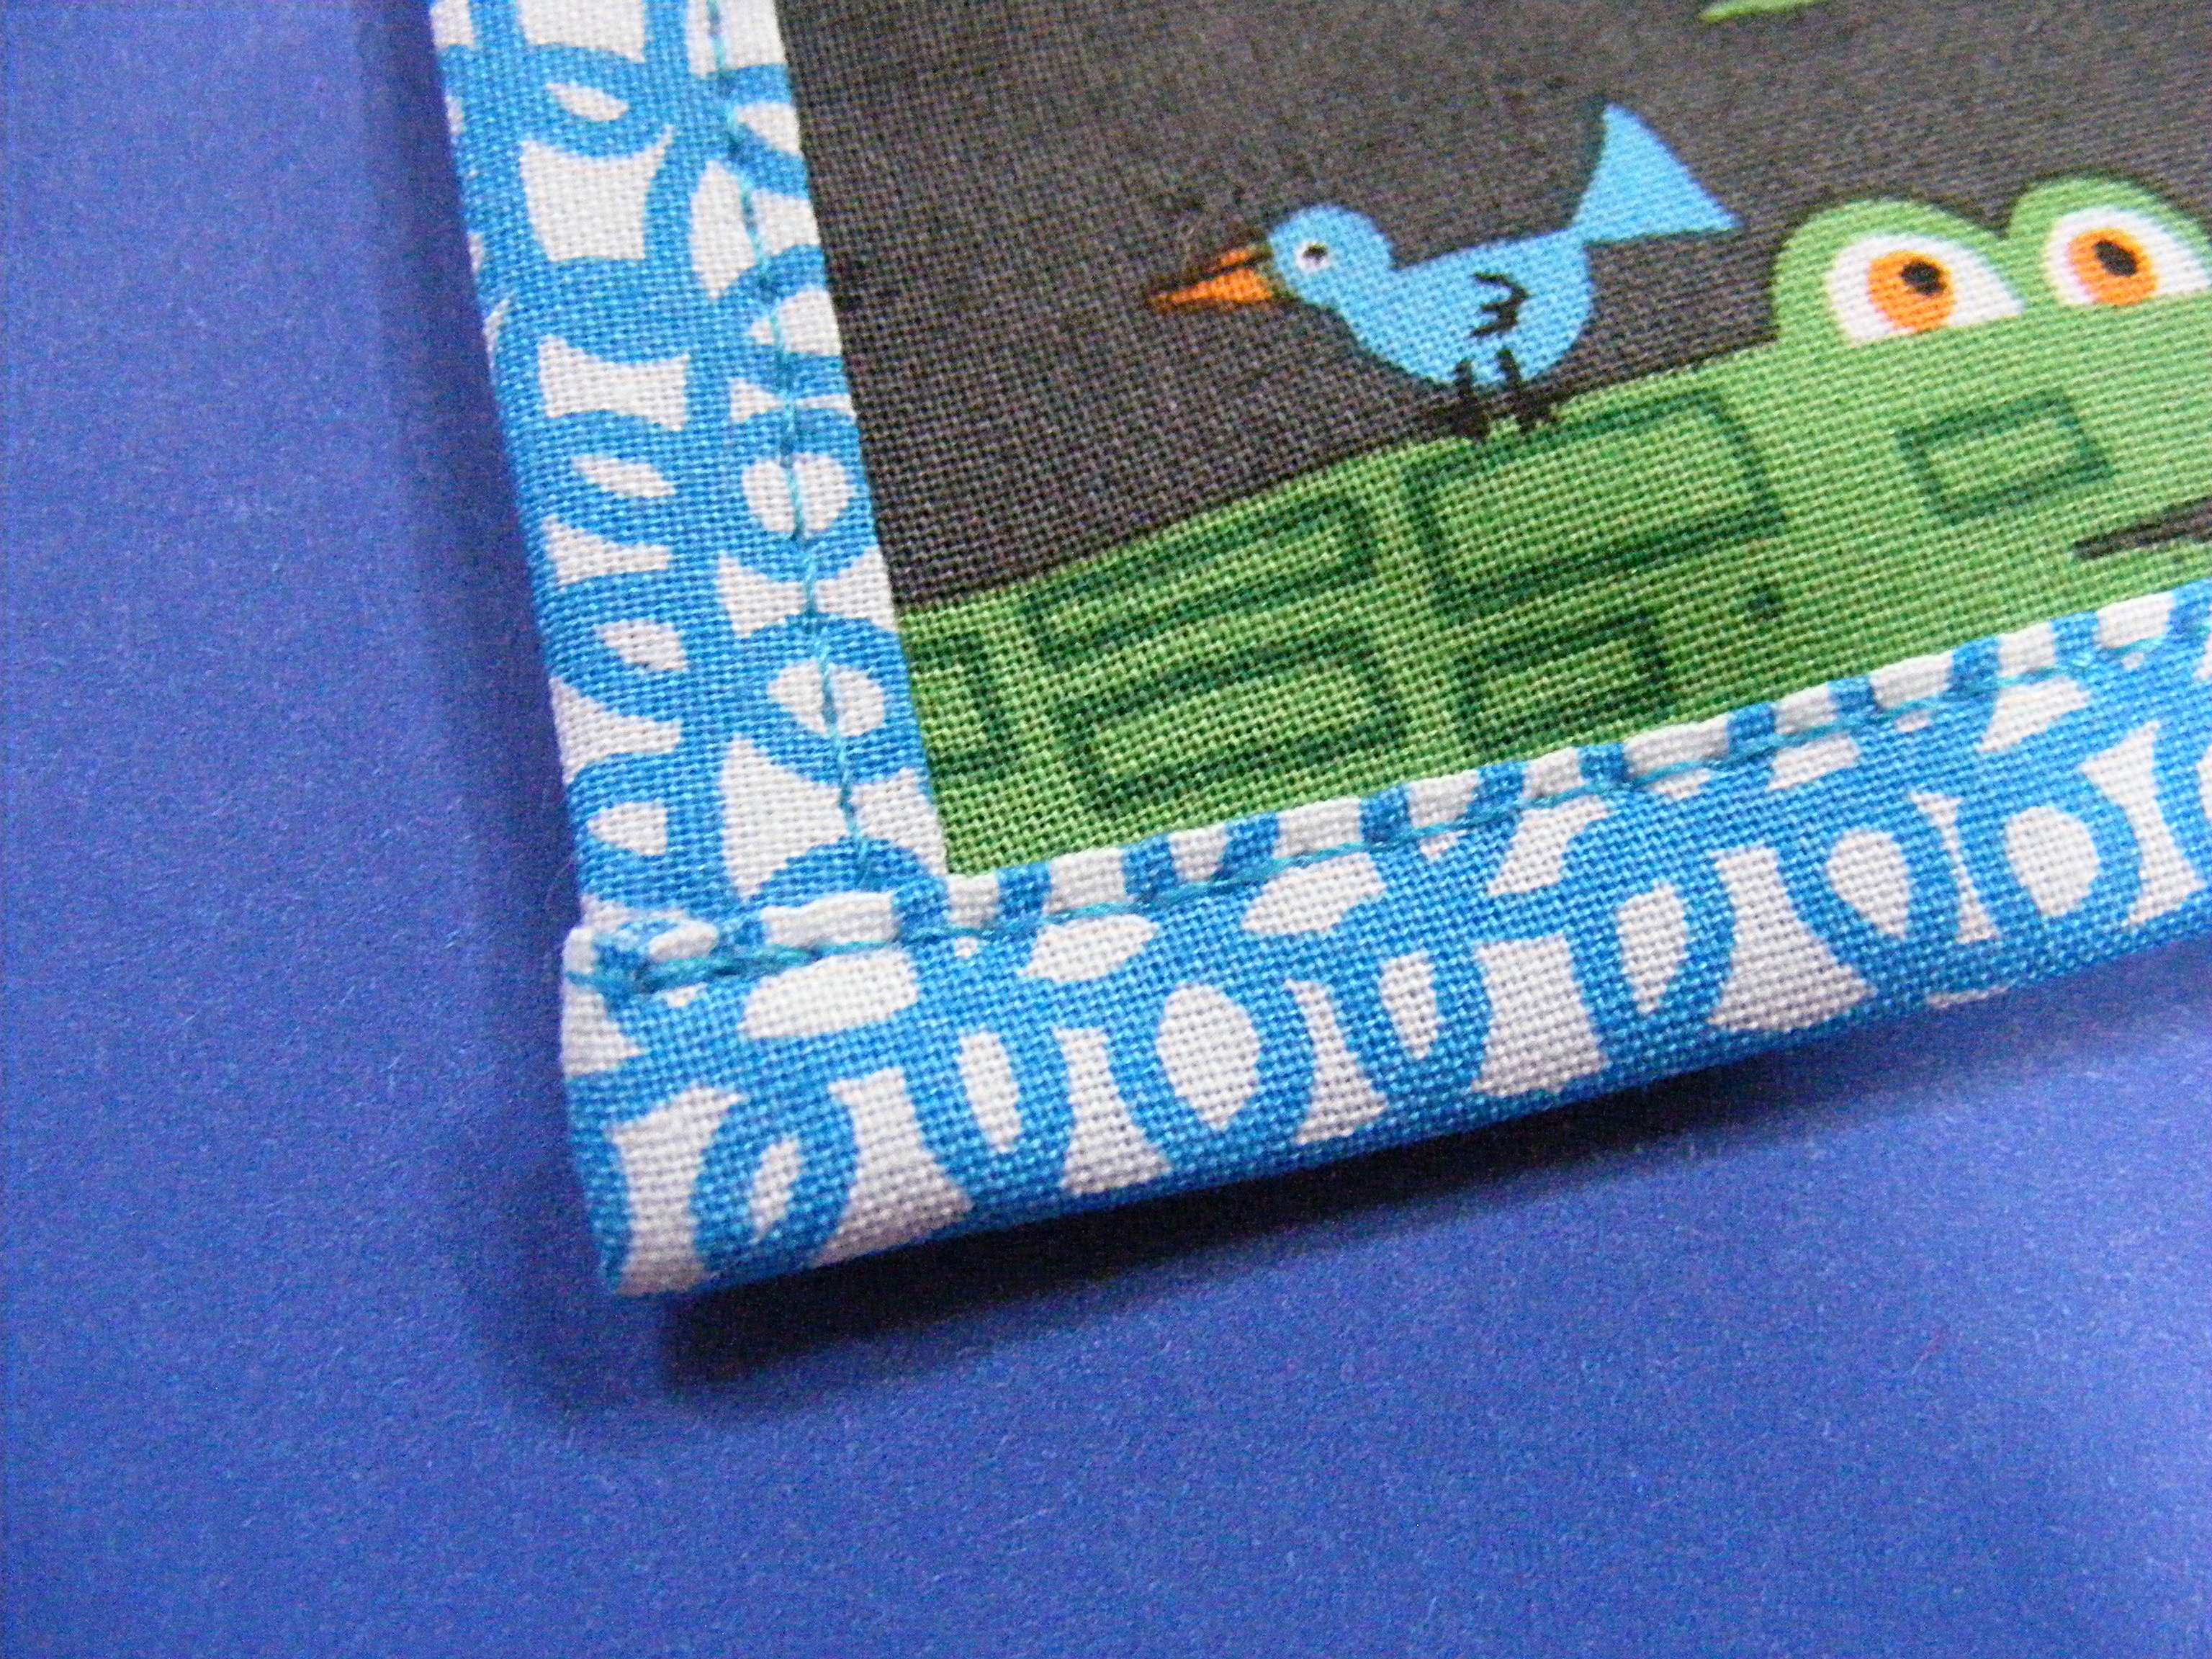
You can close up that opening two ways.

  1. Hand sew the opening closed using ladder stitch. This is slower, but completely invisible and results in the softest pages.
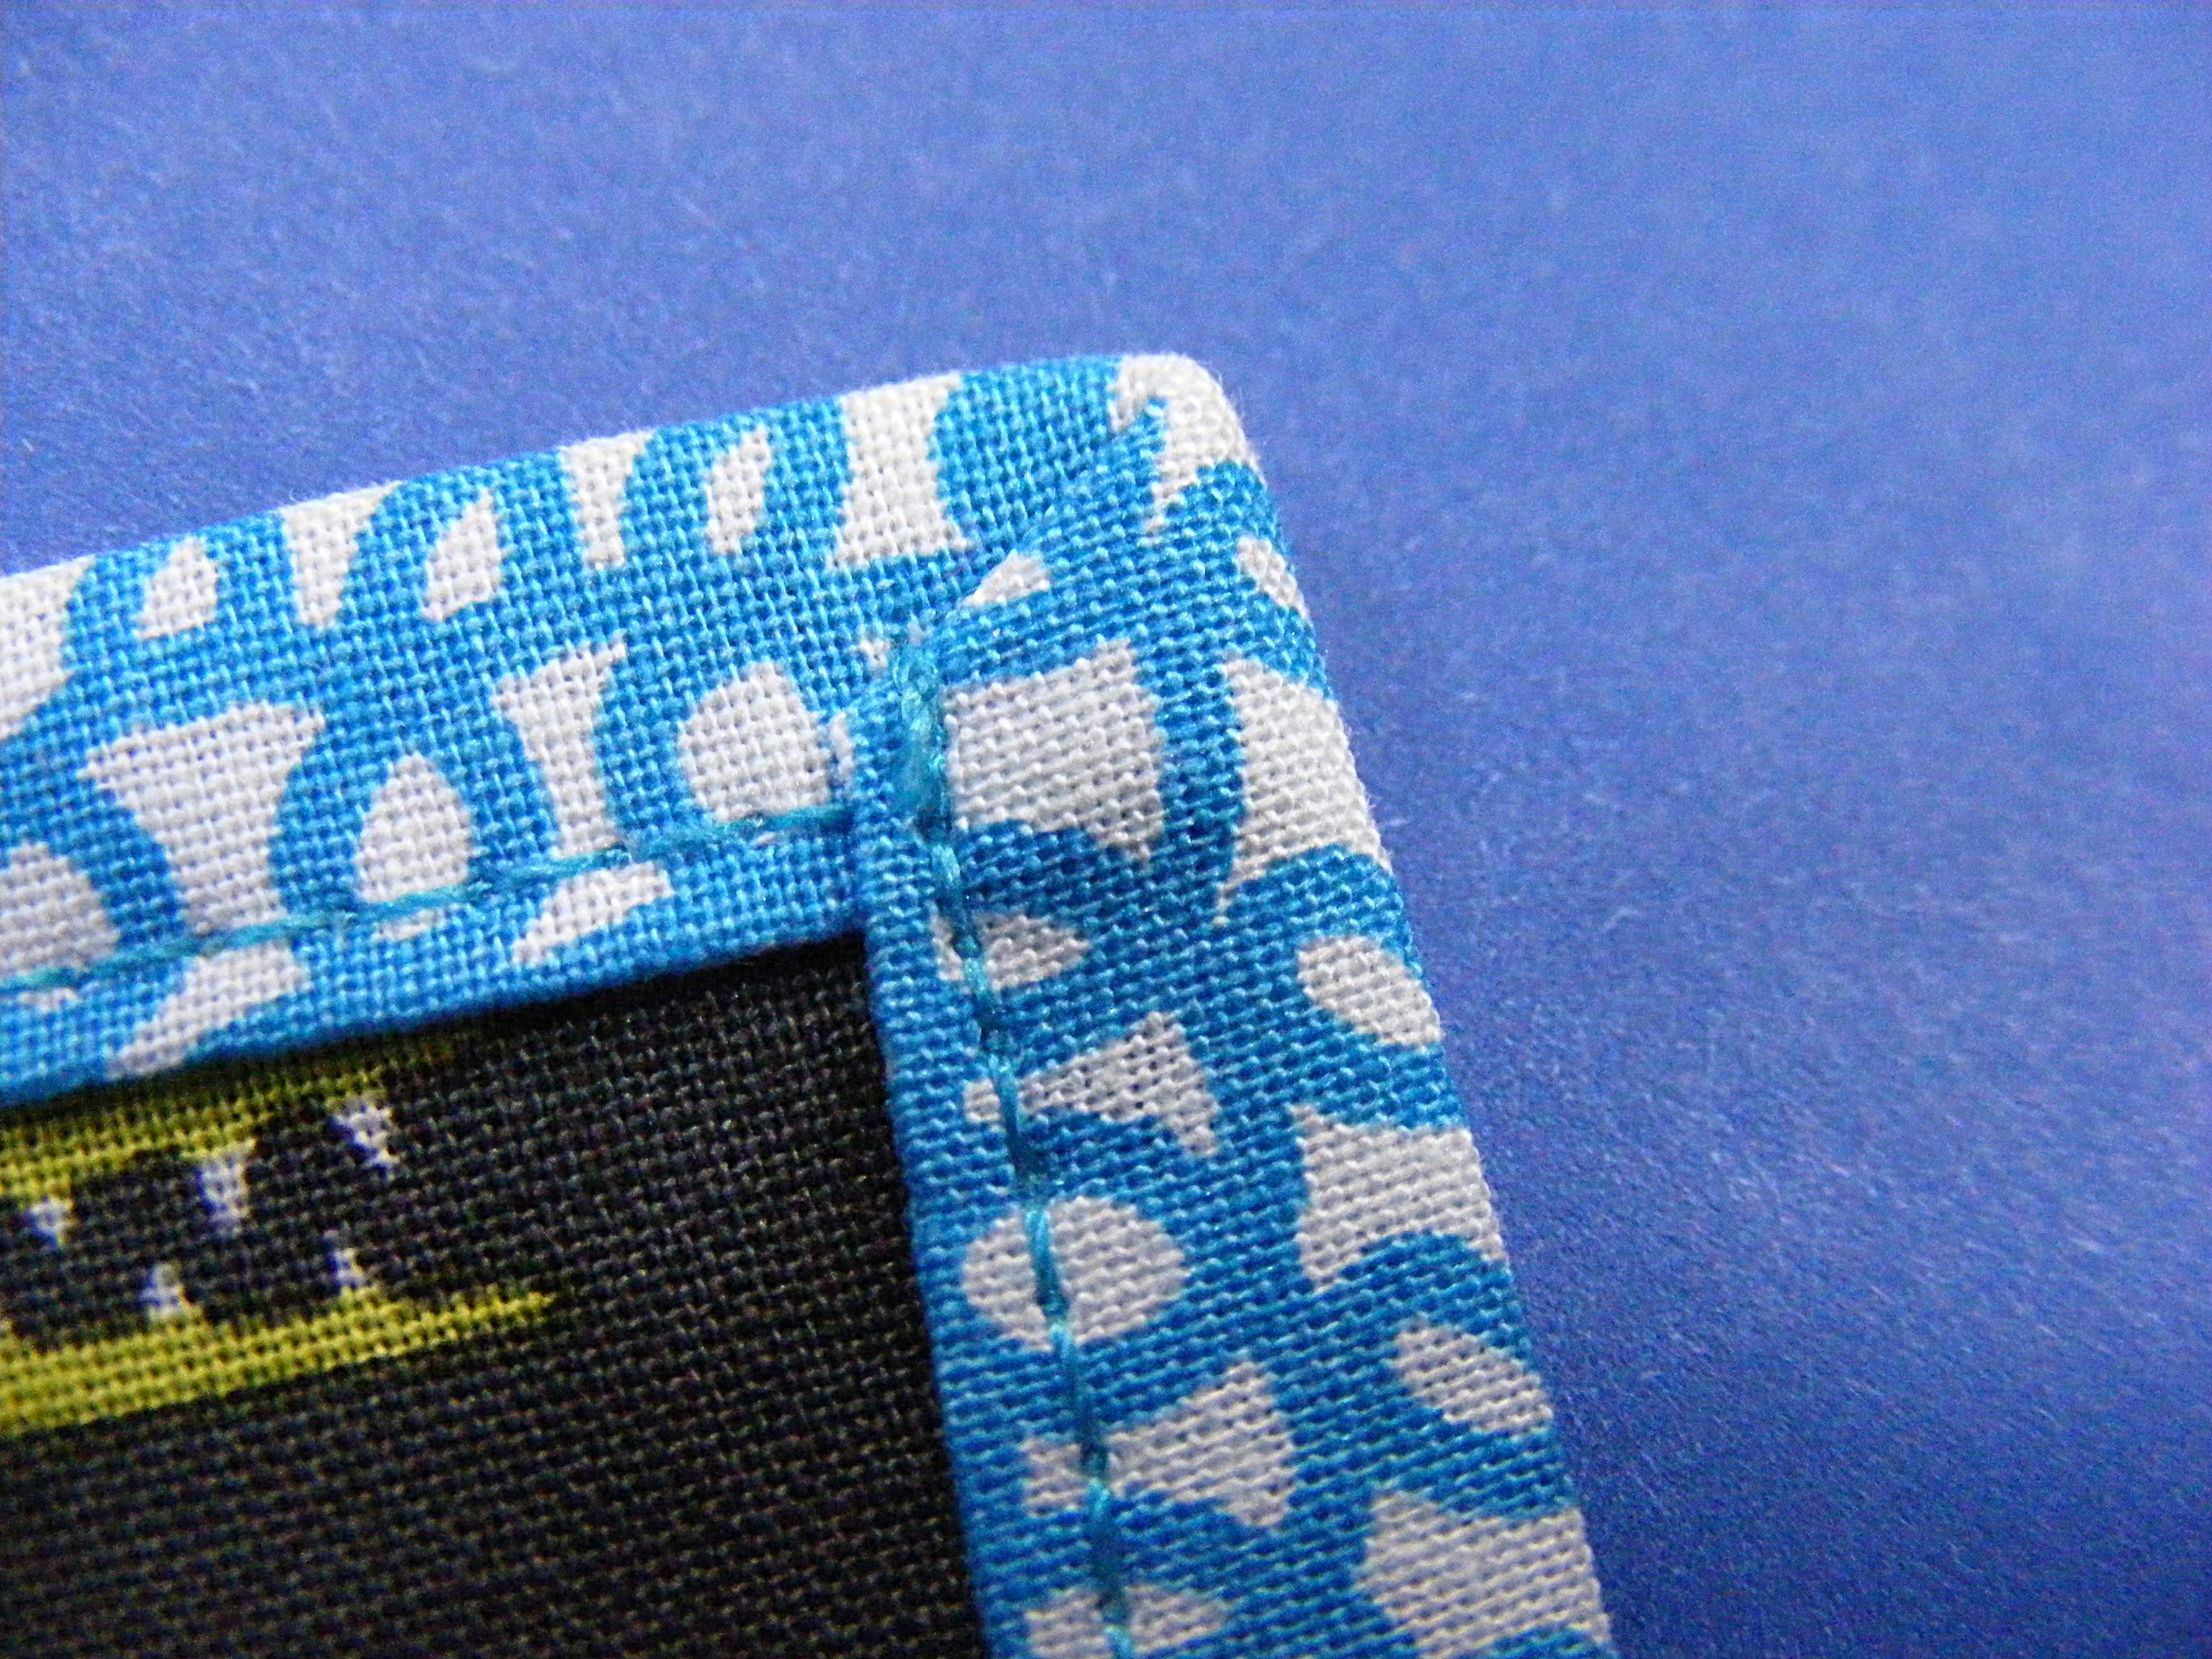
  2. Topstitch the edges of the page all the way around, closing up the opening as you topstitch. This is faster, but results in a slightly stiffer page edge.

I chose option 2 – topstitching. I’m pretty sure the page edge will soften up over time, and even if it doesn’t it’s really not unpleasantly stiff. πŸ™‚

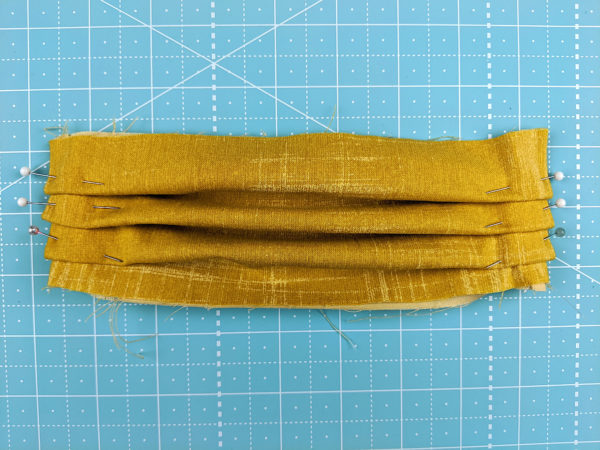
Finally, stack the pages as follows.

  • Lay page 12/1 face down so that its back (page 2/11) is face up.
  • Over that lay page 10/3 face down so that its back (page 4/9) is facing up.
  • Over that lay page 8/5 face down so that its back (page 6/7) is facing up.

Sew the three layers together right down the spine of the book, using that pressed fold line as a guide. I stitched my spine twice for extra durability.

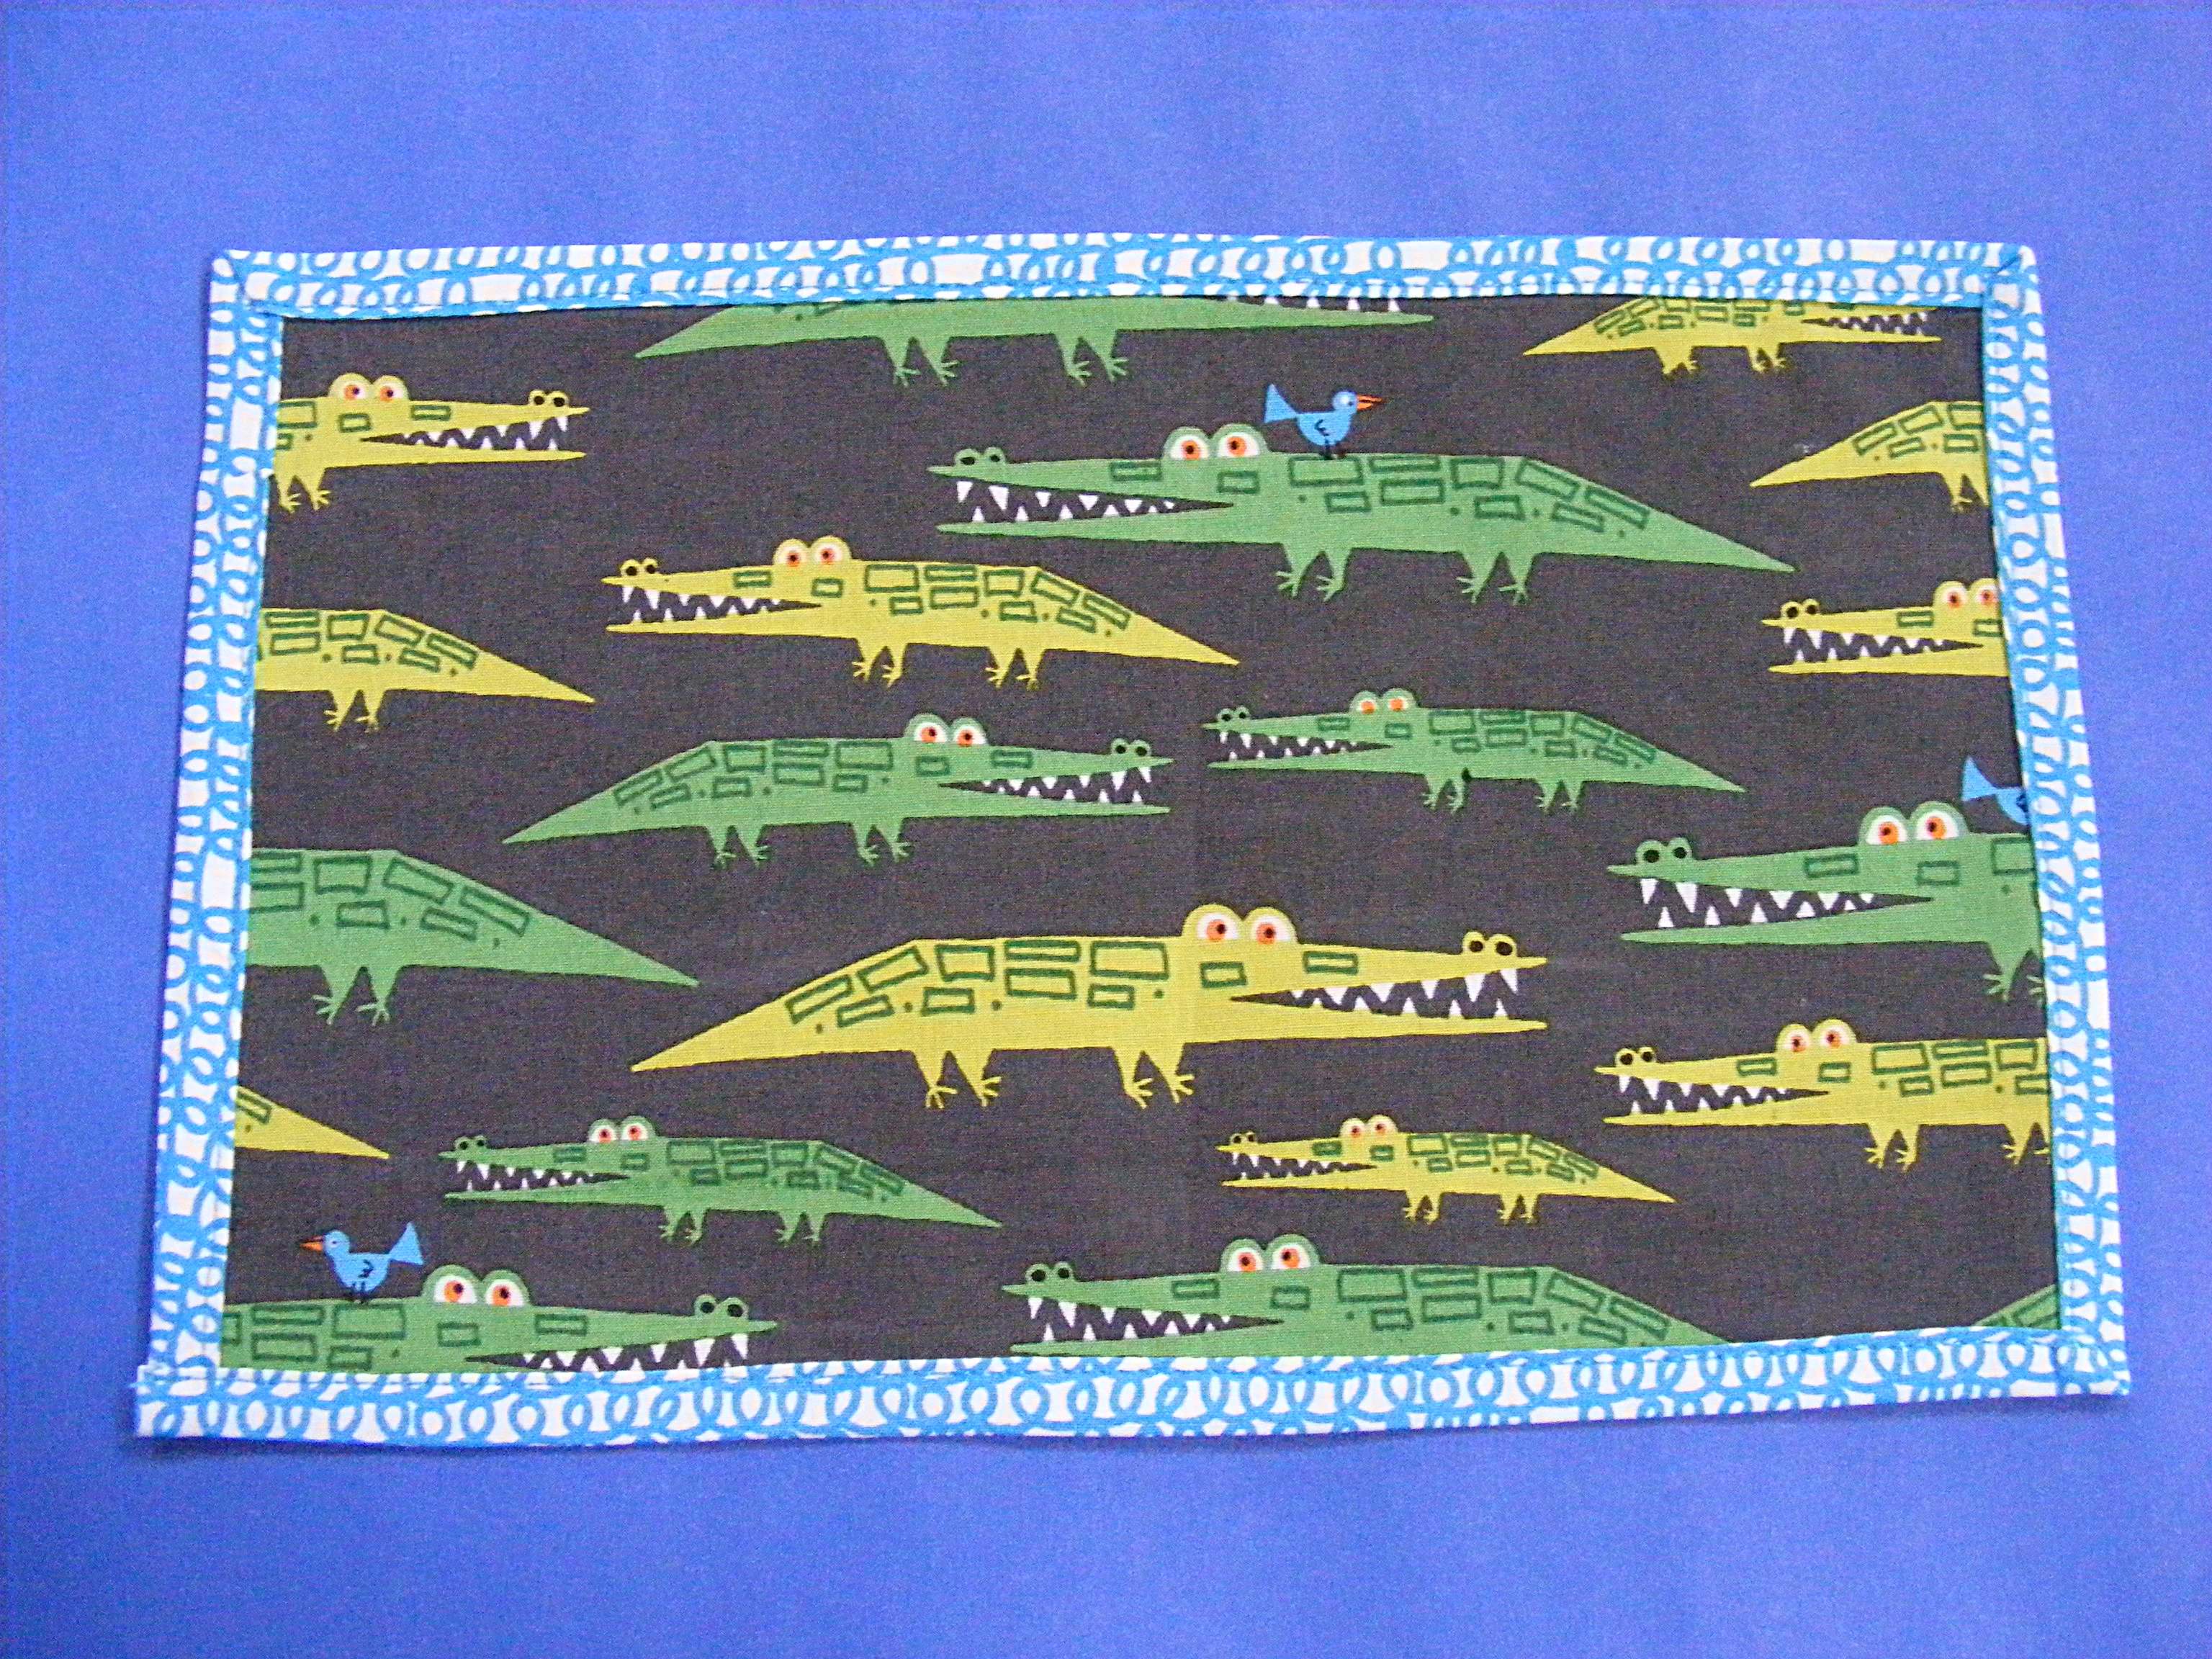
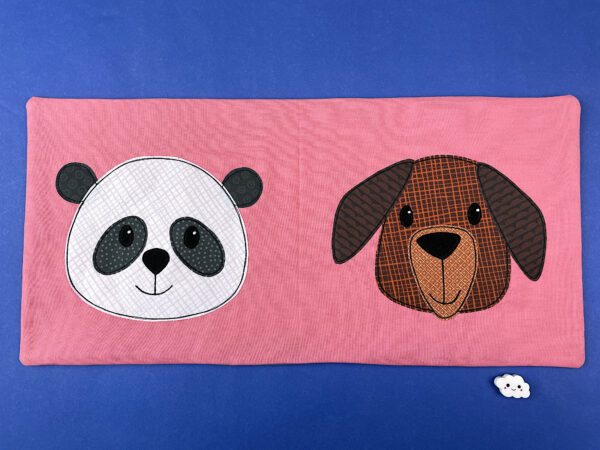
Close your book. You’re finished! Here’s my finished book. . .

Here are a bunch of additional ideas and links to further customize your book.

You can change the size of your book – just be sure to adjust the print size for your templates accordingly. I use 10-inches as the base for all my quilt blocks because it makes the math so dang easy. If you want a 9-inch book, print your templates at 90% size. If you want it to be 7.5 inches, print your templates at 75%. Easy peasy.

If you want to add or subtract pages, that will throw off the entire planning worksheet so you’d need to make your own. It also affects what batting you use in the pages. In my tests, even thin cotton batting was too puffy for a 12-page book, but it would probably work for an 8-page book. If you want to make yours longer than 12 pages, I’d recommend stabilizing the pages with interfacing instead of using the flannel.

Go crazy with fun special effects!

Maybe you want to use smooth shiny satin for your frog! Or fluffy fleece for your puppy. Or a little bit of white fur for the inner ears of the koala! This post will take you to the tutorial showing how to applique with satin, and at the bottom of that post there are links to tutorials for lots of other specialty fabrics.

Want to use an easy faux trapunto technique to give the koala a puffy nose?

I have a tutorial for that.

Want to make that frog tongue a 3D piece that kids can move around?

I have a tutorial for that.

Want to give that bunny soft 3D ears?

I have a tutorial for that.

Want to have a page with a house that has a little door that opens so you can see what’s behind it?

I have a tutorial for that.

You can find all the Shiny Happy World quilting tutorials here.

Have fun making a cloth book! I can’t wait to see what you make!

Here are several free patterns that work with my basic 10-inch applique squares – no resizing needed!

Here are several free patterns that work with just some simple resizing. This post about making coasters has info about resizing an applique pattern that can be applied to any of these projects.

Return to the main Let’s Make a Quilt Table of Contents.

How to Make a Cotton Mask – pattern and video tutorial

yellow mask on a blue background - How to Make a Simple Cotton Mask - photo and video tutorial

My daughter Jo has been a mask-making machine. She made over 1000 masks and donated them to our local United Way who is distributing them to the clinics and organizations that need them.

I don’t want to get into a debate here – so please don’t send me an email or comment about how you read these aren’t effective. Medical people in my area are asking for them, and right now I’m going to give them anything and everything they ask for. 

When I mentioned making and donating masks in my most recent newsletter, I was INUNDATED with emails from patients, nurses, mothers of nurses, hospice workers and more telling me how much these masks are needed and appreciated.

And when production has ramped up and hospitals and clinics are getting all the PPE they need, there will still be a need for masks to help reduce transmission when we all start leaving our homes again. I thought this article laid it out especially well. The short version is – everyone should be wearing masks when they’re in public. My favorite line in the article is, “My mask protects you. Your mask protects me.”

In addition to people saying they wish more people were making and donating masks, there were a lot of emails from people asking for the pattern I’m using. Keep reading for the complete tutorial.

This is a no-elastic mask. Everyone is sold out of elastic and I’ve heard from a number of health professionals saying that a behind-the-ears elastic mask is very painful when worn for hours at a time – which is what they’re having to do. I’m also hearing that some places are washing these masks multiple times a day, and the elastic is wearing out quickly under those conditions. So our mask uses fabric ties. One ties up at the crown of the head (it doesn’t seem like it would stay put there, but it really does) and the other ties behind the neck. This size fits any size head.

If you’re keeping a mask for yourself to wear to the grocery store, walking your dog, etc. make sure to remove it properly. Don’t grab it by the front of the mask and toss it on your kitchen table. Remove it by the ties, put it in the laundry, and then wash your hands.

Whew! That’s a lot of preface. Here’s how to make it. Scroll past the video for written instructions with step-by-step photos.

And here are the written instructions.

For each mask you’ll need two 6×9 inch rectangles and two 1 3/4 inch strips. I read several studies that said NOT to add any additional layers to this kind of loosely-fitted mask. Yes – additional layers will increase the filtration, but they make it harder to breathe THROUGH the mask, resulting in more unfiltered air being drawn in around the edges. Use tightly woven cotton – quilting cotton is great. T-shirt fabric also tests very well, but I don’t have any so I haven’t tried that with this pattern. It should work fine, though.

The ties need to be 1 3/4 inches wide and at least 40 inches long. We went with the full width of the fabric – selvedge to selvedge – because that’s 40 – 45 inches wide. Don’t trim off the selvedges. That finished edge means you don’t have to hem, which will save time. πŸ˜„

With this method, every 3/4 yard will make 4 masks.

If you prefer to use purchased bias tape – that will save time and stretch your fabric stash. Make sure you get 1/2″ double-fold bias tape. There are TONS of people selling large rolls on Etsy

If you use purchased bias tape, then 1 yard of fabric will make 12 masks.

Press your strips into double-fold bias tape. There’s a video tutorial here showing two different methods for doing that. Jo is using a 25 mm bias tape tool to make hers. That’s the right size for 1 3/4 inch strips of fabric. If you have a different sized tool at home, you can adjust the size of your strips accordingly. Just don’t go too skinny or it will be hard to catch all the mask layers when you sew it in place.

Put the two rectangles of fabric right sides together. (Nurses are recommending using two different fabrics so that if they have to remove the mask and put it back on, they can easily tell which is the outside and which is the inside.) Sew them together along the short sides, using 1/4 inch seam allowance.

Turn the mask right side out and press it flat.

Now it’s time to pleat the sides. You need to put three evenly-spaced pleats in each side of the mask.

If your fabric has a direction to it, make sure the pleats are pointing down.

You can eyeball the position of the pleats, but Jo has been measuring to keep things nice and even.

Measure up one inch from the bottom edge of the mask (turned sideways here). Then fold the rest of the mask down over the end of the ruler, and fold it back up at the half-inch mark.

Hold that fold with a pin and continue up the side of the mask with two more pleats, each starting one inch from the fold of the previous pleat.

Pleat up both sides, then sew those pleats in place by sewing 1/4 inch from the short edges.

Time to add the ties.

Fold the mask in half to find the center. Mark the center top and center bottom with pins. Fold the ties in half to find their centers. Wrap the center of one tie around the raw edge at the center of the top of the mask and pin. Repeat with the second tie and the bottom edge of the mask.

We’re only pinning at the centers to hold the ties in the right place. You can get the bias tape wrapped around the rest of the mask edge when you get to it while sewing.

Now it’s time to sew up those ties.

Start at the end of one tie and sew the folds together as close as you can reasonably get to the edge. When you get close to where it starts to wrap around the edge of the mask, pause, make sure the mask edge is tucked all the way up into the fold of the bias tape, and keep sewing. Continue past the edge of the mask, and on to the other end of the tie.

Repeat for the second tie.

Finished!

A few more notes. . .

If you have elastic and want to make a mask with behind-the-ear elastic loops, there’s a pattern here.

If you have smaller pieces of fabric and don’t mind taking a little more time, this center-seam pattern might work best for you.

Before you make any masks, you can contact a local organization to see if they’re requesting a particular pattern or materials.

If you’re looking for where to donate your masks, reach out locally first. I found our local United Way by contacting our county health and human services office. United Way has taken it from there, finding out which organizations can use DIY masks and handling distribution to them. There’s probably someone in your county doing the same thing.

If your local hospitals/clinics/hospice care workers/etc. don’t need masks – fantastic! You can still make them for regular people. Maybe your grocery store employees need them, or your friends and neighbors. You’re also welcome to sell masks made with this pattern. In the Czech Republic, a grassroots effort provided ten million masks in just three days.

If you post on social media, please use the hashtags #coverourcaregivers and #masks4all to help spread the word.

Thanks so much!

Free Beaver Pencil Case Pattern

I’m participating in the Back to School Sewing Series with Sulky. You can make this fun pencil case!

That beaver can’t wait to chomp on all those colored pencils. πŸ™‚

See a little sneak peek of that beaver design here – including a look at all the beaver designs I didn’t use. πŸ™‚

Materials

Step 1

Download the embroidery pattern here.

Step 2

Print or trace the pattern out onto a sheet of Sulky Sticky Fabri-solvy at 100% size. The rectangle should be 4 x 9 inches.

Step 3

Peel off the paper backing and stick the pattern onto the fabric. Make sure you position it so that the whole image will fit in the hoop, with fabric all the way around.

Step 4

Choose your threads!

So many pretty colors. πŸ™‚

Step 5

Embroider the design using two strands of Sulky 12 wt. thread. Stitch right through the stabilizer and the fabric.

I used backstitch for all the lines. Learn how to backstitch here.

I used satin stitch for the pencil leads. This video shows how I satin stitch pointy shapes.

Look closer!

I decided partway through stitching that I wanted a little more color on the barrels of the pencils – so I added some stripes running down them.

Your pattern has the added stripes. πŸ™‚

That nose!

I wanted the nose to be solid, but instead of satin stitching I decided to applique it with a tiny scrap of black felt for a velvety soft texture.

At this point I just left it unstitched.

Step 6

Trim the fabric down to 1/2 inch outside the rectangle.

Make sure you do that now – once you soak away the stabilizer that handy line will disappear. πŸ™‚

Step 7

Soak the piece in cold water for an hour or longer. I often leave mine to soak overnight with no problem. Rinse it in clean water, gently squeeze out the extra water, and iron it dry face down on a fluffy towel. This video shows how I iron my embroidery dry without smooshing the stitches.

Step 8

Whipstitch the nose in place using matching thread.

For a small piece like this I like to use a glue stick to hold the piece in place while I stitch it down.

Step 9

Stitching done!

The front piece for your pencil case is all fancied up. Now it’s time to sew it up into a pouch.

Cut a back piece from the main fabric 10 x 5 inches.

Cut two lining pieces, also 10 x 5 inches.

Step 10

Follow the instructions in this post to sew up your fancy lined zipper pouch. πŸ™‚

Finished!

Now – go check out the rest of the series! It’s a fun group of free projects!

Happy stitching!

The Big Bag – a free large tote bag pattern

The Big Bag - a free large tote bag pattern from Shiny Happy World

Here’s a free pattern for my favorite large tote bag.

I LOVE this roomy bag!

This one hangs in my studio to hold packages ready to ship, but I also have a few that I take grocery shopping and to the farmer’s market.

I’m a big fan of reusable bags for grocery shopping, but a lot of them are on the small side. I need something that will hold more than one bag of chips! Or one of those big bags of grapefruit! This large tote bag fits the bill exactly – and you can’t beat a free pattern!

Materials

  • two fat quarters of the main fabric
  • two fat quarters of the lining fabric
  • 1/3 yard fabric for straps
  • scraps of fabric for pocket and pocket binding

Cut Out All the Pieces

These straight edges are great to cut with a rotary cutter. If you’ve never used these tools before, here’s a video showing how.

  • Main bag – cut two pieces, each 21 inches wide x 18 inches tall
  • Lining Β­- cut two pieces, each 21 inches wide x 18 inches tall
  • Straps -Β­ cut two strips 6 inches wide x 28 inches long
  • Pocket Β­- cut one piece 11 inches wide x 6 1/2 inches tall
  • Pocket binding Β­- cut one piece 1 1/2 inches wide x 40 inches long

Ready? Let’s sew!

Step 1

We’ll start by prepping the straps. These are essentially doubleΒ­fold strips -Β­ you can watch a video showing how to make them here.

sewing the straps for a tote bag

Fold one of the fabric strips in half the long way, right sides facing out. Press. Open the strip back up and fold each long edge in toward the center fold. Press. Fold in half again along the center fold so that you have one long strip, four layers of fabric thick. This makes a nice, sturdy strap. Press.

Topstitch along both long edges, about 1/8 inch from the edge.

Repeat for the second strap. Set them aside for now.

Step 2

Now to prep the pocket. Fold and press your pocket binding fabric into doubleΒ­fold tape – just like the straps, but don’t topstitch the edges. Here’s that video again.

large tote bag pocket made with Ed Emberley crocodile fabric

Now we’re going to fold the bias tape around the raw edge of the pocket. Start in the bottom corner of the pocket.

Step 3

Stitch down the binding right up to the edge of where the pocket fabric ends. Don’t keep stitching! If you need to stop a stitch or two before the edge that’s ok, but don’t stitch farther.

binding a tote bag pocket with double fold tape

Stop. Backstitch a bit. Take it out of the machine.

Step 4

Open up the binding and fold it into a neat miter, wrapping it right around the corner of the fabric. Slide it back under the presser foot, backstitch a bit, then stitch down to the next corner.

Mitered corner - close up

This video shows how to miter those corners.

Repeat steps 3 and 4 until you’re back where you started.

Step 5

Trim off the excess binding, leaving about 1/4 inch extra to finish the raw edge.

The Big Bag - a free tote bag pattern from Shiny Happy World

Stop stitching a few inches before the end so you have room to open up a bit of the binding at the end.

Step 6

Open up the last bit of the binding and fold that extra raw edge under.

folding over the edge of the binding

Make it so it’s even with the edge of the pocket.

Step 7

Wrap the folded end back around the edge of the pocket piece and stitch it in place.

pocket for a tote bag - edges bound in contrasting fabric

The pocket should be bound on all four sides and ready to attach to the bag.

The Big Bag - a free tote bag pattern from Shiny Happy World

The binding is especially nice to have at the top edge of the pocket to help reinforce it and keep it from stretching over time.

You’re almost done!

Want to add a cute applique face to that pocket? You can use any of my single block patterns here. Just print the pattern at 60% of the normal size and it will be a perfect fit.

Step 8

Fold the top edge of one bag piece in half and mark the halfway point with a pin. Do the same thing with the pocket.

The Big Bag - a free tote bag pattern from Shiny Happy World

Use a clear ruler to position the pocket 5 1/2 inches from the top raw edge of the bag. Line the 5 1/2 inch mark along the top of the bag, and make one of the vertical marks line up with the center pin on the bag. Line the center mark on the pocket up on the same line and your pocket will be perfectly centered -Β­ with no measuring or math. :-Β­)

Detail

Here’s a closer look showing how to use the pin markers to center the pocket.

The Big Bag - a free tote bag pattern from Shiny Happy World

See how both the pins are lined up at the 13 inch mark?

Step 9

Stitch the pocket in place down one side, across the bottom, and up the other side. Make sure you backstitch a couple of times at the stop and start of your stitching to give extra reinforcement to the stress points at the top corners of your pocket.

finished pocket attached to a large tote bag made with a free sewing pattern from Shiny Happy World

Done! You’re ready to put the bag together!

Step 10

Let’s start with the outside of the bag. Pin the two main fabric squares right sides together. Using 1/4 inch seam allowance, stitch around both sides and the bottom of the bag. Repeat with the two lining pieces.

Now we’re going to box the corners of the main and lining bagsΒ­ so that your bag will have depth. A free pattern for a large tote bag is much more useful when the base of the bag is wide enough to hold those bulky items you need to carry.

 Watch a video demonstrating how to box corners here.

Step 11

Open out one bottom corner of the bag so that the side seam and center bottom seam line up, and the corner of the bag makes a point.

Measure down 2 1/2 inches from the tip of the stitching (NOT the tip of the fabric triangle -Β­ ignore that flap of seam allowance) and draw a line perpendicular to the side seam.

Boxing the corners of a tote bag

Step 12

Stitch right on the line you drew. Trim away the excess fabric.

boxing the corner of a tote bag

Repeat for the other corner, and for both corners of the lining.

Step 13

Turn the main bag right side out. Leave the lining inside out.

Pin the edge of one strap to the top edge of the bag, 4 1/2 inches in from the side seam.

measuring for strap placement on a tote bag

Repeat for the other end of the strap.

Repeat with the second strap on the other side of the bag.

Step 14

Put the main bag inside the lining, with the straps sandwiched between the two layers. Since the lining is inside out and the main bag is right side out, you should end up with the right sides together. Line up the side seams and pin the layers together around the top edge of the bag.

Step 15

Using 1/4 inch seam allowance, stitch almost all the way around the top edge of the bag. Leave the space between the two ends of one handle unstitched, so you can pull the bag through the opening. Be sure to backstitch at the beginning and end of your stitching. There will be some pressure on the edges as you pull the bag through.

Step 16

Reach into the opening and pull the main bag through. Pull through the handles, then pull the lining right side out and tuck it down into the bag. Press around the top edge, being especially careful to press the open edges evenly.

Step 17

Topstitch around the bag, about 1/8 inch from the top edge. Be sure that the folded edges of the opening you used for turning are lined up and that you catch both layers in the topstitching to hold them together. No hand stitching!

I wanted the topstitching thread to match the fabric of the main bag AND the lining, so I used green thread as my main thread and blue thread as my bobbin thread. The stitching is green on top and blue on the bottom. Neato!

Finished! One large tote bag made with a free pattern.

The Big Bag - a free large tote bag pattern from Shiny Happy World

The handles are the perfect length for throwing over your shoulder and the bag is roomy enough to hold three big bags of chips, or a bunch of veggies from the farmers market – including lots of healthy but bulky green leafies!

Maybe you don’t want such a large tote bag? I’ve got two more free patterns!

The Trick or Treat Tote Bag is great for trick or treating – but also for carrying library books, lunch, and more.

Trick or Treat Bag - a free pattern from Shiny Happy World

The Mini Tote Bag is quite a bit smaller. It’s great for small toys and snacks. When my daughter was very little we kept a few of these packed with “special” toys that we only played with on outings – like at a restaurant. One had a few trucks and cars, another had crayons and a cute notepad, another had a handful of action figures. They were great grab and go bags. πŸ™‚

Mini Tote Bag pattern - free from Shiny Happy World

Here are several free patterns that work with my basic 10-inch applique squares – no resizing needed!

Here are several free patterns that work with just some simple resizing. This post about making coasters has info about resizing an applique pattern that can be applied to any of these projects.

Return to the main Let’s Make a Quilt Table of Contents.

Happy stitching!

Free Receiving Blanket Pattern

baby's receiving blanket with fox fabric and fox applique

Make an easy baby gift with this free receiving blanket pattern.

A receiving blanket is seriously the easiest baby gift you can make. Choose fabulous fabric and no embellishment and you can make one in 15 minutes. Even if you add an applique (like the fox shown) you can still make it in less than an hour.

Here’s how. . .

Step 1

Cut two squares of fabric about 36 inches square.

Any kind of fabric is fine. I’m using quilting cotton here (from the GORGEOUS Into the Woods collection from Michael Miller Fabrics) but I’ve also used flannel, terry cloth, baby corduroy, and more. Just about anything goes.

I like to use one fabric for the front and a different fabric for the back, but you don’t have to.

And when I say “about” 36 inches I really mean it. I bought one yard cuts of fabric, but by the time I washed them and squared off the cut ends they were more like 34 inches. So I cut two 34 inch squares. No problem.

Step 2

Put the two squares of fabric right sides together and pin all the way around the edge.

Take a little care here and make sure you get everything laid out and pinned neatly. If your squares aren’t really lined up, it will show in the finished blanket – and make the pressing in Step 5 hard.

Step 3

Sew almost all the way around the edge, leaving an opening big enough to fit your hand for turning right side out. I usually leave 4-5 inches. Use a quarter inch seam allowance – or something close. I use the edge of my favorite presser foot as a guide which makes a seam more like 3/8 inch and that’s just fine. πŸ™‚

Step 4

Clip the corners right up close to the stitching.

clip corners to avoid bulk

This will eliminate bulk in those corners when you turn it right side out.

Step 5

Turn the blanket right side out – taking care to poke out the corners and smooth all the edges. Press the edges flat.

Step 6

Now you have a choice. You can leave the edges as they are and hand sew the opening. I like to use ladder stitch (that links to a video tutorial) for invisible stitching.

Or (if you want a no-hand-work project) you can topstitch your blanket all the way around the edge. That will make your seams extra secure and sew up that opening at the same time.

close-up of the topstitched edge of a receiving blanket made with a free pattern from Shiny Happy World

Here’s how close to the edge I typically stitch.

Finished!

But that’s not all. This receiving blanket pattern is basically a blank slate for you to play with.

Sure – you can use fabulous fabrics and make it just this simple. How beautiful is this?

deep blue fabric with foxes - Into the Woods collection

Honestly – no further embellishment needed at all.

But if you want to add something fancy, you can.

You can add some embroidery. Maybe stitch baby’s name and date of birth in the corner? There’s a free alphabet pattern for hand embroidery here.

You can add some applique. On this sample I added the Fergal Fox applique pattern in the lower right corner of the blanket.

Finished receiving blanket made with a free pattern - plus an added fox applique face.

No resizing needed – and it’s a great way to get extra mileage out of patterns you already own. If you do this, make sure you place the bottom edge of the neck right up against the raw bottom edge of the blanket.

applique fox face added to the corner of a receiving blanket pattern

That way the raw edge will get sewn up in the stitching that sews the front and back of the blanket together and it will look like the fox is peeking into the frame rather than like a decapitated head floating in the corner. πŸ™‚

There are lots more single block applique patterns available here – perfect for adding to this pattern. And there are a few free applique patterns here. Add a free applique pattern to the free receiving blanket pattern for a perfect low-cost gift!

Have fun with this pattern! Be sure to tag any photos of your finished work with #shinyhappyworld – or share it in the Shiny Happy People group on Facebook.

Here are several free patterns that work with my basic 10-inch applique squares – no resizing needed!

Here are several free patterns that work with just some simple resizing. This post about making coasters has info about resizing an applique pattern that can be applied to any of these projects.

Return to the main Let’s Make a Quilt Table of Contents.

Happy stitching!

Free Trick or Treat Bag Tutorial

Trick or Treat Bag - a free pattern from Shiny Happy World

Need to whip up a super easy trick or treat bag for Halloween this year?

Then I have the pattern for you!

It’s fully lined (which actually makes construction easier), requires no hand sewing, can be made with any of my square quilt block patterns with no resizing – and you can make it in an hour or less. πŸ™‚

This project will work with any of my square applique patterns. If you’re using someone else’s pattern, you may need to resize it to fit a 10 inch square.

I’m using two monsters from the Scary Squares monster quilt pattern.

If you have a witch who needs a black cat, you could use the free Spooky Cat applique pattern.

If you have a farmer who needs a few farm animals, you could use any of the blocks in the Noisy Farm pattern.

If you just want to customize it with a name or Halloween greeting, use a fun Halloween print fabric and this free alphabet applique pattern.

The sky is the limit!

What You’ll Need

  • 1/2 yard medium weight fabric for the main bag (I used black cotton twill)
  • 1/2 yard light weight fabric for the lining (I used a Halloween novelty print)
  • fusible adhesive (I recommend Heat & Bond Lite)
  • fabric for your applique (I used prints from the Rainbow Brights and Little Stripes fat quarter bundles – plus a bit of black and white solid)
  • black thread
  • applique pattern of your choice

Cutting Instructions

  • Cut two 11″ x 11″ squares from the main fabric.
  • Cut two 11″ x 11″ squares from the lining fabric.
  • Cut two 14″ x 4″ rectangle from the main fabric for the handles.

Put It All Together

Step 1

Applique the main fabric squares with the design of your choice. If it’s one of my portrait designs, make sure the cut edge of the body is lined up with the bottom edge of the square.

Trick or Treat Bag - a free pattern from Shiny Happy World

If you’ve never done applique with fusible adhesive, it’s super easy! You’ll find instructions with video links in any of my patterns, and there’s a general video tutorial here.

Step 2

Fold the rectangles for the handles into double-fold strips and press.

There’s a video here showing how to do that if it’s new for you.

Stitch through all the layers down each long edge.

Trick or Treat Bag - a free pattern from Shiny Happy World

Set the handles aside.

Step 3

Layer the two lining pieces right sides together. Sew down one side, across the bottom, and up the other side using 1/4″ seam allowance.

Trick or Treat Bag - a free pattern from Shiny Happy World

I clipped the corners here out of habit, but you don’t need to do that. They’re about to get chopped off in the next step.

Repeat for the two main trick or treat bag pieces.

Step 4

Box the corners  of the lining so the bag is 1 inch deep

Trick or Treat Bag - a free pattern from Shiny Happy World

If you’ve never sewn boxed corners before, this video will show you how.

Repeat for the main bag.

Step 5

Fold the bag in half to find the center of the top edge.

Pin the handles to the bag so that the inside edge of the handle is 2 inches from the center pin, and the raw edge of the handle is lined up with the raw edge of the bag.

https://wendigratz.wpengine.com/2014/07/video-sew-boxed-corners.html

Pin the handles in place on both sides of the main bag. You can baste them in place if you like, but I usually just hold them with pins for the next step.

Step 6

Leave the main bag right side out, and the lining inside out.

Slide the lining over the main bag, so that the right side of the lining is facing the right side of the applique, and the handles are sandwiched between the two layers. Match the side seams and centers and pin the two bags together around the top edge.

Sew around the top edge of the bag using 1/4″ seam allowance and leaving an opening on one side between the inside edges of one of the handles.

Trick or Treat Bag - a free pattern from Shiny Happy World

This is easiest if you start sewing right at the inside edge of one handle. Sew through that handle, around the side seam, through both handles on the other side, around the second side seam, and through the last handle. Stop as soon as you sew over the last handle (remember to backstitch!) and you’ll have an opening about 4 inches wide.

Step 7

Turn the bag right side out. This step is a little mind-bendy if you’ve never done it before, but it’s actually really simple.

First pull the main bag out of the lining so that both parts are inside out.

Trick or Treat Bag - a free pattern from Shiny Happy World

Now reach into the opening, grab the main bag and pull it through the opening so that it’s right side out. Keep pulling and the lining will follow – also right side out.

Trick or Treat Bag - a free pattern from Shiny Happy World

Now just tuck the lining down inside the bag. πŸ™‚

Step 8

Smooth and press the top edge of the bag.

Fold under the seam allowance from the turning opening and press that as well.

Edgestitch all the way around that top edge. This will finish your bag, sew up the turning opening, and reinforce the handles – all in one step. πŸ™‚

Trick or Treat Bag - a free pattern from Shiny Happy World

Finished!

Trick or Treat Bag - a free pattern from Shiny Happy World

Now go out and fill your trick or treat bag with lots of yummy candy. πŸ™‚

For a slightly smaller tote bag, made with the same method, head over here.

Here are several free patterns that work with my basic 10-inch applique squares – no resizing needed!

Here are several free patterns that work with just some simple resizing. This post about making coasters has info about resizing an applique pattern that can be applied to any of these projects.

Return to the main Let’s Make a Quilt Table of Contents.

Happy Halloween!

Tutorial – Make a Tablet Cover

blue quilted tablet cover with circles

This post is originally from November 2013. I updated it in July 2017 to add the quilted batik tablet cover I made for my iPad Pro.

The day before I left for Quilt Market I decided that a really efficient use of my time would be to make myself a tablet cover using some of my new patterns. πŸ˜›

Here’s the result.

pink tablet cover with green applique dog

I posted it on Facebook and I got a bunch of requests for a pattern.

How about a free tutorial instead?

First you’ll need to measure your tablet. Of course, they’re all just a little bit different.

Add one inch to each dimension – length and width. This is your cutting size. If your tablet is 8″ x 11″ your cutting size is 9″ x 12″.

Cut four pieces of fabric to your cutting size. Two are for the outside and two are for the lining.

Oh yes – it’s lined.

Applique whatever you like to the two outside pieces, using whatever applique method you prefer. Click here for a free workshop teaching Quilt As You Go and applique with fusible adhesive – my favorite method.

The puppy is Harold – one block in the Playful Puppies quilt pattern.

Of course, you can use any applique pattern you like! Maybe one of the critters from the Safari Quilt? Or a Silly Sloth?

For those who don’t like applique – how about embellishing it with some stitching? I’ve got a bunch of easy embroidery patterns here.

Or just make it out of the most fabulous fabric you can find!

For the new iPad cover, I used a fabulous hand-dyed batik fabric from Malka Dubrawsky of Stitch in Dye and added Big Stitch quilting around all the circles.

quilted circles on blue fabric

These are the tablet cover front and back, all quilted, trimmed to size, and ready to assemble.

Shop for Malka’s fabulous fabric here.

Learn how to do Big Stitch quilting here.

Back the outside layers with some thin cotton batting and hold the layers together with some machine quilting (if you didn’t already quilt it as part of your embellishment). For the cat/dog cover, I just followed the line of the zigzags in the fabric. Easy peasy! Since the tablet is lined you don’t even need to back the batting.

So. You’ve cut your pieces, added any fanciness you like, and quilted in some padding. Time to start sewing it all together. This is super easy.

Sew your front to your back, right sides together, using 1/4″ seam allowance. Sew down one side, across the bottom, and up the other side. Don’t forget to backstitch at the beginning and end of your stitching.

Do the same thing with your two lining pieces except leave a 3-4 inch opening in the bottom for turning the whole thing right side out later.

Turn both the outside and the lining right side out and press.

pink fabric with a pocket

I’ve got my turning stick poked through the opening I left in the lining. See how I pressed that too? That’ll make it a cinch to sew up when you’re done.

Now turn the outside inside out again. Leave the lining right side out.

Measure a strip of elastic 3 inches long. I used soft fold-over elastic in a pretty color (you can buy it here) but you can really use any elastic in any size or color.

Fold the elastic in half and pin it to the center of the front of your cover. (Fold the cover in half to quickly find the center.)

loop of pink elastic pinned to a work in progress

I like to leave a little extra hanging over the raw edge.

Slip the lining (right side out) inside the cover (inside out). Line up the side seams and pin or clip the layers together around the top. The elastic loop should be sandwiched between the two layers.

layers of batting and fabric clipped together

You can really see my quilting lines here on the batting.

Sew the outside to the lining all the way around the top using 1/4″ seam allowance.

stitching detail in white batting

I go back and forth over the elastic a couple of extra times. It’s a stress spot and I like to reinforce it.

Now comes the fun part.

Pull the lining out of the bag. Then pull the whole thing through the opening in the bottom of the lining. Sew up the opening in the lining using either whipstitch or ladder stitch and tuck the lining down into the bag.

Flip down the elastic loop to see where you need to position your button and sew the button in place.

Done!

pink quilted tablet cover with a blue applique cat

Here’s the back of my cover. Of course I had to decorate the back too!

And here’s a full view of the batik cover.

blue quilted tablet cover with batik and quilted circles

It’s the same font and back. πŸ™‚

Here are several free patterns that work with my basic 10-inch applique squares – no resizing needed!

Here are several free patterns that work with just some simple resizing. This post about making coasters has info about resizing an applique pattern that can be applied to any of these projects.

Return to the main Let’s Make a Quilt Table of Contents.

Happy sewing!

Fast & Easy Free Placemat Pattern

Free Fast & Easy Placemat Pattern - perfect to use with any quilt or applique pattern


Use this free placemat pattern and get a little bonus use out of your favorite blocks from your quilt patterns!

I love seeing people make things besides quilts with their Shiny Happy World quilt patterns.

Don’t get me wrong. I love seeing your finished quilts!

But if you make quilts – it’s a great way to get extra use out of your patterns.

And if you’re new and a little nervous about making a whole quilt, it’s a nice small, single-block project to dip your toes in. πŸ™‚

Today let’s talk placemats.

They’re so easy to make!

Placemat Pattern Instructions

A typical placemat – one that easily fits a standard place setting – is anywhere from 12″ to 14″ tall and 18″ to 20″ wide.

(A fat quarter is typically 18″ x 20″ so any placemat in this size range will take two fat quarters and some batting.)

I cut my rectangles (a front, a back, and a batting) 13″ x 19″ – right smack in the middle of the normal range.

If you’re going to use Quilt As You Go and you like to quilt before you applique (that’s what I do) layer your placemat top with the batting (no backing yet!) and quilt however you like. Press it flat.

Next – add your applique character.

Positioning the Applique

Almost all the characters in my quilts are designed to fit in a 10″ square, and I find they work really well with this placemat pattern without any resizing. If you’re using another designer’s pattern, just enlarge or reduce the image to be 8-9 inches tall.

I like to position my image to one side or the other. If it’s centered it gets completely hidden by the plate, plus I like things to be asymmetrical. πŸ™‚

Look at the way the image is framed/cropped. Maurice (my favorite cat from this Cats quilt pattern) is chopped off straight at the shoulders. I designed him to look like he was in a portrait. You’ll want to be sure to position that straight cut edge flush with the bottom edge of the placemat – like he’s popping into the frame and we just snapped a photo.

gold applique cat on a blue placemat - made with the free placemat pattern from Shiny Happy World

This bird from the Chirp pattern, on the other hand, isn’t cropped anywhere. Position complete images like this fairly close to the bottom edge of the placemat (that will anchor the image and keep her from looking like she’s floating in space) – but not so close that any part of her gets cut off when you sew up the edges.

chubby pink applique bird on a light green placemat - made with the free placemat pattern from Shiny Happy World

See the difference?

Applique your image in place using your favorite technique.

You can find all my applique tutorials here. I used applique with fusible adhesive and outlined with simple straight stitching in black thread.

Now comes the extra fast and easy part of this placemat pattern.

Finishing Your Placemat

You can, of course, layer on the backing and bind the edges just like a quilt. I love binding and would choose this technique unless I was in a hurry.

But not everyone shares my love of hand-sewn binding. πŸ™‚

For all of you – here’s a fast and easy finish.

Layer the placemat front and back right sides together. Pin or clip all the way around the edges.

partially-sewn placemat marked to show leaving an opening for turning when you sew up the edges

Sew it up around the edges (I used a 1/4″ seam allowance, but you can fudge that a little) leaving a few inches open on one side for turning.

Don’t forget to backstitch at the beginning and end of your stitching!

sewn corner of fabric shown with attention drawn to how you need to clip the corners

Clip the excess seam allowance off the corners – very close to your stitching. That will allow you to get nice crisp points.

Turn it right side out, smooth and straighten all the edges, gently poke out the corners, and press. Turn the seam allowance of the opening inside (so that folded edge lines up with the sewn edges) and press that too.

No need to sew up that opening by hand! Topstitch all the way around the edge of the placemat and that will close up the opening.

zoomed in detail showing edgestitching

I like the topstitching around the edge of the placemat to be about the same distance from the edge as my topstitching on the applique pieces. That keeps everything looking neat and unified.

pink applique pig on a brown placemat made with the free placemat pattern from Shiny Happy World

Finished!

There are so many possibilities for this! You can use any applique pattern. (I used blocks from Cats, Chirp, and Noisy Farm.)

Add some lettering from this free alphabet applique pattern to personalize each placemat with someone’s name!

Oooh! Instead of a name, use the Paper Dolls quilt pattern to create images that look like the person the placemat is for. That would be so much fun!

Use some of my free applique patterns to make a set of holiday placemats. I have free Halloween, Easter and Christmas patterns. πŸ™‚

Instead of applique, do some embroidery. The placemat size and construction method is exactly the same.

You can make traditionally pieced placemats too! Just start with your favorite pieced block, and add enough fabric around it to get it up to the standard placemat size. The method is just like this one for turning any quilt block into a pillow.

Have fun with it!

Here are several free patterns that work with my basic 10-inch applique squares – no resizing needed!

Here are several free patterns that work with just some simple resizing. This post about making coasters has info about resizing an applique pattern that can be applied to any of these projects.

Return to the main Let’s Make a Quilt Table of Contents.

Happy quilting!

Turn a Witch Hat into a Princess Hat – Easy Peasy

Turn a Witch hat into a Princess Hat - an easy peasy tutorial from Shiny Happy World

One of my favorite Dress Up Bunch patterns is this one for a witch costume.

Dress Up Bunch doll Halloween witch costume

As I was making it, I kept thinking that it could easily be converted to a princess costume – just change to a sparkly princess fabric and make a tiny change to the hat.

Here’s exactly what I mean by “a tiny change to the hat pattern.”

The witch hat is a simple cone with a brim added. For the princess hat (a hennin) you just leave off the brim and add a pretty little fall of fabric to the top.

Turn a Witch hat into a Princess Hat - an easy peasy tutorial from Shiny Happy World

Take a look at the scraps you have left over after you make the dress. I had a long strip 6 inches wide. From that I cut 3 pieces, each 6 inches wide and 12 inches long. You could use a couple of 12 x 12 squares, or several skinnier strips, or make them longer than my 12 inches, or add some pretty ribbons. Just play around and see what you like the look of.

Grab your fabrics at oneΒ corner, bunch them up as small as possible, and sew them into the top of the cone when you sew the hat seam.

Turn a Witch hat into a Princess Hat - an easy peasy tutorial from Shiny Happy World

See the little bunch sticking out from the top of the cone? The rest of the fabric will be inside the cone (as shown) while it’s inside out.

Turn a Witch hat into a Princess Hat - an easy peasy tutorial from Shiny Happy World

Make sure you go over that little bunch a couple of times with your stitching. I backstitched over mine a few times. Princess fabric tends to be fragile and you want it to be securely attached. πŸ™‚

Turn the hat right side out and. . .

Turn a Witch hat into a Princess Hat - an easy peasy tutorial from Shiny Happy World

Pretty!

Turn a Witch hat into a Princess Hat - an easy peasy tutorial from Shiny Happy World

Mollie approves. πŸ™‚

Get the witch pattern here. It will fit any of the dolls in the Dress Up Bunch.

Happy sewing!

Best,
Wendi
Wendi Gratz from Shiny Happy World

Β 

The Dress Up Bunch is a collection of cute and cuddly rag dolls. Get patterns for the dolls, plus all their fun outfits and accessories!