


If you’re like me, you’re a crafter… and NOT a photographer! But, you still want to take nice photos of your completed projects for your blog or to share on Ravelry. Help is here! In this blog post, Stacey and I share share 5 easy photography tips you can use to take lovely project photos, without lots of fancy equipment.
No fancy equipment needed!
The most common misconception about taking nice photos is that you need to have a super-fancy camera to do so. But you don’t! You can take fabulous pictures with a point-and-shoot-camera and having a few tricks up your sleeve. Nowadays I use my phone for all my photography.
So, what are these photography tips? Let’s get started!
Tip 1: Use Natural Light
I can’t say enough about the fabulous sun! To take beautiful photos, you want to find a well-lit area that’s not in direct sunlight.
For outside photos, this means picking a time of day that’s not noon – directly in the sun means lots of glare and harsh shadows. For best results, choose a day that’s slightly overcast. Those clouds filter the light and make everything perfect.
For inside photos, I use a spot next to a window that has loads of light flooding through. So I don’t get harsh shadows, I use a couple of pieces of foam core to bounce the light around.
Here’s a shot of my “tall” set-up. I use this set-up to photograph stuffed animals from the front.
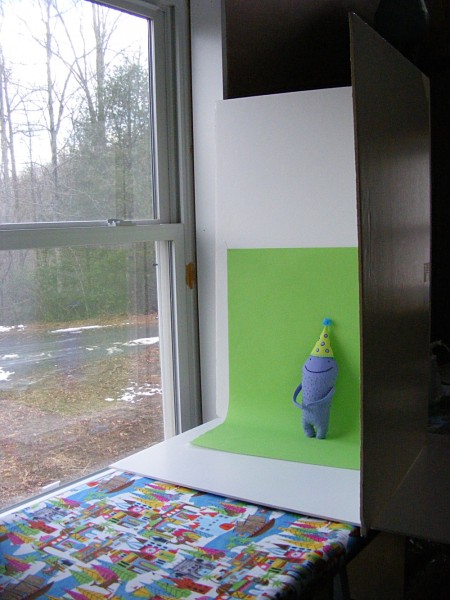
It’s just two pieces of foam core taped together to make a hinge so I can stand them up.
When I shoot a flat lay (looking it everything from straight above) I do the same thing, just with shorter pieces of foam core so I can see over them.
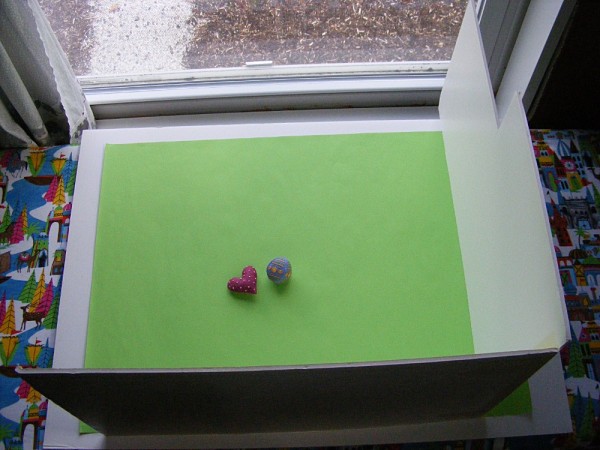
I stand on a step-stool to be able to shoot straight down.
Tip 2: Use White Posterboard for the ‘Clean’ Look
I used to think that I needed a photographer’s tent and all sorts of fancy equipment to get that fabulous white background, but now I know that you don’t!

Here’s how Stacey uses a white piece of posterboard, propped up against a wooden box that she found by the side of the road.
Using the posterboard allows you to get a white background for photos like this. . .

I prefer to have colored backgrounds like this. . .

So I use a large sheet of paper the same way Stacey uses the white posterboard. I pins my paper to those foamcore light bouncers.
Tip 3: Get a Tripod
I said ‘no fancy equipment’… but Stacey highly recommends this Joby Gorillapod Tripod.

She loves it for two reasons. The first reason is that the Gorillapod is magnetic and has bendable arms, which means that she can stick it on a stop sign/pole and take self-portraits.
But that’s not all! A tripod is also really useful in low lighting. When there isn’t a lot of light, the camera lens needs to stay open longer to get enough lighting… meaning that any shake of your hand will make a blurry photo. By having a tripod, you can be sure that the camera stays still, and take photos even when your natural light is fading.
Tip 4: Take Lots of Photos!
Stacey once snapped a great photo of a friend’s dog and an owl she crocheted.

Her friend was so amazed! She asked, ‘How did you get him to sit still like that?’
And Stacey’s answer was – she didn’t. She just took oodles of photos until she got a good one!
A lot of people seem to think that a photographer snaps the perfect picture and carries on their merry way. In reality, even professional photographers take tons of photos, and only later pick out the best ones. So do the same thing! Take a ton, and weed through them later. It increases your chance of catching that perfect shot!
Tip 5: Edit your Photos
It’s totally okay to edit your photos after you’ve taken them!
Photoshop is the professional standard, but it’s expensive. There are lots of other options! I use GIMP (which is like a free version of photoshop) and there are lots and lots of apps out there to choose from.

I edit almost every photo I take. Even when I take a photo on my white posterboard, I often have to up the exposure a little bit to get it to a true white. Or, in the case of the dog photo (above), Stacey snapped a great picture, but had to crop it so you wouldn’t see the garbage cans on the side.
It’s free, only takes a few minutes and turns your pictures from ‘nice’ into ‘wow’… so try a little editing!
Give it a try!
I’d love to hear if you do any of these photography tips already, or if you’re giving one a try today! I hope to have convinced you that you don’t need fancy lights or a thousand dollar camera to take great project photos!