


![]()
Why use those same old cardboard coffee sleeves when you can use a fancy felt coffee sleeve – all pretty and touchable?
Materials you’ll need
- 1 sheet wool-blend felt (I used Babbling Brook)
- scraps of wool felt for the flowers and butterflies
- embroidery thread in assorted colors
- 2 inches hook & loop tape
- freezer paper and Sulky Sticky FabriSolvy (optional)
Find links to all my favorite supplies here.
It’s super easy to make. It uses just a few of the most basic embroidery stitches – and there are links to video tutorials teaching all of them.
Here’s how to make it.
Step 1
Transfer the pattern to the felt. I use Sulky Sticky FabriSolvy every time I work with felt. I love it!
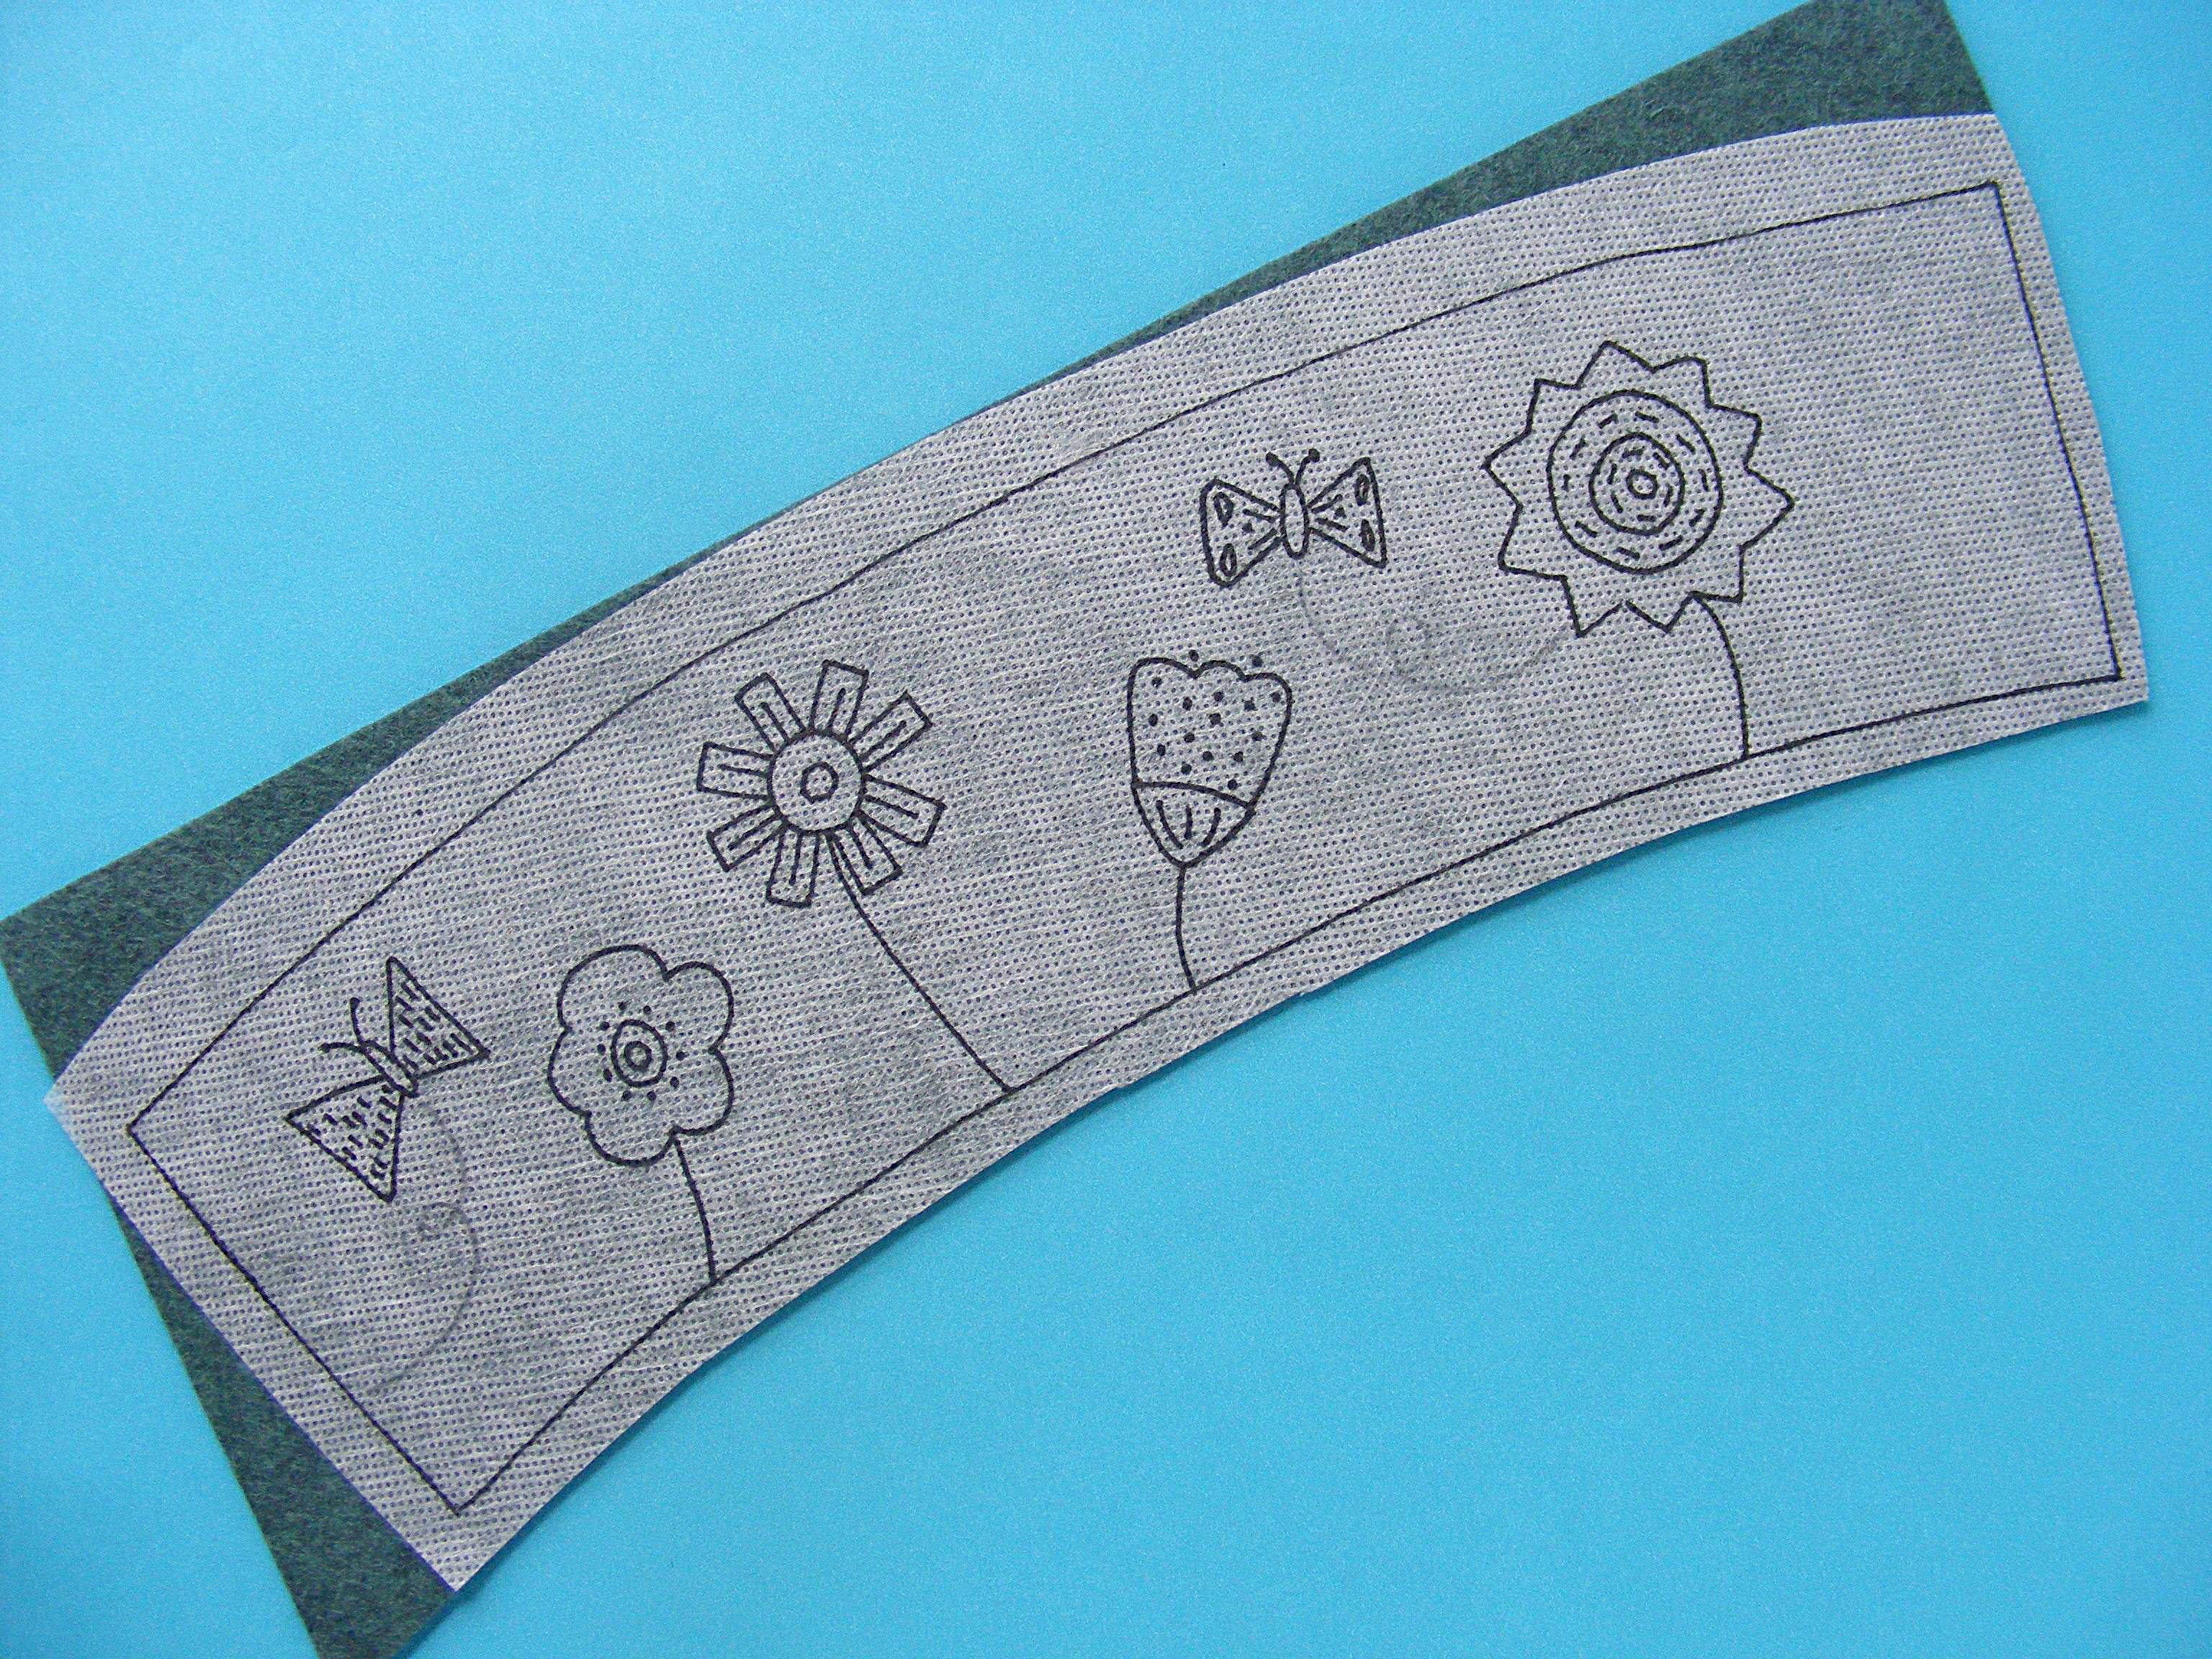
If you’re wondering how it works with felt, read this post.
Step 2
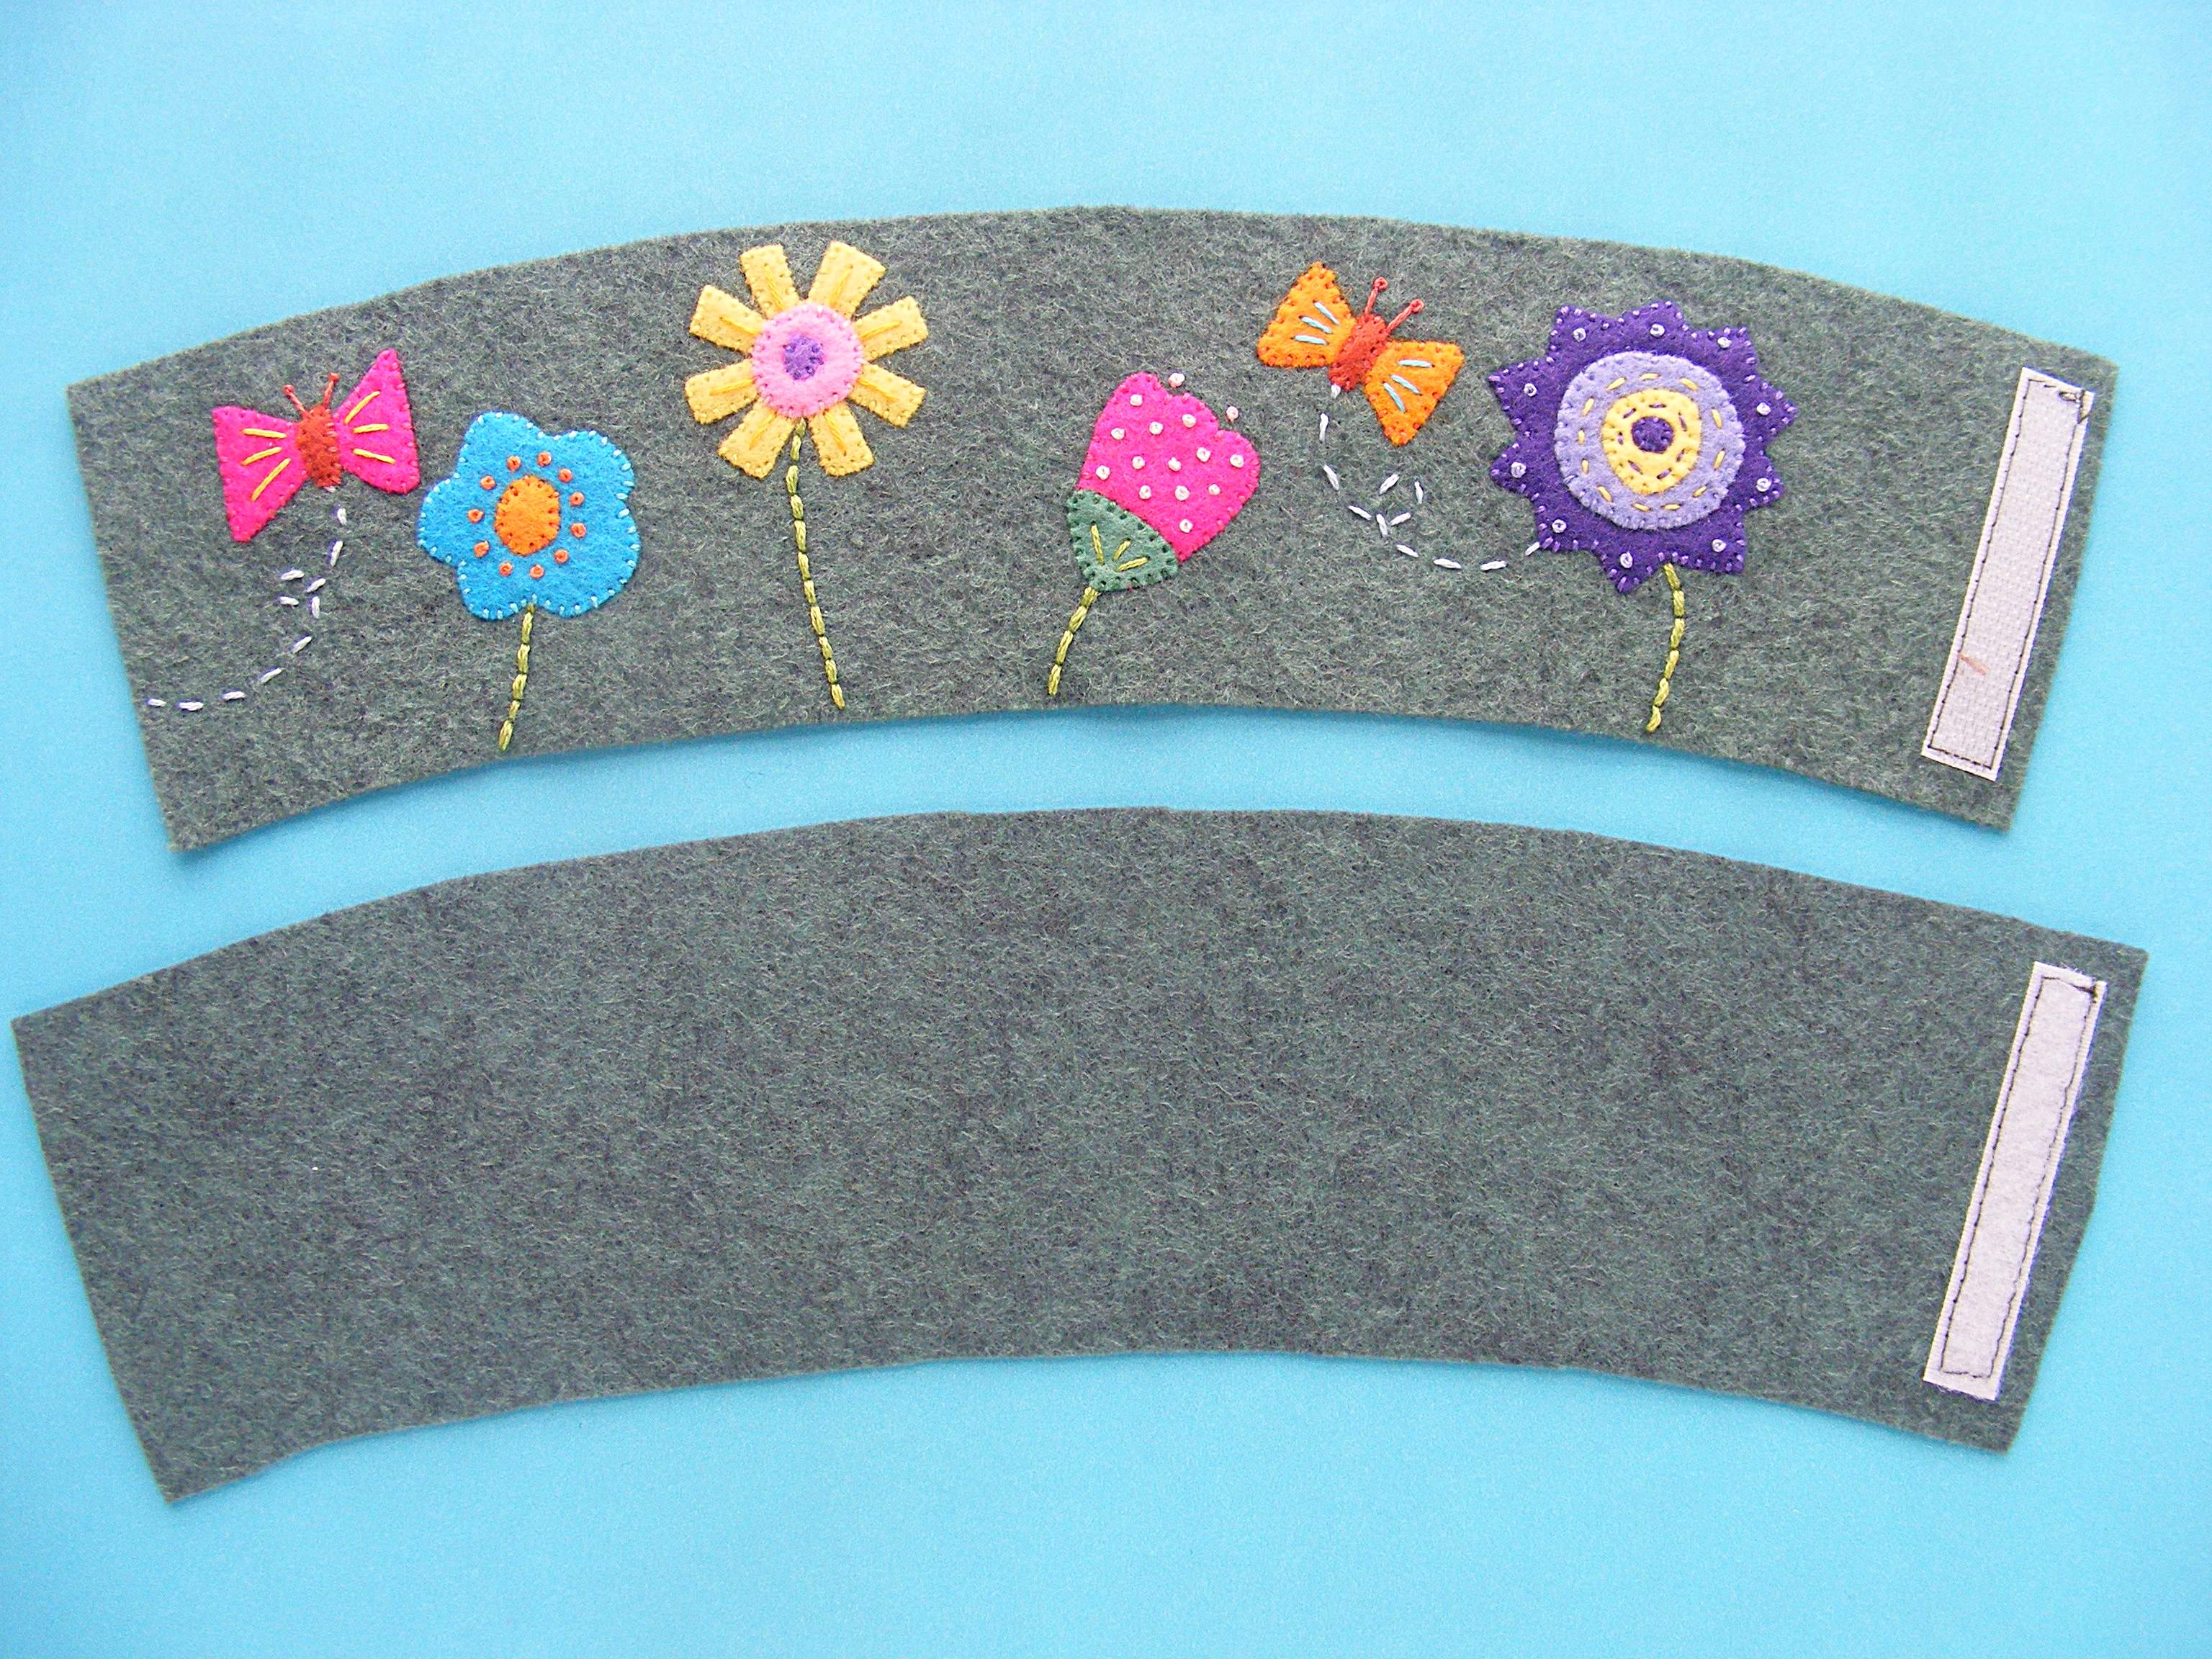
Embroider the design and trim the edges of the felt to size.
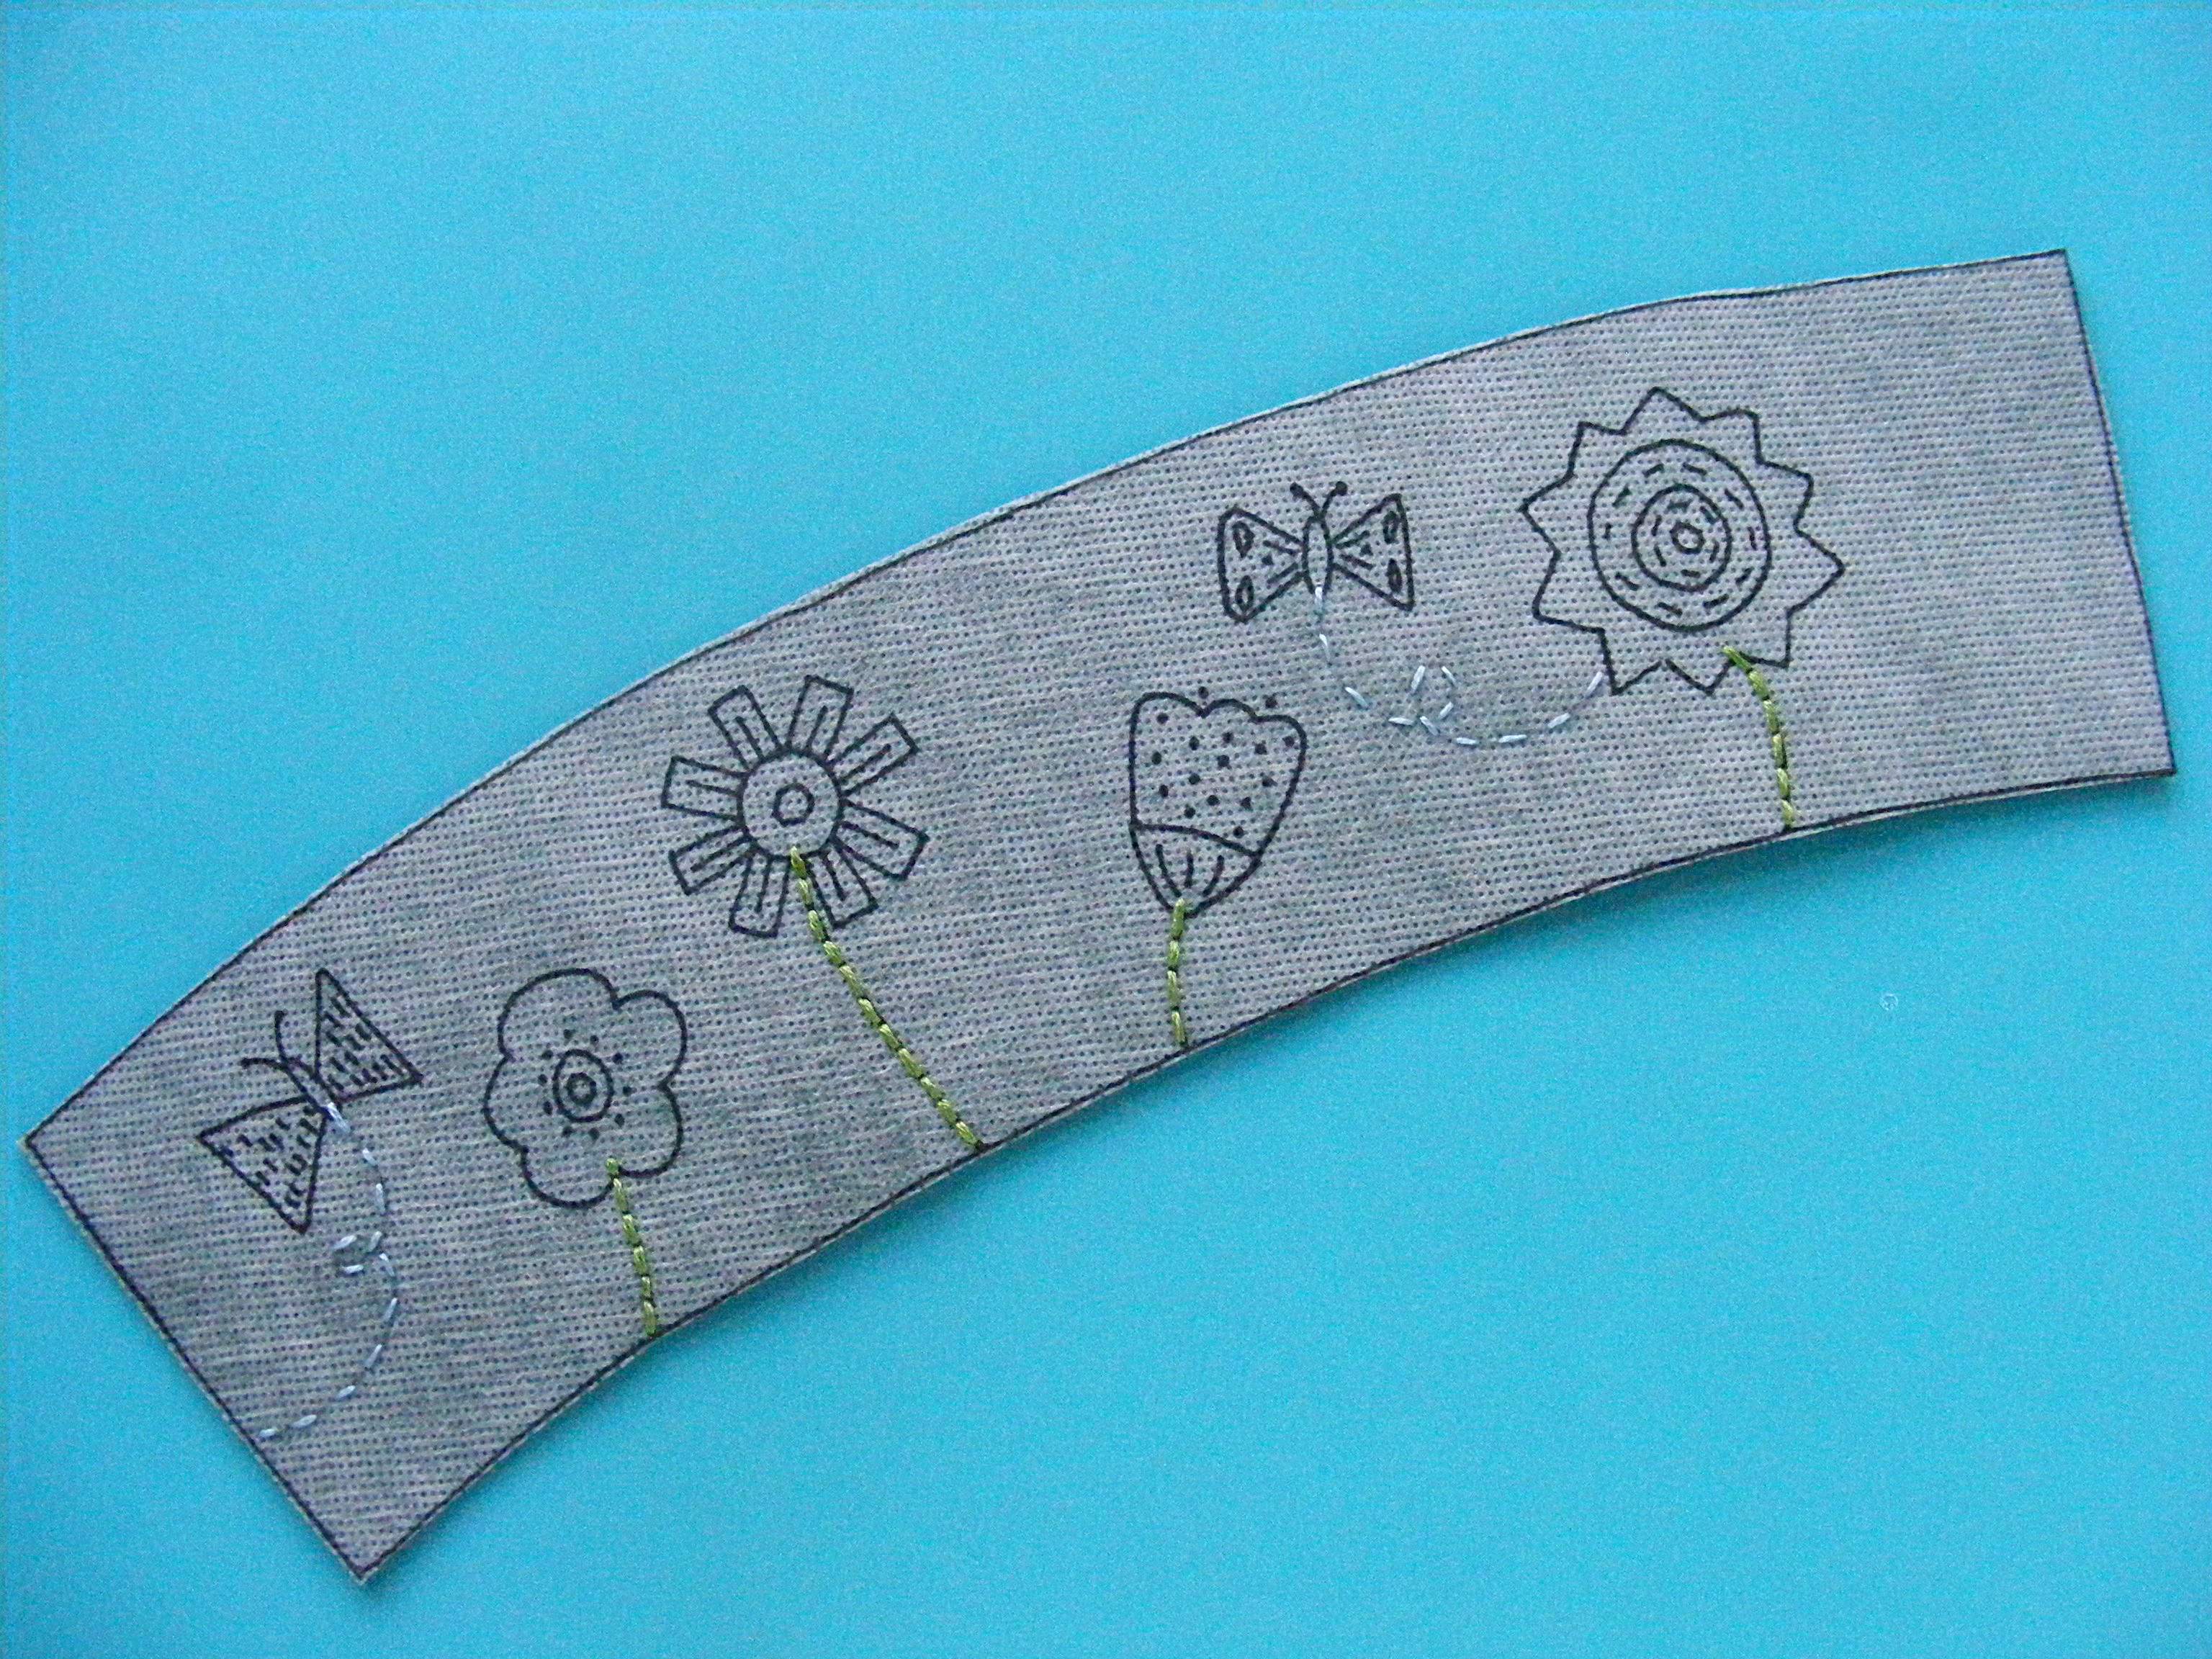
I’m going to applique all the flowers and butterflies, so all I stitched here are the stems and butterfly trails.
I used backstitch for the stems with four strands of green thread, and running stitch for the butterfly trails with two strands of light blue thread.
Step 3
Soak out the Sulky Sticky FabriSolvy in cold water and let it dry flat. Don’t wring, twist or even smoosh it. Just set it on a towel and let it dry overnight.
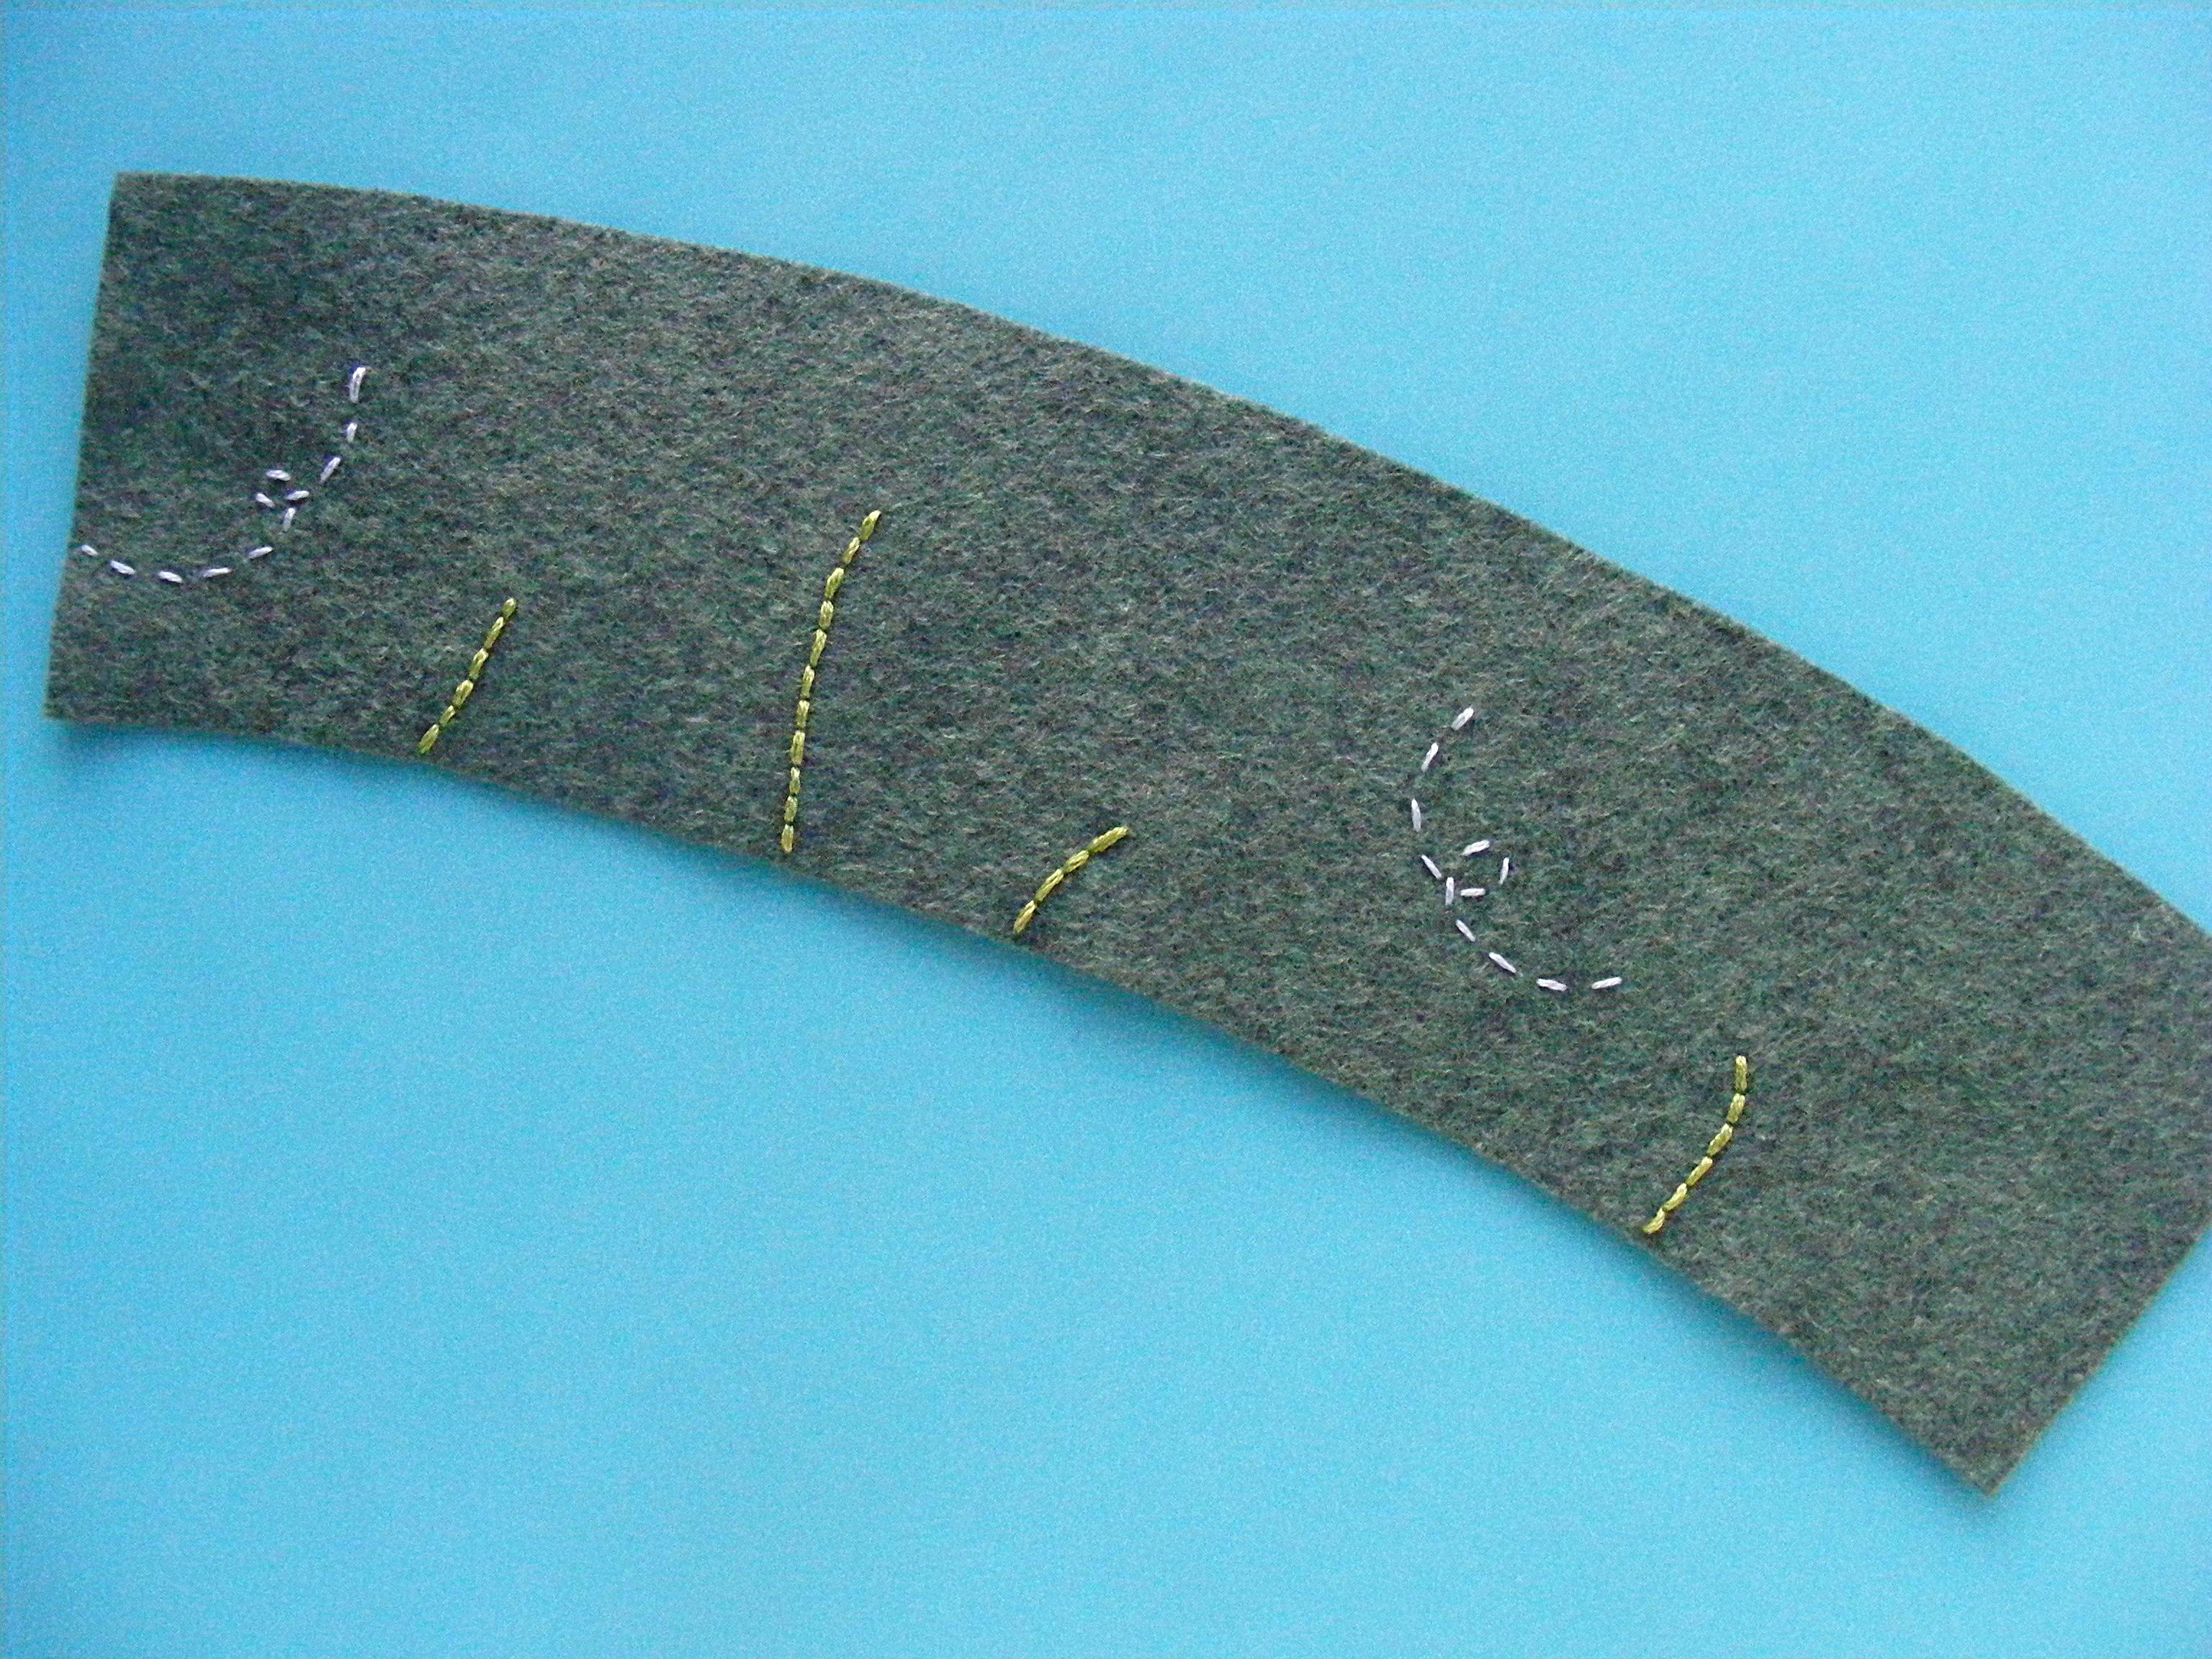
Look! Now I know exactly where each applique piece goes!
Step 4
Applique and embroider the rest of your design.
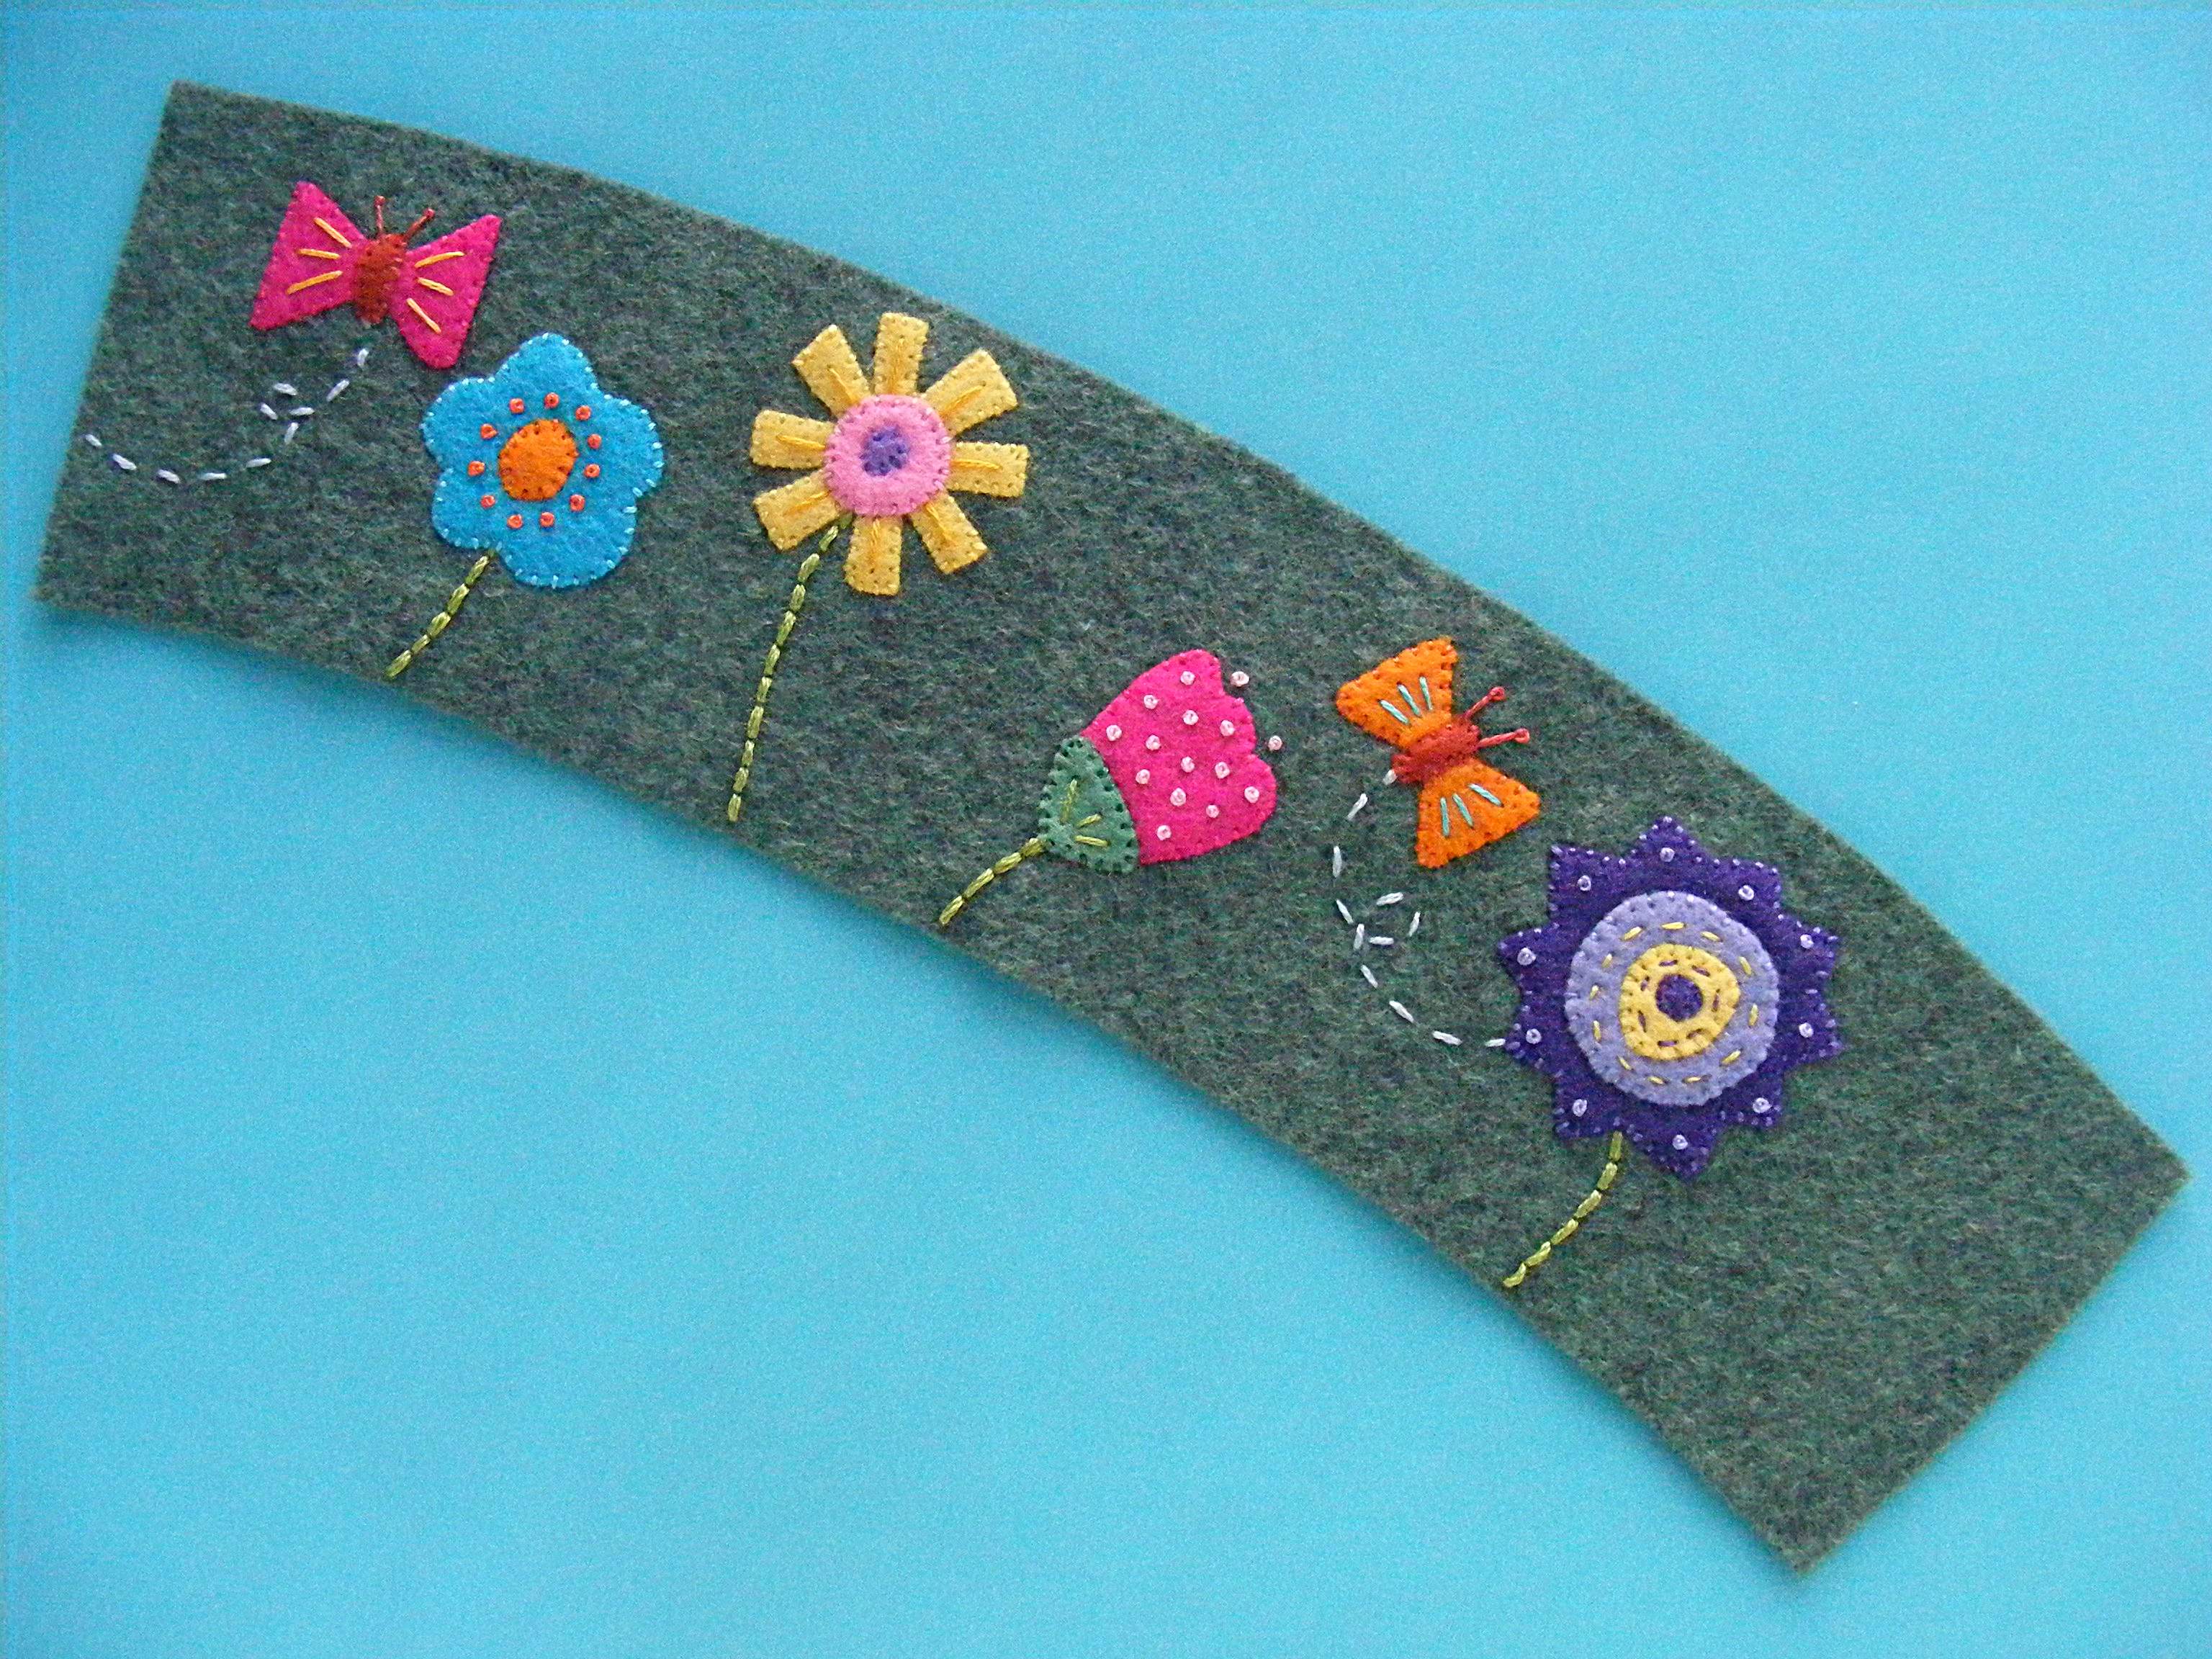
Use freezer paper to cut out the tiny applique pieces. Trace the pieces onto the paper side of the freezer paper. Fuse the paper to felt, and then cut out the pieces, cutting through the paper and felt at the same time. It will help keep your cutting accurate.
I used whipstitch to applique the pieces, French knots for all the dots, and simple straight stitches for everything else.
Everything is stitched with two strands of thread.
Step 5
Cut a second piece of felt to match the first.
Sew the prickly, hook half of the hook & loop tape to the end of the embroidered piece.
Sew the soft, loop half of the hook & loop tape to the blank piece of felt.
I used a sewing machine to attach these pieces, but you could also sew by hand.
Step 6
Sew the two layers together all the way around the edge.
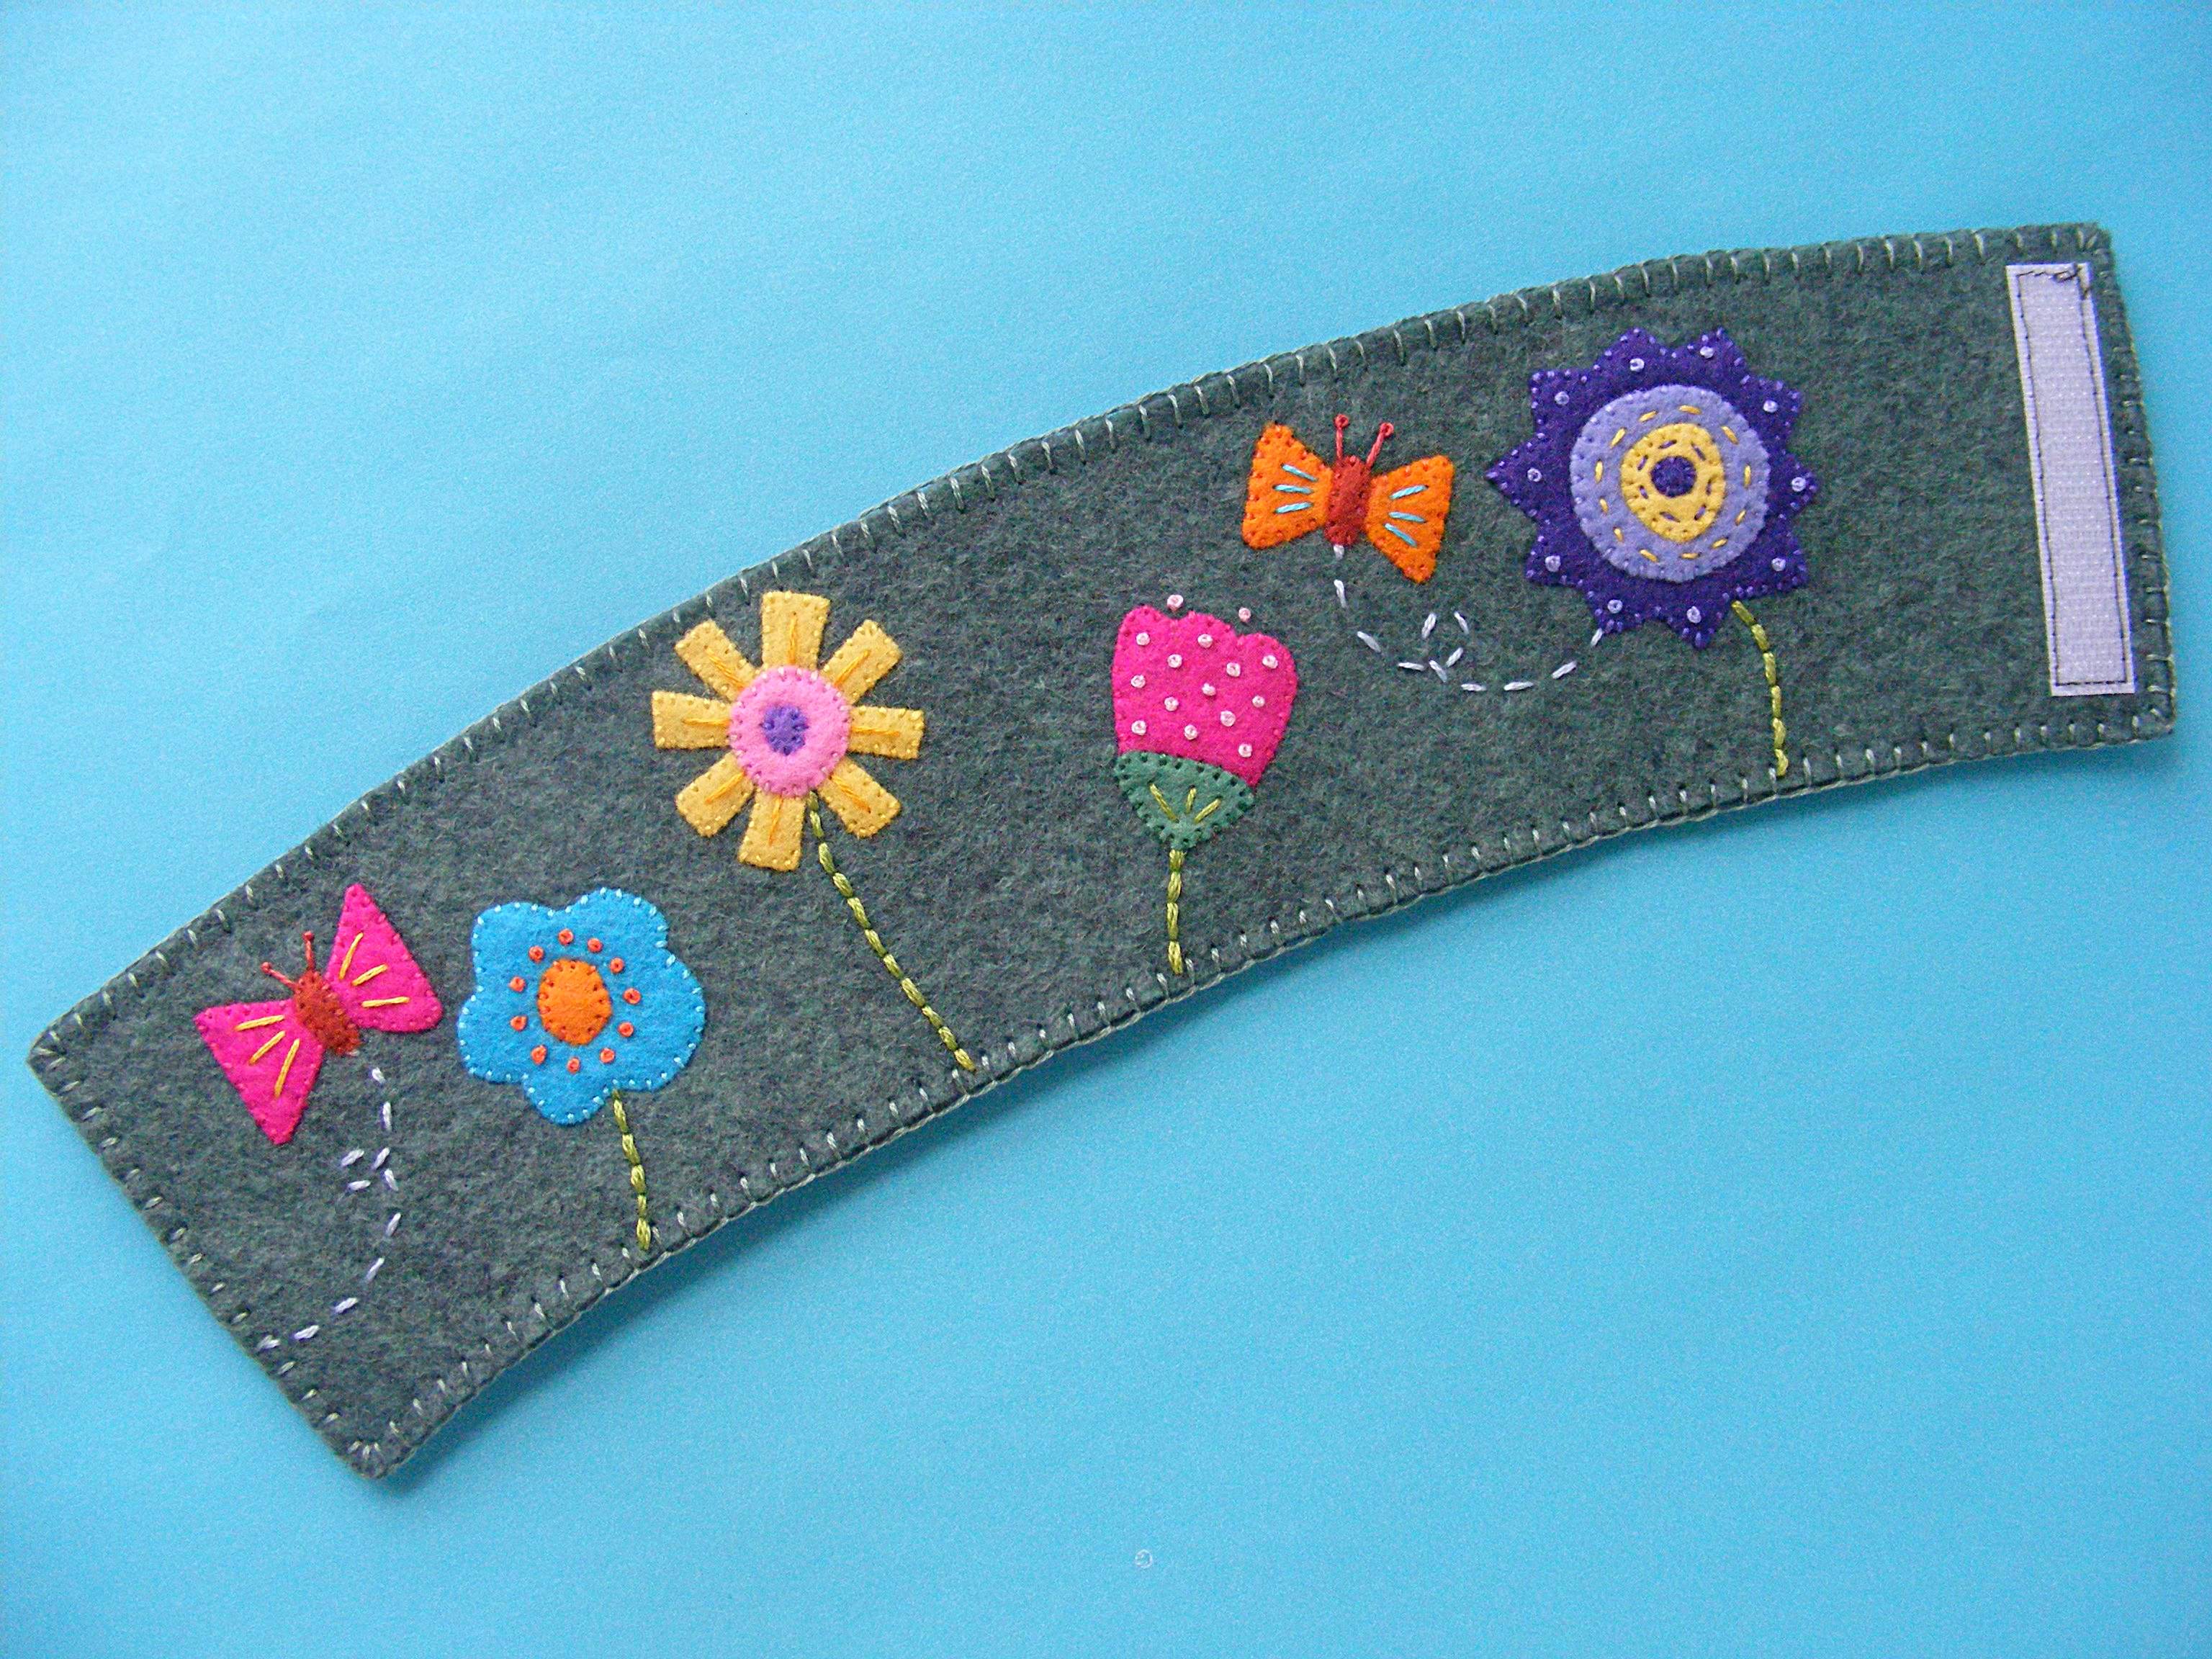
I used blanket stitch, but you could also use whipstitch, running stitch, or even sew it on the sewing machine.
Finished!
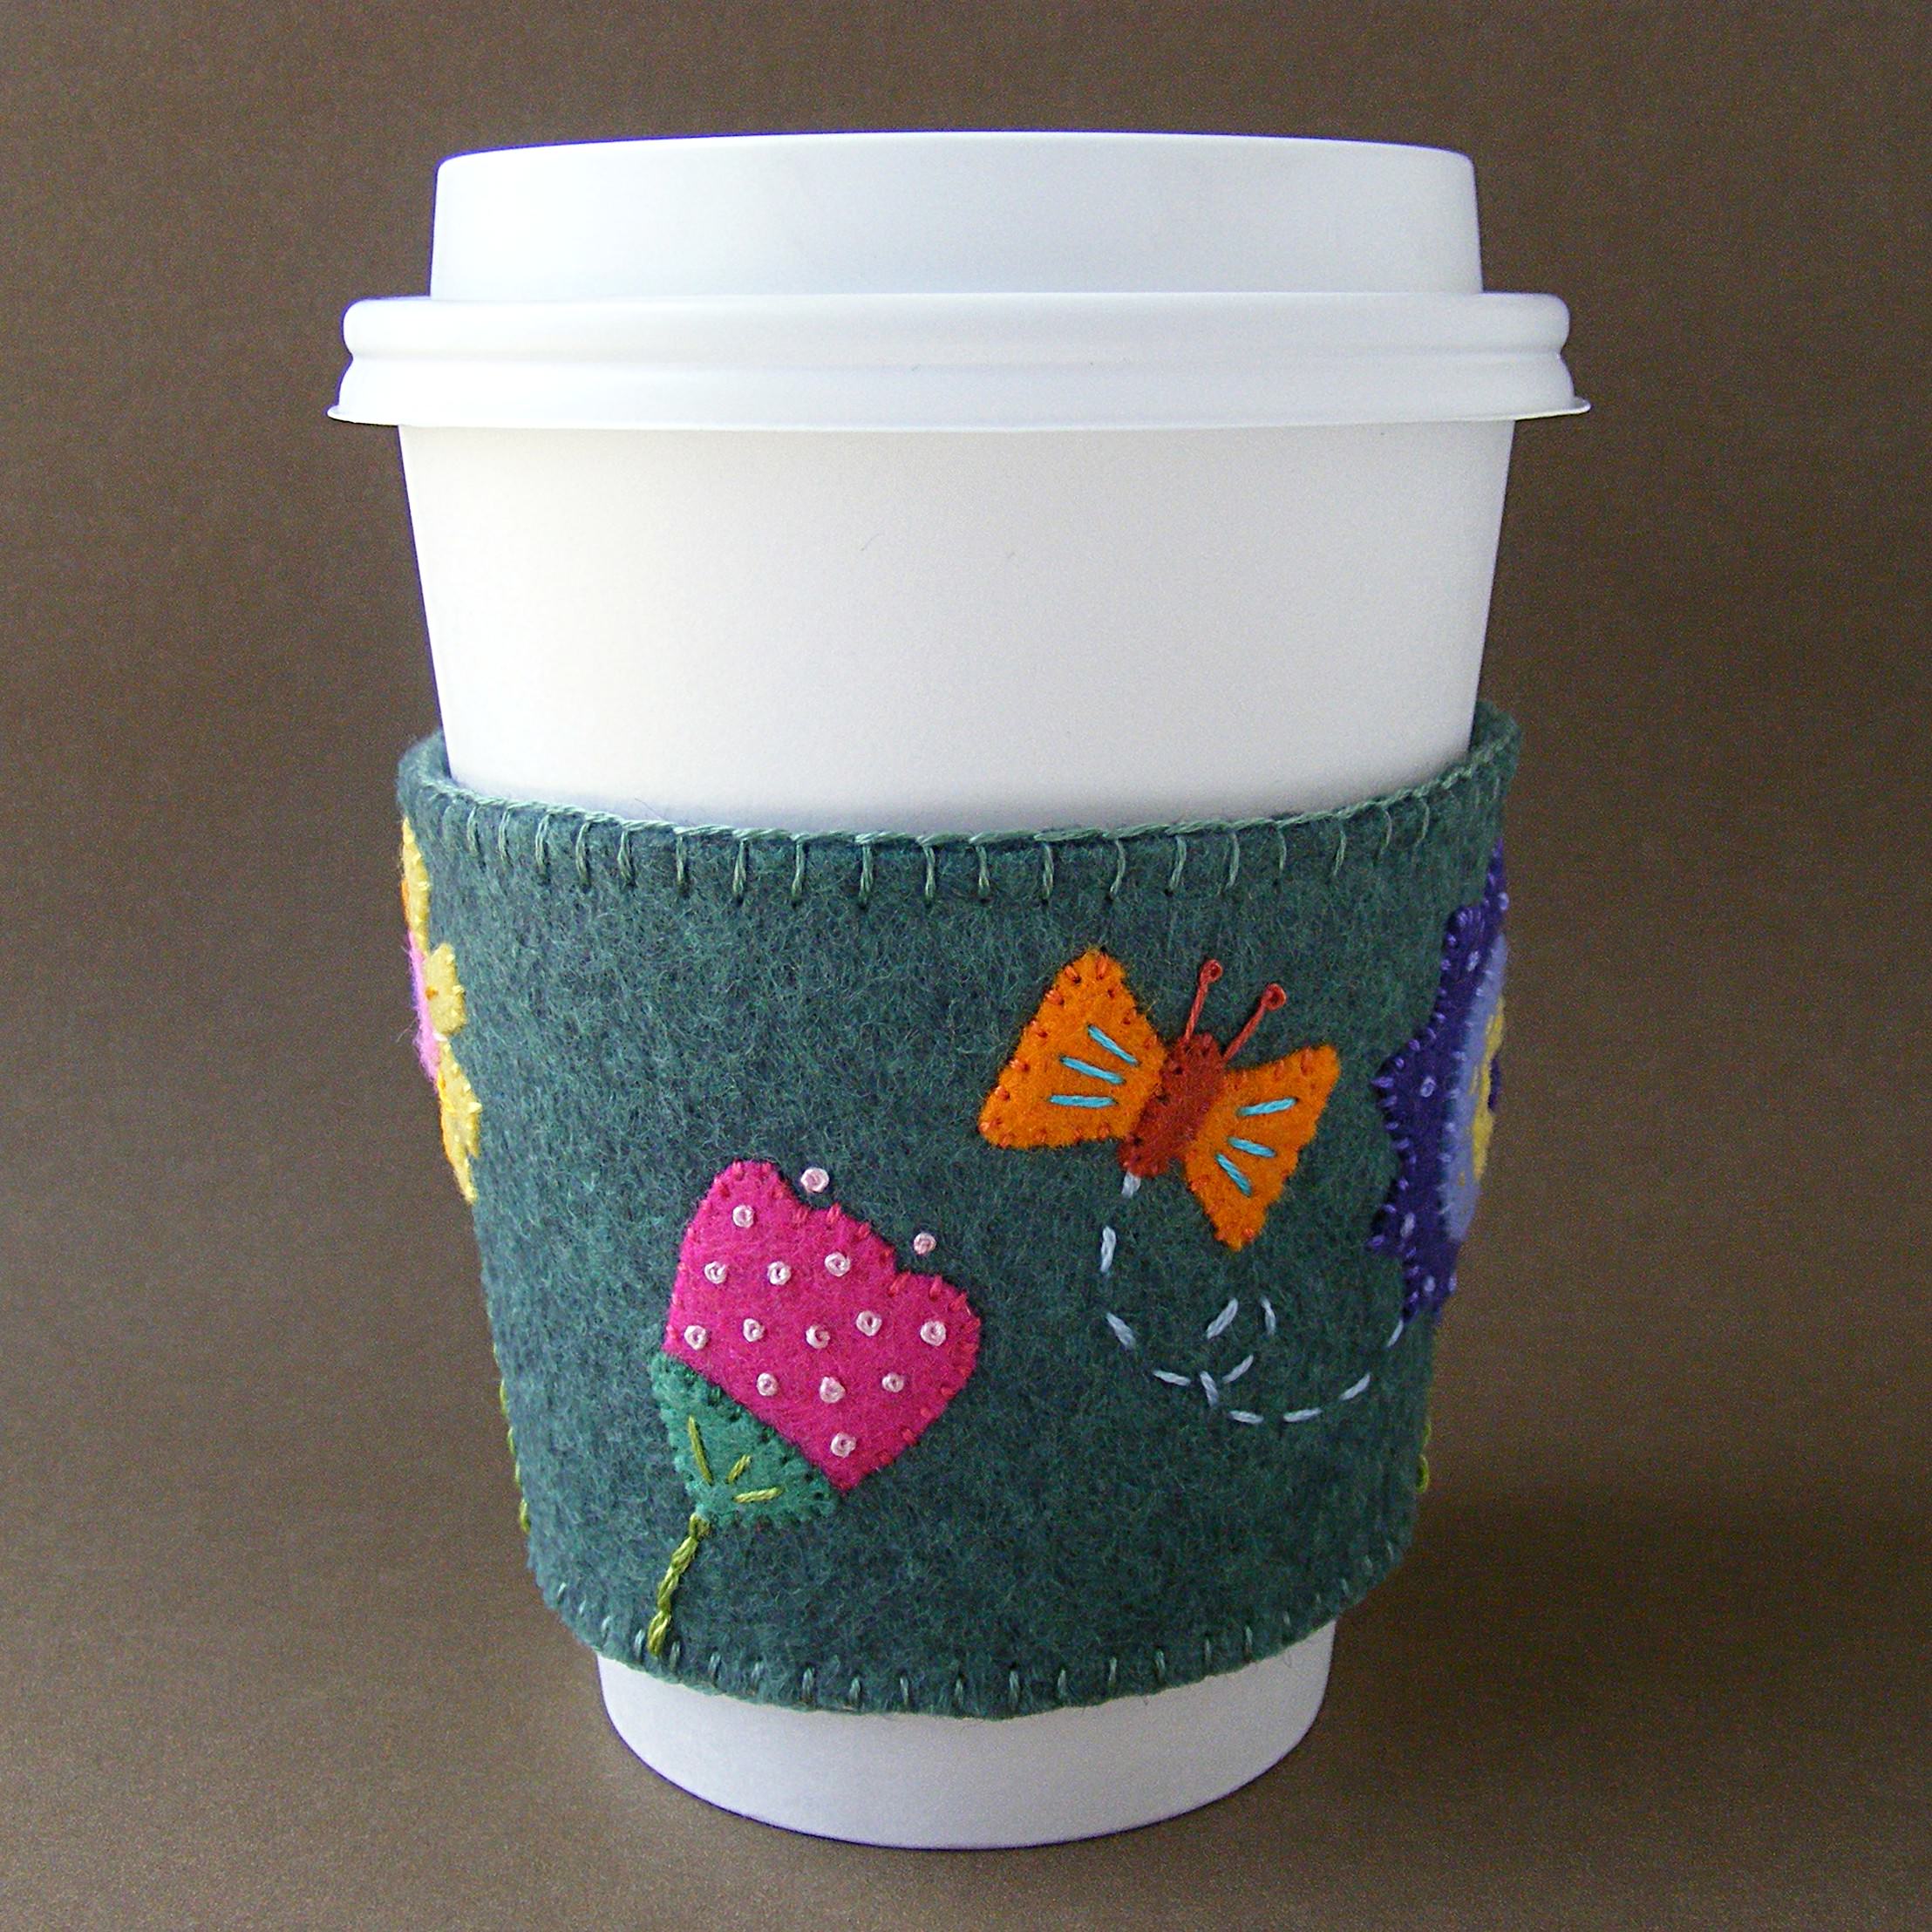
Wrap it around your coffee cup and you’re ready to go!
Happy stitching!


Wendi, What is your favorite stitch for outlining an object prior to satin stitching the object,
I thought you mentioned the stem stitch, but wanted to be sure.
Thanks and I love your teaching abilities! Instructions are so clear and nicely done.
Geri
I like to use split stitch for that.
Pingback: 19 formas divertidas de utilizar el bordado – Hand Craftsy Spain
Pingback: 19 modi divertenti per usare il ricamo – Hand Craftsy Italy
Pingback: 19 leuke manieren om borduurwerk te gebruiken – Hand Craftsy Netherlands
Pingback: 19 zabawnych sposobów na wykorzystanie haftu – Hand Craftsy Poland
Pingback: 19 maneiras divertidas de usar bordado – Hand Craftsy Portugal
Pingback: 19 lustige Möglichkeiten, Stickereien zu verwenden – Hand Craftsy Germany
Pingback: 19 интересных способов использования вышивки – Hand Craftsy Russia