


You’re in for a treat, today!
Chloe has become quite a celebrity because of her beautiful crocheting! She never ceases to post amazing project photos and animals in creative poses!
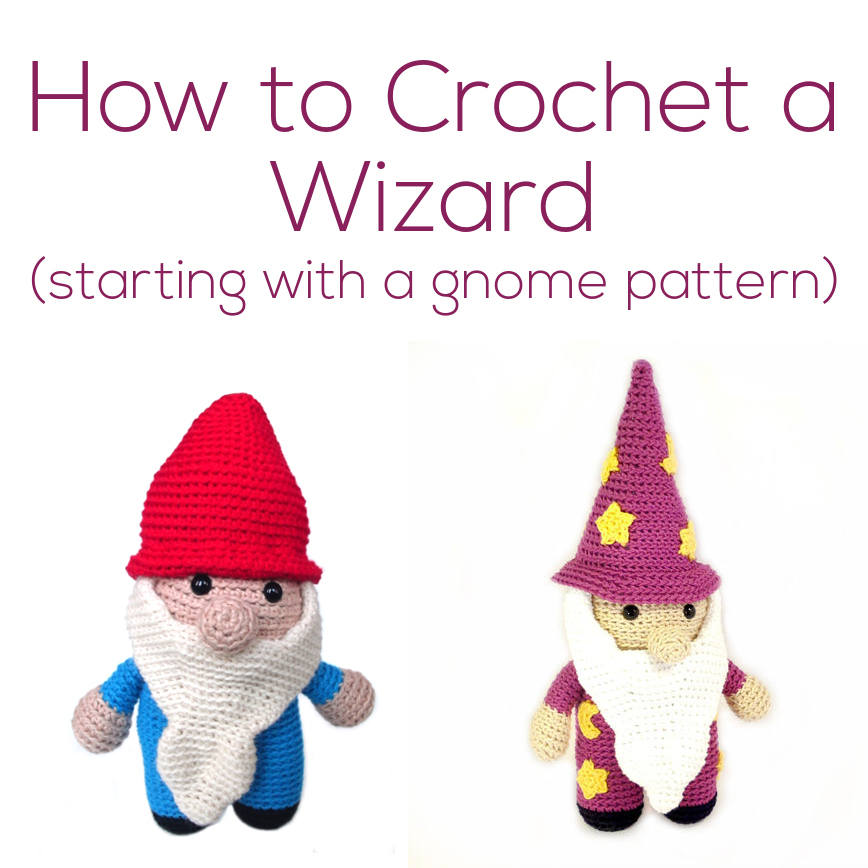
Today, Chloe is sharing with us how to transform a Forrest the gnome into a wizard! How cool is that?
And, you’ll definitely want to check out Chloe’s Ravelry page and blog to check out all of her great creations!
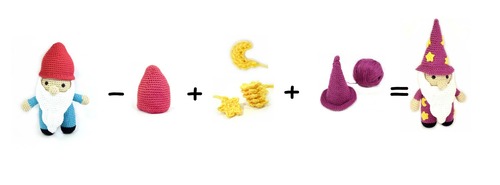
Hereby is the ingredient list and instructions for the Transgnome Potion aka How-to-turn-your-gnome-into-a-wizard Serum! So, grab your quills and note the materials you’ll be needing:
- One fully-grown Freshstitches gnome, minus the hat!
- A bunch of tiny stars and crescent moons
- Yarn in magical colour, i.e. any colour you like, for the hat, arms, body & legs
Now, take you wands..oops..hooks and off we go!
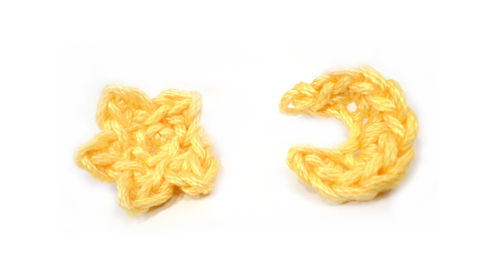
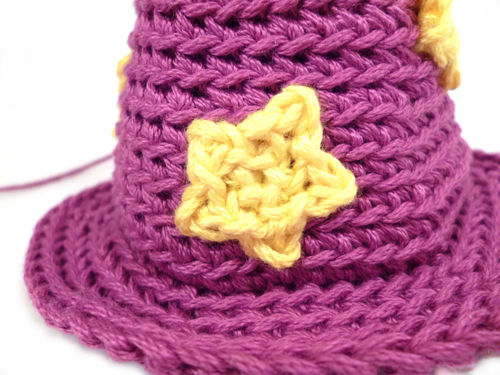
Step 1. Crochet tiny stars and crescent moons. I made 12 stars and 2 moons with a 2.75mm hook and yellow yarn. You might want to crochet more or fewer according to your item’s final size.
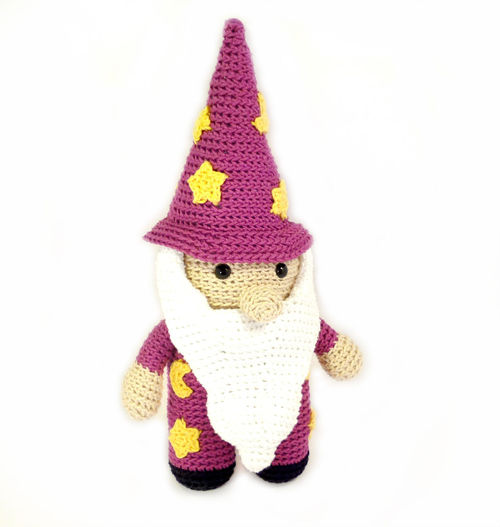
Step 2. Crochet all FreshStitches gnome parts, except for the hat. Attach tiny stars and moon onto the legs and body (mine took 7 stars and a moon). Assemble all crocheted parts together.

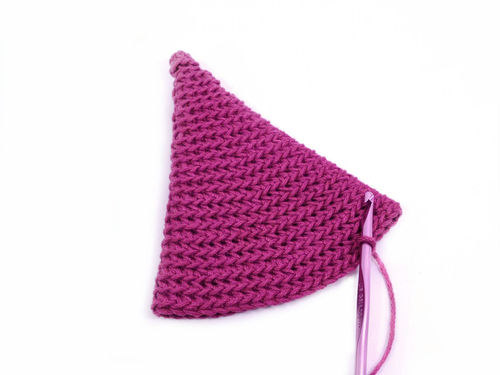
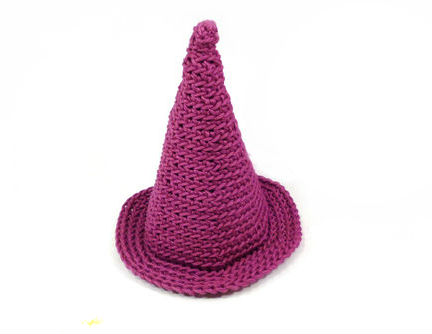
Step 3. Crochet the hat, according to the following instructions.
Wizard hat
Crochet hook: 4.00mm
Yarn: Mouzakis Butterfly Super 10, 100% cotton, in purple
You’ll need approximately as much yarn as it’s calculated for the gnome’s hat. Crochet through back loops, except for round 24. The final hat is conical and 11 cm in height.
Ch 2
Rnd 1. sc 6 in 2nd chain from hook (6 st)
Rnd 2-3. sc each st (6 st)
Rnd 4. sc twice in each st (12 st)
Rnd 5-6. sc each st (12 st)
Rnd 7. [sc twice, sc next st] * 6 times (18 st)
Rnd 8-9. sc each st (18 st)
Rnd 10. [sc twice, sc next 2 st] * 6 times (24 st)
Rnd 11-12. sc each st (24 st)
Rnd 13. [sc twice, sc next 3 st] * 6 times (30 st)
Rnd 14-15. sc each st (30 st)
Rnd 16. [sc twice, sc next 4 st] * 6 times (36 st)
Rnd 17-18. sc each st (36 st)
Rnd 19. [sc twice, sc next 5 st] * 6 times (42 st)
Rnd 20-21. sc each st (42 st)
Rnd 22. [sc twice, sc next 6 st] * 6 times (48 st)
Rnd 23. sc each st (48 st)
To make the brim, crochet the next round through the front loops
*Front loops* Rnd 24. sc each st (48 st)
Rnd 25. [sc twice, sc next 7 st] * 6 times (54 st)
Rnd 26. [sc twice, sc next 8 st] * 6 times (60 st)
Rnd 27. [sc twice, sc next 9 st] * 6 times (66 st)
Rnd 28. sc each st (66 st)
Fasten off with tail.
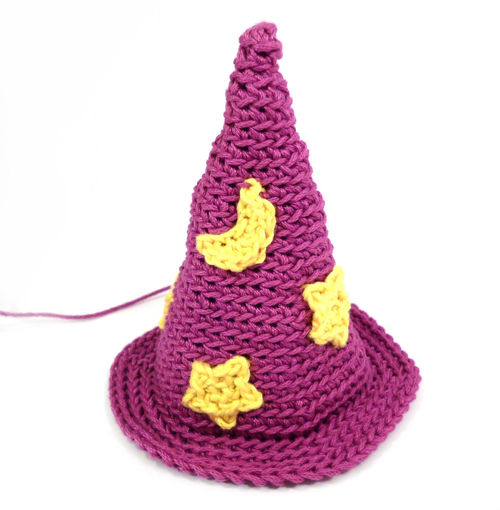
Now, you’ll use some stars and moons to decorate the hat!
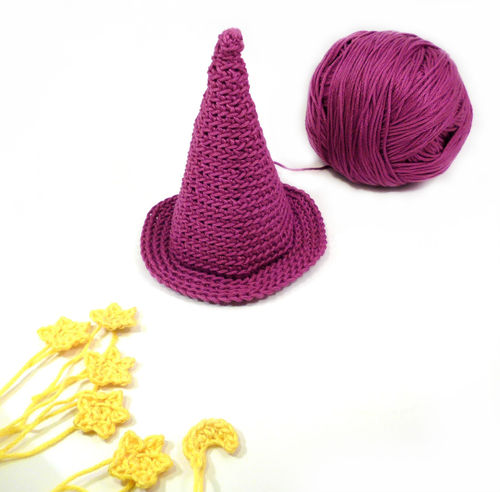
I used 5 stars and one tiny moon!
Step 4. Stuff slightly and attach the hat on the wizard’s head through round 24 of the hat.
And you’re done! Not that difficult, right?
Suggestions
- It’s more wizard-y using the same colour for the cloak and hat! I chose purple, which is a rather conventional choice for a wizard! Pick up your favourite colour, since magic comes in every possible colour!
- Likewise, the stars and moons are expected to be yellow or white, but expectations are exceeded in the magical world!
- I wanted the hat overall to look a little frail and worn-off (my wizard is doesn’t care for brand new clothes!). If, however, you want a more sturdy-looking hat, you can (a) make the brim double thick and (b) use a conical carton inside. Both these techniques are shown in the Freshstitches Leprechaun pattern that was released recently (see Hat).
Enjoy!
This might just convince me to buy the Gnome pattern…
I love this wizard!
Stacey, thank you so much for this post! I hope we get to see some wizards!!
I love the wizard! Thanks for sharing!
I love it! Thank you Stacy! This is a great idea.