


 I designed a cute little mouse pattern, and I thought I’d share a bit of the design process with you.
The Head
I knew that I wanted to have his head be part of the body structure, just folded over. The original inspiration was this owl.

I designed it especially for quick and easy sewing (I need to make them with twenty kids at a Harry Potter Camp I was teaching – you can see all the details here).
When I was playing with that design I noticed that sometimes the bit folded over for the top of his head looked kind of mouse-like. If I stuffed it before folding it over it just might work – and I filed that thought away for later.
Well – now was later!
The Bottom
I also knew I wanted his body to be fat – so that his feet would disappear when he sat up on his back legs. (He actually has no feet – but the shape of his body makes them look like they’re just hidden.)
Usually if I want a fat bottom I design a flat pattern piece for the base and set it in, but that can be fussy sewing on a softie this small – and I avoid fussy sewing whenever possible. 🙂
I decided to use a technique that I use on all my tote bags. You’ll see it too in pillow corners – to give the pillow more fatness. It’s a way of boxing in the corners to add depth. I’ve used it before on these monsters and it was really easy to sew, so I decided to try it here. The final result looks like this.

He’s not dead – he’s just lying on his back so we can see his bottom. 🙂
See how the “corners” of the body are boxed in? This is very easy to sew.
The Ugly Part of the Design Process
So – that was two design decisions made. Time to start some prototypes.
I sew these out of a yucky white sheet with whatever thread I happen to have in my sewing machine. They’re not pretty, but they let me work out the details of the pattern pieces.

Sometimes the very first prototype is just right, but usually I have to try at least a few variations before things get good. I lost track of the number of prototypes I tried for this “simple” mouse – but these were the three still sitting on my table when I was done. Sometimes I take out the stuffing and resew a couple of seams – like to take in the sides a bit – instead of starting a whole new prototype.
The proportions on the first one were pretty good. I would have done a second round to make his body a little wider – but overall he was just too big.
The second one was better size-wise. But when I stuffed him properly he was just too tall, and when I took out some of the stuffing to make him shorter, he just looked hunchbacked.
The third one was just about right.
Time to add some details – ears, paws and a tail. I usually leave them off in the first round so I can just focus on the basic body shape.
The Details
When I start to add all the other bits and pieces, I usually cut them out of paper first and pin them to the softie. That’s a quick and easy way to check proportion and placement. Then I use those as pattern pieces and make up another prototype all from fabric.
It usually takes a bit of tweaking to get things just right – the size of the ears, the length of the paws, the thickness of the tail. In this case my original tail was too skinny to turn right side out. I had to redesign it so my favorite turning tubes would fit inside. 🙂
 I’m picky about eyes – I’ve written about my obsession with eye placement here and here. The main thing to remember is that the shape of the face can change a lot after stuffing – so I always just draw the eyes on a stuffed prototype. Usually I’ll also poke holes and try out a few different eye sizes. I pick the final prototype apart and trace that eye placement onto the final pattern pieces.
Cuteness!
The final step, of course, is to make him out of cute fabric. 🙂
I knew that I wanted him to be made of quilting cotton, because I wanted to use colorful, patterned fabric.
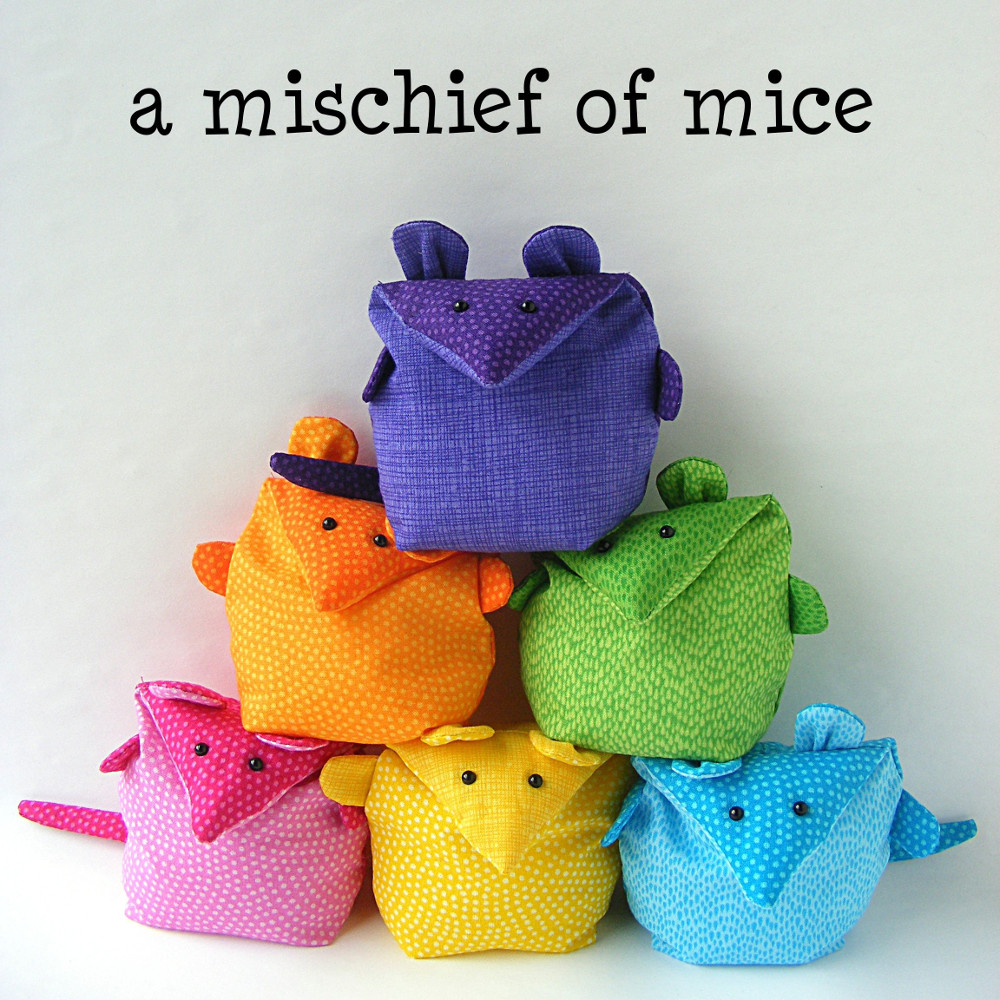
I couldn’t choose a color, and I couldn’t stop at one. I made a whole mischief of mice in a rainbow of colors – and I love them!
Finished!
So now you’ve seen the ugliness behind the scenes in the design process. 🙂
You can get the finished pattern here.
Happy sewing!
Loved seeing your behind-the-scenes process! You are not only so talented design-wise and sewing-wise, but your tutorials, explanations and videos are the most clear and helpful I’ve ever seen. Thanks for all you do!
Thanks so much! 🙂