


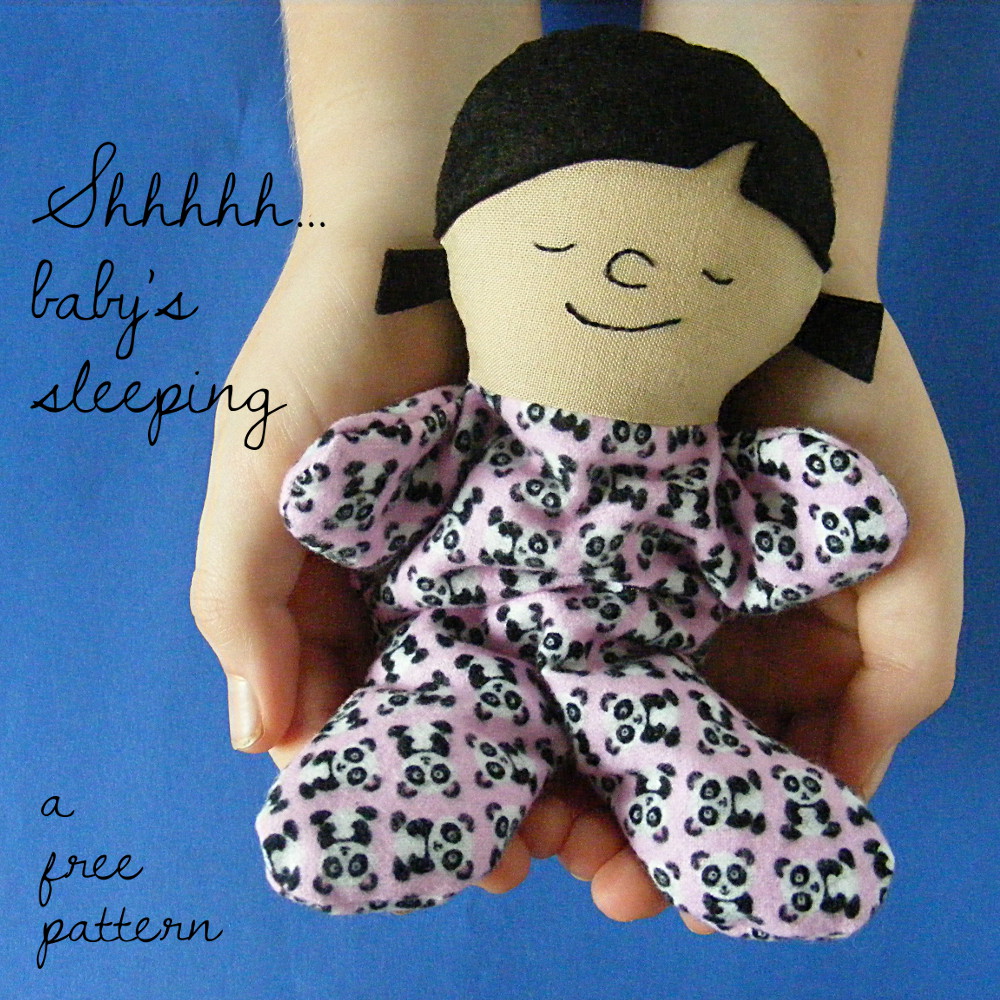
Here’s a free doll pattern to make a sweet Itty Bitty Sleepy Baby – a cuddly beanbag doll.
She’s a sleepy little girl who wants to curl up and take a nap in a special someone’s pocket. :)
She’s super easy to make - great for beginners. And she’s just the right size to be a mini doll for the dolls in The Dress Up Bunch. Fun!
Want to make her?
Here’s how!
Throughout the pattern, the links go to online video tutorials demonstrating the techniques used, or to sources for the materials. All seams are 1/4 inch seam allowance.
Happy sewing!
Materials
• scrap of people colored fabric
• scrap of wool felt for the hair (I used black)
• less than a fat quarter of pajama fabric
• embroidery thread for the face (I used Sulky 12wt. cotton thread in black)
• plastic pellets (I like PolyPellets Weighted Stuffing Beads)
• polyfill stuffing (I like Soft Touch Polyfil Supreme Fiberfill)
Step 1
Download the free doll pattern here. Print it at 100% size.
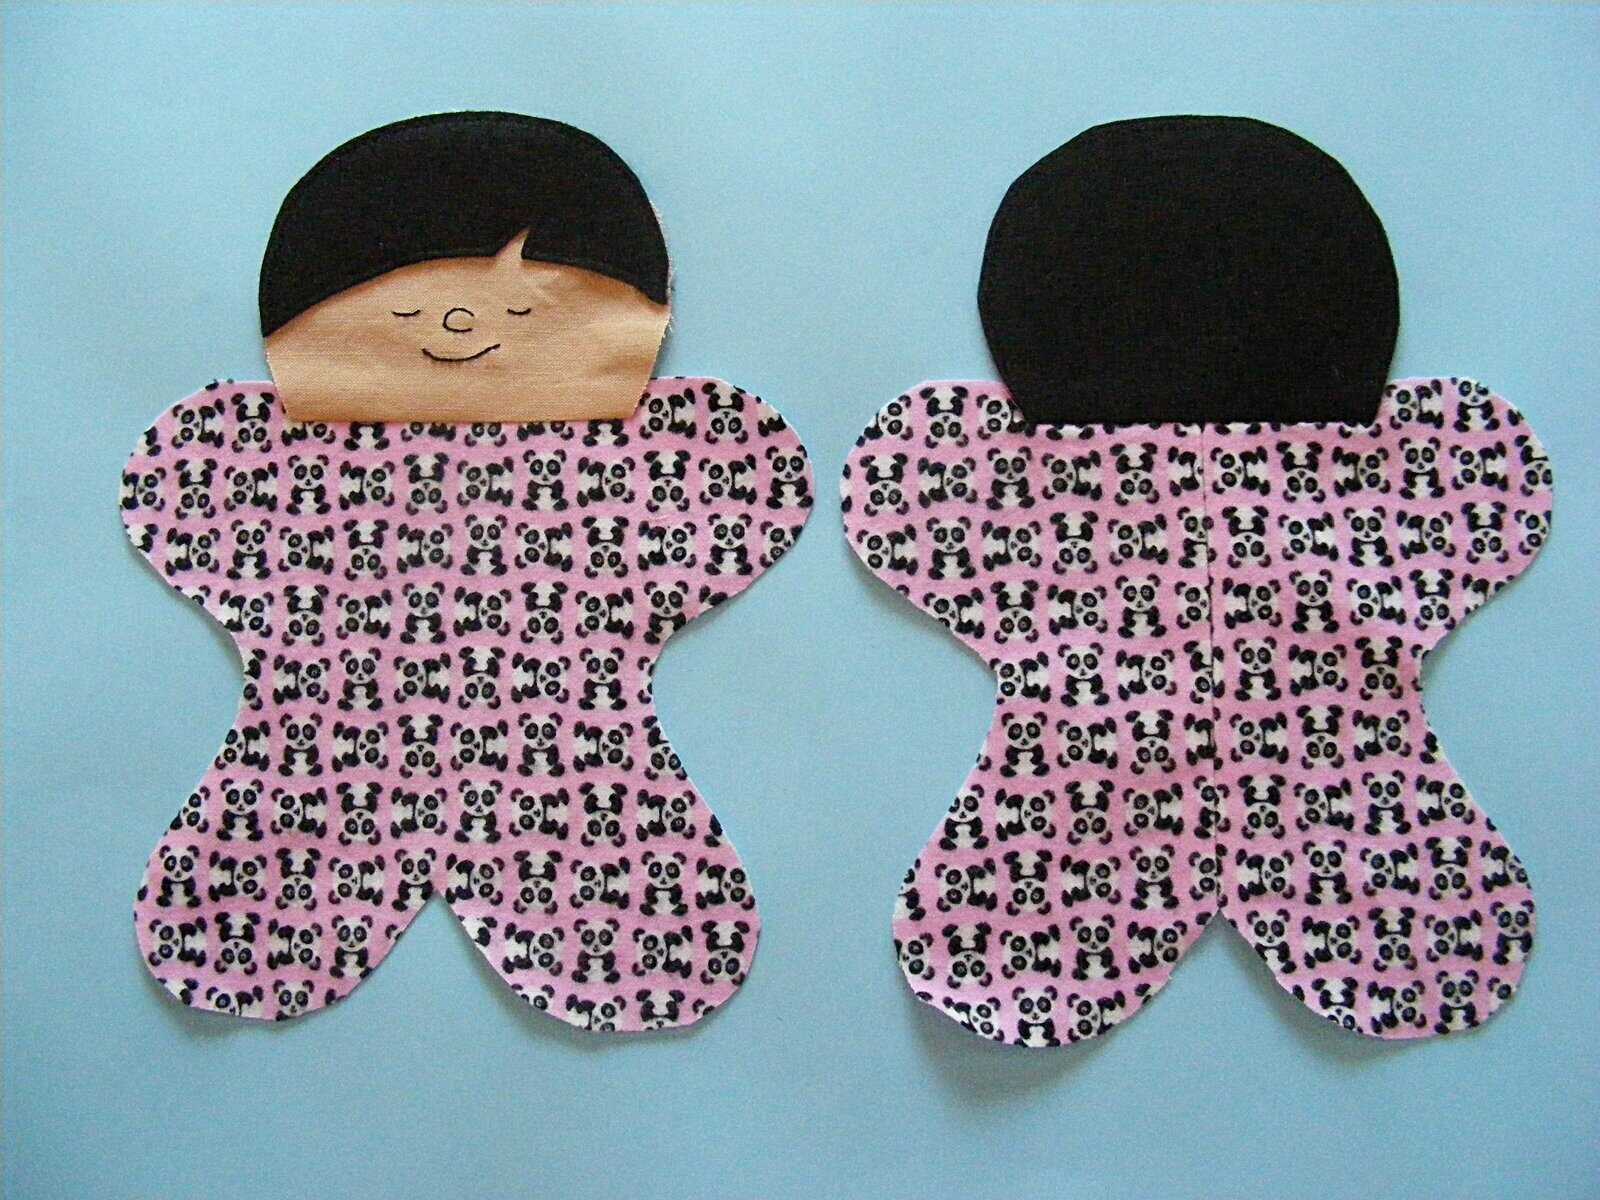
Cut out all materials as directed on the pattern pieces. You should have:
- 1 body front piece
- 2 body back pieces
- 1 head cut from people-colored fabric
- 1 head cut from felt
- 1 front hair cut from felt
- 2 pigtails cut from felt
Step 2
Trace the face onto the people-colored head piece.

Embroider the eyes, nose and mouth using backstitch and a single strand of Sulky 12 wt. embroidery thread (the equivalent of two strands of regular embroidery thread).

Step 3
Sew the hair to the face piece.
Stitch very close to the edge and use matching thread.
Step 4
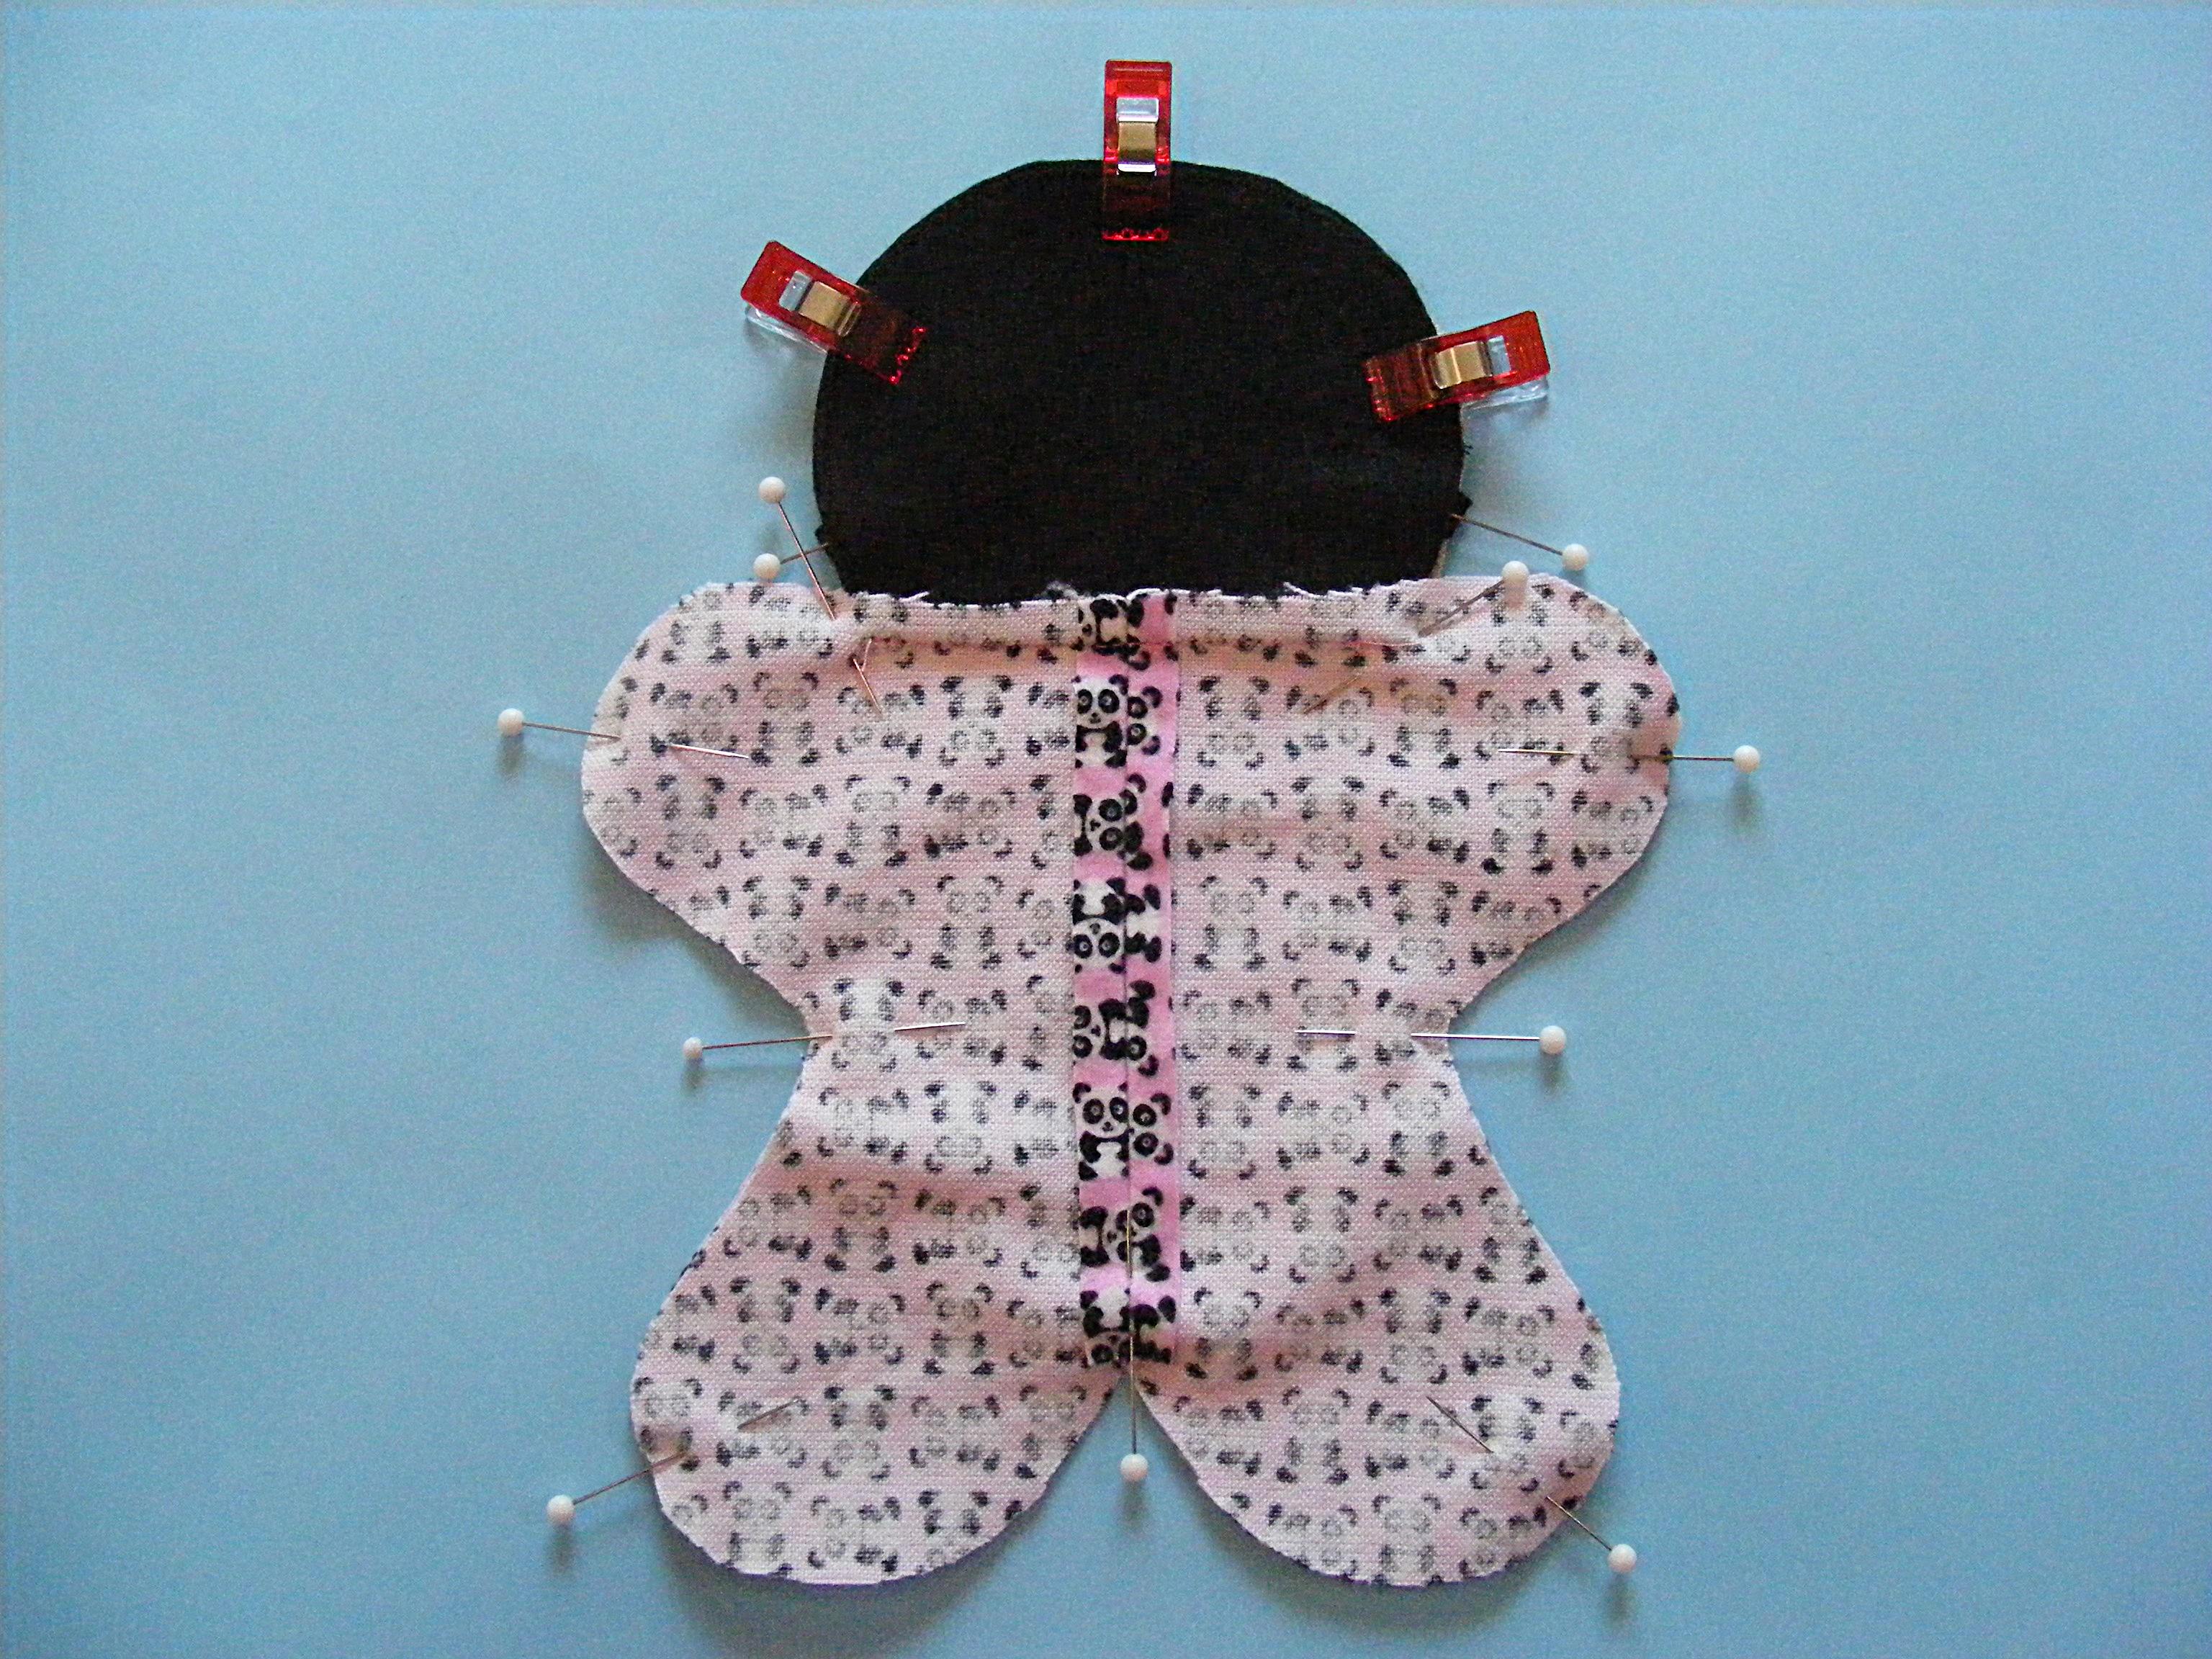
Sew the two body back pieces together along the center back line, making sure to leave a few inches open for stuffing.
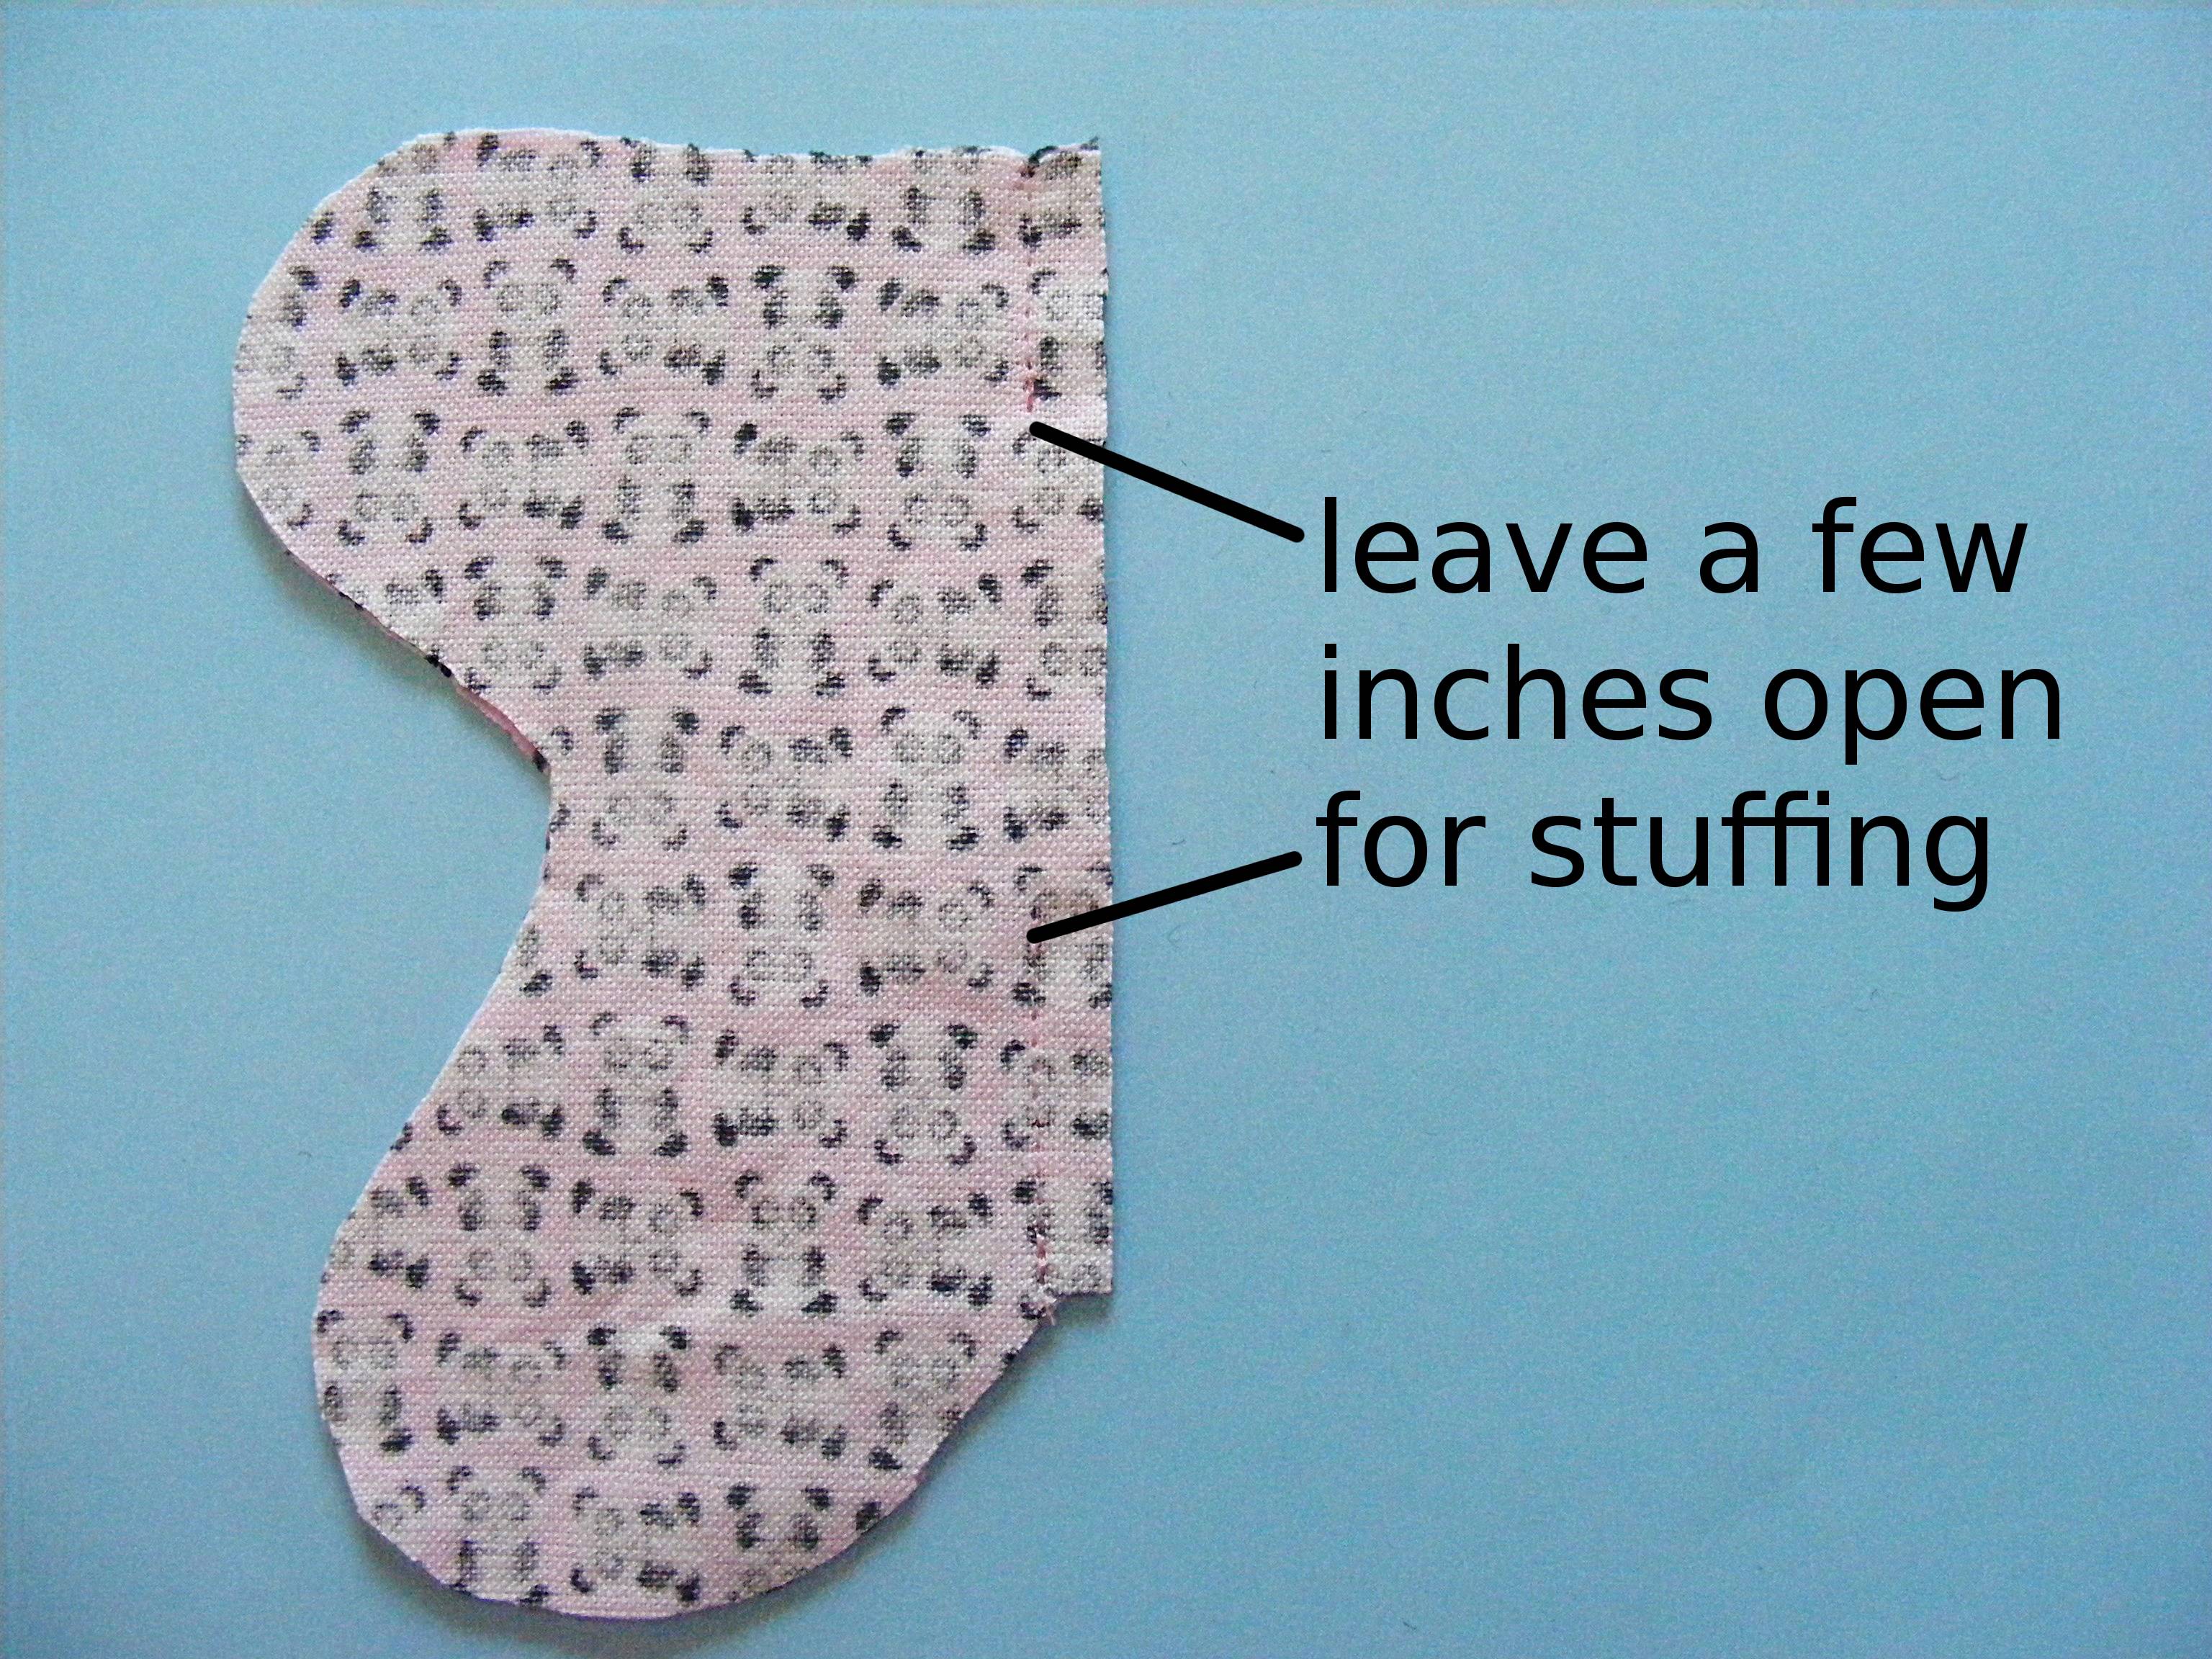
Don’t forget to backstitch at the beginning and end of your stuffing opening.
Step 5
Open up the center back pieces and press the seam nice and flat, including the edges of the stuffing opening. That will give you a nice clean edge to sew when you’re closing up that opening by hand.
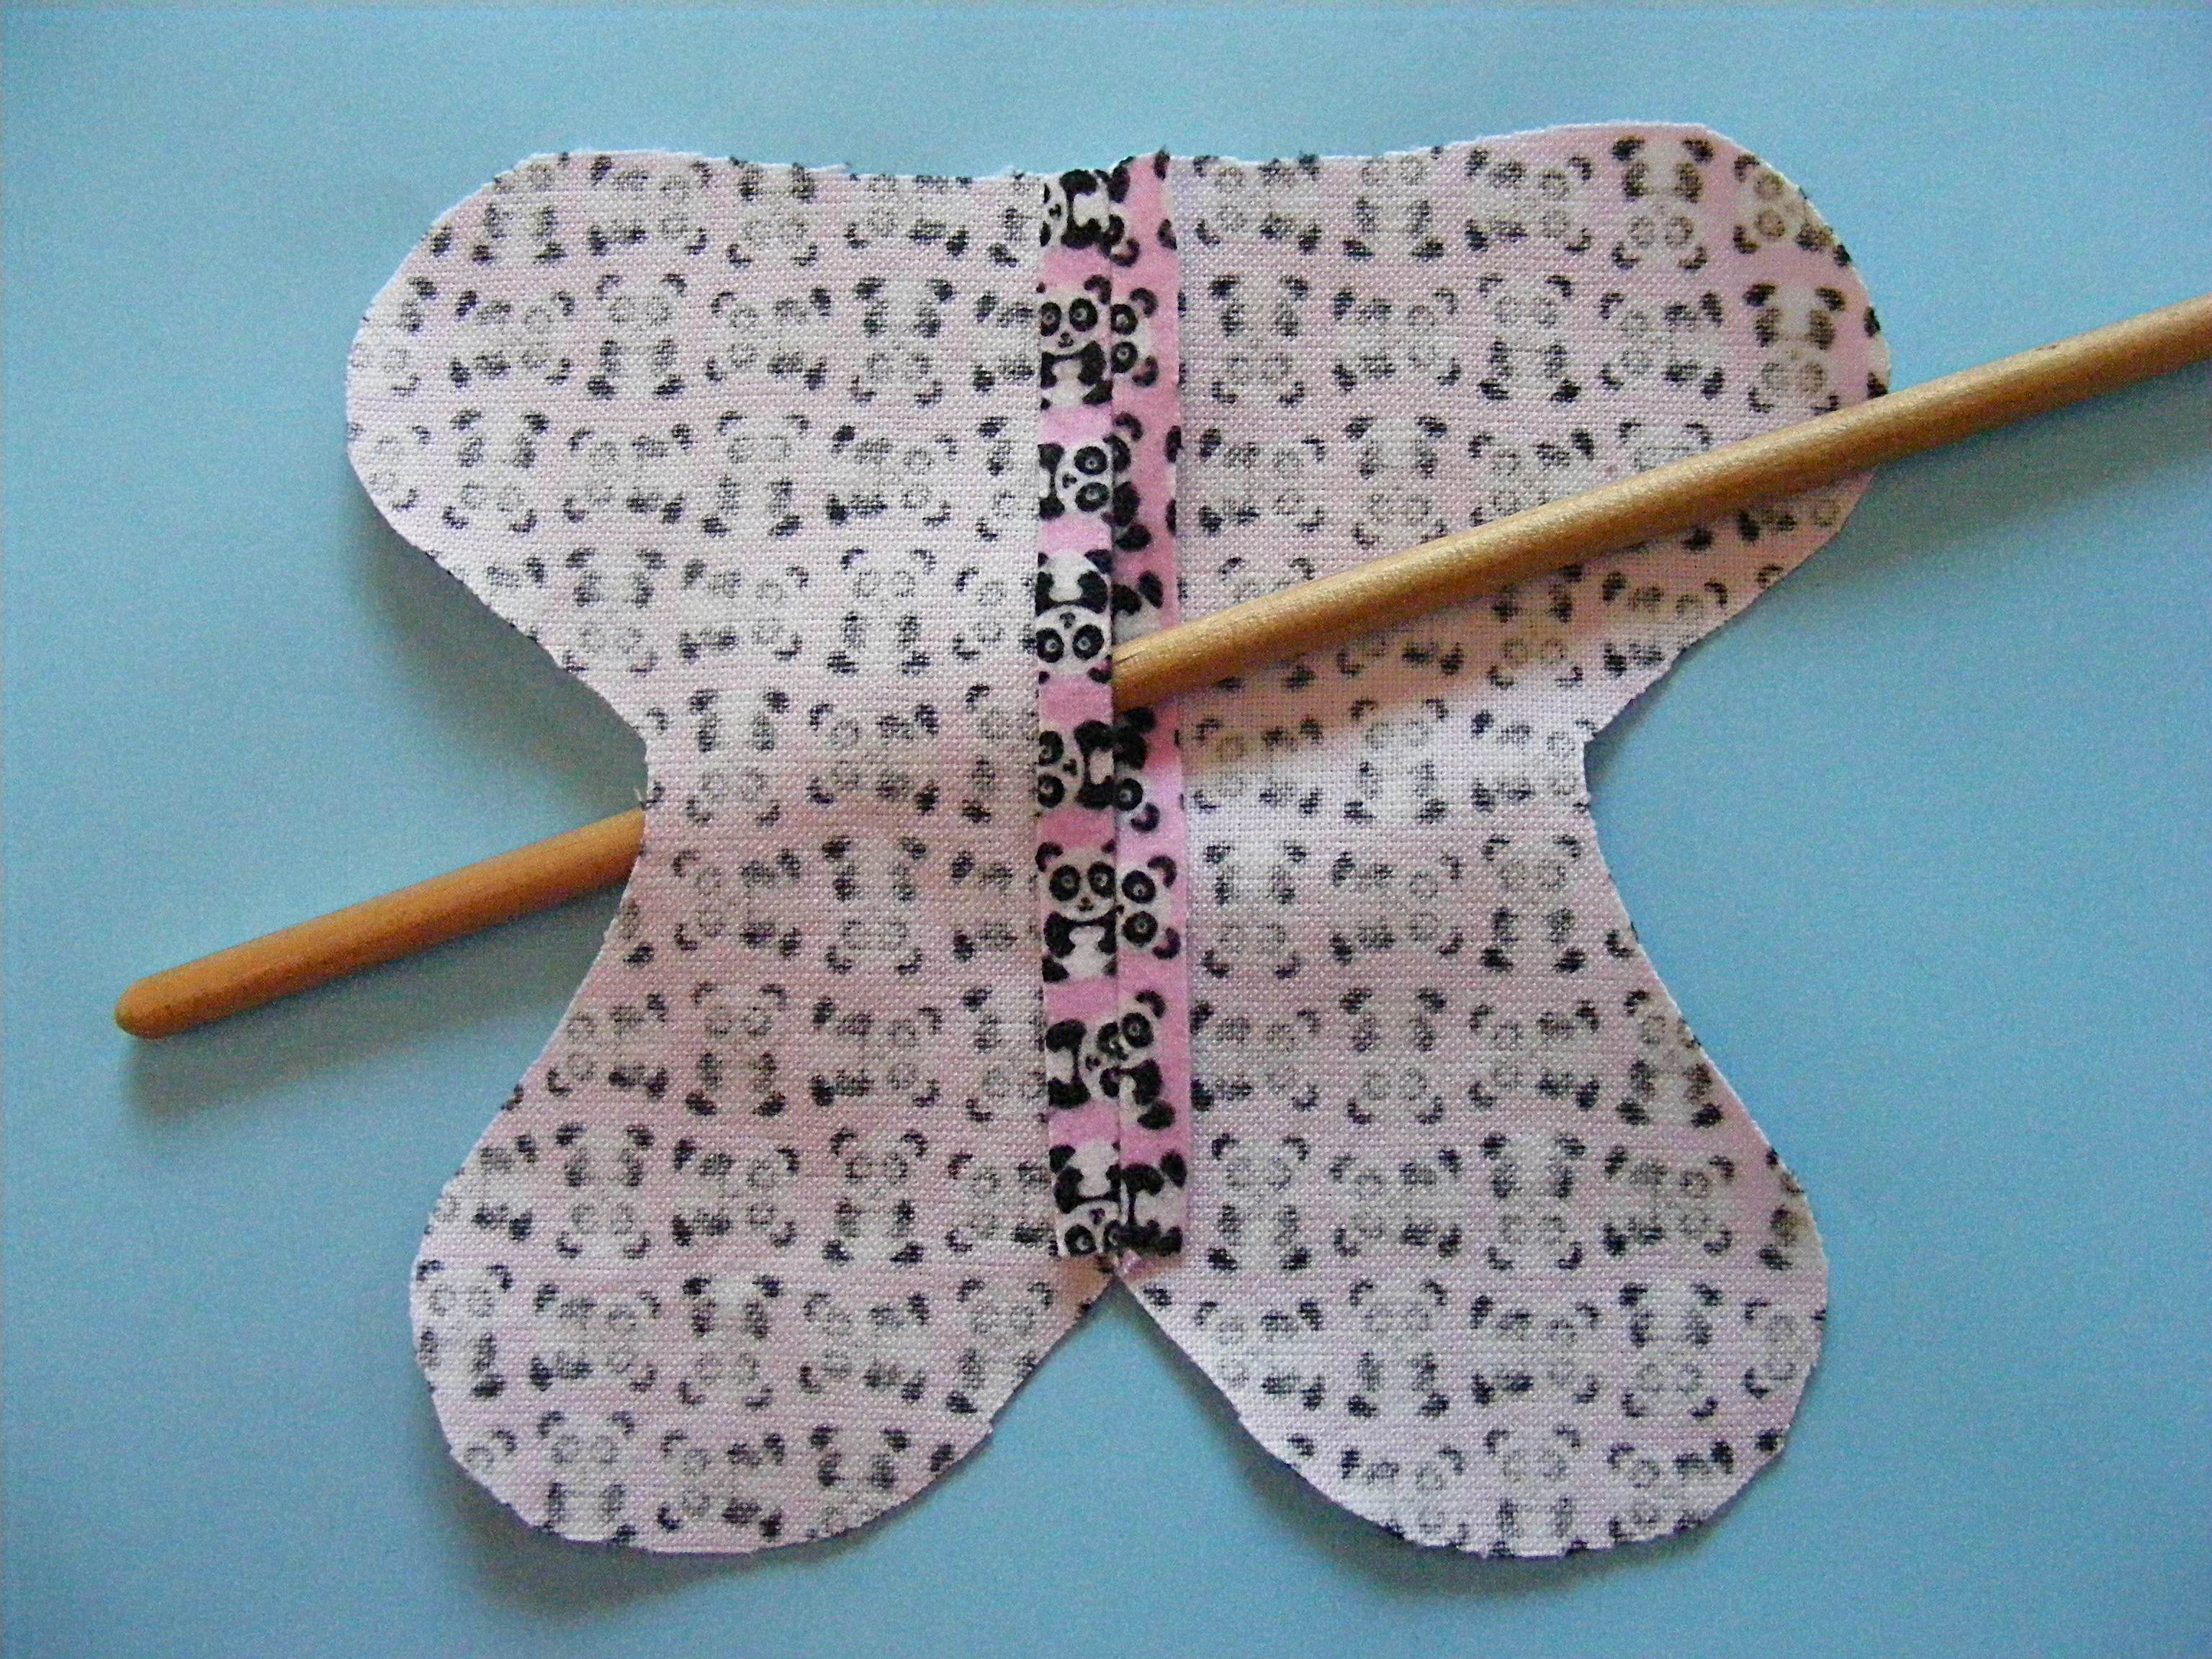
The stick shows where the stuffing opening is.
Step 6
Fold the bottom of the head and the top of the body in half to find the centers. Line those centers up so the head is exactly centered on the body.
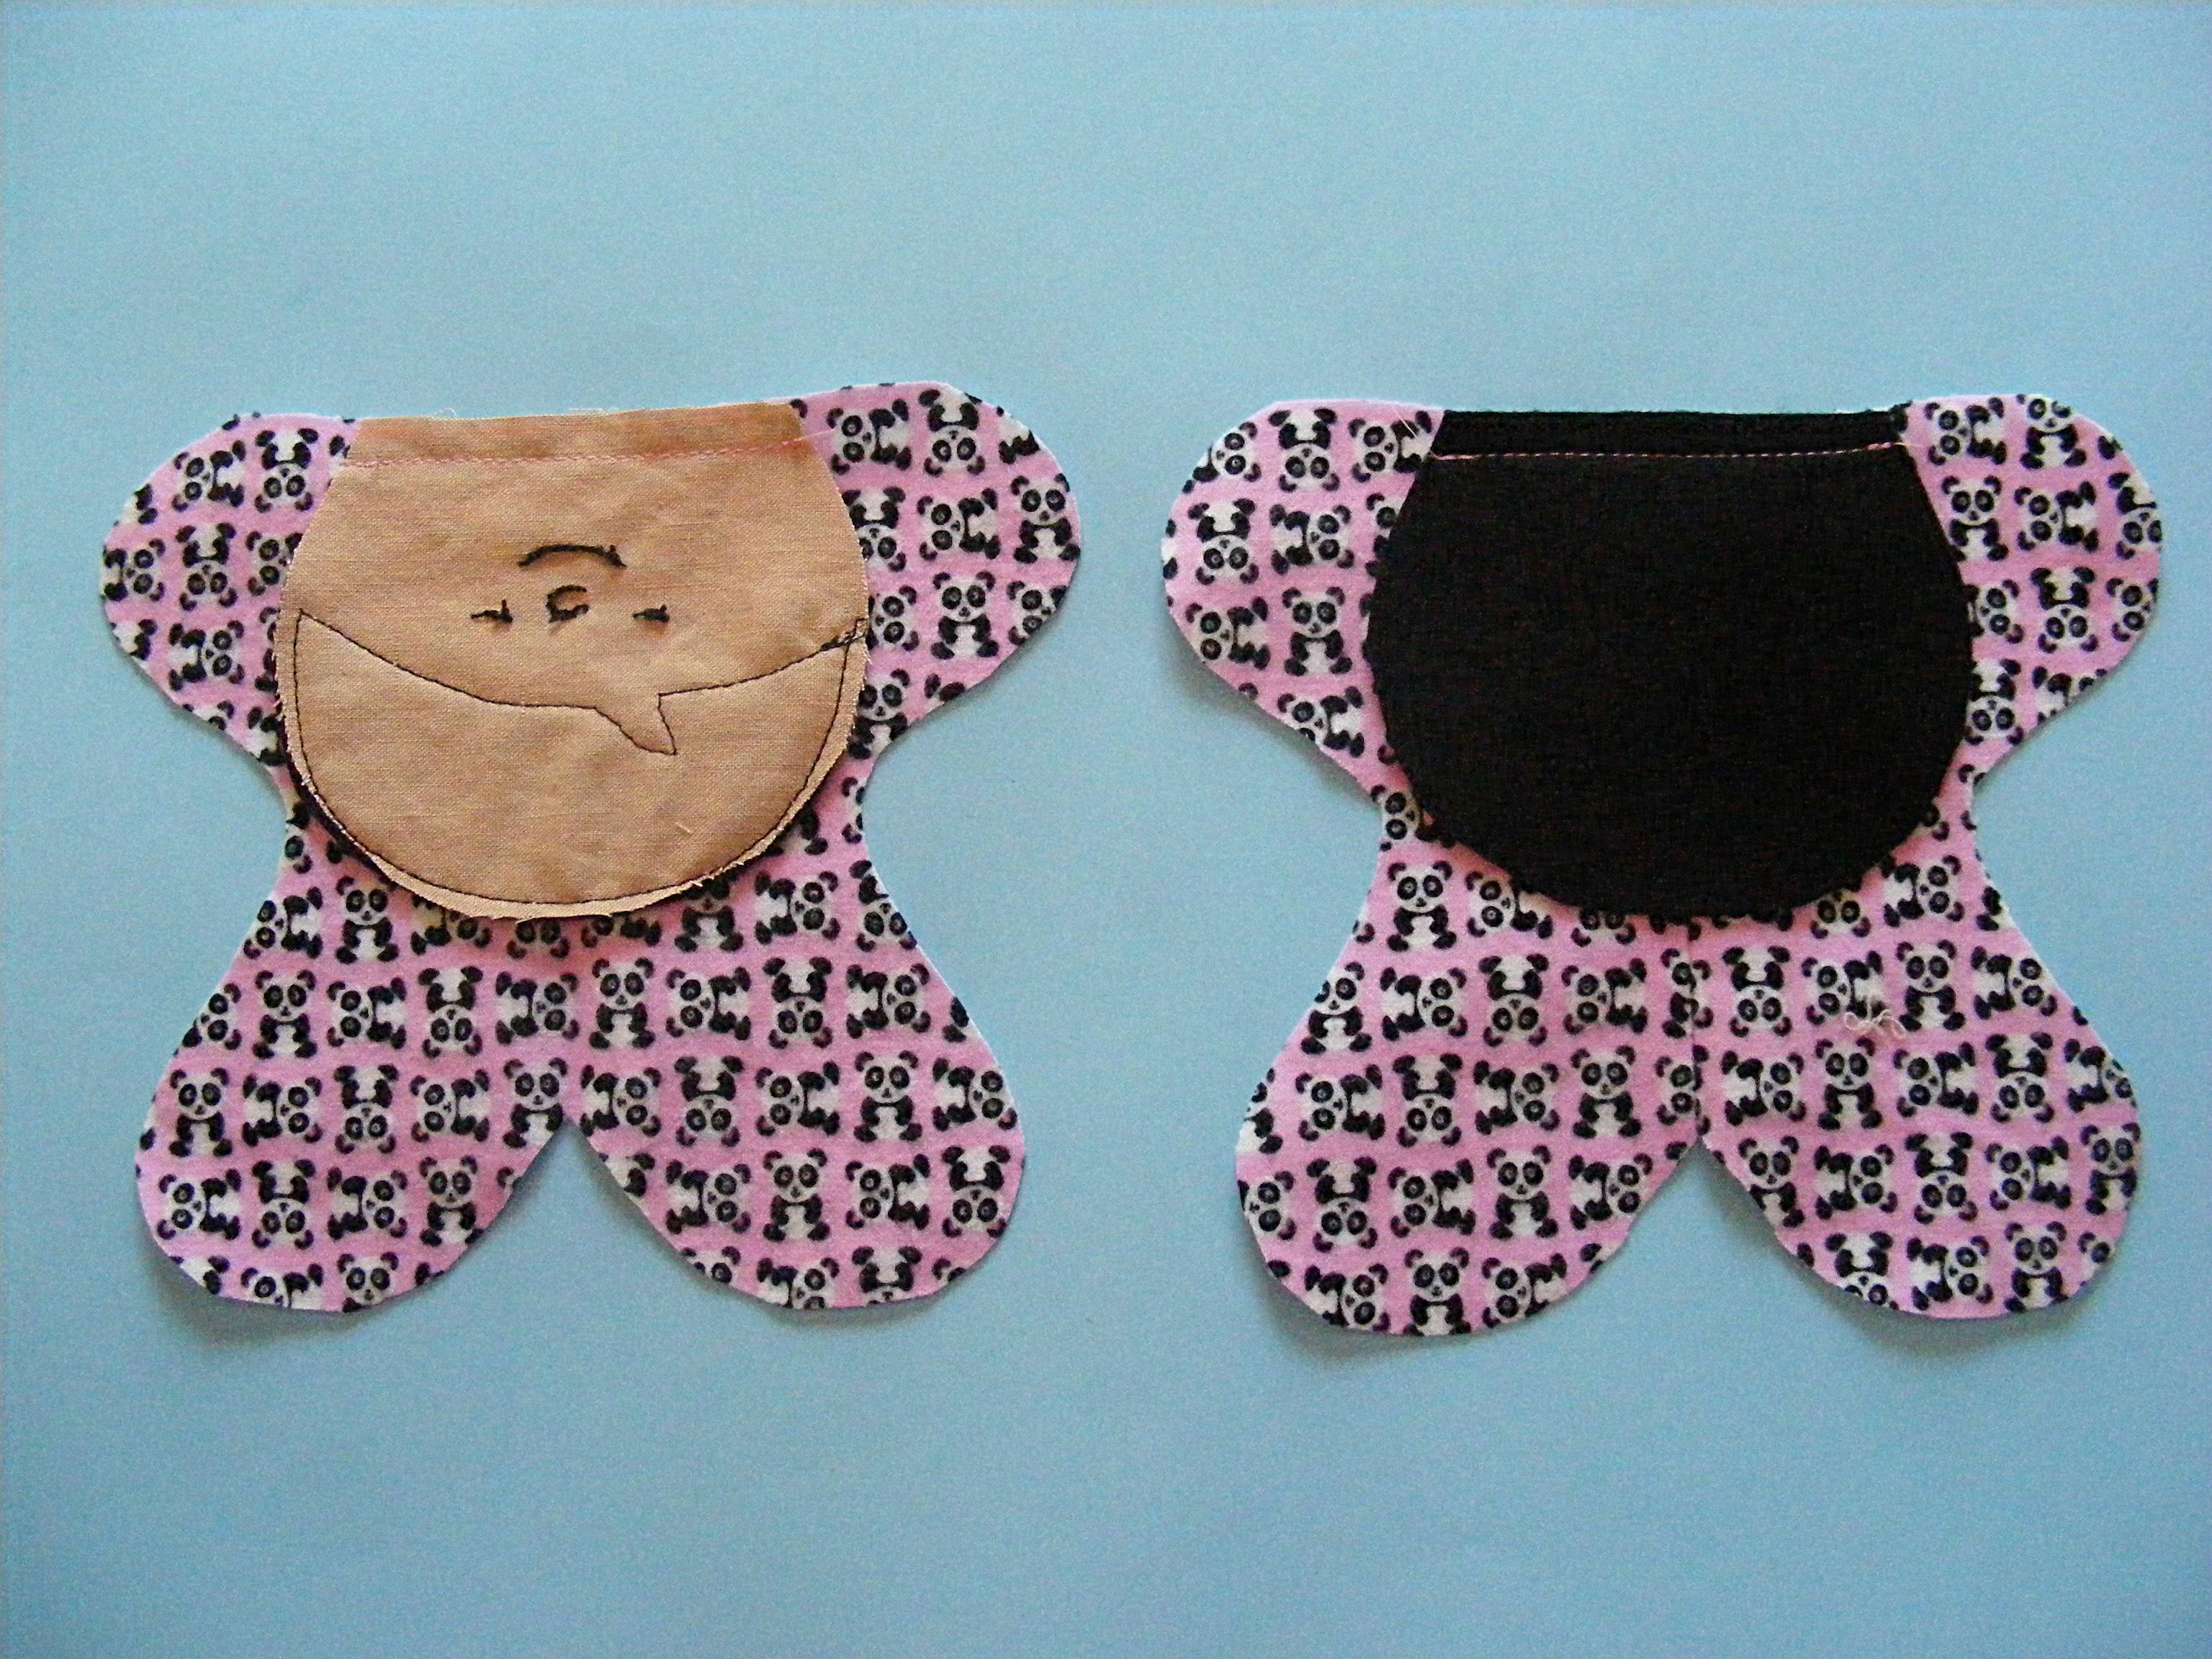
Sew the face to the body front and the felt head piece to the body back.
Step 7
Fold the heads up and press.
The seam allowance should be pressed toward the head so the body remains flat.
Step 8
Lay the body front face up on a flat surface.
Lay the pigtails over the face as shown in the photo. Don’t worry about making them perfectly even - crooked is cute. :-)

Pin or clip in place.
Step 9
Place the body back face down over the front, sandwiching the pigtails between the layers. Pin or clip the layers together carefully.
I match the neck seams first, then the center bottoms, then the dips at the sides and then the tips of the arms and legs and the head.
Step 10
Sew all the way around the body using 1/4 inch seam allowance. Make sure you’re catching the pigtails.
I changed the thread color when I got to the hair. I didn’t want specks of pink colored thread to show at the seam.
Clip into the seam allowance at all the concave curves and points as shown in the photo.

Step 11
Turn the body right side out.
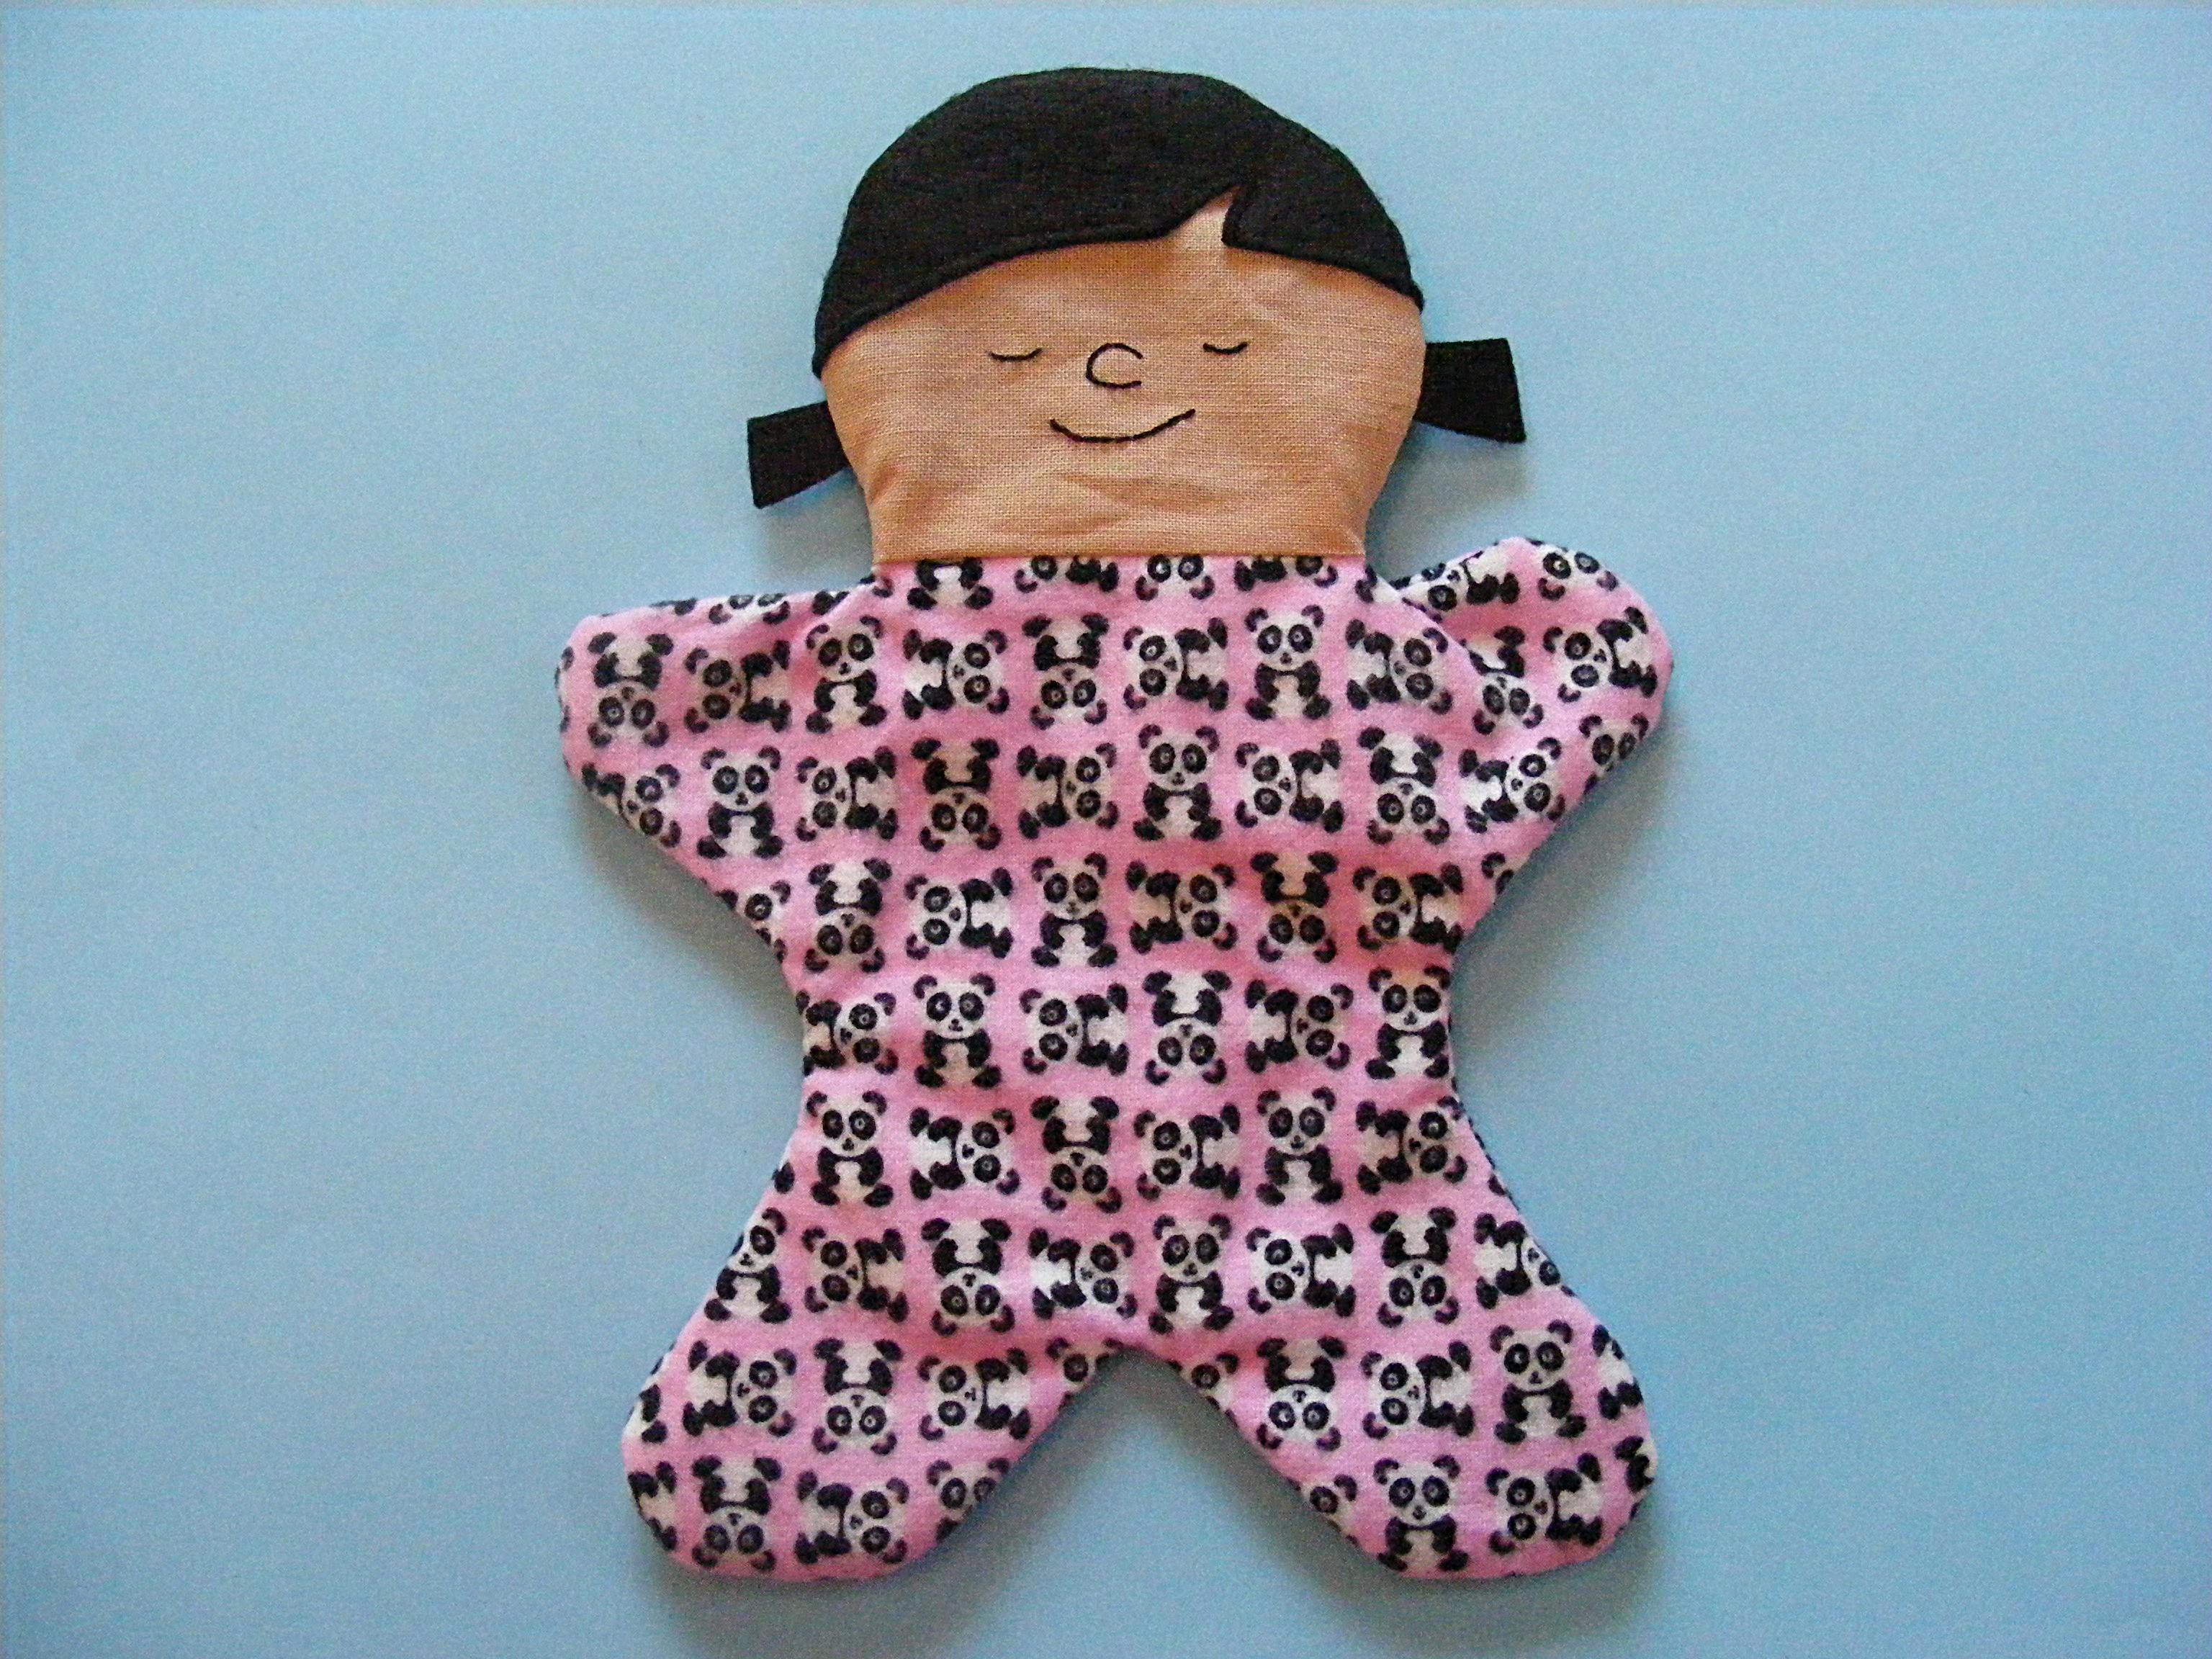
Awwww! Isn’t she a cutie? Take a moment to admire your work so far. She’s almost done!
Step 12
Stuff the head pretty firmly with fiberfill.
Pour 1/2 cup of plastic pellets into the body and sew up the opening in the back using ladder stitch.
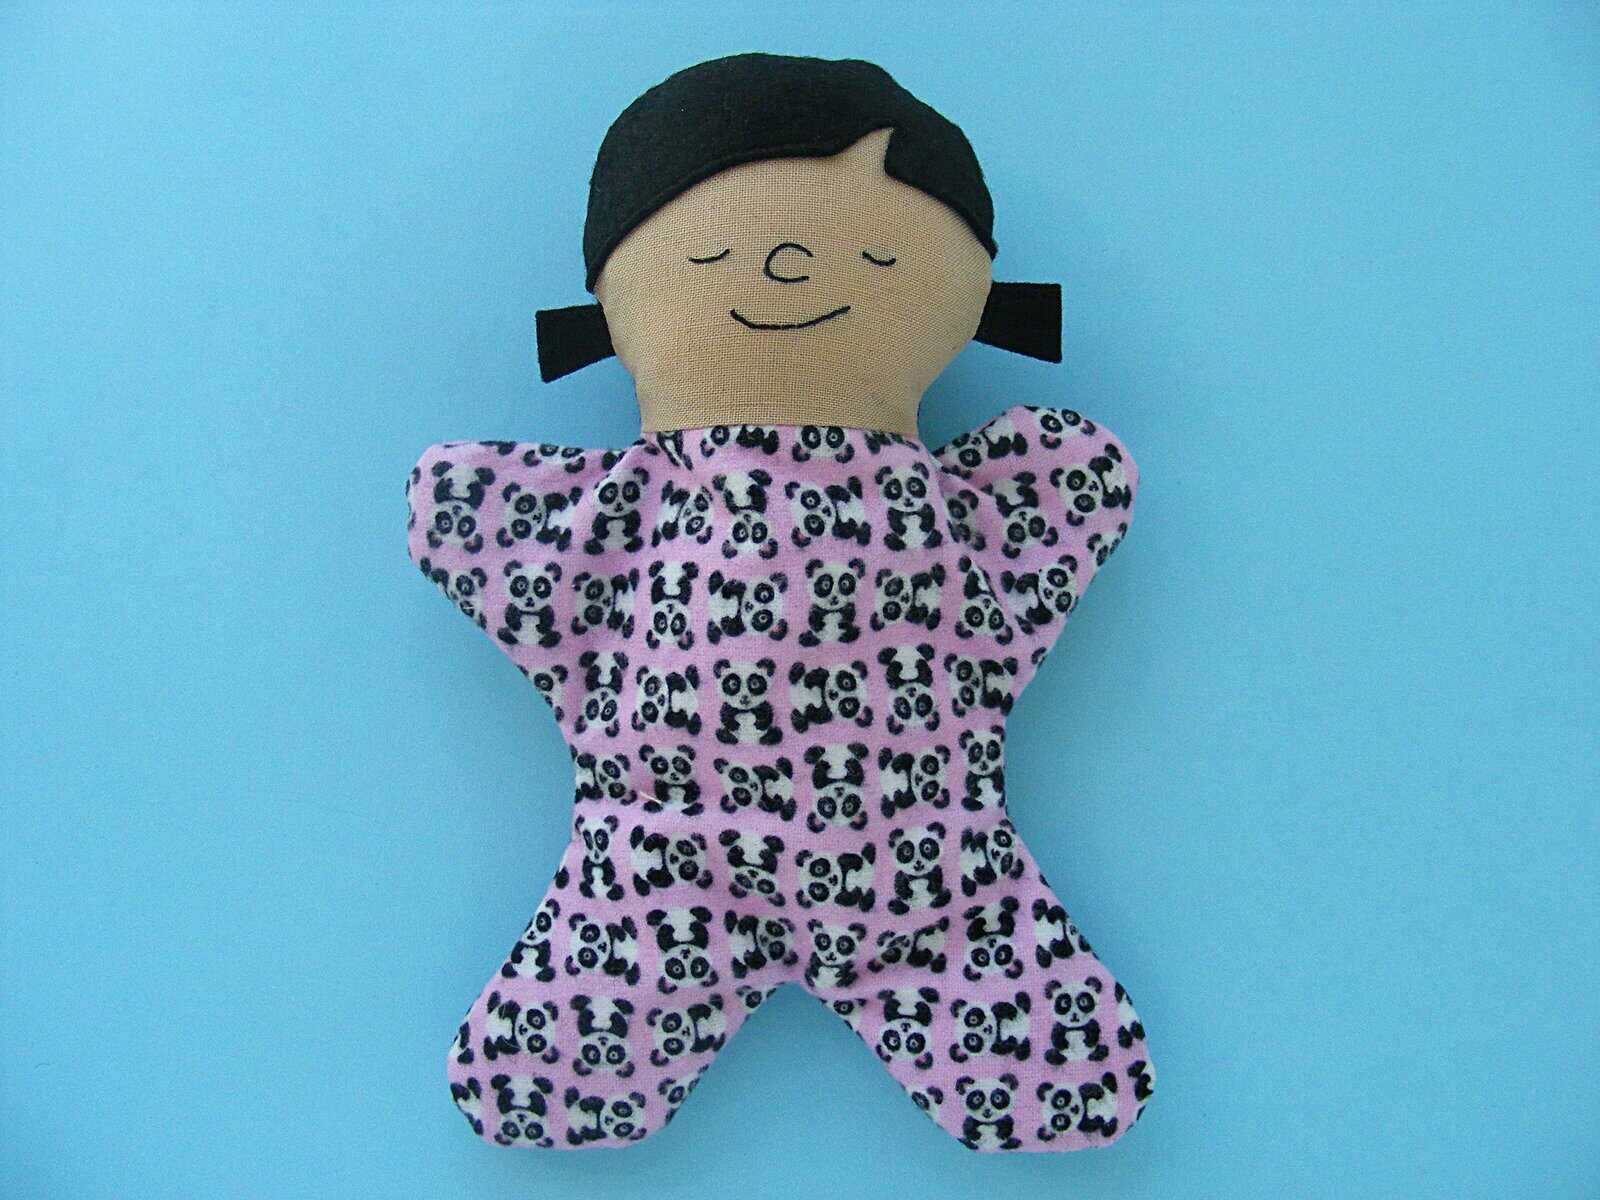
Finished!
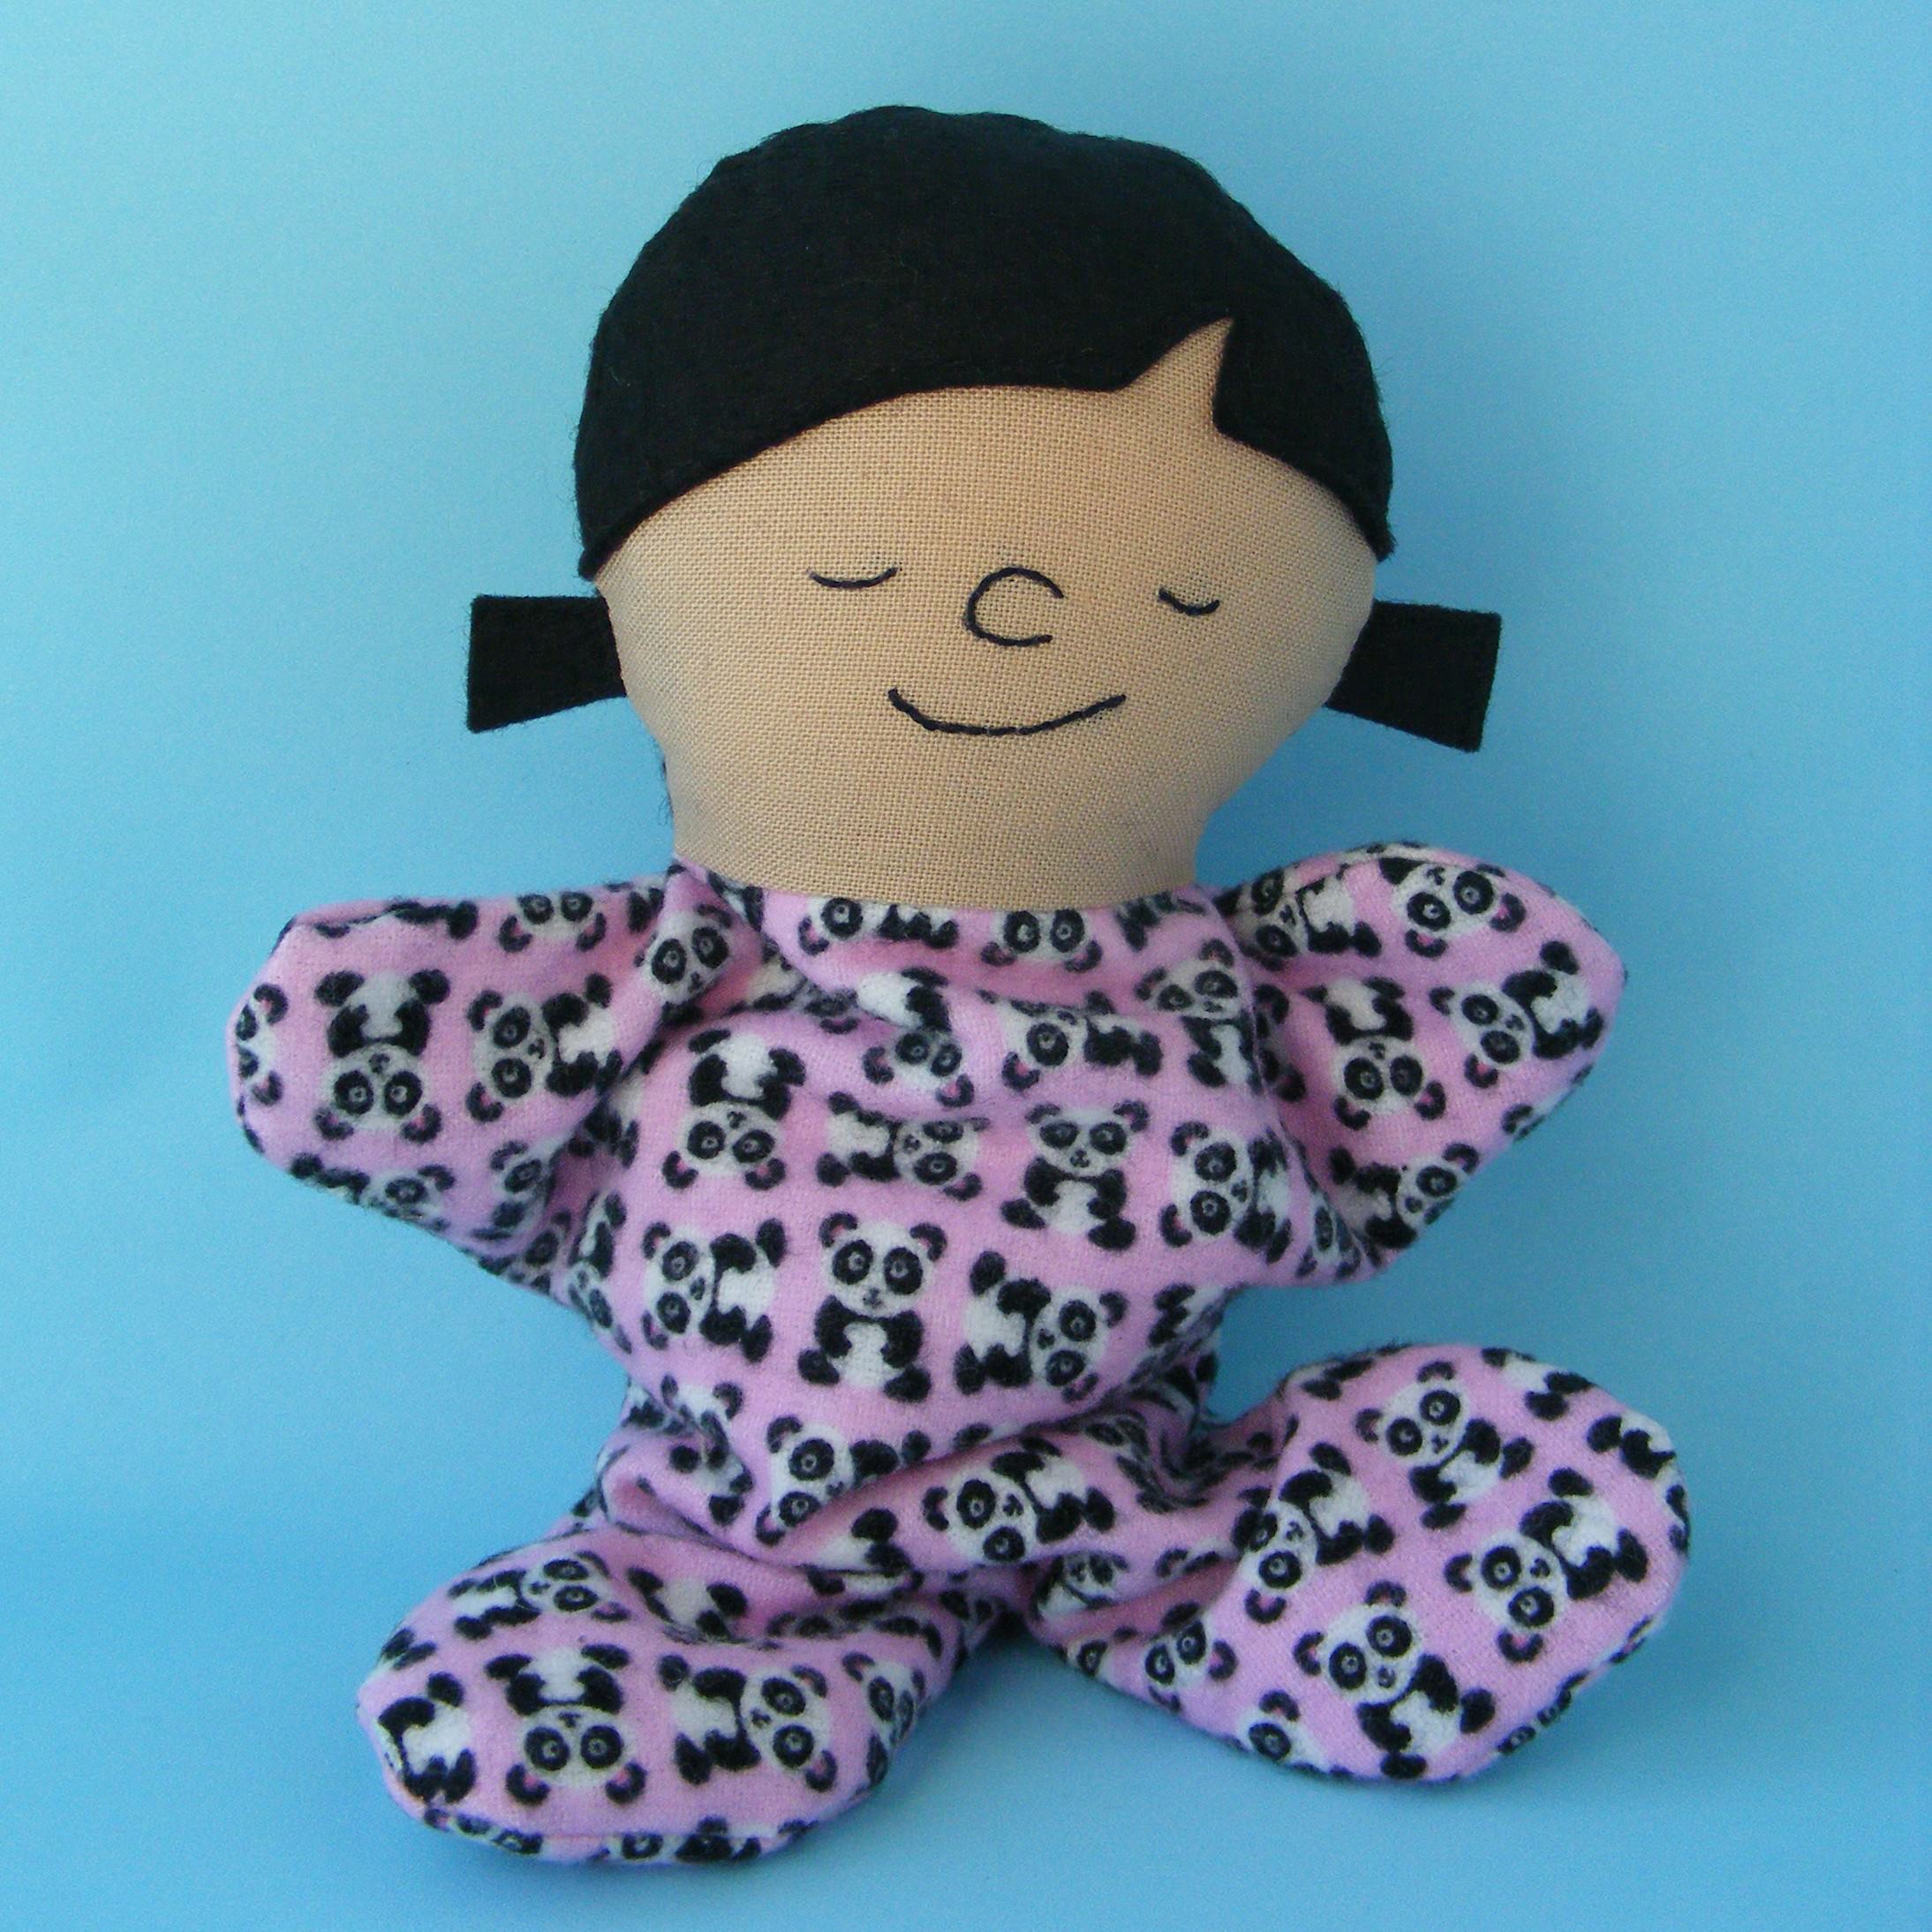
Give her a big hug and then slip her into a special someone’s pocket. :-)
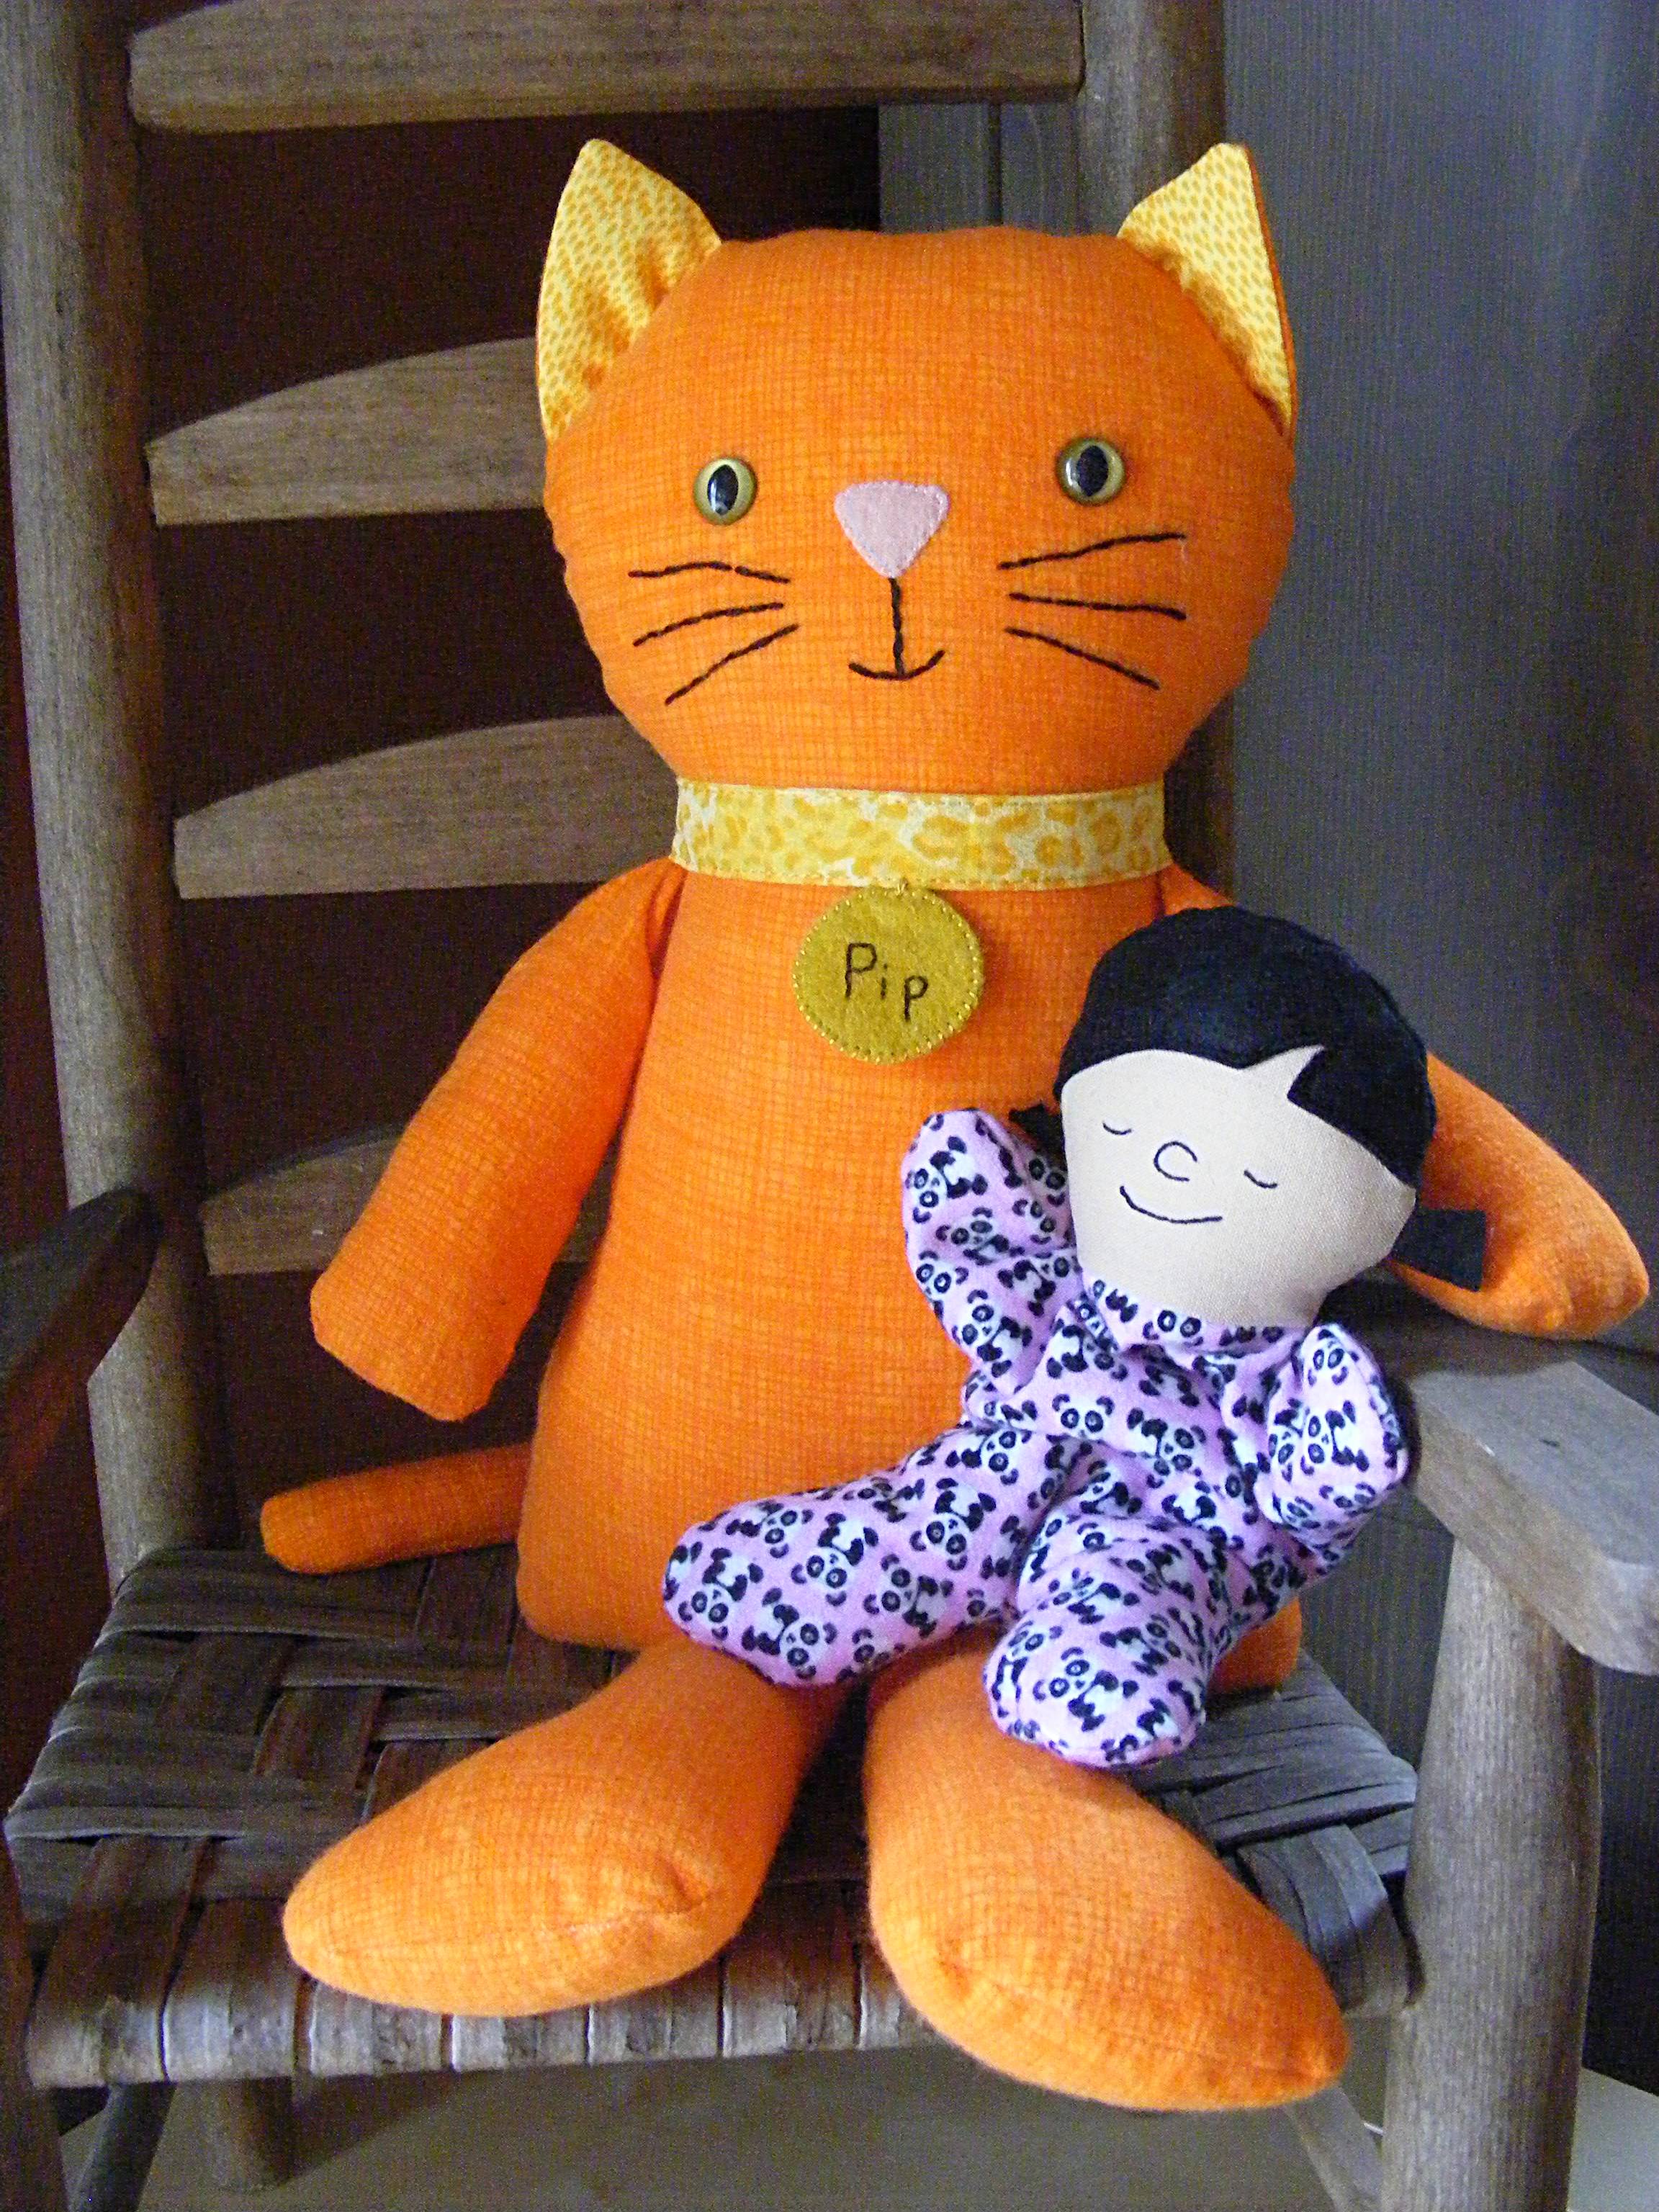
I designed her to be just the right size to work as a sweet baby doll for everyone in The Dress Up Bunch. Because dolls need dolls to play with, of course. :-)
If you like this, there are two more similar free doll patterns you should take a look at – the Itty Bitty Bunny and the Itty Bitty Pocket Pirate.
Like all Shiny Happy World designs – you’re welcome to sell items you make with my patterns, but please don’t sell or distribute the patterns themselves. 🙂
If you like this free doll pattern, sign up for the Shiny Happy News! Subscribers get a weekly newsletter with updates, special offers and links to happy things. Sign up here.
Have a great weekend, everyone!

The Dress Up Bunch is a collection of cute and cuddly rag dolls. Get patterns for the dolls, plus all their fun outfits and accessories!
Pingback: 21 Most Unusual Stocking Stuffers You Never Knew Existed | Dodo Burd
Thanks for this cute pattern – have just the little girl to make one for
Have fun with it! 🙂
Pingback: 101 Homemade Holiday Gifts | HelloNatural.co
I just found your blog today, such cute stuff and very helpful tutorials! I am not new to sewing, but haven’t done for a while so feel like a newbie! I can’t wait to try some of your patterns!
Welcome! 🙂
Pingback: 15 Cute and cuddly DIY Baby Toys - Little Red WindowLittle Red Window
Pingback: Itty Bitty Baby – Softie heaven
Pingback: Itty Bitty Baby – Softie heaven
Thank you for the free pattern, Wendi!!
I love this idea and can’t wait to make one! Do you have any tips for altering the hair to make a boy? Would love to make one of each!
You could just leave off the pigtails to make a boy. Or leave off the hair altogether!
Pingback: Best Presents Guide
Pingback: Free Rag Doll Patterns To Sew Today ⋆ Hello Sewing
Pingback: 9 Free Rag Doll Patterns For Sewing Experts - Craftsy