Handmade Christmas decorations are so much fun!
I’ve got a free Stockings pattern and a free Ornaments pattern.
They’re fun on their own, but look what you can do when you mix them together!
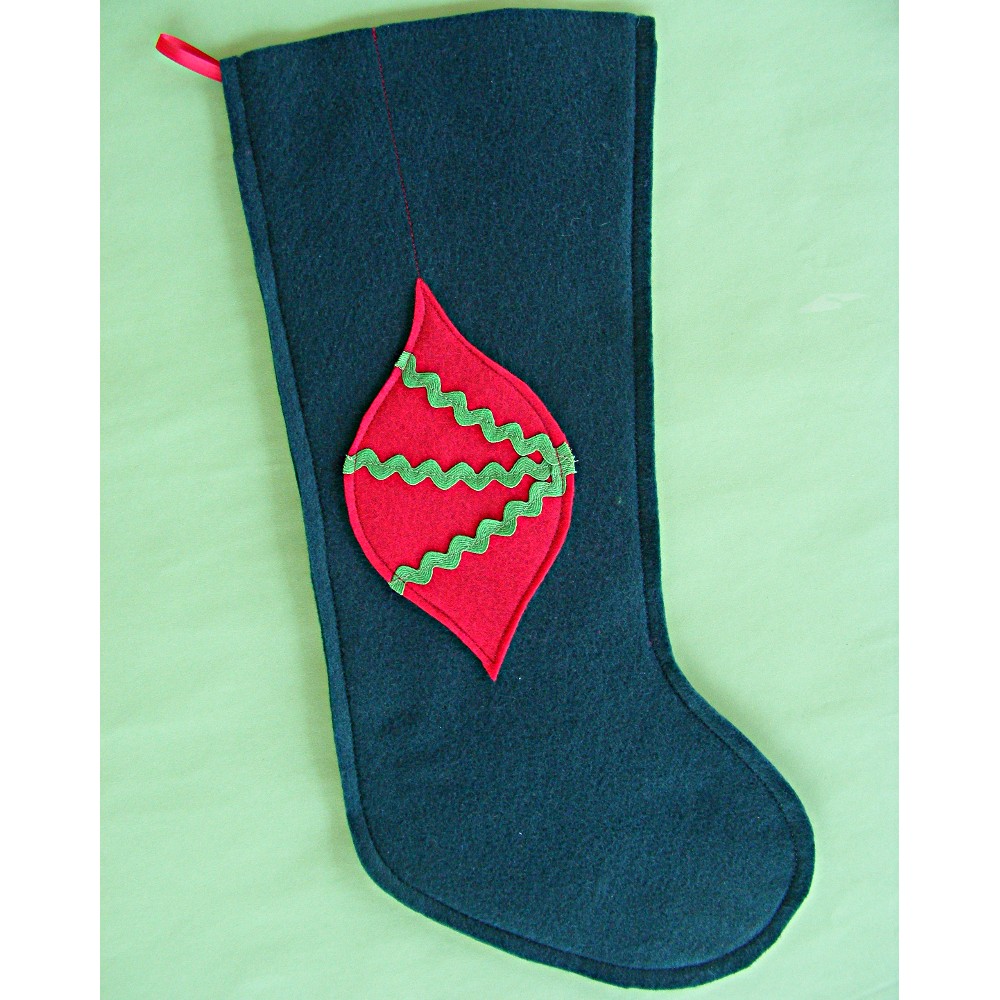
We’ll start simple. Sew some rickrack onto the ogee and sew the ogee to the stocking. If you want to get fancy you can run a line of stitching from the top point to make it look like it’s hanging. This stocking will take maybe 20 minutes to make and it’s very easy for a beginner.
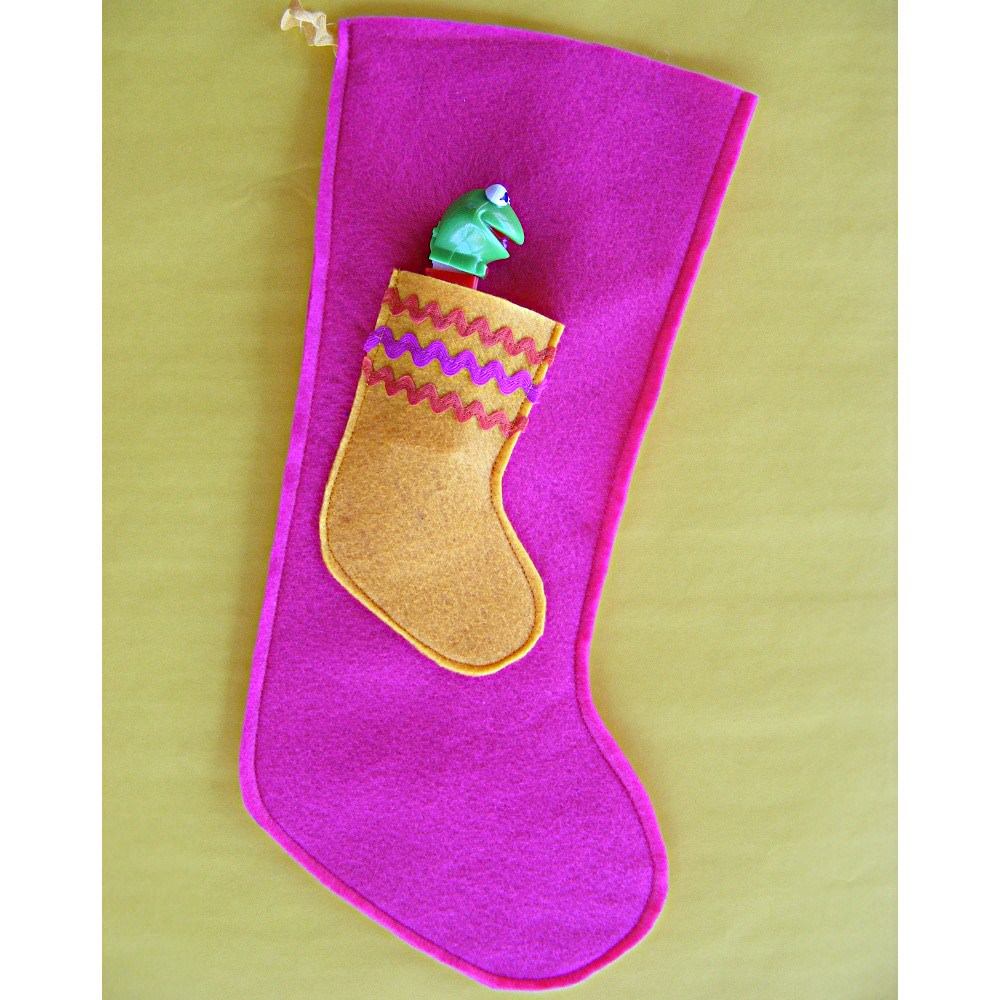
Here’s another super simple one – and one of my favorites. Stitch the little ornament-sized stocking to the regular sized stocking but leave the top unstitched. Now you have a stocking with a stocking-shaped pocket on it, perfect for holding a little Pez dispenser or a couple of lollipops or a small toy. Cute!
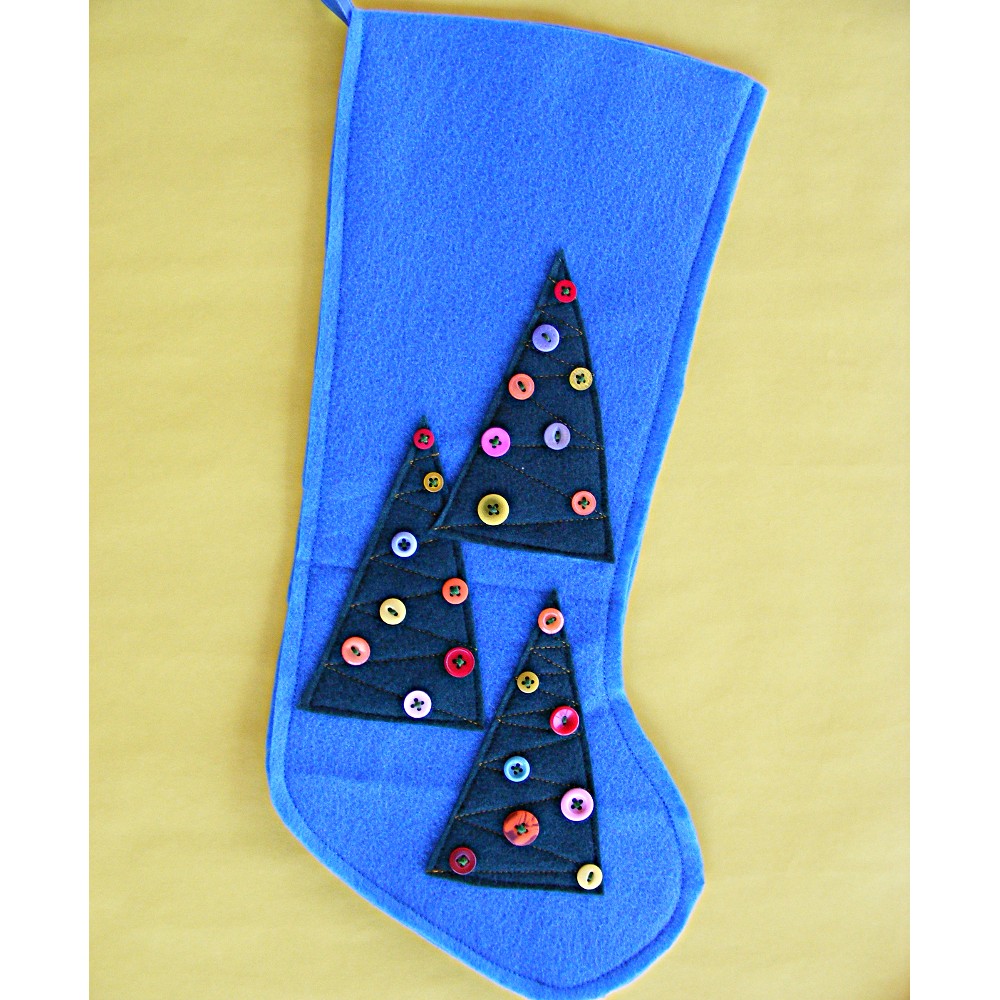
You don’t have to limit yourself to just one felt applique. For this stocking I cut out three tree triangles from the ornament patterns, stitched them to the stocking with a little swaggy zigzag action, then added random buttons. A forest of decorated trees!
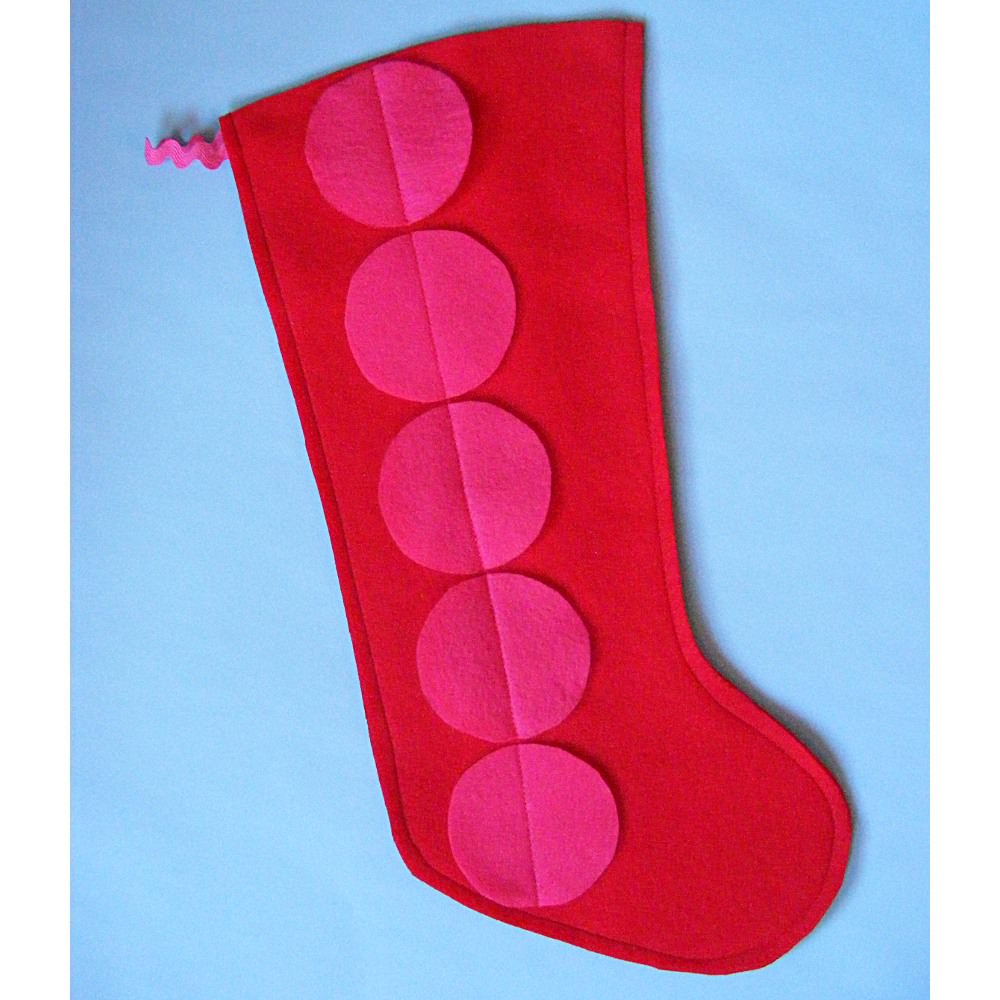
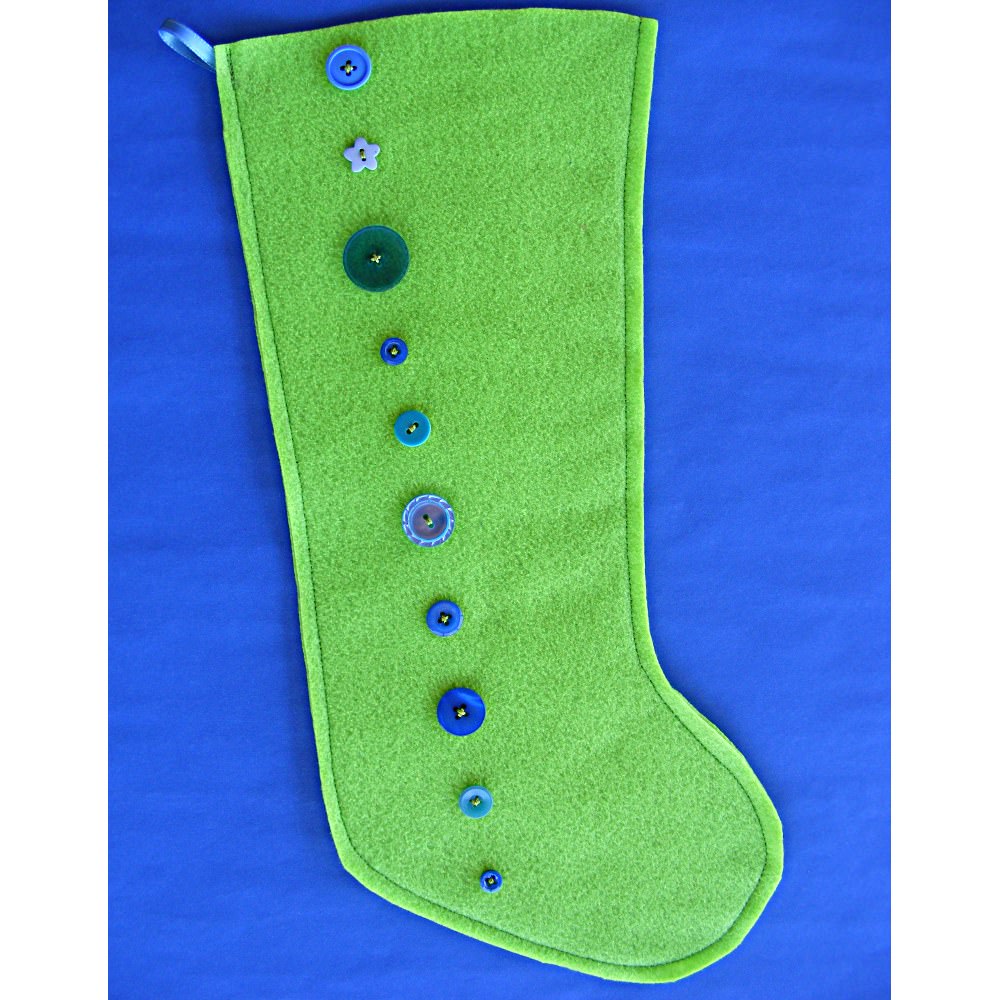
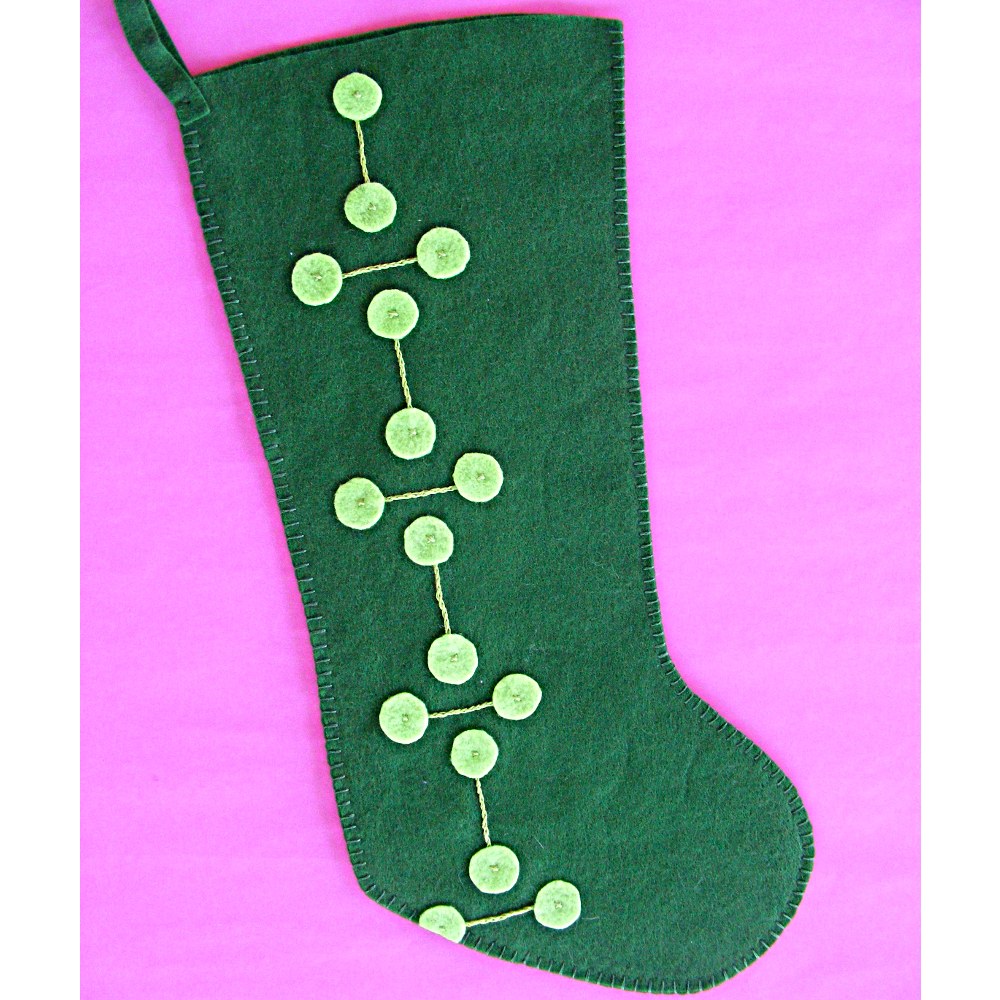
You can fit exactly five of the large ornament circles in a stack up the side of the stocking. Lay them in place, stitch one row of stitching up the middle, and you’re done.
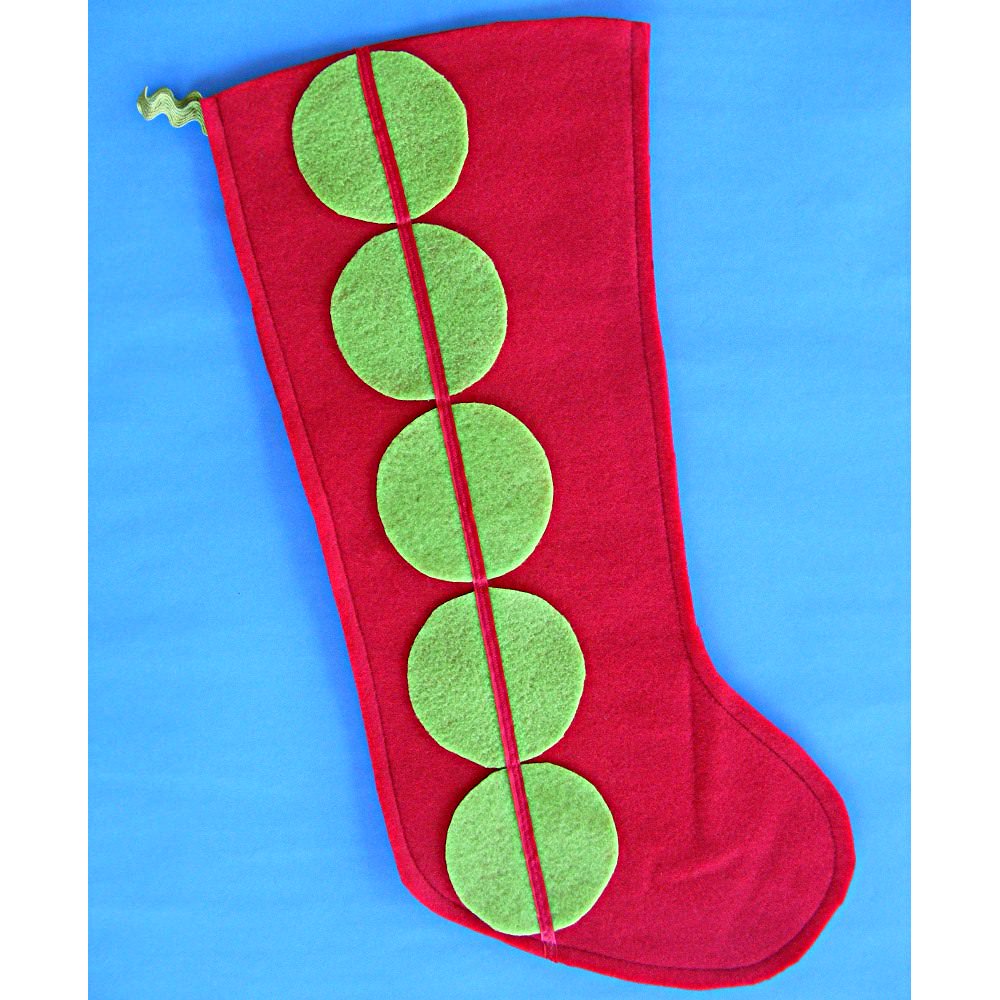
Here’s a variation with a more well-defined stripe. Instead of simply stitching up the middle of the dots, I laid a strip of satin ribbon down the center and then stitched over it. Easy peasy!
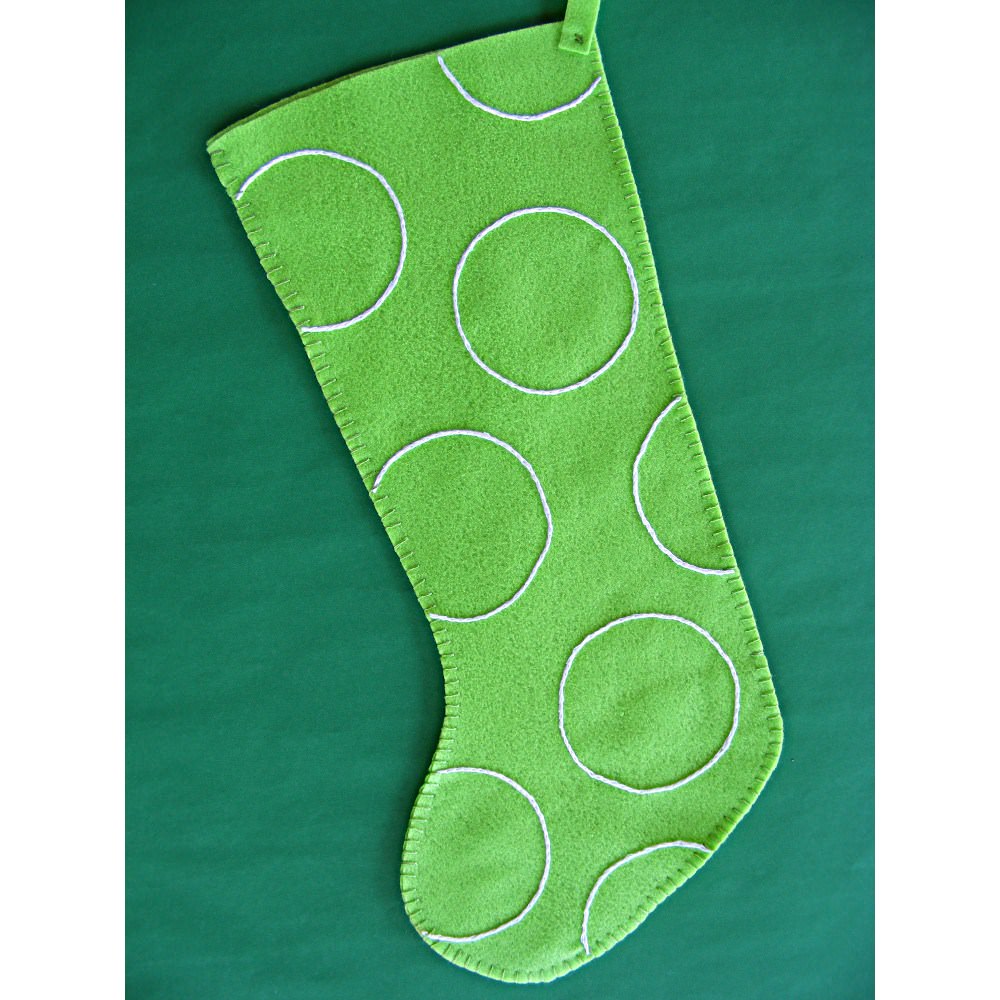
Forget about felt applique! For this one I didn’t sew down the big dots – I just used one as a pattern. I traced around it (randomly scattered over the stocking) and embroidered the circles with split stitch in white thread. Doesn’t it look minty fresh?
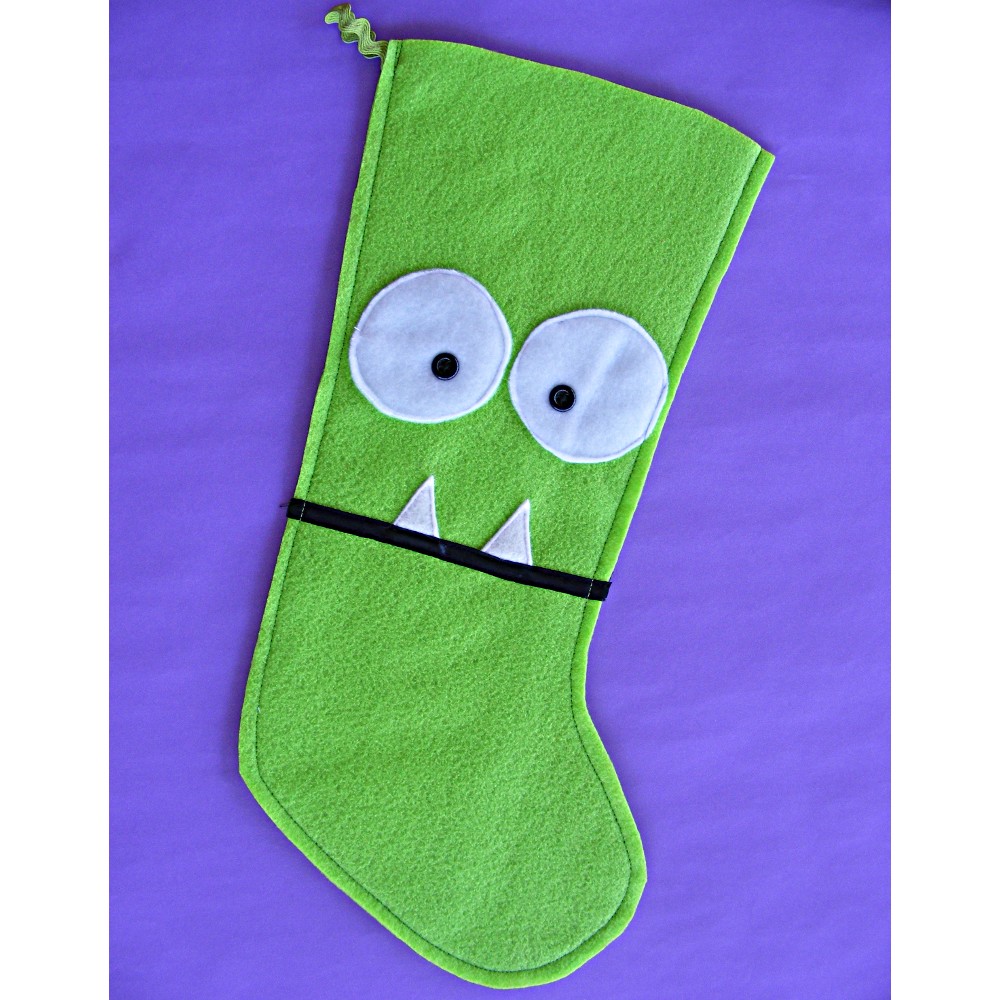
And then there’s this beauty! The big ornament circles make great eyeballs, no? The black strip for the mouth is a bit of satin ribbon, and the teeth are simply felt triangles tucked behind the ribbon before stitching.
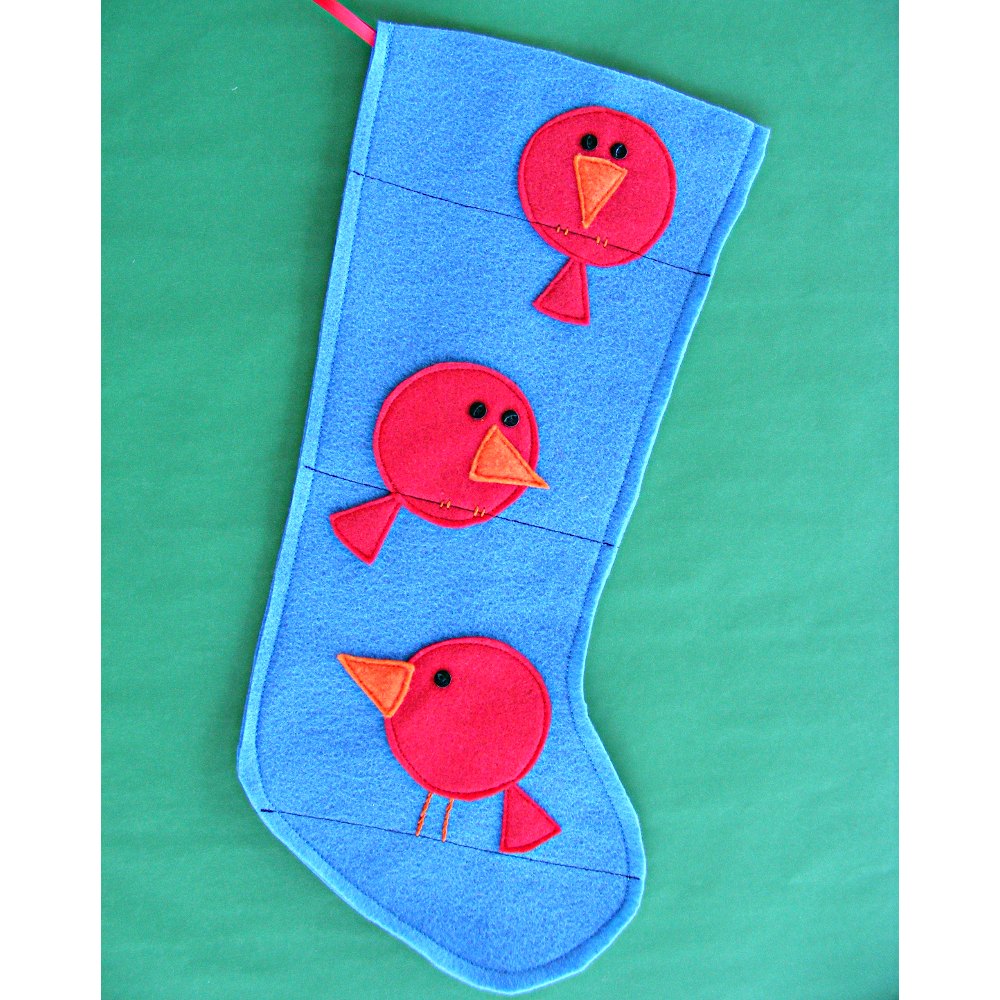
And now – my favorite. I used the big circles from the ornament pattern – and Ed Emberley’s Picture Pie: A Cut and Paste Drawing Book. Those three birds are straight out of the book – and it’s filled with other cool pictures too, all made from circles.
I’d love to see what variations you all come up with! Get the free ornaments pattern here and the free stocking pattern here. And then please post your finished projects to the Shiny Happy People group so everyone can admire them. 🙂
Happy stitching!
Best,
Wendi
![]()