


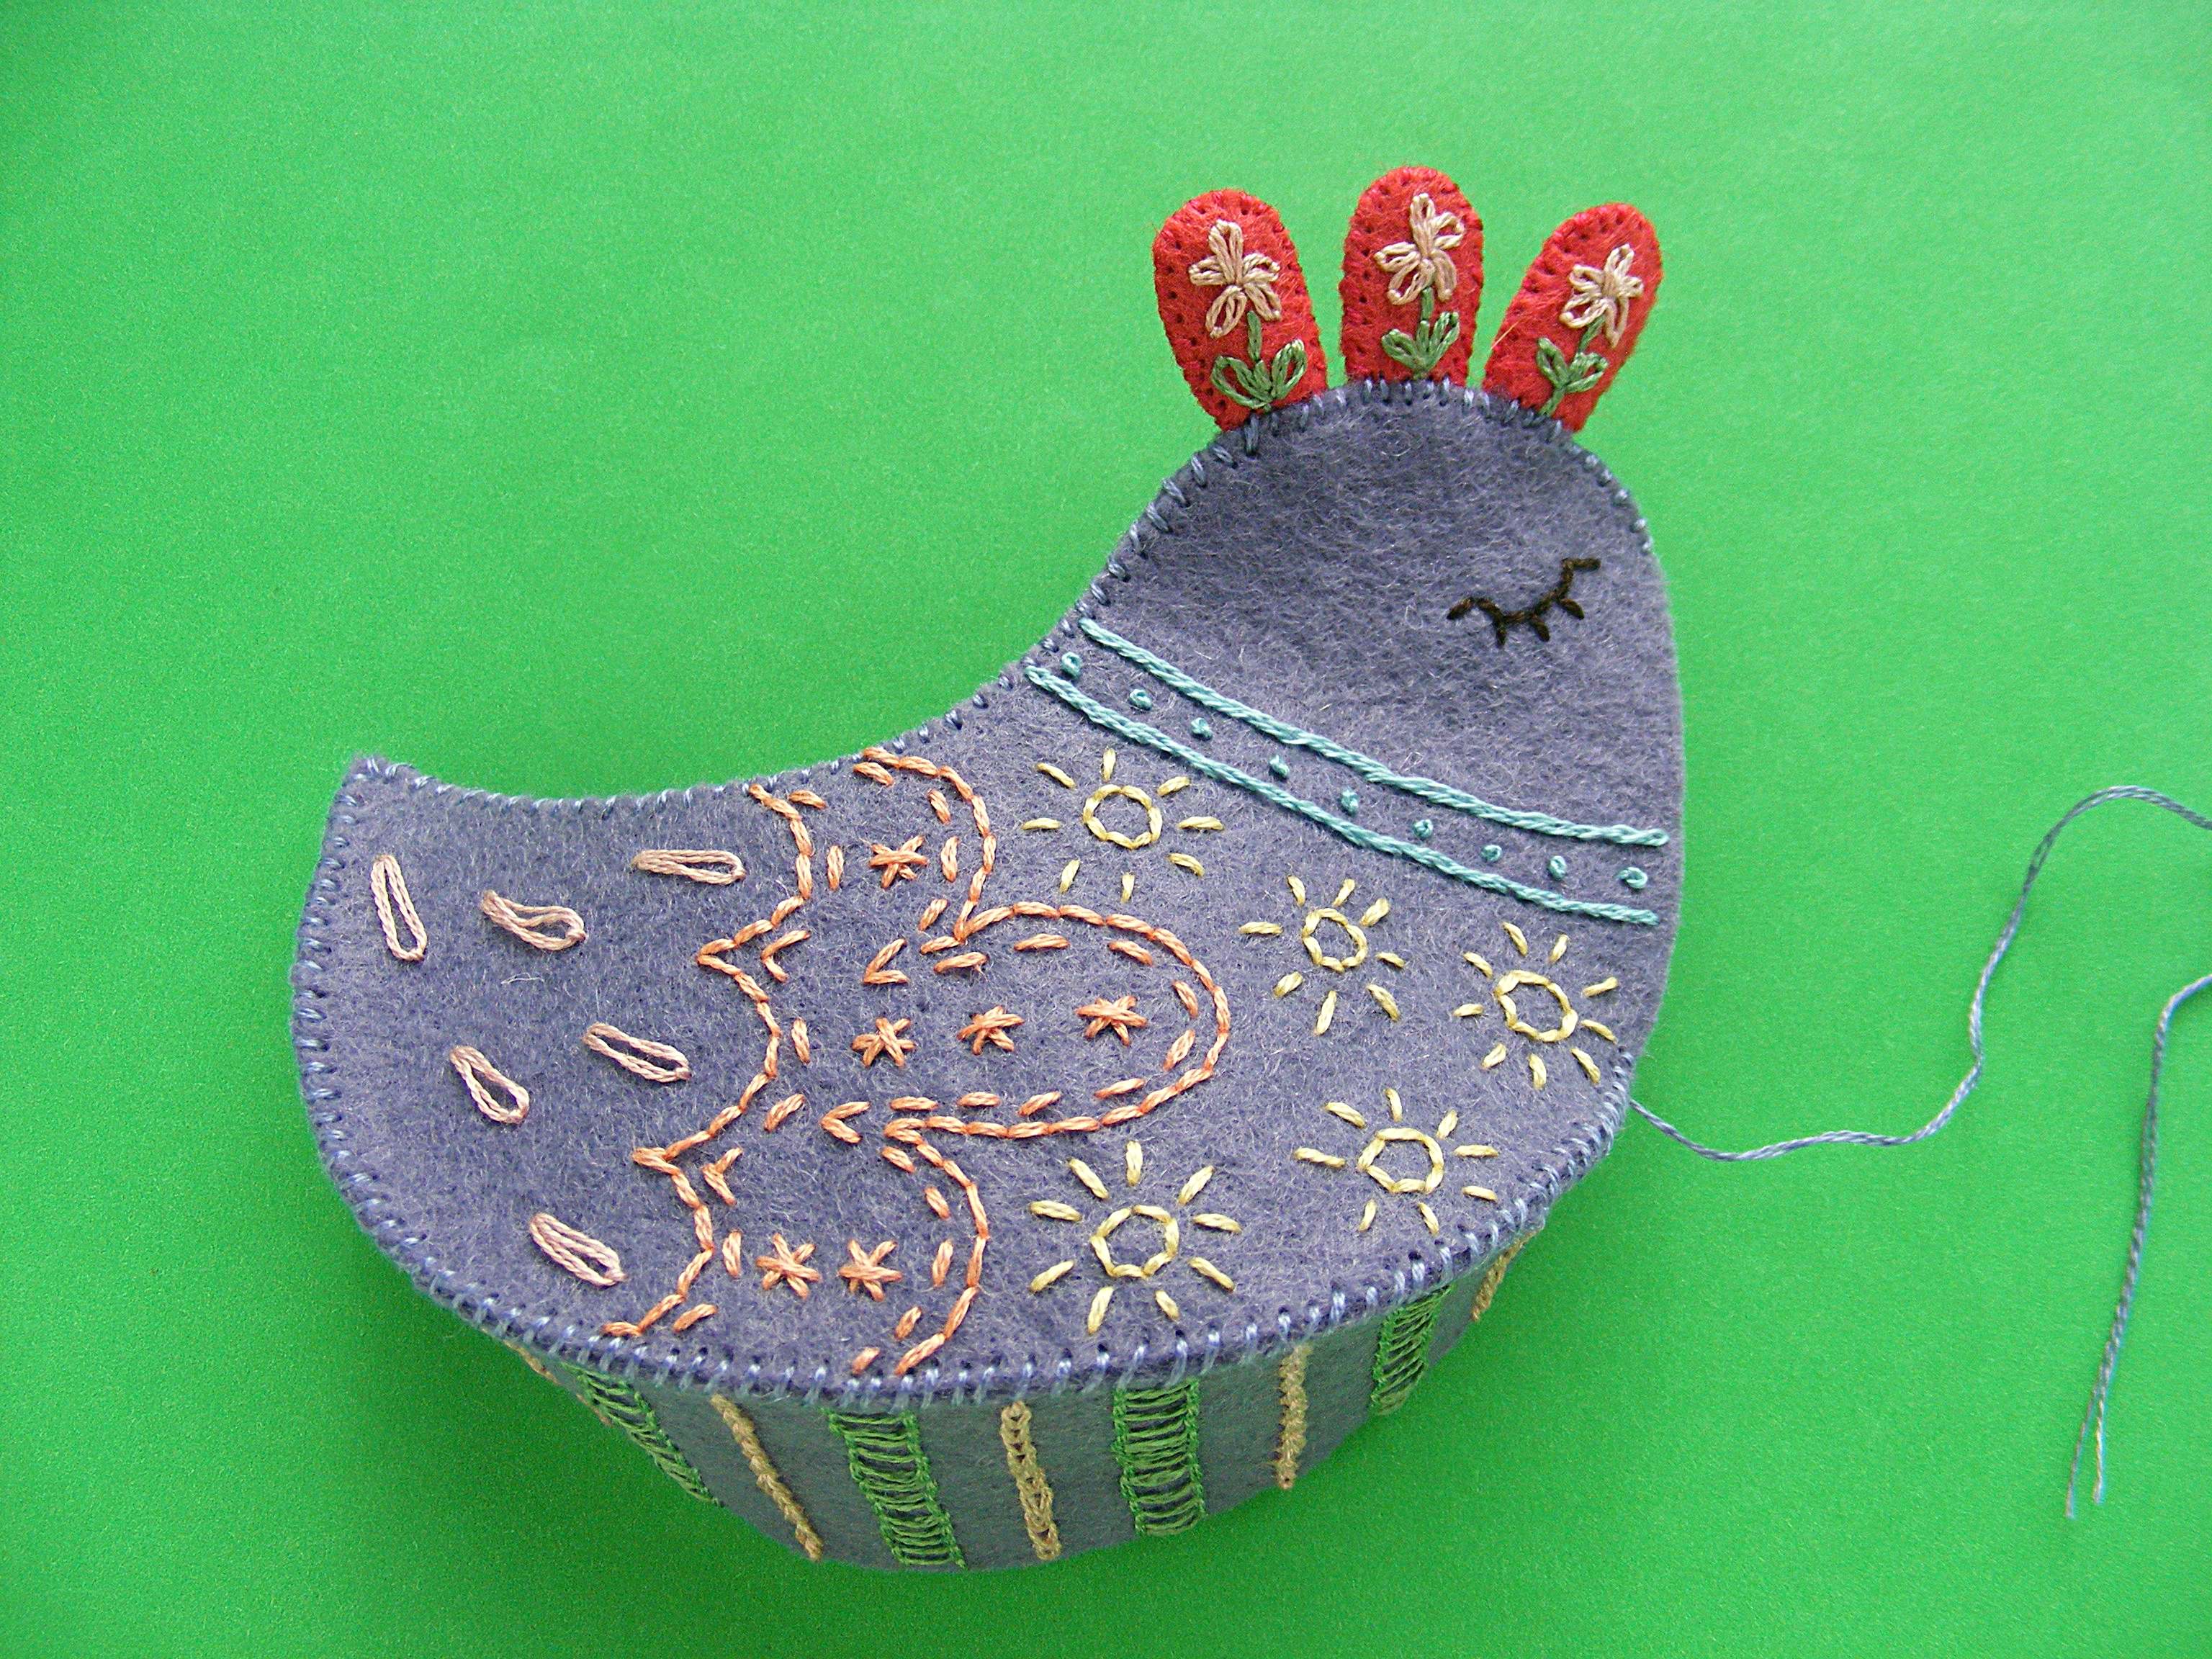
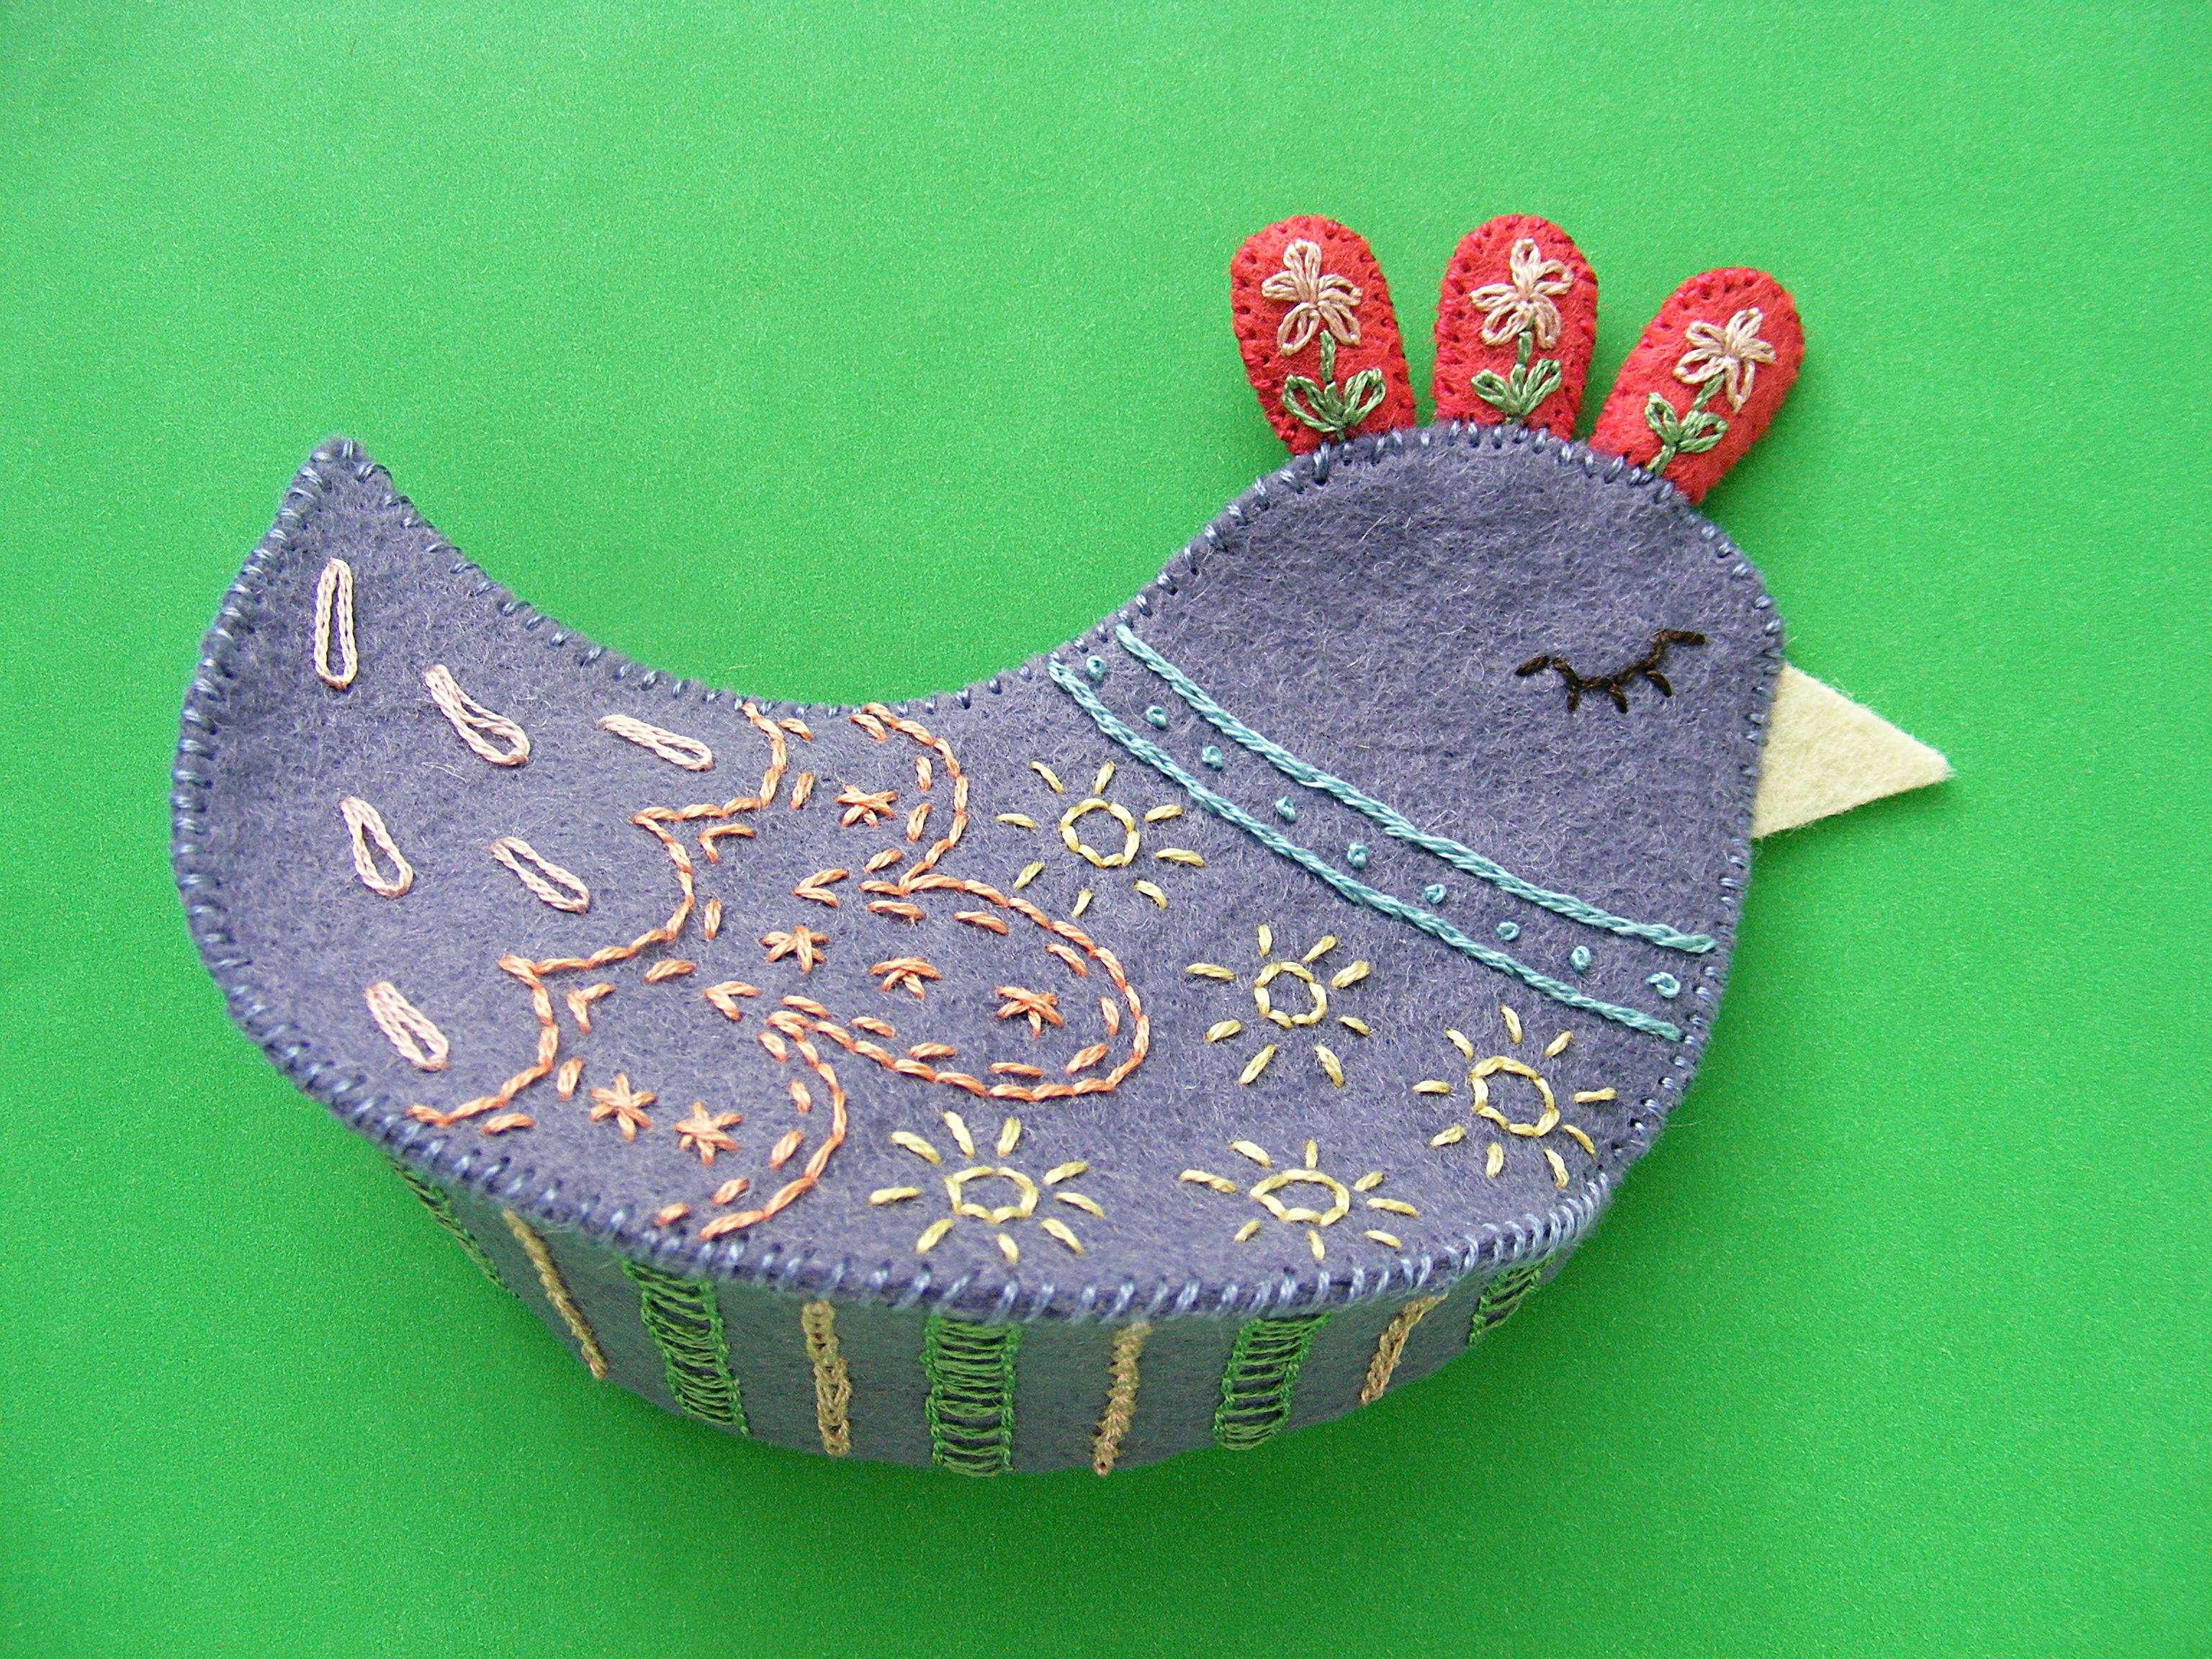
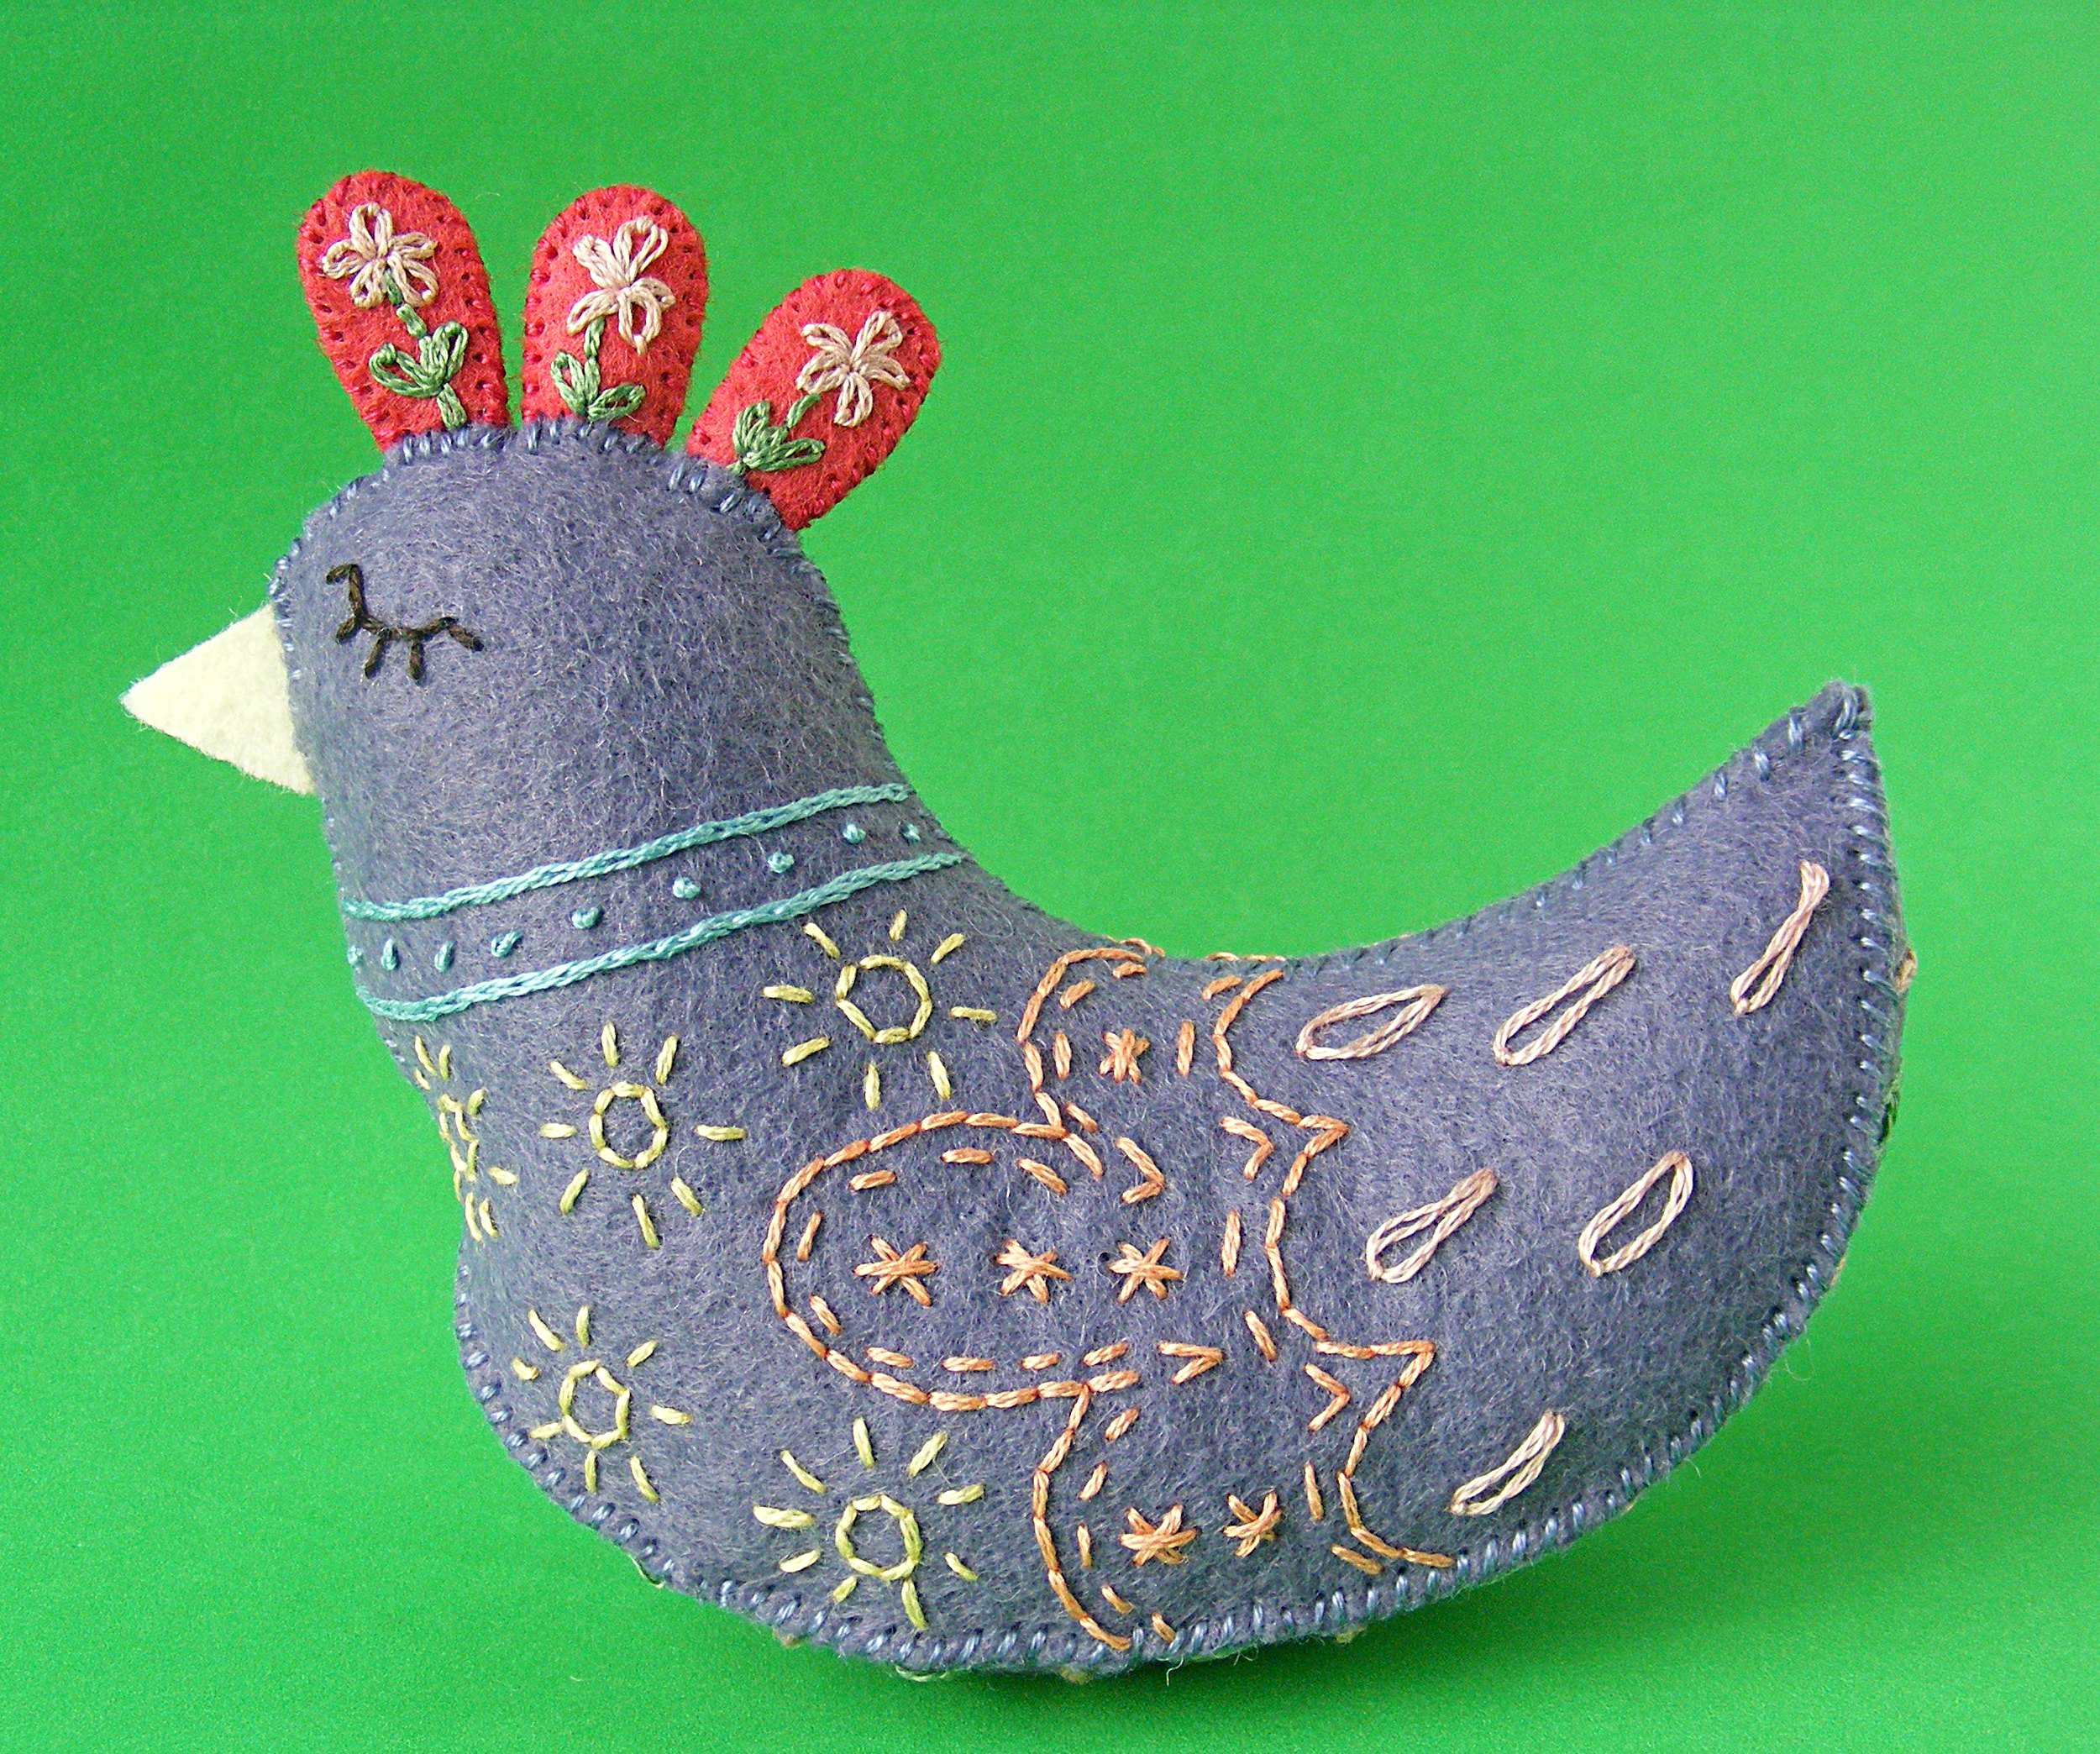
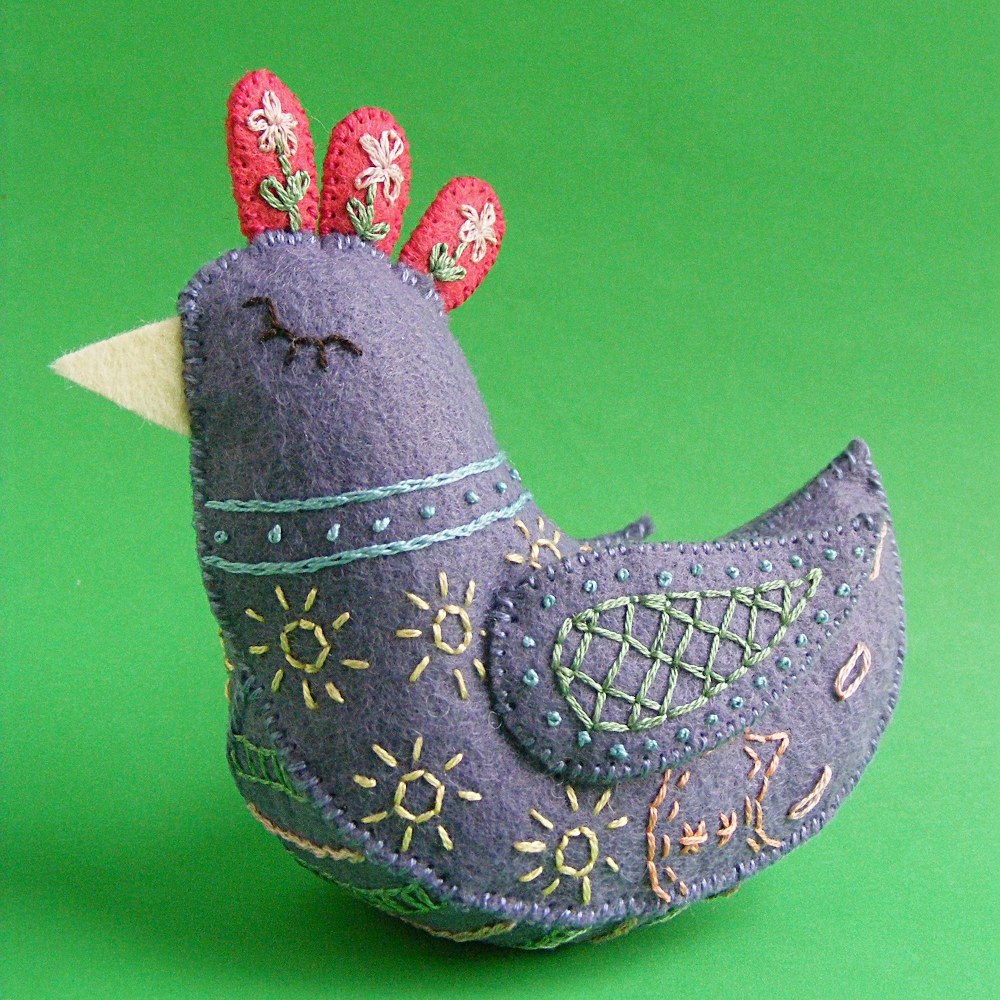
Here’s a free felt bird pattern for you to play with! Her name is Daisy. 🙂
Want to make her? All it takes is some felt, a bit of stuffing, and a few easy embroidery stitches. And a pattern, of course. 🙂
She uses just half a sheet of wool-blend felt for the body (I used purple sage, but it’s since been discontinued), a few small scraps for the beak and comb (I used strawberry dream and straw), and embroidery thread in your favorite colors.
You can find links to sources for all my favorite supplies here.
Here’s how to make her!
Step 1
Download the free Daisy felt bird pattern templates here.
Print (or trace) all the template pieces onto a sheet of Sulky Sticky Fabri-solvy.
Step 2
Roughly cut out each piece, peel off the paper backing, and stick the stabilizer to the front of a piece of felt.
Stitch through the felt and stabilizer together.
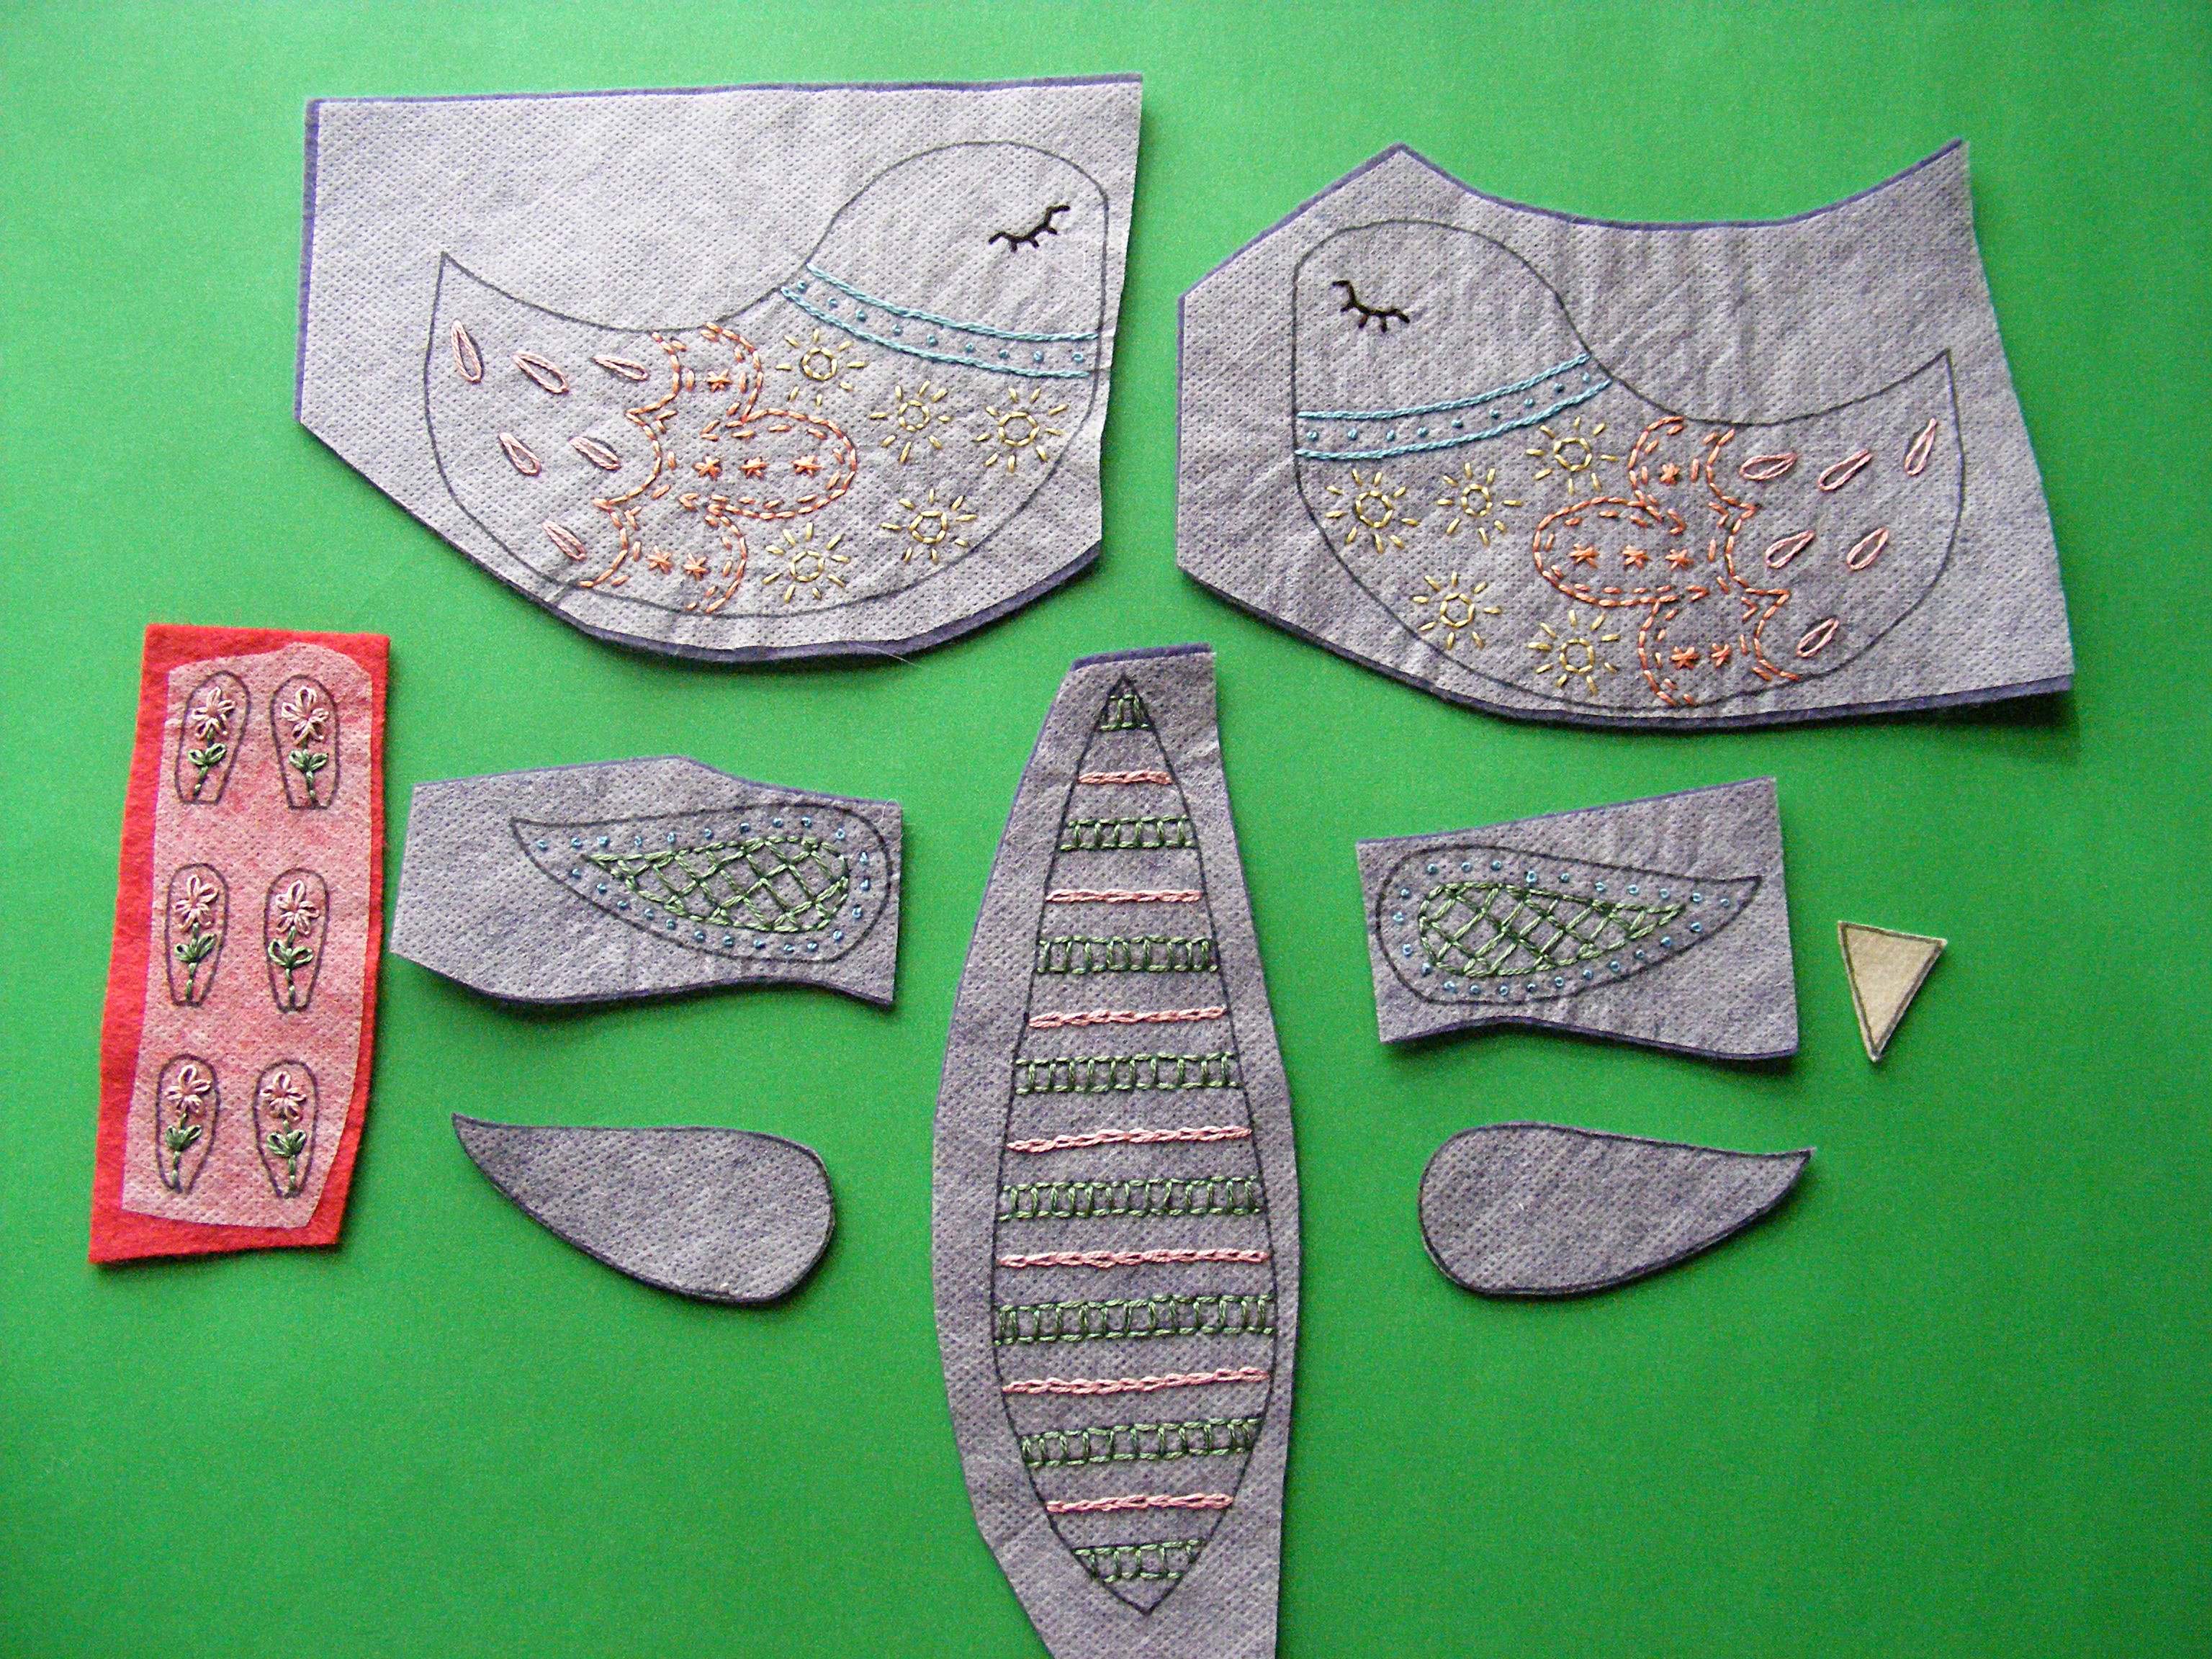
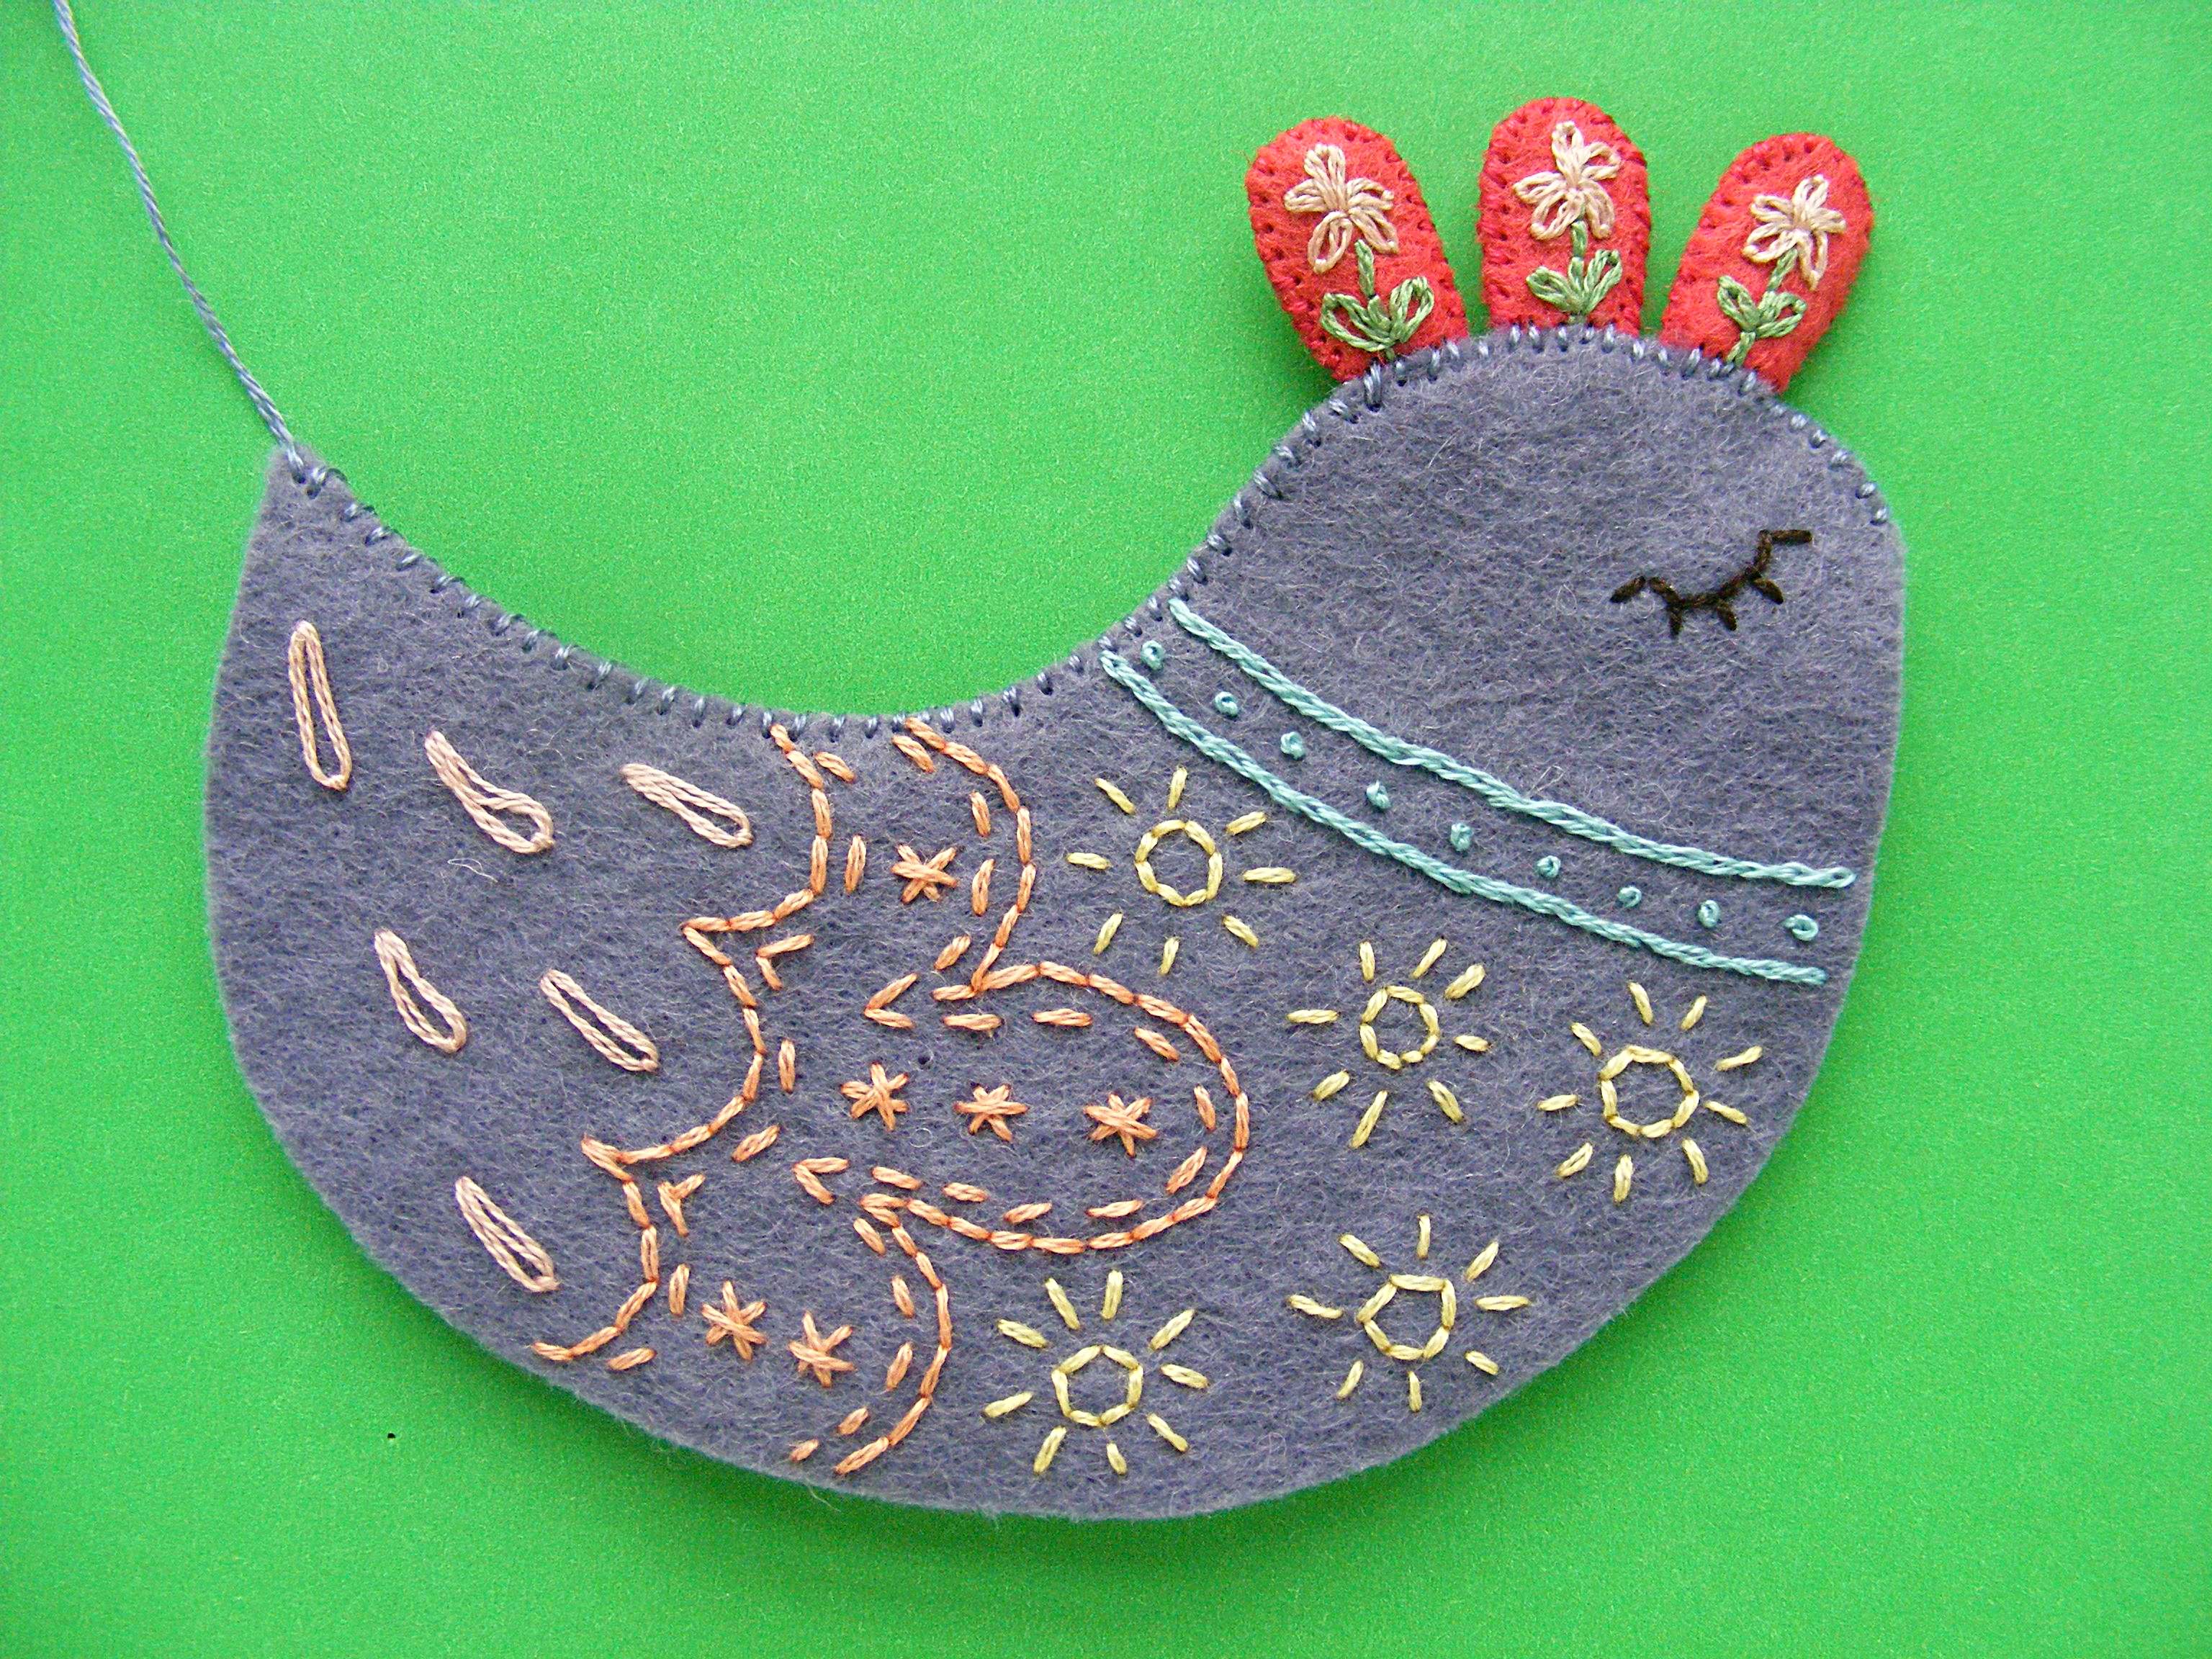
Here’s a color and stitch guide, if you want to make a purple Daisy like my sample.
- Eye - backstitch with DMC #3371
- Neck band - split stitch and French knots with DMC #597
- Starbursts - backstitch with DMC #744
- Asterisks - backstitch with DMC #3341
- Drops at tail - lazy daisy with DMC #152
- Wide belly stripes - backstitch with DMC #320
- Narrow belly stripes - chain stitch with DMC #152
- Wings - backstitch with DMC #320 and French knots with DMC #597
- Comb - lazy daisy for the flower with DMC #152 and the leaves with DMC #320. Backstitch the stem with DMC #320.
Step 3
Cut out each piece carefully on the lines. Be sure not to cut into any of your stitching!
Soak the pieces in cool water to remove the stabilizer. I like to soak them for about an hour, then rinse off the mushy stabilizer under cool running water. Use a kitchen sprayer to get off any stubborn bits. Let them dry flat on a towel. Don’t wring them out - just lay them on a towel dripping wet. They’ll dry overnight.
I’ve got more info on using The Magical Embroidery Stuff here.
From here on all the sewing is whipstitch around the edges of the felt. I used two strands of floss for all whipstitching. DMC #326 matches the strawberry dream felt I used for the comb, and DMC #161 matches the purple sage I used for the body.
Step 4
Put comb pieces together, right sides facing out, and stitch all the way around the edge. You’ll end up with three comb pieces.

Step 5
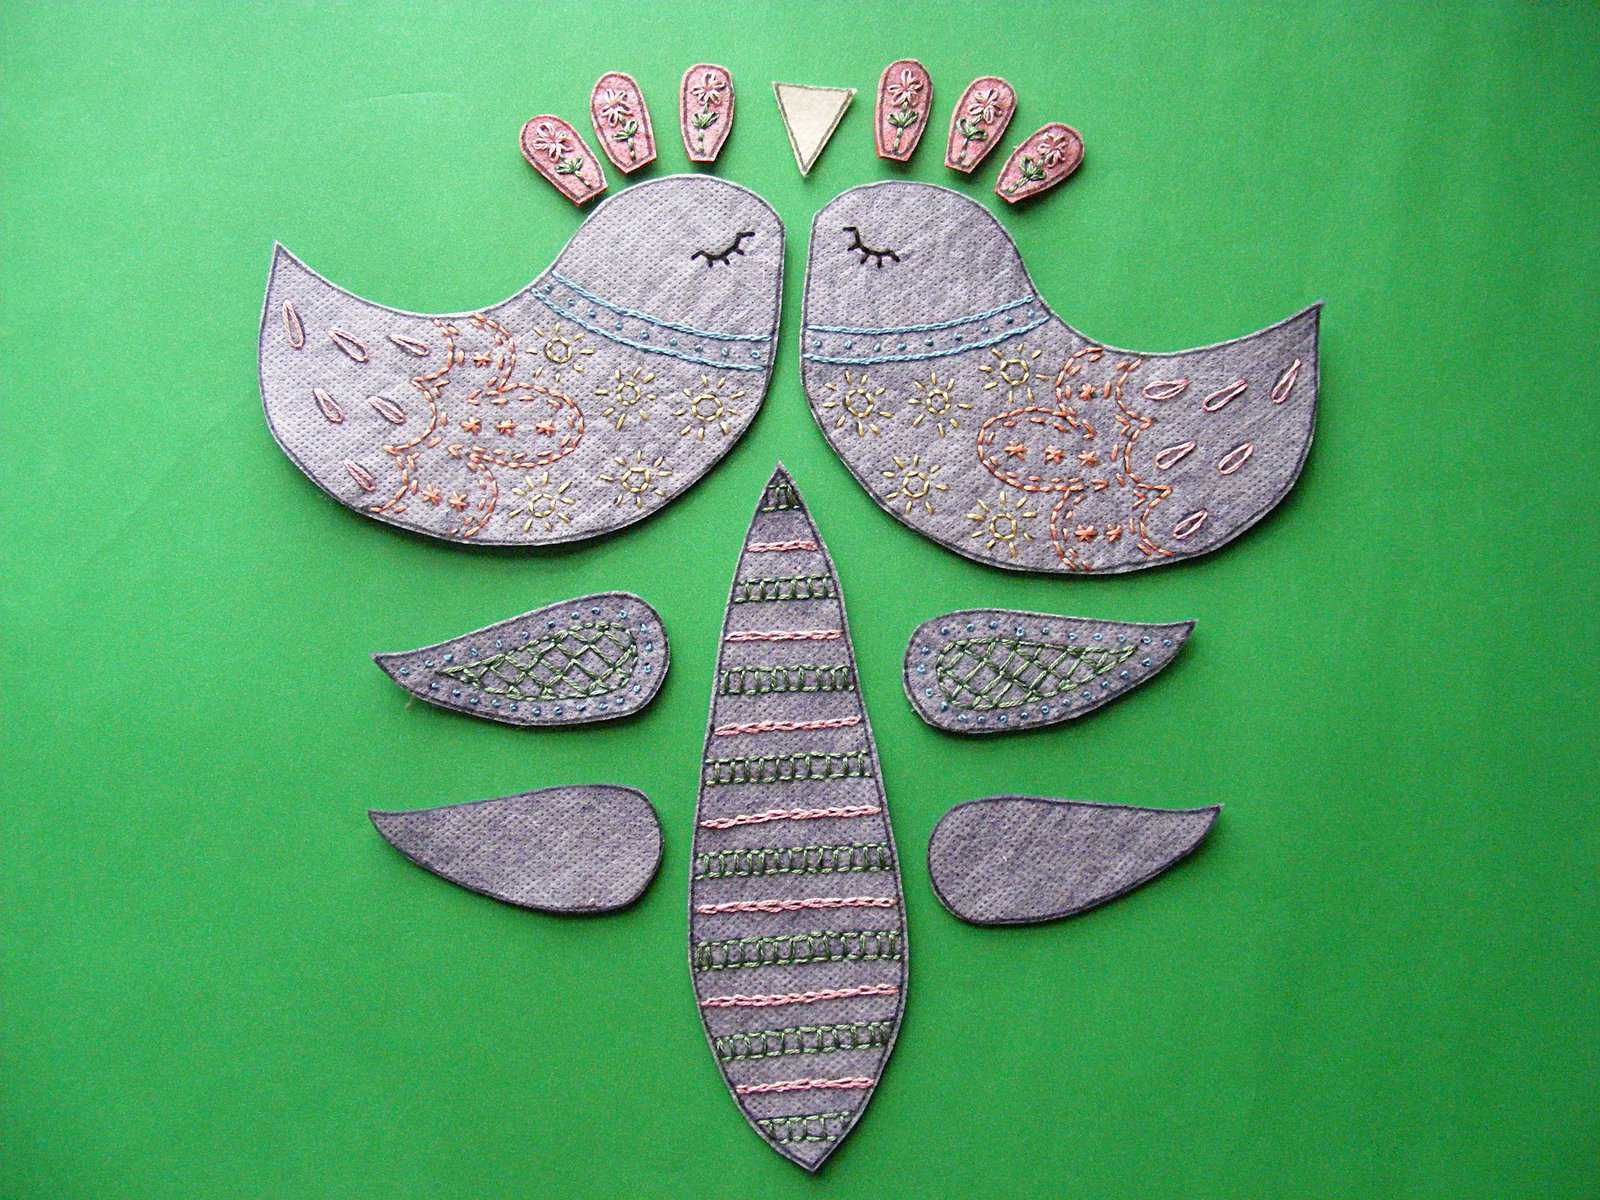
Repeat Step 3 for the wings, pairing one embroidered wing with one blank wing.
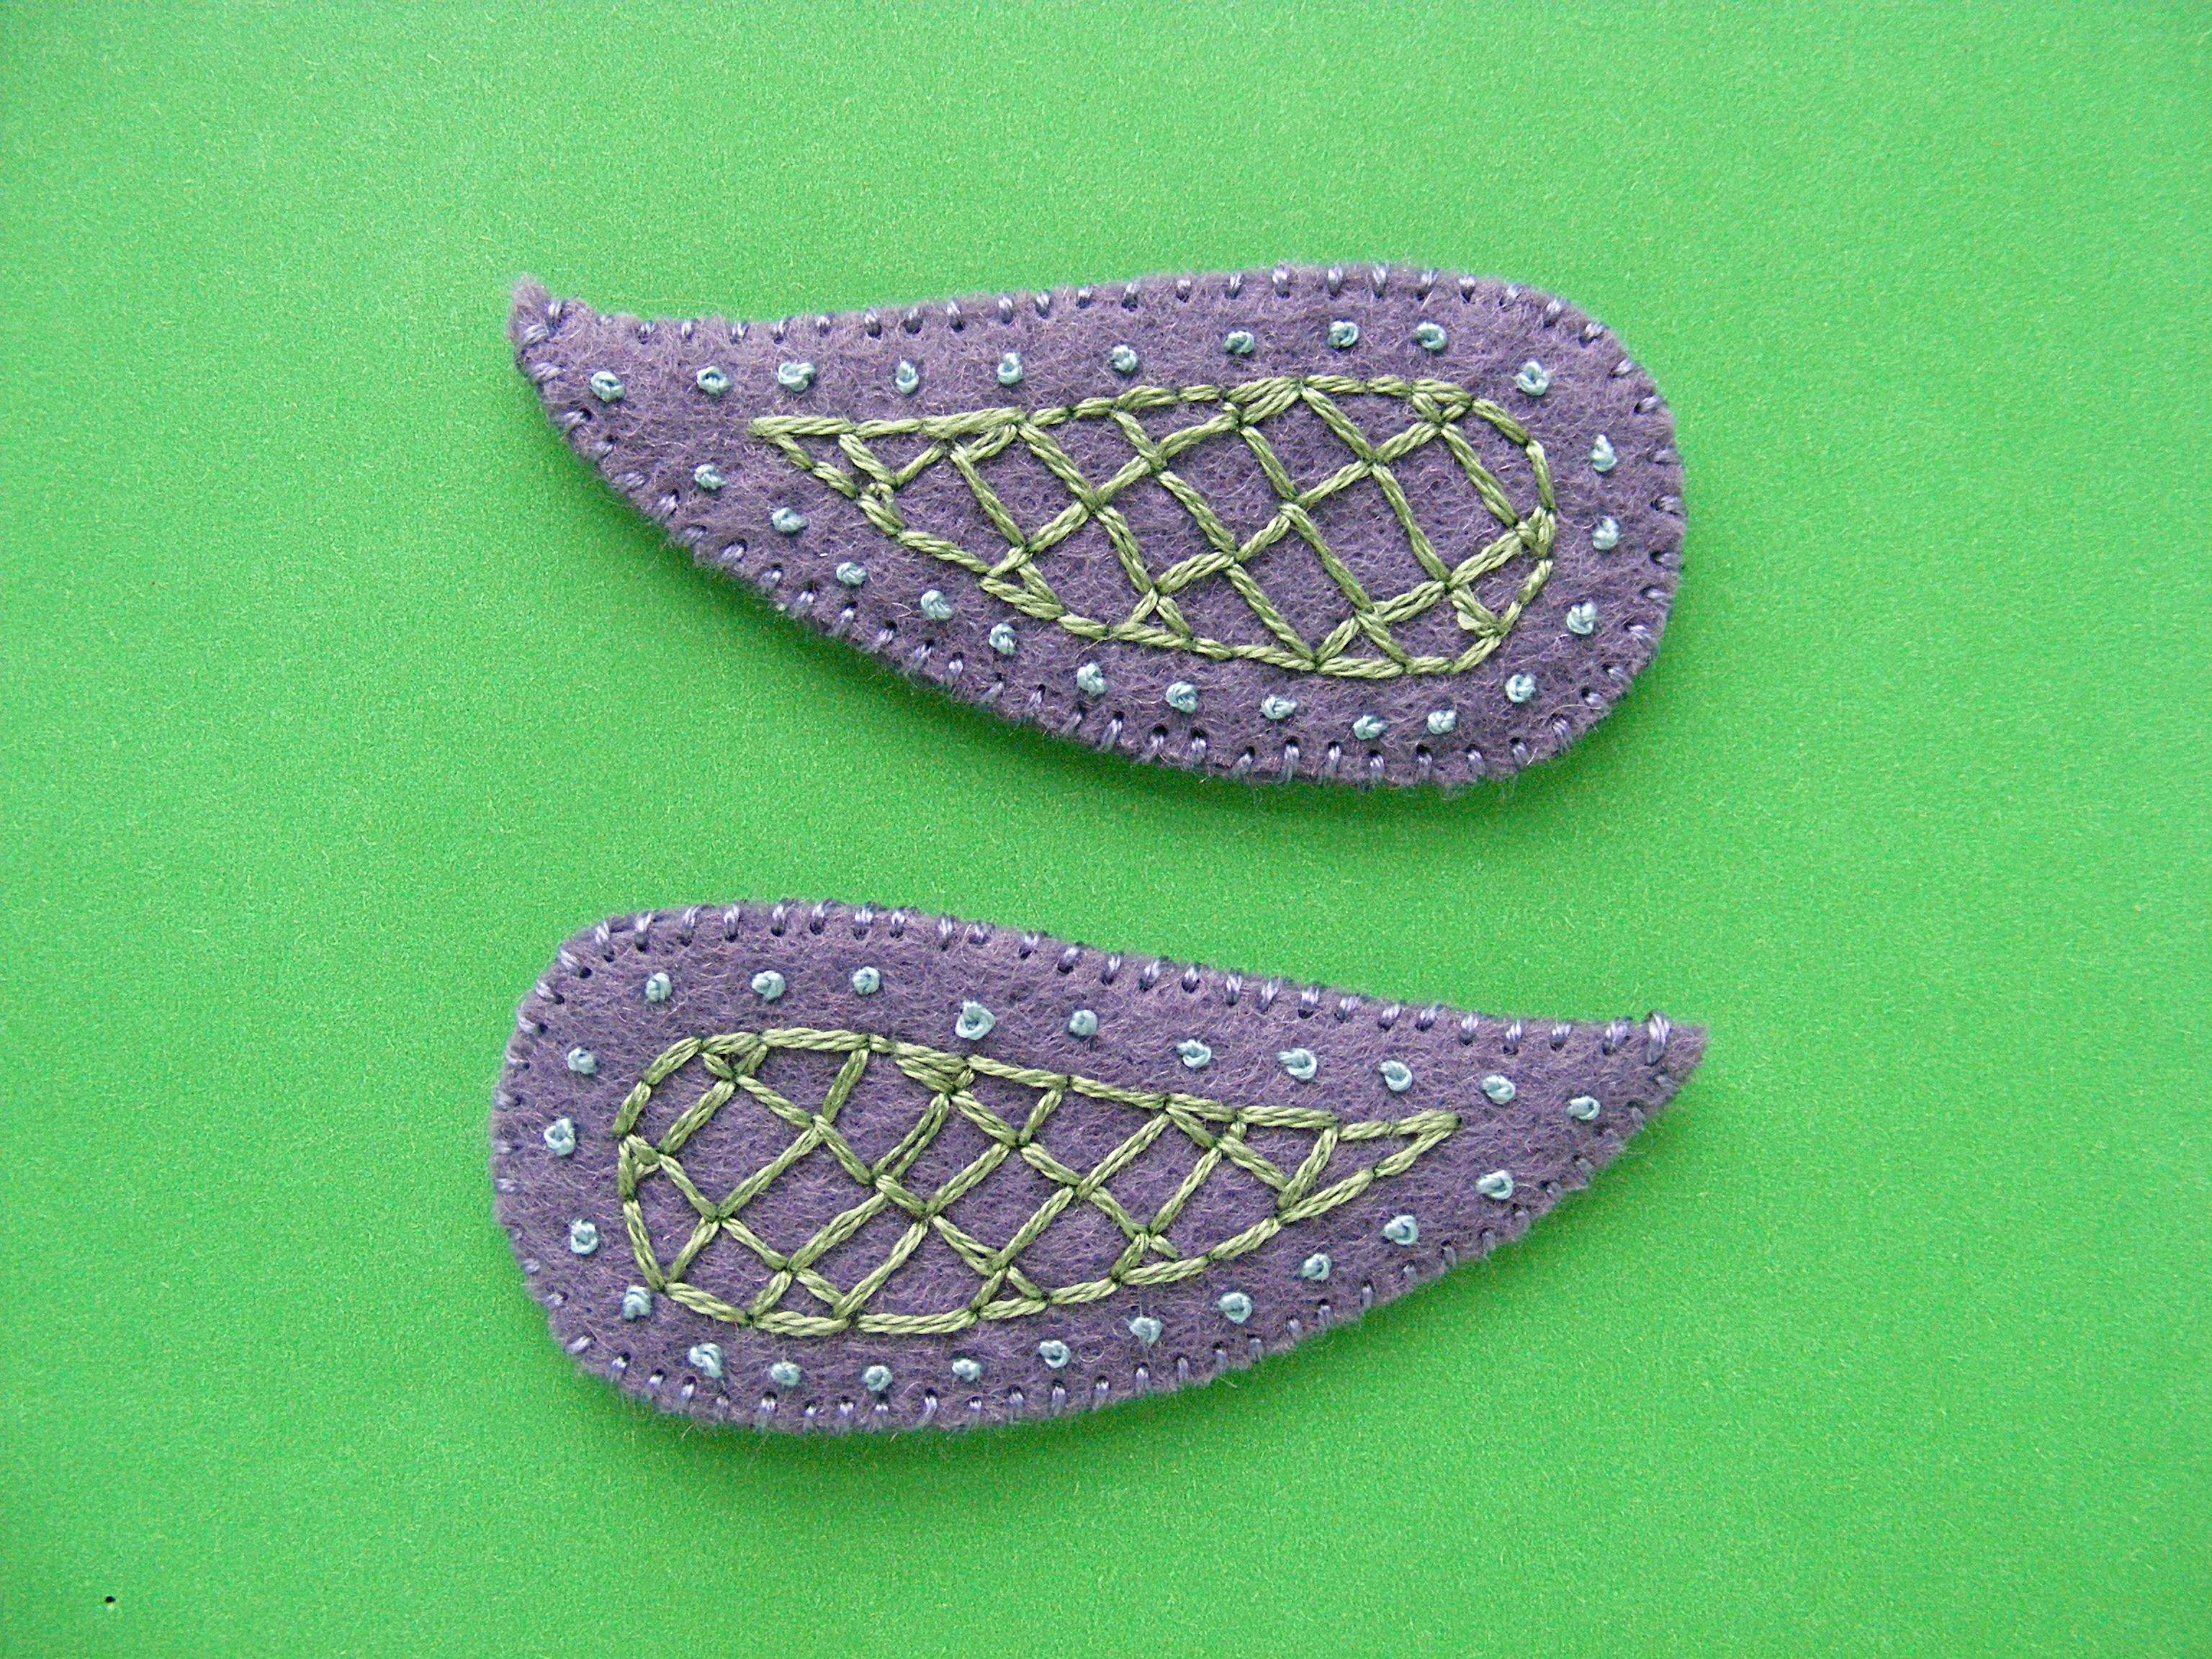
The blank sides of the wings will go up against the bird’s body where you can’t see them.
Step 6
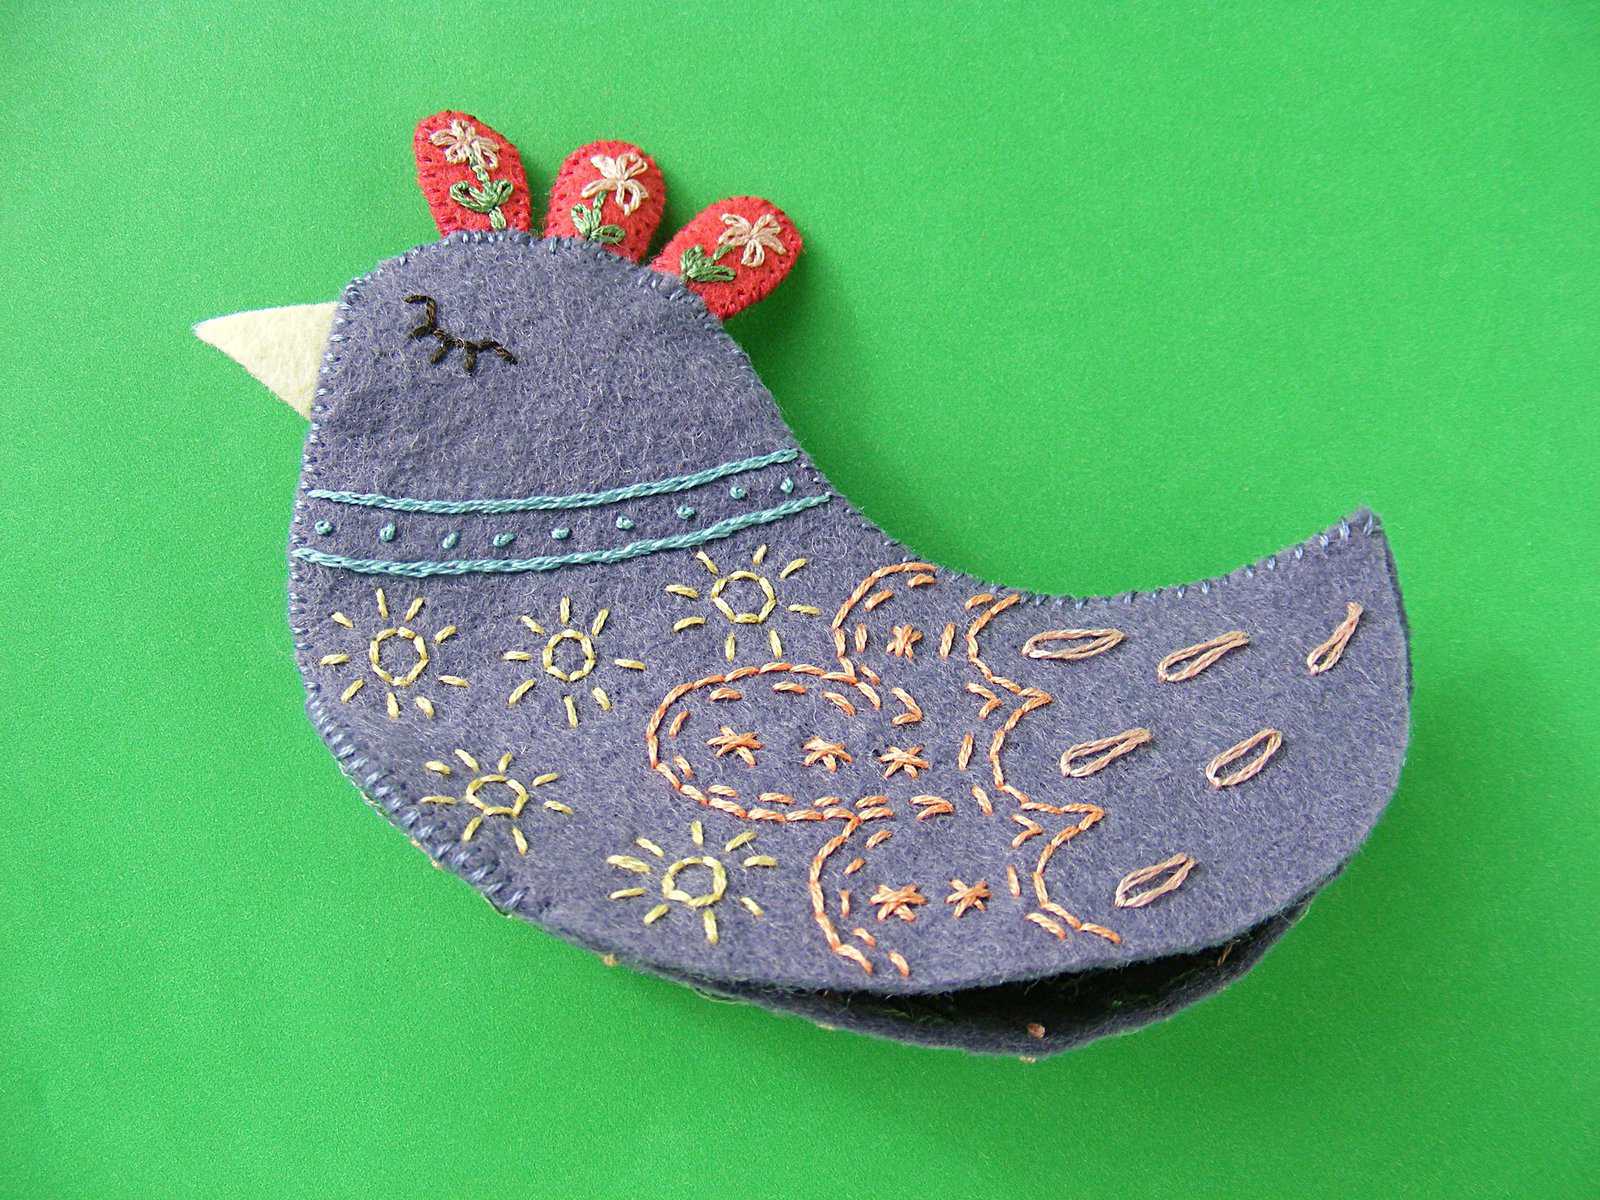
Place the two body pieces right sides facing out, with the comb pieces sandwiched between the layers. Stitch the body pieces together along the top edge of the body. Stop when you get to the tip of the tail, but don’t tie off your thread.
Step 7
When you get to the tip of the tail, slip the belly piece into place. The narrow end is the tail, and the wider end is the breast.
Stitch one body piece to one side of the belly piece. When you get to the front, stop stitching, but don’t tie off your thread.
Step 8
Go back to stitching the two body pieces together, this time stitching up the front of the face.
Slip the beak in between the two layers, right up at the top of the face, and stitch through it as you go.
Tie off your thread when you get to the top of the face.
Step 9
Flip the bird over.
Start a new piece of thread and stitch the free side of the body to the free side of the belly, starting at the front tip of the belly.
Stitch for a few inches, then tie off your thread.
Step 10
With a new piece of thread, stitch the rest of the body closed from the tail to the other side of the stuffing opening you started in Step 9.
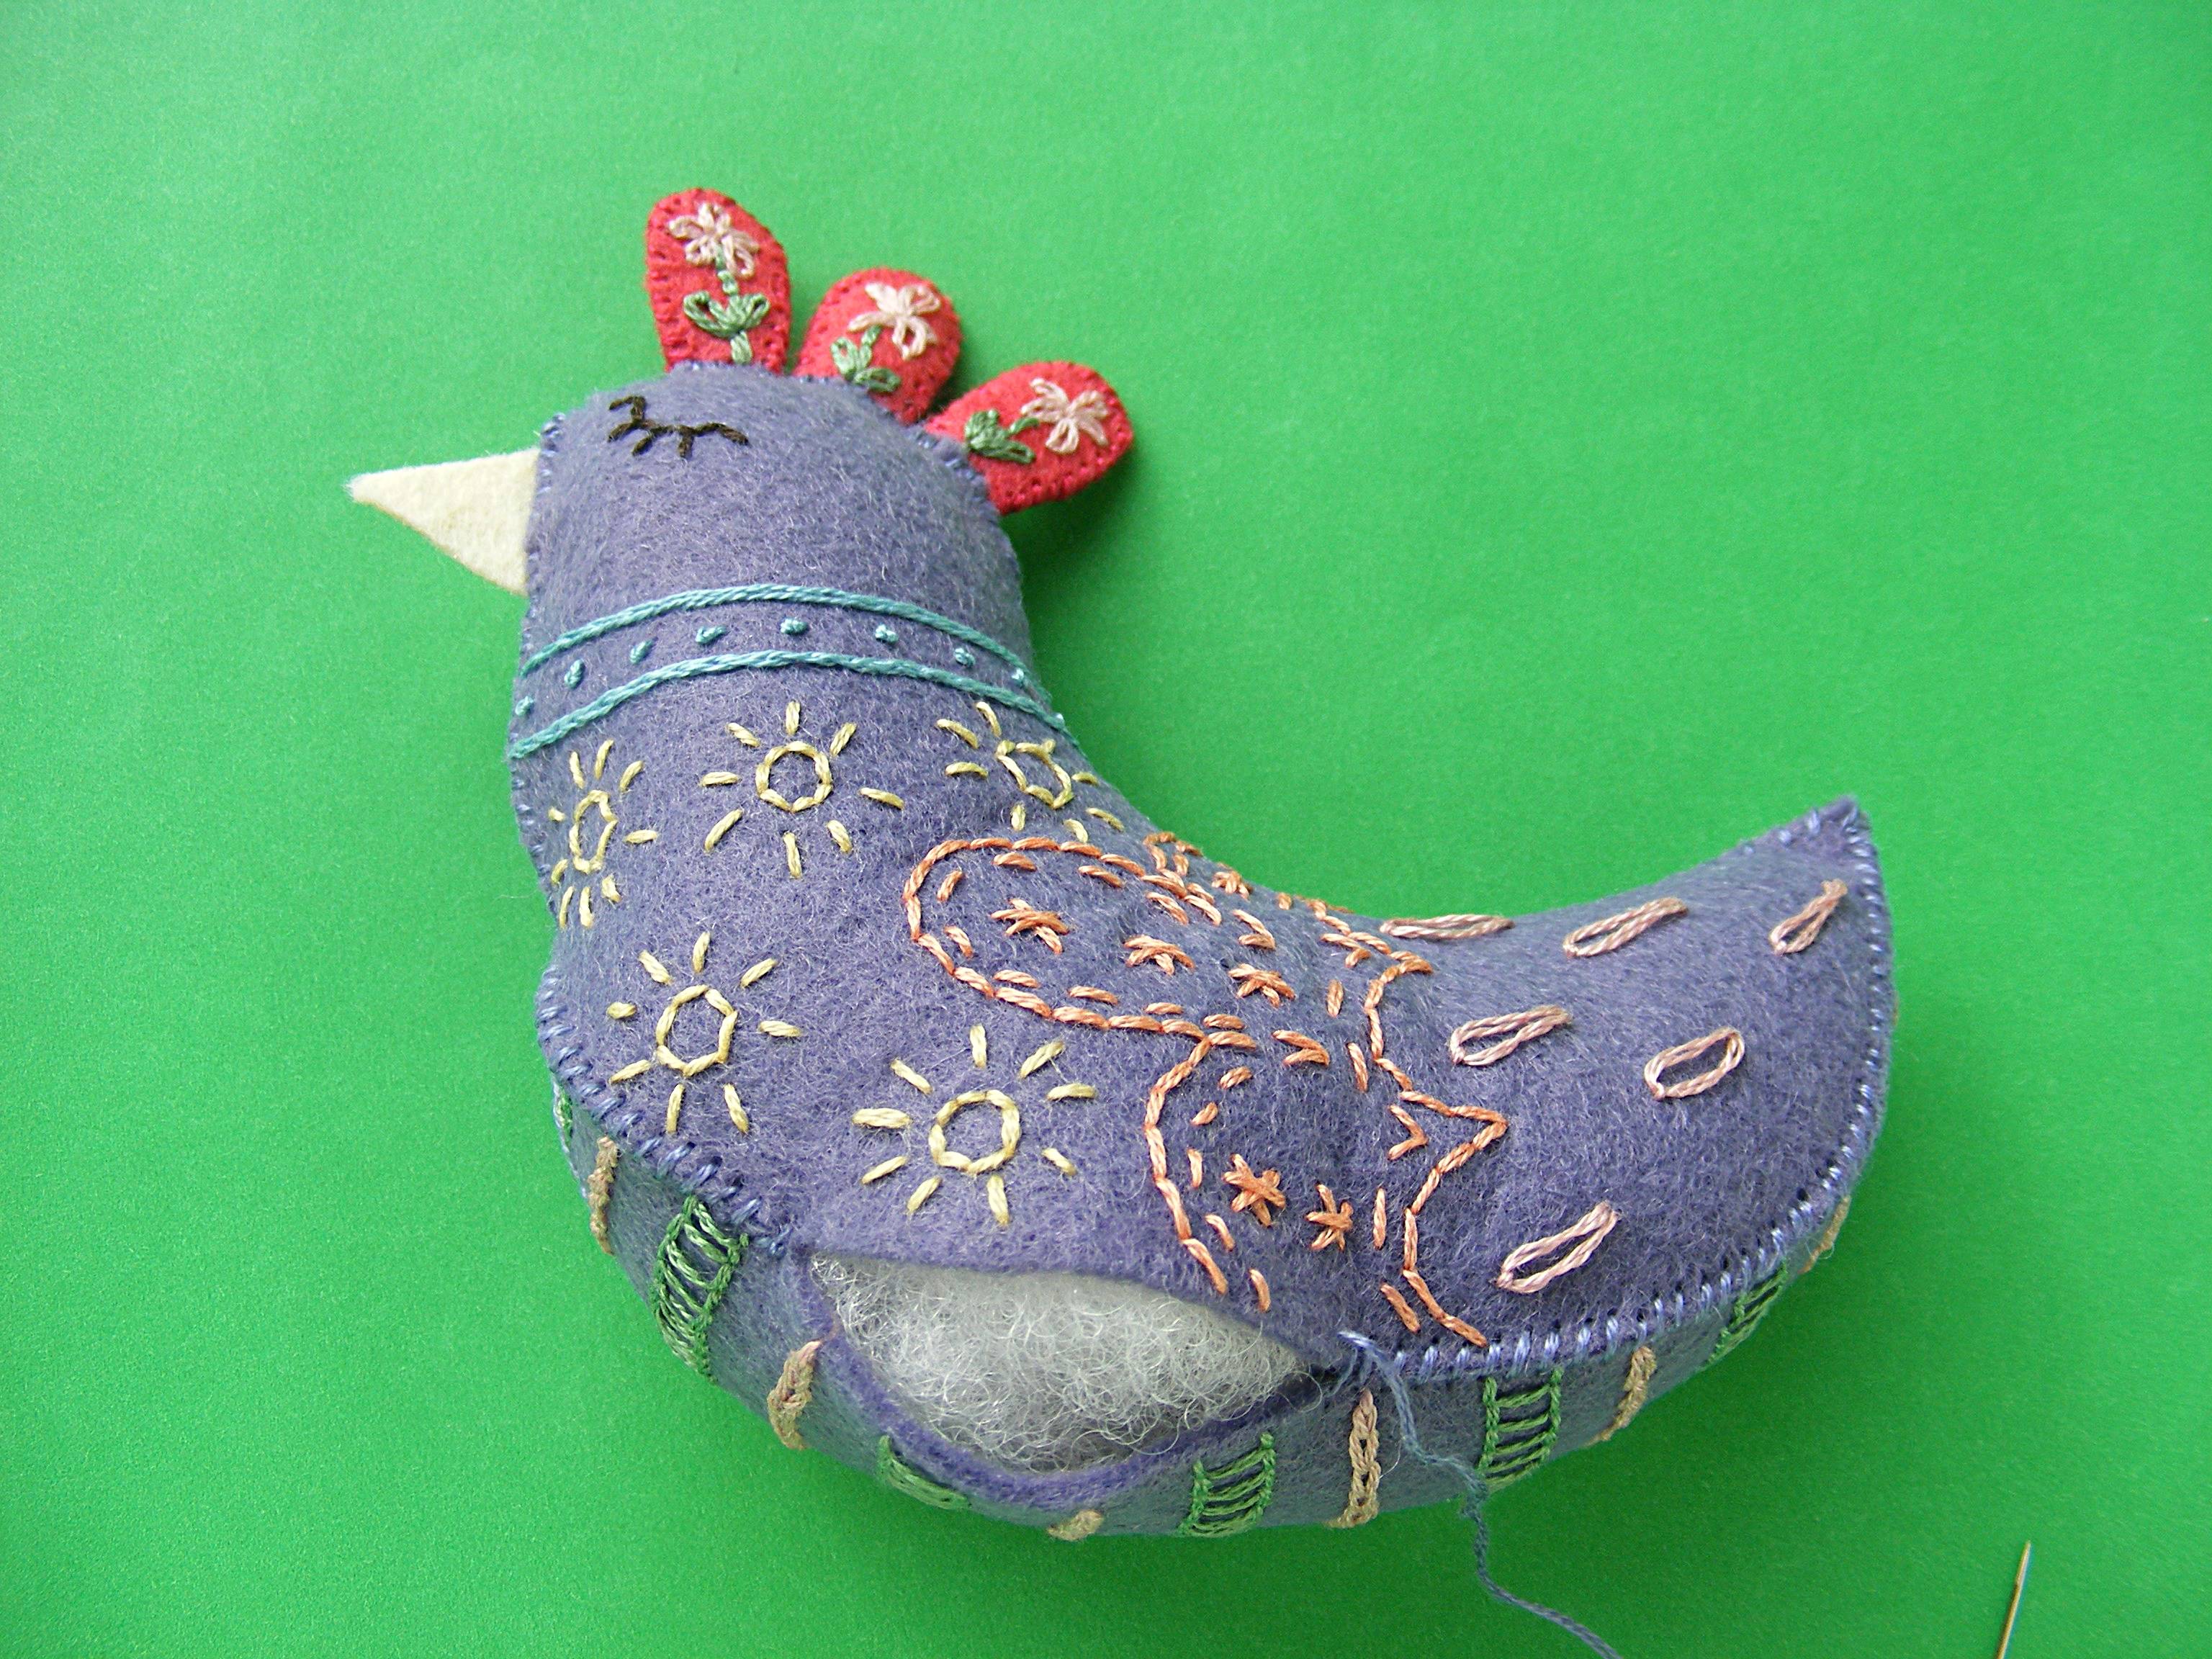
Stuff the body neatly. You can add plastic pellets if you like, for weight, but this shape doesn’t need it for balance.
Step 11
Sew up the rest of the stuffing opening.
Now she’s just waiting for wings!
Thread a long needle and knot the end. Start sewing underneath one wing, near the front. Sew through the body and out the other side, through the opposing wing. Take a small stitch back into the wing, through the body and out through the first wing. Stitch back and forth like this a few times to secure the wings. Don’t pull the thread too tight or you’ll distort the shape of her body. Knot your thread underneath one wing and bury the tail.
Done!
Isn’t she a beauty? I think this design would also be very pretty stitched up with a single color thread on a single color felt. White thread on this purple sage would be lovely! You’ll just have to make another. :)
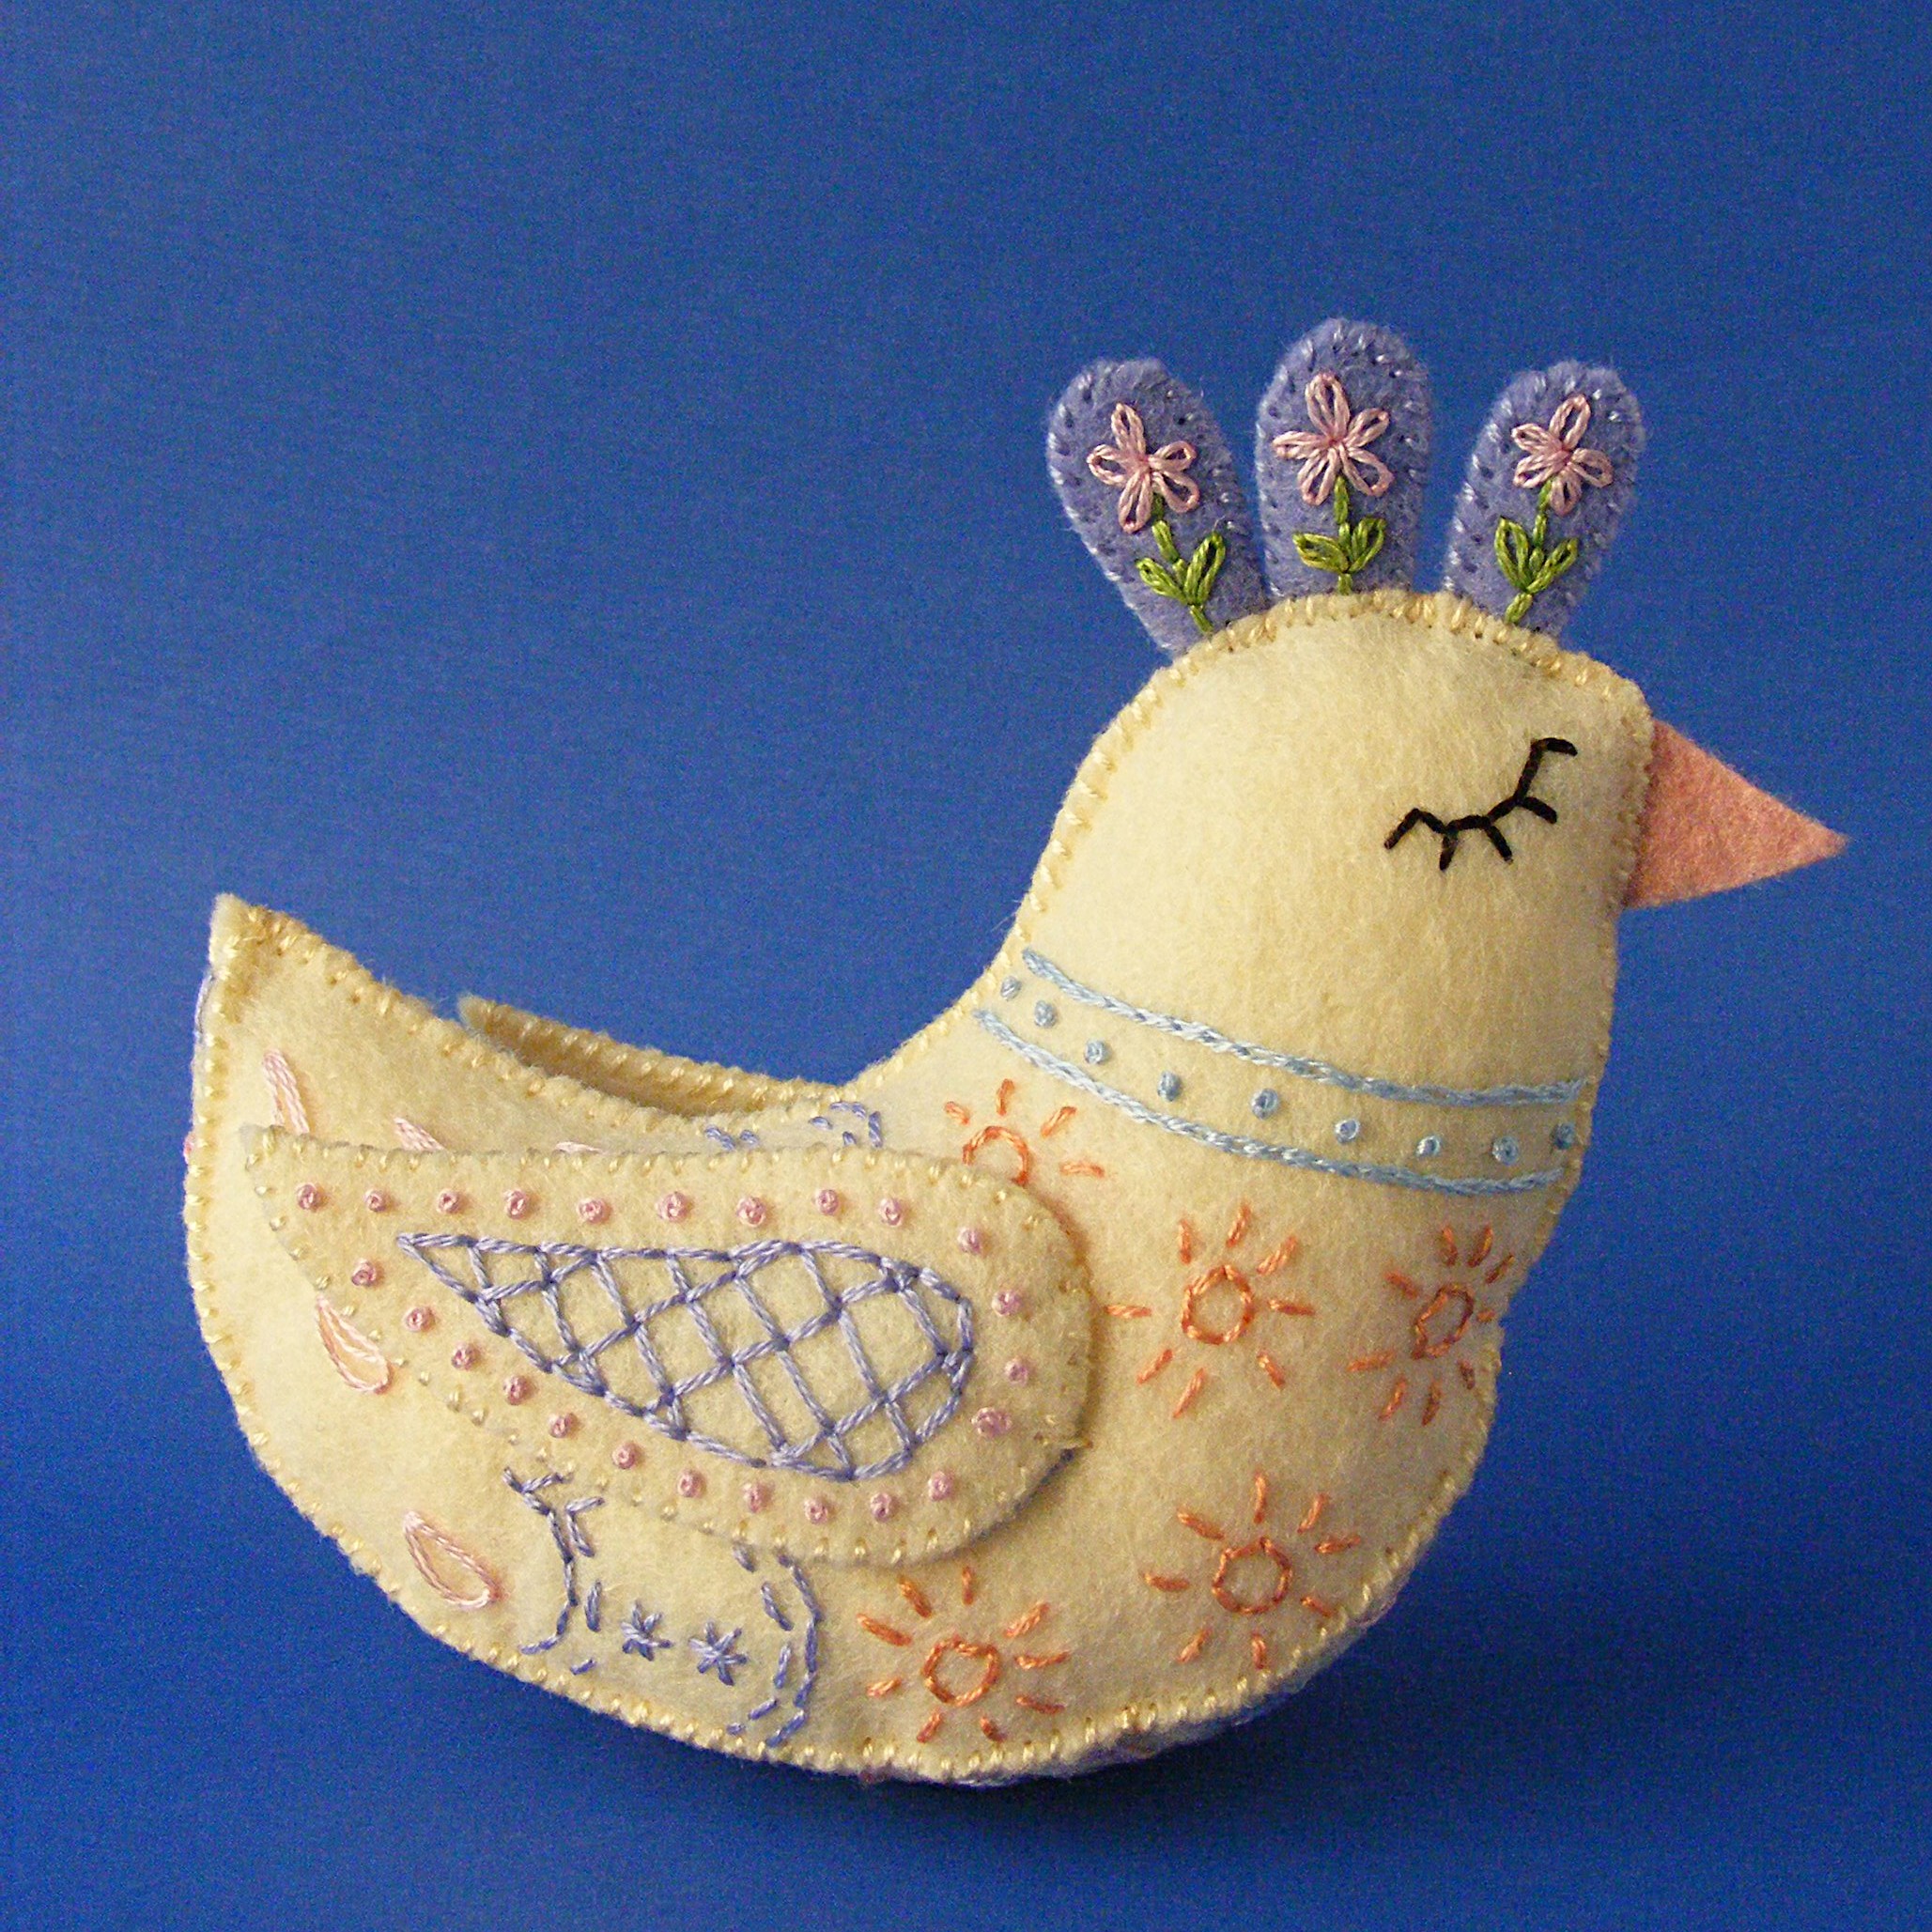
Update – I decided to stitch up a new version of Daisy with different colors. Look how pretty she is in this cream felt! (It’s actually called straw.)
Since she’s all hand-sewn, this free felt bird pattern is a great portable summer project. Take Daisy to the beach, to the pool, camping, on long car trips – you get the idea. 🙂
Happy stitching!


Play with some felt! Try the Oddballs – a fun pattern for silly monsters.
Thank you!!
You’re very welcome. 🙂
This is Monday, and on the cover page to your site the read on is not doing anything. It is not taking us to this adorable bird. Thought you should know.
The bird pattern is an exclusive for newsletter subscribers – the link to download the pattern went out in Monday’s email. If you’d like to subscribe you can do it here. http://eepurl.com/byYH9 A little while after you sign up you’ll get a welcome email that includes a link to all the exclusive patterns so far – including this one.
Love the bird
Thanks! 🙂
Hi Wendy,
I love this chicken but I think a put the email away.
Can I find the link probably in another mail?
Love to make this as a present.
Thanks for all your beautiful free patterns!
Happy Crafting,
Erika
There’s another free pattern coming in Monday’s newsletter – that’ll have a link to a folder with ALL the previous newsletter subscriber patterns. 🙂
Thank you very much. I love her.
Is this lovely bird still on the free list? I would love to make her?
She’s there, but I got reports that Google Drive (where the patterns live) was glitching the other day. It appears to be fixed now. 🙂
I used the link in the newsletter to get to this site, not able to download.
Can you be more specific? The newsletter had links to two places – this site for ALL the free patterns – and a second link to just the newsletter only patterns. Once there you should see 12 thumbnail images of the 12 exclusive patterns. You just need to click on the image for the pattern you want and it should download immediately. Did you have trouble with the actual download? Or just getting to the page with all the patterns to choose from?
Pingback: My Latest Project | MillerLife.net
Thank you for the free patterns. I loved making Daisy!
Pingback: Daisy Felt Bird Free Sewing Pattern