


This is my favorite pincushion style.
The button dimples on the top and bottom make it sit nice and flat.
The two colors for the top and bottom are fun.
And the rickrack around the seam?
Rickrack always makes me smile. 🙂
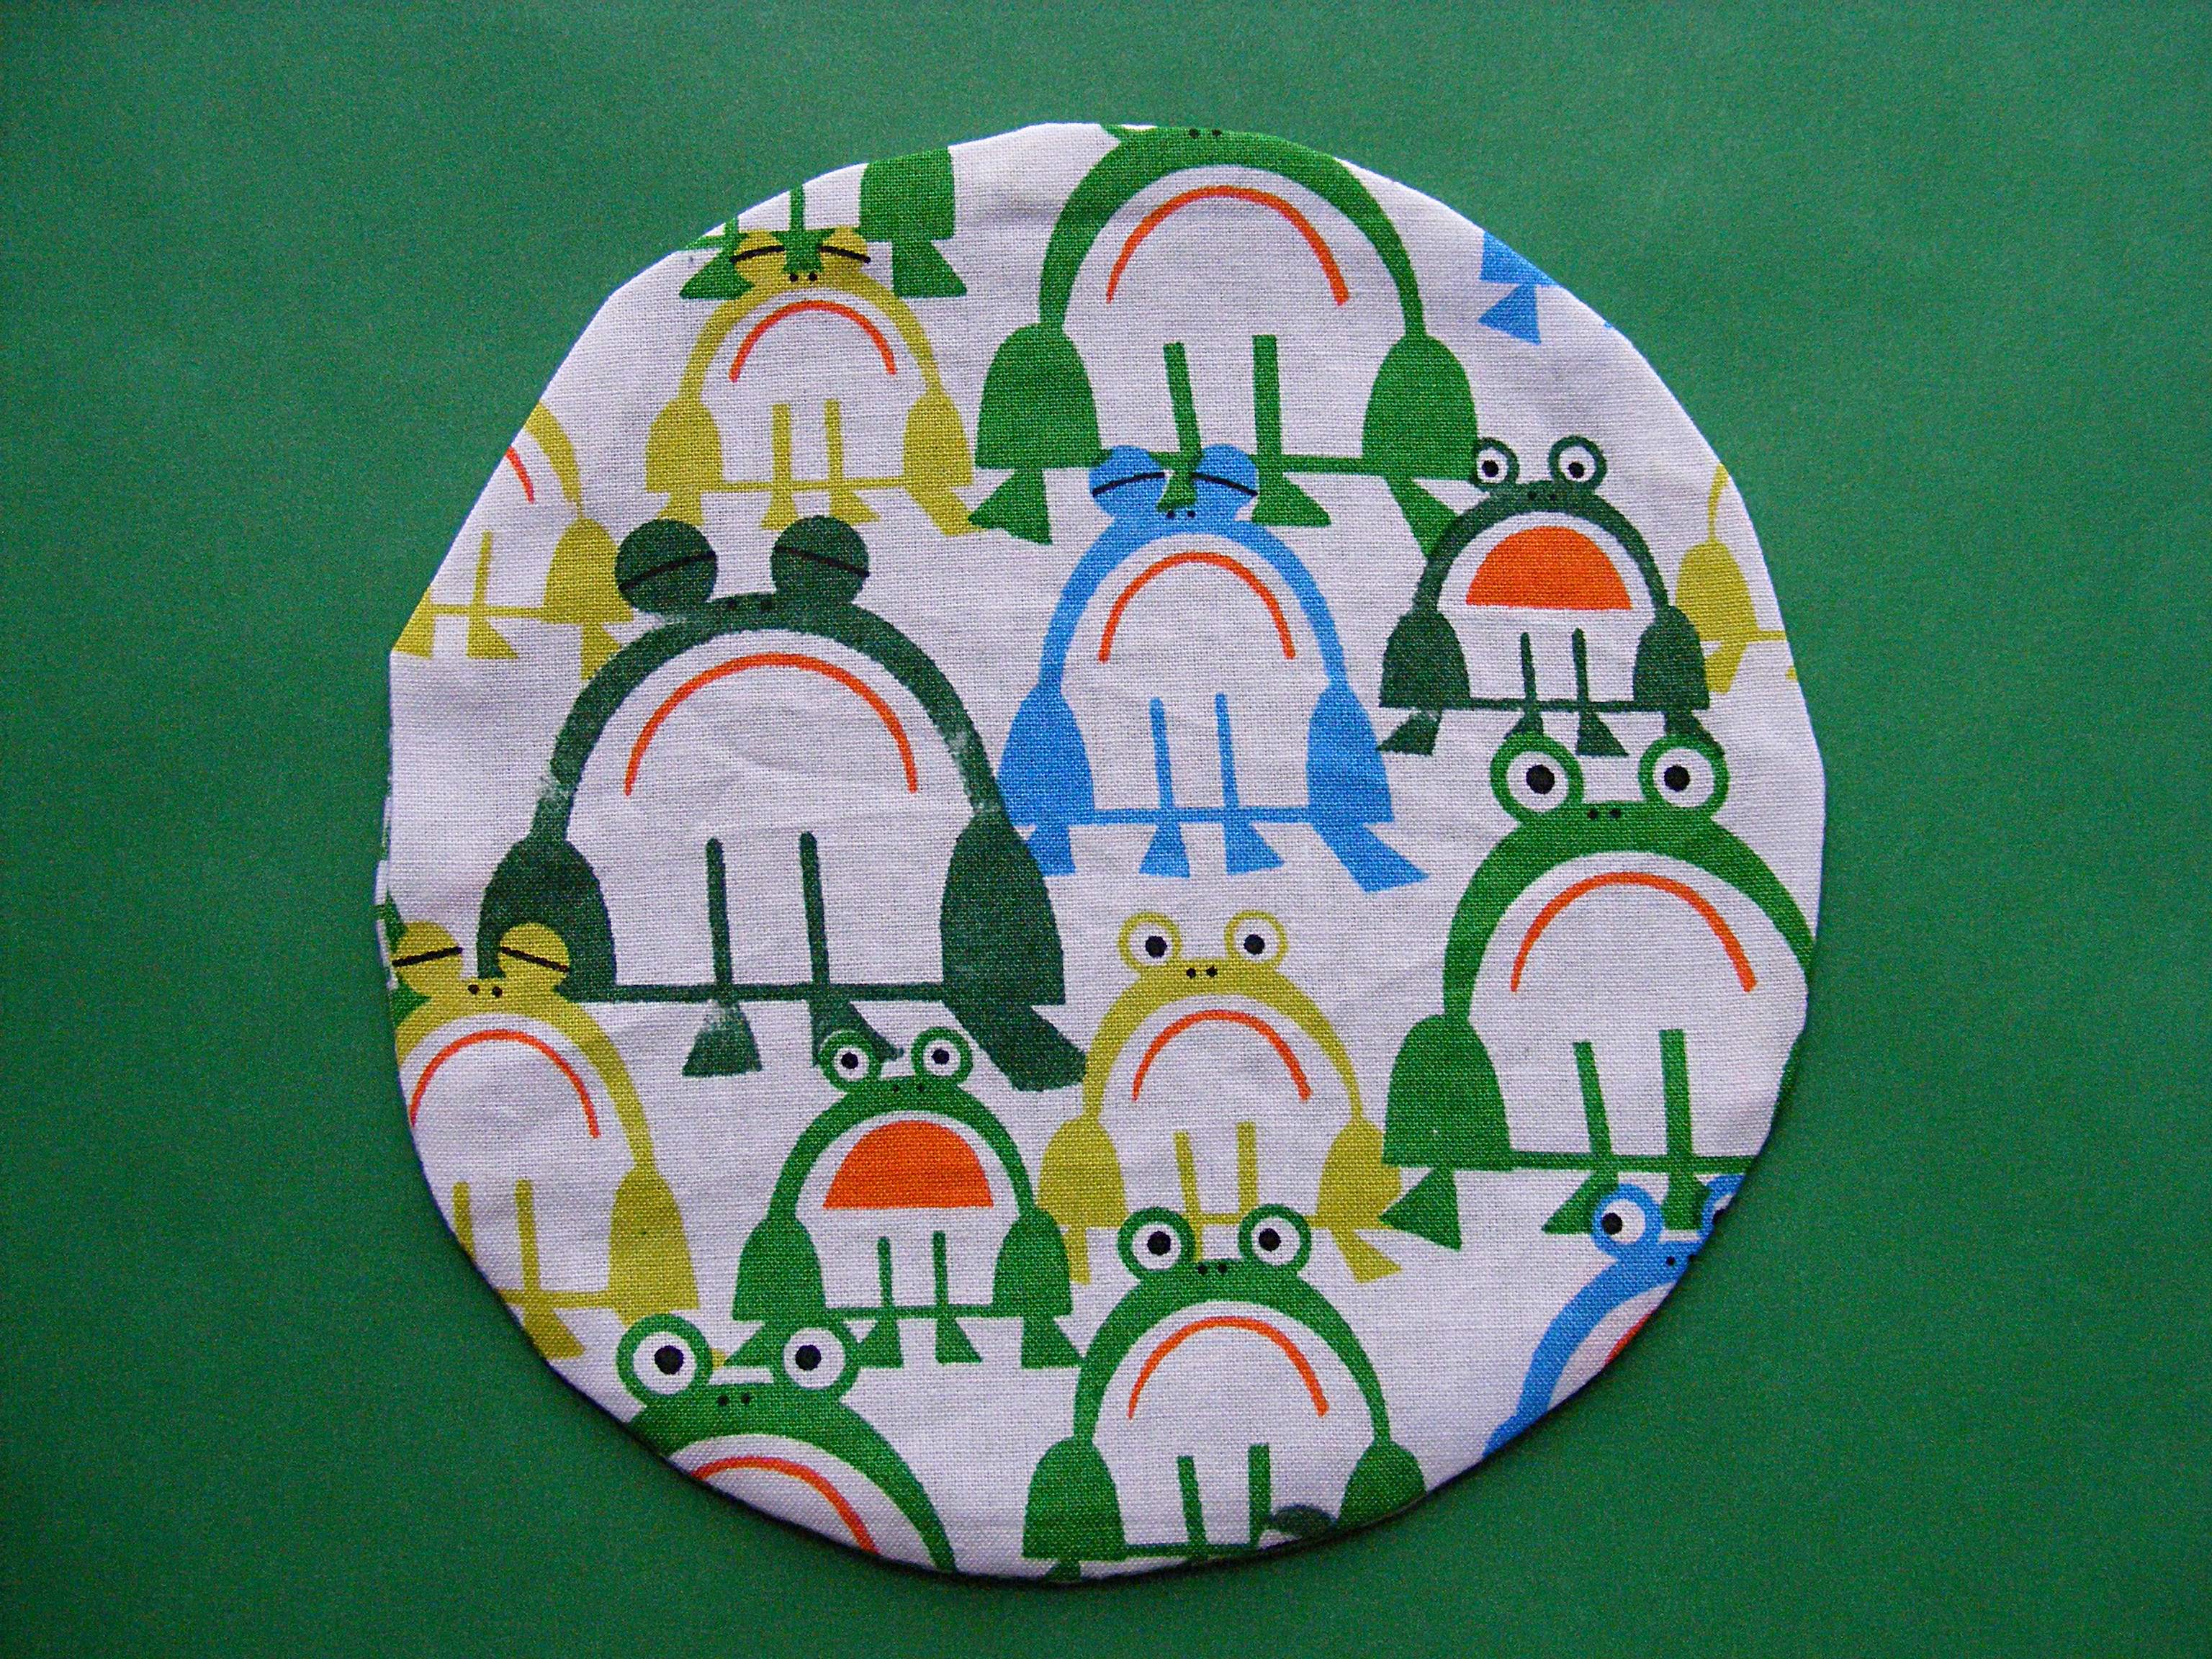
I’m love the Ed Emberley Happy Drawing collection from Cloud 9 Fabrics – it’s making my sewing room an even happier place. And you know I’m all about the happy. 🙂 This uses the frogs on one side, and the green scribbles on the other.
It’s an easy pattern – the hardest thing is packing in enough stuffing to make it really firm.
Here’s how to make it. . .
Materials
- two scraps of fabric, at least 6 inches square
- approx. 17 inches of rickrack (get the big or jumbo size – they’re easiest to work with)
- lots and lots of stuffing
- two buttons (I used 3/4″ and 5/8″)
- sewing machine, thread, basic sewing tools
Step 1
Cut one circle from each fabric. The circles should be about 6 inches in diameter. You can measure it with a compass or do what I did – trace around a dessert plate. 🙂
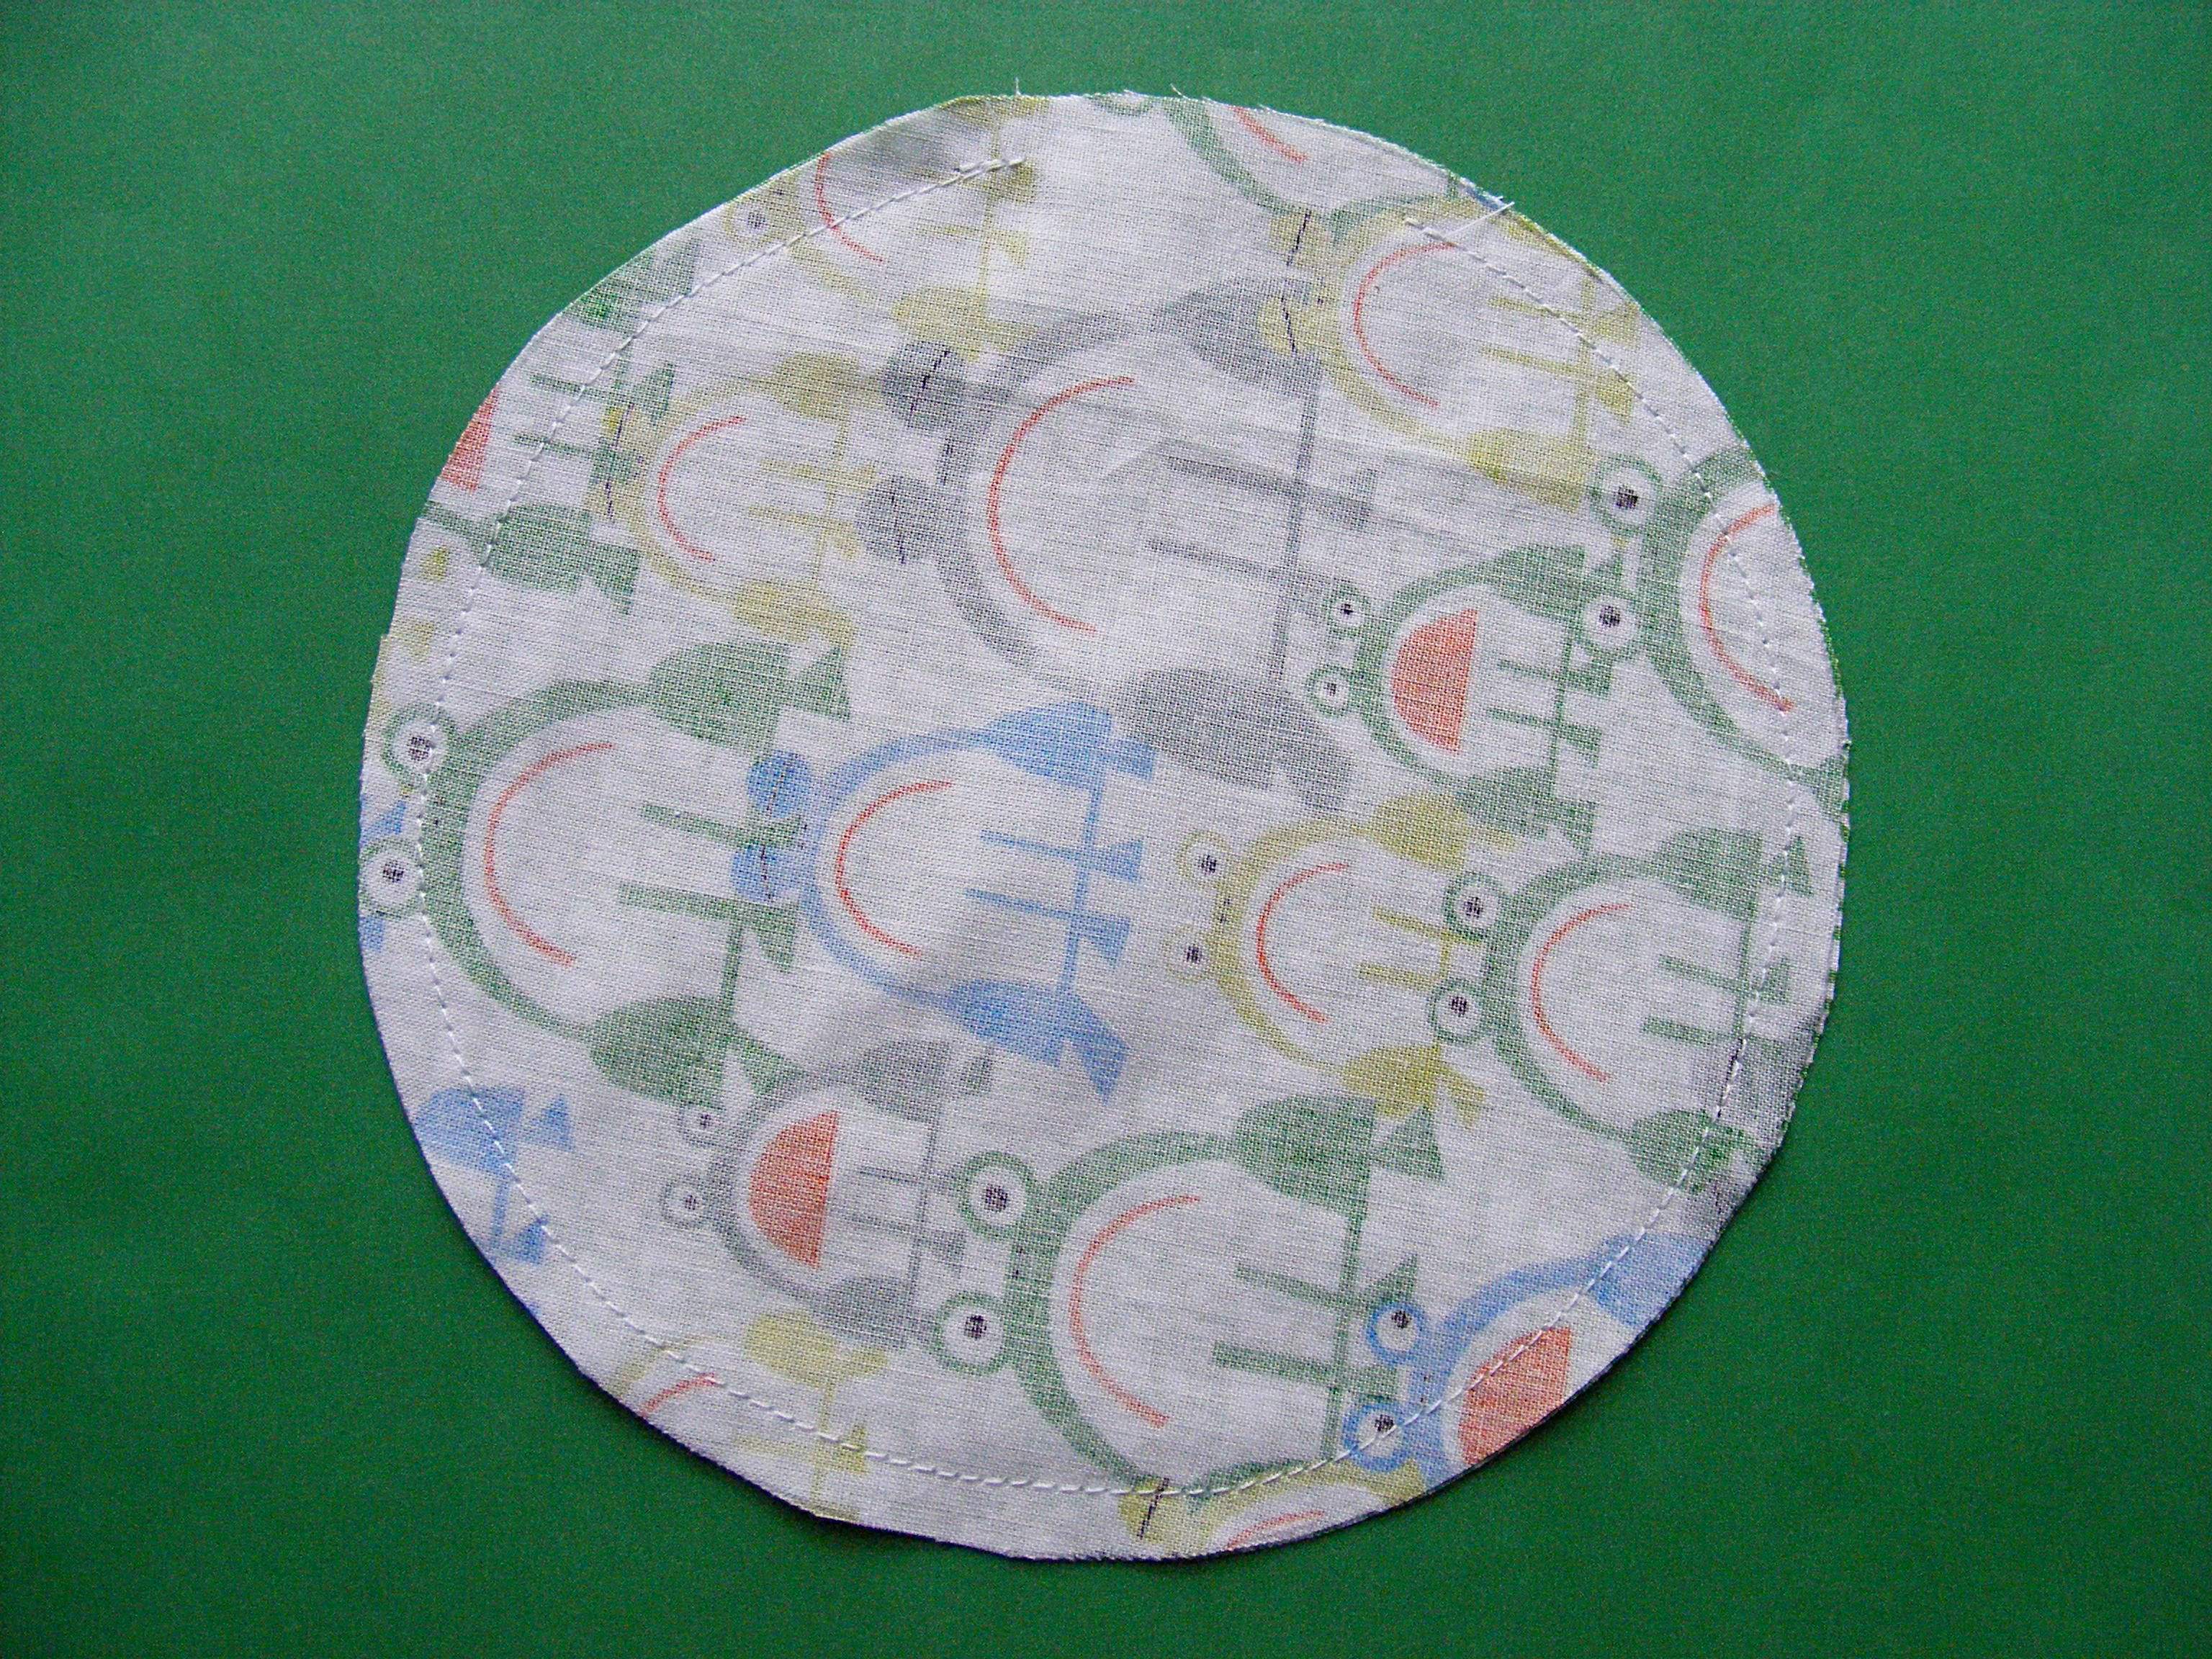
Step 2
Put the two circles right sides together and sew almost all the way around the edge. Use 1/4 inch seam allowance and leave a few inches open for stuffing.
Don’t forget to backstitch at the beginning and end of your stitching.

Step 3
Turn it right side out. Press the raw edges around the stuffing opening flat. This will really help you when you’re ready to sew up the stuffing opening.
Step 4
Fold your disk into fourths to find the exact center and mark it with a small marker on the top AND bottom.
Stuff the heck out of it. I’m not kidding here – the best pincushions are REALLY hard. It gives the pincushion weight AND makes the pins slide in and out with no resistance. A loosely-stuffed pincushion tends to “grab” the pins. Stuff. Stuff. Stuff until you can’t get any more stuffing in.
Sew it closed using whipstitch. You’re going to cover up the seam line with rickrack so there’s no need to get fancy with ladder stitching.
Step 5
Hand sew the rickrack over the seam.
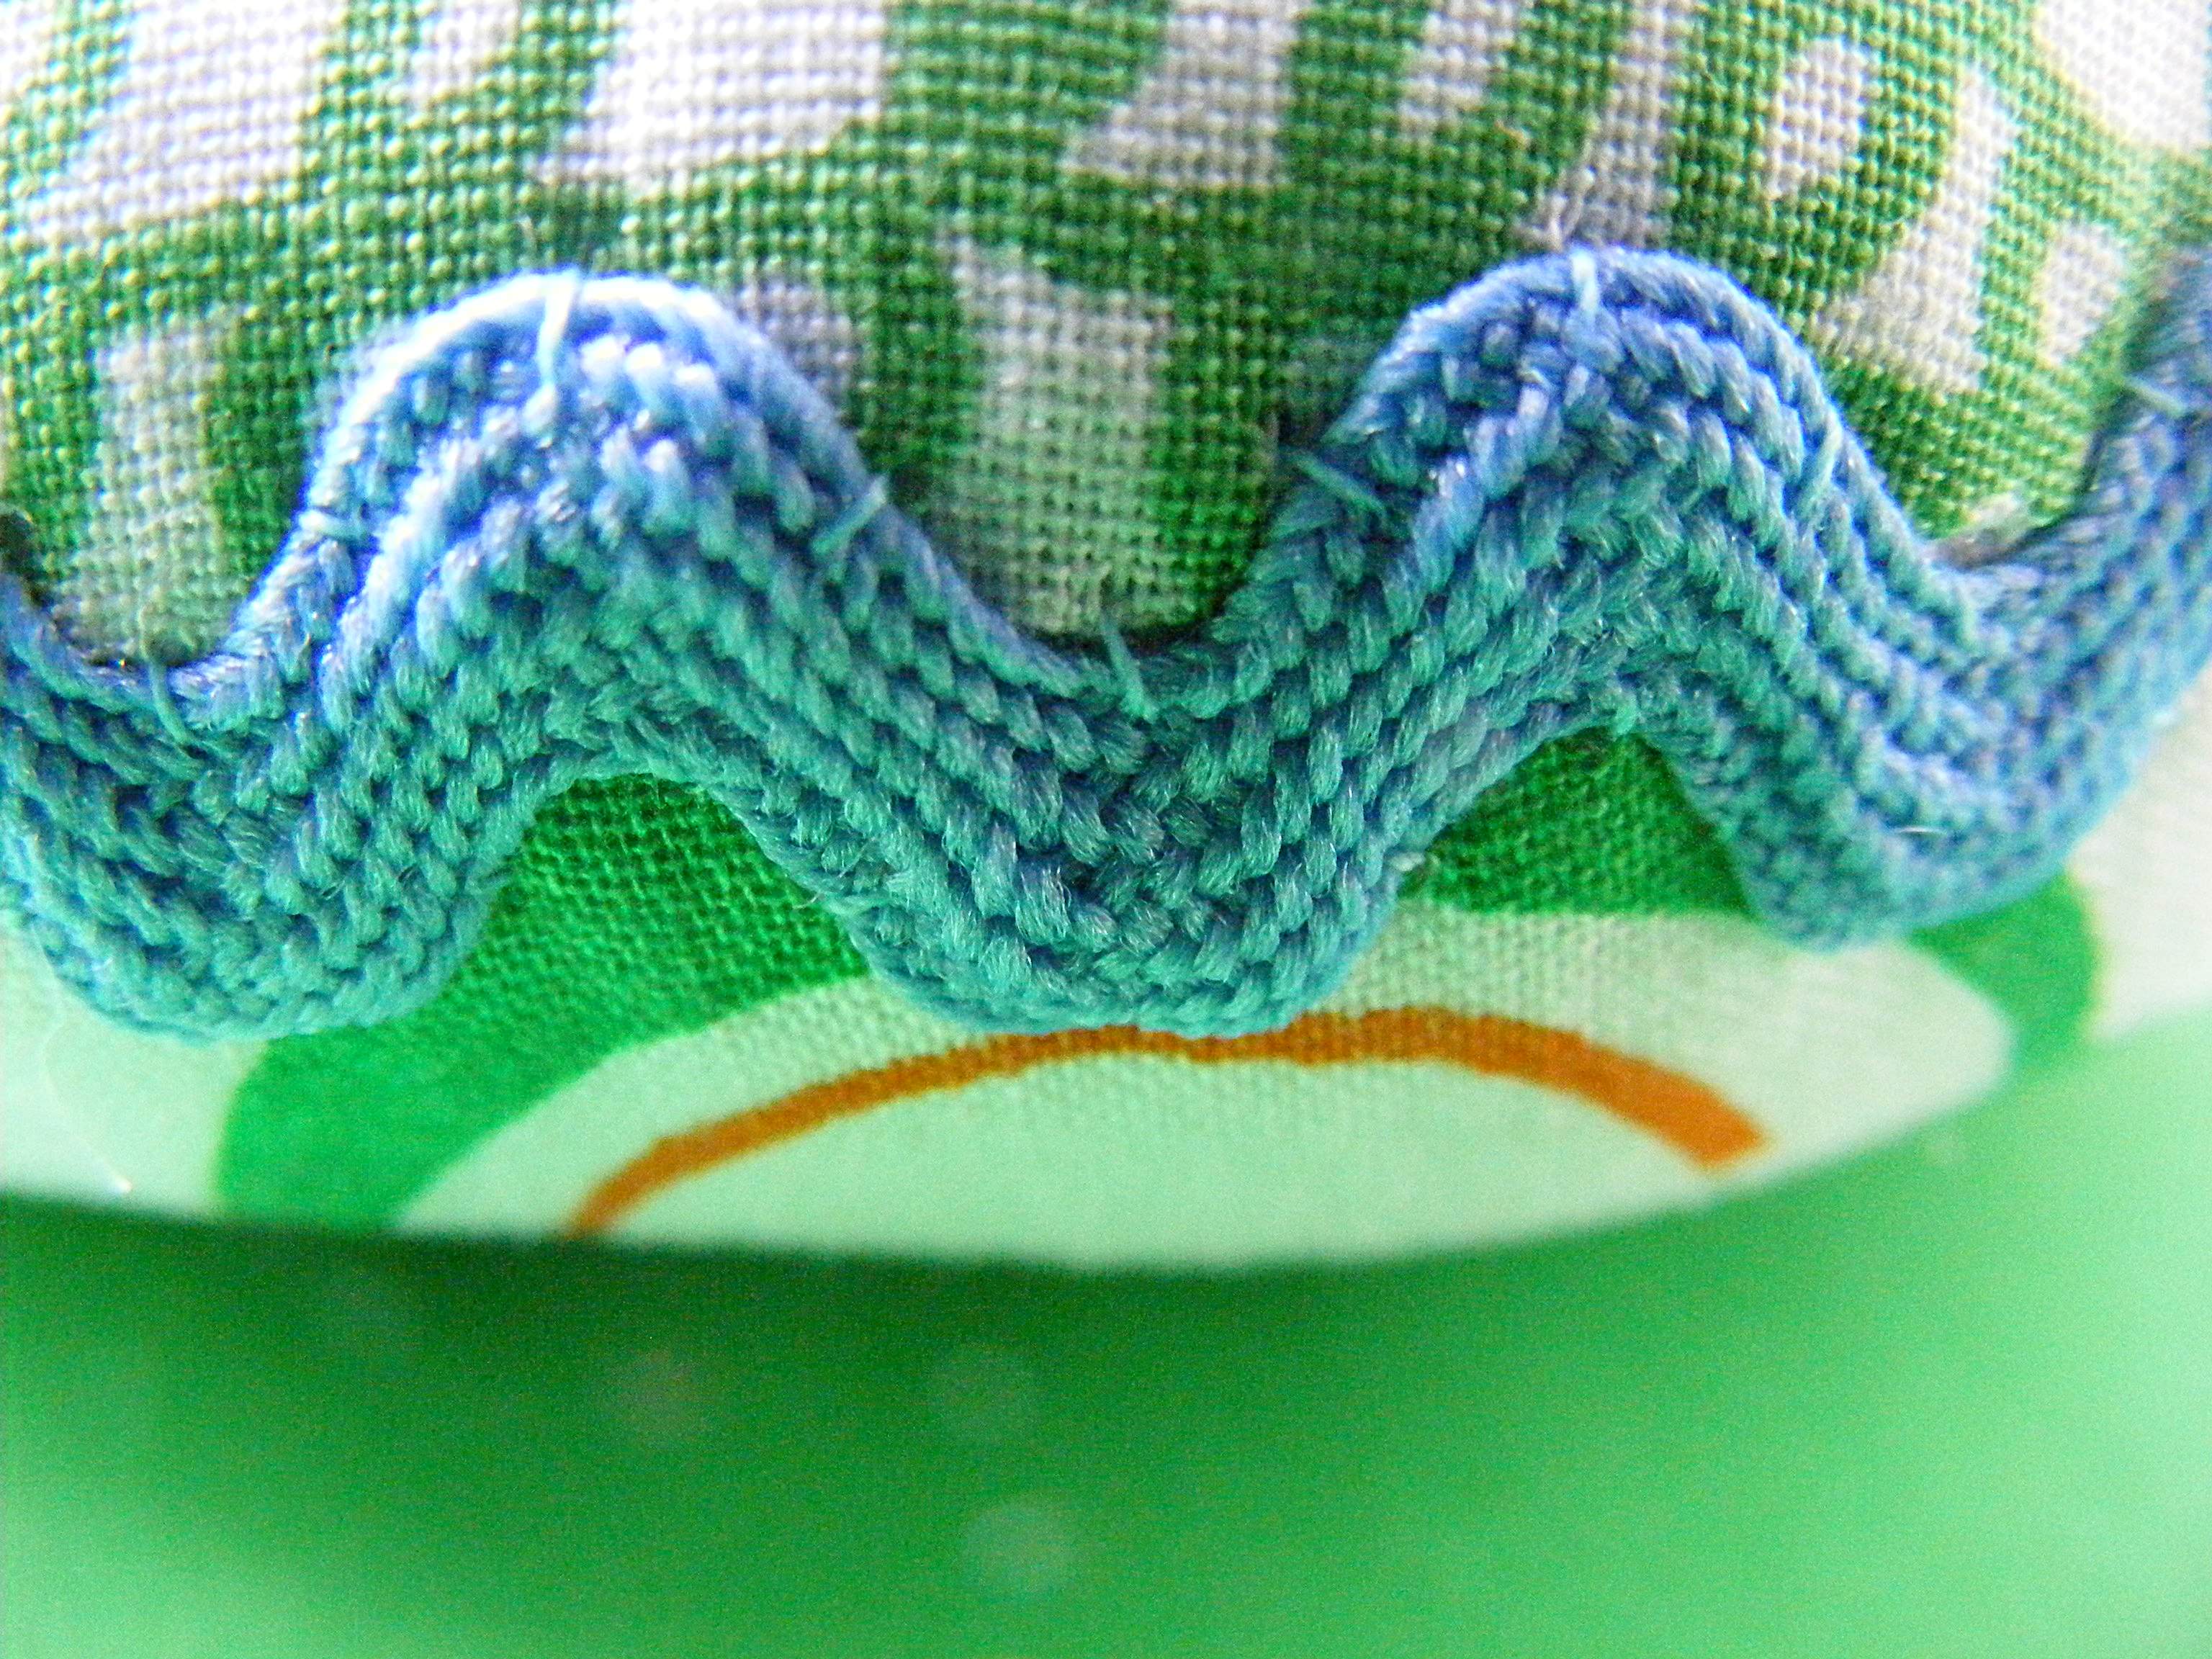
I take a tiny stitch at the top of each peak, the bottom of each valley, and midway up and down each hill. I do that on the top and bottom edge of the band of rickrack. Trim off the frayed ends of the rick rack and hit them with a dab of Fray-check or clear nail polish.
Step 6
Using the center marks you made in step 4, sew buttons to the top and bottom of the pincushion – pulling tight to make the pincushion dimple in at the center on both sides. This is the trickiest step of the whole project – watch this video to see how to do it without swearing.
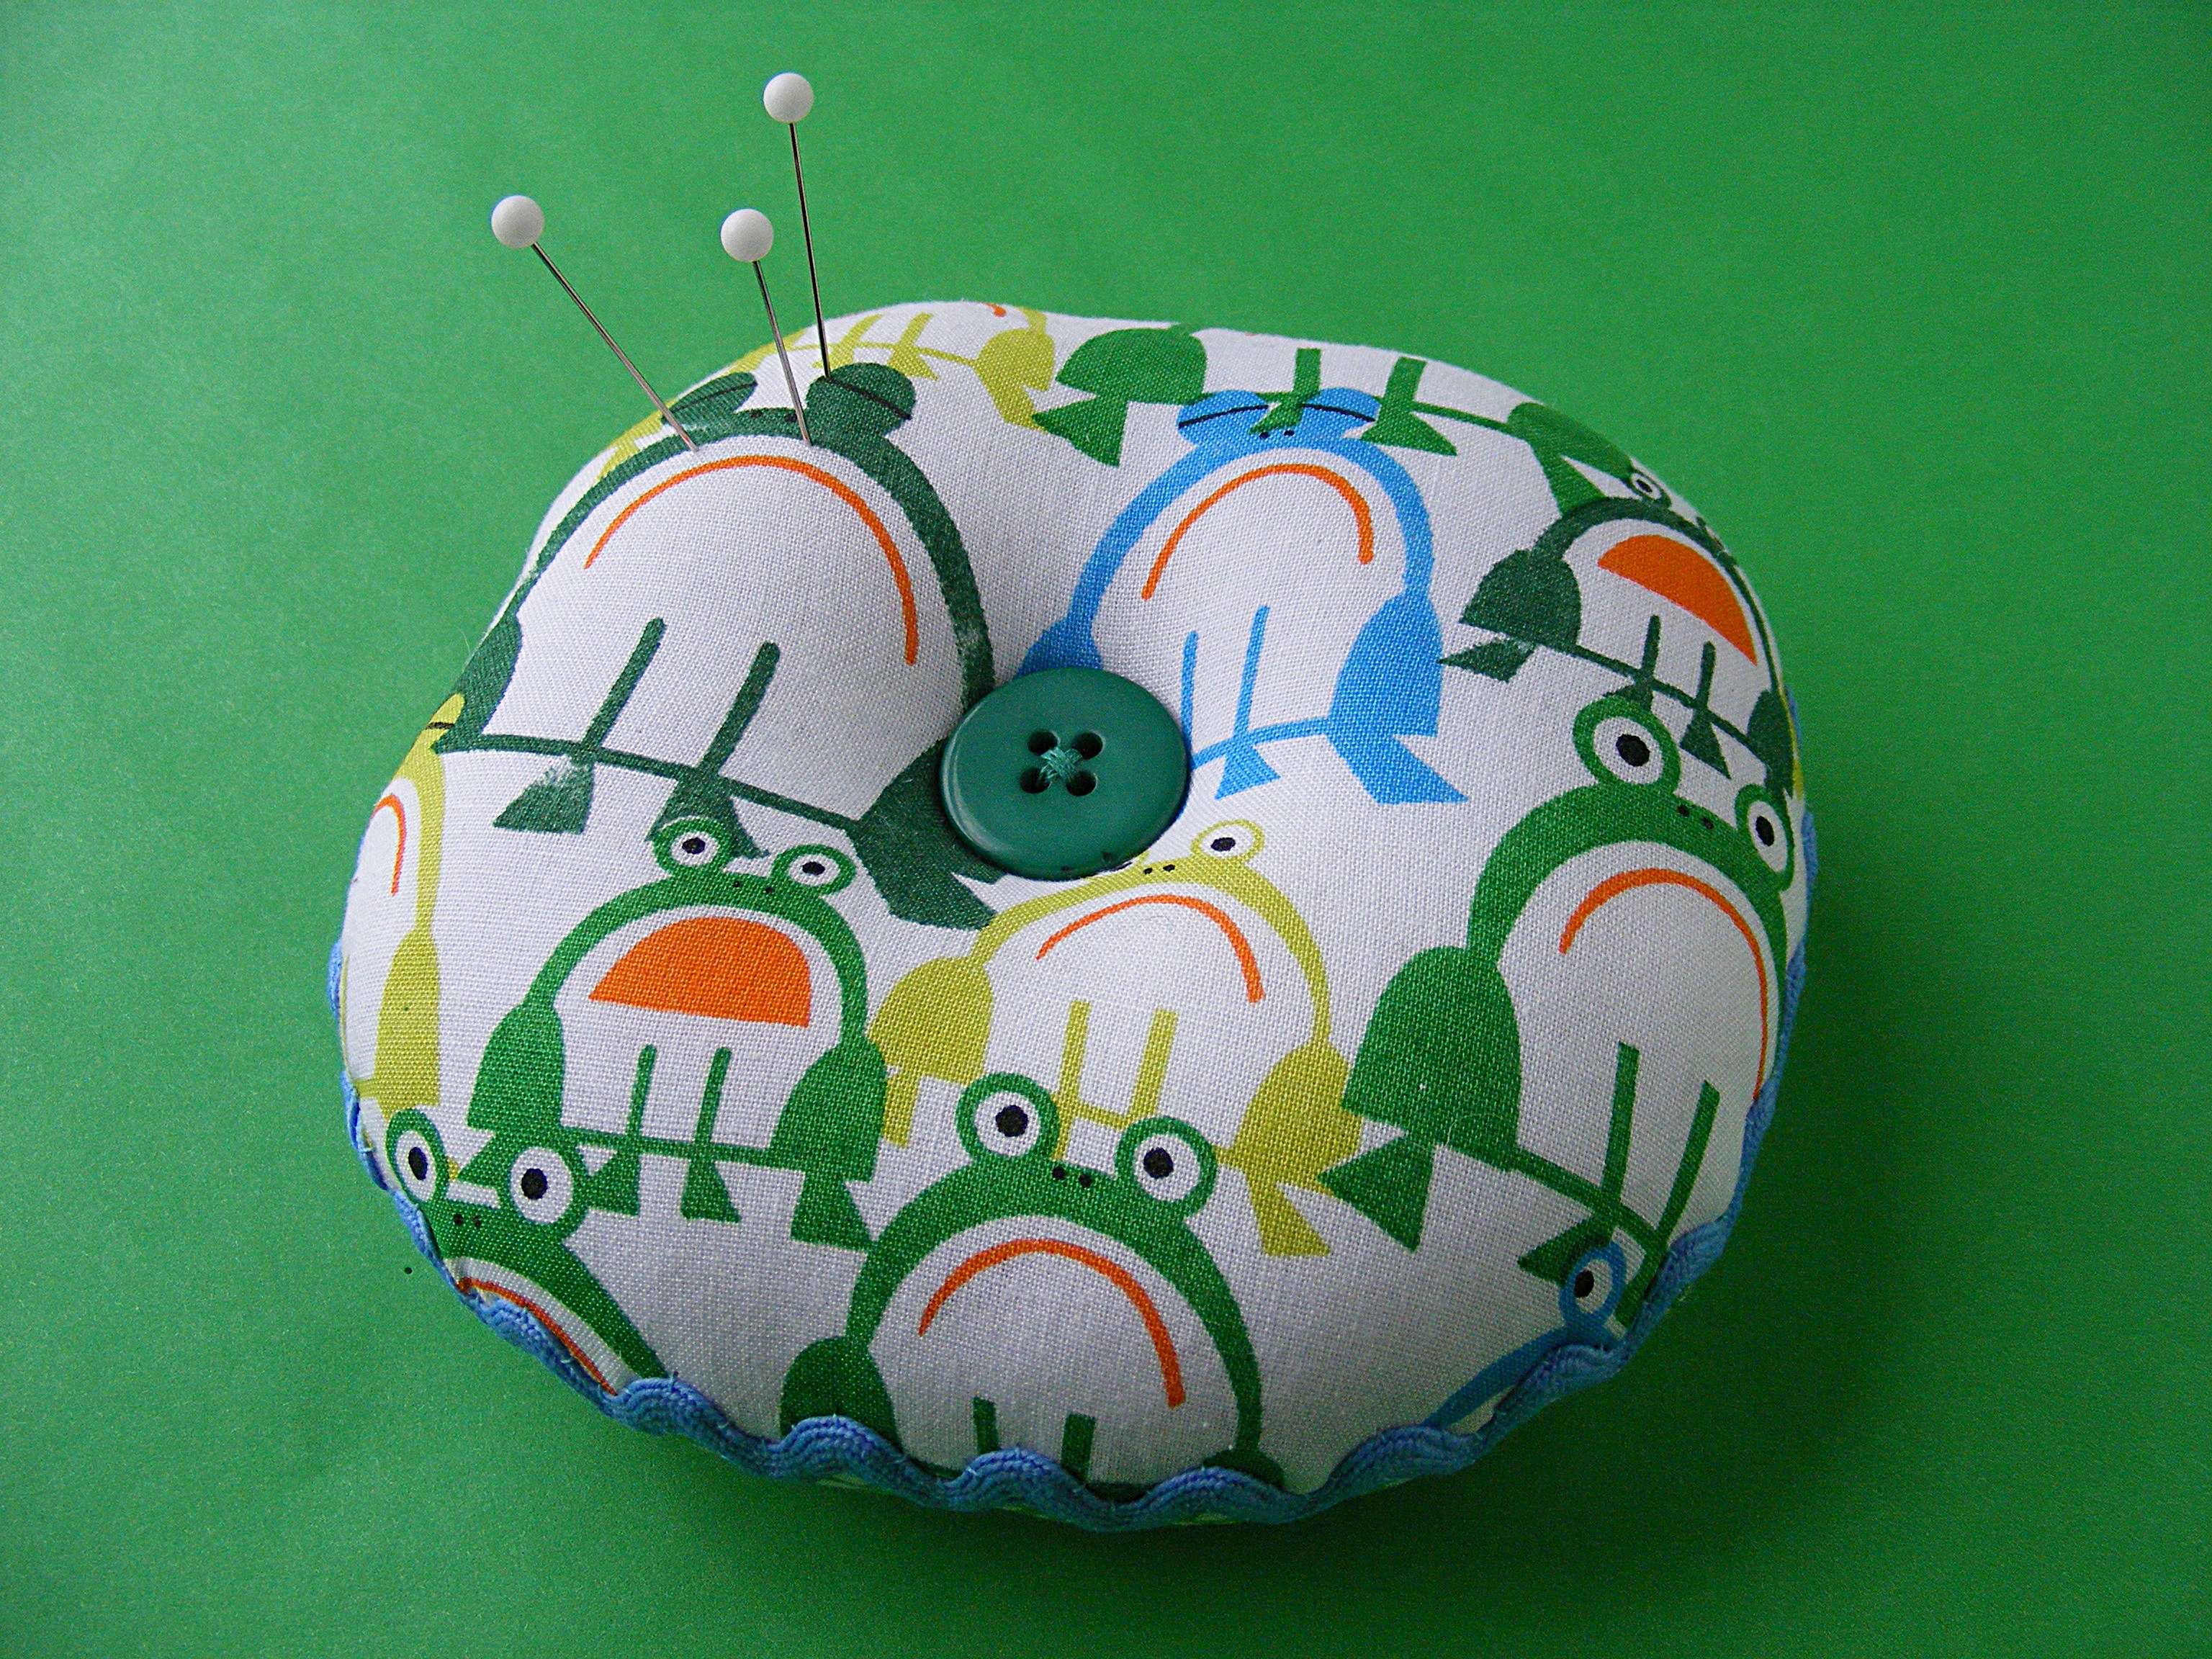
Finished! Stick in some pins and put it to work. Then make another. I keep one at my sewing machine, one at my cutting table, and one at my ironing board. You can NEVER have enough cute pincushions. 🙂
You could even make yourself a pincushion to match your other sewing room accessories. Here are links to the free patterns for all those other projects. . .
- Reversible Sewing Machine Cover
- Needle Cushion
- Easy Curtains
- Pattern Weights
- How to Recover Any Ironing Board
- Ikea Ironing Board Hack

Here are handy links to all the posts about quilting tools and supplies.
Sewing Machine
- My Sewing Machine and Why I Love It
- How to Choose a Sewing Machine for a Beginner
- My Favorite Sewing Machine Feet
- Basic Sewing Machine Maintenance
Iron
Rotary Cutting Tools
- My Favorite Rotary Cutting Tools
- How to Use a Rotary Cutter and Ruler
- How to Clean a Fuzzy Cutting Mat
Scissors
Other General Sewing Room Supplies
- Easy Pattern Weights (a free pattern)
- Pincushion (a free pattern)
- Needle Cushion (a free pattern)
- Sewing Machine Cover (a free pattern)
- How to Make a Design Wall
- How to Make a DIY Cutting Table
One More Hugely Popular Post that Seems to Fit Here Better than Anywhere Else
Return to the Let’s Make a Quilt main Table of Contents.
Move on to the posts about choosing your quilt pattern.
Happy sewing!


This is sew nice! I am sew into pincushions right now and I don’e even sew!
What do u think about using a metal pot scrubber as the stuffing? The way it has a dimple in the middle just made it jump to mind when I saw ur design! I just think that the metal mesh will help keep ur pins sharp. What do u think?
I have made some pincushions using the scrubbies and cookie cutters. Please take a look at my tutorial and let me know what u think!
http://buggalcrafts.wordpress.com/2012/05/12/cookie-cutters-not-just-for-cookies-anymore-post-27-ladybug-cookie-cutter-pin-cushion/
You could use a potscrubber, but modern pins don’t really need anything to keep them sharp or rust free. I use wool roving when I have it (the lanolin makes the pins seem to slip right into fabric) or regular old polyester fiberfill when I don’t.
Can u teach me how to sew Pom Pom around the pin cushion?
Buy the pom pom fringe that comes attached to a base strip and sew that on just like rickrack. The pompoms will dangle down.
Pingback: 12 modèles gratuits de coussins à épingles – Hand Craftsy France
Pingback: 12 patrones de alfileteros gratuitos – Hand Craftsy Spain
Pingback: 12 gratis speldenkussenpatronen – Hand Craftsy Netherlands
Pingback: 12 modelli gratuiti di puntaspilli – Hand Craftsy Italy
Pingback: 12 darmowych wzorów na poduszeczki igłowe – Hand Craftsy Poland
Pingback: 12 Padrões de Almofadas de Alfinetes Grátis – Hand Craftsy Portugal
Pingback: 12 kostenlose Nadelkissenmuster – Hand Craftsy Germany
Pingback: 12 бесплатных шаблонов игольниц – Hand Craftsy Russia