


I finished my design wall (you can get instructions here) and immediately started sewing some blocks to pin up there.
You see – I have a specific project in mind and I’m sooooo eager to get to it!
This is the door between my office and my husband’s office.
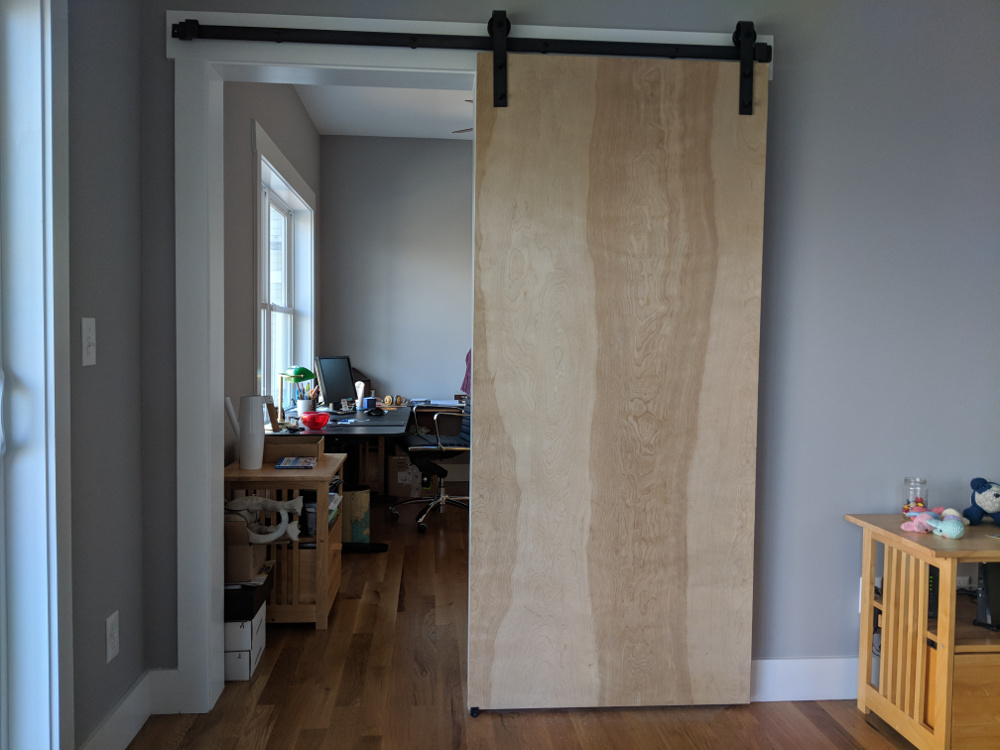
I love that barn door – and from the very beginning we planned to cover it with a quilt. Basically, I’m going to make two quilts – one for the front and one for the back, and I’m going to hand-sew the door into them (like a model on Project Runway) with a strip of solid fabric all around the thickness of the door.
I want to improv piece the quilts – but I’ve never really done that before. So I want to practice a bit and try some things out before I start on the big door project. And for that – I really wanted to have a design wall. It helps so much to be able to see the design straight on as it’s growing!
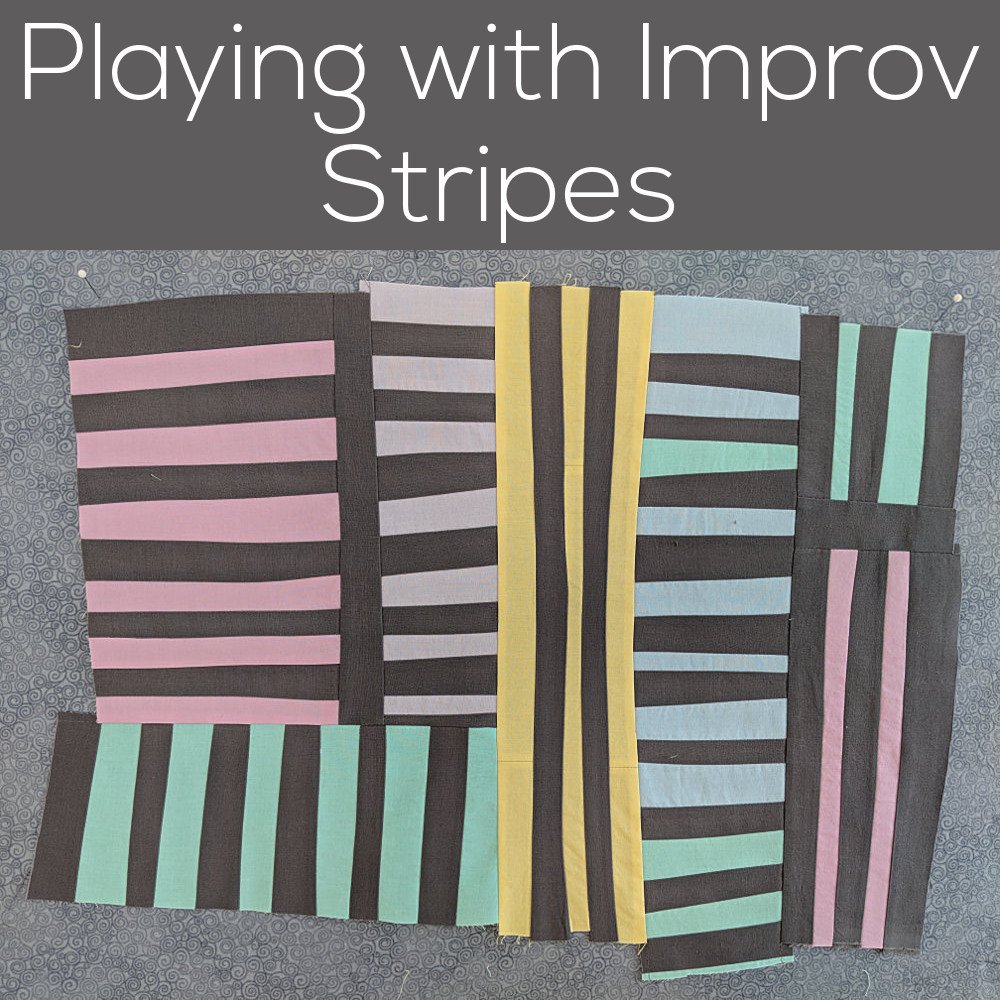
For my practice pieces I’m making some placemats. Each one will use a different basic shape so see what I like – and what’s fun to do. 🙂
I’m starting with stripes. I love stripes!
Here are my rules for this one. . .
- No rulers. I’ll use my rotary cutter and scissors – but no rulers, either for measuring or cutting. I want my lines to be slightly wobbly/crooked.
- A limited color palette of rich grey mixed with pastels. (All the pastels are all from my Rainbow Sherbet fabric bundle. Such pretty colors!)
- Big Stitch quilted with really dense stitching. Yay! I haven’t done any big stitch quilting for months and I’m itching to get back to it.
The first thing I did was measure out a space on my design wall – a little bigger than a placemat needs to be – and mark the four corners with pins. That way I can see what space a need to fill.
Then I started cutting and sewing. Remember – no rulers. I just grabbed some pastel scraps, cut a chunk of grey, cut them into strips, and sewed them together. This is so much fun! Once a finished a little chunk of pink, I moved on to other colors. Here’s a super short video showing each little chunk going up onto the wall.
After I was happy with all the chunks, I sewed them together. Easy peasy – nothing fancy.
At the end of the video you see it hooped up in a square frame all ready for stitching, stitching after one evening, and stitching after two evenings. So here’s a little more info about that part of the process.
- I’m using Sulky 12 wt. thread for all the quilting. That’s those little spools you see on top of the basted work.
- This video shows you how to do that Big Stitch quilting. It’s so much fun!
- The frame I’m using to held my work is called a Q-snap frame. There’s more info and a link to a source for it in that post about Big Stitch quilting.
It’ll probably take me about a week to do the quilting on this piece. It’s small (standard placemat size) but I only get to do hand work for an hour or two most evenings.
Happy stitching!
Best,
Wendi
