


 I know it’s not even Thanksgiving yet, but I wanted to share this free reindeer applique pattern early enough that you would have plenty of time to make it before Christmas. 🙂
It’s designed as a 10″ finished block, just like this free Santa applique pattern, this free Snowman applique pattern, and this free Mrs. Claus pattern. Use them all together to make a fun quilt or wall hanging!
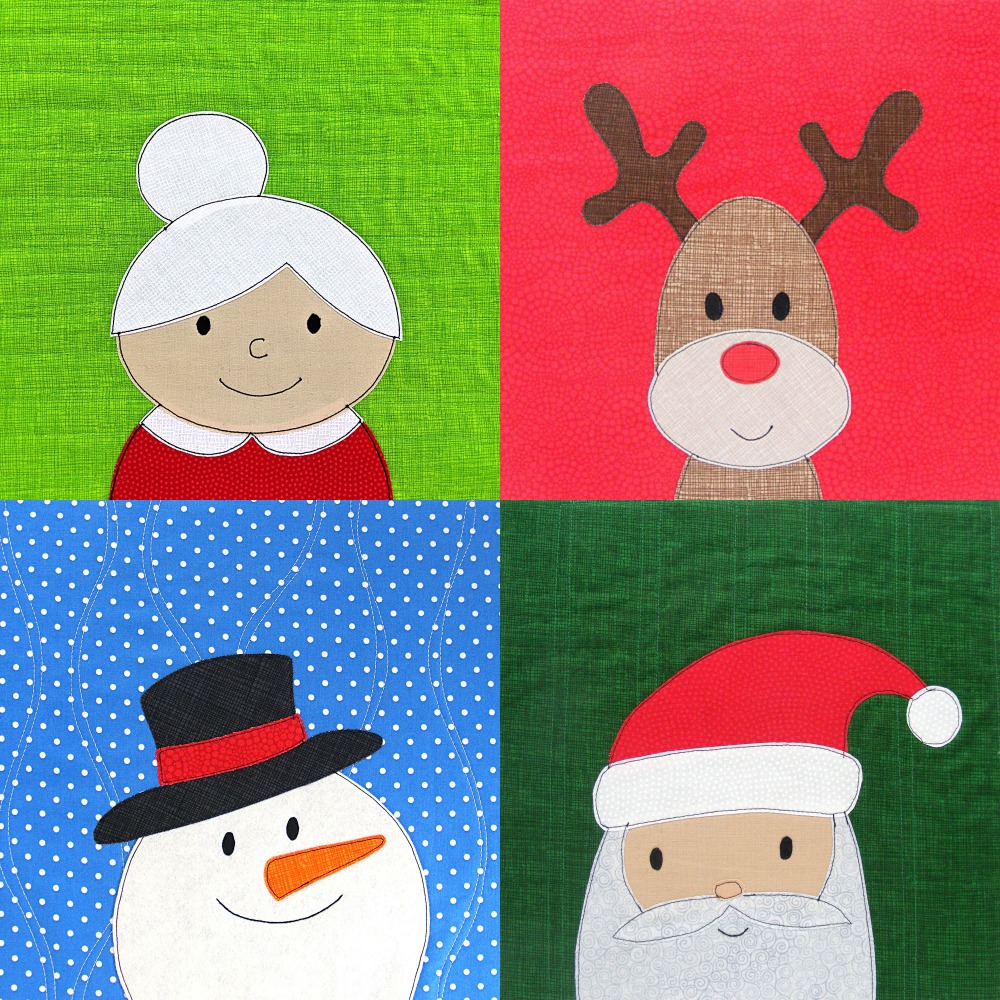
Or you can use Rudolph combined with one of these free patterns. . .
You can find all the free Shiny Happy World patterns here.
Ready to make him? Here’s how. . .
You won’t need much fabric – less than a fat quarter of everything, so you can probably find what you need in your scraps. Here’s what I used – all from Timeless Treasures. . .
- Pop in Poppy for the background block
- Sketch in Latte for the head and shoulders
- Sketch in Coffee for the antlers
- Sketch in Linen for the face
- Sketch in Ruby for his shiny nose 🙂
Want to give him a truly shiny nose? Use this tutorial to make the nose out of satin, or this one to make it out of shiny tissue lamé.
The instructions that follow are for Quilt As You Go and applique with fusible adhesive. You can, of course, use other applique methods. Find videos teaching other methods here.

Step 1
Cut a piece of background fabric and a piece of batting each 11″ square. You’ll trim it down to 10 1/2” square later, so it doesn’t have to be exact. If you’re using Quilt As You Go, quilt your block now. The quilting wouldn’t really show up on the busy fabric I chose, so I just quilted a simple grid and show it here from the back (batting) side.

Step 2
Trace or print the pattern onto the paper side of the fusible adhesive. I use printable Heat & Bond Lite fusible adhesive so I just print out the page. No tracing! The image has already been reversed, so just trace or print.

Step 3
Rough cut around each shape. Leave a little bit extra all the way around – a little extra extra (at least 1/4 inch) where there’s a dotted line. That’s the allowance that will tuck under other bits or into the seam allowance for a nice clean finish. Follow the package instructions and fuse each piece to the wrong side of the fabric.

Step 4
Cut out each piece neatly. Cut directly on the solid lines. Leave a little seam allowance past the dotted lines (like at the base of the antlers and the top and bottom of the shoulders). Cutting after you fuse ensures that the adhesive goes right up to the very edge.

Step 5
Trace any features onto the face. If you hold the piece up to a window, the light will make the lines very visible – even on dark fabric. I mark directly on any lines to be sewn (like the mouth) and inside the bits marking the appliqué position (like the eyes and nose).

Here it is after tracing so you can see the eyes, nose and mouth marked. I just use a fine Sharpie, but you can use something erasable if you’re worried about being able to stitch right over that line for the mouth.

Step 6
Peel off the paper backing, arrange the pieces, and fuse in place according to the adhesive product instructions. Remember – dotted line edges tuck behind other bits. The bottom edge of the shoulders should be lined up with the bottom edge of the block.
If you’re using Quilt As You Go, press your already-quilted block before adding the appliqué.

Step 7
Stitch all the edges down. You can use any stitch you like, in matching or contrasting thread. I really love the cartoony look of a simple straight stitch with black thread.
I demonstrate sewing with different thread weights here.
This post will help you with the order in which to stitch.

Step 8
Trim your block down to 10 1/2″ square.
Finished!
I hope you have fun with this guy – and I can’t wait to see what you make! Share your photos in the Shiny Happy People group so we can all see. 🙂

Happy quilting!
Best,
Wendi
Super cute. Thanks for sharing.
Amalia
xo
Thank you I am going to make Christmas Pillows.
Renda
Pingback: 21 Ways to Save on Christmas Decor (Part 5) | Tips for Budget Stretchers
This is the most charming, darling Reindeer I have ever seen. I just love all that you do! You truly make everything shiny and happy. A very Merry Christmas to you! 🙂
Where do I click to get the pattern for this one? I see the instructions but not a printable pattern…
It’s in Step 2 – “Download the templates here.”
Pingback: Free Nutcracker Applique Pattern - Shiny Happy World
Pingback: Free Dove Applique Pattern - Shiny Happy World