


It’s another Tip Tuesday! Today, I’m going to show you, step-by-step, how I tie a knot in my amigurumi to secure limbs.
My preferred method of tying knots in amigurumi is to attach the limbs to the body before the body is stuffed, so that you can tie the knot on the wrong side of the work.
How to tie a secure knot
You don’t want your animal’s arm/leg/whatever to fall off, so it’s important to tie a secure knot. Here’s how I do it:

The knot begins after you’ve already done your sewing of the limb to the body. Once you’ve done that, pull your yarn (already on a tapestry needle) to the wrong side of your work:

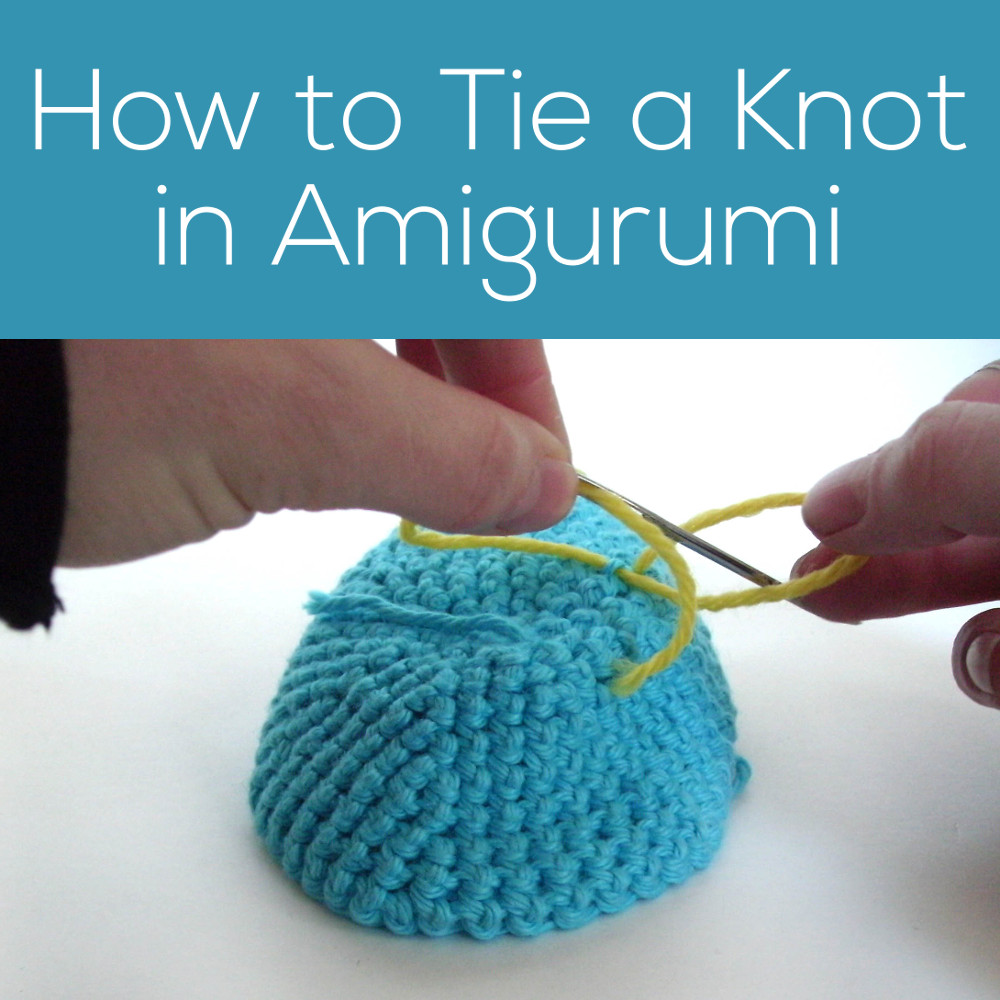
Insert your tapestry needle (from right to left) into a stitch of the body. I like to pick a stitch close to where the yarn has been pulled through to the wrong side, so that there isn’t extra yarn flying around:

Now, pull the tapestry needle with your left hand (not all the way!), and stick your right index finger in the loop that forms on the right:

Insert your tapestry needle (from left to right) into the loop that the index finger on your right hand has been holding open:

Hold onto the tapestry needle with your right hand (taking it out of the loop it was holding), and stick your left index finger into the new loop that has formed on the left:

With your left hand, pull on the loop. This will cause the old ‘right-side’ loop to shrink:

You’re almost there! Now, insert the tapestry needle (from right to left) into the loop that your left hand is holding:

Now, you want to pull the knot snug. Pull the yarn (you can remove the tapestry needle if you’d like):

And you’re done!
It looks a little complicated at first, but once you do it a few times, it becomes second nature! And this trick results in a firm and secure knot… gotta love that!

Here are handy links to all the posts about closing up the stuffing opening and fastening off in amigurumi. . .
- How to Close Up Your Stuffing Opening – Drawstring Method (Wendi’s favorite)
- How to Stitch Up Those Last Few Rounds (Stacey’s favorite)
- How to Fasten Off Amigurumi
- How to Tie a Knot in Amigurumi
Return to the main table of contents for Let’s Learn to Crochet Amigurumi.
Move on to the lessons for attaching parts.
Happy stitching!


Hi! How do you tie it down when your pieces are already filled out?
You can use the exact same knot. Just bury your tail in the stuffing after you’re done. Stick the needle in very close to your knot and bring it out anywhere on the other side of the softie. Pull it a little snug and snip off any excess – the last bit of the tail will pop right back into the softie and disappear.
Thank you I’m new to amigurumi and find sewing limbs etc really awkward this will help!
I know you showed step by step, but I’m the type person that need the video tutorial. I can follow on the video, but step by step is difficult for me, sounds crazy I know.