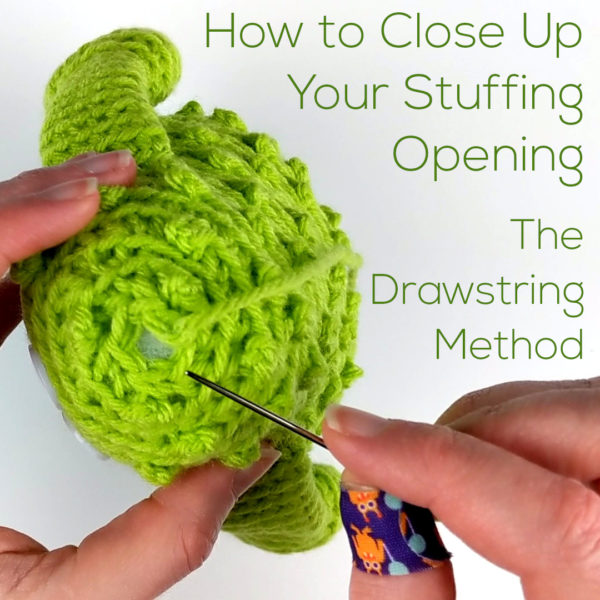
Recently I’ve been looking for a different way to close my amigurumi. Slipstitching across the opening works just fine, but sometimes it leaves a pointier top than I would like. I wanted something that was more consistently smooth.
After a bunch of experimentation, I decided on a new method where I close up the top like a drawstring bag. It works really well – and it’s super easy!
Here’s how to do it.
See how easy that is?
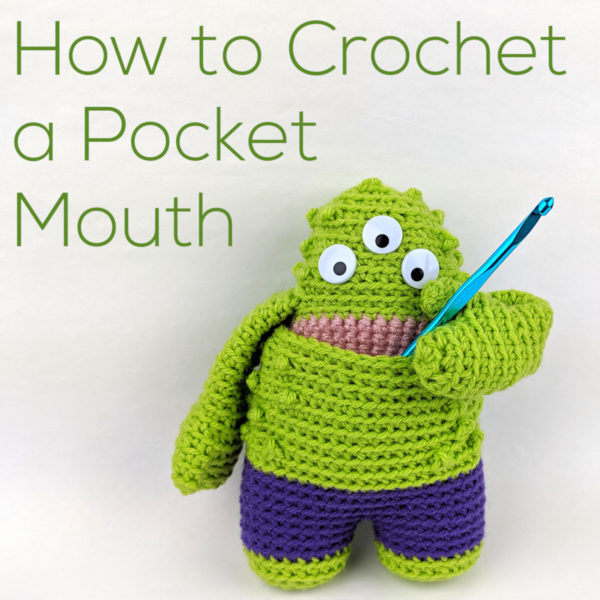
Here are handy links to all the posts about closing up the stuffing opening and fastening off in amigurumi. . .
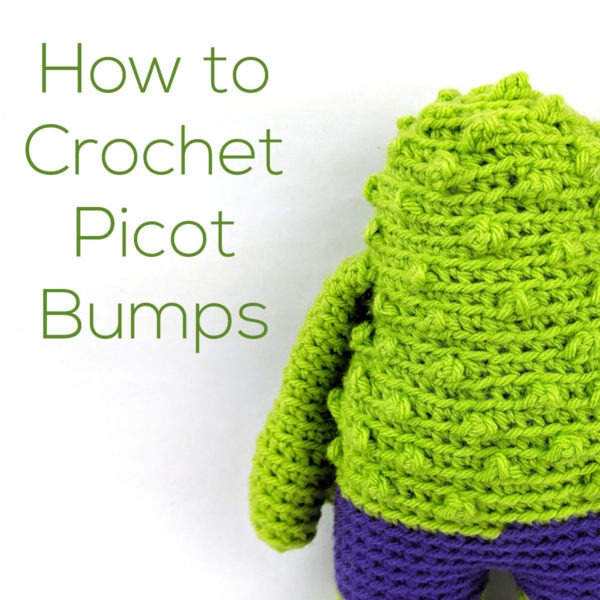
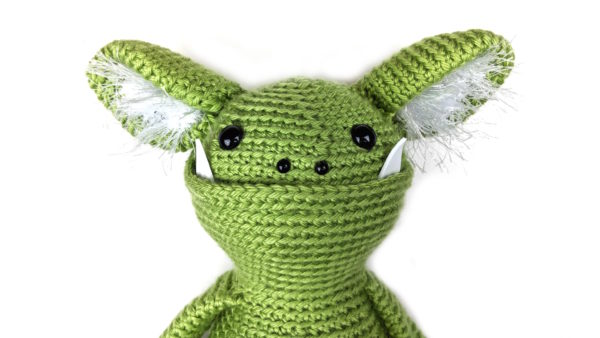
I wanted him to have spiky little bumps all over his back and head so I used a modification of a picot stitch to crochet picot bumps. Picot stitch is usually used as an edge treatment, but in this video I show how you can use it within the body of an amigurumi. It’s an easy and fun way to add texture!
See how easy that is? You can use this technique to add a spiky, bumpy texture to any amigurumi.
Have fun with it!
Here are handy links to all the posts teaching more fancy crochet stitches. . .
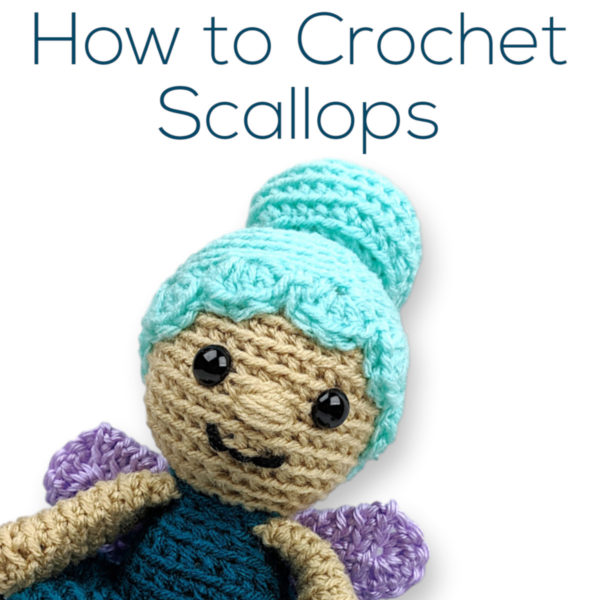
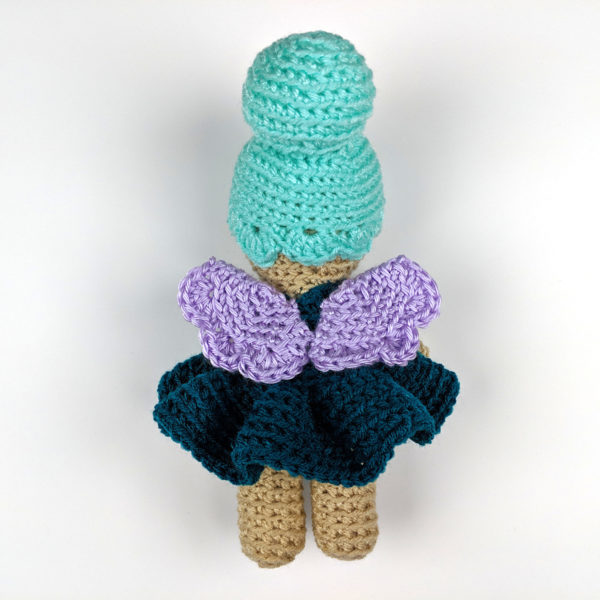
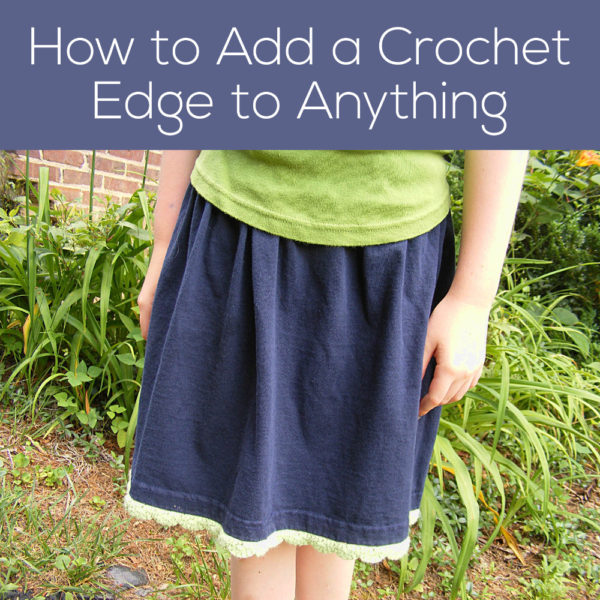
In the video I mentioned that you can use the same method to crochet scallops onto things that aren’t crocheted – like the hem of a skirt, or the edge of a pillowcase. You just need to make some stitches around the edge to anchor your crochet. There’s a video showing how to do that here.
Here you can see I’ve added some pretty scallops to the bottom edge of a skirt made from an old T-shirt.
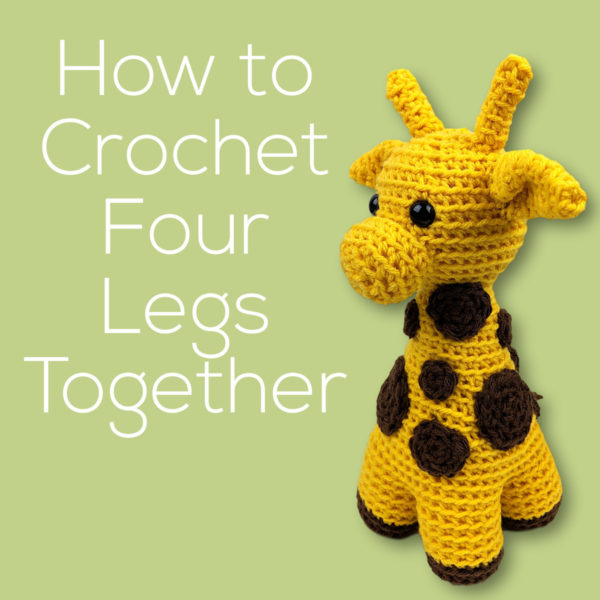
I was a little stiumped when I started to design this giraffe. How to crochet four legs together?
I really love making amigurumi that stand on two legs. Some of my favorite patterns use this basic shape and it’s really easy to do. Byron Bear here is a good example.
But when I designed this giraffe I wanted him to stand on four legs.
I did some digging online and I found that there are a lot of very different methods out there to do this, but all of them felt a little trickier than I wanted for beginners, so I came up with my own method based on how I like to crochet two legs together. The process is really the same – just with more parts!
Here’s a video showing how. . .
It works really well – and it’s pretty easy! If you can crochet two legs together (as I do in so many of my patterns) you can definitely crochet four legs together for this guy.
First of all – gauge isn’t that important for amigurumi.
You could make hundreds of amigurumi and never once measure the gauge.
When do you need to worry about it?
One – if you want your finished project to turn out the size the pattern says it will be.
Two – if you have exactly the amount of yarn specified in the instructions and you don’t want to risk running out.
So how do you measure it?
Well, because you’re stitching in the round it’s a little different than other gauge instructions.
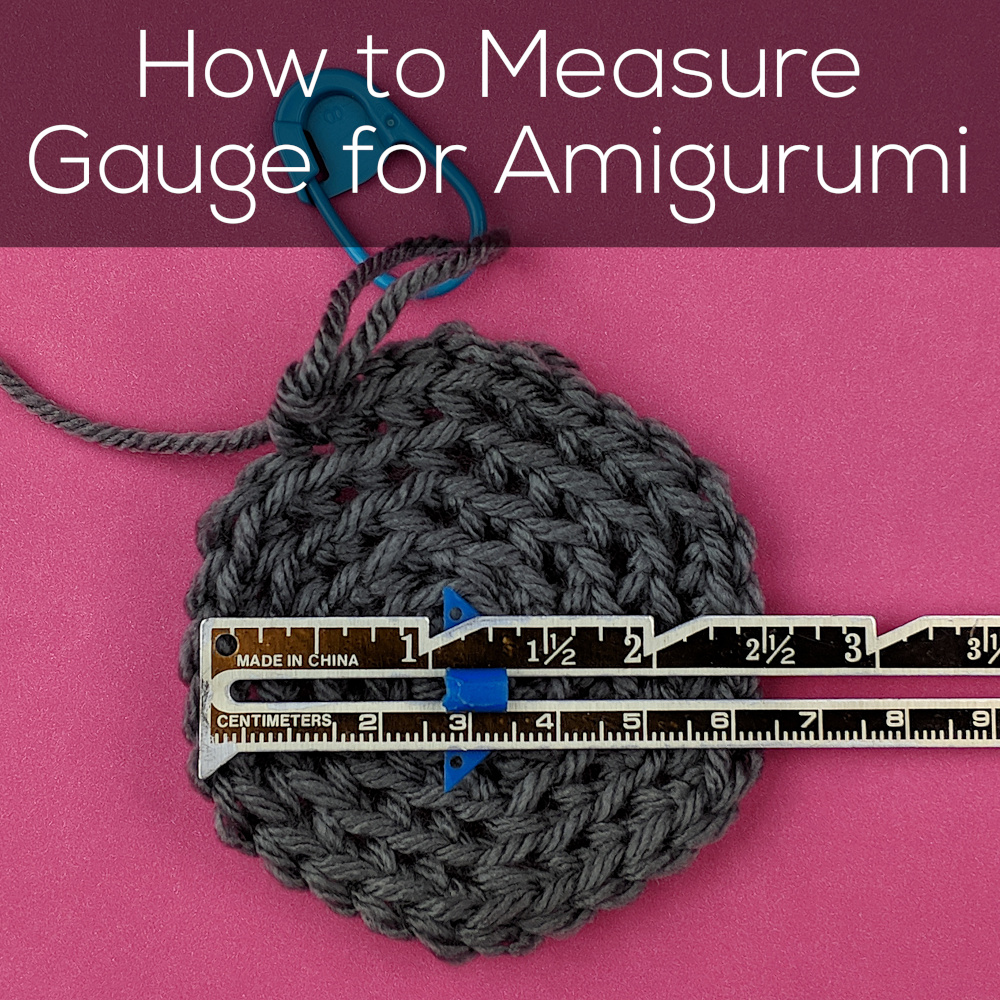
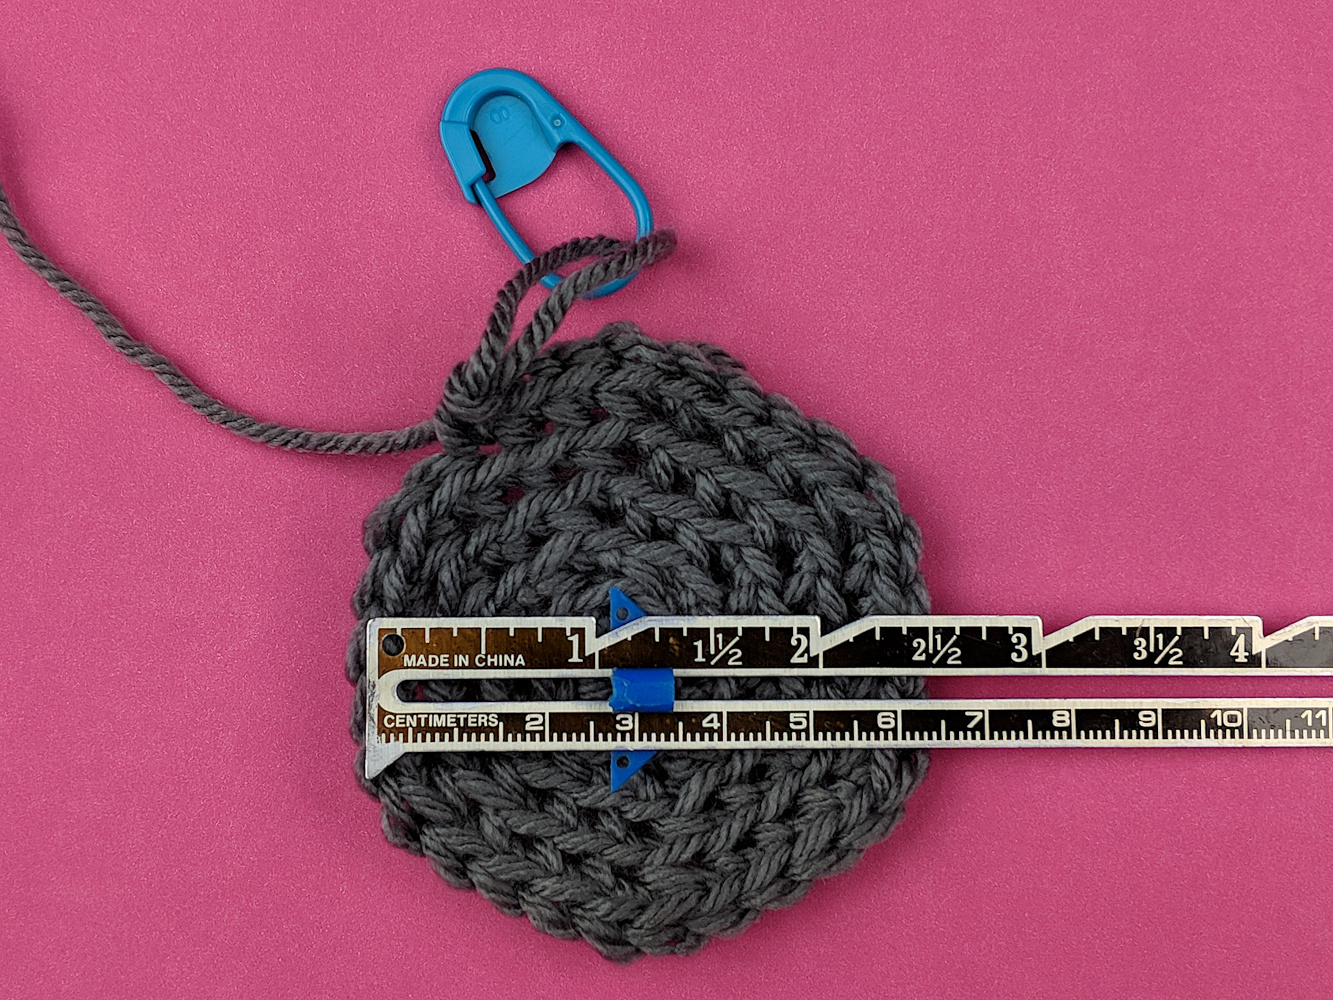
Crochet up a swatch of five rounds. Make sure you’re stitching through the back loop if that’s what the pattern says to do. (All FreshStitches and Shiny Happy World patterns are stitched through the back loop.)
Ch 2 (I like to start with a sloppy slip knot.)
Round 1 sc 6 in 2nd ch from hook (6)
Round 2 sc twice in next st (12)
Round 3 [sc twice in next st, sc in next st.] 6 times (18)
Round 4 [sc twice in next st, sc in next 2 sts.] 6 times (24)
Round 5 [sc twice in next st, sc in next 3 sts.] 6 times (30)
Now – measure across the diameter of your swatch.
Mine measures 2 1/2 inches.
If yours is 2 1/2 inches – good! Unravel your swatch (so you can reuse the yarn) and start stitching.
If yours is a little small, try using a larger hook size. If yours is a little big, try going down a hook size. You can also try switching between different hook materials – a bamboo hook “grabs” the yarn a little more than a metal hook, for example, which can change your swatch size.
Don’t try stitching just a little tighter or a little looser. As you work you’ll tend to revert back to your natural tension, so that’s not a good way to get gauge.
Keep experimenting until your swatch matches the one in the pattern – then stitch away!
Here are handy links to all the crochet troubleshooting posts. . .
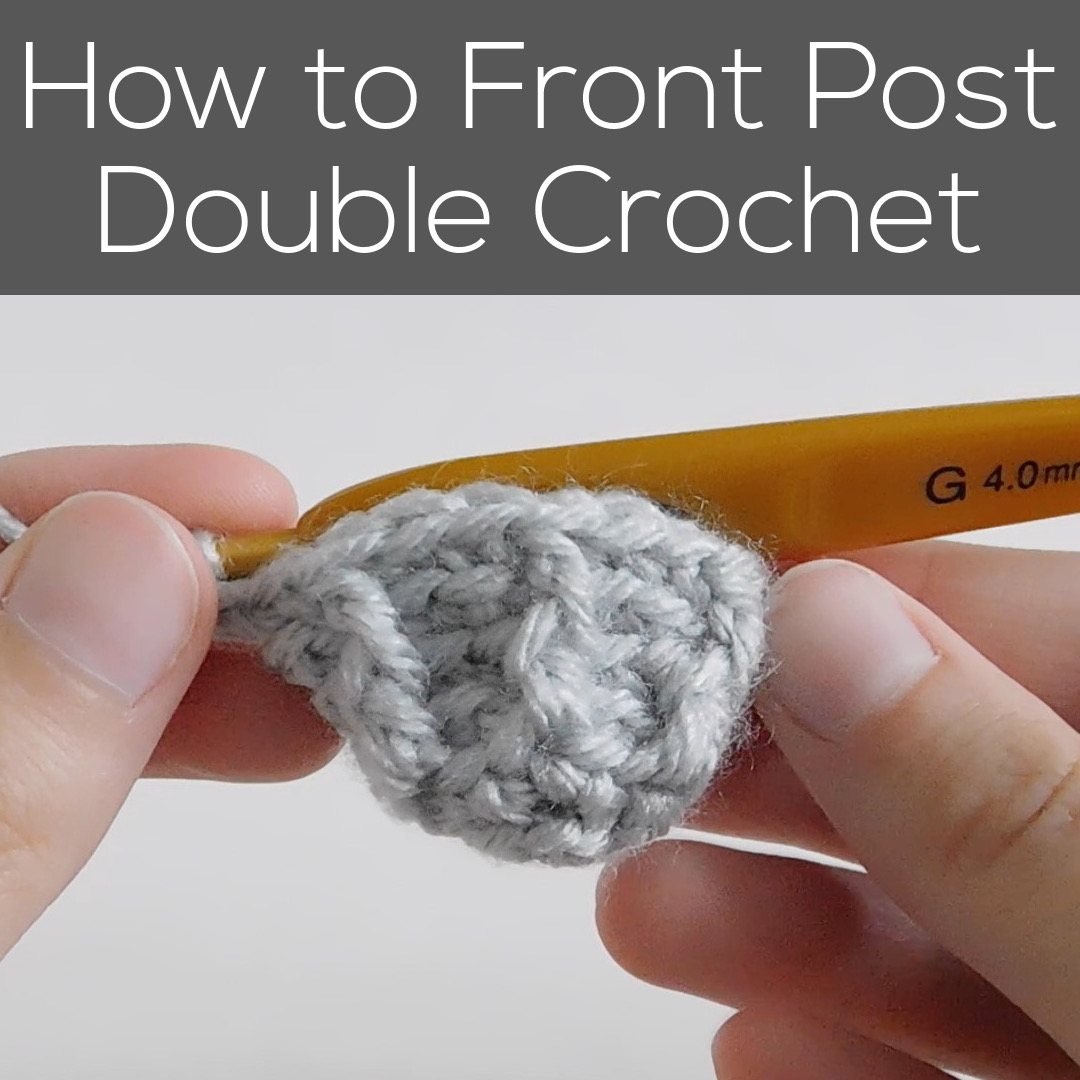
You can use front post double crochet on hats and scarves – but it can also be a handy skill for amigurumi too! You could use it to create textured seashells, fins on a fish’s fins or tail, veins in a leaf, the look of corduroy pants, a ribbed-looking hat – the possibilities are endless!
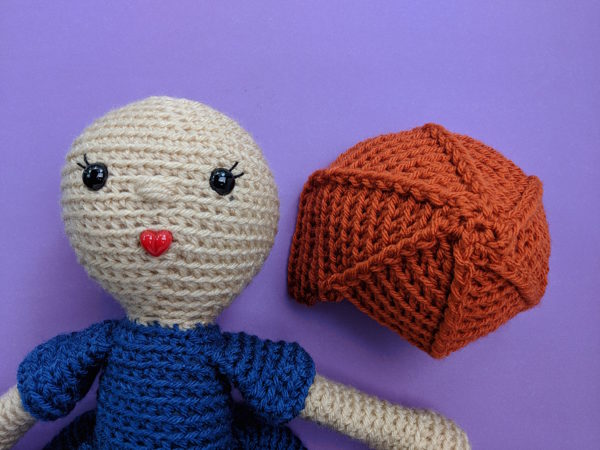
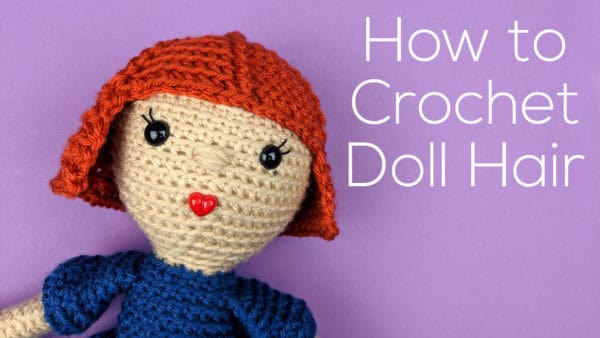
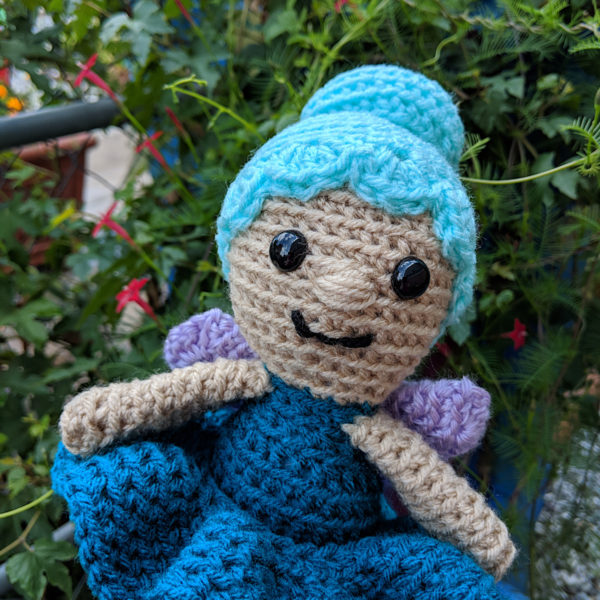
I used this stitch to add raised ridges on the hair on this doll.
Here’s a view of the hair before I attached it to the doll – shown from the top down so you can see the ridges. It adds a nice extra texture that I really like.
(I also really like that you don’t have to permanently attach the hair to the doll – make the same “wig” in a few different colors and lengths so kids can swap it out as they play. Fun!)
Did you know you can crochet one row below where you would normally crochet?
It’s a nifty little trick that can create a neat new texture on the surface of your fabric – but it can have an extra benefit for amigurumi.
It can make your shape bend!
In this terrific video, Stacey shows you how to do it.
Specifically, she shows how to single crochet in the front loop, one row below – but you can use the general idea to do lots of other stitches one row below.
Here’s how.
See how that makes the fabric bend? Isn’t that cool?
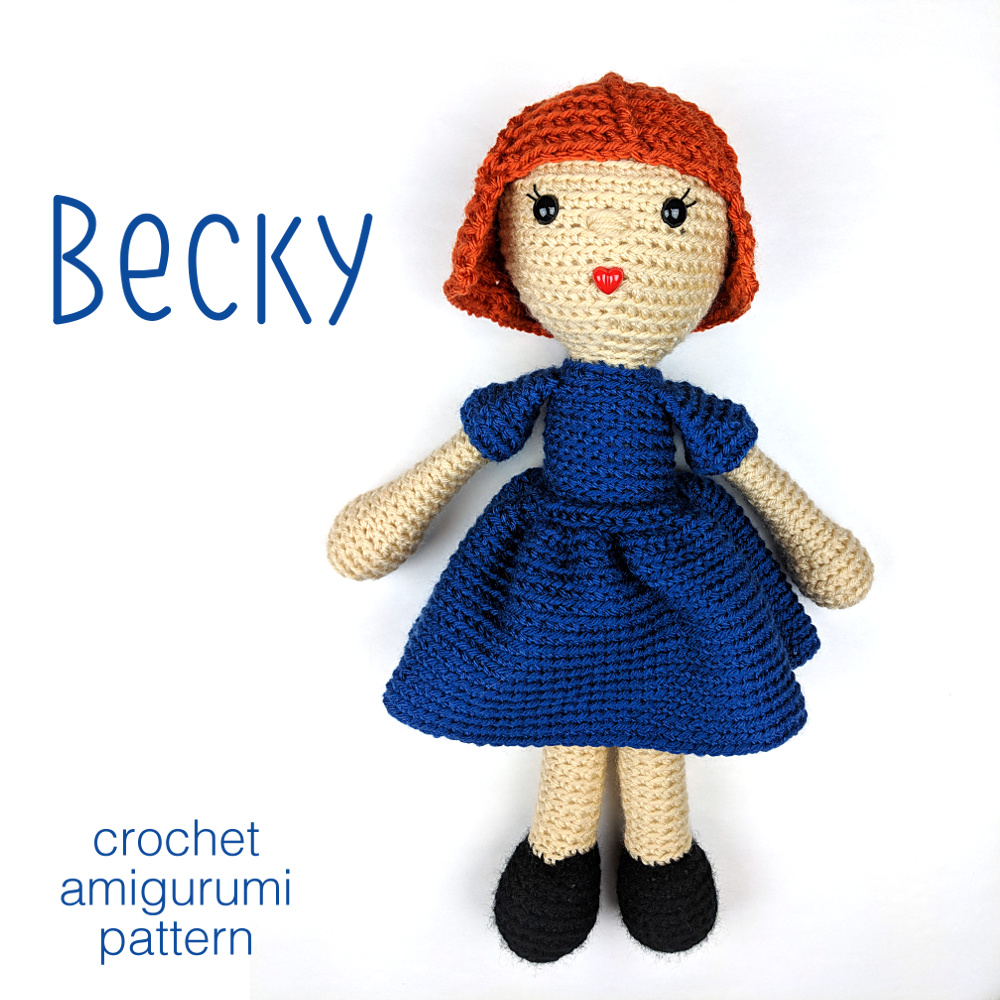
And crochet one row below is one of the skills you build on to be able to front post double crochet – the skill I used to create the ridged lines in this doll’s hair.
Crochet one row below. Pretty nifty – eh?
Here are handy links to all the posts about crocheting more advanced shapes. . .
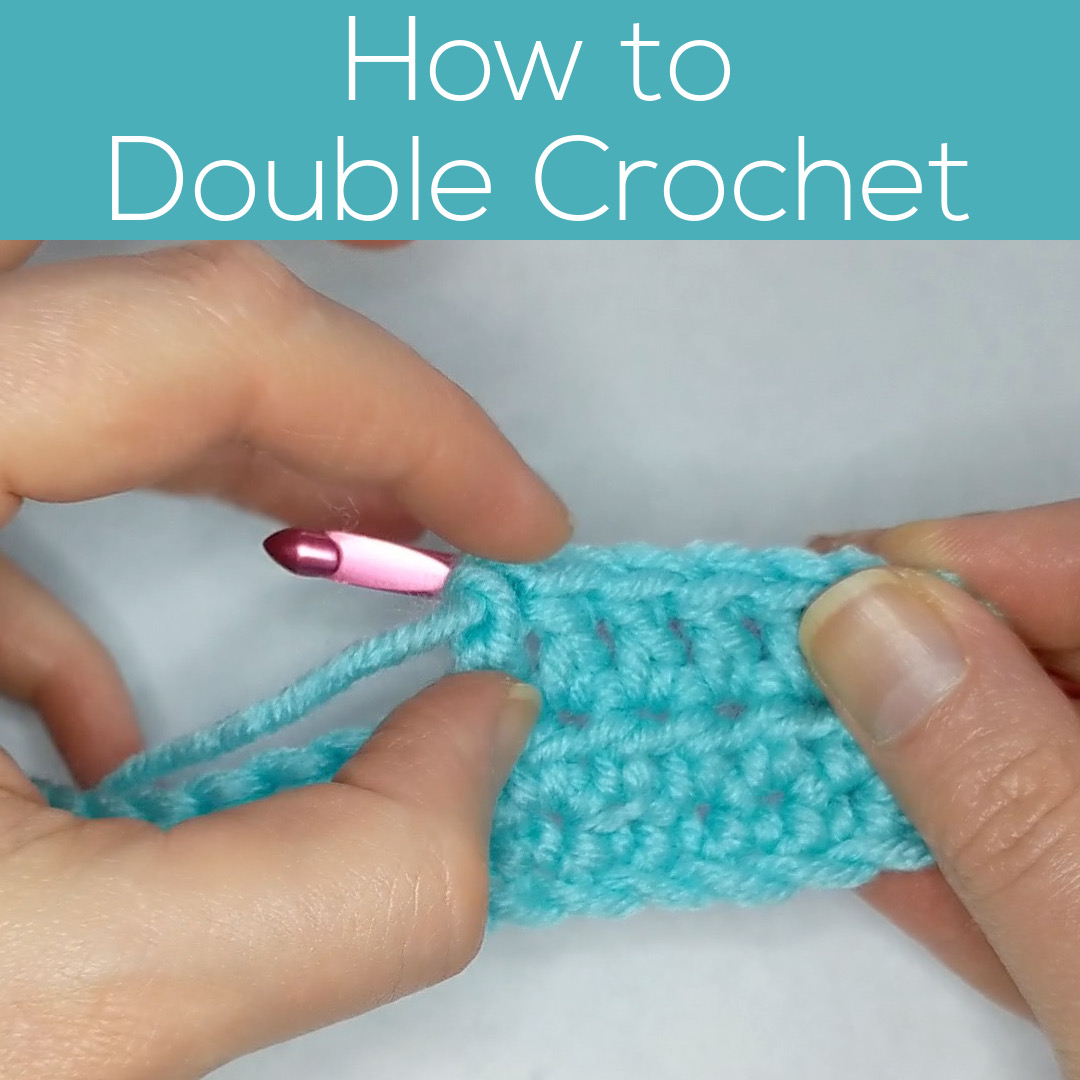
You may be wondering why you need to learn double crochet. After all, amigurumi are mostly single crochet. That gives the tightest fabric with the smallest holes for the stuffing to peek through.
But sometimes we need some slightly taller stitches (like on the convex side of a bendy piece) so we use half double crochet.
And sometimes we need something even taller, so we use double crochet.
In this video I show you a swatch where you can see (and compare height) between the three most basic crochet stitches – single, half-double, and double.
And, of course, I show you how to do it. 🙂
See how easy that is?
And how much taller it is than single crochet?
That height means bigger holes, so you’ll never see this in amigurumi bodies that need to be stuffed.
See? Even though amigurumi are mostly single crochet, there are lots of ways to slip in a little bit of double crochet for special touches.
Bonus – double crochet works great for scarves and hats. It’s a little more drapey than single crochet – and extra drapey if you go up a hook size from what the yarn label recommends. It gives scarves and slouchy hats just the right softness.
Here are handy links to all the posts teaching the basic crochet stitches. . .