How to Kettle-Dye Yarn with Kool-Aid

Are you inspired to get dyeing with Kool-Aid? I hope so!

Today, I’m going to tell you about the basics of Kool-Aid Dyeing, and show you how to achieve a kettle-dyed look.

Kool-Aid Dyeing Basics

You’ll need:

  • yarn made from natural animal-fibers (undyed is best)
  • a few packets of Kool-Aid (see yesterday’s post about testing colors)
  • a glass bowl or dish
  • boiling water or water + a microwave

The Process

Dyeing with Kool-Aid is super-easy: just add your Kool-Aid packets to some boiling water and dunk your yarn in! Easy!

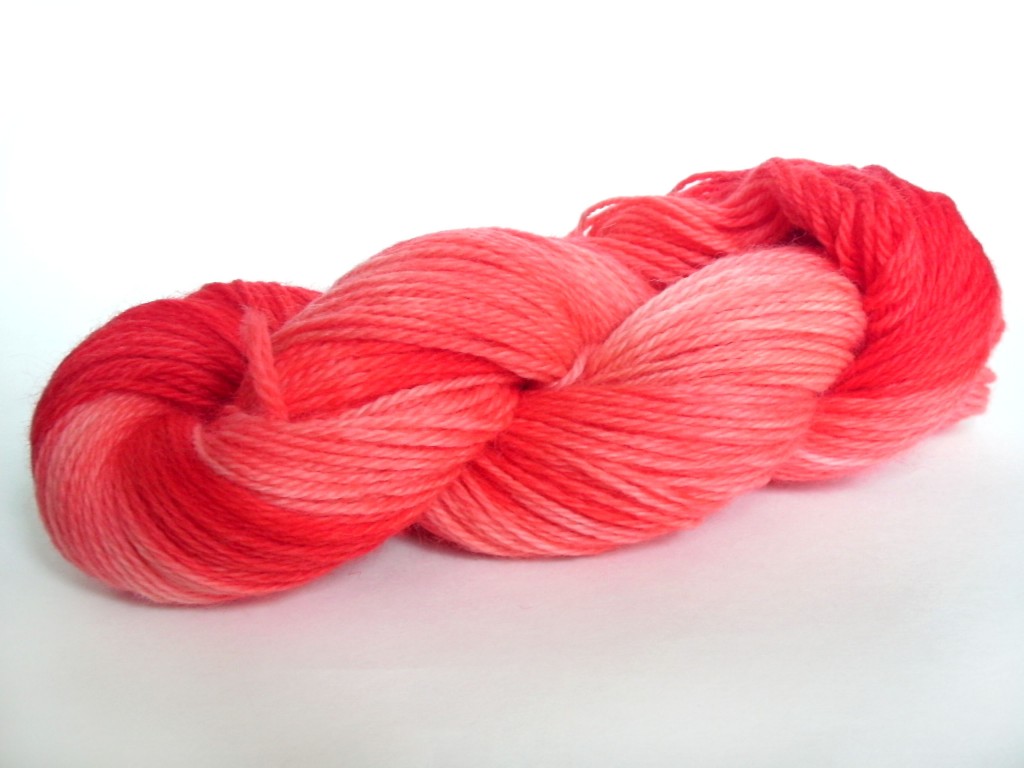
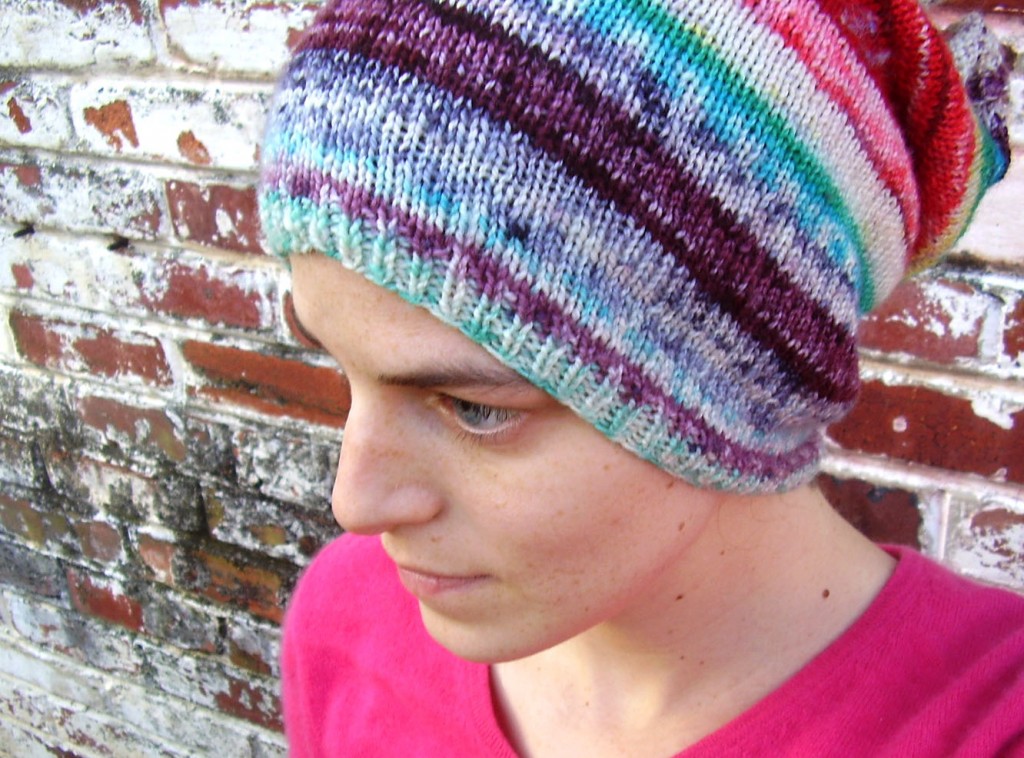
I’ll show you, step-by-step, how I use the basic technique to get a lovely kettle-dyed yarn. ‘Kettle-dyed’ is the name for a yarn that’s mostly one color, but has a range of tones gently changing throughout the yarn. It’s beautiful and easy, so give it a try!

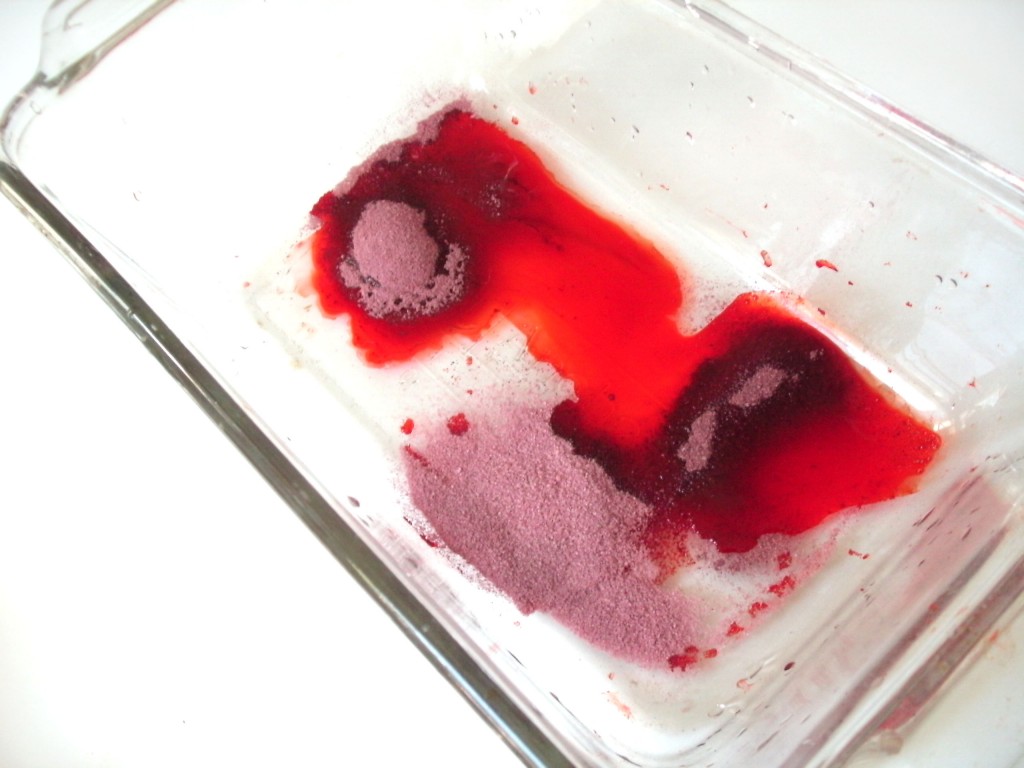
Step 1: Add packets to your bowl

I’m going to dye my yarn red, so I’ve added a couple of red packets to my glass bowl. You can either use packets that are the same color, or use a couple that are close in color:

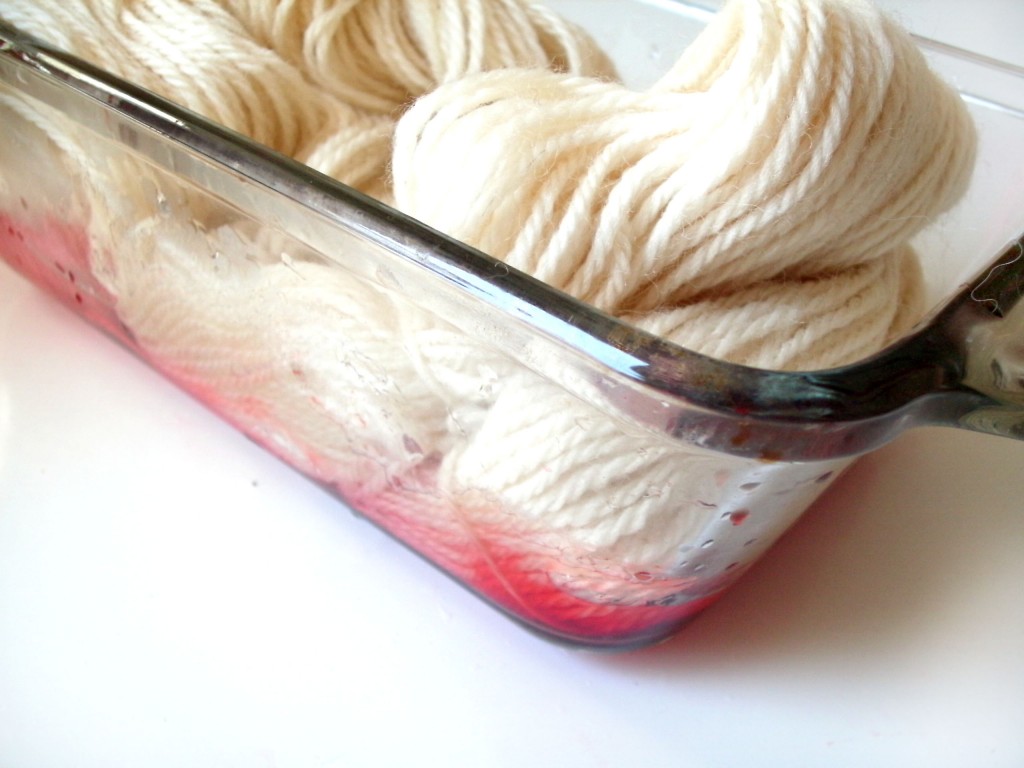
Step 2: Add water and yarn

Your yarn is going to suck up color like there’s no tomorrow… so don’t worry about messing up. I added a small amount of boiling water, and then plunked my yarn in:

The yarn that’s touching the Kool-Aid-dyed-water is going to start drinking up the color. Notice how I’ve left some of the yarn out? That’s because I want the yarn to absorb the color unevenly. That’s what gives you the kettle-dyed look!

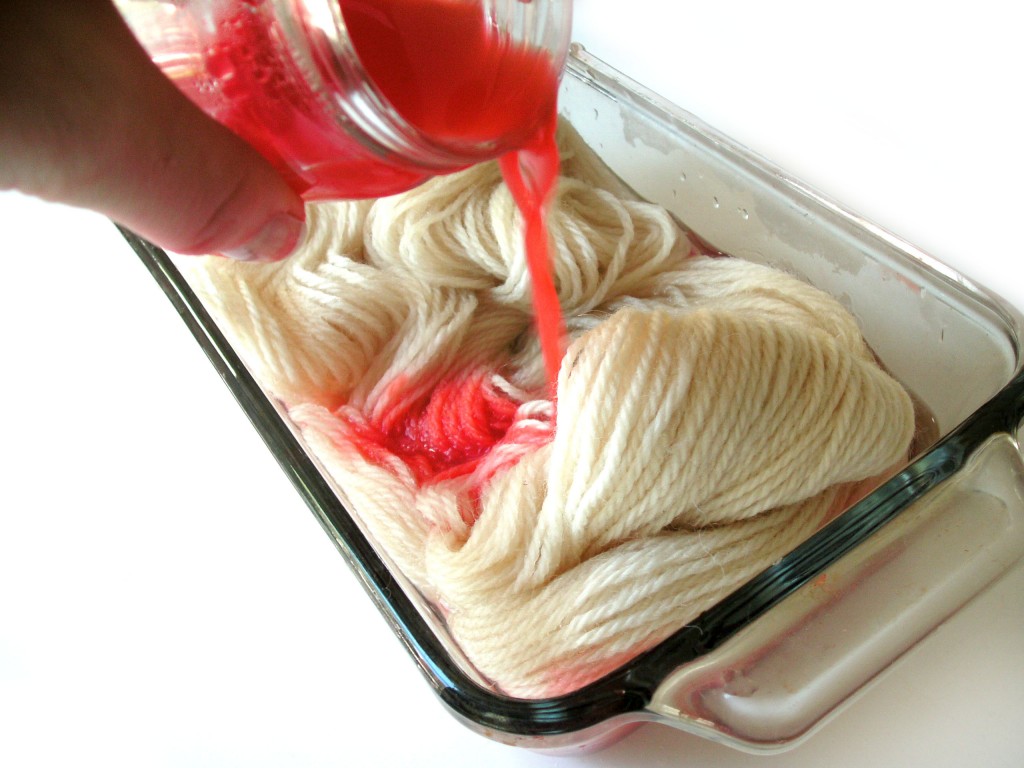
Step 3: Add more color/water until you’re happy!

You can continue to add packets of color and water until the yarn is the color you’d like. Here, I decided to pour some (hot) Kool-Aid water on top of the yarn:

If you don’t want to use boiling water, you can also use regular water, and then microwave the water + yarn so that the color will set.

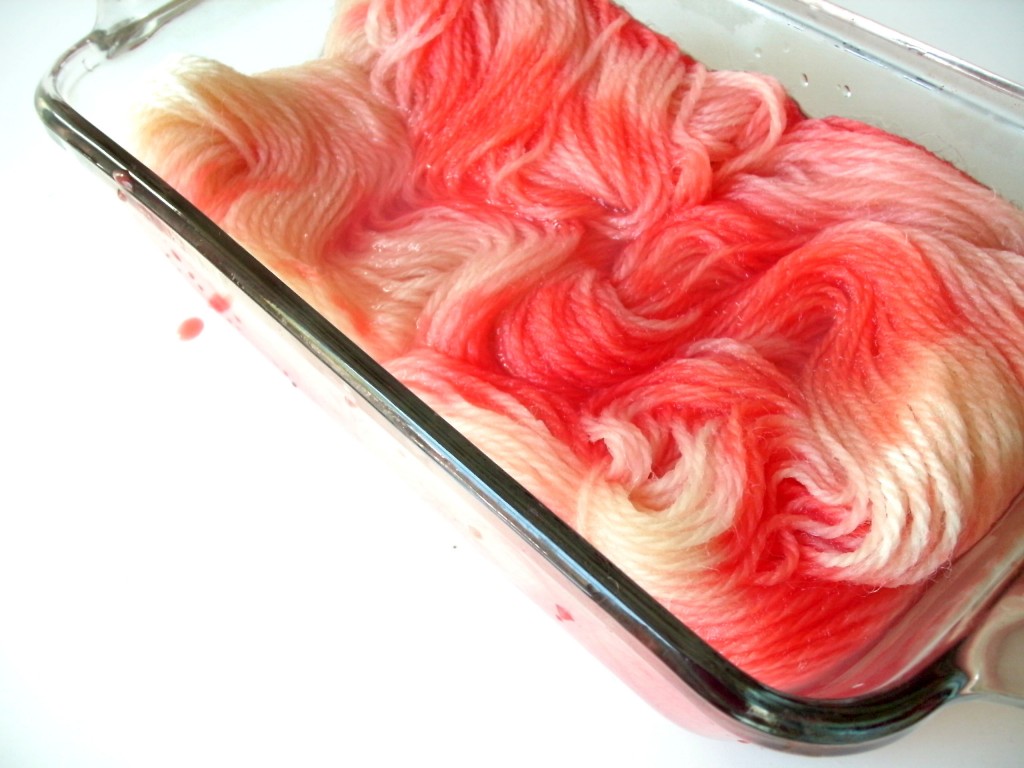
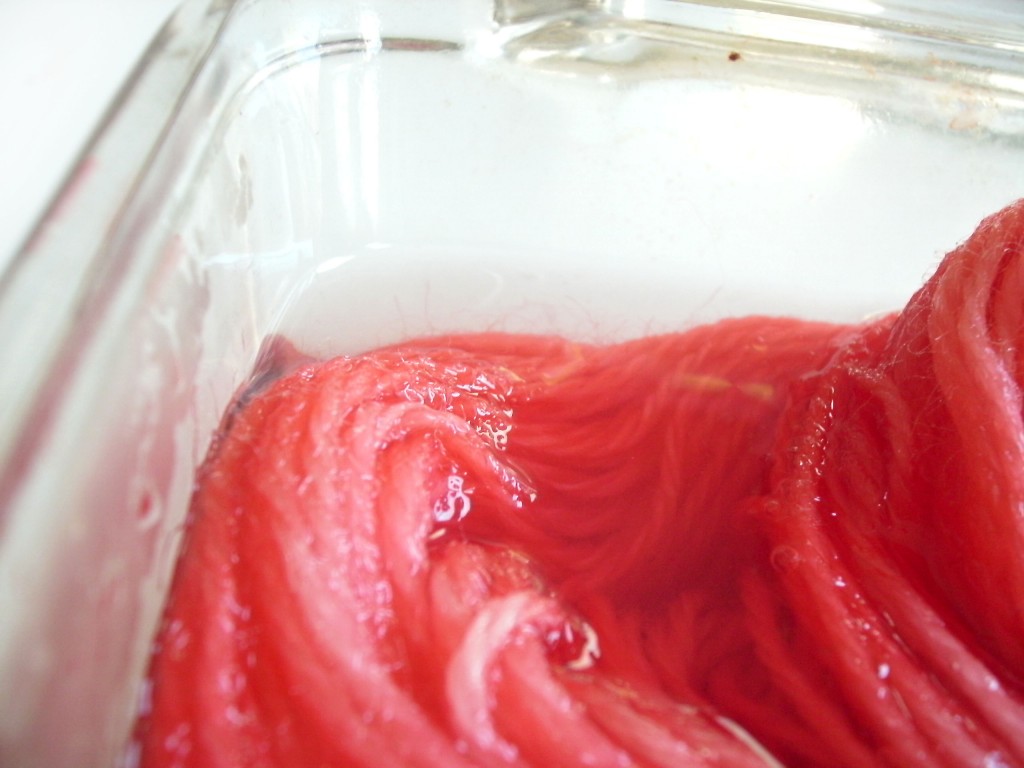
See how mine looks?

Some parts are darker, some parts are lighter. Perfect!

You’ll notice that the dye is sucked up into the yarn, and the remaining water will be clear:

Step 4: Rinse and dry!

That’s it! You don’t have to wait any length of time… once the color is in the yarn, it’s in.

Squeeze the water out of your yarn and allow to dry. You’ll end up with a beautiful skein!

Swatches

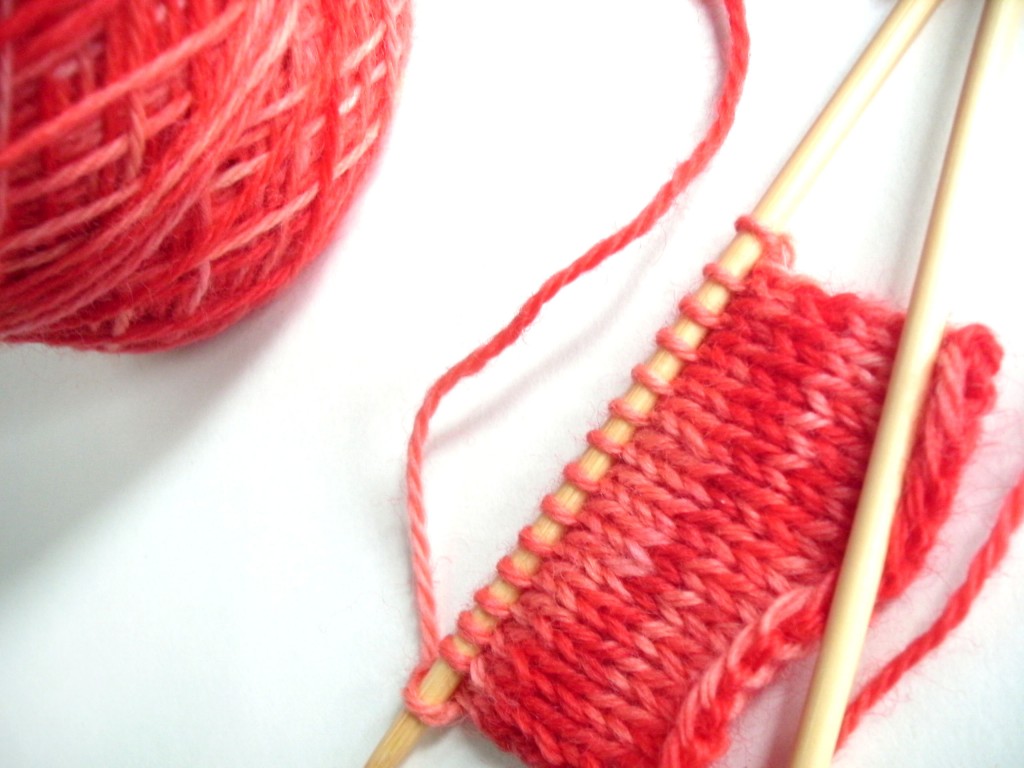
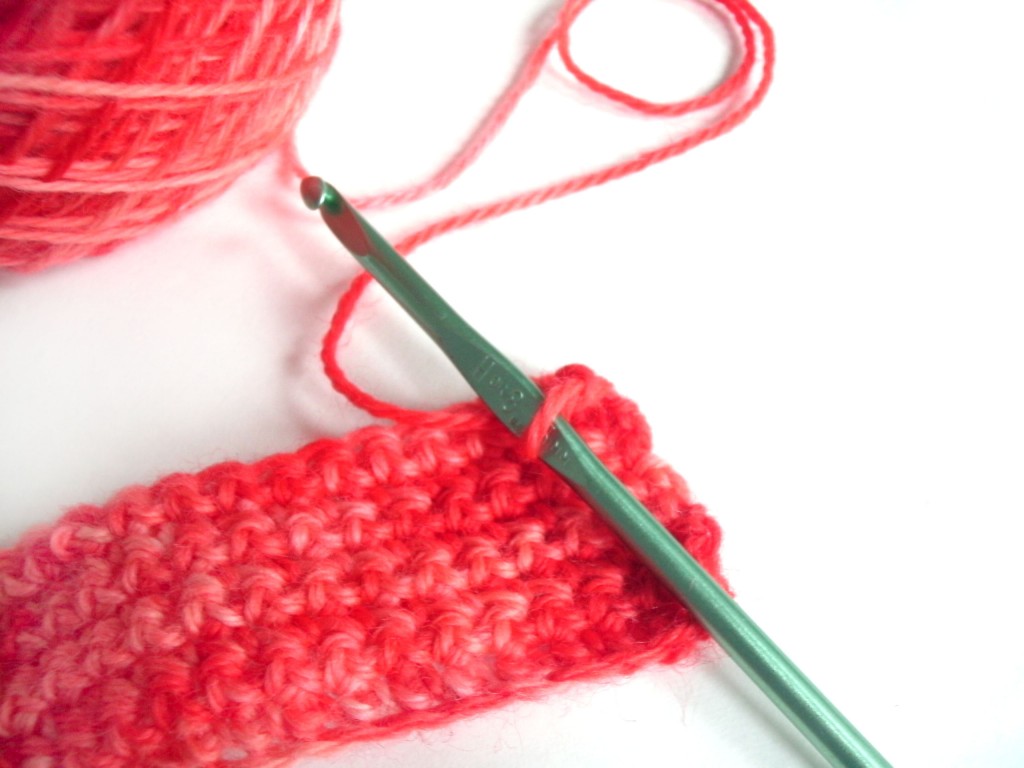
Isn’t it yummy? It’s a very subtle effect, and works up beautifully. I’ve made swatches in both knitting and crochet:


So lovely!

I hope you’ll give it a try and let me know how yours turns out!

Best,
Stacey

How to Dye Yarn with Kool-Aid: Getting Started

I’m so excited to kick off Kool-Aid Dye Week! Each day, I’ll be posting about a new technique for using Kool-Aid to dye yarn… all you’ll need is some natural-colored yarn, a few shades of Kool-Aid and some hot water. Easy!

Today, I’ll talk about the basics you need to know to get started.

Select your Yarn

Kool-Aid is primarily a drink (I’m just as surprised as you are!), so it’s not the most powerful dye on the market. I like Kool-Aid because it’s cheap, non-toxic and comes in lots of bright colors.

That said, it has some limitations. Your best bet is to stick with an animal fiber (like wool or alpaca), which will happily slurp up any dye you give it. Plant fibers aren’t as easy to dye, so I wouldn’t recommend using them.

Need a refresher on fiber types? I highly recommend The Knitter’s Book of Yarn, which has a great introduction to fiber types, including their happiness with taking dyes.

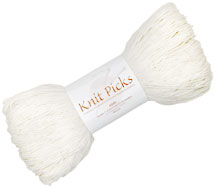
I recommend using an undyed (or natural) yarn to start out with. Knit Picks has a whole line of undyed yarn bases to choose from, and you’ll occasionally find other brands with a couple of blank bases at your LYS. An undyed yarn is preferable to a plain white yarn, which has probably been bleached, and may not soak up color as well.

However, my overwhelming recommendation is to try a test swatch first! I’ve had success with white yarns, as well as overdying (i.e. dyeing a yarn that’s already colored with even more dye) yarns with Kool-Aid, so feel free to experiment!

Selecting Colors

There are a lot of Kool-Aid colors available, and non-name-brands will also work (I’ve heard rumor that there’s a tamarind flavor of drink available in Hispanic markets that is coveted by dyers!).

So, head on over to your supermarket and start choosing! Take note: the color that the drink will be isn’t necessarily the color of the packet, but you can look at the color of the drink that Kool-Aid Man is holding as a clue. (I learned this lesson the hard way: I bought a stock of Tropical Punch flavored Kool-Aid thinking it would be blue… but it’s actually red. So, check out the color of Kool-Aid man’s drink!)

There’s an awesome review of Kool-Aid colors in this article on Knitty, so be sure to have a peek! If you’re unsure, a Kool-Aid Variety Pack may be the way to go!

Dye a test-sample

Every fiber reacts to the dye slightly differently, so the best thing to do is a little swatch to see what color your yarn will turn out to be. If you’re the experimental type, feel free to skip this step… as long as you don’t mind being surprised!

Step 1: Mix your Kool-Aid
There are two basic ways to dye with Kool-Aid: 1) Mix the powder with boiling water and dip your yarn in, or 2) mix the powder with the water to dissolve, then dip yarn in and heat (either by microwave or stovetop) to set the color. Most things I read online suggest the second, but in my experience, the heat present when you add boiling water is enough to set the color.

Whichever way you pick, I suggest doing your test swatches the same way you plan to do your final dyeing… just so there will be no surprises. In my photos, I’m using the boiling water technique:

Step 2: Add the yarn!
You can see here, I’ve just stuck in a tiny strip of yarn:

I felt like my tiny piece was enough to give me an idea of the color… but feel free to add in more yarn if you’d like.

Step 3: Check out your color!
Now take out your little piece of yarn and see how it looks!

You may want to make a little notebook to keep track of your yarn swatches and which color Kool-Aid you used.

You don’t have to stick with one color! Feel free to mix colors together and do swatches for these experimental colors, too.

Put your yarn to the test

Before you begin a big project, you might want to see how your yarn and color holds up. Are you using a machine-washable yarn, and are hoping the color holds up in the washing machine? Go ahead and wash your test yarn! It’s the only way to see how the color will perform, and will prevent any future disappointments.

In my experience, the color holds pretty well… although I’m the sort who hand-washes my woolens. I’ve had one kool-aid dyed cowl for over 2 years- and the color is still going strong!

Are you excited about the possibilities?

I am! I’m in love with Kool-Aid dyeing!

Tomorrow, we’re going to start dyeing skeins of yarn! I’m going to show you how to achieve the look of a kettle-dyed yarn (i.e. fancy-pants, Artisan-dyed yarn) with your Kool-Aid… you won’t want to miss it!

Best,
Stacey

Knook (knitting with a crochet hook): is it worth learning?

Have you heard of the Knook (pronounced ‘nook’)? It’s a very clever hook/technique that allows you to form a fabric that looks like knitting by using a special crochet hook.

While it’s a very interesting idea, it requires learning new stitches (not crochet stitches or knit stitches), so isn’t exactly a short cut for learning to knit. I’ll show you know knooking is done, then chat about the pros and cons, so you can decide whether you’d want to learn to knook, or would rather just learn to knit.

How to knook

The knook is a crochet hook with an eye at the non-hook end (exactly like a locker hook, if you’re familiar with one) accompanied by a nylon cord. I haven’t seen knooks for sale alone in the store, so you’re probably best off grabbing The Knook Beginner Set, which comes with a variety of hooks, cords and a beginners book. Videos about how to knook are available on the Leisure Arts Website, and they’re pretty clear and easy to follow.

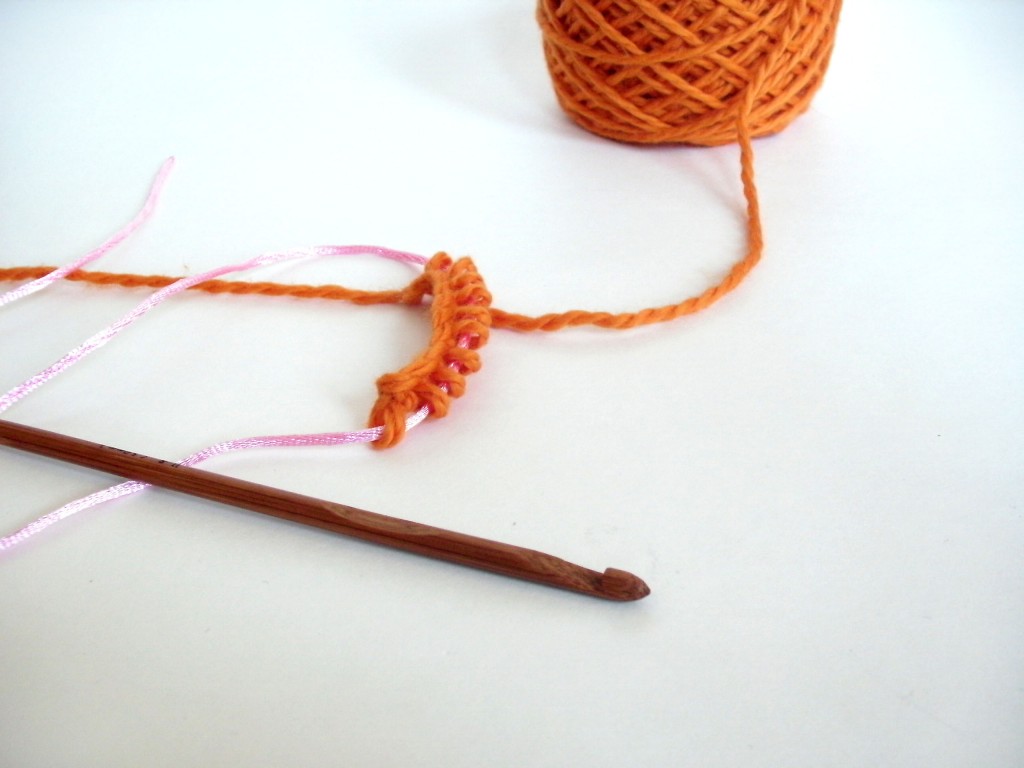
You begin knooking by threading the cord into the eye in the hook. The first row is done by crocheting a single chain, nothing tricky!

To Knook the first row, you insert your hook into the chain stitches and pick up your working yarn… similar to how you would work in Tunesian Crochet. Then, you slip all of your loops onto the cord:

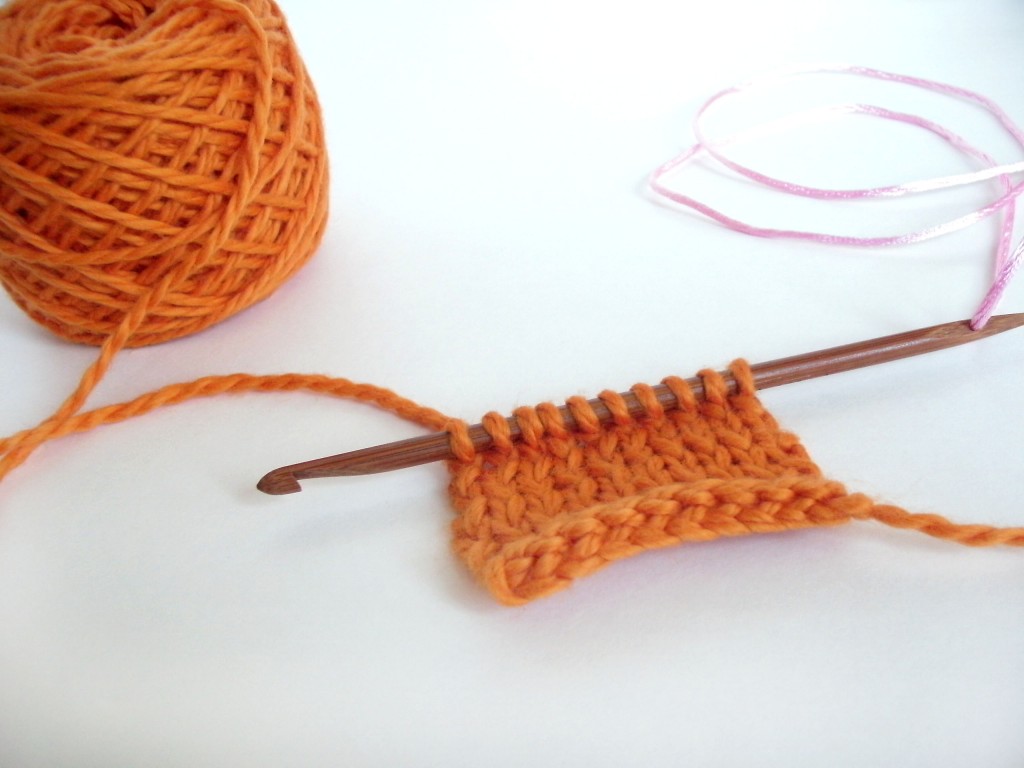
To continue, you use the hook to pick up a new row of stitches, inserting the hook into the loops that are now held on the cord. Whether you make knit or purl stitches depends on which way you wrap the yarn around the hook.

The fabric looks pretty impressively like a knit fabric!

The Advantages of Knooking

The advertisement is true: you can accomplish a fabric that looks like a knit fabric by using only the knook (crochet hook + cord). For crocheters, there are some big advantages:

  • If you’re already familiar with using a crochet hook, the movements will feel very natural, most likely making the technique easier to learn.
  • The first row is done by crocheting a chain, so there’s no need to learn a cast on.
  • Stitches remain on the cord while you’re working, so there’s less danger of dropped stitches (but see my exception to this in the next section).

The Downsides to Knooking

There’s no doubt that it’s a clever tool, but there are some downsides to learning knooking, especially if your goal is to make knitted items that you’ll see in patterns:

  • You need to learn how to wrap the yarn to knit and purl- these aren’t the same stitches that you already know from crochet.
  • A fair amount of translation is required if you wanted to make an item from a knitted pattern. There are knooking books available, but you’d be limited to that small selection of patterns.
  • The stitches are kept on a nylon cord with no method of securing the stitches. If you were to toss your knooking in a bag, you’ve have oodles of dropped stitches if the cord came out.

Is it worth it?

I’m going to start with an interesting statistic that I’ve gathered after years of teaching knitting and crochet. Knitters, when first learning crochet, typically do no better than the rest of the novice crocheters. (sorry, knitters!) However, crocheters, when learning to knit, typically learn much faster than newbie knitters!

Crocheters already know how to tension the yarn, hold things in their hands, and all they really need to learn (in order to knit) is how to pass a stitch from one needle to another. In my experience, with a good teacher and when learning to knit continental (i.e. holding the yarn in the left hand, which is how a crocheter holds it when crocheting), crocheters have a fairly easy time learning to knit.

So, if you’re deciding whether to learn to knook, it’s important to think about your goals. Do you want to knit socks? Learn to knit. Do you want to knit sweaters? Learn to knit. Do you just love the look of knitted fabric and want to make small projects? Maybe knooking is for you.

One main factor is that the knook is a product manufactured by one company… so you only have one hook style available to you and a limited selection of pattern books. Both crocheting and knitting have available lots of different hooks/needles to suit your particular style, and patterns made my thousands of designers. In order to invest time in learning to knook, you’ll have to be sure that you’re happy being limited to the options available.

I have spoken with some people who love that the action uses a crochet hook, and much prefer knooking over learning to knit. Wonderful! I’m happy whenever someone finds what works for them!

But if you have a hankering to knit… I’d recommend giving knitting a try!

Best,
Stacey

A (mini) guide to selecting fiber content in a yarn

Have you ever knit a beautiful alpaca scarf and said, “Gee, I like it… but I didn’t know it’d be so warm!” Every yarn fiber has different properties that make it soft/warm/itchy. So, it’s worth learning a bit about the fibers before starting a project!

It’s impossible to give you all the info you need to know about yarn fibers in one little blog post… in fact, whole books have been written on the topic!

For more information about how fibers and properties of the yarn (single ply, thickness, etc) affect your final project, I highly recommend The Knitter’s Book of Yarn: The Ultimate Guide to Choosing, Using, and Enjoying Yarn. There’s also a fabulous section all about fiber properties in The Knitter’s Life List – definitely worth getting if you’re looking for more info!

Wool

Ah, our friend wool! We’ve all heard of it, and for a lot of people, wool has a bad reputation for being itchy and allergy-causing. While there are some folks with a genuine allergy to wool, wool-allergies are pretty rare. Chances are, the person has a sensitivity to coarse wool fibers. And who can blame them… no one likes an itchy sweater!

If you were made to wear a wool sweater in the 80’s as part of your school uniform (like my poor hubby), you probably have horrible nightmares about the itch factor… but fear not! Not all wool is itchy!

Different sheep breeds produce wool with different (staple) lengths of fiber and courseness. Coarser and longer fibers (in general) are scratchier, but more durable and water-resistant. Shorter fibers (heard of Merino?) are oh-so-soft, but prone to pilling and need to be handled more gently.

In general, wool needs to be hand-washed (because too much agitation will cause the yarn to felt). However, there are some ‘super-wash’ wool yarns available on the market: yarns where the wool fibers have been treated to prevent felting. These super-wash yarns are a great choice for baby items!

If you want to use natural fibers for an amigurumi project, wool is a great choice for any of my patterns.

To try:

Alpaca

An alpaca is a cousin of the llama, and some breeds have incredibly soft fiber. Alpaca is warmer than wool, but has a tendency to be a little bit prickly.

Alpacas come in a wide range of colors, and the yarns available on the market reflect this wide color range.

To try:

Cotton

You’ve heard the song, right? The fabric of our lives…

I totally love cotton! Some cottons are incredibly soft (there are different breeds of cotton just like there are breeds of sheep!) and items made from cotton are lightweight and cool, partially because of cotton’s ability to absorb water (and sweat). However, cotton is much less elastic than wool, so it’s best to select projects designed to be made with a cotton that take into account its lack of elasticity.

Cotton naturally comes in a range of colors, although commercially produced yarns in the tans and greens are becoming harder and harder to find due to a difficulty in sourcing the raw product.

Typical cotton production requires a very heavy use of pesticides, so organic cotton yarns are worth investigating.

To try:

Silk

Yummy! Silk is made from the cocoon of a silkworm… a single thread can be hundreds of feet long!

Silk is incredibly soft, takes dye amazingly and has the superb ability to keep you warm when it’s chilly and cool when it’s hot.

Traditional silk production involves killing the larvae inside the cocoon, which is necessary to unravel one continuous thread of (highly desirable) silk. ‘Peace Silk’ is made by letting the larvae emerge from the cocoon before harvesting the silk threads. This results in shorter threads, but a live silkworm.

In yarn, silk is often blended with another fiber (like wool) to produce a yarn with a combination of elasticity and shine.

Other fibers

Oh, I’ve hardly scratched the surface! There’s yarn from bison, possum, corn, soy, banana silk… even crab shells! And each yarn fiber has its own exciting collection of properties!

So, even though I haven’t had time to chat about them all, I hope I’ve encouraged you to give a different fiber a try… and have given you a little more information that you can use before starting your next project!

A plan for organizing your yarn stash!

A Plan to Organize Your Yarn Stash - from FreshStitches and Shiny Happy World

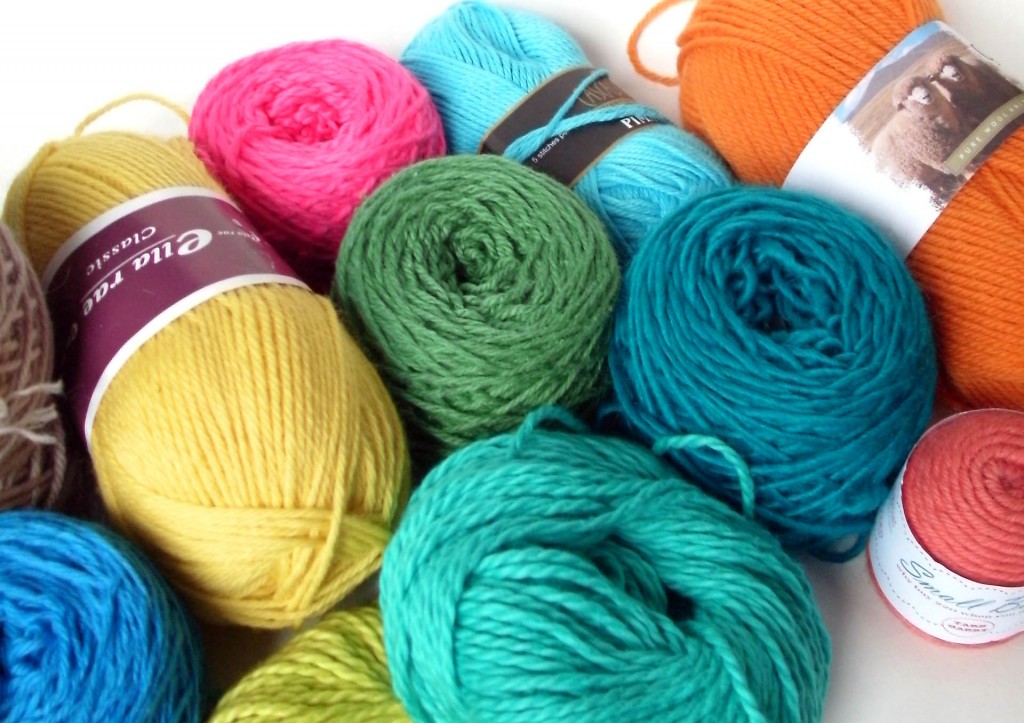
Every knitter and crocheter has one… it’s called a ‘yarn stash’. And, if left unchecked, your stash can quickly turn into an unkept mess that just seems to keep on growing (on it’s own, of course!). But don’t worry! I’m here with a step-by-step-guide to organize yarn and get your stash under control.

Finding yarn in your stash is the key to using it

How many times have you bought yarn for a project… only to later discover that you had a very similar yarn at home? That’s because if you can’t find a yarn quickly and easily, you’ll forget that it’s there.

So, organizing your yarn so that you know what you have (and know how to get to it) is key. I’m not going to go into details about a specific organizational system (bins vs. shelves vs. baskets), because you have to find what works for you.

I am going to show you how to go through what you own and get your yarn under control.

Step one: drag it all out and sort it

Now, I know that some of you with larger stashes are rolling your eyes right now. But seriously, how can you know what you have unless you actually get it all out and look at it?

You can’t just say, ‘oh, I know what’s in that bin’… because you probably don’t. So get it all out.

Now that it’s out, sort it into piles. You’ll have to pick categories that make sense to you. Mine are: yarn for ‘real projects’ (i.e. yarns I have multiple skeins of), yarn for one skein projects (usually pretty sock yarn), yarn for custom stuffed animal orders (worsted weight yarns that are partial skeins), scrap yarns, and yarn to get rid of.

It’s important to be honest about your piles. Yarns only make it into my ‘scrap yarn pile’ if it’s a partial skein that I would actually use to make a scrap afghan. Nothing under 20 yards. No laceweight. No eyelash. Be honest with yourself!

Now these piles may take up your entire living room. I know it’s scary… but you’re after something better!

Catalog, wind and store

Now that you’ve divided your yarn into piles, resist the temptation to just put it back on the shelf!

Is some of your yarn tangled? Were you able to see it in its old storage space? If not, it’s time to rethink your strategy. Here’s what I do:

Catalog

Of course, we all fantasize about beautiful shelves that allow us to store pretty skeins in full view. But, many of us don’t have that kind of space, and need to use bins or boxes. So it’s important to take note of what you have.

I love the ‘stash’ tool on Ravelry – it allows you to list the yarn that you have and even list it ‘for sale or trade’ if it’s a yarn that you don’t want anymore.

Wind

If your yarn is in full skeins, then it’s probably behaving itself without getting tangled. However, if you have partial skeins, they have a propensity to get themselves in knots.

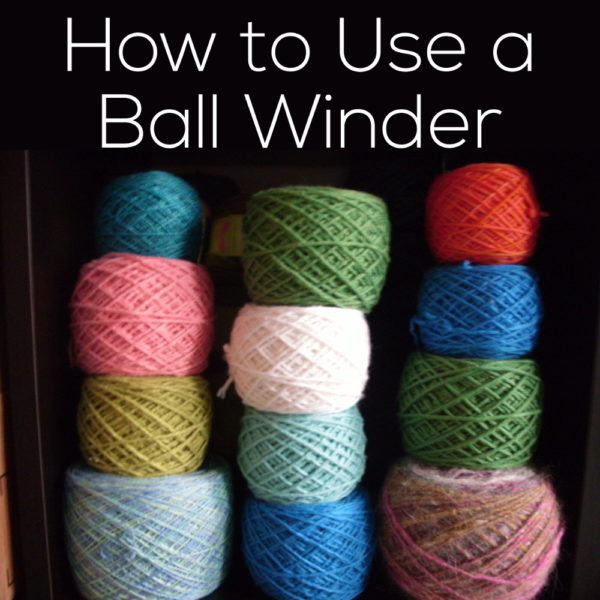
I have a Lacis Ball Winder that I use to wind partial skeins into cakes (see a how-to-video, here). When wound, the yarns stack nicely, and lay in a bin without getting tangled.

Store

NOW that your yarn is neat and cataloged, you can put it back on your shelf!

Make plans

Sure, your yarn looks neat… but don’t stop there! Do yourself a favor and make plans with the yarn while it’s still fresh in your mind.

When I’ve gone through my yarn, I like to match yarn with projects. That way, when I’ve finished a project and am itching to start another… I already have one (that uses yarn from my stash!) set up. That keeps me from buying more yarn on a whim.

For example, I have 10 skeins of this yarn in a color that just doesn’t flatter me at all:

My plan is to over-dye the yarn in brown and knit a Buttercup. If I didn’t make the plan, I would probably just leave that yarn languishing!

Weigh your yarn for project planning

If you have partial skeins, it can be hard to know how much yarn you have- making it hard to plan a project. A real help is to weigh your yarn. I have an inexpensive digital scale that I use to weigh mystery bits of yarn. By using the information on the ball band, you can calculate the yardage… and plan a project!

Enjoy!

Phew! That was a lot of work… but now you can sit back, knit, and enjoy your beautiful stash!

Want tips for organizing and decluttering your whole craft room? Wendi has a great post here.

How to use a ball winder

How to Use a Ball Winder - a video from FreshStitches and Shiny Happy World

This post contains affiliate links. That means I make a little commission if you buy something after clicking through. All affiliate links are marked with an *.

Today, I’ve put together a little video to show you how to use a ball winder.

What is a ball winder?

A ball winder* is a handy device that allows you to make neat center-pull yarn balls (also called ‘cakes’). They’re a great alternative to hand-winding yarn, and contrary to popular belief, aren’t terribly expensive.

About the Lacis Ball Winder

Specifically, I’m going to show you how to use the ball winder that I own, the Lacis Wool Yarn Ball Winder*. Why this one?

In my opinion, this is the best ball winder for the at-home crafter: it’s inexpensive and very reliable. You can read my full review about the winder, by clicking here.

However, I’ve read some not-so nice things about this winder in online reviews: saying that it doesn’t work properly. Unless the reviewer received a defective model, I think the problems experienced come from improper installation/usage of the ball winder.

So, I’m going to show you how to install, tension and use the winder… and you’ll be a happy camper!

The Video

To view the window in full-screen mode (which is probably easier to see), click the icon in the lower right corner of the insert.

With proper installation and usage, I think you’ll find that your winder works like a dream!

Here are handy links to all the posts about yarn. . .

Return to the main table of contents for Let’s Learn to Crochet Amigurumi.

Move on to the lessons for the basic crochet stitches.

Happy stitching!

A Yarn Lover’s Guide to Sydney, Australia

Looking for yarn shops in Sydney, Australia? Then this guide is for you!

I’ve spent a fair bit of time in Sydney, and it’s a beautiful and walkable city. I’ve picked four areas of town that are fabulous for walking around and sightseeing – and they also have some of the best yarn shops in Sydney! In this guide, I’ve included yarn stores, craft stores/markets and shops where you’ll find yarn and exclusively Australian wool products.

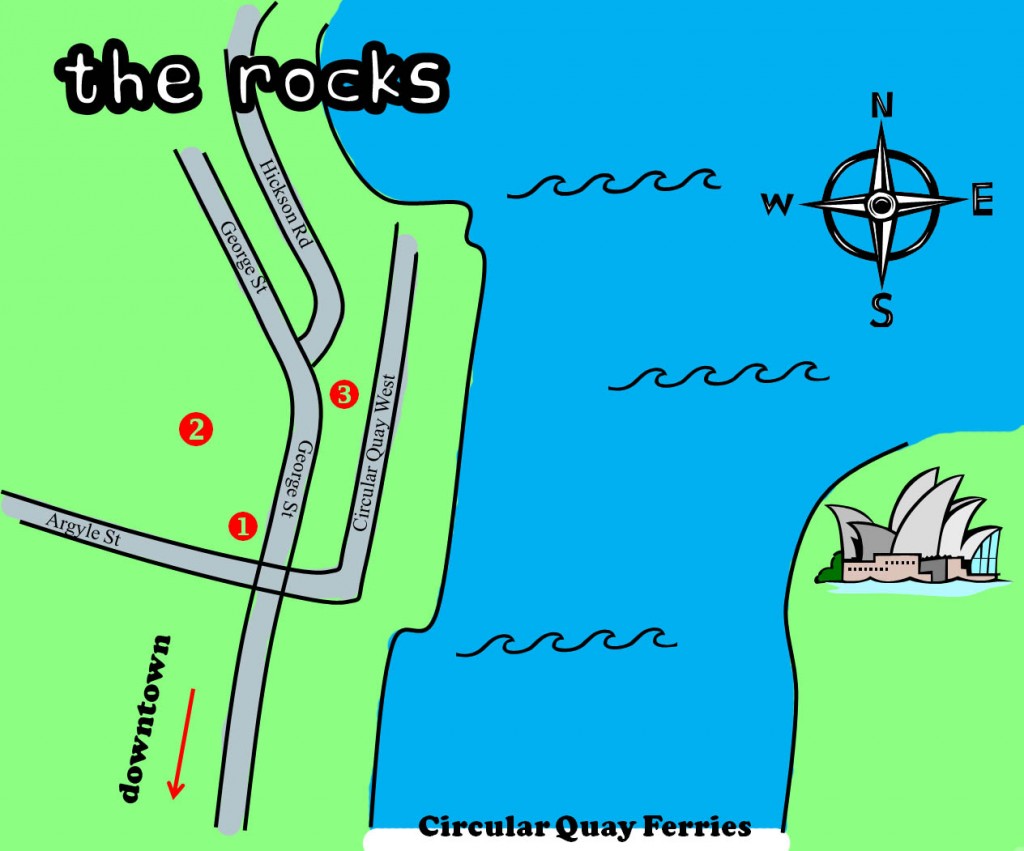
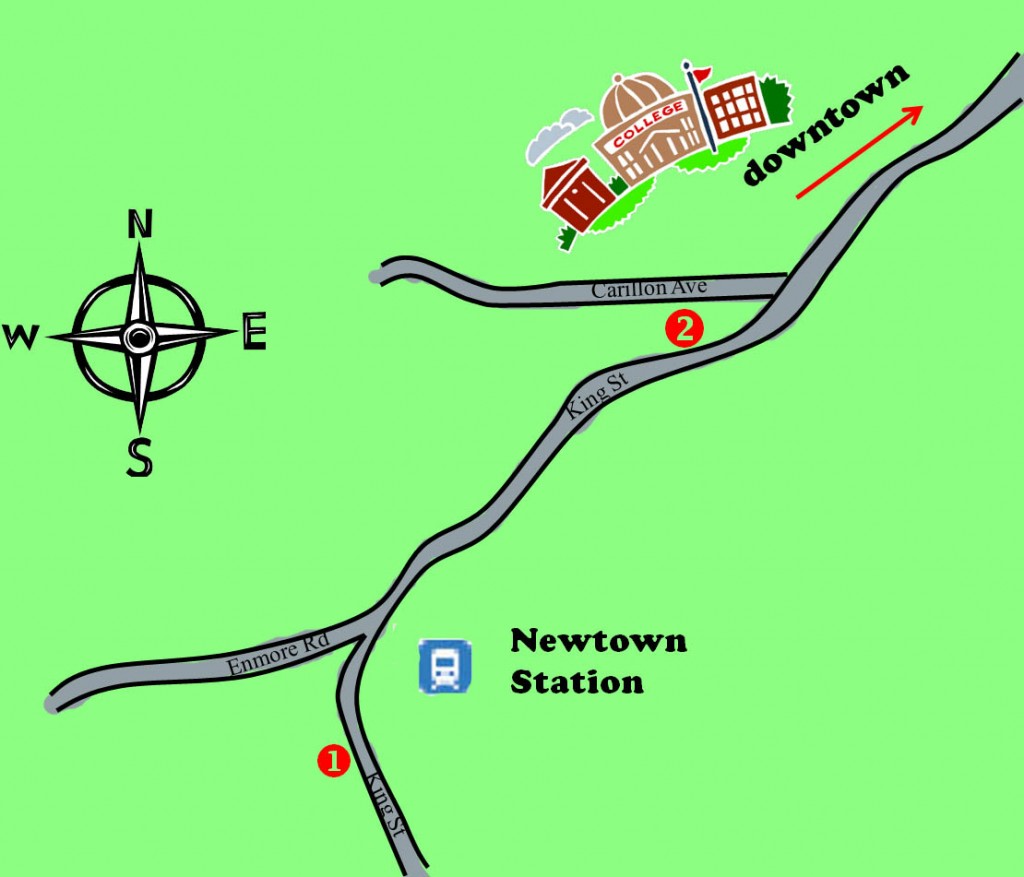
I’ve sketched some maps… but you’ll want a ‘real’ map as well, since mine aren’t terribly detailed.

Ready? Let’s get started!

The CBD

The CBD (Central Business District) is what Aussies call their ‘downtown’. On any trip to Sydney, you’ll likely find yourself wandering through this district of beautiful buildings and shops. Subway stations are plentiful, but if you’re making a special trip, then Town Hall is probably your best bet for the yarn shops.

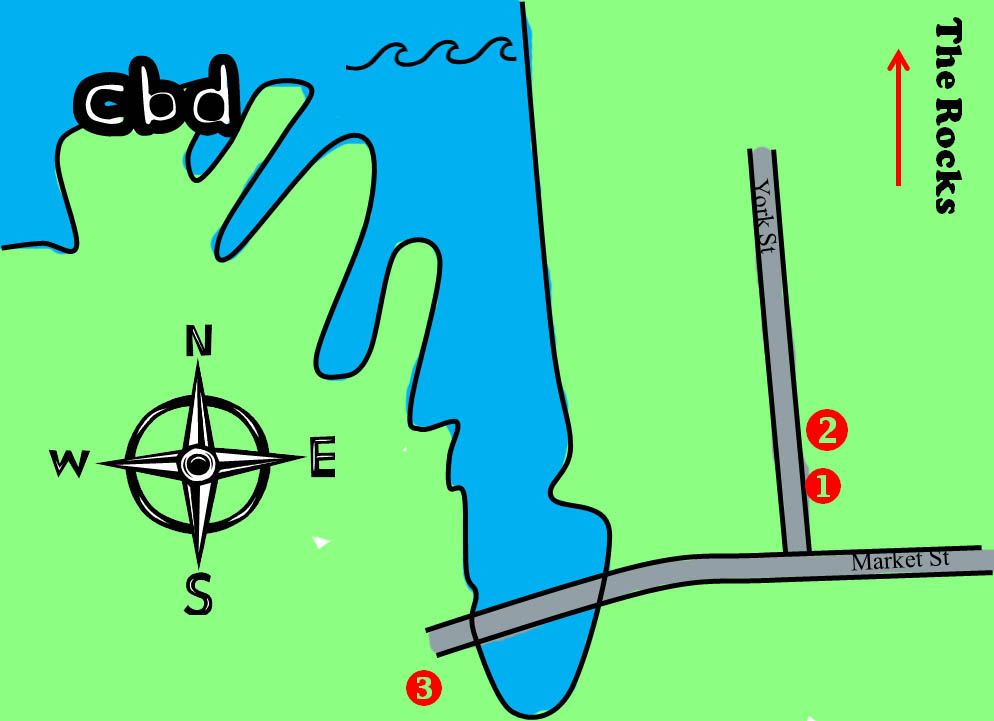
map showing yarn shops in Sydney, Australia - the CBD

1. Morris and Sons, 50 York St. Morris and Sons is a cross between an LYS (local yarn store) and a big box store. They have a couple of stores nationwide and their own brand of (reasonably priced) yarn. They also carry loads of imported fine yarns and have a table for sitting & stitching. Click here to read a full review.

2. Lincraft, 68 York St. Lincraft is comparable to a JoAnn’s or Hobby Lobby in the US: lots of craft goodies, and mediocre (but cheap) yarn. You may not find much yarn worth putting in your suitcase, but it’s amazingly good fun to look around at all the supplies. It’s stocked slightly differently than an American shop (for example, you’ll find a hat-making aisle and kangaroo scrapbooking supplies), so I doubt you’ll walk out empty-handed.

3. Darling Harbour Souvenir shops. Walk west along Market Street, and you’ll head over to Darling Harbour, which is full of souvenir shops. I wouldn’t usually recommend going to these (usually junky) shops, but this is where you’re most likely to find scarves and hats made from possum yarn. Possum yarn is unique to the Australia/New Zealand region (mostly from New Zealand, where they’re an introduced species threatening the native wildlife), and is incredibly warm and soft. It’s very difficult to find the yarn, so a lovely possum scarf might be your best bet.

Other sights. The Queen Victoria Building is the main ‘place to shop’ in the city. Wander a little further to Galleries Victoria and stop by Kinokuniya– a fabulous Japanese book store with an unbelievable selection of craft (and knitting and crocheting) books.

Walk north up George Street, and you’ll end up at our next stop…

The Rocks

map showing yarn shops in Sydney, Australia - The Rocks neighborhood

The Rocks is sorta touristy, but sorta artsy and hip… and it’s one of my favorite districts in town.

1. The Sheep Shop Okay, you’re going to be mad at me, but I don’t actually know the name of this place! But, it’s a genuine sheepskin store, not some wacky souvenir shop. It’s on the left, and you’ll see it as you’re walking up George Street from Circular Quay (pronouced: Circular KEE). This shop occasionally stocks possum scarves and accessories (see point 3, above) and lots of wonderful sheepiness. Come here for the real thing.

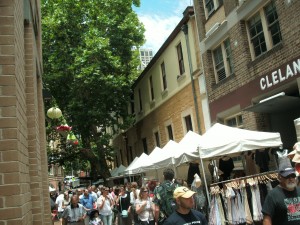
2. The Rocks Market. The market is held every Saturday and Sunday, and is a great source for handmade items. I haven’t yet seen a stall full of handspun yarn, but it would fit right in.

3. Craft NSW, 104 George St. This store is a lovely place full of work made by local artisans. I can’t guarantee it will always be in stock, but I’ve spotted some great local handspun yarn for sale. Click here for a complete review of the shop.

Other sights. Hands down, The Rocks is the best place to have your photo taken with the Opera House in the background. Just walk up to the water and you’ll see what I mean (it’s where I took the photo above). This is also the home of The Museum of Contemporary Art, which is worth a visit if you have the time. On the food scene, you’ll want to check out Pancakes on the Rocks (for yummy crepes) and The Rocks Cafe and have a Kangaroo Burger (the tourist favorite) or a plain ‘ol burger with a slice of Beet (the Aussie classic).

Mosman

Mosman is sorta like the ‘well-to-do’ district: filled with lovely shops and beautiful cafes. To get to Mosman, I’d recommend the ferry from Circular Quay (even though buses do run): it’s a fantastic view of the city!

Mosman is also home to my one of my favorite yarn shops in Sydney: Mosman Needlecraft, 529 Military Road. It’s a well-stocked shop with lots of goodies – and I always like checking out the needlepoint (a rarity in the US)! Click here for a full review.

Other sights. I happened upon in.cube8r Gallery on my last trip there: it’s a great gallery filled with work from local artisans. There was even an amigurumi artist – steal my heart! It’s also worth having a walk up and down Military road, and maybe down a street to get to the water. Beautiful.

Newtown

Newtown is the district right next to Sydney University, and so has a ‘college-town’, hippie feel to it. It’s also home to Sydney’s newest yarn store – A Coffee and a Yarn, which makes it well worth the visit.

I like to walk into Newtown from the city because my in-laws live nearby (City Road turns into King St), about a 45 minute walk end-to-end. If you’d prefer, take the subway to the Newtown station, placing you right next to the yarn shop!

map showing yarn shops in Sydney, Australia - The Newtown neighborhood

1. A Coffee and a Yarn. This shop opened last year and is as much like an American LYS as I’ve seen in Australia. Classes, tables for sitting, nice yarn and even a coffee bar!

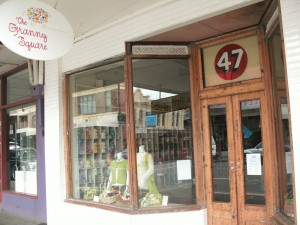
2. The Granny Square. If you’re walking in from the city, you’ll see two yarn shops on your right (one picture, The Granny Square). They weren’t open when I was passing by, but if you’re on a yarn adventure, you might want to make the stop!

Other sights. I love Newtown for its yummy Asian food… and almost every noodle shop you stop into is wonderful! It’s also the place to find some rarer cuisines, like Nepalese food.

It’s your turn!

Planning a visit? Already been? Let me know if you spy any new yarn shops Sydney! I’d love to hear how your trip went!
Mosman Needlecraft: Sydney, NSW, Australia

  • store: Mosman Needlecraft
  • address: Shop 3, 529 Military Road, Mosman, NSW 2088 Australia
  • website: www.mosmanneedlecraft.com.au/
  • date of visit: January, 2012

If you’ve read my previous posts about Australian yarn stores, you have probably heard me lament that they aren’t quite the same as American yarn stores. A typical Aussie ‘wool shop’ (and trust me, relatives have sent me to many of them!) has: no table for knitting, scratchy yarn with a limited selection and owners who look at you as if you have two heads if you mention ‘Ravelry’. Sigh.

With that as background, I have to announce: I love Mosman Needlecraft! The store is beautiful and spacious. They’re stocked with beautiful and amazing yarns… even hand-dyed yarns! There’s even a table where you can come in to sit and knit!

The owners are super-friendly, love their yarn and are on Ravelry! They’re up to date with the latest patterns! They even ask what yarn interests you and look into ordering it! Swoon…

You’ll find pretty much everything you could be looking for: Berocco, Claudia Handpainted, Debbie Bliss, Jade Sapphire, Madeline Tosh, Malabrigo, Rowan… I could keep going. They’re also fully stocked with pattern booklets and books.

Of course, I’m selling the store short by focusing so much on yarn. Mosman Needlecraft is a full needlecraft store, with supplies for cross stitch and embroidery in addition to knitting. I know very little about those things- but the displays looked nice!

It can be tricky to find a rockin’ awesome LYS in Australia… so if you’re in Sydney, be sure to stop by Mosman Needlecraft! It’s the best source of yarn I’ve found in the city!

Is ‘worsted weight’ the same as 8 ply yarn?

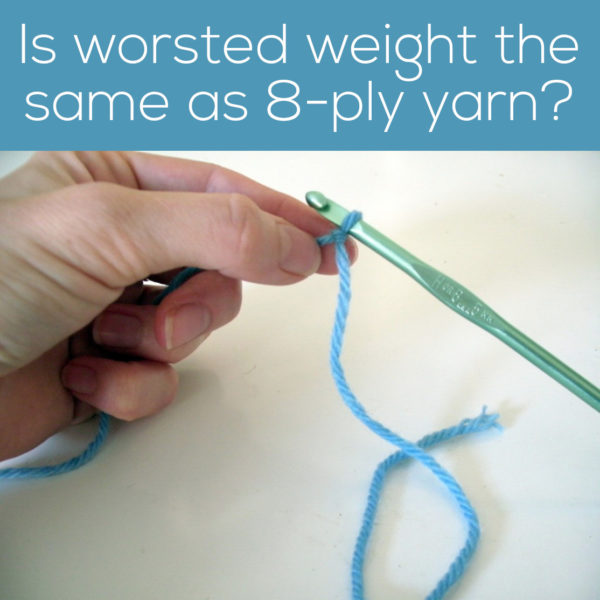
Is worsted weight the same as 8-ply yarn?

I get asked this question via email quite often, so I figured it was time to answer it in a blog post!

The short answer is: no.

But leaving it there would make a very boring blog post, wouldn’t it? So, here’s a bit more info about how yarn weights are labeled!

What does ‘weight’ of a yarn mean?

‘Weight’ refers to the thickness of a yarn. Yarn can be very skinny or very bulky, and everywhere in between.

Knowing the thickness of your yarn is crucial when you’re trying to follow a pattern or figure out which hook/needle size to use, because the yarn’s thickness (largely) determines the gauge that you will get in your knitted/crocheted piece.

American and British Yarn weight terms

Worsted weight yarn is the American term for yarn that you might spy in Australia or the UK as ’10 ply’ yarn. It’s the most common yarn weight that you’ll find on American shelves… and if you shop in Big Box stores, you might see it labeled as a “medium weight yarn.”

8 ply is the yarn that you’ll find most easily in Australia (which I know from personal experience), and I’ve heard that it’s pretty standard in the UK as well. It corresponds to what is called ‘dk’ weight in the US.

Want a handy printable chart? This post has lots more info about yarn weight – including the different names and the recommended crochet hook size – for each weight

Help! How do I follow a US pattern with 8 ply yarn?

If you’re knitting/crocheting a garment, then there’s a slightly long and complicated answer about getting proper gauge and such when you substitute yarns.

However, the reason I get this question so often is because folks in the UK and Australia want to crochet an amigurumi pattern (which calls for worsted weight yarn), but they can only find 8 ply yarn. . . and then the solution is easy-peasy!

If you’re making amigurumi, what’s most important is that you use the right sized hook for your yarn. So, if you’re using an 8 ply yarn, select a hook size that gives you a nice-looking fabric that stuffing won’t show through.

Your finished piece will be an eensy bit smaller than one crocheted with thicker yarn… but it’s easier than ordering yarn from overseas!

So there you have it… worsted weight and 8 ply yarns aren’t the same… but you shouldn’t let that stop you from making an awesome amigurumi!

How to organize scraps of yarn

After you knit or crochet your first project, you’re immediately faced with an organizational problem: weird bits of leftover yarn. The more projects you do, the more these scraps build up.

And, if you don’t organize your scraps well, they have a habit of tangling themselves together into one giant knot. Not good.

So, even though it may seem a little obsessive… I wind each one of my leftover yarn bits into a nice little ball, and tuck them into my ‘scrap box’.

The Box

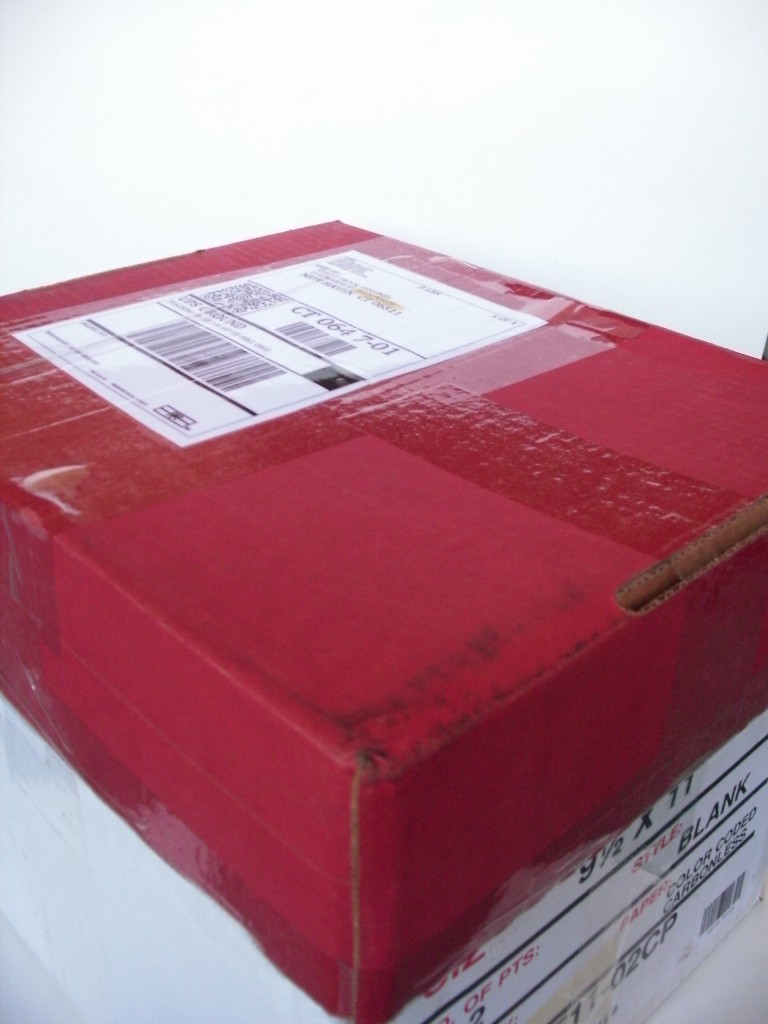
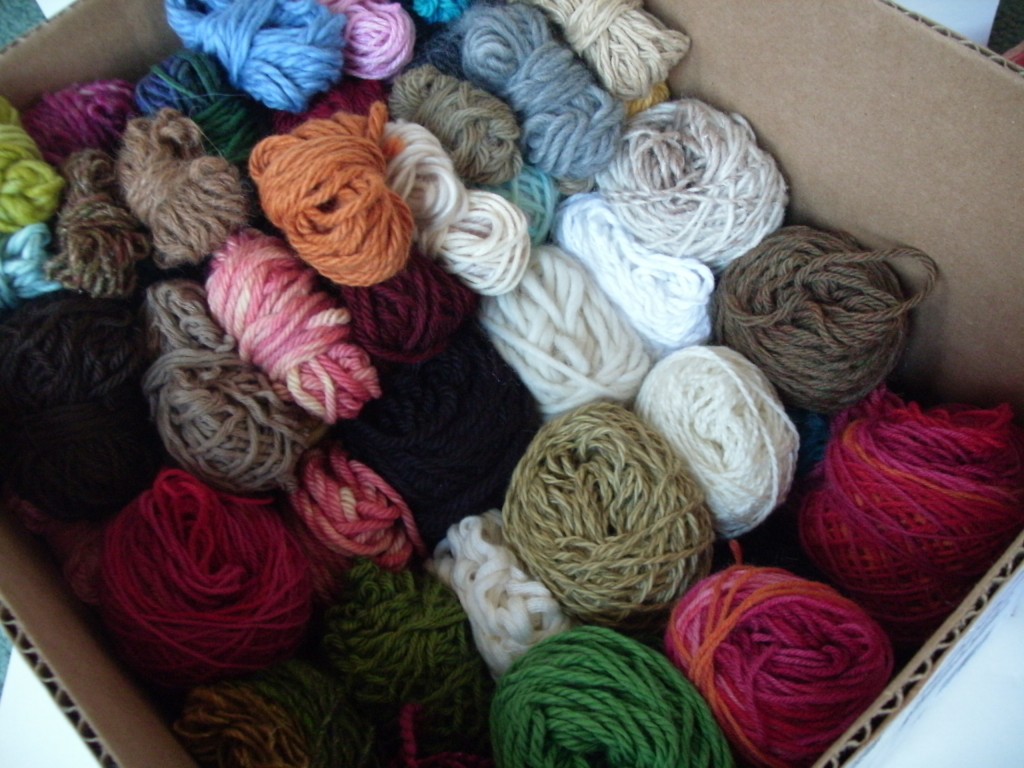
My box is just an ordinary copy-paper-turned-shipping box that I got in the mail one day. It’s sturdy, has a lid, and fits nicely on a shelf on my yarn bookshelf. Nothing fancy.

The big leftovers

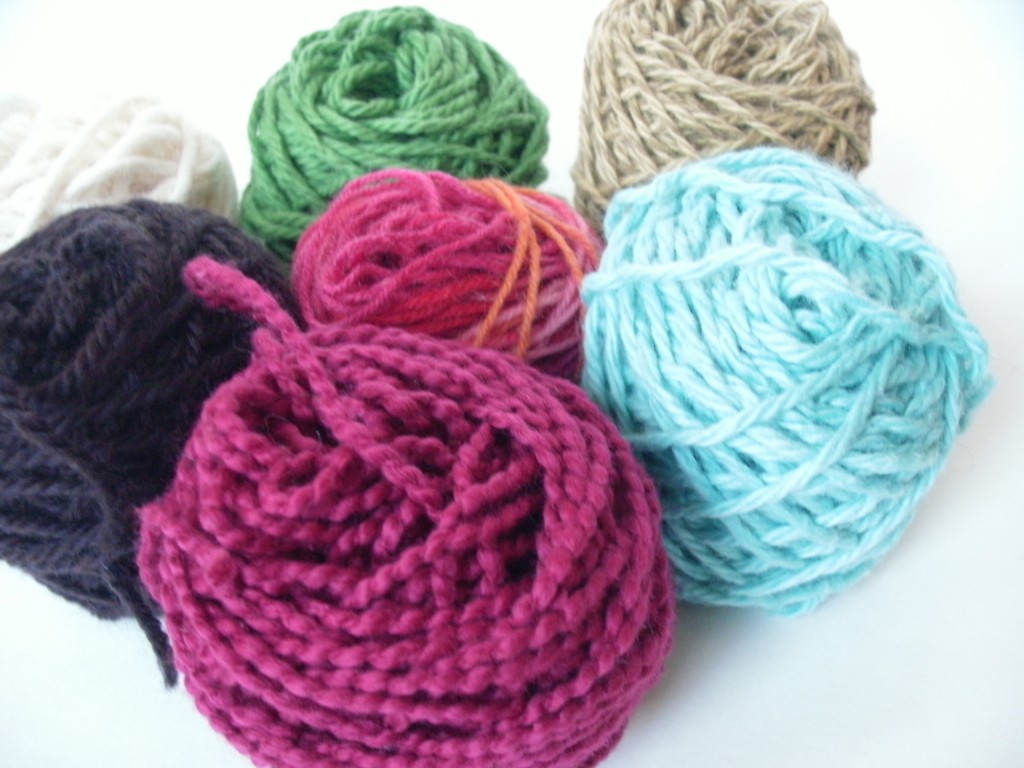
My favorite kind of scrap yarn is the ‘big leftover’. You know what I mean… it’s a quarter to a half of a skein of some yummy yarn left over from a project. Since these guys are pretty substantial in size, I wind them with my ball winder. I make sure to tuck the end in the ball so that there’s no danger of them becoming unraveled.

Little Bits

Little leftover bits of yarn are trickier… I’m not even sure why I keep them. Maybe one day, I’ll just need 10 yards of bright orange for some project or another…

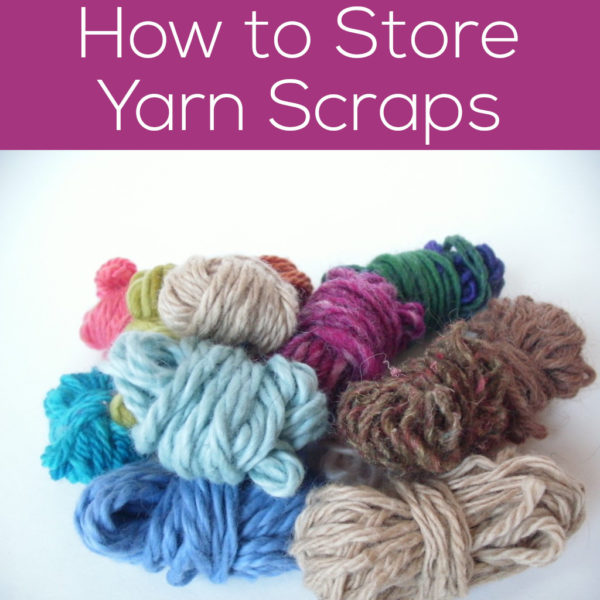
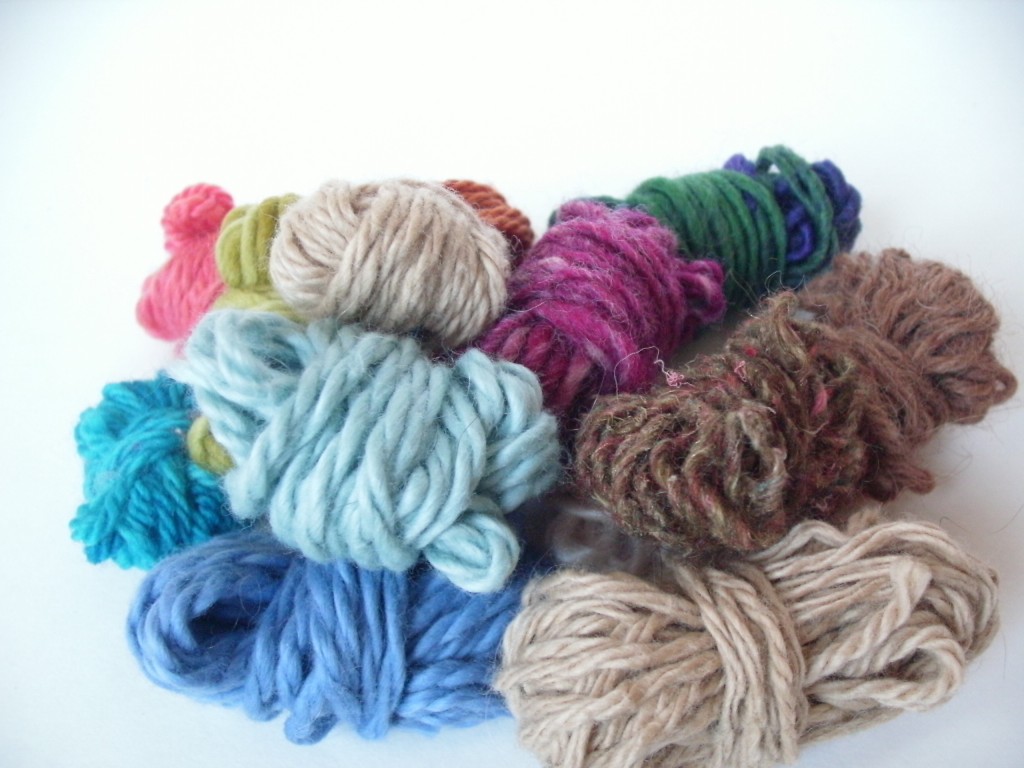
I just wind these guys around 2 fingers (it’s much too little amount for the winder), and then tie them around the center. Just like the big leftovers, you’ll want to make sure the ends are fastened so they don’t get the chance to become a giant knot in your scrap box.

What to do with the scraps…

Hmm… for now, mine live happily together (and neat) in their box. Sometimes I grab a ball if I need a little bit of a color… but no serious plans yet.

So, tell me… how do you organize your scraps? Any plans for them?