BLOG: Felt Patterns

Fancy Schmancy Felt Garland – free pattern

Colorful embroidered felt garland for children’s decor and crafting projects.

I’m going to be honest, you guys.

This project is insane!

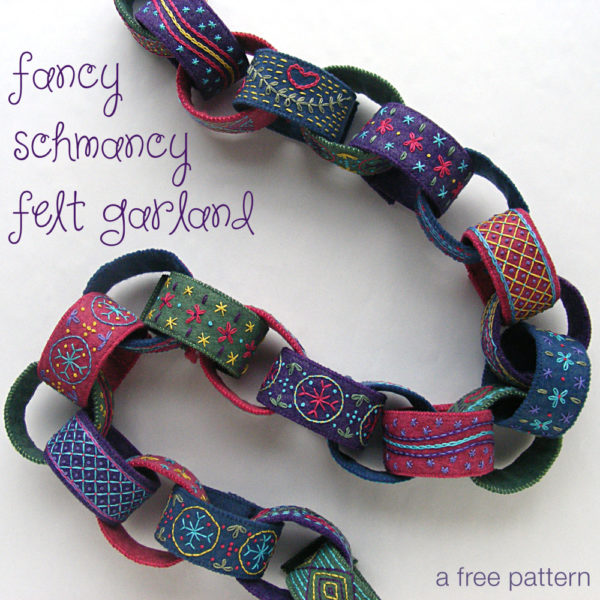
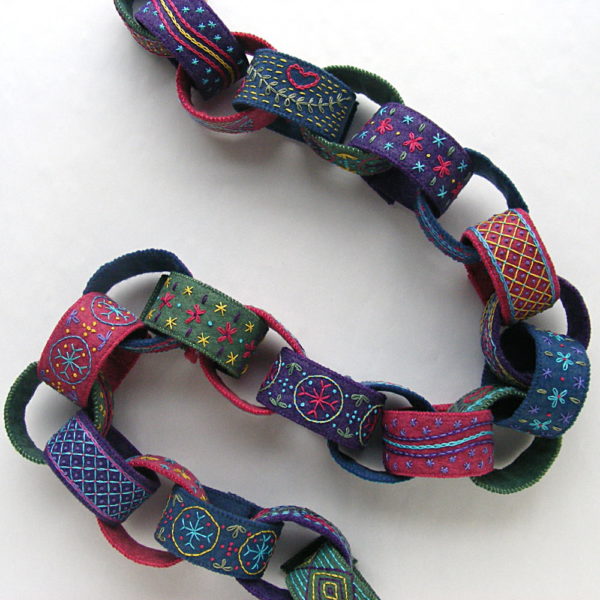
I mean – it’s lovely. A paper-chain inspired garland of hand-embroidered felt rings with hook & loop closures so you can store them easily. It’s sooooo beautiful and looks so warm and cozy and wintry. I’m absolutely enchanted with how it turned out!

But seriously. Hand-embroidered felt garland rings? Twenty-four of them? This is hours and hours and hours (and hours!) of hand embroidery. Of course, I enjoyed every minute of it. But I’d be the first to admit that I’m a little crazy about hand-embroidery on wool felt. This is a project that will keep your hands busy for a LOT of cozy evenings.

If I haven’t talked you out of it yet, here are the instructions. . .

The pattern includes six different band decorations and they all fit on one piece of Magical Embroidery Stuff (aka Sulky Sticky Fabri-solvy). So I did six bands each of four different felt colors for a total of 24 rings. That made a chain 42 inches long. For the materials below I’ll assume you’ll do the same crazy thing. 🙂

What you need

  • wool-blend felt – 2 sheets of each color you plan to use (I used grape jelly, babbling brook, denim, and ruby red slippers)
  • embroidery thread in matching and contrasting colors (I used DMC #550, 502, 336, 600, 3746, 522, 726 and 3846)
  • 2 feet of hook & loop tape
  • the pattern (download it here)
  • Sulky Sticky Fabri-solvy (optional, but very strongly recommended)

You can find a list of my favorite supplies (with links to where to buy them) here.

Throughout the pattern, the links go to video tutorials teaching that skill. If it’s a new stitch or technique for you, just click through to see how to do it!

Here’s how to make it. . .

1. Print the pattern. You can download it here. Print the pattern at 100% size onto four sheets of Sulky Sticky Fabri-solvy (aka The Magical Embroidery Stuff).

Colorful embroidered patches with flowers, hearts, and leaves for sewing or decorating.

2. Peel the backing off and stick the stabilizer/pattern transfer onto the felt.

Cut the pieces out on the lines.

Embroider the designs right through the stabilizer.

I didn’t embroider the designs the same way every time – preferring instead to just play around. You should play too! You can find tutorials for plenty of stitches here. . .

For the lines I used. . .

For the dots and flowers and leaves I used. . .

By all means – don’t be limited to these stitches! They’re just what I used. You can find lots more stitch tutorials here.

Colorful embroidered felt hair accessories with floral and heart patterns.

3. Soak off the Sulky Sticky Fabri-solvy. I soak mine in cold water for at least an hour, then rinse off the mushy stabilizer under cold running water. Don’t rub it to remove any stubborn bits – just hit them with a kitchen sprayer if needed.

Lay the pieces flat on a towel to dry. Do not wring, twist or even smoosh them. Just set them sopping wet on a towel and let them be. I promise they’ll dry. 🙂

(If you’ve never used Sulky Sticky Fabri-solvy before, I ramble on endlessly about how awesome it is and why I love it so much and how I use it here.)

Colorful embroidered felt hairbands with flowers and hearts for kids and adults.

4. Finish the bands. Cut second piece of felt for the back of the band. I just laid the front band down and cut around it so the back would match the front exactly.

Sew a small piece of hook & loop tape to the blank end of the top of the band, and to one end of the back of the band.

I used a sewing machine, but you could do it by hand if you prefer. I left enough space on the embroidered side to use the narrowest big-box-store hook & loop tape (like you see on the top band) but if you order one of my kits you’ll get the special less-bulky skinny hook & loop tape I prefer (like you see on the bottom band).

Put the front and back together so that the hook & loop tape is on opposite ends of the band and sew the pieces together around the edge. I used whipstitch, but you could certainly use a sewing machine – especially if you want to finish before the end of the year. 🙂

Colorful embroidered fabric strips with vibrant patterns and intricate stitching.

5. Wrap them into rings and build your chain.

In the photo above you see the six designs in the pattern, stitched up on purple felt.

Colorful embroidered fabric headband with floral and geometric patterns, handcrafted for children.

Finished!

*happy sigh*

I do so love handsewing felt. 🙂

Happy stitching!

If you like this free pattern, sign up for the Shiny Happy News! Every week I send out things to make you smile – free patterns, new tutorials, recommendations of patterns by other people, fun videos, yummy recipes and special discounts. 🙂

Best,
Wendi
That's me!

Free Elf Ornament Pattern

Felt elf Christmas ornament on green background with "Merry Christmas" message.

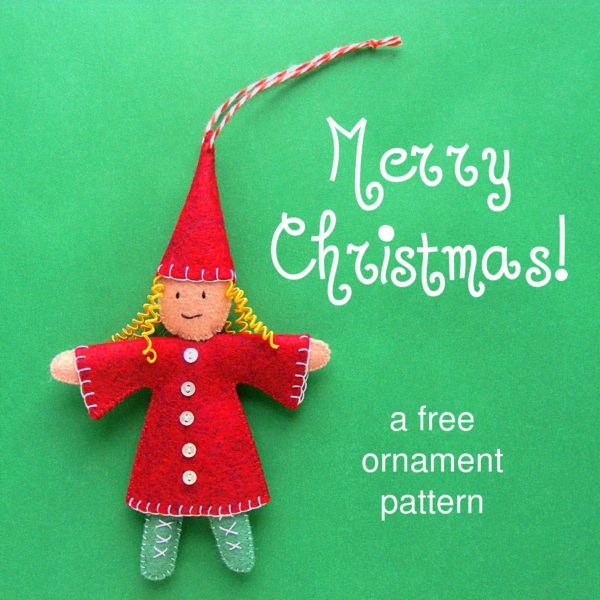
Make this sweet little elf ornament! Hang her on your tree or attach her to a package for someone special. :-)

It’s a free pattern!

Here she’s a Christmas elf. But she doesn’t have to be! I made a couple of “everyday” pixies that you can see here, along with their holiday friend.

Colorful felt elf ornaments with whimsical designs for holiday decorations and crafting.

Make a bunch of them in a rainbow of colors!

And did I mention they’re posable? They have a pipecleaner “skeleton” so you can bend and pose them however you like. This little cutie is sitting on a spool of thread.

Elf Girl - free pattern from Shiny Happy World

Want the pattern? Here’s the link to download it. It’s free!

Download the free Elf Ornament pattern here.

Have a great weekend, everyone!

Best,
Wendi
Wendi_Gratz_Shiny_Happy_World

A Happy Snowman Felt Ornament Pattern

Cute snowman Christmas ornament with felt and embroidery details, perfect for winter decor.

Here it is – the last ornament in the 2014 Christmas Club collection!

I saved the snowman for last – hoping that at least some of us might have snow by now. Ha! We’ve had two snows already – and I know some of you have too.

Here’s the whole collection. . .

Christmas ornament plush decorations with festive characters and holiday themes for ornaments and gifts.

And now that the whole collection is out, you can no longer sign up for the club. But you CAN buy the whole collection – all twelve patterns for $29.99. That’s less than $3 for each ornament!

Get the pattern collection here.

You can also get the pattern for just the snowman.

Merry Christmas!

Best,
Wendi
That's me!

Gingerbread! A Free Felt Christmas Ornament Pattern

Colorful felt gingerbread house ornament for Christmas decoration.

This project is part of the 2014 Crafty Christmas Tutorial Link-Up over at Bugs & Fishes. Go check out all the fun projects!

As much as I love to cook, and as much as I love the flavor of gingerbread, and as much as I love candy and fussy details – I’ve never made a gingerbread house. Until now.

Maybe the problem is that I know a real gingerbread house is not really edible, even thought it’s made of edible goodies.

No such illusions with this little house made of felt and embroidery thread! You get all the pretty decorations and fanciness and it will last for years. Plus you can make it on your couch in front of the fire instead of in the kitchen. 🙂

Here’s what you’ll need. . .

You can find links to sources for all my favorite tools and supplies here.

  • scraps of wool felt (I used Tahitian sunset for the gingerbread and lavender, grass skirt, blue bayou and fuchsia for the decorations)
  • matching embroidery thread (I used DMC floss in white, 3858, 3746, 550, 907, 699, 326, 601, 603, 3846)
  • 1 sheet of Sulky Sticky Fabri-solvy (optional, but recommended – will make two ornaments)
  • small amount of polyester fiberfill stuffing (a few cotton balls will do if you don’t have it)
  • scrap of string or yarn for the hanging loop

Throughout the pattern, the links go to video tutorials teaching that skill. If it’s a new stitch or technique for you, just click through to see how to do it!

Here’s how to make it. . .

1. Print the pattern. You can download it here. It’s formatted to give you the pieces for two houses – make one for yourself and one for a friend. Print the pattern at 100% size onto a sheet of Sulky Sticky Fabri-solvy (aka The Magical Embroidery Stuff).

Bright green background with sock monkey patches and felt embellishments for craft embellishment projects.

2. Peel the backing off and stick the stabilizer/pattern transfer onto the felt. I used Tahitian sunset for the gingerbread, fuchsia for the pink lollipops on the sides of the door, grass skirt for the green stick candy sills, blue bayou for the door, and lavender for the purple candy.

Cut the pieces out on the lines.

Embroider the designs right through the stabilizer.

Colorful embroidered felt gingerbread house and door patches for sew children’s craft projects.

I used the following stitches and colors. . .

  • For the snow along the roof I used U-stitch and 4 strands of DMC #white.
  • For the snowflakes I used 2 strands of DMC #white.
  • For the center window I used backstitch in 2 strands of DMC #white, with French knots in the same color below it.
  • For the candycane stripes on the windows and door I used whipped backstitch. Backstitch the lines first with 4 strands of DMC #white, then whip with 2 strands of DMC #326.
  • For the lollipop sticks on the sides of the door I also used whipped backstitch. Backstitch the lines with 4 strands of DMC #699, then whip with 2 strands of DMC #907.
  • For the swirls on the purple candy I used chain stitch and 2 strands of DMC #550.

Colorful felt gingerbread house craft kit for kids, with embroidered details and decorations.

3. Soak off the Sulky Sticky Fabri-solvy. I soak mine in cold water for at least an hour, then rinse off the mushy stabilizer under cold running water. Don’t rub it to remove any stubborn bits – just hit them with a kitchen sprayer if needed.

Lay the pieces flat on a towel to dry. Do not wring, twist or even smoosh them. Just set them sopping wet on a towel and let them be. I promise they’ll dry. 🙂

(If you’ve never used Sulky Sticky Fabri-solvy before, I ramble on endlessly about how awesome it is and why I love it so much and how I use it here.)

Colorful gingerbread house felt applique with candy canes and festive embroidery for Christmas decoration, made by Shiny Happy World.

4. Layer the small applique pieces onto the house. The stitching makes such a nice guide to help position everything!

I usually just hold them in place while I stitch them down, but this time I experimented with using a fabric glue stick. I used Prym brand and it stuck really well, but there was also a noticeable hardness to the glued bits. It wasn’t so hard that it was difficult to sew through – especially since I was mostly just sewing around the edges and I put a dab of glue in the middle of each piece – but I’d be careful not to use too much.

Colorful felt gingerbread house Christmas ornament with embroidered candy canes, flowers, and festive details.

5. Use whipstitch and matching thread to applique each piece in place.

Here’s a video showing how to do whipstitch applique.

Add a tiny bit more detail stitching because there wasn’t enough already. Really – if you can’t go overboard on a gingerbread house then when can you? It’s supposed to be slightly insane. 🙂

I added little diagonal stripes on the green stick candy with 2 strands of DMC #699. I also added little starbursts in the centers of the pink lollipops using 2 strands of DMC #603.

Gingerbread House - a free felt Christmas ornament pattern from Shiny Happy World

6. Layer the ornament front and back together and whipstitch all around the edges.

Whipstitching the edges of the felt is a little different that whipstitch applique, so it has its own video. You can watch it here.

Leave the bit under the door open for stuffing.

Gingerbread House - a free felt Christmas ornament pattern from Shiny Happy World

7. Add a few pinches of stuffing through the hole, then switch to matching blue thread and sew up the opening.

Thread a 10″ piece of string through the peak of the roof and tie a knot to form a hanging loop.

Finished!

Like all Shiny Happy World designs – you’re welcome to sell items you make with my patterns, but please don’t sell or distribute the patterns themselves.

If you like this free pattern, sign up for the Shiny Happy News! Subscribers get a weekly newsletter with updates, special offers and links to happy things. :-) Sign up here.

This ornament is the same style and size (and difficulty level) as all my other holiday ornament patterns. Here are the first ten ornaments in this year’s Christmas Club collection.

Handmade felt Christmas ornaments featuring animals and holiday characters.

*happy sigh*

I do so love handsewing felt. 🙂

Happy stitching!

Best,
Wendi
That's me!


A Pretty Felt Bird Ornament Pattern

Colorful felt bird plush toy for children's decor and educational activities.

I seem to be slightly obsessed with pretty, patterned birds – but they’re so much fun to stitch!

This felt bird ornament is the tenth ornament in the Christmas Club collection. We’ve only got two more to go! Here they all are so far. . .

Christmas Club 2014 - twelve felt ornament patterns

You can still join at any time! The Welcome PDF that you get with your order has a link to access all the patterns that have gone out so far.

The Club is closed now, but you can still get all the patterns!

Get the entire 2014 pattern collection (at a discount!) here.

Get just the bird pattern here.

See all the felt Christmas ornament patterns here.

Merry Christmas!

Best,
Wendi
That's me!

A Matroyshka Doll – felt Christmas ornament pattern

Colorful felt Matryoshka doll ornament with embroidery details, perfect for children’s crafts.

All the detail stitching and bits of applique in this matroyshka doll were So Much Fun! I love a rich little project like this one – lots of detail for fun stitching, but it’s small so I can finish it in a couple of nights. 🙂
This is the ninth ornament in the Christmas Club collection. Here they all are so far. . .

Santa felt ornament, Christmas holiday decoration, festive felt craft, handmade holiday ornament, crafty Christmas decor.

You can still join at any time! The Welcome PDF that you get with your order has a link to access all the patterns that have gone out so far.

The club is closed now, but you can still get all the patterns!

Get the entire 2014 ornament collection here.

Get just the Matroyshka doll pattern here.

Find all the felt ornament patterns here.

Merry Christmas!

Best,
Wendi
That's me!

A Red Rocket – felt Christmas ornament pattern

Red Rocket - a felt ornament pattern in the 2014 Christmas Club collection

I love this retro red rocket Christmas ornament! We have a collection of tin rockets and robots and this felt version fits right in with that vintage toy feel.

This is the seventh ornament in the Christmas Club collection. Here are the first six. . .

half of the felt ornaments in the 2014 Christmas Club collection

You can still join at any time! The Welcome PDF that you get with your order has a link to access all the patterns that have gone out so far. Get all the details and sign up here.

The weekly club is closed now, but you can still get all the patterns.

Get the entire 2014 Christmas Club pattern collection here.

Get just the red rocket pattern here.

Find all the felt ornament patterns here.

Merry Christmas!

Best,
Wendi
That's me!

A Cute Kitty – felt Christmas ornament pattern

Felt cat ornament with embroidered features on pink background, perfect for sewing and DIY crafts.

I love this cute kitty felt Christmas ornament! This is one you can whip up in no time – which makes it super easy to make more than one. How about one in smoky grey? Or a black cat for Halloween? Play! (Or fill one with catnip and let your cat play. But don’t hang that one on the tree!)

This is the sixth ornament in the Christmas Club collection. We’re halfway there! Here’s the collection so far. . .

half of the felt ornaments in the 2014 Christmas Club collection

You can still join at any time! The Welcome PDF that you get with your order has a link to access all the patterns that have gone out so far. Get all the details and sign up here.

The club is closed now, but you can still get all the patterns. 🙂
Get the entire 2014 Christmas Club collection here.

Get just the kitty pattern here.

See all the felt Christmas ornament patterns here.

Merry Christmas!

Best,
Wendi
That's me!

A Dapper Felt Gingerbread Man Ornament

Felt gingerbread man ornament with embroidered details, smiling face, blue vest, striped pants, and a candy cane loop for hanging.

I love this cute felt gingerbread man ornament – with his dapper pinstriped pants and his fancy snowflake buttons. 🙂

The pattern includes suggested felt colors to make chocolate and sugar cookie versions. Wouldn’t it be cute to make a bunch with different colored outfits and string them together into a garland?

This is the fifth ornament in the Christmas Club collection. Here are all five so far. . .

5 ornaments in the 2014 Christmas Club pattern collection

The club is closed now, but you can still get all the patterns!

Get the full 2014 Christmas Club collection here.

Get just the Gingerbread Man pattern here.

Find all the felt ornament patterns here.

Merry Christmas!

Best,
Wendi
That's me!

A Not-So-Itsy-Bitsy Spider – a new handsewing pattern!

Felt spider toy with humorous Halloween message, soft and plush Halloween decoration.

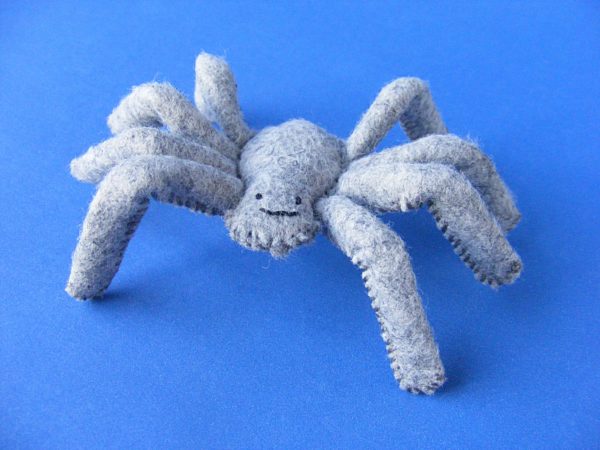
I originally designed this spider as a best friend for Nellie the Pig. She was made of light grey felt with a friendly smiling face – not scary at all. This is the perfect little spider to send up the water spout when you’re singing The Itsy Bitsy Spider with a group of preschoolers. 🙂 You can see that spider here.

Soft gray plush spider toy with a smiling face for children, made from cozy fabric. I named her Aranea after one of Charlotte’s daughters who decided to stay behind with Wilbur.

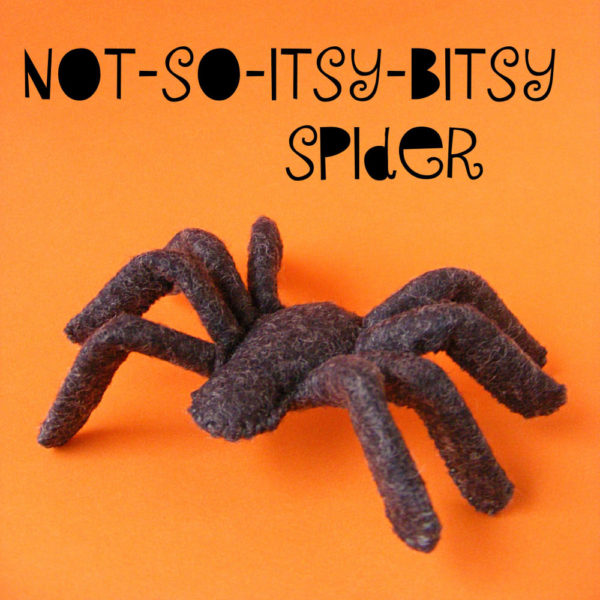
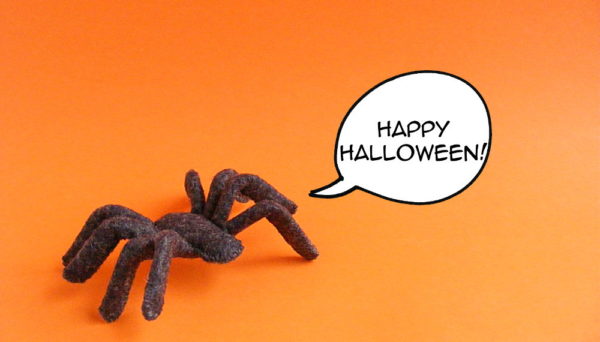
However – I decided that a spider pattern just wouldn’t be right without a slightly spookier version. I wanted to show you another version that would be perfect for Halloween decorations – something you could scatter around a table. 🙂 This version skips the embroidered face and uses Licorice felt for a slightly-hairy-looking, almost-black spider.

Spooky spider gummy toy for Halloween on orange background.

This is definitely NOT the spider to use with your preschool class. It’s surprisingly realistic looking! Jo suggested adding a hair clip to the bottom of the body for a spooky barrette.

And now the pattern is available in the shop! It’s a PDF pattern, so it will be delivered instantly by email.

Get the felt spider pattern here.

There are also materials kits available in both colors. Choose the kit option from the drop down menu above the add to cart button.

This will only take an evening to stitch up and it’s all hand sewing so you can take it anywhere.

Happy sewing!

Best,
Wendi
That's me!