


There are SO MANY different ways to outline applique pieces – and scribbly outlining is one of my favorites!
A lot of people applique with satin stitch or decorative stitching like blanket stitch. I demonstrate how to use decorative stitches in one of the lessons in my Fusible Applique Made Easy Class on Craftsy. Here’s an example of some of that stitching.
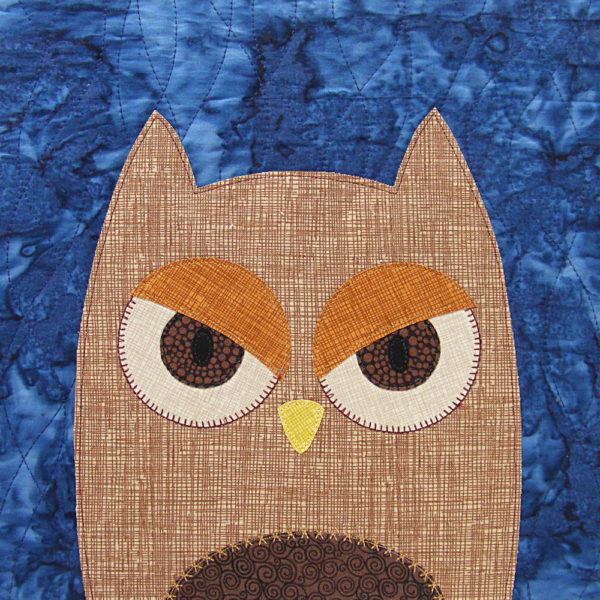
There’s blanket stitch around the bottom of the eyes, another stitch around the belly patch, and straight stitching everywhere else.
You can see lots more examples of this in the Parliament of Owls quilt pattern.
Fancy stitching can be fun, but I usually outline with a simple straight stitch and black thread. I love the cartoony look it gives and I think it really suits my applique designs. Plus it’s super easy!
(A lot of people worry that their fabric will fray if they just do a straight stitch outline. I posted a photo of one of my daughter’s quilts after over a year of constant use and many trips through the washer and dryer. Click here to see how it holds up.)
Sometimes, if I want a thicker line, I use a thicker thread. I like using 12 wt. thread from Sulky Petites and I’ve got a post here where I talk about what you need to do to work with thicker thread – what needle to use, what to use in the bobbin, etc.
Sometimes when I want a thicker line but I’m too lazy to change my needle (like maybe just on cat whiskers) I’ll use regular thread and go over the stitching two to three times, being careful to stitch right over the previous stitching so it looks like one solid, thicker line. You can see that in this cat.
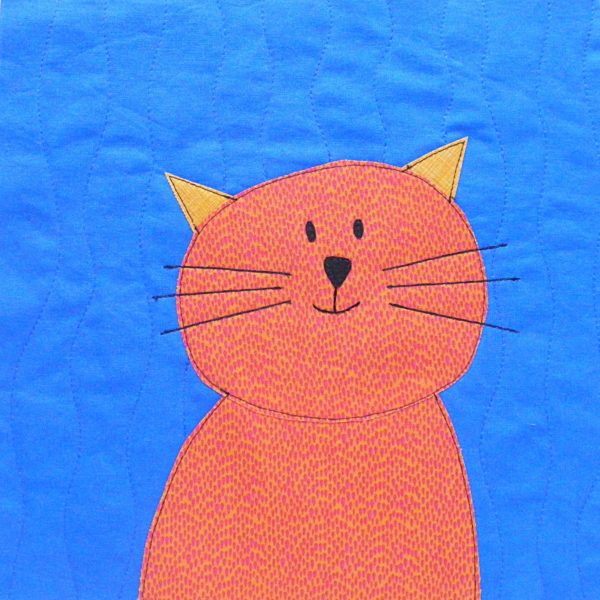
I did most of the outlining with regular thread, but you can see the line is thicker on the whiskers and the mouth. That’s where I went over it a few times.
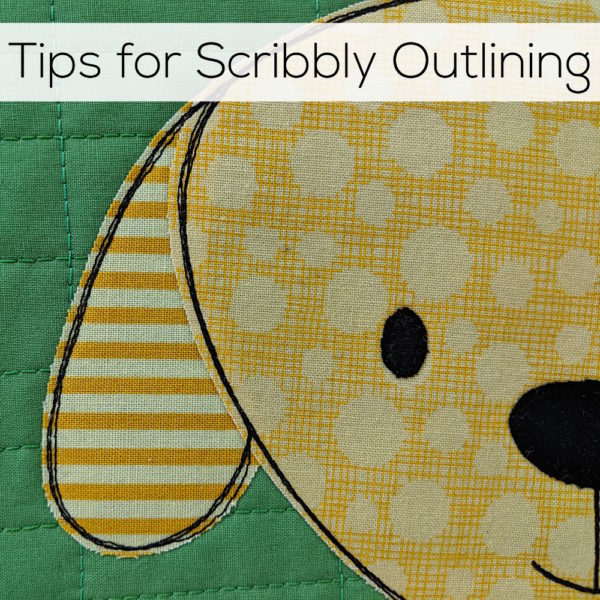
Lately I’ve been wanting to play around a bit with scribbly outlining, more like the lines in my sketchbook.
So I tried it! It took me a few blocks to get just the look I was trying for.
It took three rounds of stitching to get this look. Two just looked like a mistake – three looked intentional.
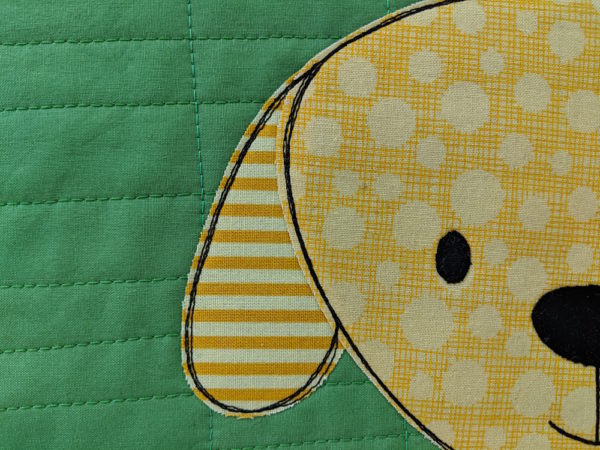
It’s kind of hard to deliberately go off the line! I’ve made hundreds of these blocks and by now it’s kind of automatic to follow the line as closely as possible. 🙂 I found it helped to deliberately ignore the line on pass two, to just pretend it wasn’t there and outline again as if it was a blank piece. Then on round three, if the first two lines were still too much on top of each other, I would deliberately veer off line. Make sure you cross over the line when you veer – you don’t want another line consistently inside or outside your original line. You want to cross over so sometimes it’s inside and sometimes it’s outside. That gives the best sketchy look.
Bonus! Four lines of scribbly outlining looks pretty much exactly like three. That means there’s no real benefit to doing four trips around the whole thing, but you can use that extra trip in some places to avoid having to start and stop to go around pieces like ears and muzzles and necks. For that snippet you see above, there are three rows of stitching around everything except the bit of the head that overlaps the ear. I went over that bit four times so I could stitch the ear without ever having to stop and tie a knot.

Here are links to all my posts about outline stitching.
- How to Topstitch and Edgestitch
- How Durable Is Straight Stitching?
- In What Order Do I Stitch?
- Stitching Eyes and Mouths – with lots of help for stitching tight curves
- Tips for Scribbly Outlining
- Playing with Thread Weight
Finished with this topic?
Return to the Let’s Make a Quilt main Table of Contents.
Move on to the lessons about how to trim and assemble your blocks.
Happy stitching!
Thank you for the whisker tip and 3 Pass vs 4. Very helpful. 👍
I have a project waiting for the machine applique …I think I will see if I can do the scribbled stitching. It’s Halloween wall quilt and this style might be the perfect touch
What kind of foot are you using on your machine for this? An embroidery foot or regular foot?
I use a clear applique foot.
Could you use a open toe free motion embroidery foot on this technique? I’ve done a bit of this in the past and was wondering if this technique would be successful in your opinion? Thanks so much for the website and all of the information and patterns you so generously share! X
Yes! I’ve never done it, but I know several people who have and it looks great. Someday I’ll get the hang of free-motion stitching. 🙂
Thanks for all the free patterns and instructions! Your directions are very clear and easy to follow. I want to let you know that the pictures are not showing up in this post.
Thanks for letting me know! I’ve fixed it. 🙂
What stitch length and needle do you use for your scribble outlining?
This dinosaur quilt is the first of your patterns I have attempted and I’m really enjoying it. The instructions are so clear and the video tips and hints are jut great.
I use a regular universal needle – nothing special. Usually a size 80. I usually set my stitch length at 2.0 for outlining – but it really depends on how tight the curves are. If they’re very gentle I may up that to 2.5.