I use fusible adhesive to applique almost all of my quilt blocks, and I get a lot of questions about the stiffness.
I use Heat & Bond Lite. Yes – it is somewhat stiff when you’re making the block. I find that stiffness VERY helpful when I’m doing all my outline stitching. Basically, it acts as a wonderful stabilizer.
The first time you wash the quilt, it softens up a LOT. After a second wash I find it doesn’t feel stiff at all.
But maybe you like using a different brand that doesn’t soften as much in the wash. Or maybe you’re making a wall-hanging that you never plan to wash. Or maybe you like to layer on lots and lots of pieces and don’t want the added thickness of lots of layers of adhesive. Or maybe you’re in the middle of a project and you’re almost out of fusible and it’s raining and you don’t want to leave the house to get more so you’re trying to conserve every last bit.
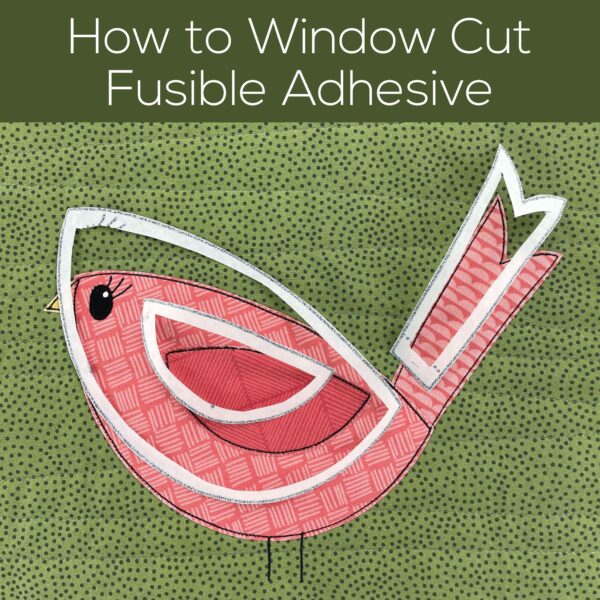
It doesn’t matter why. 🙂 I’ve had several people ask if I can show how to do window cutting with fusible adhesive, so here it is!
Step 1
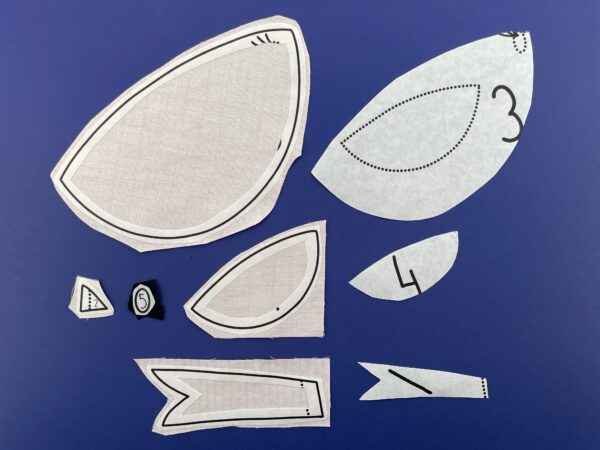
Print or trace your pattern just like normal. If you want, you can trace smaller pieces inside larger ones – just leave at least 1/2 inch between any lines.
Step 2
Rough cut around each piece just like normal. Leave a little extra all the way around the outside of each piece.
Step 3
Cut away the inside of each piece, leaving at least 1/4 inch of fusible. You can use scissors, but I think it’s much easier to use an X-Acto knife.
Step 4
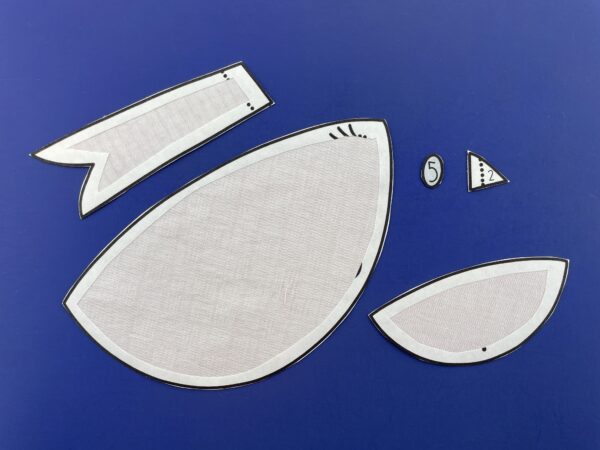
Fuse the pieces to the wrong side of your fabric.
On the left side of the photo you can see the window-cut pieces fused to the back of the fabric. On the right you can see the bits that I cut out of the inside. You can use those cut-out bits for smaller applique pieces.
Step 5
Clean cut around the pieces on the solid lines, just like normal.
Step 6
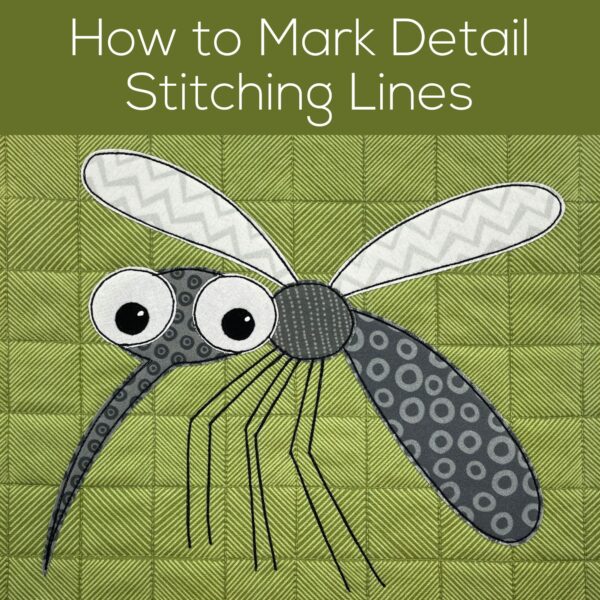
Trace any placement or stitching lines.

Normally any placement and stitching lines (here the wing and eye placement and the eyelashes) are on the paper side of the fusible adhesive, but you cut that away. You’ll need to lay the pieces over the placement guide of your pattern and trace those lines.
Step 7
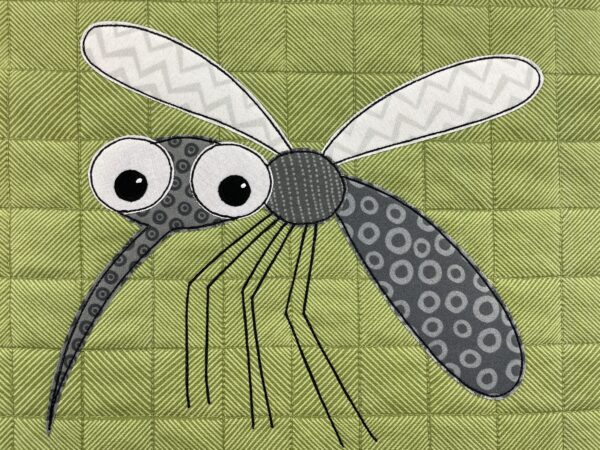
Layer the pieces together, fuse them in place, and do all the outline stitching, just like normal.
Finished!

So there you go – the ease of applique with fusible adhesive with the softness of needle-turn applique.
Happy stitching!

Here are links to all the posts showing how to applique with fusible adhesive – my favorite method. It’s fast and easy and (with the right materials) it holds up beautifully to rough use and repeated washing.
- How to Applique with Fusible Adhesive – a very basic intro
- How Durable is Applique with Fusible Adhesive?
- Fusible Applique the Easy Way – the way I currently work – use with any of my patterns that include SVG files
- How to Use a Light Box to Layer Your Applique – perfect placement every time
- How to Applique with Fusible Adhesive – photo tutorial – use with any of my patterns that do not include SVG files
- How to Applique with Fusible Adhesive – video tutorial – use with any of my patterns that do not include SVG files
- How to Window Cut Fusible Adhesive – if you’re worried about stiffness
Here are links to special posts about eyes.
- Easy Eye Options for Applique
- Using Fabric Markers and Paints for Small Eyes
- Free Embroidery Machine Files for Machine-Stitched Eyes
- How to Machine Stitch Eyes without an Embroidery Machine
- How to Minimize Show-Through on White Eyes
- How to Applique Dark Eyes on Dark Faces
- How to Add Catchlights to Eyes
- How to Change the Eyes on Your Applique Patterns (adding lashes or changing to sleepy or smiling eyes)
Here are links to some extra fun things you can do with your applique.
- How to Add a Baby Animal to Any Block
- How to Squish Two Animals into One Block
- How to Add Playful 3D Bits to Your Applique
- How to Add Soft 3D Pieces to your Quilt Block
- How to Add a Door (that Opens!) to Your Quilt Block
- How to Give Your Monster an Underbite
- Fake Trapunto (Stuffed) Applique
- Broderie Perse Applique
Other Applique Methods
Finished with this topic?