Variegated Yarns: swatches in knitting, crocheting and weaving

It’s always so mysterious how a pretty little skein will work up, isn’t it? Especially with variegated yarn!

I dyed up a little (well, BIG) skein and made swatches in knitting, crocheting and weaving! And they’re SO different!

Here’s the skein I dyed (if you want to try it, check my tutorial on how to dye yarn with Wilton Icing Dye):

variegated skein dyed with Wilton icing dye

Knitted Swatch

Here’s my knitted swatch!

Variegated yarn in knitting

The factor that’s relevant in how variegated yarn will work up is how long each color repeat is and how much yarn each stitch uses. Although skeins vary, most are about 3-4 feet in circumference, and a variegated yarn will break this length up into a few colors. So, most color repeats are a few to several inches.

Here’s how to calculate how much yarn each stitch uses.

You can see here that each color lasts several stitches before switching to a new color.

Crocheting

Crochet stitches, in general, use more yarn than knitting stitches, so a color repeat will last over a fewer number of stitches.

Here’s my crochet swatch

Crochet swatch with variegated yarn

This swatch is done in single crochet, and most of the colors last for a few stitches before changing (as compared to several with knitting). This results in a ‘splotchier’ looking fabric.

You might be interested in reading about the latest craze of Planned Pooling.

Weaving

Totally different from knitting and crochet, because there isn’t a ‘stitch’, the color repeat goes for as long as it actually goes on the yarn. In most cases, a color lasted for an entire row on my scarf.

Also, weaving uses two directions of yarn, the warp and the weft.This results in a really lovely plaid-like fabric. Here’s my swatch:

weaving swatch with variegated yarn

All together now!

They’re all so different, right?

swatches: weaving crochet knitting

It just goes to show that when you find that dream variegated skein, you still have choices to make! You’ll want to select a project (and craft) that will result in the colors working up the way you want!

Best,
Stacey

Want to try 9 inch circular needles?

I absolutely love knitting socks on 9 inch circular needles.

Most people think I’m crazy when I say that my favorite knitting needle is a 9″ circular. But I can’t help it. I’m in love.

When you knit with other techniques (double point needles, two circulars or magic loop), there’s always a join that creates the potential for laddering (those icky loose stitches) as well as costs you some time maneuvering them around.

With the 9″ circular, there’s none of that! You just knit around and around!

A little video for you!

Are you a bit nervous about knitting with 9″ circulars? Don’t be!

I made this video a little while ago:

And it’s pretty good, but felt like I could give you a better idea of what to do my knitting a miniature heel flap, where I could also show you how to pick up stitches. So, I made you this one:

(sorry, the manicure isn’t as nice… but that’s okay, right? I filmed the first one while I still had fancy nails from filming my Craftsy course!)

The heel flap is what most people think is the scariest part of knitting on a 9 inch circular… and I hope you can see that it’s really not hard!

Don’t you feel like giving it a try?

Pick your favorite pattern!

Almost any pattern can be converted to 9″ circulars!

If you’re a newbie, I recommend Churchmouse Yarn and Tea’s Basic Sock pattern. If you’re looking for a more advanced pattern, I recommend the book Sock Knitting Master Class.

Candy Skein Yummy Fingering

There are no patterns that I know of that specifically call for 9 inch circular needles. So, you should feel comfortable with knitting on a circular needle before beginning a pair of socks, as you will need to do some ‘translating’ in terminology.

Give ’em a try!

bright socks 9" circular

I’ll be honest, if you have big hands or like a lot of ‘space’ when you knit… the 9″ probably isn’t for you.

But if you like to knit socks, and are tired of losing a double point, getting ladders in your work or having trouble tossing your knitting into your bag and going… then you might love these guys! Try them!

Happy knitting!

How to Dye a Gradient Yarn using a Spray Bottle

How to Dye a Gradient Yarn Using a Spray Bottle - tutorial from FreshStitches and Shiny Happy World

Remember when I told you how to dye a gradient yarn with a sock blank? Well, today I’m going to go a step further and show you how to get an even more gentle gradient using a *spray bottle.

When I made this skein of yarn, I was feeling Easter-y, so I picked yellow, blue and pink:

wilton dye for dyeing yarn

Click this post to see what the Wilton Icing Colors look like on yarn.

wilton colors 2

Okay, now here’s the technique: I rolled out my sock blank and dunked each end and the center in one color, leaving a lot of white space in between. See?

dyeing a gradient yarn tutorial

Ignore my ugly cooking sheet in the background. Actually, don’t ignore it (it’s crucial for keeping your counters clean in this project!)… just pretend it’s prettier!

Now, load up your spray bottle with the dye.

spray bottle 4

You want to use the spray bottle to direct your dye exactly where you want it. With this blue, I’m going to spray more towards the blue dyed portion of the yarn, and then spritz less to blend it into the yellow.

how to dye a gradient yarn

Now wash your bottle really well and repeat with the other two colors. You’ll get a very blended effect!

See how the colors blend? Because the dye is wet when you’re spraying, the blue mixes with the yellow and makes green… it’s an effect that’s hard to get if you’re just dipping the blank in dye.

dyeing a gradient yarn

I let it dry, and then wound it on a niddy noddy. Here’s the hank:

skein of yarn dyed by FreshStitches

The gradient-ness doesn’t show up too well in a hank. But no worries, I’ll show you what I’m knitting. Here’s a little shawl I’m working on:

shawl knit and dyed by FreshStitches

Isn’t the gradient fantastic? I can’t wait to wear this one!

How to Dye a Rainbow Gradient Yarn (using a sock blank!)

Today I’m going to show you how I dyed this beautiful skein of yarn:

Gradient Rainbow yarn dyed with Wilton Icing Dyes by FreshStitches

I’ve talked about how to dye a gradient before, but today’s technique is a bit easier (but costs a little more). For this project, I used a sock blank.

What is a sock blank?

A sock blank is basically length of undyed yarn knitted up using the stockinette stitch. I purchased mine from Knit Picks. It’s more expensive than buying yarn in a skein, but having the yarn already knitted up makes it easier to dye a gradient.

How to dye

You can dye yarn lots of different ways (check this post for how to use Kool-Aid), but for this project, I used Wilton Icing Dye. (check this post for a tutorial on how to dye with Wilton Icing Dye).

color card for wilton icing dye on yarn, freshstitches

Once you’ve set up your dye, you’ll want to apply a little bit to the sock blank… basically making rainbow stripes. You want the stripes to be horizontal (along with the direction of the stitches) in order to get a gradient.

gradient rainbow yarn by freshstitches 2

I used a silicone pastry brush to apply the dye and put the blank on a big cookie sheet (you don’t want that dye getting on anything else!

gradient rainbow sock blank freshstitches

To get the best gradient effect, overlap the colors a little bit (that is, you want a little green over top of the edge of the blue stripe… otherwise, you’ll get very definite stripes)

How to finish the yarn

You just let the yarn dry, and it’s dyed! But, you’ll want to wash and unravel the yarn before knitting with it, or else it will be all kinky (just like when you frog a project).

I washed the yarn (I guess it’s not a blank anymore!), and then unraveled it and wound it onto a niddy noddy. This makes a nice skein (and has the benefit of allowing the yarn to dry well).

niddy noddy freshstitches

Pop it off, and you have a skein!

gradient rainbow yarn by freshstitches 1

You can see the true beauty of the yarn when it’s wound into a cake:

Gradient Rainbow yarn dyed with Wilton Icing Dyes by FreshStitches

Amazing, right?

Tips and Tricks

  • If you’re not sure how a particular color will come out, do a test swatch! You don’t want to mess up an entire skein because one color comes out different than you wanted!
  • The disadvantage to a sock blank is that the bits of yarn that are tucked inside the stitches are a little harder to soak with dye, so a light application of dye may result in splotchy yarn. (although… it’s a cool look, so experiment. You may want that on purpose!)
  • Be careful what you put your blank on. Keep in mind that excess dye will be carried along with the liquid… and if it touches other parts of your yarn, it’ll dye that, too!
  • You can make your own blank, particularly if you have a knitting machine!
  • This same technique works with any kind of dye!

Happy stitching!

Best,
Stacey

Self-Striping Sock Yarn

If you watched my most recent Coffee with Stacey, you’ll know that I absolutely love knitting socks from self-striping yarn.

Rainbow striped socks knit by FreshStitches

My go-to sock yarn, Knit Picks Felici (shown above), has been discontinued. Self-striping yarn is hard to find… it’s difficult to dye and some beautiful ones are stunning but not suitable for socks.

So I thought it would be fun to post a list of delicious self-striping sock yarn!

Can you tell I’m shopping?


Have you tried any of these?

Or have a favorite to recommend? I want to hear it!

If you love beautiful rainbow-y socks, you’ll probably also want to follow Susan B. Anderson’s blog… she does lots of lovely knitting!

My favorite tool: a 9" circular knitting needle

Hi there folks! Welcome to day 6 of Knitting and Crochet Blogging Week!

4th Annual knitting and crochet blog week

Today’s topic is ‘a tool to covet’… so I’m going to talk about my favorite tool: my 9″ circular knitting needle!

Why a 9″?

Most people think I’m crazy when I say that my favorite knitting needle is a 9″ circular. But I can’t help it. I’m in love.

Toe-up socks knitting

I’ve already chatted about how I like knitting socks… and 9″ circular needles are a fabulous way to knit them! When you knit with other techniques (double point needles, two circulars or magic loop), there’s always a join that creates the potential for laddering (those icky loose stitches) as well as costs you some time maneuvering them around.

With the 9″ circular, there’s none of that! You just knit around and around!

My favorite one is the *Hiya Hiya 9″, because the tips of the needles aren’t too pointy. Clover makes a 9″ needle that’s made from bamboo with pointier tips. It’s just a matter of personal preference which one you choose.

What are the downsides?

I can’t report many… I love not losing a double point needle under an airline seat (oy, what a mess!) and not having to worry about finding multiple needles to get a sock done.

However… the 9″ is small… and too small for a number of people.

knitted socks

The only way to know if a 9″ will work for you is to give one a try.

Another downside is that they haven’t really ‘taken off’ yet, and they can be a bit difficult to find in stores. For example, even though big box stores carry the line of Clover needles, I’ve yet to see the 9″ available with his needle-buddies. Some LYSs carry them, so it’s worth giving your local shop a call to see if they have them!

Give ’em a try!

bright socks 9" circular

I’ll be honest, if you have big hands or like a lot of ‘space’ when you knit… the 9″ probably isn’t for you.

But if you like to knit socks, and are tired of losing a double point, getting ladders in your work or having trouble tossing your knitting into your bag and going… then you might love these guys! Try them!

Best,
Stacey

This post contains affiliate links. That means I make a little commission if you buy something after clicking through. All affiliate links are marked with an *.


Do you need sharp-tipped knitting needles?

Do you need sharp-tipped knitting needles? Some recommendations from Shiny Happy World and FreshStitches

I’ll level with you. I don’t like sharp-tipped knitting needles.

Do you know why? I’m a pusher:

Point pusher with knitting needles callous

That means that I push on the tip of the needle as part of executing my knitting stitch. A sharp tip means a major ouchie.

But, even I’ll admit: there are times when you need a sharp-tipped knitting needle.

When to use sharp-tipped knitting needles

Some folks love using super-pointy needles all of the time. These folks will tell you that every knitting project is the right time to use sharp-tipped needles.

Knitting with Karbonz needles from Knitter's Pride Review

But what about those of us who have a knitting style that makes using sharp-tipped needles painful? When is it really helpful to use a sharp needle?

Here are a few cases where I reach for my sharp tips:

  • when working with a yarn that’s fuzzy (for example, containing mohair)
  • when using a lace-weight yarn (the tips help you navigate a super-thin yarn)
  • on any pattern that calls for ‘big’ decreases (like k3tog, common in bobbles), since the tip helps you get through all those stitches at once
  • any other time I’m having difficulty manipulating the stitches, perhaps passing one stitch over another

Selecting a sharp-tipped needle

For those of us who don’t love pointy needles, selecting one for occasional use is a pickle. You want a nice, quality needle… but since it’s only going to come out of the cupboard infrequently, you also don’t want to pay too much.

A few that didn’t make the cut…

When I first started knitting, I made my sister-in-law a lace mohair cabled scarf. It was impossible to knit with my regular needles (do to the lace-weight and mohair combo), so I bought a pair of Addi Lace needles.

I absolutely adore Addis, but I sold this Lace circular on ebay the minute I was done with them. Why? The smell of brass as I was working (that was also left behind on my hands) was too much for me to bear.

I’ve also heard fabulous things about the Stiletto tip on Signature needles. Very pointy! But, these needles are an investment… and to get your money’s worth, these needles are best suited to those who like a sharp-tipped needle for everyday knitting.

Knitter’s Pride Karbonz

Just the other week, the perfect solution happened across my desk. Knitter’s Pride’s new line: Karbonz.

carbonz needles

They meet my criteria for a lovely needle: they’ve got a good feel, a smooth join and they’re reasonably priced. And they’re available in circulars, double points and straights. At around $15, they’re a fabulously high-quality needle that’s not out of range for (my) occasional use.

join

I can’t say for sure whether sharp-tip-lovers will find their new favorite needle in these, but my suspicion is that they tick a lot of boxes. They’re very lightweight (made from carbon fiber), have more flexibility than other metal needles and are warm to the touch.

Downsides? At current, they’re only available in sizes 0 to 4 (but are available in the myriad of half sizes in that range, have a peek here to see the full line). And while the surface of the needle is slick (and certainly smoother than most wood and some aluminum needles), they’re not quite as slick as the nickel-plated Addis.

So, if you’re like me and need a sharp-tipped needle for occasional use that won’t break the bank, give Karbonz a try. And if you like sharp-tips and want a warm light-weight needle, then give them a try, too!

Enjoy the remainder of your weekend, everyone!

disclaimer

Picking needles for knitting your sock…

A lot of folks get intimidated by sock knitting… and one of the things that’s so scary is picking what kind of needles to use! There are so many choices!

The truth is that the choice of which needles to use is completely personal preference, so you’ll probably have to try out a few. In this post, I’ll talk about the 4 main needle options for sock knitting, as well as the pros and cons of each one. Then, it’s up to you to pick your fave!

Double Point Needles

Options Available: material (metal, wood or plastic), length (ranging from 5-8″)

Double point needles (often abbreviated dpns) are a very common way to knit socks, and probably the most common way you’ll learn when you’re starting out. In fact, it’s the method I use in my Easy Peasy Sock pattern.

Pros:

  • Many sock patterns are written for dpns, so using them for these patterns is a lifesaver! (unless you’re already experienced with tweaking sock patterns)
  • They’re not very expensive.
  • Almost every needle company makes dpns (or a few!), so you have lots of options.

Cons:

  • There is a high probability of ‘laddering’, a funny gap that happens when moving from one dpn to another. You’ll have to knit carefully to avoid it.
  • The skinnier ones (which you use for socks) have a tendency to break. You might want to consider metal or needles with a replacement policy.
  • You’re using 4-5 needles to make once sock. Losing one (or dropping it under an airplane seat) is sad.

Are you going to be tossing your socks in a purse? Think carefully about how likely your stitches are to fall off, your needles are to break or get lost. If you love dpns, you might want to consider getting double pointed needle tubes so your in-progress socks don’t get into any mischief.

Two Circular Needles

Options Available: all of the options usually available for circular needles: material (metal, wood or plastic), length (ones ranging from 16″ to 32″ are usually used), pointiness of the tip

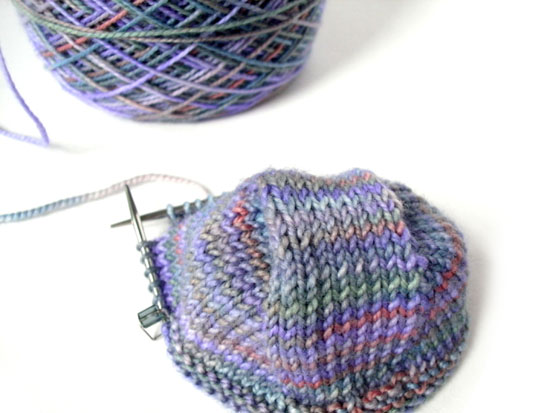
You can use two circular needles knit socks… they basically behave like 2 giant bendy double point needles. This is the way I knit my first pair of socks, and I love it! It’s a wise idea to use two circulars of different length (or different colored tips) so you can distinguish them while knitting. An added bonus is that this method makes available knitting 2 socks at one time (Knitting Circles around Socks, pictured).

Pros:

  • Because there are only 2 spots in between the needles (compared to 3 or 4 with dpns), laddering is less of a problem.
  • You may already have the circulars in your needle stash.
  • The ability to do two at a time? Rock on!
  • The project can easily be tossed in a bag without much risk of stitches falling off.

Cons:

  • If you don’t already have the needles, buying two circulars for one pair of socks can be costly.
  • Not many patterns are written for this technique, so you may have to do some adaptation.

It’s true, knitting on two circulars (especially two-at-a-time) has a little bit of a learning curve… but if you stick with it, you’re rewarded with less laddering and a more portable project. I also enjoy that you’re able to use your favorite circular needles (like my super-slick Addi Turbos), and don’t have to switch to another brand/style.

One circular needle (aka Magic Loop)

Options Available: material (metal, wood or plastic), pointiness of the tip

Magic Loop works very much like knitting with two circulars, except that you use one very long circular (usually a 40+ inch). The actual knitting technique is very similar, and has the same bonus is that this method makes available knitting 2 socks at one time (2-at-a-Time Socks uses one circular needle).

Pros:

  • Just like 2 circulars, less laddering (as compared to dpns) occurs.
  • The ability to do two at a time? Still rock on!
  • Also like 2 circulars, the project can easily be tossed in a bag without much risk of stitches falling off.

Cons:

  • Unless you knit shawls (or really like knitting your socks this way), you’re unlikely to use your 40″ needles on many projects.
  • Also like 2 circulars, not many patterns are written for this technique, so you may have to do some adaptation.

To me, knitting on 3 circulars and magic loop (1 long circular) have very similar pluses and minuses. More than anything, it’ll come down to your preference. For me personally, having extra cord drives me nuts. Therefore, magic loop drives me crazy! But for others, remembering which of the 2 circulars to use is endlessly confusing.

A 9″ circular

Options Available: material (metal or wood), pointiness of the tip

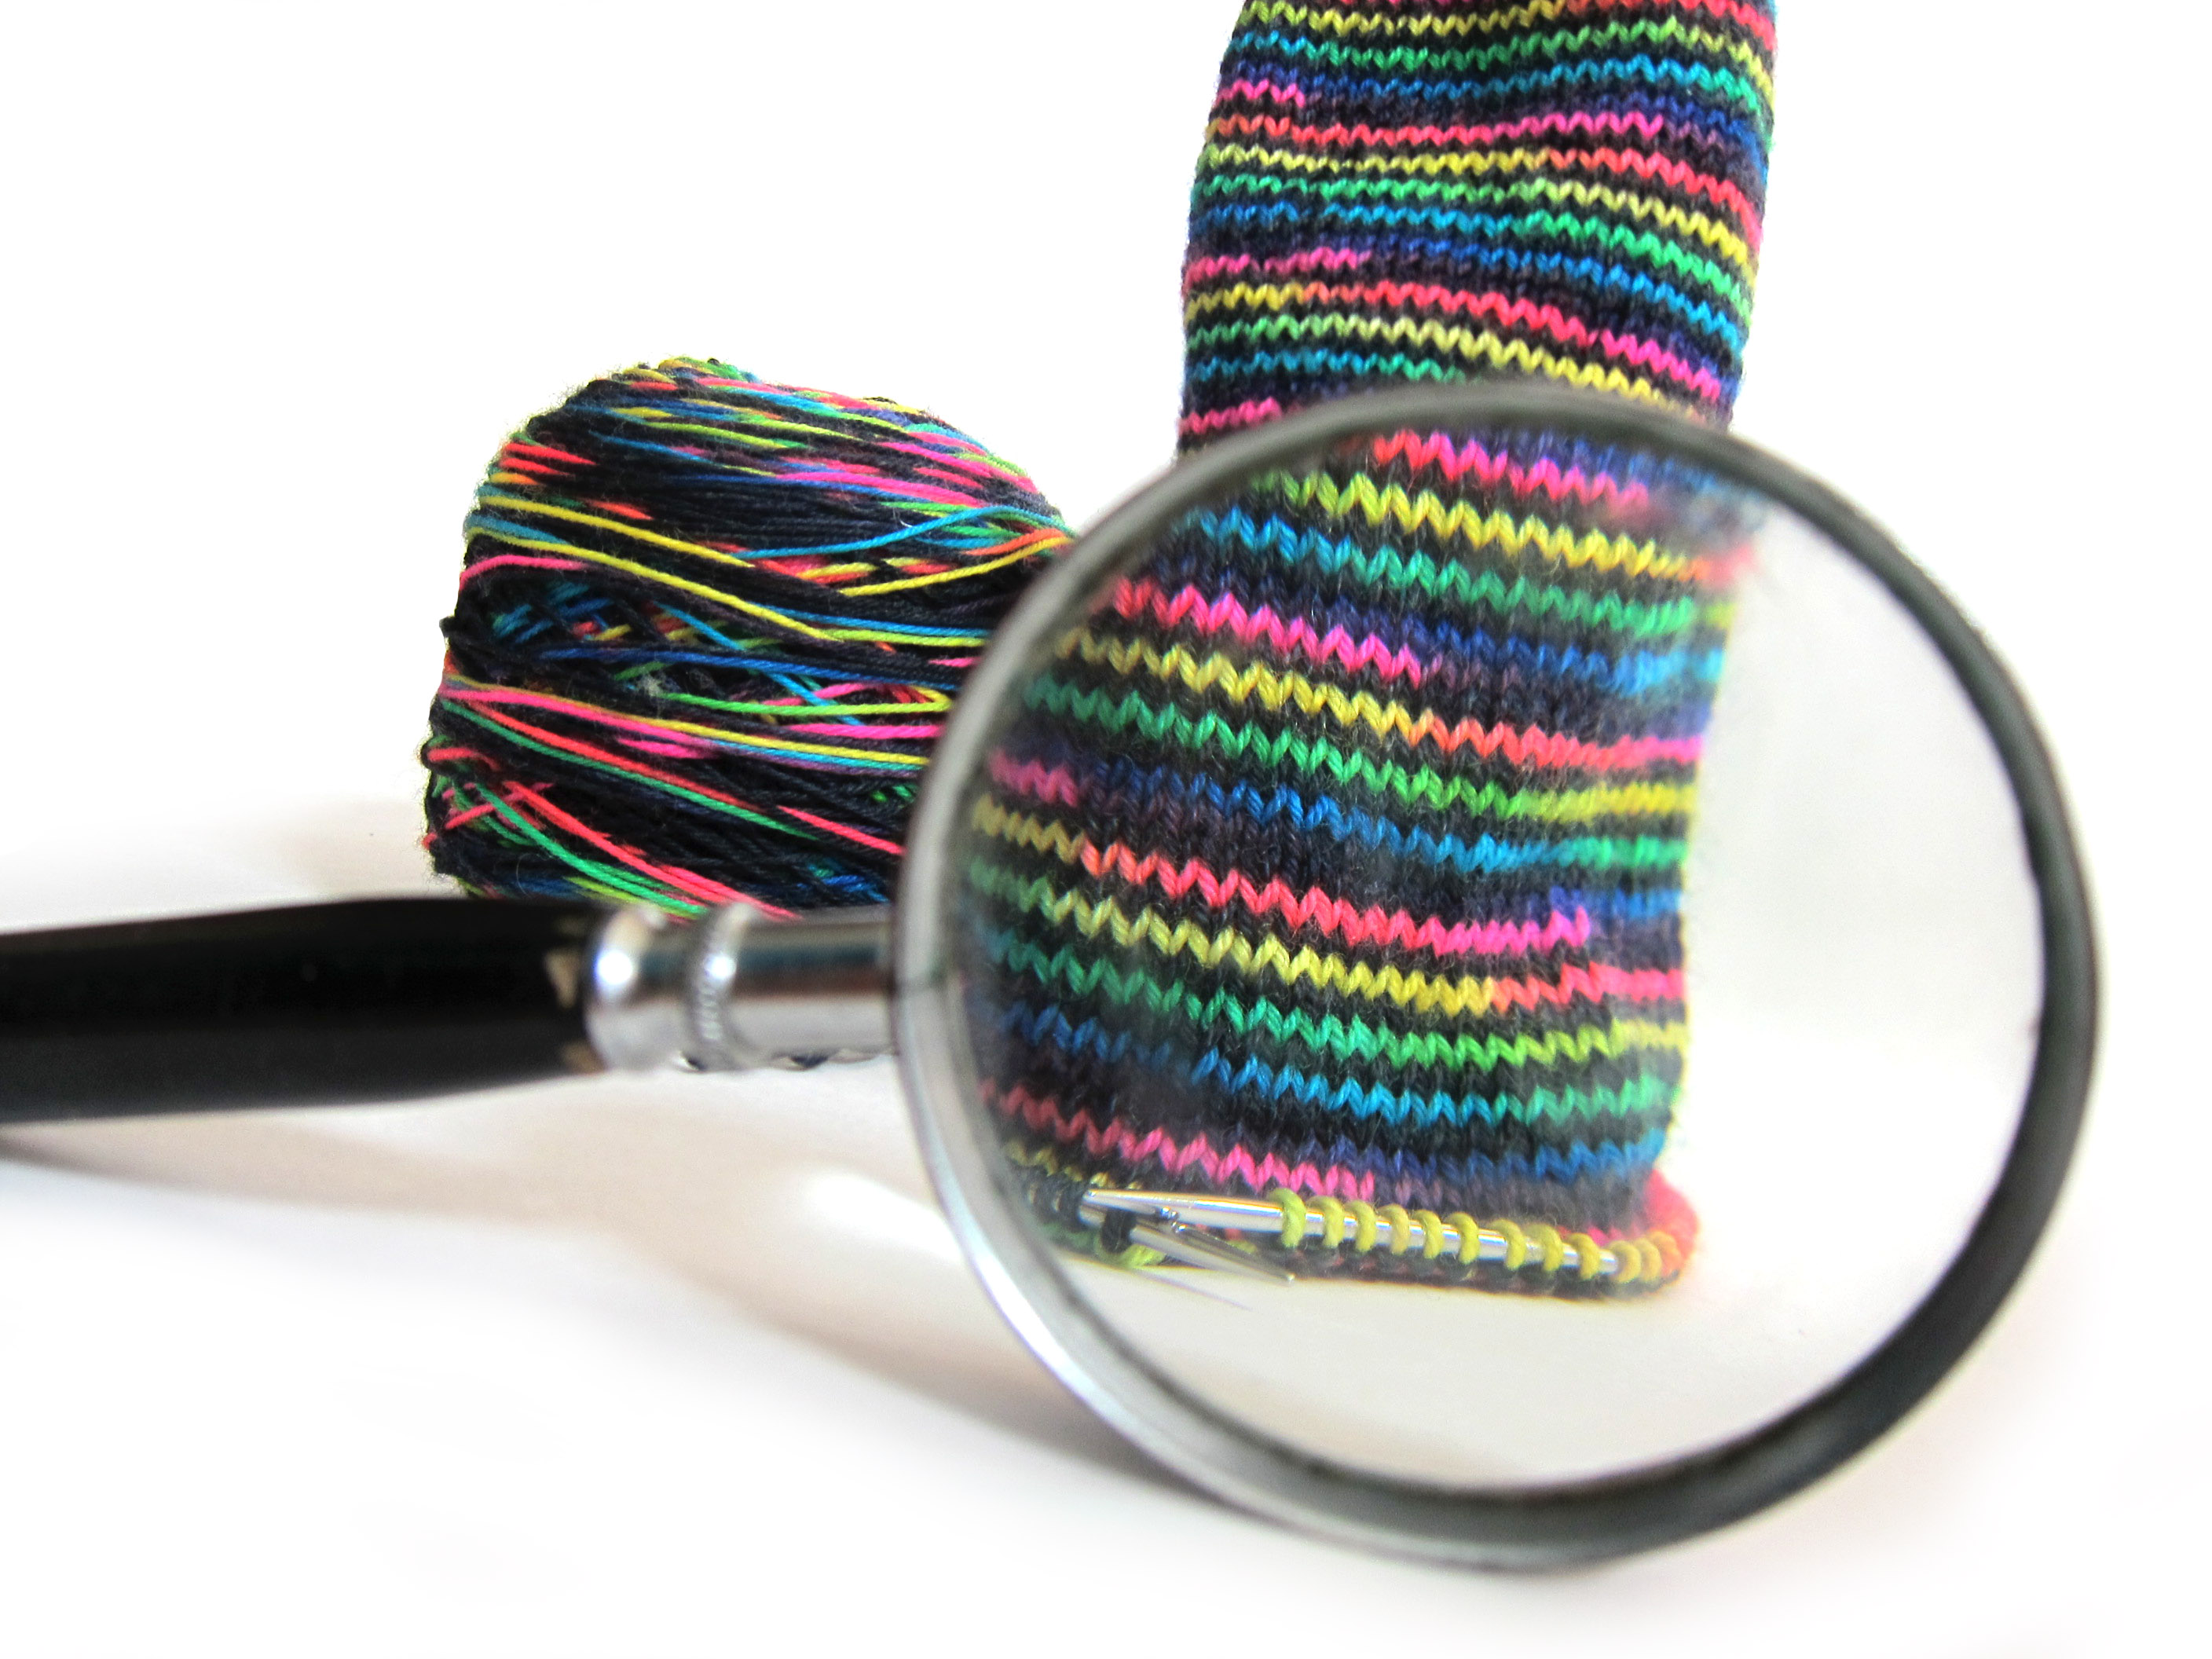
I’ll confess: this is my favorite way to knit socks. No laddering, no need to switch needles… just smooth knitting!

Pros:

  • No ladders!
  • Very easy to toss in a bag and travel with.

Cons:

  • You will need to switch to a different technique (either of the above 3 mentioned) to knit the toe, because there are too few stitches to fit around the circular.
  • Again, almost no patterns are written for this technique, so you’ll have to do some adaptation.
  • Many people say the smaller size gives them a hand cramp.
  • The needles aren’t yet widely available, and won’t be a part of any interchangeable kit.

I travel a lot, and I always bring a sock with me to work on. I absolutely adore the ease and portability (because I’ve had the traumatic experience of a dpn rolling under my airplane seat), and since my hands are small, I don’t mind the knitting. But, I also know a number of people who can’t stand them, so the only way to find out is to try them! The leading manufacturer in making 9″ needles is Hiya Hiya, who has 3 styles available: bamboo, metal and sharp.

Which are your faves?

What’s your preferred method of knitting socks?

If you’re a newbie… I hope I’ve given you a (not stressful) review of the options that are out there!

Tips for storing knitting & crochet projects

Most of us have a couple of knitting or crochet Works-in-Progress going on at one time. For today’s Tip Tuesday blog post, I’ve gathered ideas about different ways to store in-progress works. Store them neatly, and you’ll avoid the perils losing your hook or spare yarn associated with the project!

I gathered ideas by asking my twitter friends how they store WIPs. They all agreed… storing WIPs needn’t be expensive, but the storage has to keep the project together and tidy.

Questions to ask yourself before selecting a storage mechanism

  • Where do you crochet/knit? If you store and work on your WIPs in the living room, then portability might not be very important. If you tend to carry a few projects around in your purse, then you’ll need to make sure your method is travel-hardy!
  • What’s important for you to keep on hand? Some stitchers keep only the current work stored. Others like to gather up all of the yarn they’ll need for the project, plus that extra needle. Knowing how much you like to store will help you determine the kind of storage you’ll need.
  • What size are the projects you work on? If you love making afghans, you’ll need a larger tote or basket. If lacey shawls are your fave project, then a smaller bag will do. Most knitters/crocheters need a variety!
  • Do you need any extra accoutrements? In this post, I’m showing off different bag/holder ideas, but storage doesn’t end there! Think about if you need any extra tools for storing. For example, if you want to carry around a pair of socks on double points, you’ll probably also want to invest in some point protectors or a DP tube so that your socks don’t fall off of your needles while in your bag.

Storage Options

Ziplock bags
The most popular way of storing WIPs was hands-down the Ziplock bag. They come in various sizes (try the gallon size for projects like scarves, quart size for socks and mittens), are inexpensive and see-through. Since they’re transparent, you can instantly see what project is inside (a must when you start to gather WIPs). As an added bonus, you can either write on the bag itself, or stick a note inside that reminds you of crucial project info.

Cloth tote/ Reusable grocery bags
Many of us have reusable grocery bags in our home. These make great storage bags.

These bags often have handles, which makes them easy to carry around. They’re also suitable for larger projects because of their size. Lululemon bags (pictured above) come along with any purchase you make, and have a snap at the opening that’s great for keeping projects inside.

Plastic shoeboxes
If you aren’t interested in portability, then plastic shoeboxes are a great storage idea. They stack (meaning they’ll fit nicely in a corner of your room) and they’re often transparent.

For your larger projects, you can grab plastic boxes in larger sizes that are still stackable and tidy.

Your yarn store’s bag
You’re already buying the yarn… why not use the bag as a project bag?

Many yarn stores actually keep future-use in mind when ordering their bags… so make use of it!

Fancy project bags
I, of course, advocate re-using bags and making do with what you have. But, every once in a while, you need to get yourself something nice… so why not make it a lovely project bag?

You can purchase project bags in every shape, size and fabric! Check your LYS (they’re bound to carry a few styles) or have a look around Etsy (search for ‘project bag’). Erin Lane stocks a large selection of project bags- including the adorable drawstring bag pictured. I also love the square zippered bags from JessaLu. Have a look around… you’ll probably want to treat yourself to one!

How do you store your WIPs?

Please share! I’m always on the lookout for new ideas!