


Do you need to crochet skinny parts for things like antennae and legs? If there’s one part of an amigurumi pattern that can make people feel cranky, that’s it. They’re tiny and sometimes they wind up inside out! Eep!
Today, I’ll show you how to make sure you’re crocheting right-side out and how to count the rounds without a stitch marker.
Crocheting skinny parts right-side out
When you’re crocheting a large piece, it actually doesn’t matter which side is out. If it’s wrong-side out, you just turn it around once you’re done. No biggie. (Read am I crocheting inside-out for more details)
However, the antennae of the slug (and legs of the ladybug and mosquito and fly) are so small, it’s important to crochet with the right-side out.
Let’s say your piece looks like this after round 2:

You can tell it’s inside-out because the pretty ridges (from the front loops) aren’t showing up on the outside. All you need to do is turn it right-side out!
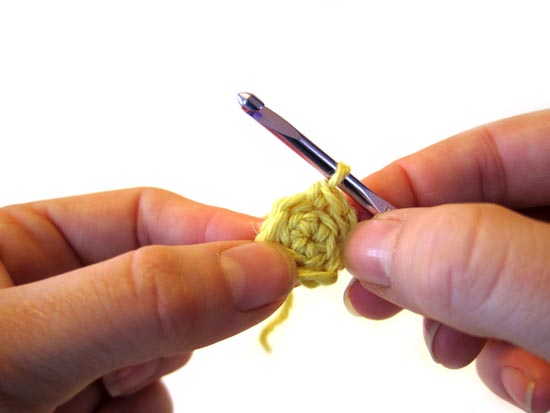
Ta da!

Now, keep your piece like this, and continue crocheting. It’ll be right-side out when you’re done!
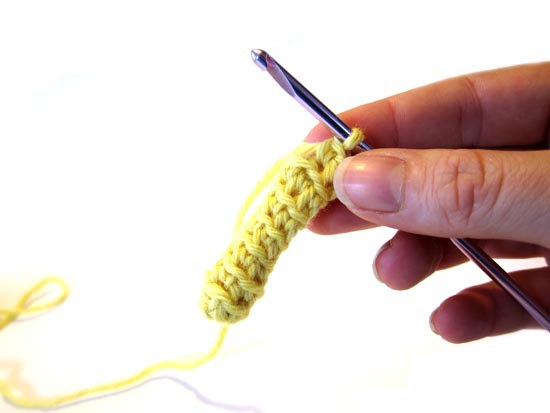
Did you forget and now you have a long, inside-out tube? No worries! Thread the tail from starting your crochet onto a tapestry needle, poke it into your tube from the bottom and pull it out the top, then pull on the tail to turn your tube right side out. Easy peasy.
How to count rounds without a stitch marker
For parts as skinny as an antennae or a leg, you can crochet without a stitch marker! (shocking, I know!)
Here’s a little video to help you out: (to see full-screen, click play, then click the box in the lower right-hand corner)
Happy crocheting!
Hopefully, these two tips will have you crocheting skinny parts with ease!

Here are handy links to all the crochet troubleshooting posts. . .
- How to Count the Number of Stitches in a Round of Crochet
- How to Hold Your Yarn for Crochet
- Am I Crocheting Inside Out?
- Help! Crocheting in the Back Loop Is Too Hard!
- What to Do If Your Foundation Chains Are Always Too Tight
- How to Work Small Pieces in the Round
- Tips for Crocheting Teeny Tiny Antennae
- How to Measure Gauge for Amigurumi
- Getting Accurate Row Gauge
- How to Clean Amigurumi
- Wrist Exercises for Knitters and Crocheters
Return to the main table of contents for Let’s Learn to Crochet Amigurumi.
Happy stitching!


AAH!! Thank you so much for this post! And for your May 2011 post that you linked above! I seriously thought I was the only person in the world with this question/problem! Wow. Mind officially BLOWN. I feel a lot better now! Thank you!
Thank you so much for breaking this pattern down with tips to help us through it! I’ve bought my pattern but haven’t jumped in yet, and I’m actually kind of glad, since I now have more tips to prevent what I assume would have been a lot of frustration. 🙂 I also decided to use a worsted weight yarn for my first slug (instead of the thinner silver yarn I want to eventually make her in) just so I can figure it out “actual sized” before going smaller.
These tips were great. Thanks so much for both of them. I really have trouble counting the rounds and now it won’t be a problem!
Stacey, for some reason I can not get your video to play. It’s curious because I usually can. The message says my browser does not recognize any of the video formats available. I did not know if you changed something, or what has happened. I have no trouble watching other videos on other sites, nor did I ever have trouble here on your web page. If you have any idea, please let me know. Thanks for all of your tips.
Rae
@Rae- Oh, no… that’s really weird! Can you click through on the video to YouTube?
Pingback: Another Edition of Crochet Link Love! — Crochet Concupiscence
I also multiply the number of rows by how many stitches per row and count each stitch as I crochet. . .which works until a child interrupts you, so thanks for the ridges hint 🙂