


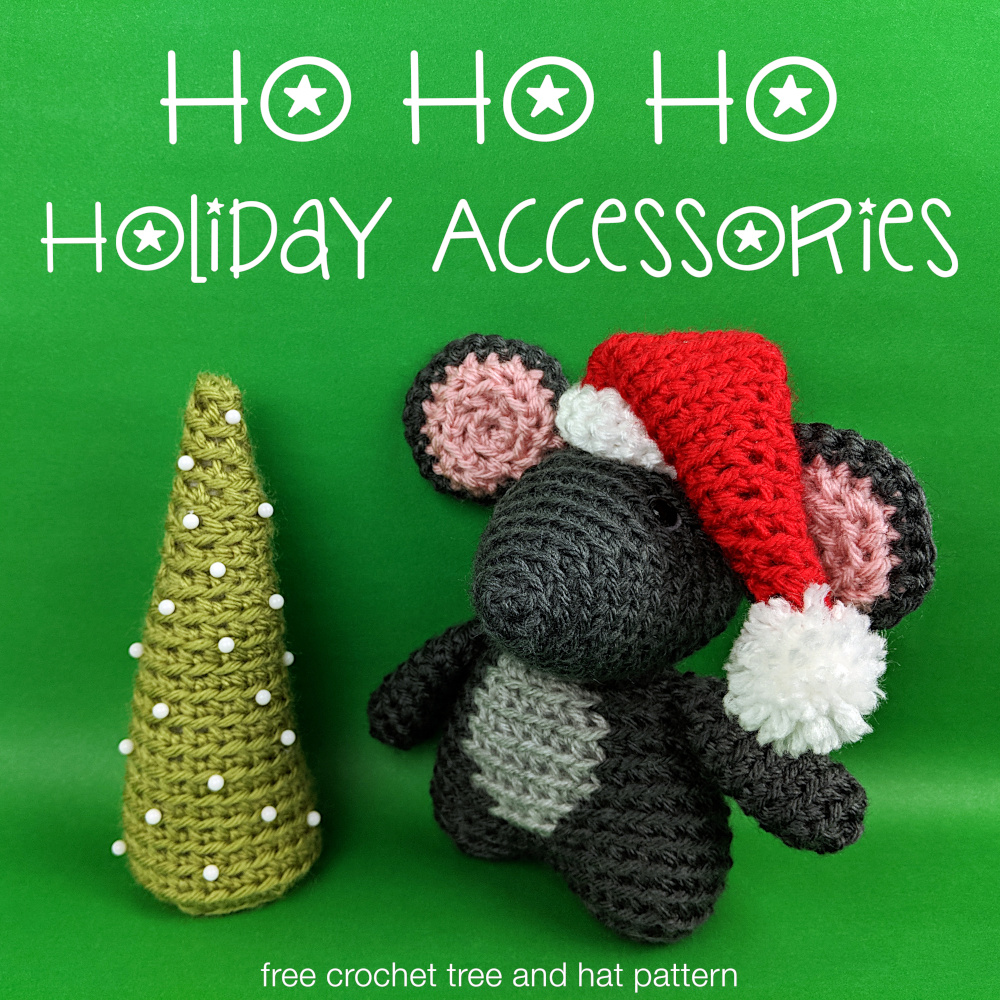
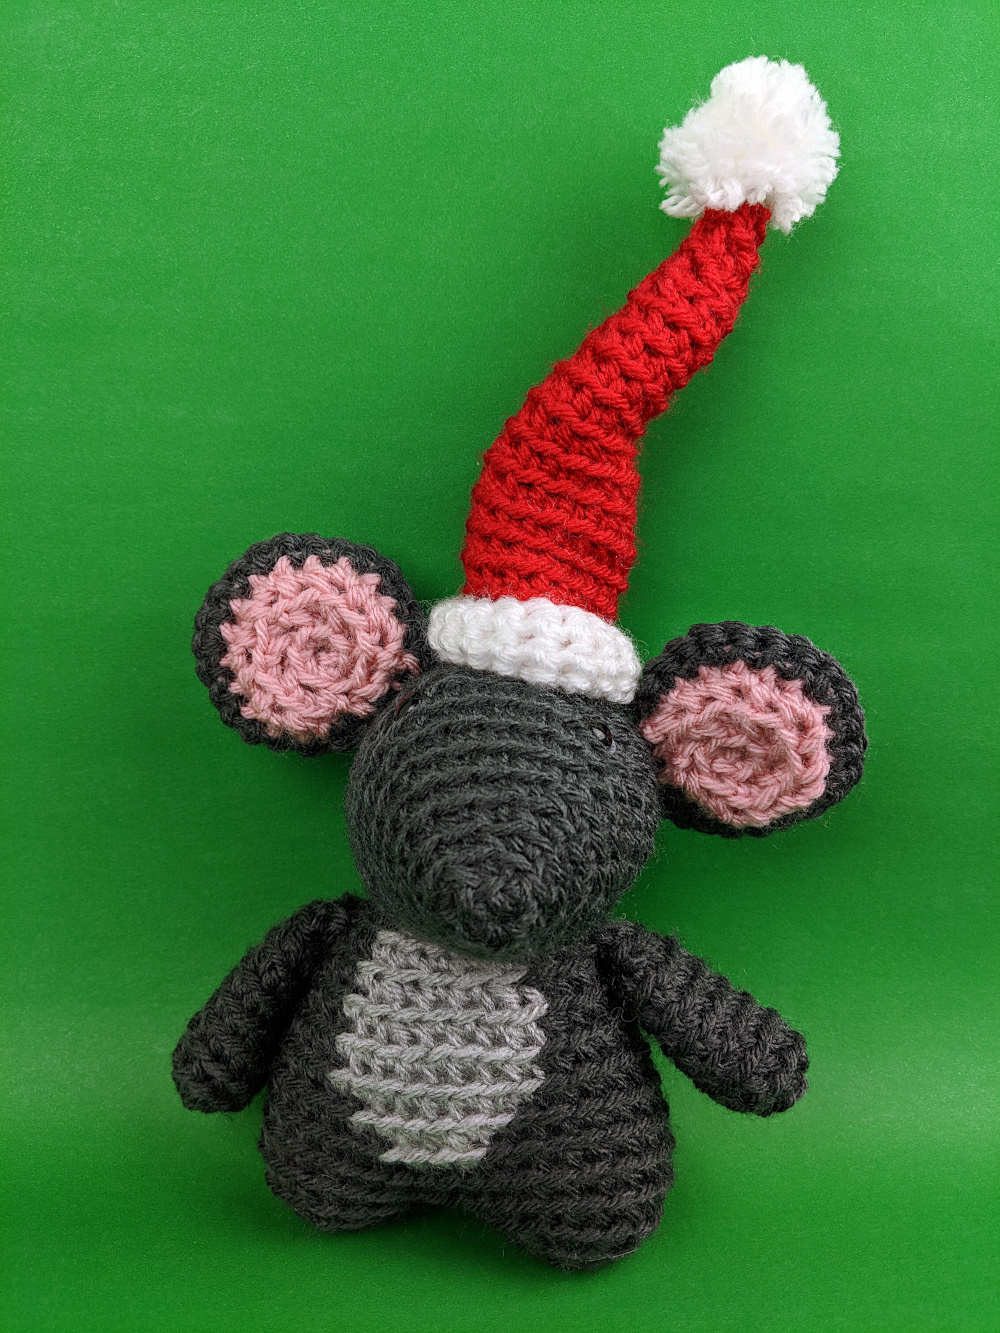
Milo Mouse is all decked out for Christmas!
I’ve got free patterns below for both the tree and the hat – plus some extra fancification ideas for both at the bottom of the post. Have fun with these!
You can use these patterns for any holiday decorations – the repeat pattern is easy to follow to make them larger if you need. Or just use thicker yarn!
Abbreviations
- ch: chain
- sc: single crochet
- sc2tog: single crochet 2 stitches together
- st(s): stitch(es)
The tree and the hat both start the same way. . .
Ch 2 (I like to start with a sloppy slip knot. This video shows how. And this video shows how to chain.)
Round 1 sc 4 in 2nd ch from hook (4) This post will help you find that second chain from the hook.
Round 2 sc twice in next st, sc in next 3 sts (5) This video will help you if you find it tricky to start the second round.
Round 3 sc twice in next st, sc in next 4 sts (6)
Round 4 sc twice in next st, sc in next 5 sts (7)
Round 5 sc twice in next st, sc in next 6 sts (8)
Round 6 sc twice in next st, sc in next 7 sts (9)
Round 7 sc twice in next st, sc in next 8 sts (10)
Round 8 sc twice in next st, sc in next 9 sts (11)
Round 9 sc twice in next st, sc in next 10 sts (12)
Round 10 sc twice in next st, sc in next 11 sts (13)
Round 11 sc twice in next st, sc in next 12 sts. (14)
Round 12 sc twice in next st, sc in next 13 sts. (15)
Round 13 sc twice in next st, sc in next 14 sts (16)
Round 14 sc twice in next st, sc in next 15 sts (17)
Round 15 sc twice in next st, sc in next 16 sts (18)
Round 16 sc twice in next st, sc in next 17 sts (19)
This is where the pattern changes, depending on whether you’re making the tree or the hat.
For the Santa Hat. . .
Round 17-20 Change to white yarn and sc in each stitch (19, 4 rounds) This video shows how to change colors cleanly.
Fasten off and weave in the tail.
Make a small white pompom and tie it to the end of the hat. There’s a video showing how to make a pompom here. I wrapped mine around the times of a fork for a nice small puffball. 🙂
Finished!
 If you’re making a hat for a larger softie, just follow this pattern of increasing one stitch per round until the hat is big enough to fit, then stitch at least four rounds of straight single crochet for the contrasting band. You may need to add more rounds of contrast to feel like it’s in the right proportion with the hat, depending on how much bigger you make it. Trust your judgement. 🙂
For the tree. . .
Picking up after round 16 above.
Round 17 sc twice in next st, sc in next 18 sts (20)
Round 18 sc twice in next st, sc in next 19 sts (21)
Round 19 sc twice in next st, sc in next 20 sts (22)
Round 20 sc twice in next st, sc in next 21 sts (23)
Round 21 sc twice in next st, sc in next 22 sts (24)
Stuff the tree and slip a large washer across the stuffing at the base of the tree. This will give your tree a nice flat base and the washer adds a nice weight.
Round 22 [sc2tog, sc in next 2 sts] 6 times (18)
Here’s what it looks like after that first decrease round wraps around the edge of the washer.
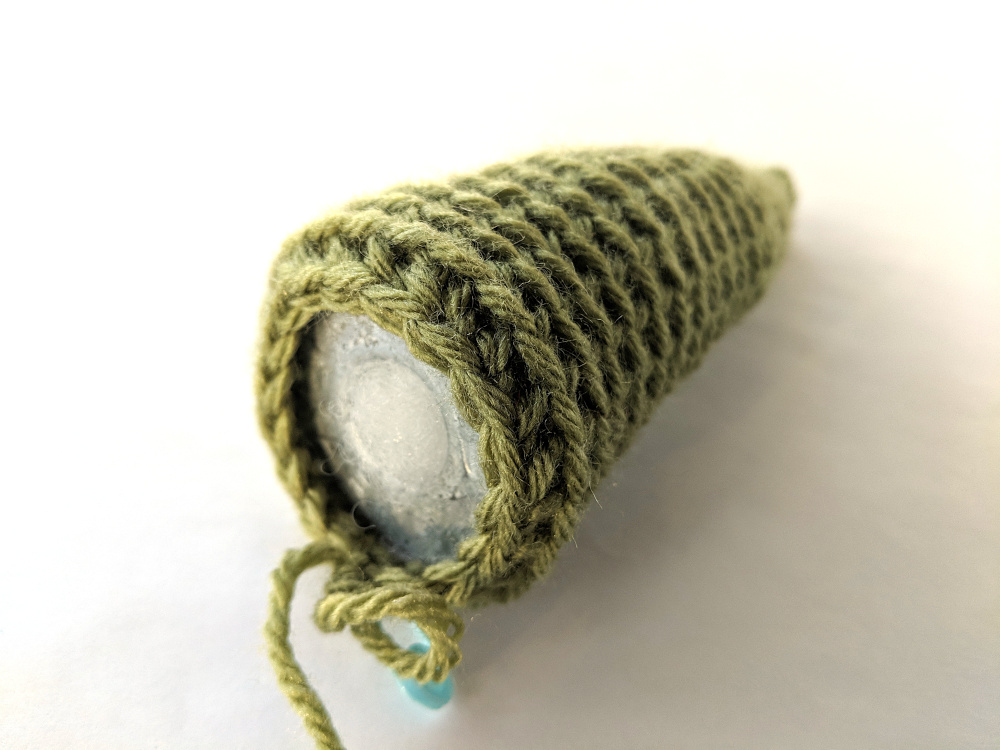
If you don’t have a metal washer, you can cut a circle of cardboard. It will give you the flatness without the weight.
Round 23 [sc2tog, sc in next st] 6 times (12)
Round 24 [sc2tog] 6 times (6)
Use the drawstring method to close up the last hole.
Finished!

If you want to make your tree bigger, keep following the same increase pattern after round 21. To make your decrease rounds easier to calculate, make sure to make your last increase round one whose stitch count is evenly divided into 6.
I dressed up my tree with some simple white-headed pins – but there are tons of possibilities to dress up both the tree and the hat!
For the tree. . .
- Use multicolored instead of white pins.
- Wrap it in tiny fairy lights.
- Sew (or pin) on buttons.
- Add beads as you crochet! That link goes to a video showing how.
- Use sparkly or glitter or eyelash yarn.
- Pin on garland from the trim section of the fabric store – braid or cord or rickrack.
For the hat. . .
- Sew on a bell or tassel instead of making a pompom.
- Surface crochet the contrasting band on the hat with eyelash yarn. Yep – that’s another video link. 🙂
- If your hat is kind of stiff and you want it to flop down like the one in the photo, you can drop a metal nut into the tip of the hat. The weight will keep it dipping down. I use a surprising amount of hardware store items in my softies. 🙂
If you decide to give a holiday Milo Mouse as a gift, I suggest pairing it with these books.
- The Night Before Christmas – I had the line “Not a creature was stirring, not even a mouse” in my head as I designed Milo. There are so many beautiful editions of this story available – the link goes to one with very traditional illustrations.
- Mr Willoughby’s Christmas Tree – I just love this story about the tippy top of a Christmas tree. 🙂
Have fun with these patterns!
Best,
Wendi