Bears in the Hills – a Progress Report

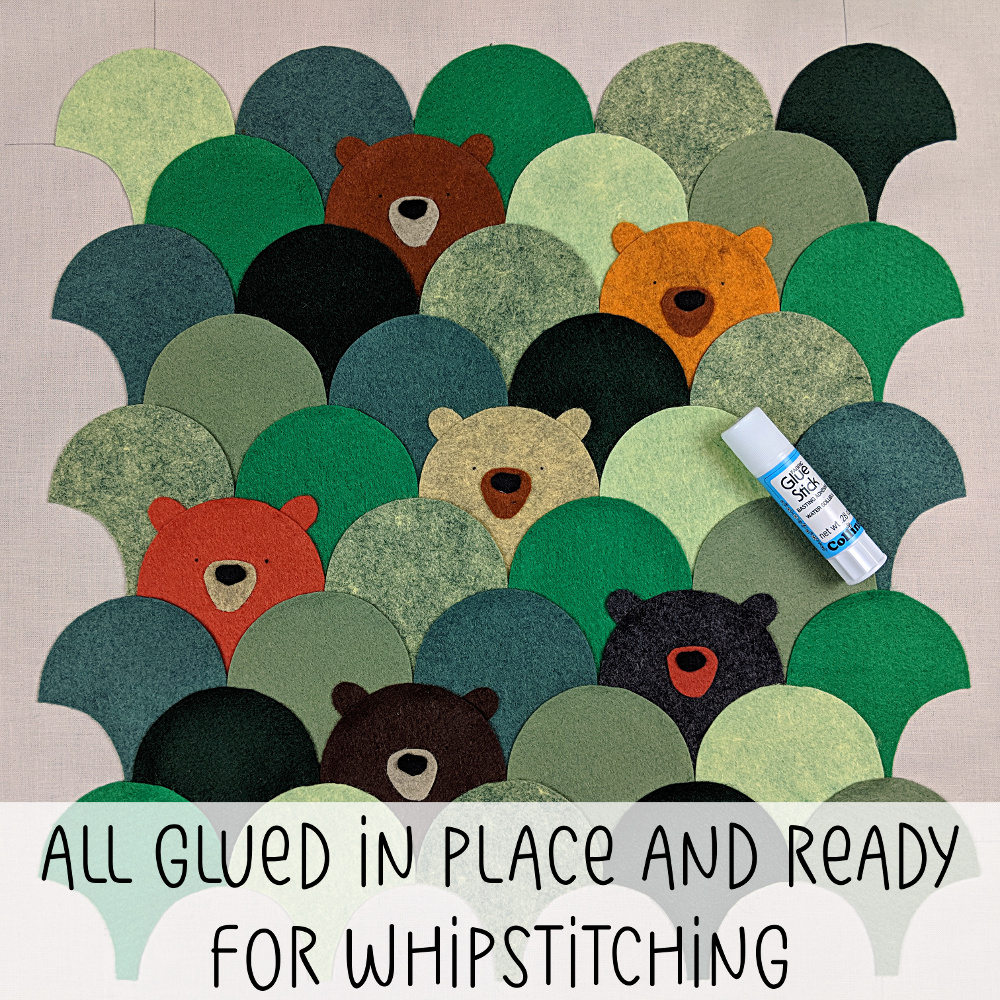
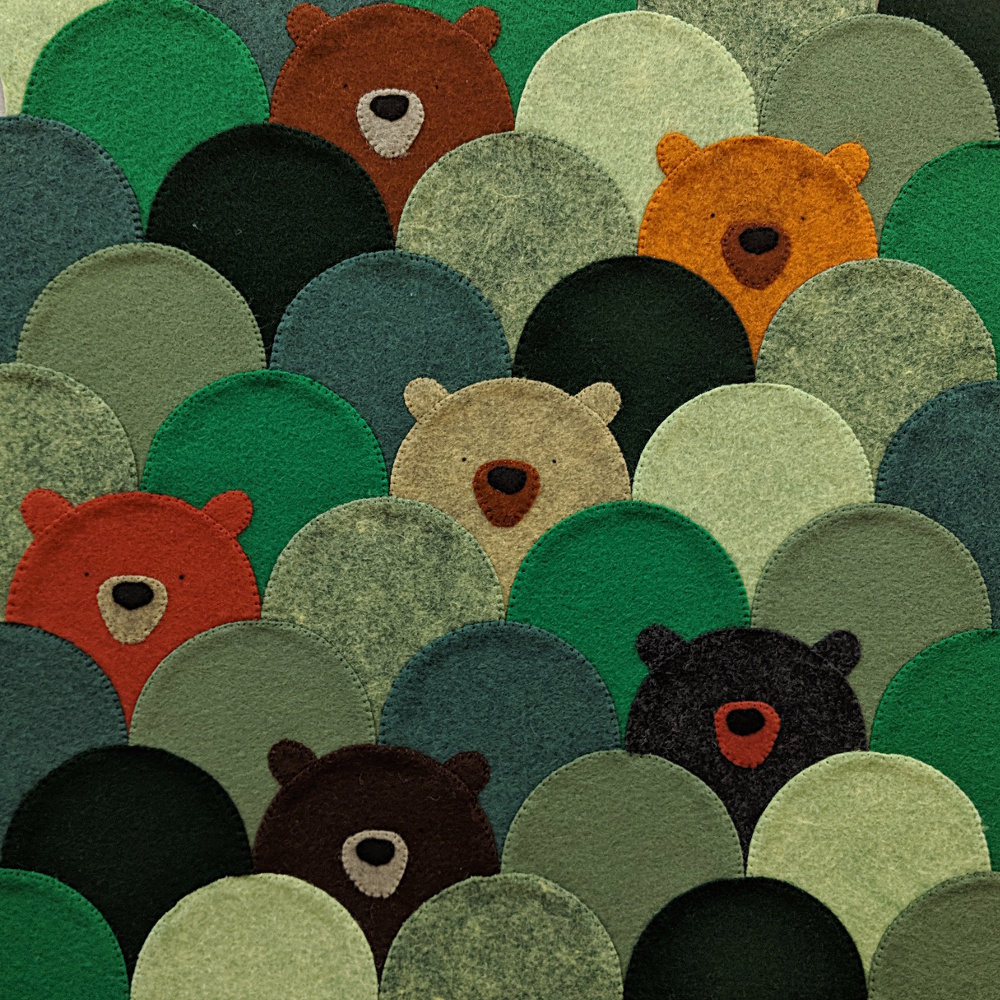
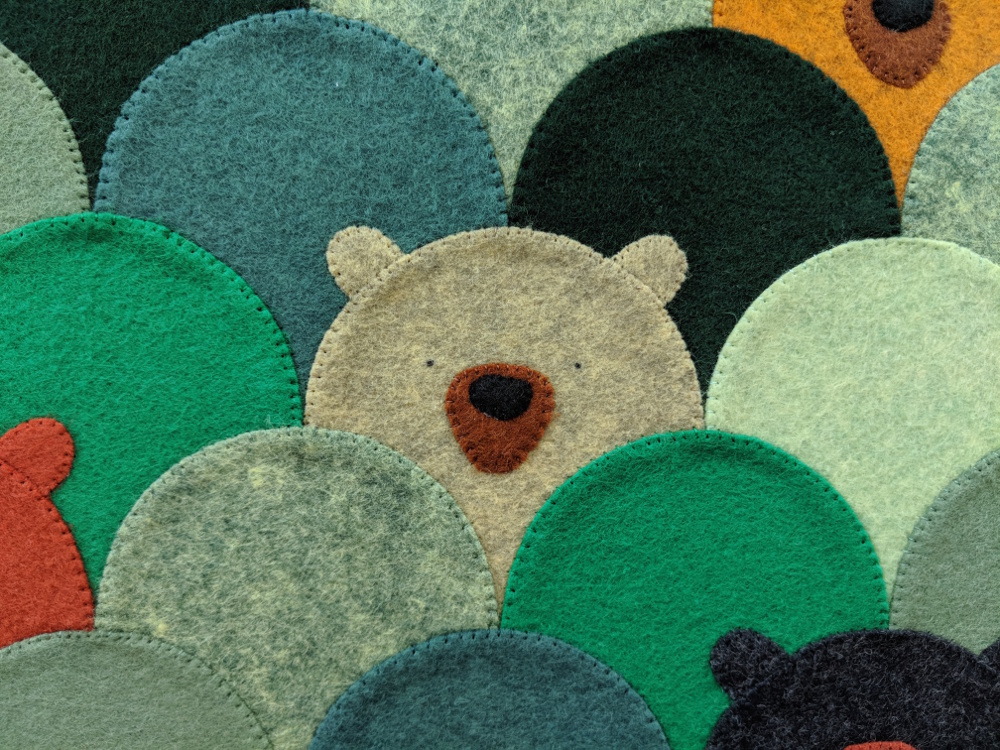
I’ve finished all the whipstitching around the edges of the hills and the bears.

Ready for the fancy stitching!

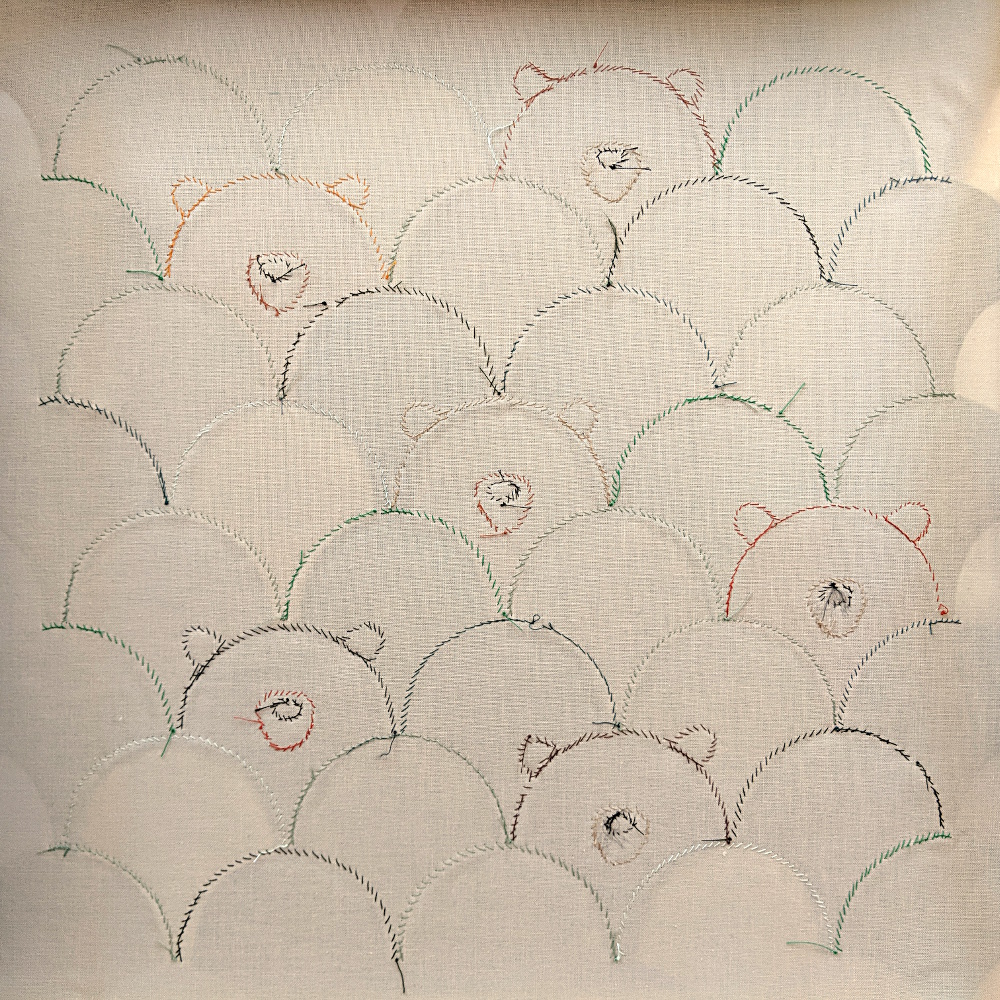
I wanted the whipstitching to be fairly invisible. To make sure I got all the scallops outlined, I flipped it over to check the back.

So here’s what comes next. . .

Next week I’ll be putting together the online class. Here’s what will be available as soon as the class opens. . .

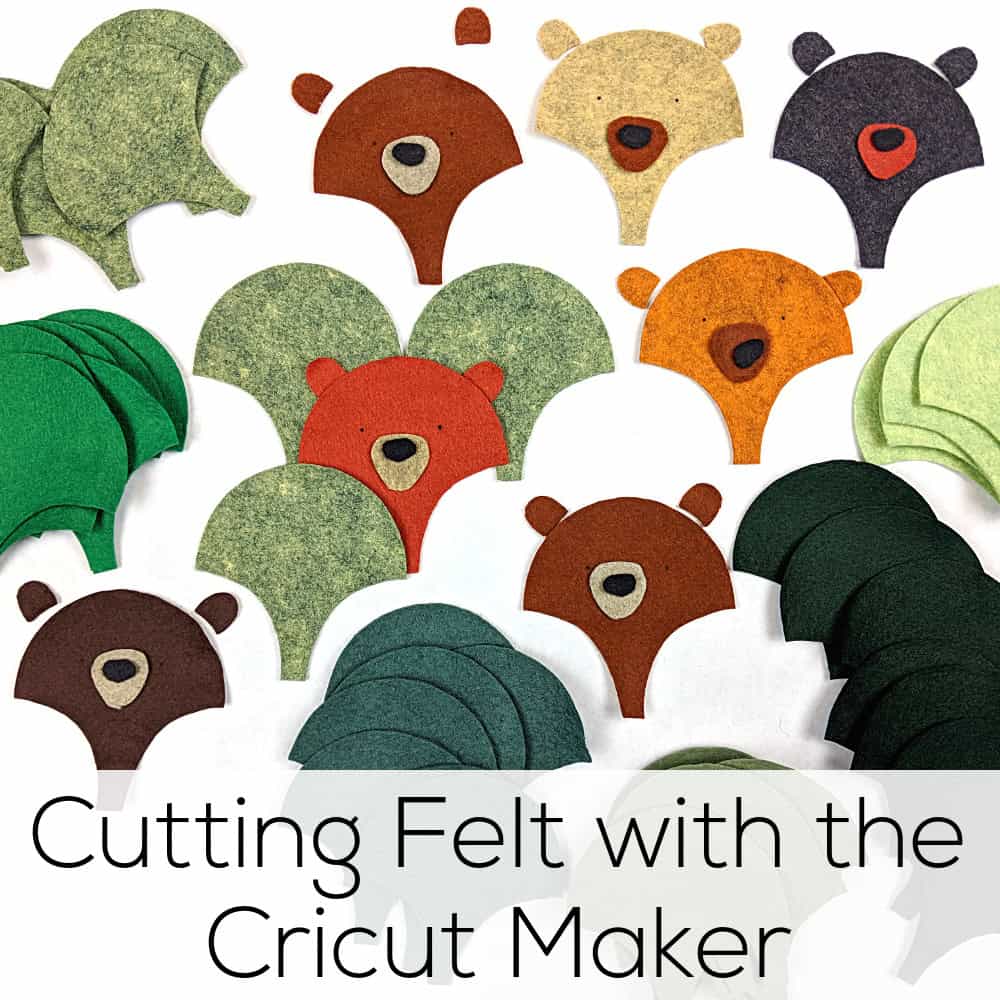
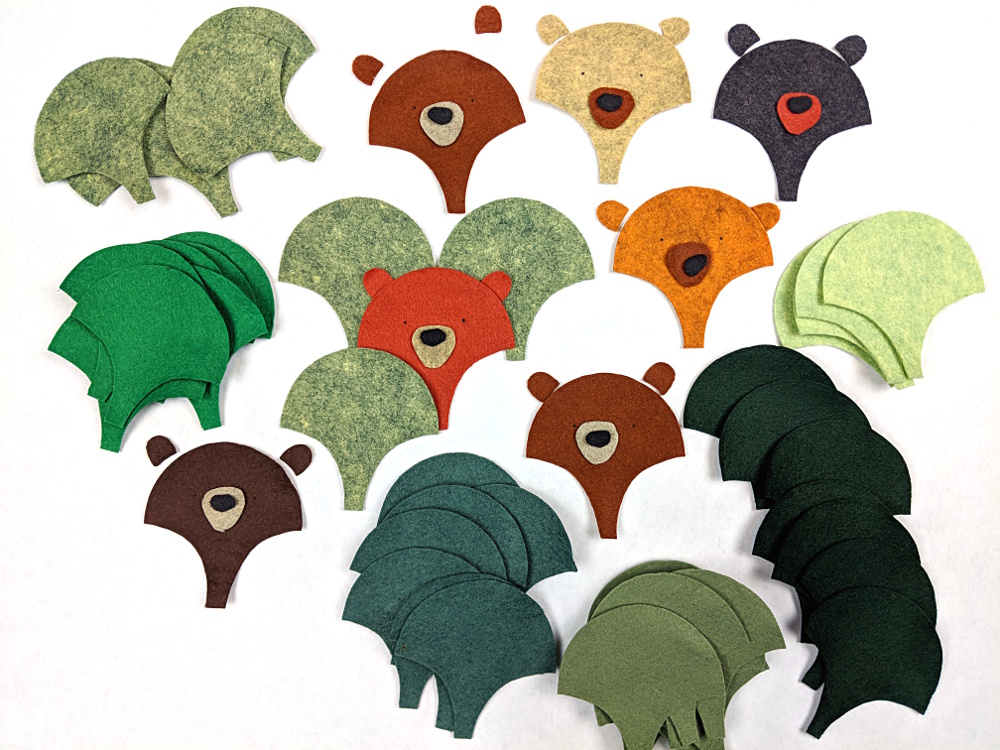
  • the pattern – both a PDF for printing on freezer paper to cut by hand and an SVG file for those who have cutting machines
  • a video showing how to cut, layer and glue the pieces in place
  • a video showing how to whipstitch the edges
  • a bundle of felt sheets in the colors I used
  • a bundle of pre-cut pieces for those who want to jump right to the fun part 🙂

Update – the class is finished now – with all the lessons showing how to do the fancy stitching! Get the class here.

After the class releases, I’ll start adding more videos showing how to embroider the faces and how to add fancy stitching to the hills.

This is going to be so much fun!

Happy stitching!

Best,
Wendi

Bears in the Hills – WIP

I don’t usually do all caps but. . .

I AM SO EXCITED WITH HOW THIS IS TURNING OUT!

Seriously! I can’t wait to get these guys in a frame to start stitching. You’re going to have to pry me out of my couch for the next few weeks. 🙂

And that’s not all!

I want you guys to stitch with me!

I decided the best way to make this a pattern is to actually make it a video workshop. I’ve shot video already showing how to position all the pieces and my little tricks for securing them in place while I stitch.

This was my studio today, with those fancy new lights in action.

Look at that awesome even lighting! 🙂

The next step is going to be whipstitching the edges down with matching thread (not embroidery thread – I want these stitches to disappear) and then I’ll jump into fancy stitching!

My plan is to get all the kind-of-boring-to-most-people-but-I-really-love-it whipstitching done, and then start recording videos showing how I freehand stitch the hills. Maybe one new video a week?

Update – the pattern is now available here.

Happy stitching!

Play with some felt! Try the Oddballs – a fun pattern for silly monsters.

Cutting Felt with My Cricut Maker

Well – I finally opened the box of my new Cricut Maker.

So exciting!

But I’ll be honest – we got off to a bit of a rocky start.

The Design Space app didn’t install automatically and the link to click to continue the installation was a dead end to a nonexistent page. Not a huge deal – I know how to find my files and install them myself, but it’s the kind of thing that really frustrates a person who’s not super comfortable with technology so I thought it was worth mentioning.

They include some materials for your first project (a card) which is great. It let me walk through all the steps of making (not designing) and actual thing.

Designing was TRICKY. That’s going to take some practice – but I managed to get my first project (those bears in the hills) all set up and ready to go.

Time to cut some felt!

Uh oh. That does NOT look good.

I cut it on the felt setting and this was actually the second try with increased pressure. The first try just roughed up the surface of the felt without actually cutting anything.

I decided to lie to the machine and tell it I was cutting heavy fabric like denim. That prompted me to change it to the teeny tiny rotary blade instead of the knife blade.

Much better!

Look how clean the cuts are! And see the eye markings? The machine did that too with the pen attachment. So handy!

After I got the settings figured out I was on a roll. 🙂

I cut all the pieces for my new Bears in the Hills in about an hour – while I was cleaning my studio. 🙂

Next week I’ll have a video showing you how to layer all these guys up and prep for stitching.

I can’t wait to try the Cricut on regular fabric for applique quilt blocks – that’ll be my next project with the machine.

Happy stitching!

Best,
Wendi