Dye yarn with Wilton Icing Dye!

Did you know that you can dye your yarn using Wilton Icing Dyes?

Dyeing yarn with Wilton Icing dye from FreshStitches

You already know I’m a huge fan of dyeing with Kool Aid… but the colors can be a little limiting. So I had to try my hand with the Icing Dyes!

Advantages of Icing Dye

Icing dye, as the name suggests, is actually meant for dyeing. Granted, it’s usually food and not yarn… but it means that there are a wide range of colors that are really quite nice.

The dyes also have the property that you can mix them together with fairly predictable results, which isn’t necessarily true of Kool Aid.

The main disadvantage is that you’ll need to add vinegar to your dye bath to get the color to set. That’s not too big of a downside!

Wilton Icing Dye Color Card

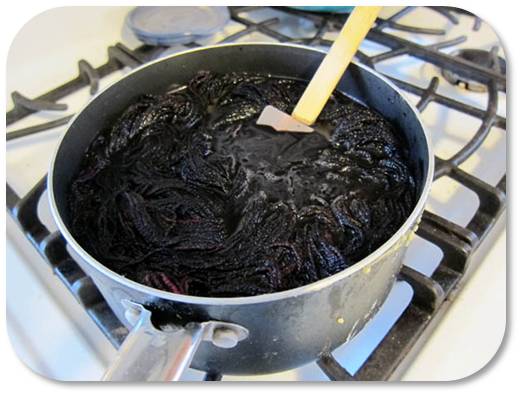
For each color, my recipe was:

  • 8 yards of white worsted weight yarn
  • 1/8 tsp of Wilton Icing Dye
  • 2 T vinegar
  • 1/4 cup boiling water

And here’s how the colors look!

Wilton icing dyes and yarn freshstitches color chart

I’m so excited about the possibilities! These are the colors straight out of the jar… you can mix the colors to get even closer to what you want.

Notes on Dyeing

  • These colors were all produced with the same strength of dye. Experiment with adding less dye for more subtle colors.
  • Purple is notoriously difficult. It’s hard to tell from the photo, but the blue & red tones separated out quite a bit. I love the look, but you’ll want to always test swatches if you want a certain look.
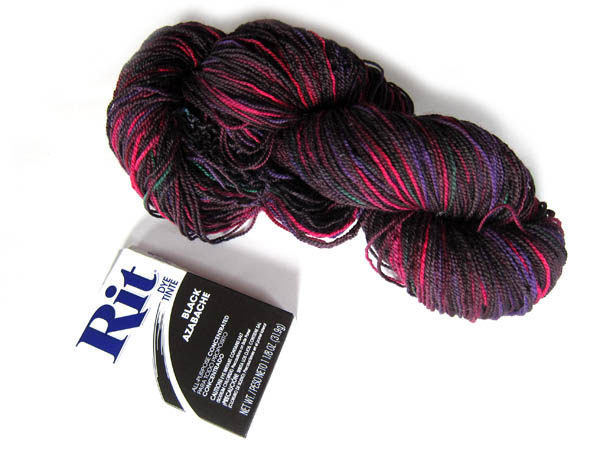
  • A true black is very hard to achieve. I’ll play around with adding a higher intensity of dye.
  • Always do a test swatch! These 8 yard skeins were just perfect, you can wind them yourself for playing!

Have fun!

Here are handy links to all the posts about yarn. . .

Return to the main table of contents for Let’s Learn to Crochet Amigurumi.

Move on to the lessons for the basic crochet stitches.

Happy stitching!

Zoom Loom Review

I knit. I crochet. I spin. I’ve tatted. I’ve tried almost every needlecraft I’ve ever heard of… except for weaving.

Why the gap in my fiber experience? I’ve always thought weaving was a little bit scary. There’s a warp, a weft and a lot of technique. It all seemed really complicated. And looms are usually big and non-portable.

That’s why I was super excited when I got a chance to try the Zoom Loom.

Schacht Zoom loom

The Zoom Loom is a portable weaving loom. It’s fitted with pins that (along with the instruction manual) tell you exactly how to wind your yarn and where to do the weaving.

Zoom loom progress

Look at me, I’m weaving!

Why I love the Zoom Loom

The instruction booklet that comes with the Zoom Loom is easy to follow, and I was super excited to weave an adorable little square on my first try!

zoom loom finished weaving

Isn’t it pretty?

The great features about the loom are:

  • it is small
  • the pins on the loom show you exactly where/how to do the weaving
  • each square requires a precise amount of yarn, meaning you can wind small balls in advance
  • the instructions are very easy to follow!

But… it’s not a complete substitute for a full loom

I enjoyed making my small square, and The Woolery’s webpage has suggestions for turning these squares into bigger projects.

However, the Zoom Loom isn’t a substitute for a full loom. Some things I noticed:

  • because the pins are fixed, each ‘weave’ is a fixed space apart. My piece made with sock-weight yarn feels a little flimsy, and I suspect a bulky would not fit.
  • if you’re looking for a project to throw into your purse, you might be disappointed. Although more portable than a regular loom, you cannot simply stop in the middle of winding the warp and head out.
  • you are limited to 4″x4″ squares. Although there are project suggestions, every project is composed of small squares.

Get yours!

Sound fun?

Go forth and start weaving!


disclaimer

How to overdye yarn!

tiptues

Admit it. You have a skein of yarn in your stash that isn’t your favorite color. You might not even be sure how it got there…

What’s a girl to do? Overdye it!

How to Overdye

I’m a huge fan of Kool-Aid Dyeing yarn, but when you’re trying to cover up an existing color… Kool-Aid just isn’t strong enough.

Dyeing yarn with Rit Dye

To overdye yarn (which basically just means dyeing over a color), you’ll need a fabric dye like Rit. You can see my not-favorite-color skein above as well as a package of black dye.

The dye needs heat to set and can be abrasive, so you don’t want to use your normal cooking pots. I used the saucepan that I use for making soap (which I don’t use for food!).

To dye your yarn, follow the instructions on the packet (which are basically: add yarn, water and dye to a pot and heat):

dyeing with Rit

If you’ve dyed with Kool-Aid before, you’ll notice that the Rit dye takes a little longer. The package says up to a half hour… but I got the results I was looking for in about 10 minutes.

And it’s that easy! Take out your yarn, rinse, and hang to dry! And you’ll have a newly-colored skein of yarn!

Best,
Stacey

Playing with Paper

Using my applique and embroidery patterns to make collage cards

Today my daughter is about halfway through her 3-week stay at camp. THREE WEEKS! She’s never been gone more than a week before! And those previous trips were to stay with family. I miss her – but I know she’s having a great time. I knew she would love it the second we set foot on the grounds – and every one of her letters confirms what a terrific time she’s having. Her last letter began with “I am so homesick” and then went on to detail everything she loves about camp. She loves the food – especially the bread (there’s fresh-baked bread every day). She quoted songs she’s learning. She’s gone swimming almost every day. She loves skits. Her tent mate loves the book of scary stories she brought with her and could I please send the other one in the series?

I don’t think she’s actually homesick. I think she’s trying on the idea of homesickness. And that’s okay. I want her to be happy to be there – and then happy to come home when that time is over.

The letters have, of course, been going both ways. We came home the other night to TWO bats in the house, so that gave me lots of exciting news to tell her.

I’ve been using some of her favorite patterns to make the cards I send to her – and I thought I’d share those with you today.

sly cat

This one is made from the Sly Cat embroidery pattern – shrunk down a bit to fit on a card.

anywhere bear

This one is made from a bear applique pattern. I had to shrink this one down a bit to fit on a card – but that’s easy to do with a copy machine or computer.

pink rainbow girl 1000 px

This one I had to enlarge just a bit to be a good card size. It’s one of the girls from the Rainbow Girls embroidery pattern.

I love making collage pictures like this. I have an enormous collection of paper that I’ve painted with various textures and it’s really easy to use the embroidery or applique patterns as a guide. I tape the pattern up in a window, then hold my painted paper over it and trace the shape I want to cut out. Cut it out with a pair of scissors or an exacto knife and glue it down with a glue stick. Easy peasy. I draw the faces (or other fine lines) with a fine-point Sharpie. If you want to stitch lines on this paper – this video will show you how.

If any of you have experimented with other ways to use the embroidery or applique patterns, I’d love to see them!

Hope you all are having a great week!

Best,
Wendi