Free Pattern: crocheted square washcloth!

stack of blue/green crochet washcloths

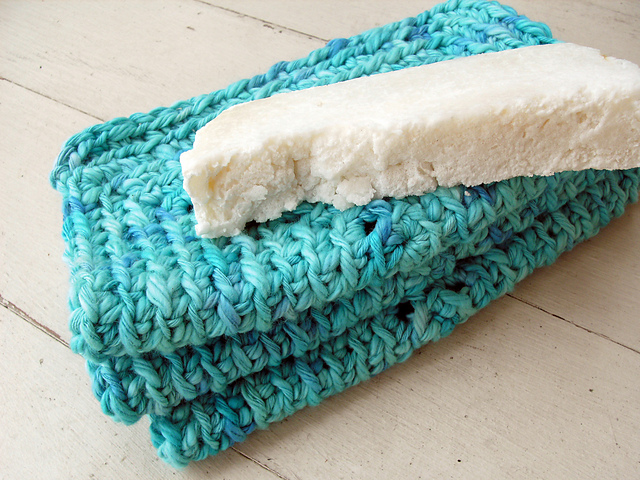
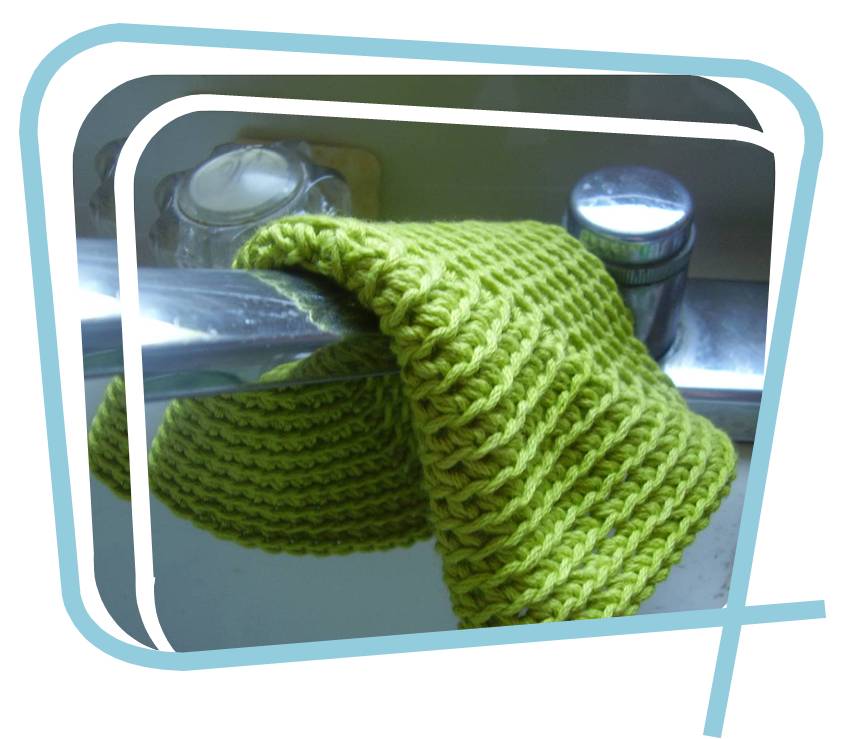
Who doesn’t love crocheted washcloths? This pattern is worked in the round, so you can make the washcloth as large as you’d like without too much advance planning!

crochet washclothsYou’ll need:

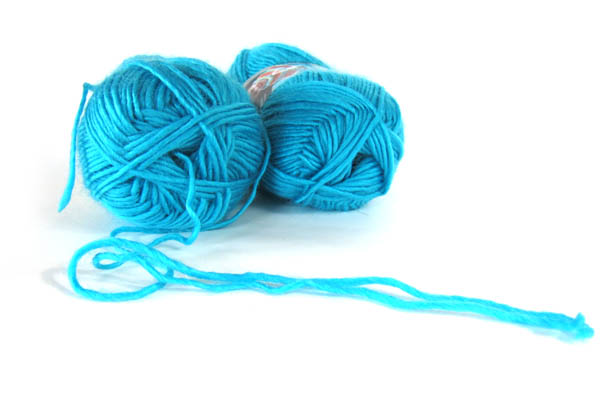
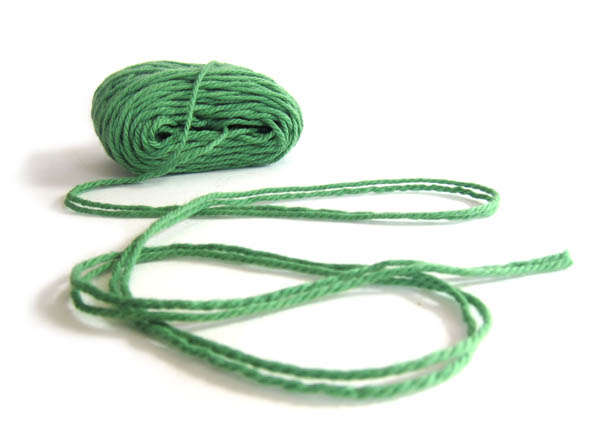
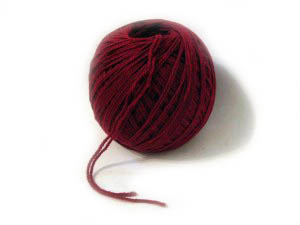
  • yarn Cotton works best, I’ve used a worsted weight yarn to make the washcloths pictured
  • a hook Use the hook size recommended on the yarn’s ball band. I use a size H for worsted weight yarn
  • a stitch marker (optional) (for marking the start of the round)

Of course, you can use any size yarn that you’d like, as long as you use a crochet hook to suit. For the washcloths pictured (which are about 8″ square), about 50-60 yards was used.

The Pattern

abbreviations
sc: single crochet
st(s): stitch(es)

pattern notes
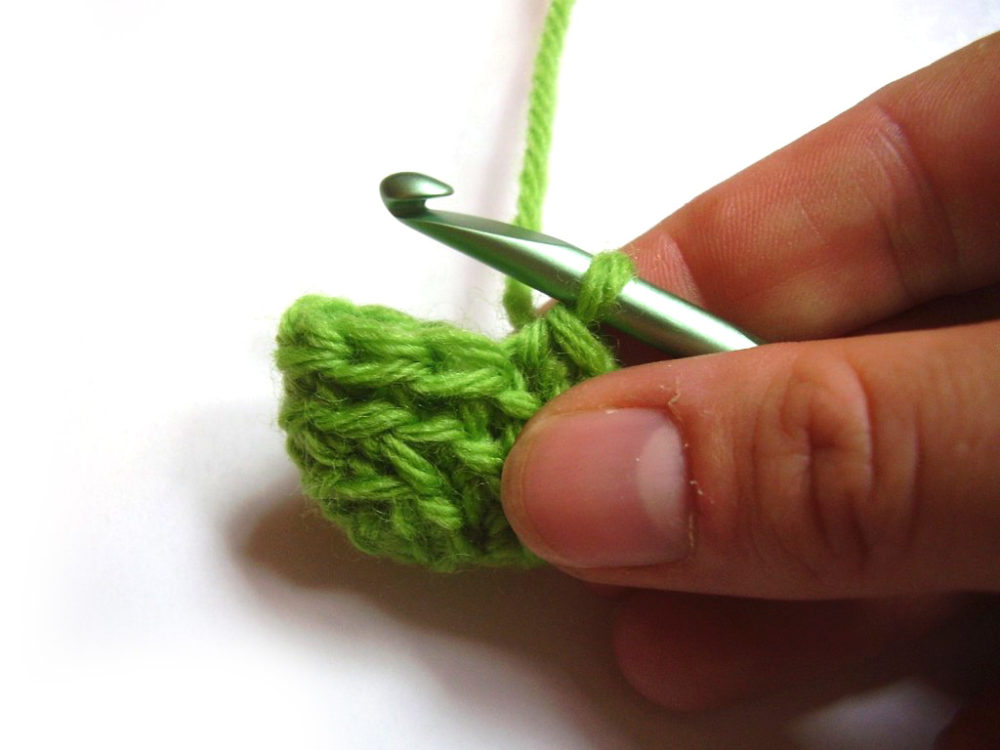
If you’d like to get the ‘ridges’ that are shown in the sample washcloths, then crochet through the back loop only. For a ‘more traditional’ look, crochet through both loops. This decision is purely stylistic, and you’ll have a great washcloth either way.

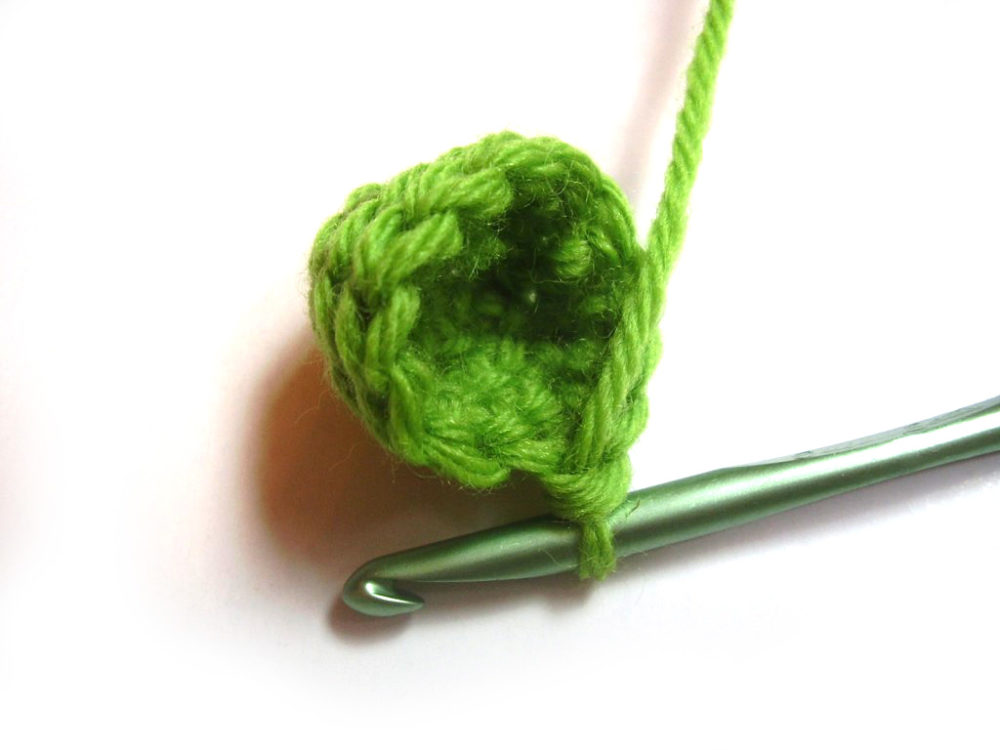
The general pattern is that you’ll sc 3 times in each corner stitch. The row-by-row pattern is written out below. For this pattern, each round will finish a stitch or two short of what you may expect. It’s done this way so that the written pattern is less complicated. Just roll with it for a round or two, and you’ll quickly discover the general pattern… and can continue on your own!

To start, ch 2
Round 1: Sc 8 times in 2nd chain from hook (8)
Round 2: * Sc 1, sc 3 in next st. Repeat from * 3 times. (16)
Round 3: Sc in next 2 sts. * Sc 3 times in next st, Sc in next 3 sts. Repeat from * 2 times. Sc 3 times in next st, sc in next st. (24)
Round 4: Sc in next 3 sts. * Sc 3 times in next st, sc in next 5 sts. Repeat from * 2 times. Sc 3 times in next st, sc in next 2 sts. (32)
Round 5: Sc in next 4 sts. * Sc 3 times in next st, sc in next 7 sts. Repeat from * 2 times. Sc 3 times in next st, sc in next 3 sts. (40)
Round 6: Sc in next 5 sts. * Sc 3 times in next st, sc in next 9 sts. Repeat from * 2 times. Sc 3 times in next st, sc in next 4 sts. (48)

Keep working this pattern until your washcloth is the size you want! The general pattern is to single crochet three times in each corner stitch… and to keep going! Easy!

washclothBest,
Stacey
Stacey from FreshStitches

Save

Using a Nostepinne

Using a Nostepinne Replacement to Make a Center-Pull Yarn Ball - tutorial from FreshStitches and Shiny Happy World

In this blog post, I’m going to show you how I used a sunscreen bottle to wind a beautiful center-pull ball of yarn!

ball of yarn

When you purchase yarn that comes in a hank, you’ll need to wind it before using. You can usually wind your yarn at your local friendly yarn store when you purchase it… however, if you want to wind your yarn into a ball at home (maybe because it’s midnight and you’re itching to start a new project), you’ll have to come up with something else.

Some folks own a their own ball winders… but, the nice ball winders can be pricey, and the cheap ones can be unreliable. I used to wind my yarn on my hands… but you either wind up with a ball (pretty, but not center-pull), or you wind a center-pull ball on your hands, which makes your fingers feel all squished. (Read here for why you may want to use a center pull ball.) I’d heard about using a Nostepinne for winding balls… and not being one to splurge on new tools, I decided to give it a try, but using a sunscreen bottle.

A Nostepinne is (usually) a wooden stick used to wind beautiful balls of yarn. One end of the Nostepinne is tapered, so that the ball easily slides off. Since a ‘real’ Nostepinne doesn’t have too many intricate details, I found a suitable replacement in my medicine cabinet… a bottle of sunscreen! I found this set of instructions for using a Nostepinne.

I grabbed my sunscreen, and set to work. I used the ‘football-shaped’ method of winding yarn, simply because it was quick and easy. As I wound more balls, the process got to be quite quick. Below, you’ll see a photo of the yarn still on the bottle.

on bottle

Then, I pulled the ball off of the bottle, and it looks lovely! It sits nicely (doesn’t roll around) and is center-pull. Yay!

ball & bottle

So, you don’t need to buy a ‘real Nostepinne’ to get great results. Find something in your cabinet and give it a try!

Here are handy links to all the posts about yarn. . .

Return to the main table of contents for Let’s Learn to Crochet Amigurumi.

Move on to the lessons for the basic crochet stitches.

Happy stitching!

How to work with two yarns at once

I often get asked about the best way to work with two yarns at once. So, in this post, I’ll talk about the pros and cons of three different ways of working with a double yarn.

Big owl crocheted cuddly

Of course, for any amigurumi pattern, you can crochet with two yarns at once, use a bigger hook and follow the pattern… and you’ll end up with a bigger animal! Fun! (shown above: a giant Nelson the Owl!)

Working with two balls of yarn

how to work with two strands of yarn at once

The most obvious way of working with two yarns at once is to simply hold two strands of yarn together from two separate balls of yarn.

advantages

  • If you purchase your yarn already in balls, you don’t have to do much… just find the ends and go!
  • If you want to do some interesting yarn combinations (such as hold one strand of plain yarn together with one strand of beaded yarn- which I’ve done when knitting a felted bag), no additional work needs to be done.
  • Since the balls of yarn are independent, it’s okay if one ball is longer/shorter than another. Just work on a new second ball when one runs out.
  • You can hand-wind your balls of yarn. Since you can work from the outside of the yarn, there’s no need to make center-pull balls (which either require a ball winder or a specialized hand-winding technique).

disadvantages

  • Balls can sometimes be unruly. With this technique, some people struggle with keeping both balls of yarn in the same place, or keeping them from becoming hopelessly tangled. If you want to avoid this, consider winding two center-pull balls, and only working from the center. This eliminates (at least lessens the amount of) the ‘rolling-around factor’.
  • If you purchase your yarns in skeins, you’ll need to wind two skeins at a time to work in this technique. This can sometimes be inconvenient.
  • If you’re working on a small project that doesn’t need two balls worth of yarn, this technique requires modification. You can divide your yarn in half, and work with two smaller balls, but in my opinion, this eliminates the ‘easy advantage’ of this technique.

Work from two ends of a center-pull ball

how to work with two strands of yarn at once
A second technique is to work from both ends of a center-pull ball: holding the yarn that comes from the center together with the yarn that comes from the outside.

advantages

  • You only need to wind one ball of yarn at a time: particularly great if your project requires only one ball of yarn, or an odd number of balls.
  • You can do this ‘straight off the shelf’ with many yarns packaged as balls – most are center-pull.

disadvantages

  • You’ll need to make center-pull balls… which either require a ball winder or a specialized hand-winding technique.
  • This, like working with two balls at once, can sometimes become tangled and a little unruly.

Winding two balls of yarn together

together-300x225
A third technique is to wind two balls of yarn together, and then knit or crochet with the two ends.

advantages

  • This technique is easy to work from: no ends or stray balls to get tangled.
  • You can hand-wind your balls of yarn. Since you can work from the outside of the yarn, there’s no need to make center-pull balls (which either require a ball winder or a specialized hand-winding technique).
  • If you purchase your yarn in skeins, winding two yarns together takes half the amount of time as winding two separate balls of yarn.

disadvantages

  • If you purchase your yarn already in balls, this technique takes extra time to get started.
  • If you’re working on a small project that doesn’t need two balls worth of yarn, this technique requires modification. You can divide your yarn in half, and then wind these two smaller balls together…but that makes this technique more time-intensive.

So, there you go! Hopefully, one of these techniques will be right for you!

Best,
Stacey

What size crochet hook do I use for amigurumi?

Want to learn how to make adorable crocheted stuffed animals with an easy online workshop – totally free?

Sign up for Let’s Make Amigurumi here. You’ll learn how to get started, the tools and supplies you’ll need, and how to make an easy amigurumi from start to finish using simple crochet stitches.

It’s a fun, inexpensive, and totally portable craft. You can do it!

What size crochet hook should I use?

Of course, this question is easy-peasy if you have the exact yarn called for in the pattern. But what if you want to substitute yarn for your amigurumi? Fortunately, this is easy to do too!

The most important thing when making amigurumi is to make sure that your hook is appropriately sized for your yarn, so that you get a nice, solid fabric. So, let’s say that you’ve selected a yarn that you want to use. How do you know what size hook is recommended? Check the yarn label!

yarn label
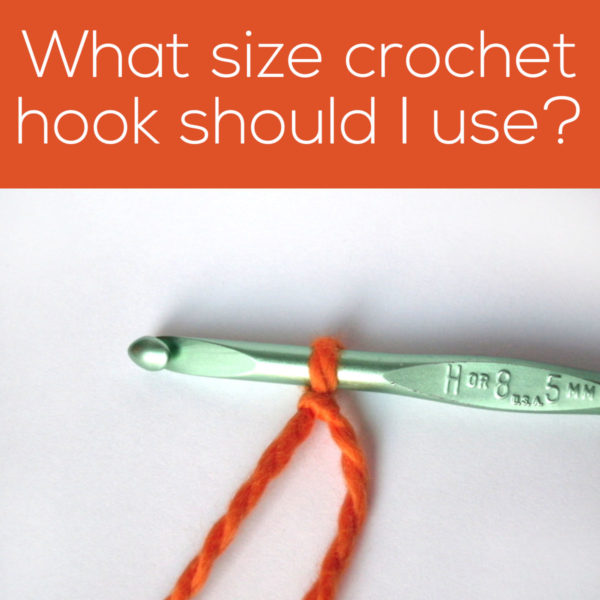
At left, I’ve taken a photo of a yarn label (from Stonehedge Fiber Mill’s Shepherd’s Wool, if you’re wondering). Most yarn labels specify the needle size that is required for knitting needles, but we crocheters can use that information, too. Notice that the label recommends a 5.0mm needle. Well, you’ll use a 5.0mm hook, too! If you want to find out what letter this number corresponds to, then look it up in a crochet hook size conversion chart. Here, you’ll find that it’s a size H hook.

Many people recommend using a smaller hook size than recommended to keep your stuffing from showing through. However, if you read our tips on keeping stuffing from showing, you’ll find some great tricks to keep that stuffing from showing, using the recommended hook size.

This way, you’ll be able to use any yarn (and the appropriate hook size) for any amigurumi!

Happy stitching!

How to Keep Stuffing from Showing through Amigurumi

How to Keep Stuffing from Showing through Amigurumi - tips from Shiny Happy World

It’s a common problem when making amigurumi: the stuffing sometimes can be seen through the stitches, something nobody wants! Fortunately, there are a couple of ways to minimize the stuffing from poking through the stitches. The photo below is one of my amigurumi… and you can’t see a single bit of white fluff!

making amigurumi with no stuffing poking through

Crochet through the back loop

This is my favorite technique to eliminate stuffing-peak-through: crochet through the back loop only (see this post for more details). Basically, crocheting through the back loop only creates a less-holey fabric, great for amigurumi.

Use a smaller hook

This seems to be the most common solution. I’ve seen lots of people using a size C hook on a worsted weight yarn… now, that’s tiny! This solution definitely creates tighter stitches, but it’s fairly common to get hand cramps because you’re crocheting too tightly.

Use less stuffing

The classic amigurumi advice is to stuff your amigurumi with way more stuffing than you think you’ll need (I’m a proponent of this advice, as well!). However, if your amigurumi is decorative (and isn’t going to be squished/hugged very often), you can probably get away with stuffing your toys a little less… which will result in less stuffing poking through.

Use colored stuffing

The main reason that you stuffing can be seen is because it’s white, and usually, what you’re crocheting isn’t. One solution is to use colored stuffing. Now, you may need to get a bit creative here. I haven’t seen commercially available colored PolyFil, but you have lots more choices than just polyester stuffing to fill your amigurumi. One idea is to use wool roving (the stuff used for spinning). You can select a roving that closely matches the yarn you are using, or you can dye the wool yourself (click here to learn how to dye wool with Kool-aid). The downside to this idea is that roving is more expensive than dedicated stuffing (unless you happen to have a sheep in your yard), and it can be difficult to get an exact color match.

Needless to say, there are lots of options to keep that stuffing from showing through! Try one, and end up with great-looking amigurumi!

Here are handy links to all the posts about stuffing amigurumi. . .

Return to the main table of contents for Let’s Learn to Crochet Amigurumi.

Move on to the lessons for closing up the opening.

Happy stitching!

Tips and Techniques for felting

bearfelt

One of my newest patterns is Gerry the Felted Bear! We have become quite taken with felting, so in this blog post, we’ll review all the important stuff you need to know. But trust me, it’s easy!

Selecting yarn for a felted project

All of our FreshStitches patterns are made using worsted weight yarn. You’ll notice that most of our cover models are made from Ella Rae, a 100% wool yarn. For most of our patterns, any worsted weight yarn will work – so many of our customers use acrylics (such as Red Heart classic), or their favorite yarn. But when you make a felted animal, you need to take a little more care to select a yarn because you need to pick a yarn that will felt!

It’s important to select a yarn that is made from 100% animal wool. Acrylics won’t work here! Also, select a wool that doesn’t say ‘superwash’. A wool will say ‘superwash’ if it is a wool that can be put in the washing machine. It means that the wool has gone through a special process that removes the fiber that makes it felt – you don’t want to use that for a felted animal!

Here’s an easy way to check if your yarn will felt – if it says ‘100% wool’, and the label says ‘hand wash with cold water only’, then there is a good chance that it will felt!

Different brands felt differently, so you may want to do a test swatch. Also, different colors felt differently. For example, white yarn sometimes doesn’t felt very well: the bleaching process occasionally removes the felting ability of the fiber. That said, many whites do felt, so try a test to find out if yours does!

Okay, so you’ve picked your yarn, and you went ahead and crocheted your amigurumi. Now it’s time to felt! The three crucial ingredients to the felting process are: heat, water and agitation. Here, we’ll talk about three ways to achieve a great felting job.

felting in the washing machine

You’ve probably heard stories of someone putting a hand-knit sweater in the washing machine, and it comes out super-tiny… that’s because it felted! No surprise, then, that the washing machine is the easiest way to felt a stuffed animal. It doesn’t matter if you have a top- or front-loading washing machine: both will work. (You’ll read lots of places where it’s claimed that front-loading washing machines don’t work – but I live in an apartment, and my laundromat only has front loaders, and I’ve never had a problem). If you have a European super-energy efficient washing machine, then you may want to use another method, because super-energy efficient often means that there isn’t enough water to get the felting to work.

So, you have a washing machine. Toss your crochet in, put a tiny bit of detergent in (like, 1 tablespoon), turn the machine to the hottest setting, and let it go! With stuffed animals, you want the yarn to felt as much as possible, so there is no worry about over-felting. If the piece doesn’t felt as much as you’d like, just throw it in for another cycle.

felting in the dryer

If you don’t have a washing machine that will work, you may want to use the dryer. The dryer is hot and spins stuff around, so it’ll felt the yarn just fine!

Soak your crocheted pieces in water, and toss them into the machine. If the pieces are too dry, the dryer will dry them, without completely felting them… so wet is good! Same as above, if the piece doesn’t felt as much as you’d like, just re-wet the pieces, and throw them in for another cycle.

felting by hand

Finally, you can felt by hand. I’m not going to fib – it’s tiring. I have often attempted to felt by hand, and then I get tired and decide to throw the pieces in the washing machine instead! But, if you’re energetic, give it a try.

Fill a tub with hot water- as hot as you can stand. You may want to put on some rubber gloves if it allows you to use hotter water. Toss in a little bit of soap or detergent, and scrub away! You want to agitate the fabric as much as you can – rub it together, twist it, beat it. The difficult part is sustaining the scrubbing long enough to felt the piece, and also to felt evenly around the entire piece.

Give it a try!

So, there you have it! Lots of ways to felt! After you are done felting, stuff your pieces with newspaper to allow them to dry in a nice shape. Once they’re dry, you’re ready to assemble according to the directions in the pattern.
Happy felting!

Tips for stuffing large amigurumi

This post has some great general info about stuffing amigurumi. Read on for some extra tips for getting arms and legs stuffed evenly!

You probably wouldn’t be too surprised if I told you that how you stuff your amigurumi is important. After all, you spend lots of time crocheting… you want to end up with an animal that looks great! And stuffing is crucial to obtaining a great final look.

You may be surprised, though, that stuffing large amigurumi (most FreshStitches patterns are about 8″ tall) requires slightly different techniques than stuffing tiny amigurumi. It’s true that you need to stuff your animal firmly, but there are a couple more tricks I’d like to share.

stuff1


The first thing to note is you need a fair bit of stuffing for large animals! And because crochet stretches, the amount of stuffing used determines the size of the finished product. So, if you’re stuffing body parts like legs, you want them to be the same size, meaning you need to stuff them with the same amount of stuffing! Before I stuff, I set out equal amounts of stuffing for each leg (or arm, or whatever you want to be of equal size).

how to stuff your large amigurumi


You want to stuff your amigurumi part with one big ball of stuffing, instead of continually putting in little bits of stuffing. If you fill the part with little balls, the finished product will look lumpy. So, try stuffing your amigurumi using one big ball of stuffing.

how to stuff your amigurumi

If, at this point, you realize that you haven’t added enough stuffing, you can add more to the center. The stuffing you added earlier will press out to the sides, keeping a smooth look, and you can add more to the center. If you have too much, just rip off what’s hanging off the top!

stuffing your amigurumi easy tips!!


Now, you have two stuffed parts of equal size! Of course, these stuffing tips apply to all amigurumi parts- even if you don’t need to have pieces match in size. For large amigurumi, the key is firm, even, non-lumpy stuffing!

Here are handy links to all the posts about stuffing amigurumi. . .

Return to the main table of contents for Let’s Learn to Crochet Amigurumi.

Move on to the lessons for closing up the opening.

Happy stitching!

How to work small pieces in the round

Most amigurumi crocheters have run into a classic problem: crocheting in the round on a tiny piece is annoying! Well, I have a tip that I think will help out.

tips for crocheting a small piece in the round

What do I mean by ‘crocheting on a tiny piece’? I’m not just talking about crocheting with thread! Even if you are working with a worsted weight yarn, some pieces (like the horns on Jackie the cow) have a small circumference. This means, as you are working in the round, you have to rotate the work almost every stitch just to keep going, and it seems like there isn’t enough room for your fingers!

tips for crocheting a small piece in the round


The solution to this problem is to fold your piece in half (as pictured above)! Let’s say you are working on a piece with 12 stitches on each round. Smoosh the piece in half, and you’ll have a piece with 6 stitches on each side.

Now, you can hold the piece (without worrying about sticking your fingers in the middle!), and crochet away… you’ll only have to turn the piece twice per round, a definite improvement!

So, next time you’re crocheting a little piece in the round, give this tip a try!

Here are handy links to all the crochet troubleshooting posts. . .

Return to the main table of contents for Let’s Learn to Crochet Amigurumi.

Happy stitching!

Crochet Hook Size Conversion Chart

crochet hooks in various sizes

Crochet hook sizes can be a bit confusing, especially if you are either new to crochet or live outside the U.S. and are trying to find the right size to follow an American pattern. I’ll explain the American crochet hook size system, and provide a conversion chart so that you can crochet with ease, no matter where you are!

Variety of crochet hooks

American Crochet Hook Sizes

American crochet hooks go by two names: a letter and a number. For example, the crochet hook size that is most commonly used for worsted weight yarn is an ‘H’, which is sometimes called a ‘size 8’. From an international point of view, this number is incredibly confusing! Most countries identify crochet hooks by their size in millimeters (mm). A size H crochet hook is 5mm, which as you can notice, doesn’t clearly line up with the number ‘8’. However, this confusing notation isn’t a problem if you reference a conversion chart when you are ready to crochet.

Crochet Hook Conversion Chart

Click here to download my handy printable crochet hook size conversion chart. Not only does it convert between American letter/number sizes and mm – it also lists all the various yarn sizes and the many (many!) names each size can be called.

Use the chart to find the hook size called for by your pattern, and you will be able to identify the size (in mm) that you should use. This should allow you to find the hooks you need to crochet using American patterns, no matter where you are!

The chart also reveals a few other slightly confusing aspects of crochet hook sizes. 😛

You’ll notice that the difference in mm between two hook sizes is not a consistent difference. For example, the difference between a ‘B’ and a ‘C’ crochet hook is .5 mm. However, the difference between an ‘H’ and an ‘I’ crochet hook is 1.0 mm. This can make it difficult to remember all of the conversions, so be sure to check each hook size that you would like to convert. Usually, both the American size and the size in mm are written on the crochet hook package, so that’s a convenient place to check when you’re making a purchase.

Also – the very smallest crochet hooks are called steel crochet hooks and their sizing is different. They don’t include letters, and as the crochet hook gets bigger, the size number gets smaller. It’s weird, I know.

There are occasionally some differences in sizing according to various brands, but the chart includes the most common ones.

Want to learn more about crochet hooks? This post breaks down the anatomy of a hook and helps you choose which kind is right for you.

Finally – a reminder that all of this is just a guideline! The hook size called for in the pattern, on the yarn band, or in the chart is just a suggested starting place. Crochet a little swatch and adjust your hook size up or down as needed.

Here are handy links to all the posts about crochet tools and supplies.

Return to the main table of contents for Let’s Learn to Crochet Amigurumi.

Move on to the posts about yarn.

Happy stitching!