5 Tips for being a good student (and get the most out of class!)

I love teaching. And I truly believe that anyone can learn to knit or crochet. My own sweetie learned to crochet a duck in just one weekend:

Tim crocheting at Pittsburgh Knit and crochet festival

I’ve taught oodles of students, and I’ve discovered that the ‘good students’ typically demonstrate some of the same strategies… and you can do them too! Here are some tips for making sure you get the most out of your class!

1. Ask questions

If you don’t understand something, ask! There is no shame in admitting that you’re confused about what’s going on. Raise your hand, even if you don’t know exactly what to ask. Even if you say, “I’m just not getting this part”, a good teacher should be able to guide you.

Of course, do the class (and teacher) a favor and wait until an appropriate time for your question.

2. Ask yourself, ‘could I do this at home?’

It’s all well and good to follow the teacher’s instructions, but if you can’t do the same thing on your own, then how are you going to keep practicing? The teacher isn’t coming home with you!

Once you follow an instruction, ask yourself if you could do the same thing by yourself. If not, take notes or ask the questions you need to get it straight. And then, if possible, do it over again to test yourself.

colorwork crochet class Stacey Trock Stitches

3. Take notes

I know… you had been hoping to leave the notepad in high school. But, if you want to learn a new skill, it helps to jot down notes in your own words. Or, for a tricky stitch, maybe take a photo of your hands (but be mindful of a teacher’s photo policy). Do whatever you need to do so that you can replicate the results at home, later (see #2).

4. Sign up for the right class

This one happens before you even step into the classroom: sign up for the class that’s at the right level for you. It’s tempting to sign up for a super-advanced class, thinking that you’ll learn more. But getting in over your head will really just leave you frustrated. You will probably even learn less, since the teacher will be unable to slow down an entire class to catch you up.

class

5: Set a realistic goal

What’s your goal for the class? Information in the class might be flying left and right… and it can be difficult to catch every tidbit. Maybe your goal is to learn a new technique. Focusing on accomplishing your task (as opposed to trying to remember every word from the teacher’s mouth) will set you on the path to success!

Happy stitching!

SHARE THIS

How to Declutter a Craft Room

A peek inside my Shiny Happy World studio

I recently posted some photos of my newly tidy studio and a bunch of people asked for more details. A BUNCH of people. They all wanted to know how to declutter a craft room – exactly what I did.

I’m happy to share! Especially because this time I feel like I finally got it right. πŸ™‚

Sure, I’ve “decluttered” before – but only with moderate success. This time I swore things would be different – and they were!

The number one change in my approach was a change in my attitude. Instead of asking “What can I get rid of?” I asked “What do I want to keep?”

On the surface that seems like it’s really the same question – but the subtle difference was key for me. First, let’s look at a before photo. It’s not taken from the same angle (it’s actually from the other side of the room) but it’ll give you a pretty clear picture of what things looked like.

How to Declutter a Craft Room

And this was a good day! Every horizontal surface is full of stuff. There are plastic tubs stacked under my sewing table and in front of my storage shelves. There are permanent piles of stuff stacked on the corners (out of the way, right?) of my work tables. There is stuff everywhere – and I wasn’t using even close to half of it.

No more!

Here’s what I did. . .

Start with one thing. The experts say to do one room at a time – but even that was too much for me. I tackled one piece of furniture at a time.

Remove everything from that piece of furniture. Stack it on the floor, pile it on a table – whatever you have to do to get down to an empty piece of furniture. As you unload, you’ll spot some things you know you need to get rid of. Bag them up if they’re trash, box them for donating – go ahead and get rid of them now. But know that this is the easy stuff – things like the jar of bobbins that went to a sewing machine I got rid of over ten years ago, or the water damaged tablet of nice drawing paper. This is where I’ve stopped before – the things with an easy reason to get rid of them. This time I went deeper.

Clean it. Clean it really well. Dust it, polish it, vacuum out all the weird nooks and crannies full of Cuddle Fleece fuzz. Make it look (and feel) like a new piece of furniture.

Now – start “shopping” in that pile of stuff. Pull out the things that you actually WANT. The knick-knacks that make you really happy when you pick them up. The supplies that you love to use. I used the word shopping very deliberately. If you were strolling through Joann’s and you saw this stuff – how much of it would you actually put in your cart and buy today? Probably not much.

The best example of this was when I went through my yarn bin. I don’t use much yarn. I’ll crochet something every once in a while, and sometimes I need yarn for hair or a tail – but that doesn’t add up to much. You wouldn’t know that from looking at the huge (overflowing – the lid wouldn’t fit on it) bin of yarn I had. I called Jo in (because she crochets sometimes) and we dumped it out on the floor. We very quickly picked the 5-6 skeins of yarn we actually liked – and got rid of everything else. Yarn in ugly colors, scratchy yarn, fluffy yarn that I loathe crocheting with – it all went away. And I breathed a huge sigh of relief!

Don’t ignore the emotional difficulty. Decluttering like this can be hard because it often means letting go of dreams. I had kept a bunch of small skeins of eyelash yarn (given to me by someone who was decluttering – ha!) because I thought I might someday use them in amigurumi. They’d be cute manes or tails, or be great for little hedgehogs or porcupines. The problem with that is that I don’t crochet amigurumi. I could learn – and I’d like to – but the realistic side of me knows that I probably won’t. Or – to be more precise – I will definitely NOT take the time to learn every single craft I’ve hoarded supplies for for the last two decades. I already sew, quilt, and embroider – I’m very unlikely to also learn amigurumi, knitting, jewelry-making, garment sewing, printmaking, watercolor painting, acrylic painting, and all of the other kajillion crafts I was storing supplies for, just in case I decided to try them out. And if I really do decide to crochet a cute little hedgehog, I will go out and buy the single skein of grey eyelash yarn I will need. None of the 20 skeins I had were grey anyway. πŸ˜›

Put the things you really want back where they go. Make sure they’re stored in a way you can easily access them – both to get them out when you want them, and to put them away again when you’re done. No storing things stacked on top of other things!

Move on the the next room/piece of furniture.

I did this over and over again, touching every single thing in my studio. And I mean every single thing. I went though my pencil cups and got rid of the hard pencils, the pencils with hard erasers, the pencils that were too short to get out of the cup without digging. I touched every single thing in the room and asked myself if I really wanted it. Not if I could think of a reason to keep it – you can always think of a reason to keep something. The question is – Do you really want it?

Two more decluttering tips for you. . .

Be fast. You know in your gut if you really want something. As soon as you touch it – pay attention to your gut. Do not start listening to your head. Your head will start telling you, “Well – you could use it for this or that or some other thing.” That’s what you told yourself when you picked it up at a rummage sale 10 years ago and you haven’t used it yet. You’re probably not going to. Get rid of it! If you find yourself dithering, you don’t really want it – but for some reason you feel bad about getting rid of it. Which brings me to. . .

Be ruthless. Some of your best decisions will be the hardest. Letting go of some things means letting go of dreams or might-have-beens. Sometimes there’s a lot of guilt attached – money spent on supplies for a craft you ended up not enjoying, time and money spent on a partially-finished project that’s been sitting on the corner of your sewing table for years. Sometimes people you love give you things you don’t like very much, but you feel like you need to keep them. It’s all hard – but I feel so good about every tough decision I made! Especially getting rid of the things that had guilt attached to them – talk about burdens lifted!

And now – I work in a lovely, inviting space that I’m not embarrassed to show you. My supplies are easy to reach and easy to put away. I don’t have to clear off a corner of my table to work on a project.

I have never experienced this before. Never!

But I love it – and I find that it’s spreading. I recently started on my kitchen – one cabinet at a time – and the results are fantastic. I can’t wait to finish that room and move on to my closet! I’ll have to move more slowly – decluttering my studio was basically a full-time job for a week – which means the results aren’t quite as dramatic, but they’re soooo satisfying. πŸ™‚

So there you have it – my tips for how to declutter a craft room. Have fun!

Here are handy links to all the posts about quilting tools and supplies.

Sewing Machine

Iron

Rotary Cutting Tools

Scissors

Other General Sewing Room Supplies

One More Hugely Popular Post that Seems to Fit Here Better than Anywhere Else

Return to the Let’s Make a Quilt main Table of Contents.

Move on to the posts about choosing your quilt pattern.

A Peek Inside My (Tidy!) Studio

A peek inside my clean sewing room at Shiny Happy World

Look! It’s a clean sewing room!

Over the years I’ve thought a lot about showing the space I work in here on the blog. But – frankly – it’s always been a bit of a mess. More than a bit, actually. If you follow along on Facebook you know I spent the last week doing a MASSIVE declutter. My husband has been doing the same thing in his office and between us we’ve gotten rid of fiveΒ carloads of stuff. Β (Now it’s time to tackle the rest of the house.)

I put a lot of thought into my decluttering this time and I was far more successful than I’ve ever been before. I wrote a post about how to declutter a craft room here – and you can see some scary before photos. πŸ™‚ But for now, I’m (finally!) going to share photos of my clean sewing room, followed the rest of the week with more specific posts about how I tackle some of the most common craft-supply storage issues.

First up is a bird’s-eye view of my space.

A peek inside my Shiny Happy World studio

I took this photo from the top of the stairs to my husband’s office, which overlooks my studio. He writes children’s books and also works from home. It’s nice having our spaces adjacent so we can holler back and forth at each other throughout the day.

I love my space! It has lots of windows and terrific natural light. Please ignore the fact that none of those windows have trim yet. It will happen someday, but the fact that it took me five years to remove all the factory stickers from  the windows might be an indicator of something. . .

I’m going to start my tour at the ironing board (the purple bit at the right of the photo) and take you counterclockwise around the room. But first – look up!

A peek inside my Shiny Happy World studio

Technically I guess you’d be looking straight ahead from your stop at the top of the stairs. The corner over my ironing board has this support beam that I painted a pretty blue and then wrote “make” in purple. That’s what I do here! I love the glass baubles hanging from the support. And just to the left of the windows hangs my very first quilt. (More info about that here.)

A peek inside my Shiny Happy World studio

If you walk down the stairs you’ll run into my supremely awesome ironing board. It’s an Ikea hack and I posted all the details and instructions here.

The baskets and drawers are a later addition. (More Ikea stuff). All my wool felt is stored in the drawers. The blue cubbies are for general supplies (starch, water bottle for filling my iron, embroidery hoops, etc.). The natural baskets hold a lot of the tools and supplies I sell in the shop.

Keep moving to the left and you come to my desk, with some things I love hanging over it. I especially love these toys by Amanda Visell.

A peek inside my Shiny Happy World studio

And here’s my desk itself. It’s a hollow-core closet door from Home Depot sitting on two glass-fronted end tables from Target. It’s the best desk ever!

A peek inside my Shiny Happy World studio

The scanner and two printers used to be stored under my old desk so that I had to sit on the floor every time I wanted to use them. My back is very glad I don’t have to do that anymore. πŸ™‚

See the tiny bit of orange hutch in the top left corner? That’s next.

A peek inside my Shiny Happy World studio

The jars in this hutch hold buttons, trim, elastic, eyeballs and more fun stuff – but it’s also a place where I put random things I love, like this. . .

A peek inside my Shiny Happy World studio

Behind the doors at the bottom of the hutch are random office supplies and all my shipping supplies.

If we keep moving left we’ll zoom past a tall bookcase full of kids nonfiction books. . .

A peek inside my Shiny Happy World studio

. . . and come to these low bookshelves where I store all my kits.

Turn the corner and this is where I store Cuddle Fleece.

A peek inside my Shiny Happy World studio

The quilt over the top keeps the bolts safe from sunlight and dog hair. πŸ™‚

Turn the corner again and you’ll pass my washer and dryer, the door to Jo’s room, and a (probably overflowing) laundry hamper before you come to this.

A peek inside my Shiny Happy World studio

The right bookcase is all my picture books – great reference for when I need to know what a crocodile might look like standing upright on his back legs. πŸ™‚

The left bookcase is all my craft/sewing/drawing/design reference books and sketchbooks, plus a few favorite things like the Party Animals.

A peek inside my Shiny Happy World studio

There’s a new guy ready to join the party soon!

Continue left and there’s this long row of low bookcases along the half-wall overlooking my dining room.

A peek inside my clean sewing room - Shiny Happy World studio

This is where I keep thread, beads, markers, paints, glue, my tool basket, files of patterns in progress, and other stuff. It’s just a step away from my main work table so it’s really handy. If I want to keep a clean sewing room – I need to make it easy to put things away properly. Otherwise I’ll let those supplies pile up.

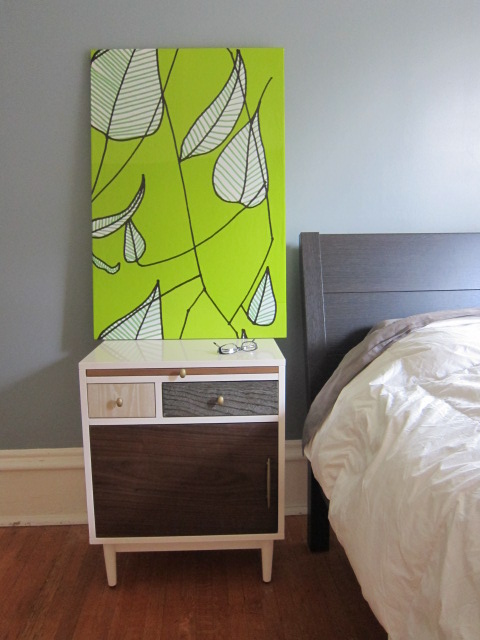
Now we’re back to the stairs. Under the stairs is some pretty art. . .

A peek inside my Shiny Happy World studio

. . . and this piece of furniture.

A peek inside my Shiny Happy World studio

The striped bins hold my scraps and behind the doors you’ll find paper, extra printer ink, and random, bulky weird-shaped things like my tripods.

On the wall above the stairs (as you head back up to my husband’s office) is a collection of some of my favorite children’s book art.

A peek inside my Shiny Happy World studio

It’s impossible to shoot a photo without getting sun glare – I’ve tried every time of day and every time of year. But there’s some great stuff up there!

We skipped a couple of tables in the middle of the room.

A peek inside my clean sewing room - Shiny Happy World studio

This is my main work table with a big cutting mat up top, and fabric storage underneath. (And Augie Dog peeking in the side of the photo.) It’s between my desk and the low storage shelves.

Just past it you can see my sewing table – the magenta one.

A peek inside my clean sewing room - Shiny Happy World studio

That table top is a collage of picture book pages with a layer of clear epoxy over it. I love it! You can see how I did it here. There’s a futon backed up to the sewing table, because my studio is also the guest room. πŸ™‚

And that’s it! My clean sewing room! More details coming every day this week about fabric storage, tool storage, embroidery floss storage, and pins & needles.

I hope you enjoyed the tour! Happy Monday!

Peanut Butter and Jelly Cupcakes Recipe

Peanut Butter and Jelly Cupcakes - recipe from Shiny Happy World

I know, right!

Peanut Butter & Jelly Cupcakes.

Jo loves taking these classic flavor combinations and turning them into cupcakes – and this one was a gem.

Start with delicious peanut butter cupcakes. (Scroll down for the recipe.)

Fill them with your classic Concord grape jam.

Whip up a batch of Jo’s Basic Buttercream Frosting and mix in 3/4 – 1 cup of grape jam.

Pipe it onto the cupcakes and enjoy. πŸ™‚

I love how you get different flavors as you eat your way through this cupcake. Around the edges there’s no jam filling, and less jam frosting – so the dominant flavor is the slightly salty peanut butter cake.

As you get closer to the center you start getting more grape flavor from the jam filling – with an extra little burst of jam right in that center bite.

Delicious!

Peanut Butter Cupcakes

MakesΒ 24 cupcakes
Ingredients
  • 1 cup creamy peanut butter
  • 1/2 cup unsalted butter, softened
  • 1 cup buttermilk
  • 2 eggs
  • 2 teaspoons vanilla
  • 2 1/2 cups all-purpose flour
  • 1 cup granulated sugar
  • 1/4 cup brown sugar
  • 2 teaspoons baking powder
  • 1 teaspoon baking soda
  • 1/4 teaspoon salt
Instructions
  1. Preheat oven to 350 degrees and line your cupcake pans.
  2. Sift together the flour, baking powder, baking soda and salt. Set aside.
  3. Cream together the butter and peanut butter.
  4. Add in the white and brown sugars and beat well.
  5. Add the eggs one at a time and beat until barely mixed.
  6. Add the vanilla and combine.
  7. Add 1/3 of the flour mix and stir until not quite mixed.
  8. Add half the buttermilk and repeat.
  9. Add half of the remaining flour mix and stir.
  10. Add the rest of the buttermilk and stire.
  11. Scrape down the sides of the bowl and add the last of the flour mix. Stir until barely combined – then scrape down the sides of the bowl again and stir by hand until combined.
  12. Divide into cupcake pans and bake 20-24 minutes.

Enjoy!

Best,
Wendi & Jo

Tips for Getting Back to Knitting after an Injury

Do you remember when I severely cut my thumb?

Three months later, I still only have partial sensation on my right thumb. And I’m right handed. The doctor told me that it might take a full year for the nerves to completely heal.

But you won’t catch me complaining… it could have been much worse. Did you know more than 500 Americans lose a limb every day? My numb thumb is a piece of cake.

Tips for Getting Back to Knitting/Crocheting

There are still some things I can’t do. I definitely notice that my hand is ‘not normal’. But I’d like to share a few insights that will help you get back on the path to knitting/crocheting as quickly as possible after an injury.

Talk to your doctor

This may sound obvious, but your doctor is the best one to advise you on treatments/therapy you should be doing to recover after your injury. Don’t hesitate to mention that you have a needlework hobby! A doctor may automatically ask about your line of work… and forget to ask about other goals you may have.

doctor illustration

It’s completely okay to say, “I crochet as a hobby, do you have recommendations for improving my fine motor skills?” Vanessa from MMAAC recommends bringing a notebook with you that contains questions you have for your doctor.

Accept the ‘New Normal’

For now, I can’t lift items one-handedly (at least, not reliably!) and I find myself relying more on my left hand. I’m very fortunate that for the most part, I can knit and crochet similarly to how I did before.

If that isn’t true for you, it might be time to have a talk with yourself about your expectations. You can only do what you can do, and lamenting over your loss of ability is only going to cause heartache.

Set Reasonable Goals

Think about where you’d like to be (remembering what’s reasonable!) and create concrete steps you can do to get there. Physical therapy may be a component of this.

goal setting

Can you crochet for 5 minutes a day? Do it consistently, and you might find yourself at 10 minutes. Baby steps.

Research Alternative Techniques

There’s more than one way to knit! If an injury is plaguing you, look into other techniques that may be more comfortable. Is your Tennis Elbow making knitting a pain? Perhaps knitting continental (holding the yarn in your left hand) is less painful.

holding crochet hook like a pencil

Or maybe try holding your crochet hook a different way? Or swap to an ergonomic hook? There are lots of possibilities!

Reach out to Chat

Don’t be afraid to be open about your injury- you never know when a game-changing suggestion will come your way! There are a number of Ravelry Groups dedicated to particular injuries… you never know where you’ll find a great suggestion that will help!

Have you had an injury?

Did it affect your knitting/crocheting? Any recovery tips you’d like to share?

Made with Love? Or Made with Stress, Swearing and Sweat?

I make quilts for the people I love.The next time you’re making something – a quilt, a stuffed animal, a dress – and you’re stressing out about a place where your seams don’t line up, or a little pucker in the sewing, or eyes that aren’t exactly level, stop.

Stop and take a deep breath.

Remember why you’re making what you’re making.

If it’s for a show and you really, really, really want to win a ribbon – well, you really do need to stress about those tiny details. Sorry. (I don’t do that any more and that decision makes me happy every day.)

If it’s for any other reason – relax.

No one else will ever look at your work as critically as you do.

Not only will your best friend not care that that seam intersection is off by 1/8″ – she won’t even notice. She’ll be touched that you put so much time and love into something made especially for her. Look! You used all of her favorite colors! Even orange, and she knows you hate orange.

Your granddaughter will not notice that there’s a little pucker where you attached the sleeve to the dress for her doll. It’s under the doll’s arm, for Pete’s sake! And she’s too busy putting the dress on and taking it off for the hundredth time.

Your son will not notice that the eyes on his new teddy bear are a little crooked. He’ll be too busy hugging it close.

So really think about all the “mistakes” you see.

Will it interfere with all the love the recipient wants to give it?

If you wobbled and have a spot where there’s practically no seam allowance on your quilt and you’re worried the seam will pop the first time it’s washed – fix it. If you used the wrong seam allowance sewing the doll dress and now the sleeves won’t fit over the hands – fix it. If an eyeball is loose on the teddy bear and in danger of popping off and inspiring nightmares – fix it.

If it’s anything else – all those little things only you will notice – then let it go.

Which would you rather receive? A gift made with love? Or a gift made with stress, swearing and sweat?

I thought so. πŸ™‚

Happy Wednesday!

Best,
Wendi
Wendi_Gratz_Shiny_Happy_World

An honest talk about charity, donating and the Philippines

I was going to show you how I made my monster skirt today… but I’ve postponed it a little because there’s a topic weighing heavily on me that I want to talk about.

By most reports, the typhoon that struck the Philippines is the worst tropical storm to make landfall. The death toll is over 3,000 and some estimates predict it will reach 10,000.

What I’m about to say may be controversial, but please hear me out.

Donating toys to the Philippines

Please do not send stuffed animals to the Philippines

The victims of the Philippines typhoon do not have food, drinking water or medicine. They don’t have enough personnel to move debris to search for survivors, or enough well-bodied people to bury their dead. It is a catastrophic situation that most of us find hard to imagine.

As crafters, we want to help. Our first instinct is to make/sew something to send to people in need.

This is a great instinct, but we need to use our judgement. We need devote our crafting energy towards causes where we can make the greatest impact.

And right now isn’t the time. Let me tell you a little about what we learned from Newtown…

Lessons from Newtown

Do you remember when we collected stuffed animals to send to the children of the Newtown tragedy? Crafters banded together and sent an astonishing number of stuffed animals. I was so proud!

I was devastated to find out that what we thought was a great idea turned into a burden. The town was overwhelmed with stuffed animals, requiring countless volunteers and warehouses.

It breaks my heart to say that many of those animals never made it to children. There were just too many.

Do what is most needed

I love stuffed animals (trust me!), but we need to make sure we are doing what is best for the disaster area. The people in the Philippines need water and relief workers, and right now, the best way to get that help to them is to donate money to a relief organization.

Sending a stuffed animal to the Philippines won’t calm the grumble of a child’s hungry tummy and it takes up valuable shipping and distribution resources that are needed for essentials. The shipping cost, alone, would provide food for a family for days.

Use the tragedy to inspire your charity crafting

I know that in horrible times such as this, your fingers get itching to make something… that’s wonderful! You can still help! Maybe you make animals and sell them, donating the profits to the relief effort.

Or maybe you feel inspired to make animals… but save them and donate them to your local fire department, to calm a local child after a scary incident.

amigurumi crochet bear

Crafters are an amazingly caring group of people. Please continue the tradition of caring by doing what’s best for the disaster-struck region. Send money. Save your stuffed animals for where they’re needed.

Getting My Quilting Mojo Back

Getting My Quilting Mojo Back

I used to be a quilter – with a capital Q. I entered my quilts into shows and sold them in galleries. I liked making the quilts, but I hated everything else about the process. I hated writing Very Serious Artist Statements. I hated entering quilt shows. I hated worrying about how much time I was spending on a quilt, knowing that that was pushing up the price. I didn’t like thinking about my designs in that way.

So I stopped. And I started Shiny Happy World and I didn’t make a single quilt for a few years.

Buttonholes Quilt PatternI started making cute toys instead of expensive quilts. And then I started designing patterns for those cute toys so other people could make them too. And that was awesome!

But then I made a quilt. I made the Buttonholes quilt and it was really fun to design a quilt pattern especially for beginners – with no places where the seams needed to match up and no stress whatsoever.

And then I made the Scary Squares quilt and had the Most Fun Ever. And then there were a few more quilts – including the Puppies quilt which I love, love love. Scary Squares quilt pattern from Shiny Happy World

And all of a sudden I realize I have my quilting mojo back. And you know why? Because I’m making quilts that I LOVE. These quilts will never appear in any gallery. They’ll never win a prize in a show. But they make people smile and they keep people warm and they’re really fun to make. I’m not stressing about points or matching seams – I’m playing with color and shape and cuddly monsters and cute puppies. And I love it!

Why did this come as a revelation?

12_puppy_applique_patternsI reviewed Quilting Happiness here, and in responding to some people’s comments about the book and the review, it really made me think about my own quilting journey. I feel like I fell into this trap of always pushing my skills – always making more and more complicated quilts – until I didn’t enjoy what I was doing. I was designing for the galleries and the judges and my own weird internal measuring stick.

It’s like I had to give myself permission to make quilts that were “below” my skill level. Where does that come from? I have the technical skills to make a mariner’s compass quilt. Or a Baltimore Album quilt. That doesn’t mean I HAVE to make one! Making one (for me) will be stressful and sweaty and I’ll probably say a lot of bad words. I can do it – but it won’t be fun. And I want my quilting to be fun, dang it!

I’m writing this because I know a lot of you have struggled with the same thing. I read it in a lot of private emails after I posted my Quilting Happiness review. You don’t need my permission – but I’m giving it here just in case hearing it from another source helps.

You do not need to challenge yourself with every project you make. If you want to learn a new skill – awesome! But don’t feel like you have to. It’s ok to just make things for the joy of it. You can make beautiful, stunning, gorgeous quilts for the rest of your life without ever worrying about chopping off points or matching seams.

There. I’m off my soapbox now. πŸ™‚

Starry Night quilt in progress - 10 starsAnd now that I have my mojo back, I’m planning a LOT of new quilt patterns for next year. Most of them will be of the easy peasy Buttonholes variety – with no fussy points and no seams to match. A few of them will be skill stretchers, like the Starry Night quilt. (Update – I’ve pulled the Starry Night pattern temporarily while I reformat it to be released as a regular pattern. Sign up for the newsletter to make sure you know when it’s in the shop.) I hope all of them will be fun – and that all of you will make things you love, whether those things are simple rag dolls or complicated quilts. Think about what makes you happy when you sew and follow that path!

Have a wonderful day!

Happy sewing! Or quilting! or stitching! Or whatever you love to do!

Best,
Wendi
Wendi_Gratz_Shiny_Happy_World

Meet Jo – My Daughter and Coauthor!

Jo Gratz - author of Creature CampThis is one of my favorite photos of Jo. I think she was seven or eight and I have no idea why she was wearing that mask while she sewed – but it’s totally her. πŸ™‚

Creature Camp is coming out soon and Jo helped me so much with it that she became a co-author!

I hadn’t planned it that way.

I’ve taught so many kids how to sew (including Jo). I put together a proposal for a book written for kids, teaching them to sew (and even design) their own softies. That meant working up a detailed outline of the book, sketching all the softies that would be included, and selling the proposal. Stash bought it and I went to work prototyping and making. When it came time to photograph the first finished softie I was. . . disappointed. It looked like a grown-up had made it and I know that can be intimidating for kids. I realized I wanted all the softies in the book to be sewn by actual kids. Luckily, I have an actual kid who likes to sew and loves softies. Jo said she was willing to sew up every project in the book. Woo hoo! Stash was immediately on board and Jo and I went to work.

Not only did she sew all the samples – she also did all the sewing for the step by step photos. Those are her hands you see in the how to photos. Every single stitch you see in the book was sewn by a real kid – mostly Jo.

She also gave me great feedback along the way. “This step is hard. Can we make it easier?” “I think we should fold these ears here.” “I like these long, skinny legs. Can we make them even longer? That would be fun!”

She was a huge part of the book!

So I wanted to introduce you to Jo, tell you a little bit about her sewing history, and along the way answer some questions you probably have about sewing with kids.

What’s a good age to start using a sewing machine?

Jo_first_sewing_machineIt depends on the kid.

Jo was four when she got her first machine.

(It was a toy. Don’t do that. After a couple of months it died in a large cloud of smoke and she moved on to a real machine.)

My classes usually start at age 6, but Jo was asking to use the machine, I knew she could focus, and she had pretty good motor skills. Let them start on the machine just as soon as you think they’re able. Sewing on the machine is lots of fun and I’ve never yet met a kid who didn’t want to do it. I’ve got a post here with some tips to help you get started.

Jo_first_quilt_block

Right away she said she wanted to make a quilt big enough to fit her bed (a twin). These are the first blocks. Look how proud she is!

What Kinds of Projects Should Kids Work On?

Jo_Wedge_Uglydoll_tutu_age_7

Six-year-old Jo makes a tutu for Wedge the Uglydoll.

Whatever they are most interested in! I usually steer kids towards small projects – some beanbags, a skirt for a favorite doll, a simple softie – something they can finish in a day or two and get that quick satisfaction.

But Jo really REALLY wanted to make a quilt. A big quilt for her bed.

That’s okay too.

Just don’t expect them to finish it soon. πŸ™‚

It took Jo four years to finish her quilt. It would get put away for months at a time while she worked on other things (or didn’t sew at all) and then she’d pull it back out again and add a few rows.

Jo_quilt_age_five

Jo’s quilt after about 1 1/2 years.

If your child chooses a big project, try to find a way to let it grow as you go – not just be pieces in a pile. If I were making this myself I’d have sewn all the rows together, then joined the finished rows into a big quilt. Jo sewed two blocks together, then two pairs into a four-square block, then sewed four-square blocks into a row two blocks tall, then attached that row to the growing quilt. She loved seeing those units get bigger and bigger and it really helped that every time Jo pulled the quilt out and worked on it, it GREW.

Don’t Expect Them to Follow an Imaginary Line

Jo_Singer_age_6

Jo sewing at age six.

The number one thing you can do to help kids sew successfully right out of the gate – especially if they’re starting really young – is to draw a sewing line on the fabric for them.Β 

I was still drawing lines on Jo’s quilt blocks at age six – if you click on the photo above you’ll be able to see it bigger.

Creature Camp is recommended for ages 8 and up if they’re sewing solo. But if you’re willing to lend a hand, a younger stitcher can handle any of the projects in the book. After Jo sewed all the main samples we recruited some of her friends to sew variations on the projects in the book. It was such fun watching them play with the patterns!

One of those stitchers was just seven years old and I knew she’d want to make the reversible butterfly/caterpillar – one of the more advanced projects near the end of the book. I drew on the stitching lines for her and helped her with some of the trickier pinning and she did just fine.

And now here’s Jo! She was nine when she made all the projects in the book, ten when we got this sample back and I recorded the video – and eleven now. That’s how long it takes to write a book! Here’s Jo talking about her favorite project in the book. . .

Jo and I will both be signing any books you order directly from me. She’s a co-author – of course she’ll sign them too! Imagine her excitement when she typed her name into the search window in Amazon and our book came up!

Get the book here!

Happy sewing!

Best,
Wendi
That's me!

Tutorial: How to Frame Fabric (quick art!)


Happy Saturday!

Today I’m going to show you how to make a quick art-piece by framing fabric!

My favorite fabric

I took a trip to Finland in 2008, and I bought a yard of some amazing fabric from Marimekko.

Although I loved the fabric… it gave me anxiety: what should I do with it? What if I sewed something that didn’t fit?

I finally came up with the perfect solution… frame it!

How to frame fabric for quick art

How to Frame Fabric

You’ll need:

  • A frame (a lot of tutorials call for a canvas stretching frame… but I just grabbed an old wooden one from the curb!)
  • Enough fabric to cover your frame (plus a few inches on all sides)
  • A stapler

Materials for making fabric art

Step 1: Wash & iron your fabric

You can skip the ironing if your fabric comes out of the dryer nice and crisp!

Step 2: Place foundation staples

Lay your fabric face down, and place the frame on top.

how to frame fabric

Now, pull the fabric up and over the sides of the frame and place a staple at the center of each side. Be sure to tug so that the fabric is taut.

Do this for each side.

tutorial for framed fabric

Step 3: Finish Stapling, and do those corners!

Work your way around the frame, placing staples every couple inches or so.

Do the corners last, and when you get to them, take a little time to tuck the corners and staple them neatly.

Corner of framed fabric

Step 4: Enjoy!

That’s it! You now have beautiful fabric art!

fabric art

Take pride in the beautiful art you made and display your favorite fabric in your home!

SHARE THIS