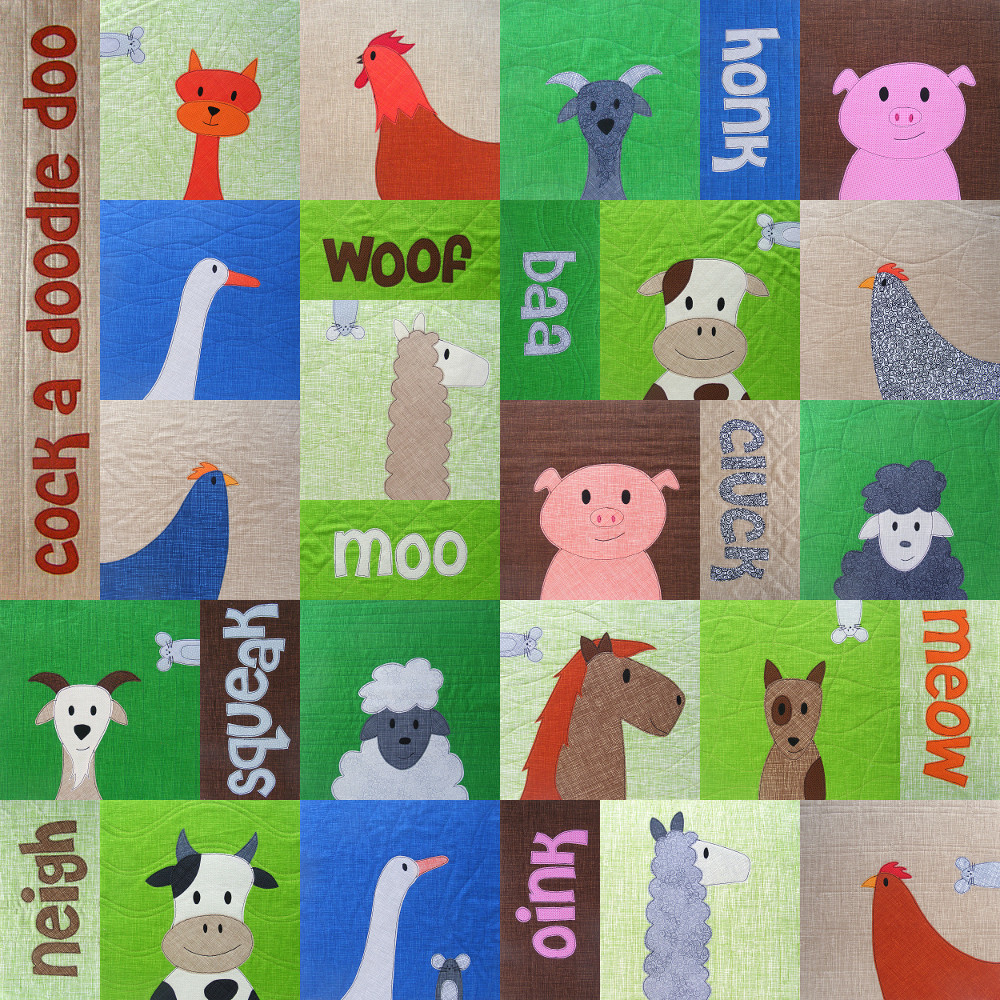
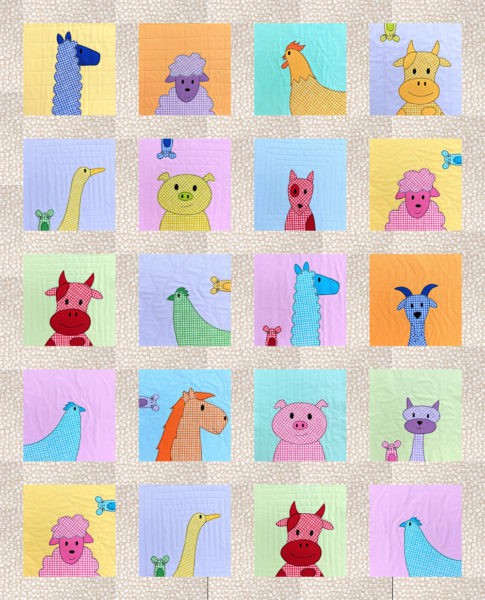
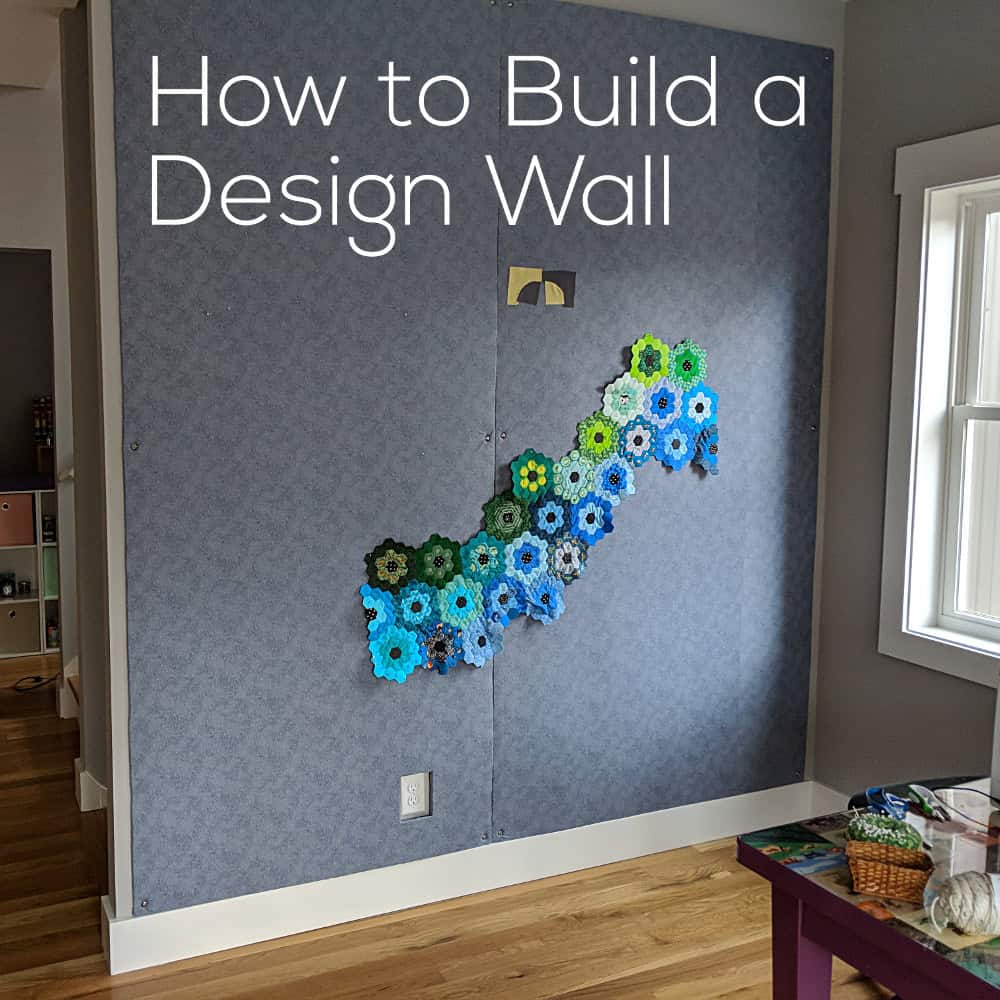
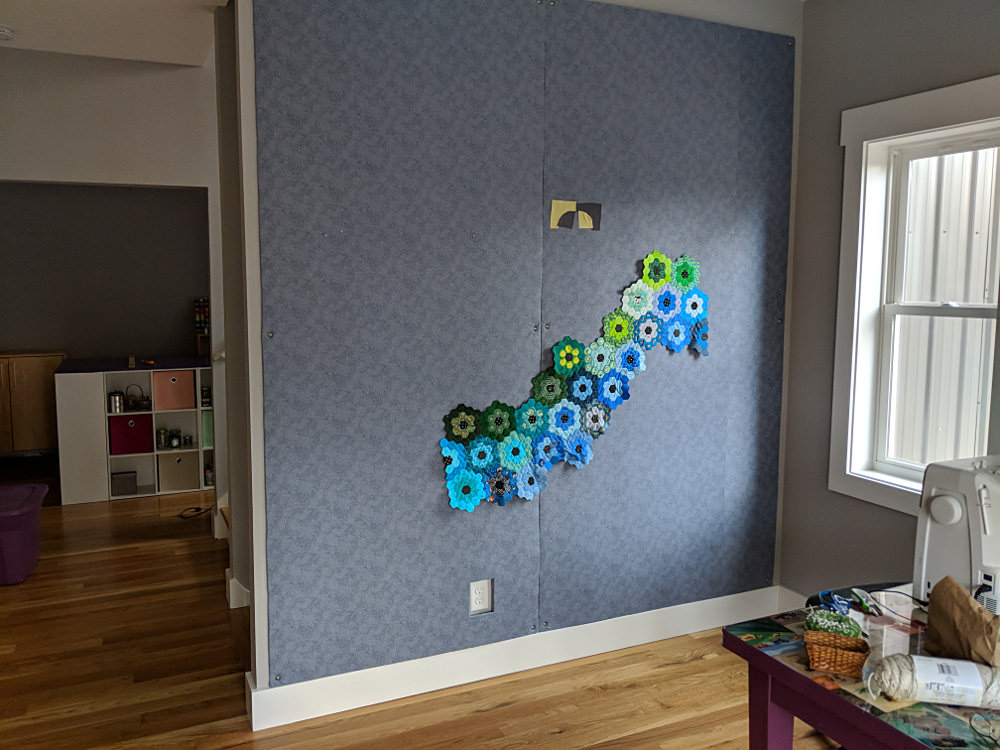
I’ve gotten a lot of questions lately asking for suggestions for the background colors of the Noisy Farm quilt pattern.
The cover sample you see above is from before I had fabric bundles in my shop, and most of the fabrics I used are no longer available.
One of the things I love about the way I do fabric bundles now is that you can use any bundle for any quilt. Here’s an example of three quilts that all use the Warm Neutrals fat quarter bundle for the animals – but different bundles for the background colors.
Changing just the background colors really changes the whole feel of the quilt – and I love them all!
So when people ask for suggestions for background colors for the Noisy Farm pattern – I want to tell them they can use anything! Go totally bright with the Solid Rainbow! Go a little more subdued with Box of Crayons! Go baby sweet with Rainbow Sherbet! Go natural with Green Batiks! Want even more suggestions? Go to the Noisy Farm pattern listing and look at the additional photos. There are a bunch showing finished quilts that other people have made with different fabrics than my samples.
For my new version of the Noisy Farm quilt I used Rainbow Sherbet for the background blocks. I went totally wild with the animals and using the Gingham Play fat quarter bundle. Gingham always says “farm” to me and I can’t wait to make the animals in fantasy colors.
One more change – I made this one a silent farm. 🙂 I left off the half-blocks with animal sounds and added sashing. I get a lot of requests about adding sashing to a Quilt As You Go quilt. There’s a tutorial here showing how you can reset (almost) any of my quilt patterns with added sashing. I even did the math for you for all the sizes. 🙂
If you’ve made any of my quilt patterns using a different color scheme – please share! Seeing all the different versions of my patterns makes me Muppet-arms-flailing happy – and it’s a great resource for your fellow makers out there to see different options. 🙂
I finally have a design wall in my new house and I’m so excited! There really is nothing like being able to step back and see an entire quilt like this!
And I’m going to show you (in excruciating detail) how I built mine – including the specific materials I used. I’ll also show you a pieced board I made for my husband. And I’ll even show you how to do that little cutout around the electrical outlet.
Ready?
Here we go!
To start with – I like to use foam insulation board. Styrofoam sheets are less expensive – but pinning into styrofoam gives me the willies. It’s a real nails-on-the-chalboard reaction so I don’t do it. Look for the 4 ft x 8 ft sheets of foam insulation board at your home improvement store. I like the ones that have a metallic foil material on one side.
I covered my board with flannel because I want to have both options – being able to pin into it but also being able to just smooth blocks up there and let them cling to the flannel.
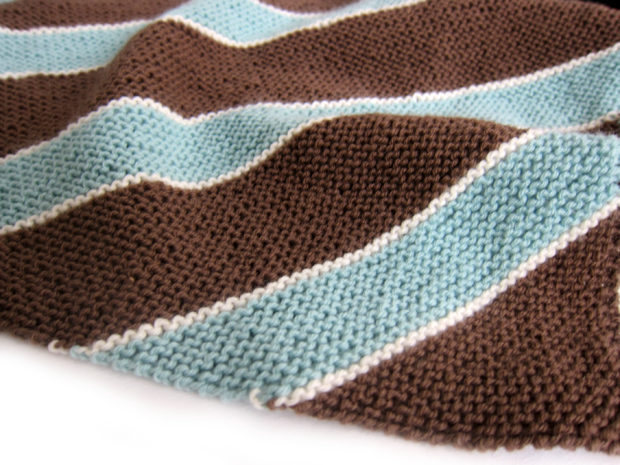
Specifically I used Jazz flannel in the color Smoke from Timeless Treasures. Click throgh so you can see it close up. It’s a nice tone on tone print that looks interesting when there’s nothing on the board, but is subtle enough not to distract me from any design I’m working on up there. Later I’ll show you a different kind of option.
For my last design wall I glued the fabric to the board – but that meant I couldn’t wash it, or easily change it if it got faded. This time I did the whole thing with pins.
Start out by piecing together enough fabric to completely cover your board, and wrap around each side with a couple of inches to spare. Press everything nice and smooth.
Lay your insulation board foil side up and cover it with the fabric – getting the fabric as centered as possible.
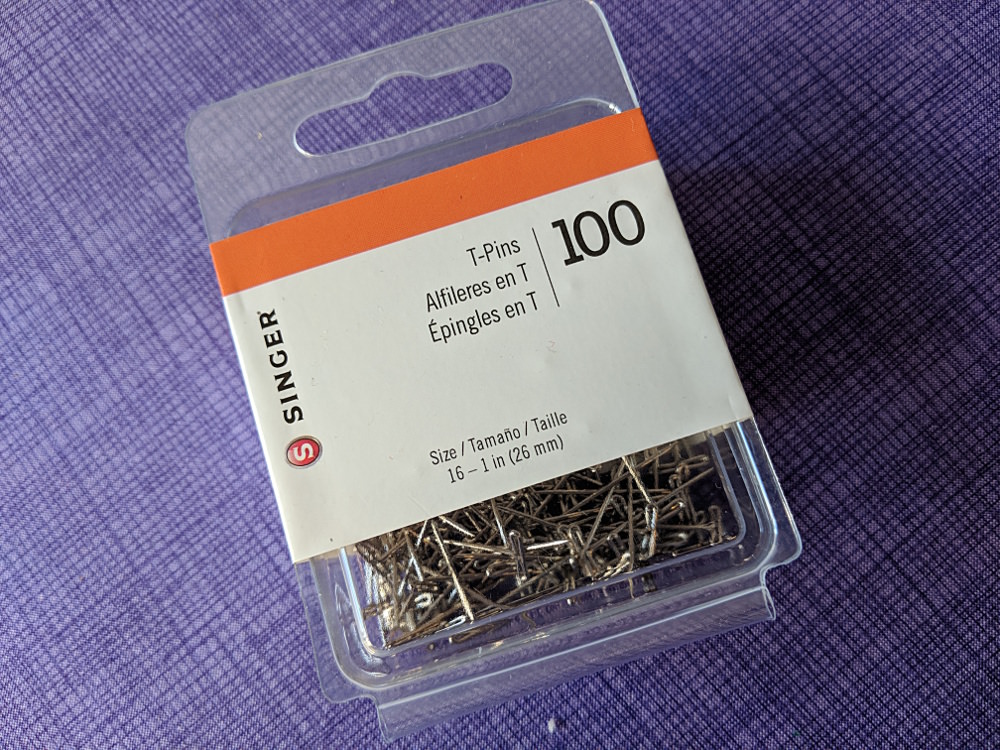
Start pinning your fabric into the sides of the insulation board. I used these 1-inch T-pins.
Basically – I used the exact same method I use to prepare fabric for framing – just on a larger scale. You can watch that video here.
Keep adding pins, pulling the fabric smooth but not stretching it, until you have pins all the way around your board every 1-2 inches.
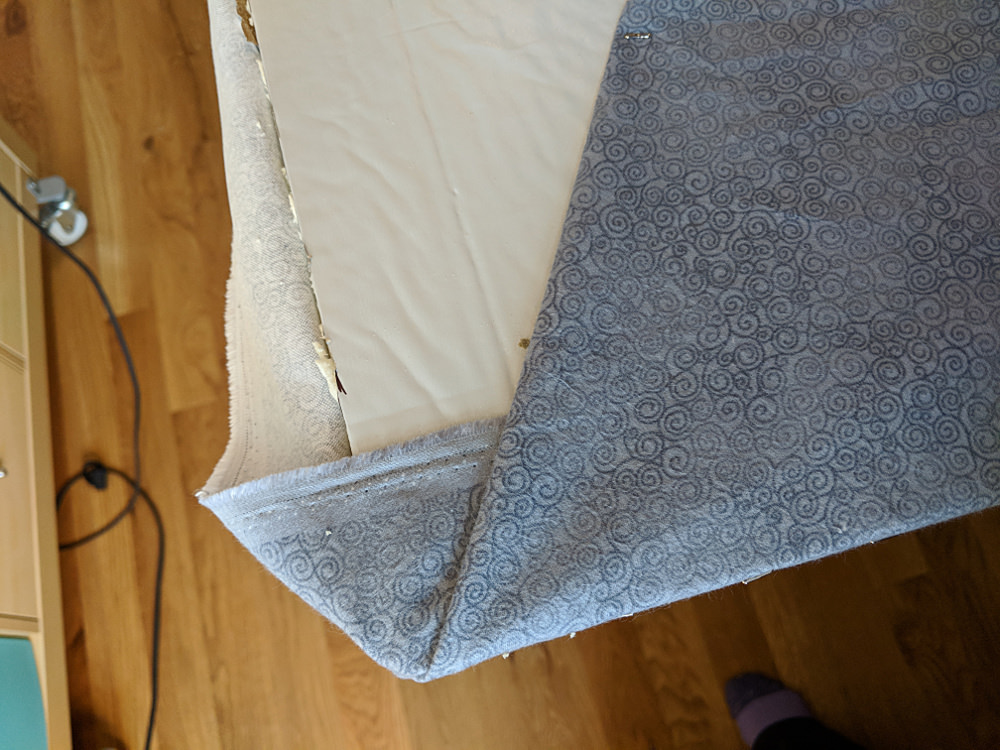
Flip your board over so you’re working from the back.
Fold in one corner, then fold in one side. Insert some of the T-pins at an angle so they hold the fabric flaps in place, but don’t poke through the front.
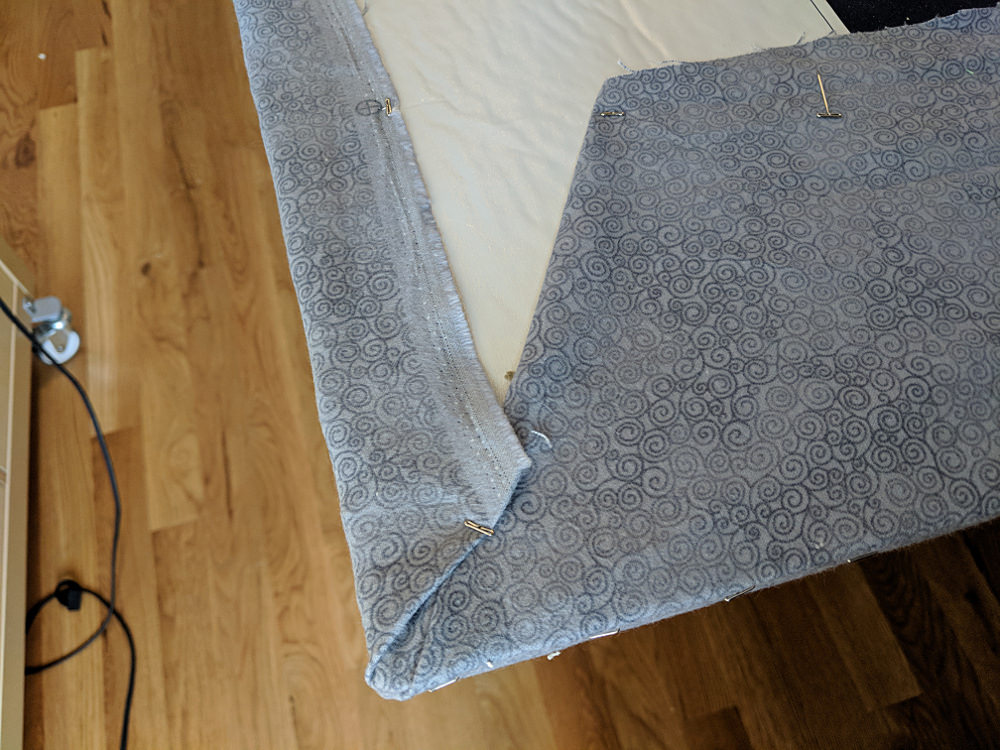
Fold in the other side. Now your corner is nice and neat!
(See how pretty that tone-on-tone Jazz print is?)
Continue around the back of the board, securing the excess fabric with T-pins inserted at a slant. Remember – the side pins are the ones really holding the fabric in place on the front of the board. These are only holding the excess fabric in place, so you only need a pin every 8-12 inches or so.
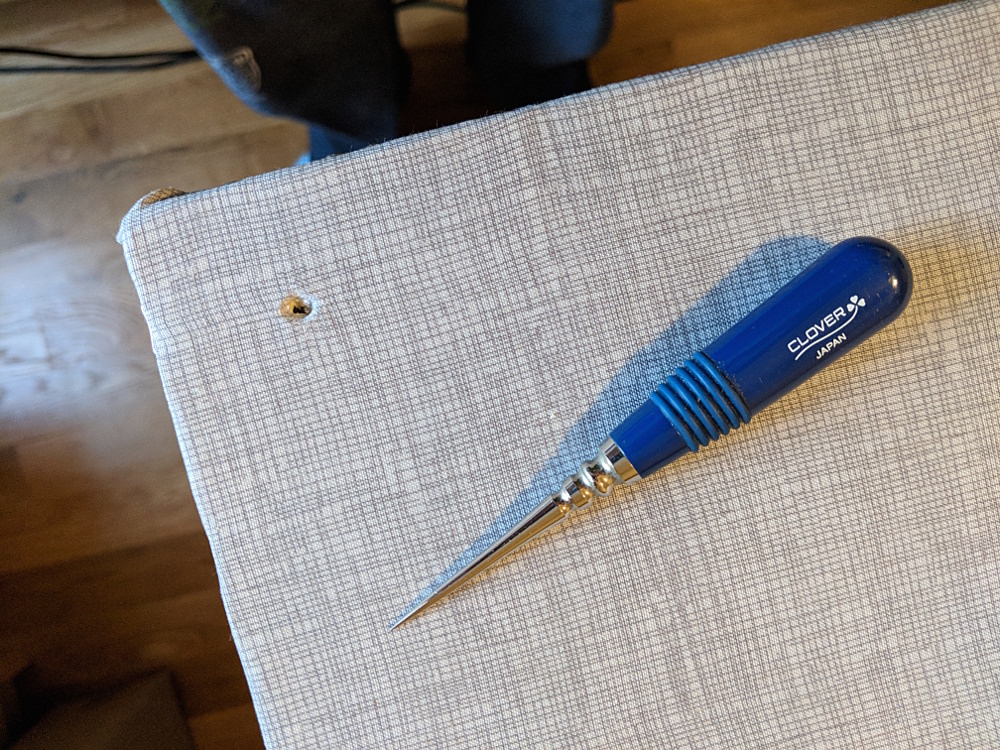
Use an awl or other sharp tool to poke a hole in each corner of the board (mine is 1 inch in from each edge) and one more in the middle of the longest edge.
This step is important! Don’t think you can just screw right through the fabric. The bit or the screw will catch the fabric and yank it into an awful twist, ruining all that work you did getting everything nice and smooth.
Hold the board just where you want it on the wall and mark through each of those holes with a pencil. Take the board away and insert a wall anchor at each of those spots.
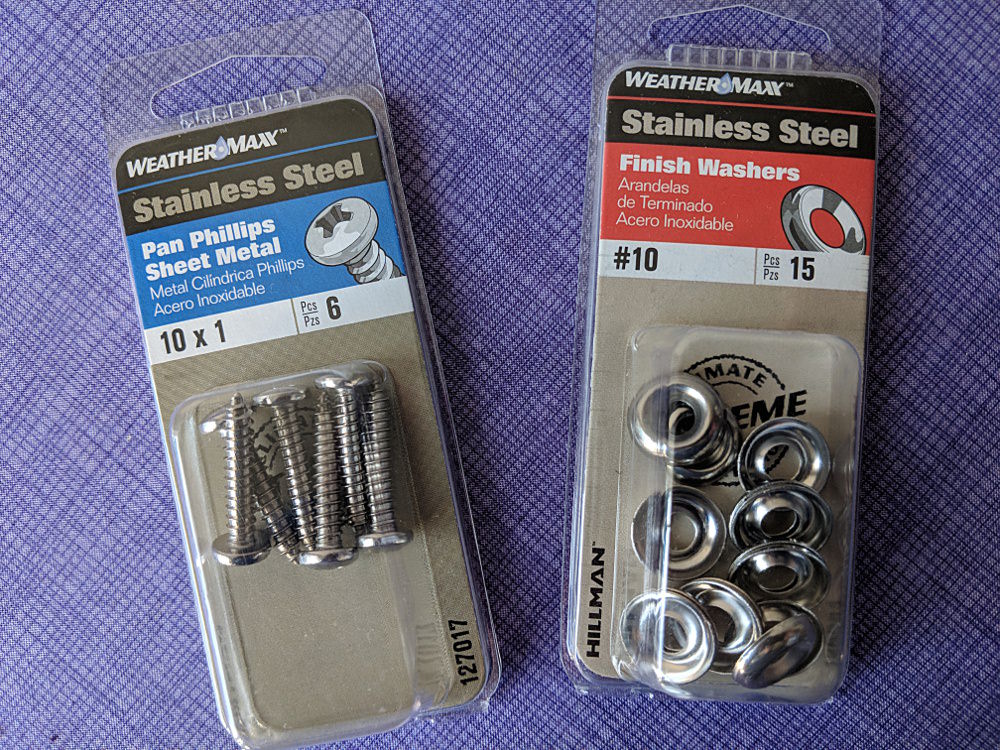
Now screw the board into those wall anchors!
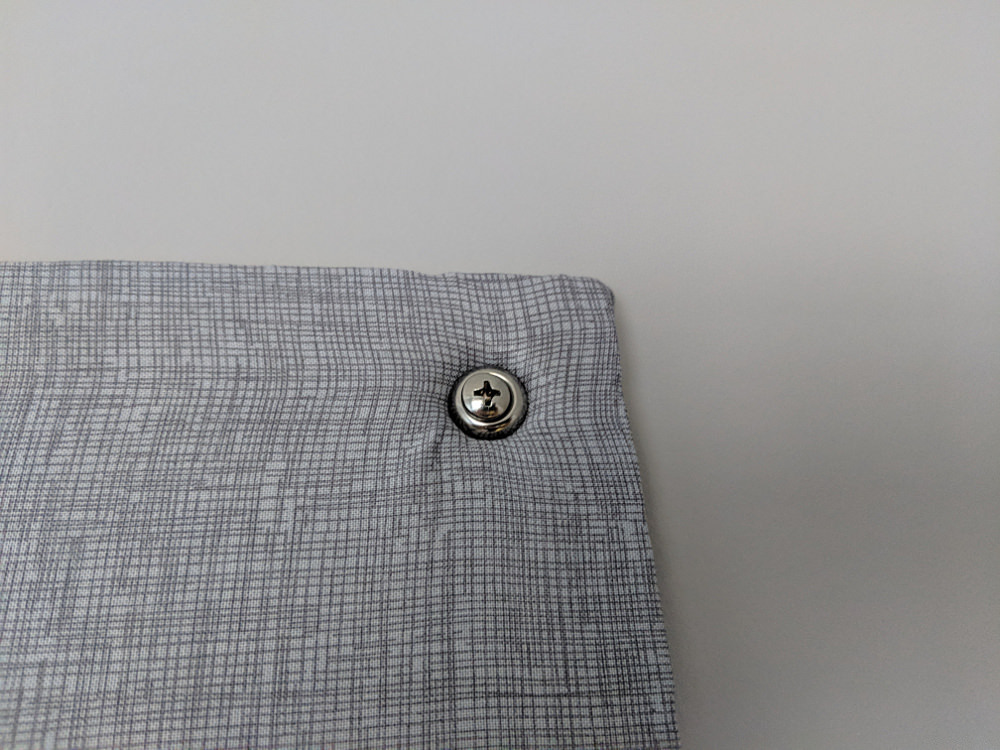
I used these nice stainless steel screws and washers.
You definitely need to use some kind of washer so that over time the head of the screw doesn’t just pull through the soft foam. See how nice these look?
I like to screw it in tight enough that it kind of dimples into the surface of the foam. That way I can skim blocks right over the screws if I want to.
What About Electrical Outlets?
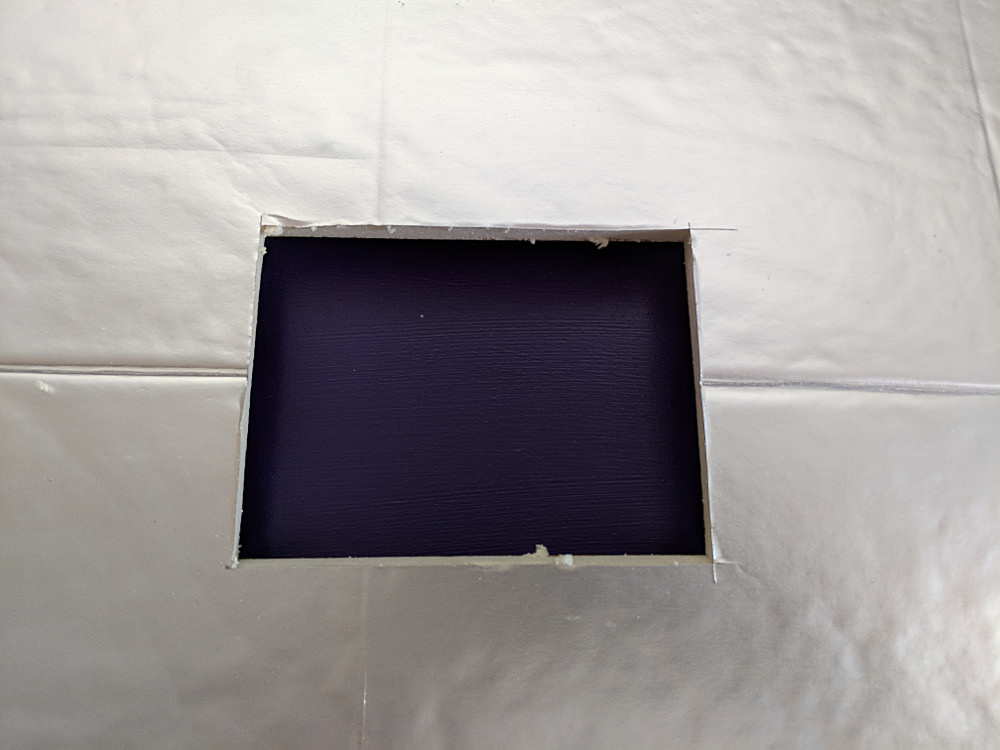
So my first board was easy – but the second one was going to go right over an electrical outlet. And I wanted to be able to continue to use that outlet, so I needed to cut a hole in the board and finish those edges.
Don’t worry – it’s not hard!
Measure your space and cut a hole in your board just a little bit bigger than your outlet cover.
This stuff is easy to cut with a simple X-acto blade.
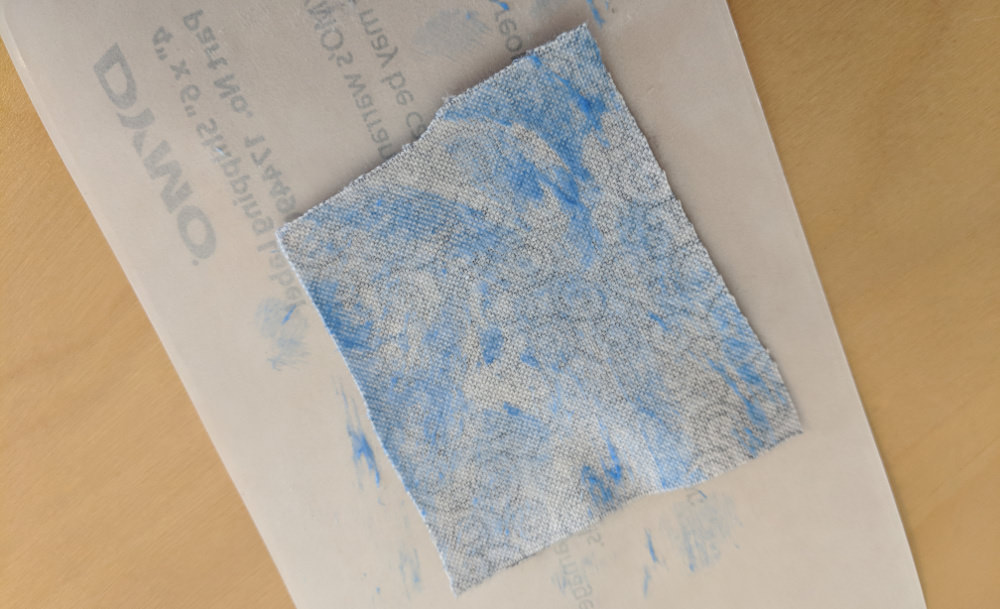
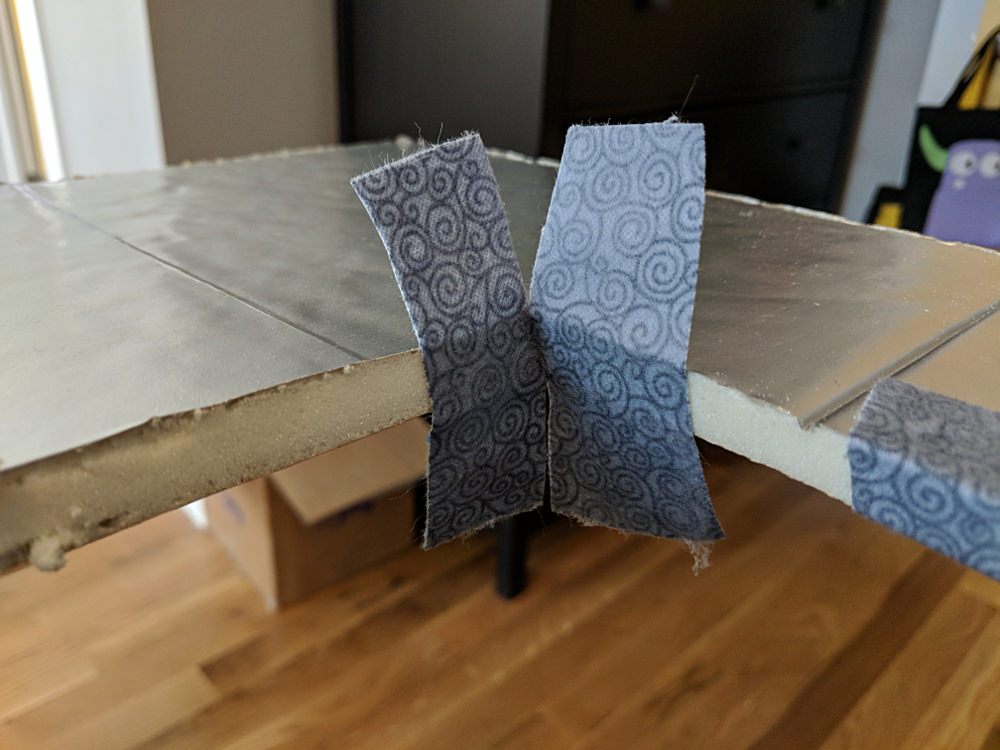
Now cut four squares of fabric roughly 2-3 inches square. It doesn’t not have to be exact – or even especially neat, as you can see with mine.
Cover the back of one square of fabric with glue.
I used a Uhu glue stick – not my fabric glue stick. I wanted a permanent hold here.
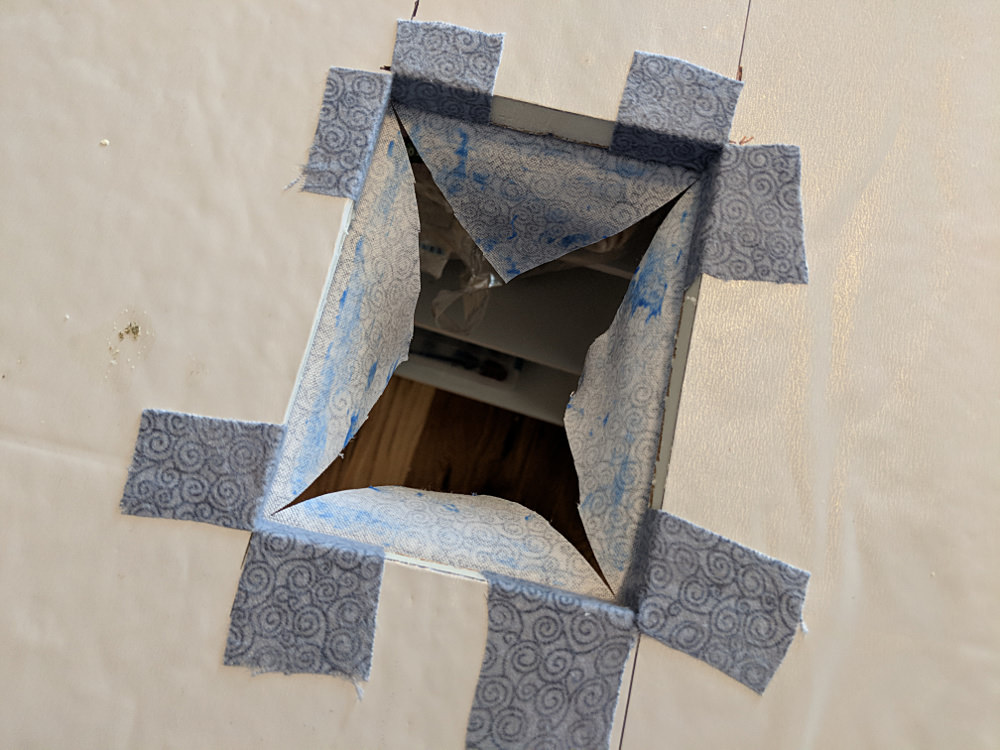
Stick the square right into one corner of your cutout and press it in place, as shown.
Now use a sharp pair of scissors to snip down from the top and up from the bottom – right on the fold created.
You want to cut very close to the surface of the board – with just a few threads to spare.
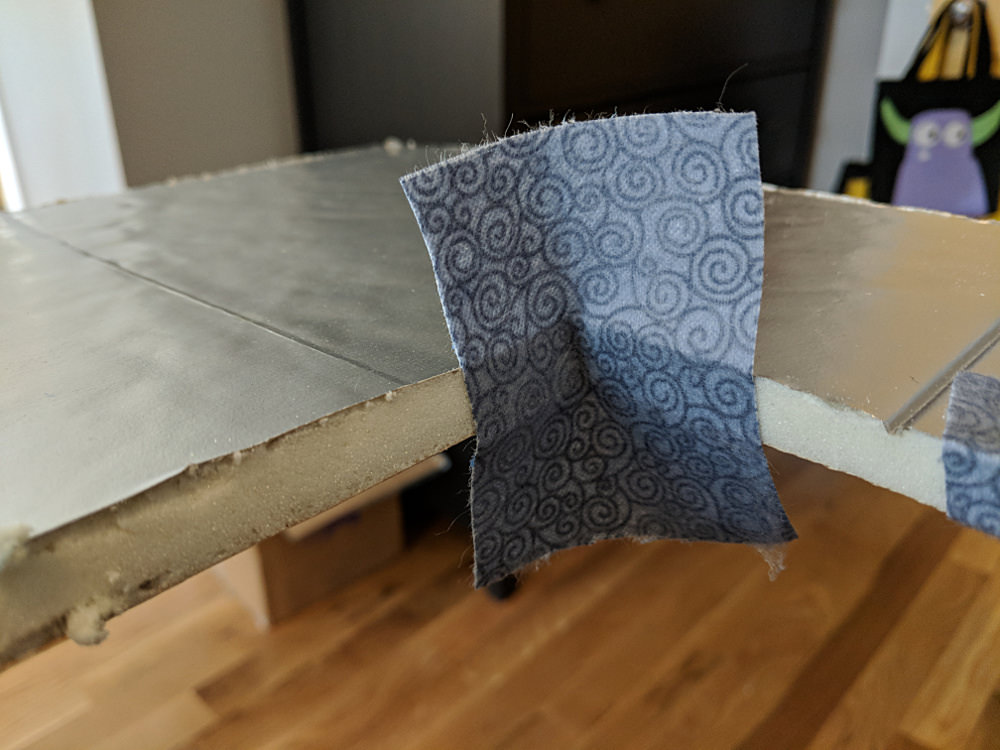
Now folds those flaps down and smooth them onto the front and back of the board.
Repeat for the other three corners.
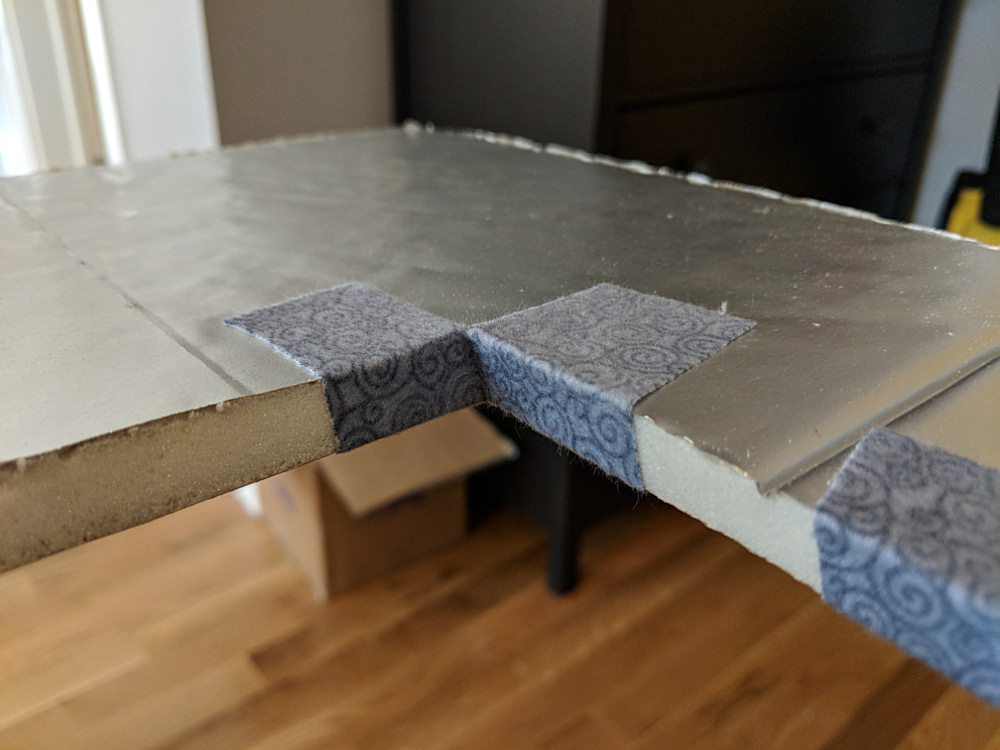
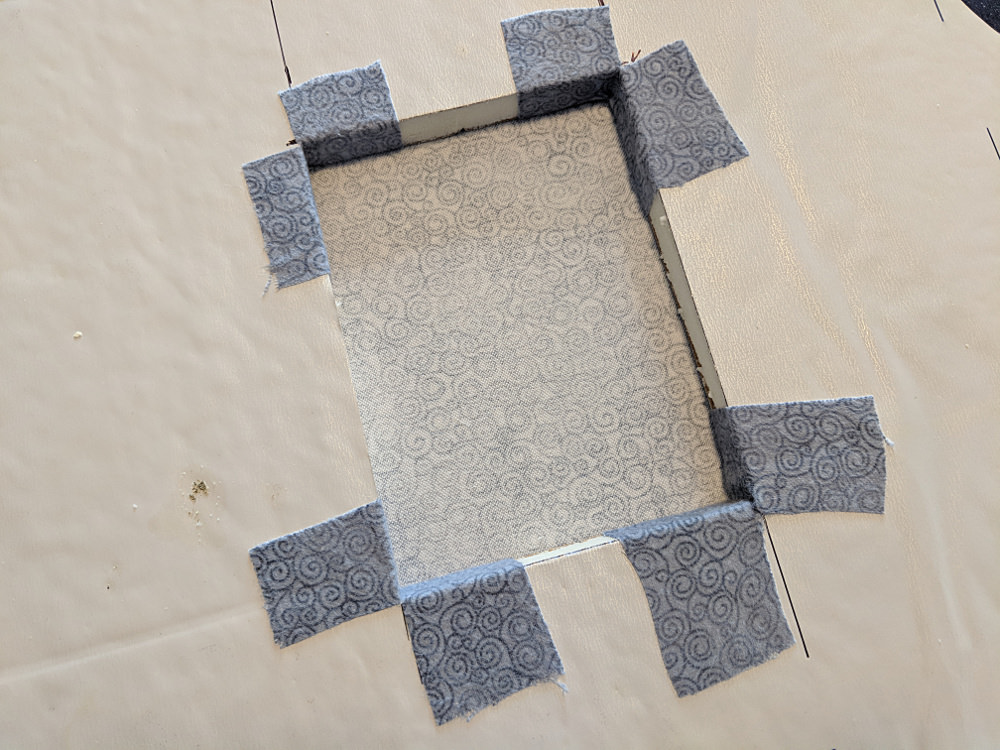
Now just cover your board like a showed in the first part of the tutorial. Pretend that hole isn’t even there.
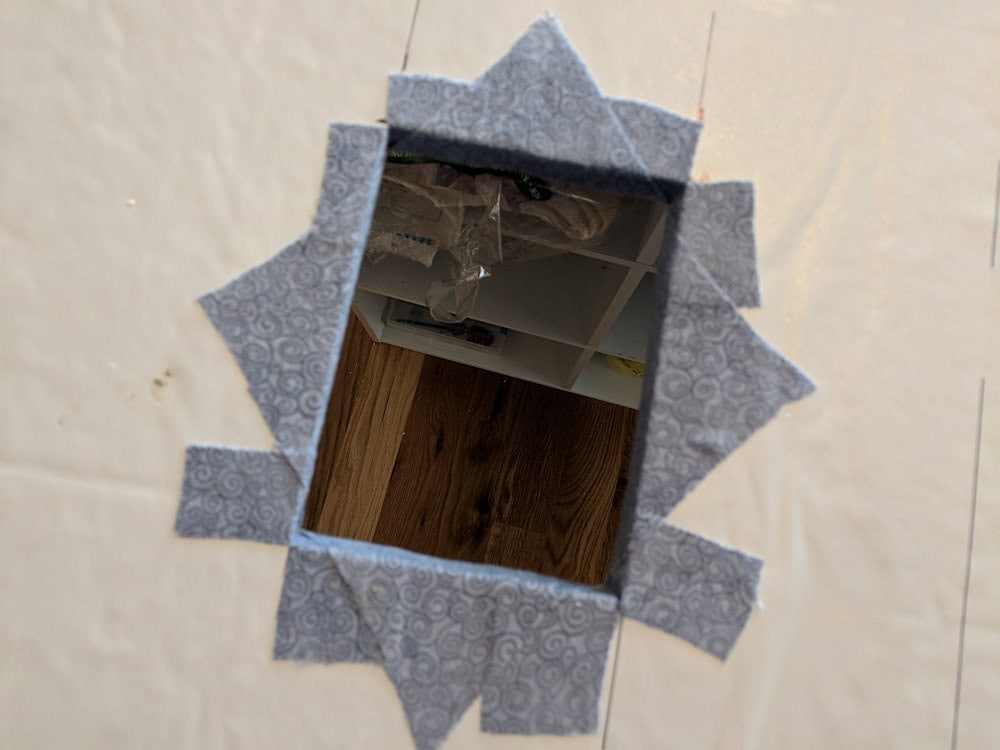
When you flip your board over, you’ll see the back of that fabric through the hole.
Make sure the board is on a flat surface (so you have something to press against) and coat all the fabric inside the cutout with glue.
Now use a pair of sharp scissors to cut an X in that fabric from corner to corner.
Pull those triangle flaps to the back side of the board and smooth them in place.
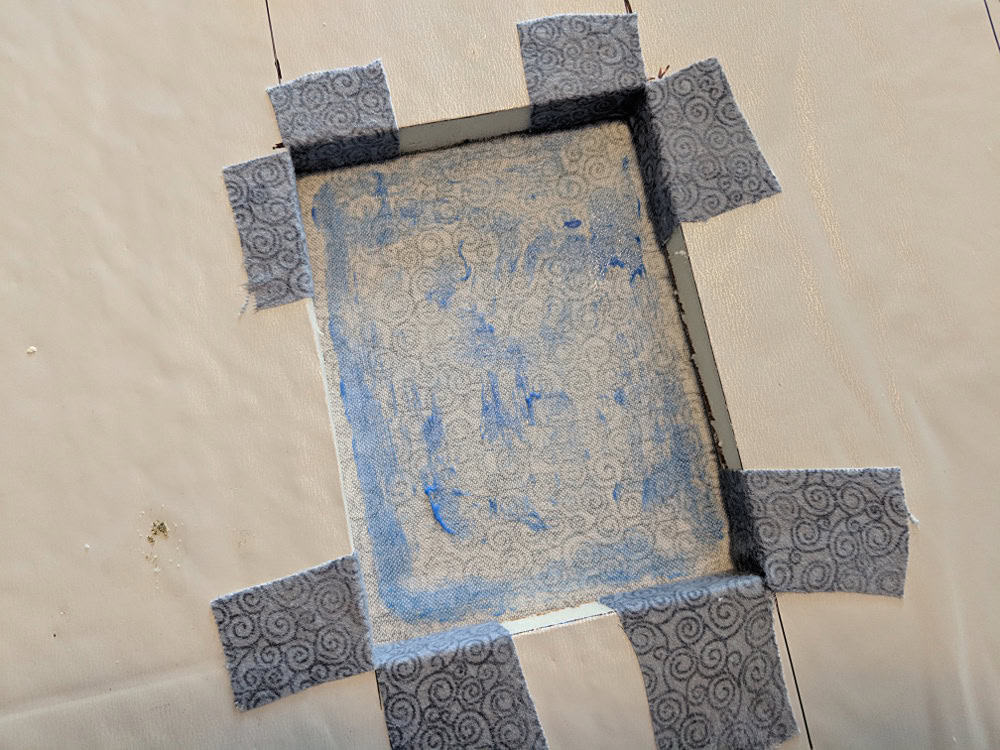
Sorry – I was using my camera’s autofocus and it focused on what it could see through the hole, instead of the fabric treatment around the hole. But I think you can still see what I did, blurry as it is. 😛
That’s it! This board is ready to hang, just like the first one.
Ta da! I have a design wall!
Tomorrow I’ll show you the small improv quilt I already used it for. 🙂
Pieced Bulletin Board
I needed my board to be pretty simple so it wouldn’t distract from whatever I’m designing on it.
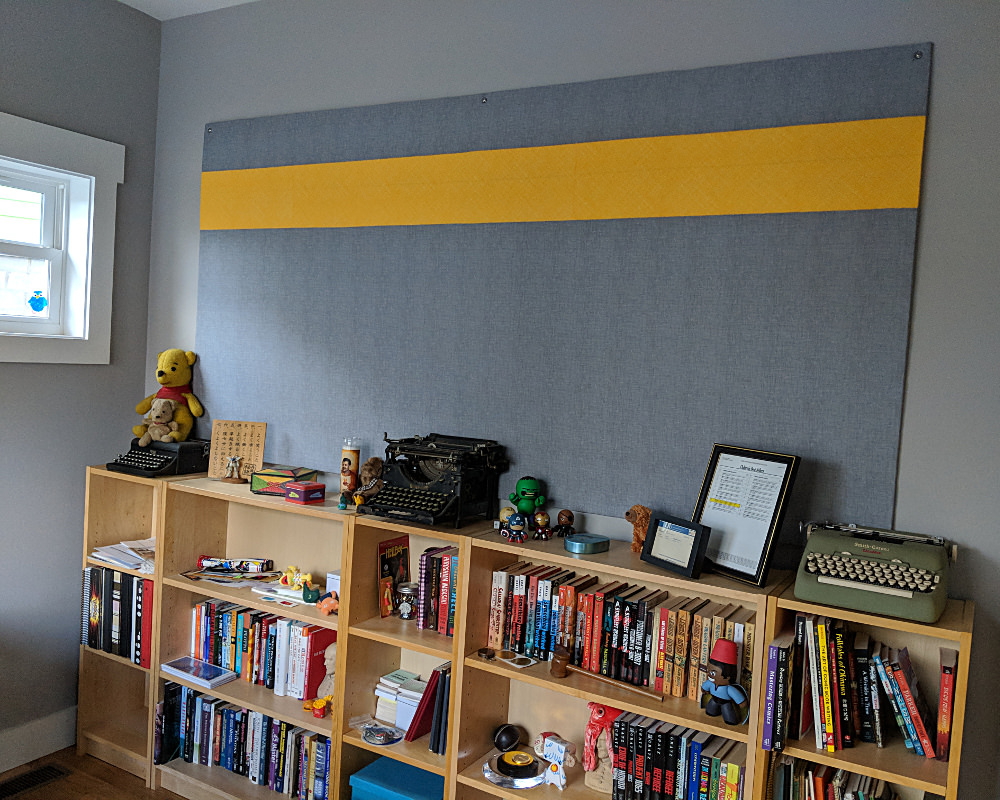
But my husband wanted a similar board to outline his next book on – and he wanted it to have a bit of design. Nothing too fancy – but just a little extra pizzazz.
Here are the fabrics he chose.
That gorgeous gold is Hatch in Citrus and the grey is Sketch in Dove – both from Timeless Treasures. He doesn’t need fabric to cling to his board, so I just used regular quilting cotton instead of flannel.
And here’s his finished bulletin board.
It’s all ready for him to start hatching his next novel!
I love having a design wall again! It makes it so much easier to really SEE the layout of a quilt in progress.
This post contains affiliate links. That means I make a little commission if you buy something after clicking through. All affiliate links are marked with an *.
Kawaii means ‘cute’ in Japanese, and when it comes to amigurumi… there’s a lot in the face!
I make most of my amigurumi as bigger plush toys, that are cute… but not super cutesy. Real human people have their eyes at the halfway point of their face, and this is where I put a lot of my animal’s eyes:
Cute, right?
I’ve drawn up a little graphic of what it looks like to put eyes at the halfway point on a sample bear:
But what if you want to make your amigurumi even CUTER? Even more kawaii?
Try putting the eyes even lower on the face, and spaced further apart! Check out this cutie!
Even cuter! Squee!
Play around with eye placement on your next stuffed animal!
In fact, one of my most popular blog posts is this one where I talk about putting colors together.
But maybe you’re not into wearing lots of different colors. I have another great color combo for you: a neutral + a pop of color!
How to do it
My philosophy for mixing neutrals and color is to mix warmth, but keep the darkness the same. For example, I mix a warm color with a cool neutral… but keep them about the same lightness.
Here’s a little chart showing some ideas:
See it in action!
I just finished knitting Dromos (well… actually, I finished knitting it a long time ago, but I just finished weaving in the ends!), and I just love it. It combines a medium brown with a soft blue.
Here’s a close up:
Yummy, right? It’s a warm brown mixed with a cool blue, and they’re both similar darkness and a similar muted tone.
And do you remember Phi?
A cool grey plus a warm orange… both fairly dark. Delicious!
Dark grey and lime green? Oh, yeah.
Bonus: whenever you use different colors in a project, it’s an opportunity to stash-bust and use up some odd skeins you might have on hand! Stripes are a stash-busters best friend!
Have you done this before? What’s your favorite color combination?
Last winter, our (very old) house was freezing. Even with the furnace running full blast, we couldn’t get the temperature above 60 degrees (to be fair, it was below -20 degrees outside!)
Obviously, that’s not good. So, one item on this summer’s to-do list was to get attic insulation.
You get what you pay for
You can hire a dude to throw some insulation in your attic for pretty cheap. But I’m not an expert in insulation. How do I know if it’s really going to keep our house warm? How do I know if I’m getting a quality product?
I believe that with most things, you get what you pay for. We found a company that cost a bit more, but I could tell they were craftsman who took pride in their work. They gave us references, brought photos showing the kind of work they do and carefully answered our questions. They were even honest about what improvements wouldn’t help, even though doing that work could have meant more money for them.
And, their work has a lifetime warranty, meaning that I can call them if I have trouble with their product! I love quality workmanship and a great company!
Now, let’s chat crochet patterns…
Every once in a while, I get a comment on my facebook page saying something like, “why is this pattern $5? I can get one for free online.”
Yes, you can get a free pattern online. But what’s the quality of that pattern?
I’m not saying that all free patterns are bad. In fact, many big companies use free patterns as a form of advertising, so they spend big bucks to publish quality patterns to give away to their customers.
But there are a lot of patterns that someone threw up on their blog or Ravelry. How do you know the pattern is correct? How do you know that you won’t be pulling your hair out halfway through because they instructions are terrible?
When you buy a pattern from me, you’re paying for a quality product. You’re paying for:
A well-written pattern complete with progress photos
The right to email me and get help if you have trouble (like a warranty!)
A very large archives of photos and videos to help you through every step of the process
A happy crocheting experience!
I can’t tell you how many people email me asking for help on a cruddily-written free pattern that they found online. I tell them that they’ll need to contact the designer for help… and very often, they tell me that the designer doesn’t reply! To be frank, if someone posts a pattern on their blog, they don’t have an obligation to help you!
What result do you want?
If you’re very skilled yourself, then you might be willing to take the extra time to sort out the hassles with a poorly-written pattern. If I was skilled in insulating attics, maybe I’d be willing to hire a cheapo guy and finish up the work myself.
But most of us aren’t designers or handymen. When we start a project, we want it to be easy and stress-free. That’s what you pay for when you buy a quality product!
Right now, you have 2 choices when it comes to crochet hooks. You can go to a store and purchase a hook that’s been made in the millions by a manufacturer or you can purchase a hand-carved, custom crochet hook.
In the future, I think there will be a third option. Hang on to your crochet hooks.
What’s wrong with the current options?
When a manufacturer makes a crochet hook, they’re trying to make one that will appeal to a large number of people. Their goal is to sell them by the thousands/millions.
While there are lots of different designs, there might not be a hook that’s perfect for you. Especially if you have small hands or a unique crocheting style.
The hand-carved hooks can be personalized (for example, to fit a smaller hand), but they are pricey. This makes purchasing one ‘just to try out’ out of reach for most consumers.
Crochet Hooks and 3D Printing
Have you heard of 3D printers? They’re basically printers that use a resin (instead of ink) to create a 3D item.
Less than a decade ago, these printers cost tens of thousands of dollars and were only used by researchers and companies. Now, though, there are a selection of 3D printers available in the $500 range, meaning they’re becoming practical for home use.
You probably have purchased a pdf pattern online for knitting, crocheting or sewing. These are usually patterns made by independent designers (like me!) that can be produced without the costs involved with printing & distributing a book.
This model allows independent designers to create patterns for niche markets. For example, a giant company might not be interested in spending thousands to produce a squid pattern, but as a pdf pattern (without much cost overhead), designing an adorable squid is practical! Yay, niches!
I predict the same thing will happen with crochet hook designs. You will be able to purchase 3D Printer Plans for a crochet hook, that you can print on your printer at home.
The cost of these plans would be similar to purchasing a pdf pattern, and would allow the customer to purchase a crochet hook almost exactly to their liking. Independent hook designers will cater to different hand shapes and styles, exactly as they do now with stitching patterns.
Isn’t that such a cool future?
What do you think? Do you see print-at-home hooks in your future?
This week, I’m headed off to Stitches South and teaching a packed schedule of classes!
One of the classes I’m teaching is Designing Crochet Afghans. Since I’ve designed a few afghans in my day, I’m excited to teach other folks the tools they need to design their own!
It’s a great resource for crochet stitch patterns! I’m terrible at coming up with new stitch patterns… but with a book like this, you can be terrible and still come up with new afghan designs. Isn’t that great news? (If you’re interested in more info, click over to my review of the book)
Check out this pretty little swatch I made from one of the stitch patterns in the book:
Can’t you picture this as a full-sized afghan? Or this would be a square in an afghan with various squares?
The possibilities are endless!
So, check out this book… and maybe I’ll see you at Stitches South! I’ll report back with photos for those of you who can’t make it!
Best,
Stacey
This post contains affiliate links. That means I make a little commission if you buy something after clicking through. All affiliate links are marked with an *.
Floating in the ether is the idea that designing is a minimum-wage job. It’s an easy myth to buy into, because when you first start, it’s common to spend dozens of hours putting together a pattern that yields a few hundred dollars. And no one likes earning $4 per hour. Or even less.
However, it’s a mistake to think that minimum wage is the ceiling salary for your craft business! Whether you’re designing, crocheting finished items for sale or writing books… you’re starting a business. And businesses are rarely profitable in the first couple of years.
Over time, as you build a following, diversify your offerings and make your business more efficient, your business will grow! And you can earn more than minimum wage! You can even earn a real salary! I’ve chatted to a number of folks in the yarn world who are the primary wage earners for their households or who make as much as they did as they did in a ‘regular’ job. It’s possible!
Why doesn’t everyone do it?
If you can earn a real salary from crafting/writing/designing, then why doesn’t everyone do it? And why does the myth of minimum wage earnings persist?
Running a successful craft business requires more than doing your favorite craft all day long. It requires marketing, doing a little accounting and probably some website editing. It has boring parts.
It isn’t easy, and frankly, it isn’t always fun (Although, don’t get me wrong, it usually is!)… but if you have a passion for a particular craft and want to start a business, then I want you to know that with effort, you can make it work as a career!
2013 Financial Summary
I began FreshStitches in 2008, at which time I worked various part-time jobs concurrently. It was about 2010/2011 before FreshStitches became my full-time job.
You can check out my previous year’s financial reviews: 2011, 2012 and mid-2013.
Here is a graph of my 2013 income sources:
While the majority of my income comes from FreshStitches (mostly pattern sales, but increasingly kits as well), a tidy bit comes from writing books and teaching. This is where time is a real luxury: the 11% I earned in book royalties is from books that were released in 2010 and 2012!
I truly believe that diversity is key. While it might look like I could quit writing books & teaching and still earn 70% of my salary, that philosophy misses the interconnectedness of the components. I can’t tell you how many people see my book in the store, and then come to my website. Or take a class with me and then follow my blog.
Surprisingly often, I see a question posted online (or get an email from someone) that says something like:
I’m wondering how I can homeschool my 6 children, do all the housework and run an at-home business that brings in a 6-figure salary. How can I do it all?
(well, that’s the vibe of the question at least)
There’s no shortage of ‘secrets’ for having it all. Get up at 5am. Tweet while your kids are in the bathtub. Do some magical ‘outsourcing’ for your business.
Want to hear what I think?
You can’t be Superwoman. Something’s gotta give.
I leave clothes in the dryer for longer than I should (multiple days, sometimes), I occasionally buy those frozen ravioli instead of cooking dinner and my business growth is restricted to the amount of work I can do during a normal work-day. (I don’t work nights or weekends!)
In that balance, I run a successful business, exercise regularly, cook dinner most nights and host a rotating list of family/friends as houseguests. Could I have a more successful business? Probably. Could I do a better job at housework? Oh, yeah. But I know that something needs to give, and I let some stuff go!
Internet Envy
On the internet, we have the ability to project the image that we want. This leads to oodles of women online touting all of the fabulous things they can do. You might be tempted to believe that she’s really pulling the Superwoman thing off.
Real life is a little different than this fantasy image.
The woman who works full-time at a law firm and fosters orphan puppies has a housekeeper that she doesn’t mention.
The business-owning woman who cooks fabulous meals has a husband with a flexible schedule who can watch the kids in the evening.
The marathon-running mom of 5 has a mother who lives next door and does most of the family’s cooking.
Need I go on?
Almost no one is actually uber-amazing. Not even me. I’m just a normal person who keeps life rolling by setting a few things aside when things get crazy.
Do you feel better?
So, tell me… have you been feeling down by comparing yourself to these non-existent Superwomen? Have I convinced you to let it go?
Life’s to short to try to live it any other way than what’s best for you!
Being a knitting/crochet designer is kind of a weird job. Being successful means being part designer, part webmaster, part marketer and part photographer. And you can’t go to school for it. (okay, you can go to school to learn to design, but not do all the other stuff!)
I learned it through the grapevine…
Most of what I know about ‘the biz’, I learned from other designers. Chatting on online forums. Talking in person at trades shows. It took me years to feel like I really got what was going on.
That’s me and Space Cadet pausing for a photo during a chat-session!
I can’t tell you how much I learned about marketing and my brand by chatting late into the night with other designers at conferences!
But now… the Reference Guide!
If you’re a newbie designer, you’re coming in at a great time! You don’t have to spend big bucks traveling to conferences to find out about the ins and outs of the industry… there’s a book about it!
Alex Tinsley (designer behind Dull Roar and also Designer Liason with Malabrigo) has just written an ebook that tells you (basically) everything you need to know to be a knitting or crochet designer.
I just read it. It’s awesome.
Not only is Alex hilarious, but the information in the book is dead-on. She gave me permission to post a looky-loo at the table of contents:
So You Want to Be A Knitting Designer covers how to write patterns, hiring a tech editor, photography, self-publishing, how to work with magazines, marketing, what to do if your idea is stolen, how to wholesale to yarn stores… you name it!
Is this book for you?
Alright, so let’s talk about what this book does and doesn’t do.
This book:
gives you real, authentic help for becoming a designer: including a pattern template, sample emails for sticky situations and advice about submitting proposals that you really need for real design life.
gives you a comprehensive list of resources for finding tech editors, hiring photographers and chatting with other designers.
walks you through the basics of the industry (including the dos and don’ts of asking for yarn support!) in a friendly and honest manner… from someone who’s worked in lots of different parts of the industry.
leaves you feeling confident about doing knitting design as a career (it’s hard, but not mysterious!)
Although the book has ‘knitting’ in the title, it’s equally applicable to crochet designers, too!
This book is intended to helping someone who’s seriously thinking of designing navigate the industry, and already has some knitting experience. It doesn’t contain lessons on how to design, detailed help with taking photographs or address the financial/tax/contract aspects of beginning a business.
Get it!
I would really recommend this book to anyone interested in becoming a designer (whether it’s part or full-time).
Not only does it distill lots of information that’s available in thousands of posts online into one fun & readable document, but it also contains a little bit of extra information that many designers aren’t always willing to post in a public forum (such as how much tech editors are usually paid and examples of email templates in sticky situations).
I’m so happy Alex wrote a book like this… the industry really needed one!