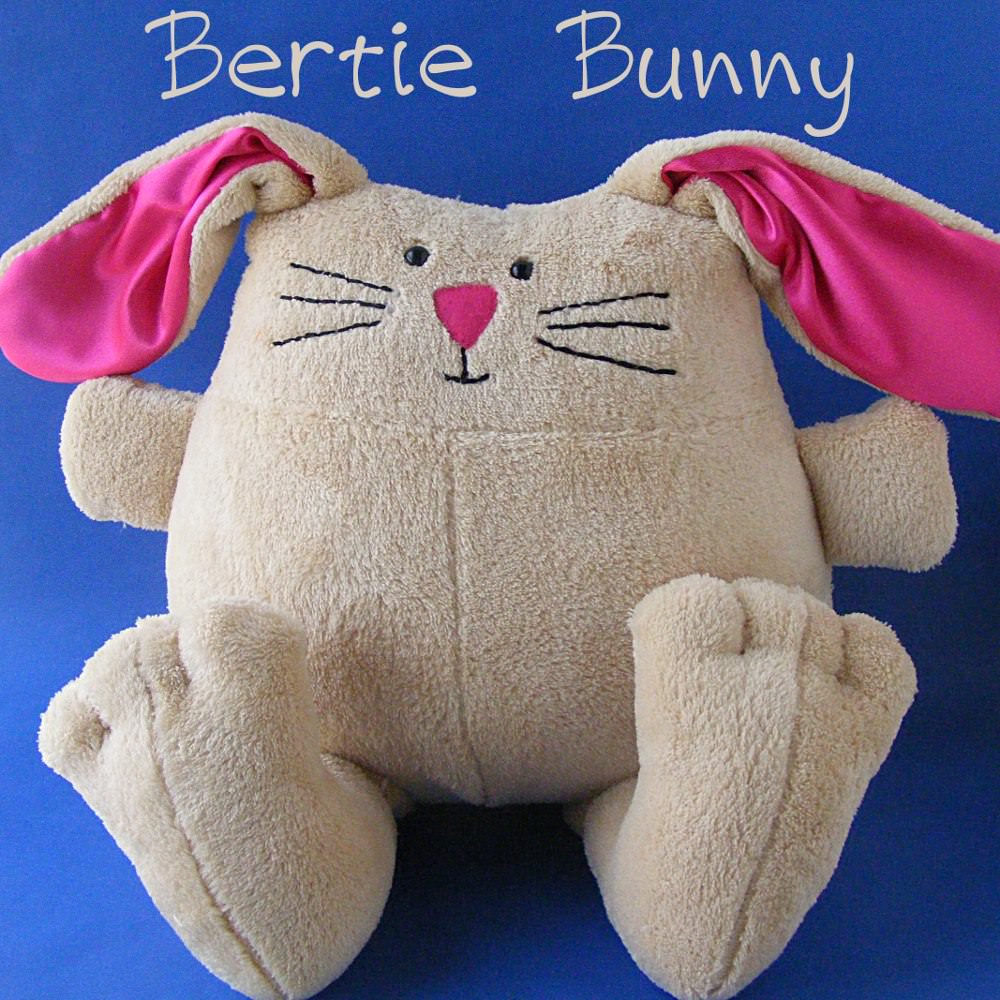
It’s a free bunny softie pattern! With a soft beanie body and small size, this Itty Bitty Bunny is just perfect for Easter baskets! And it’s super easy to make!
It can’t wait to hop into the pocket of someone special. 🙂
Here’s how to make it!
Materials
- scrap bunny-colored fabric
- scrap of pink satin for the bunny ears
- less than a fat quarter of pajama fabric
- embroidery thread for the face (I DMC #3371 and #601)
- plastic pellets (I like PolyPellets Weighted Stuffing Beads)
- polyfill stuffing (I like Soft Touch Polyfil Supreme Fiberfill)
Step 1
Download the pattern templates.
Cut out all materials as directed on the pattern pieces. You should have. . .
- 1 body front piece
- 2 body back pieces
- 2 head pieces
- 2 ears cut from bunny fabric
- 2 ears cut from ear lining fabric
Step 2
Trace the face onto one head piece.

Embroider the eyes and mouth using backstitch and two strands of DMC #3371.
Satin stitch the nose with two strands of DMC #601.
Step 3
Place one ear lining and one ear piece right sides together and sew around the top (curved) edge.
Turn the ear right side out and press. Fold the bottom edges in to the center of the ear and stitch them in place.
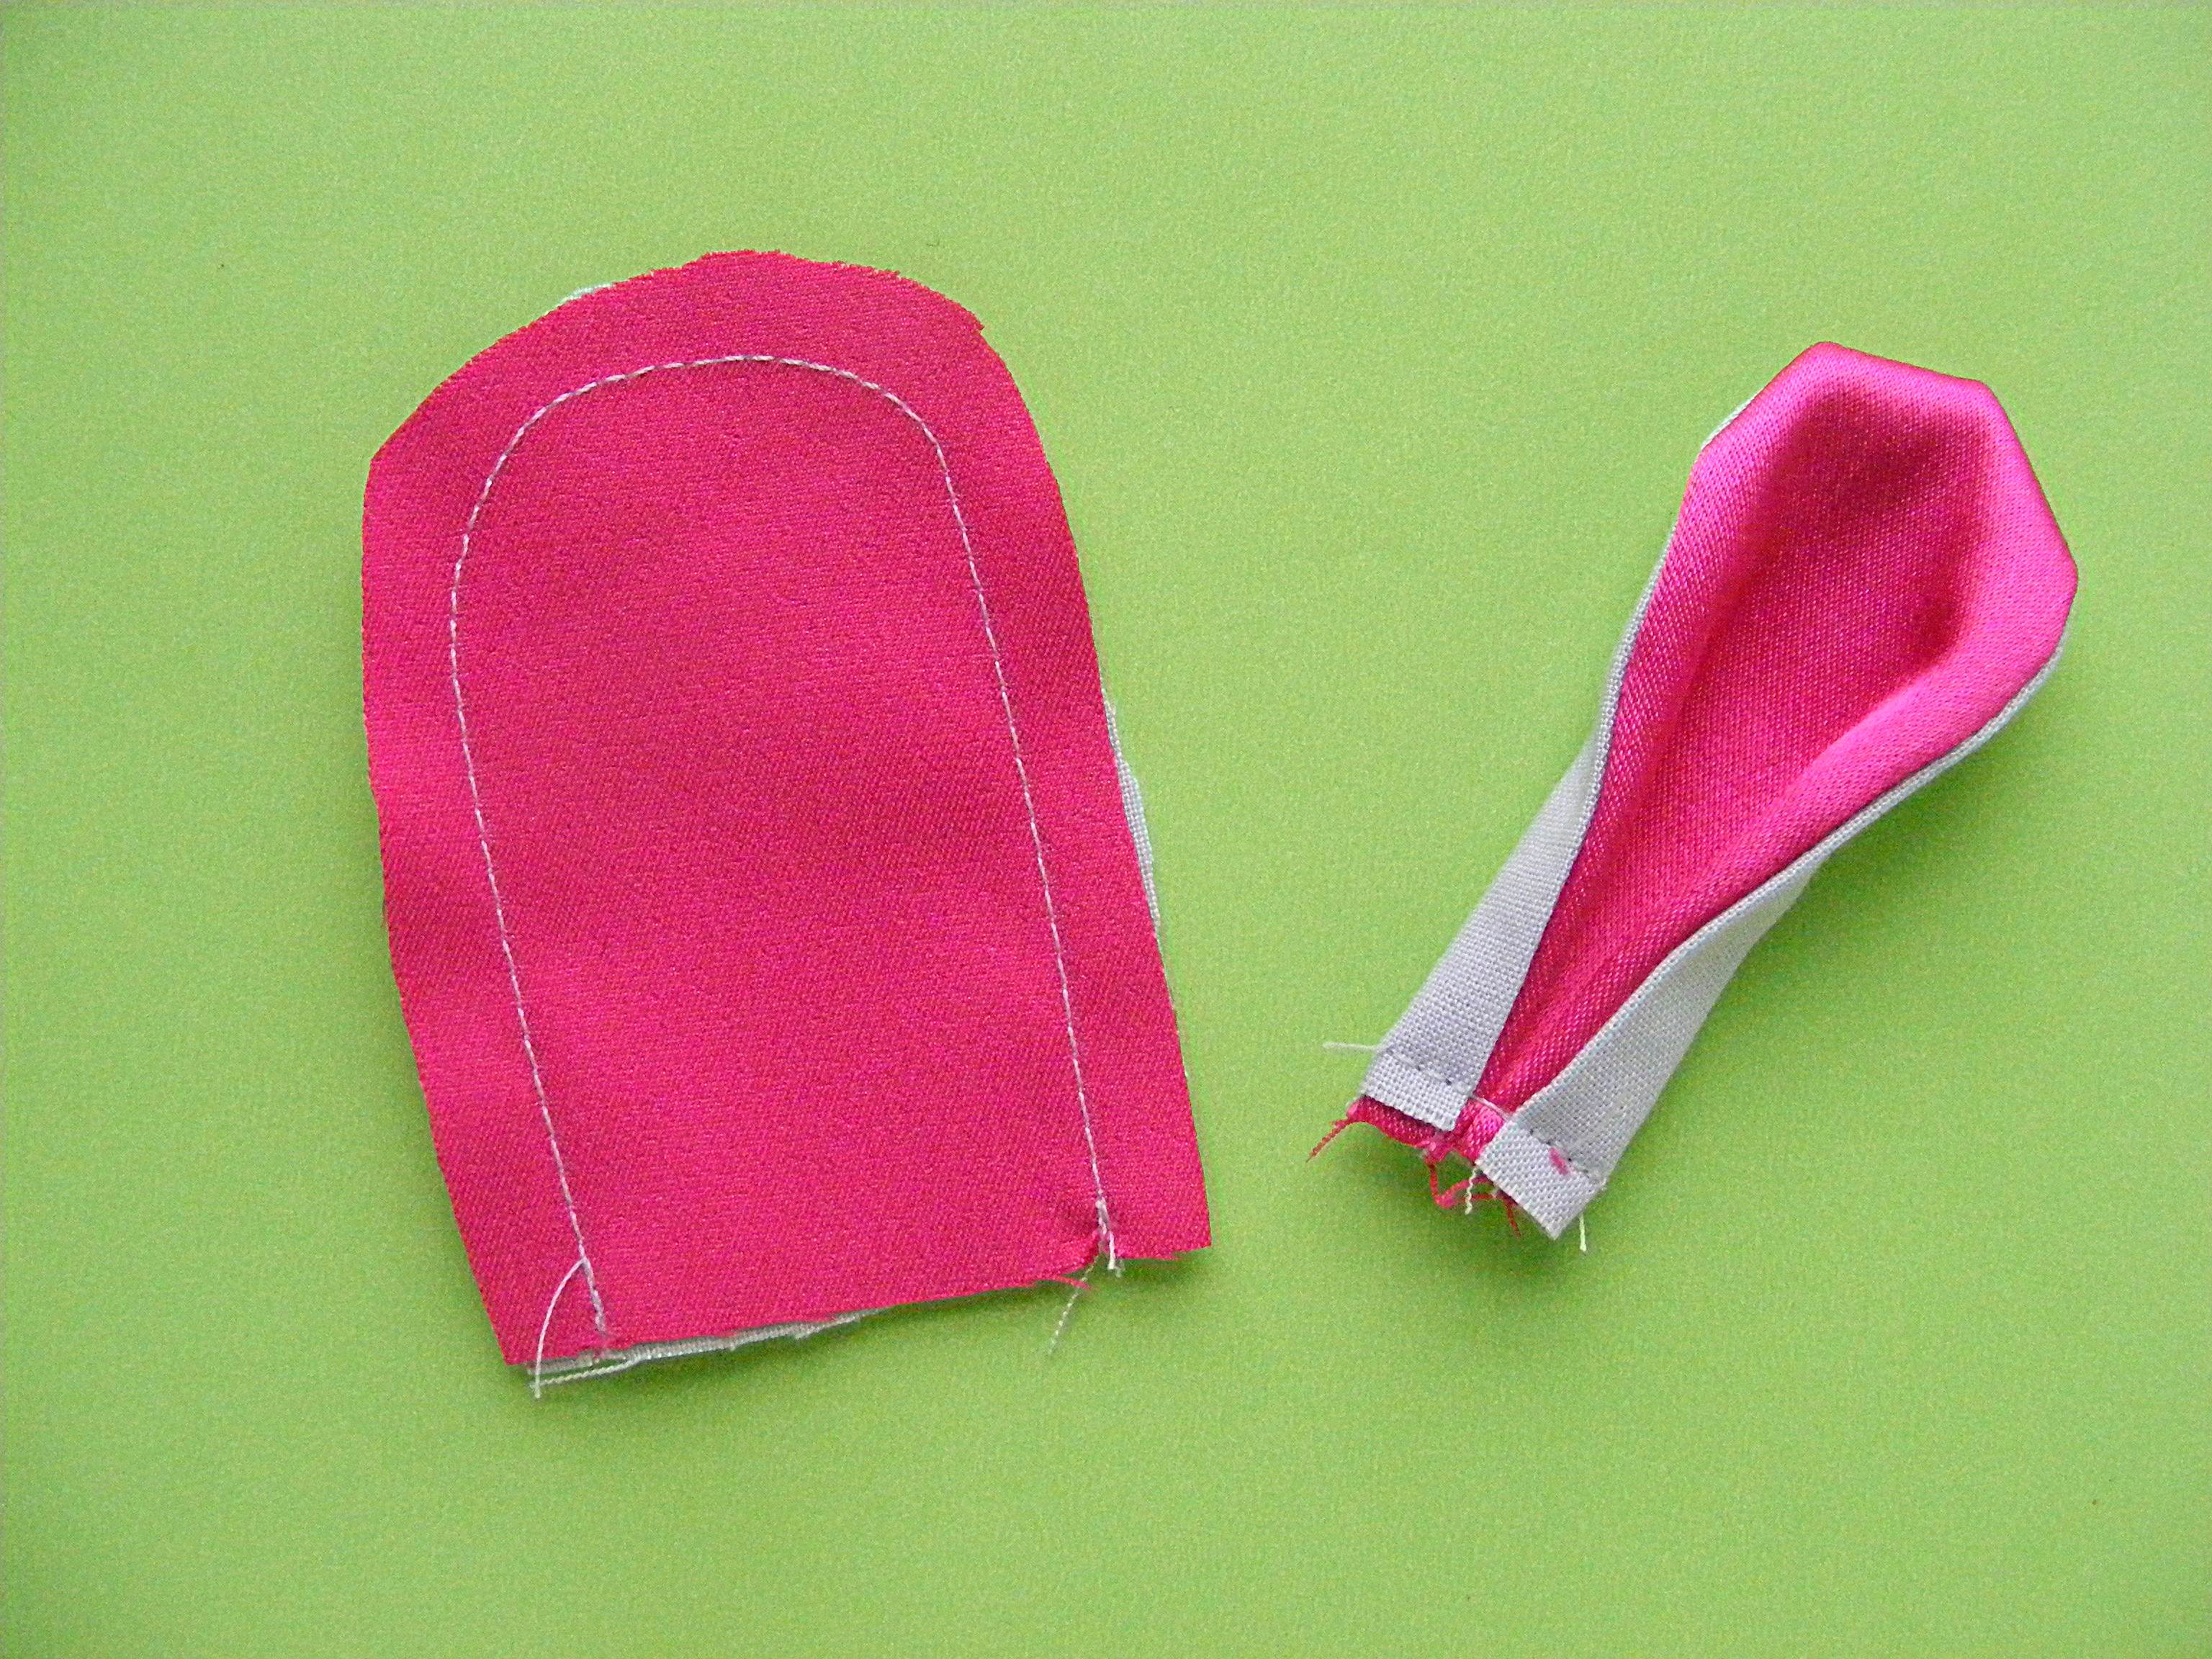
Repeat for the second ear
Step 4
Sew the two body back pieces together along the center back line, making sure to leave a few inches open for stuffing.
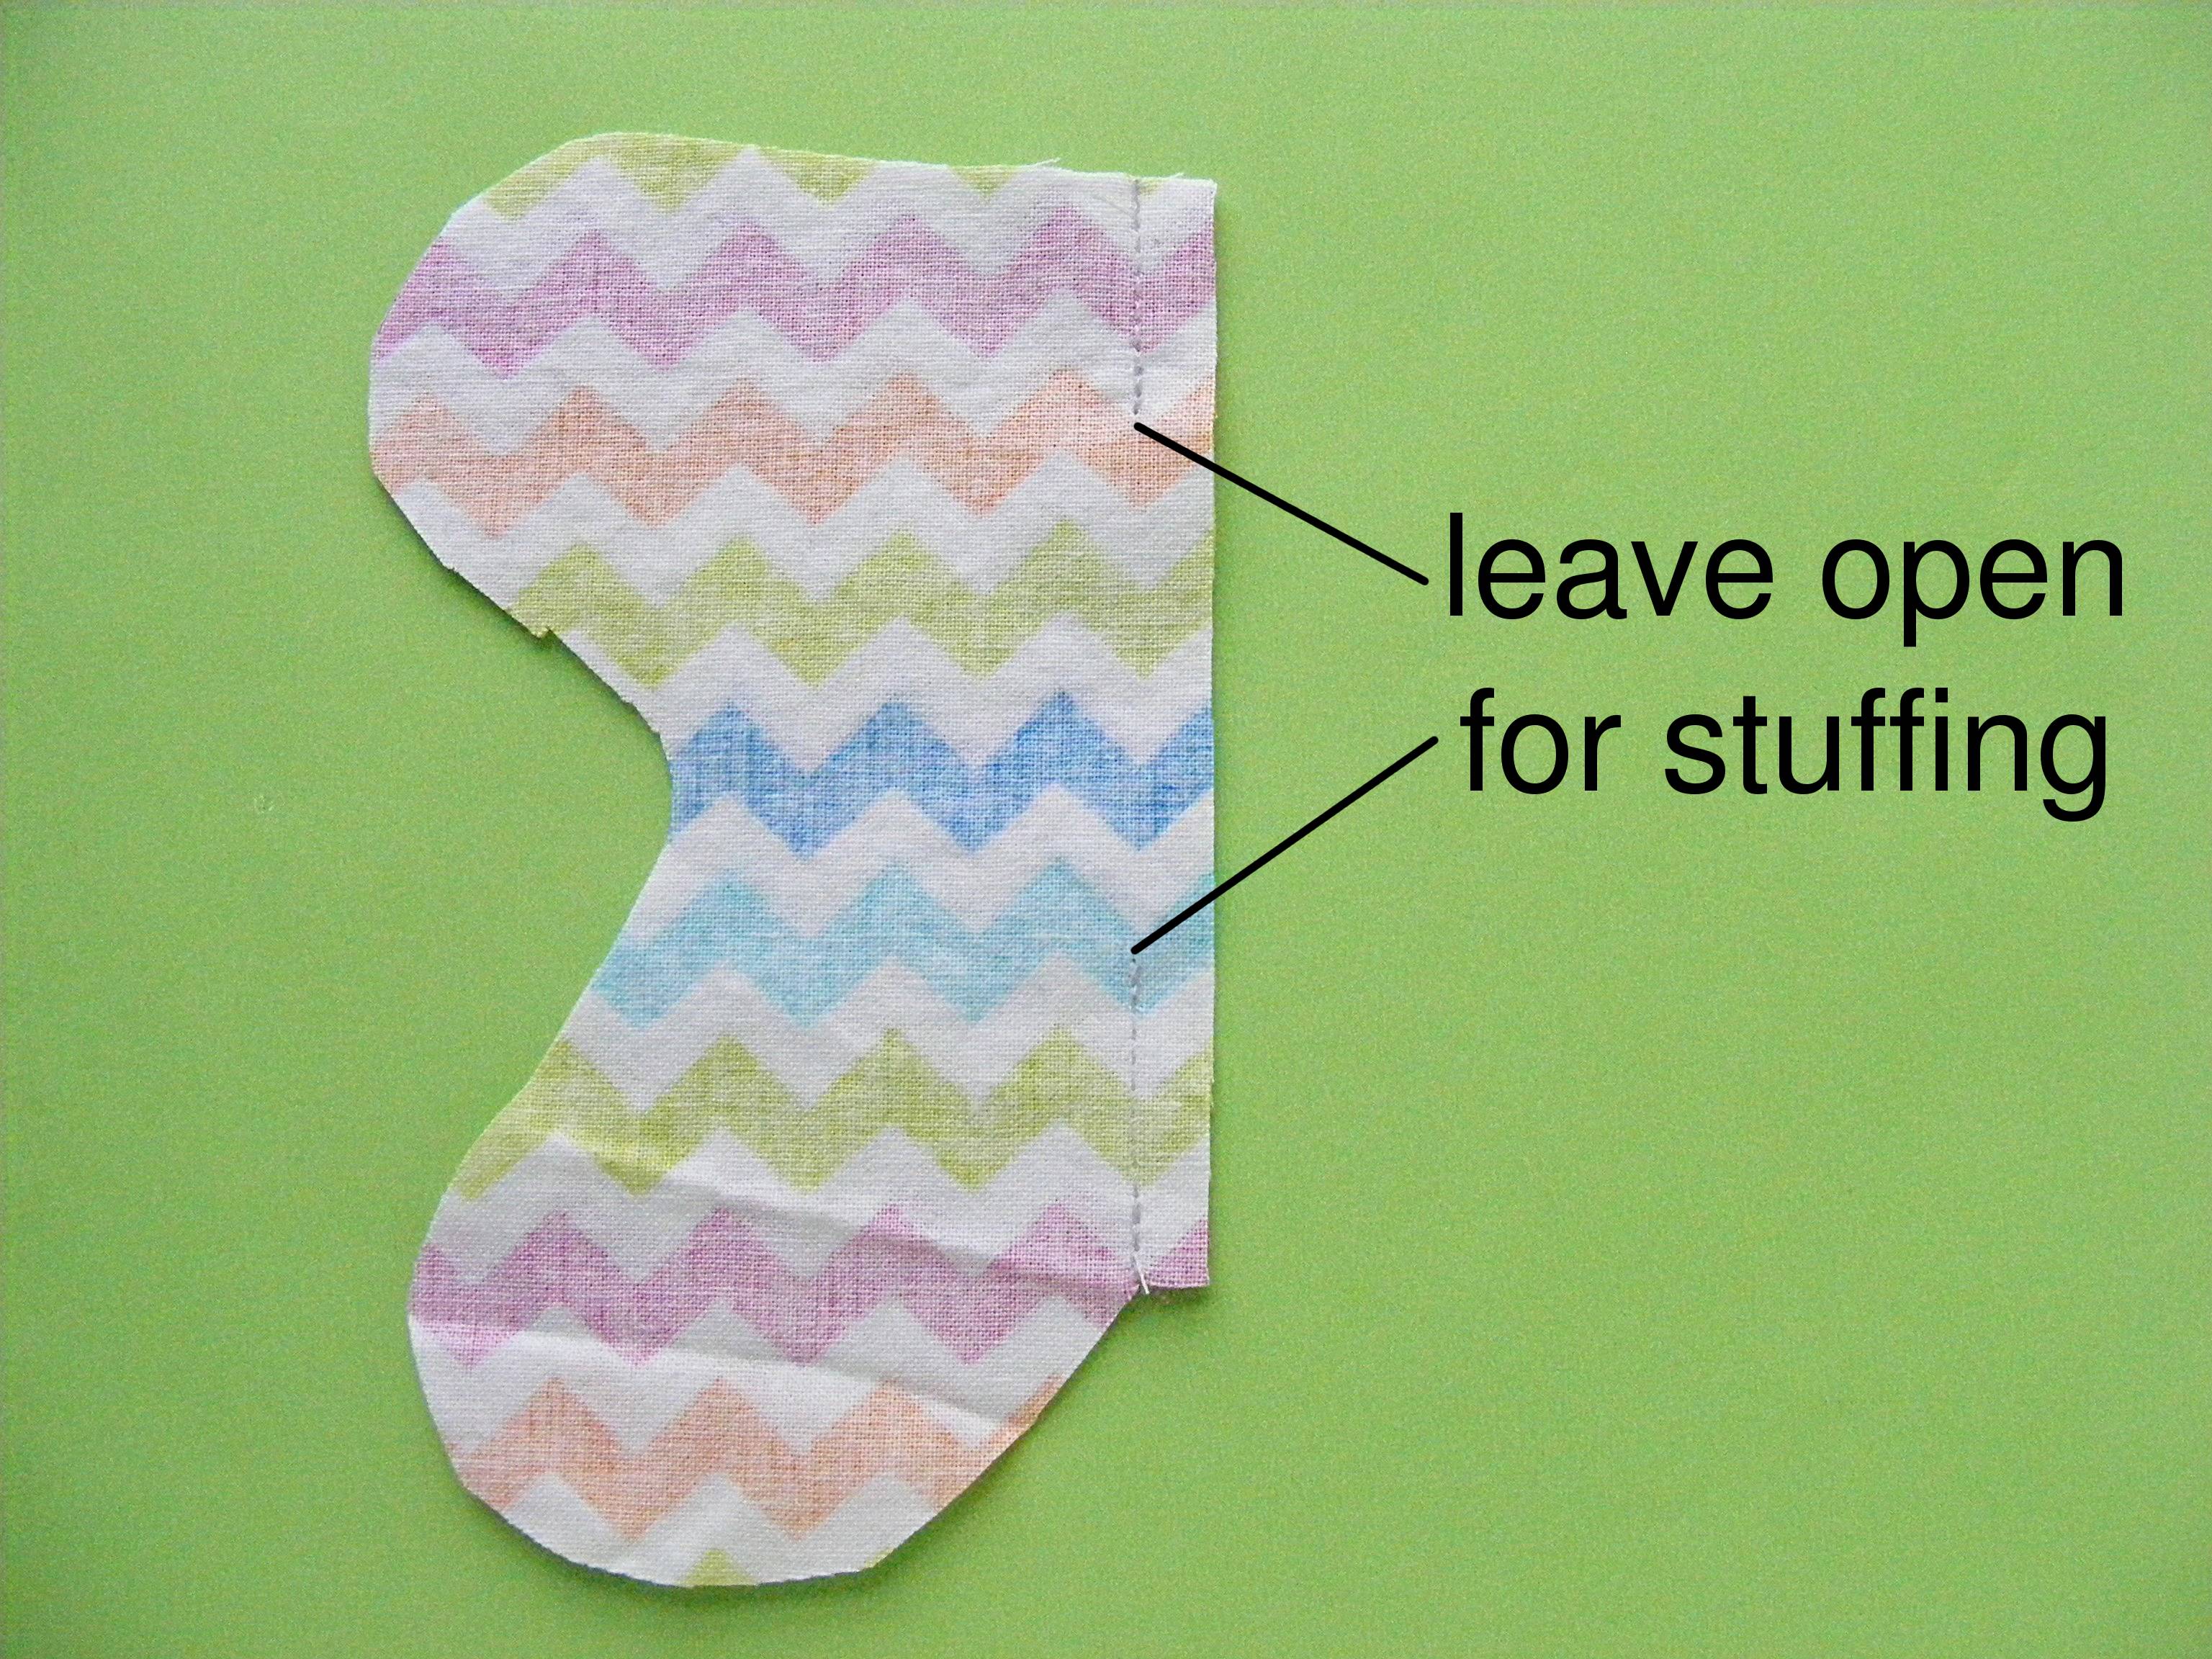
Don’t forget to backstitch at the beginning and end of your stuffing opening.
Step 5
Open up the center back pieces and press the seam nice and flat, including the edges of the stuffing opening. That will give you a nice clean edge to sew when you’re closing up that opening by hand.
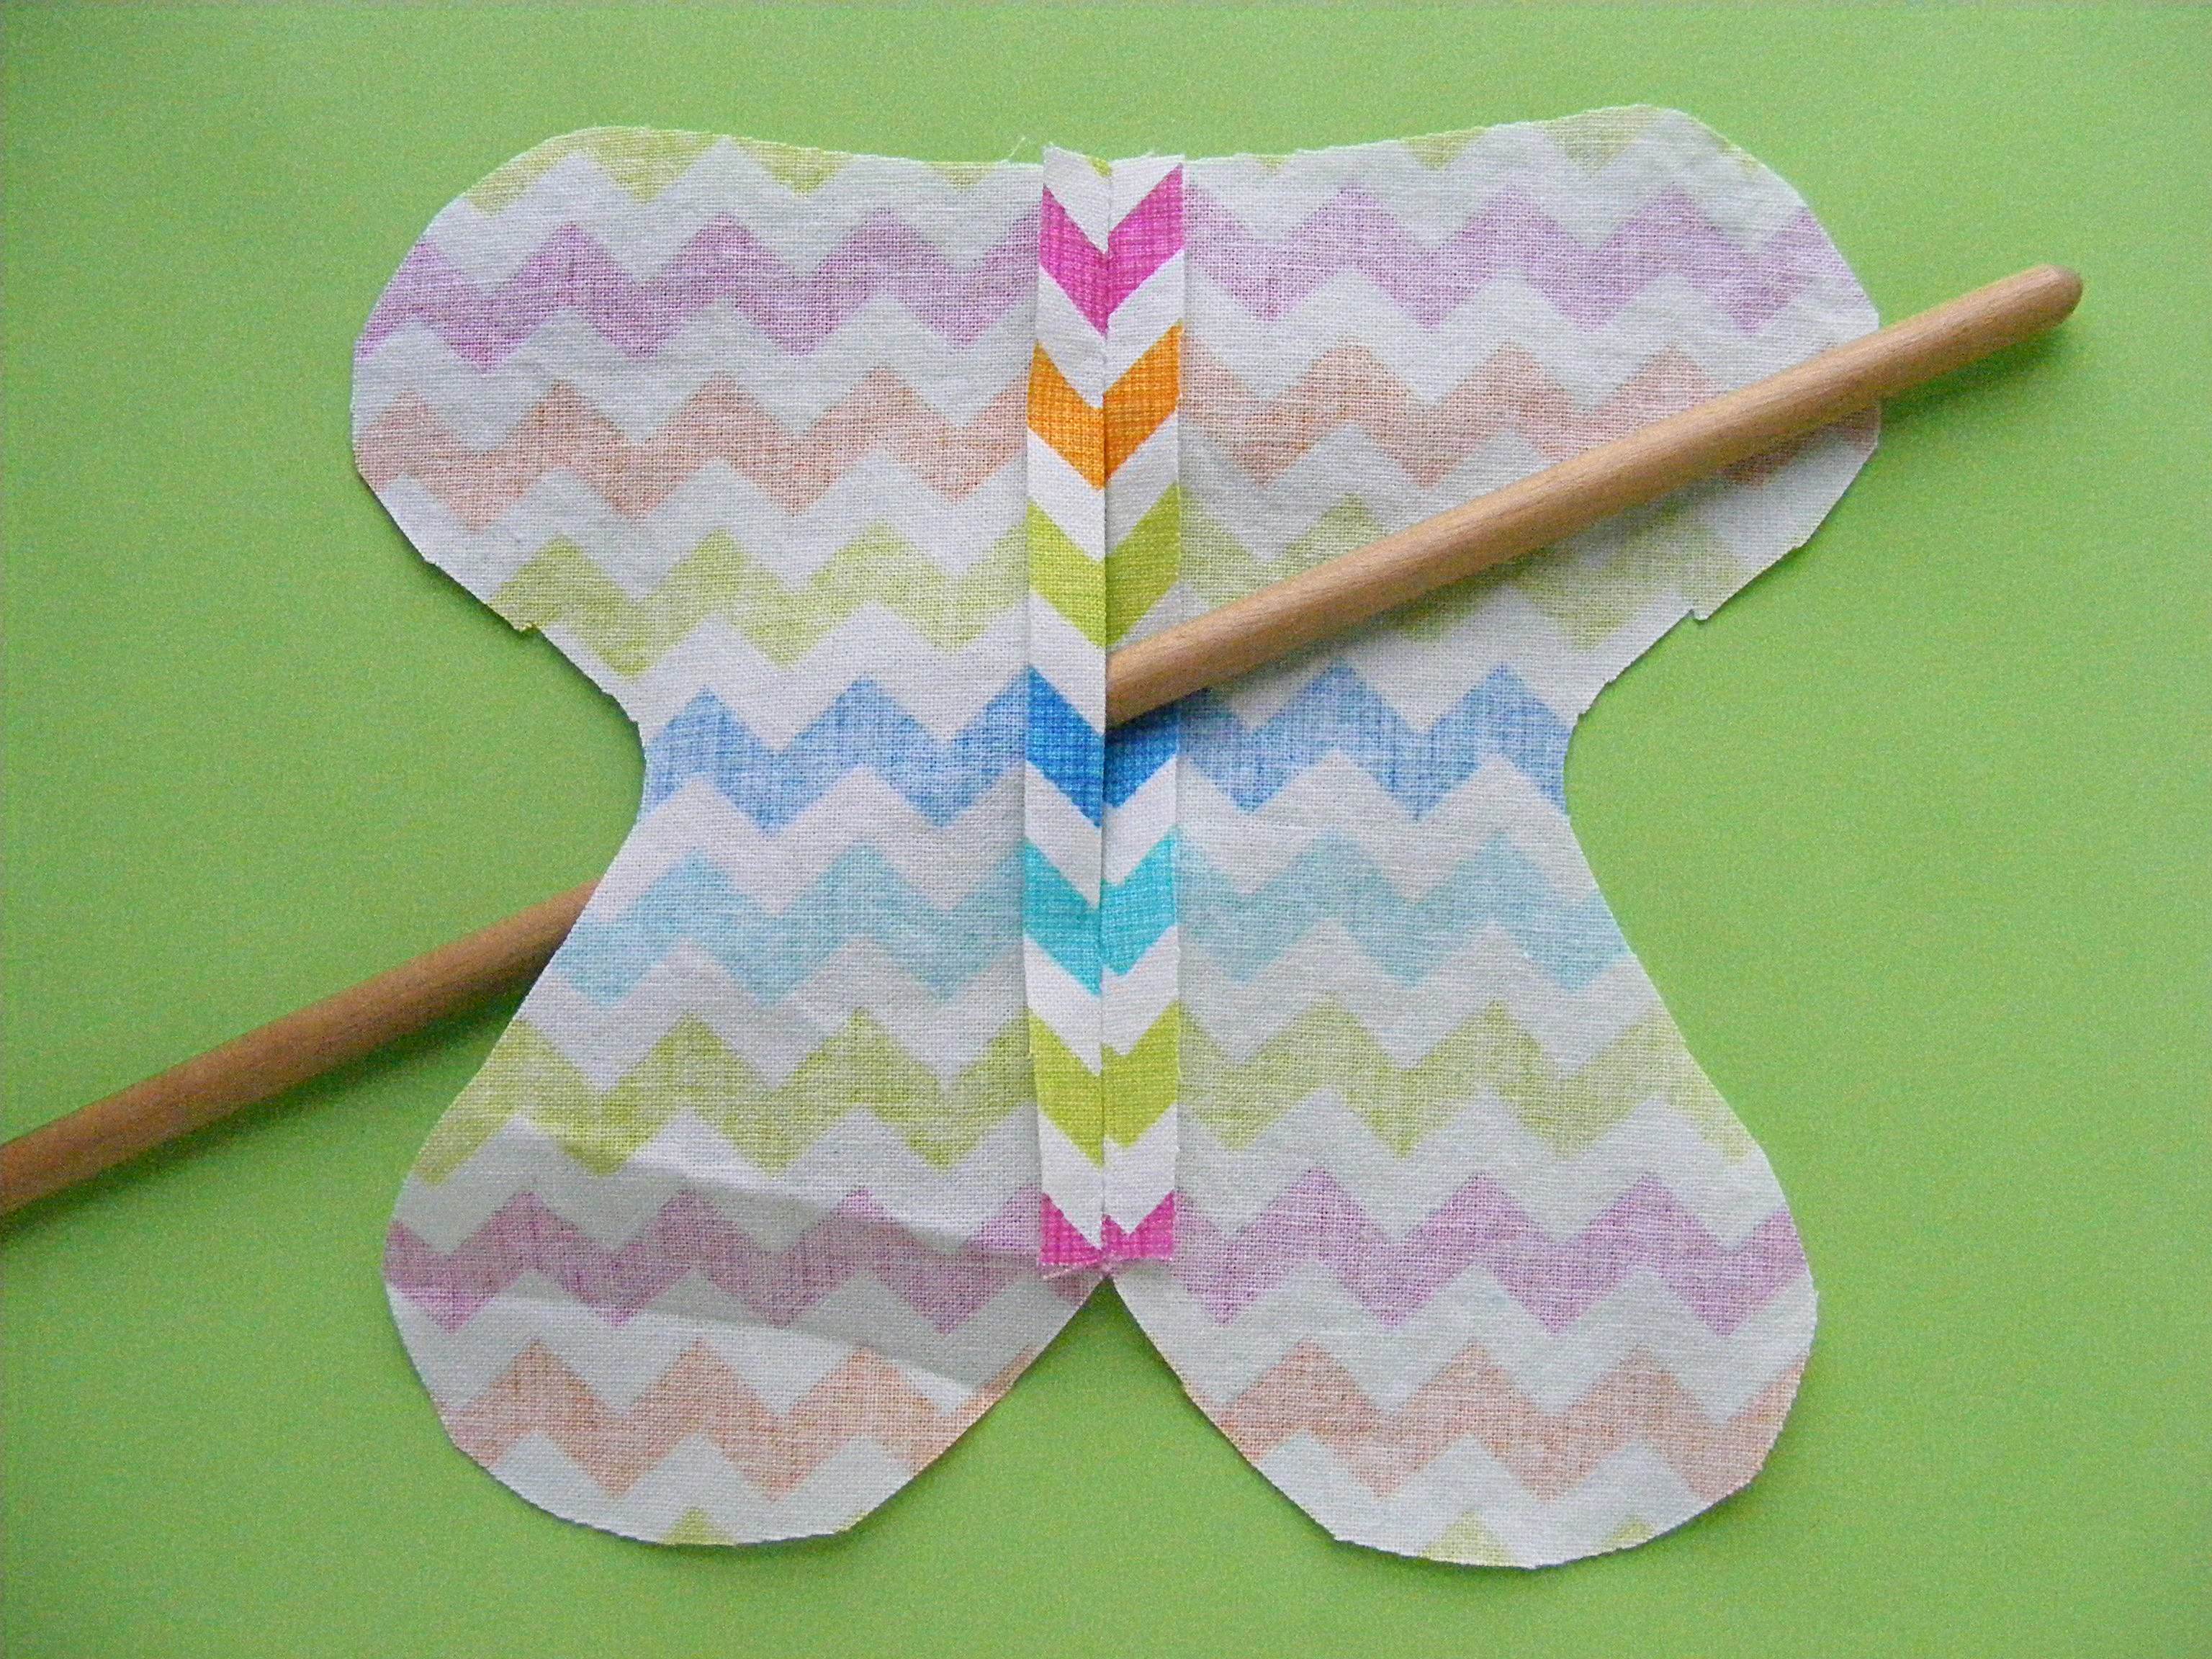
The stick shows where the stuffing opening is.
Step 6
Fold the bottom of the head and the top of the body in half to find the centers. Line those centers up so the head is exactly centered on the body.
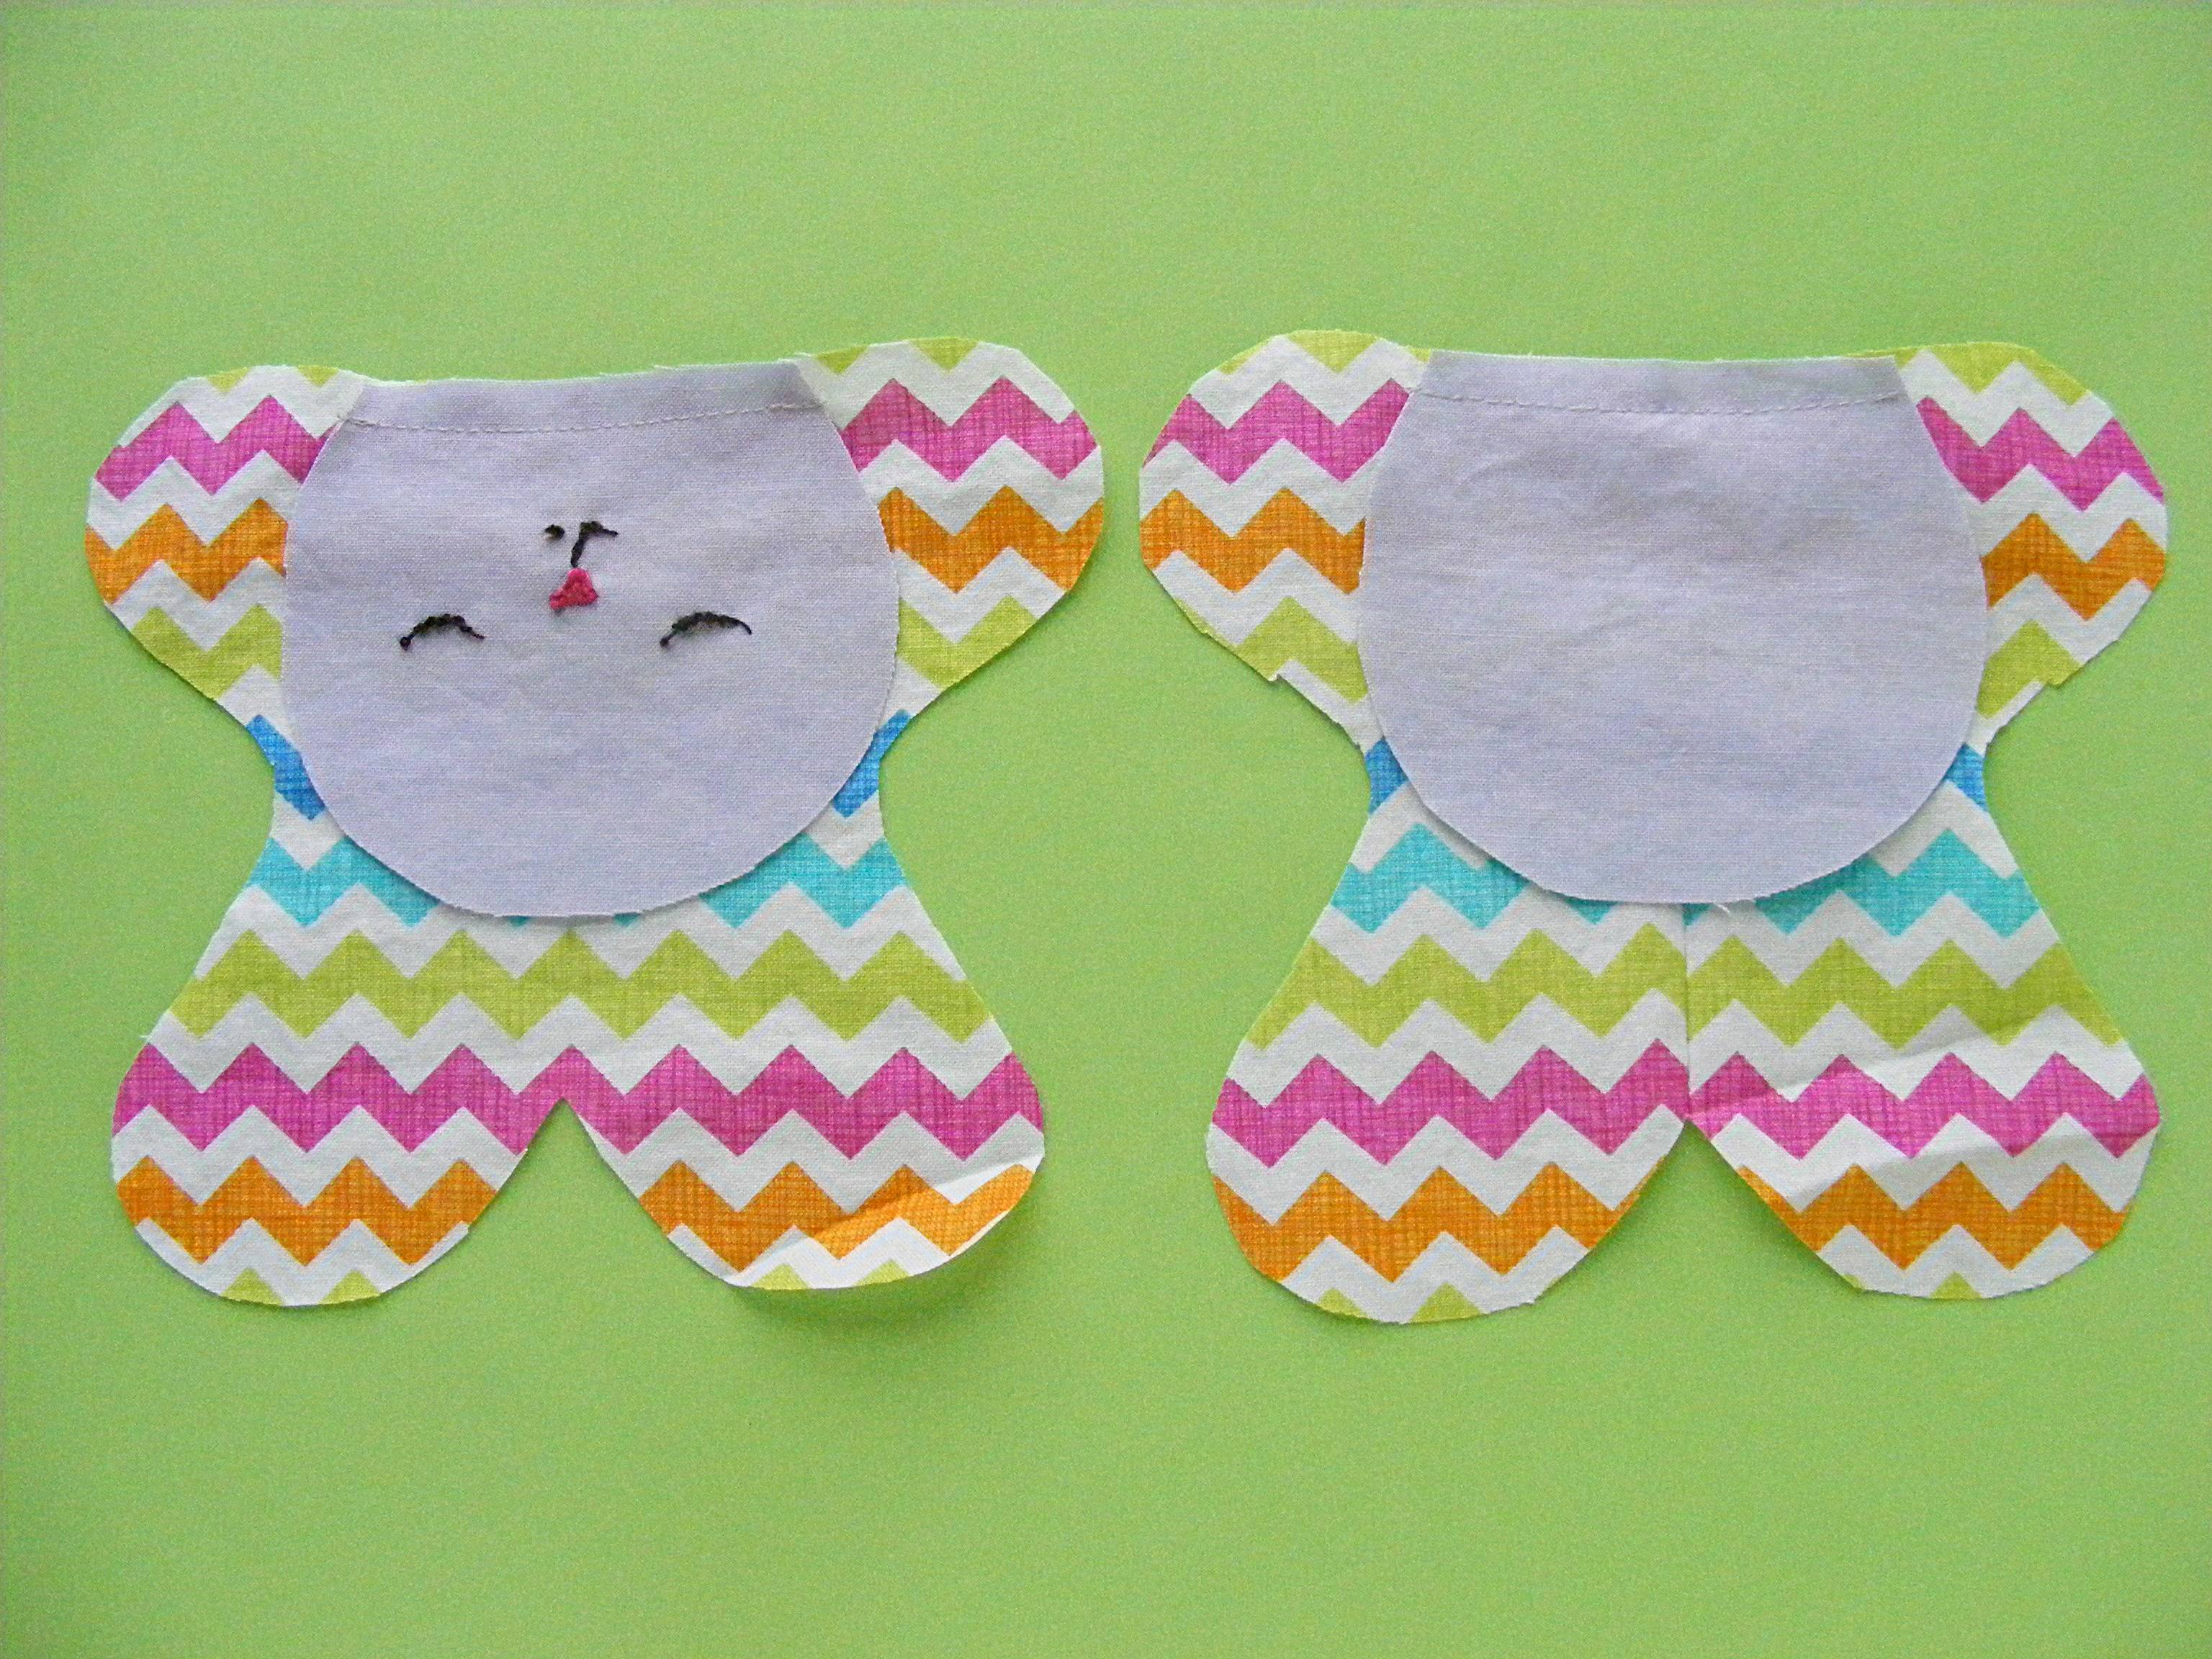
Sew the face to the body front and the other head piece to the body back.
Step 7
Fold the heads up and press.
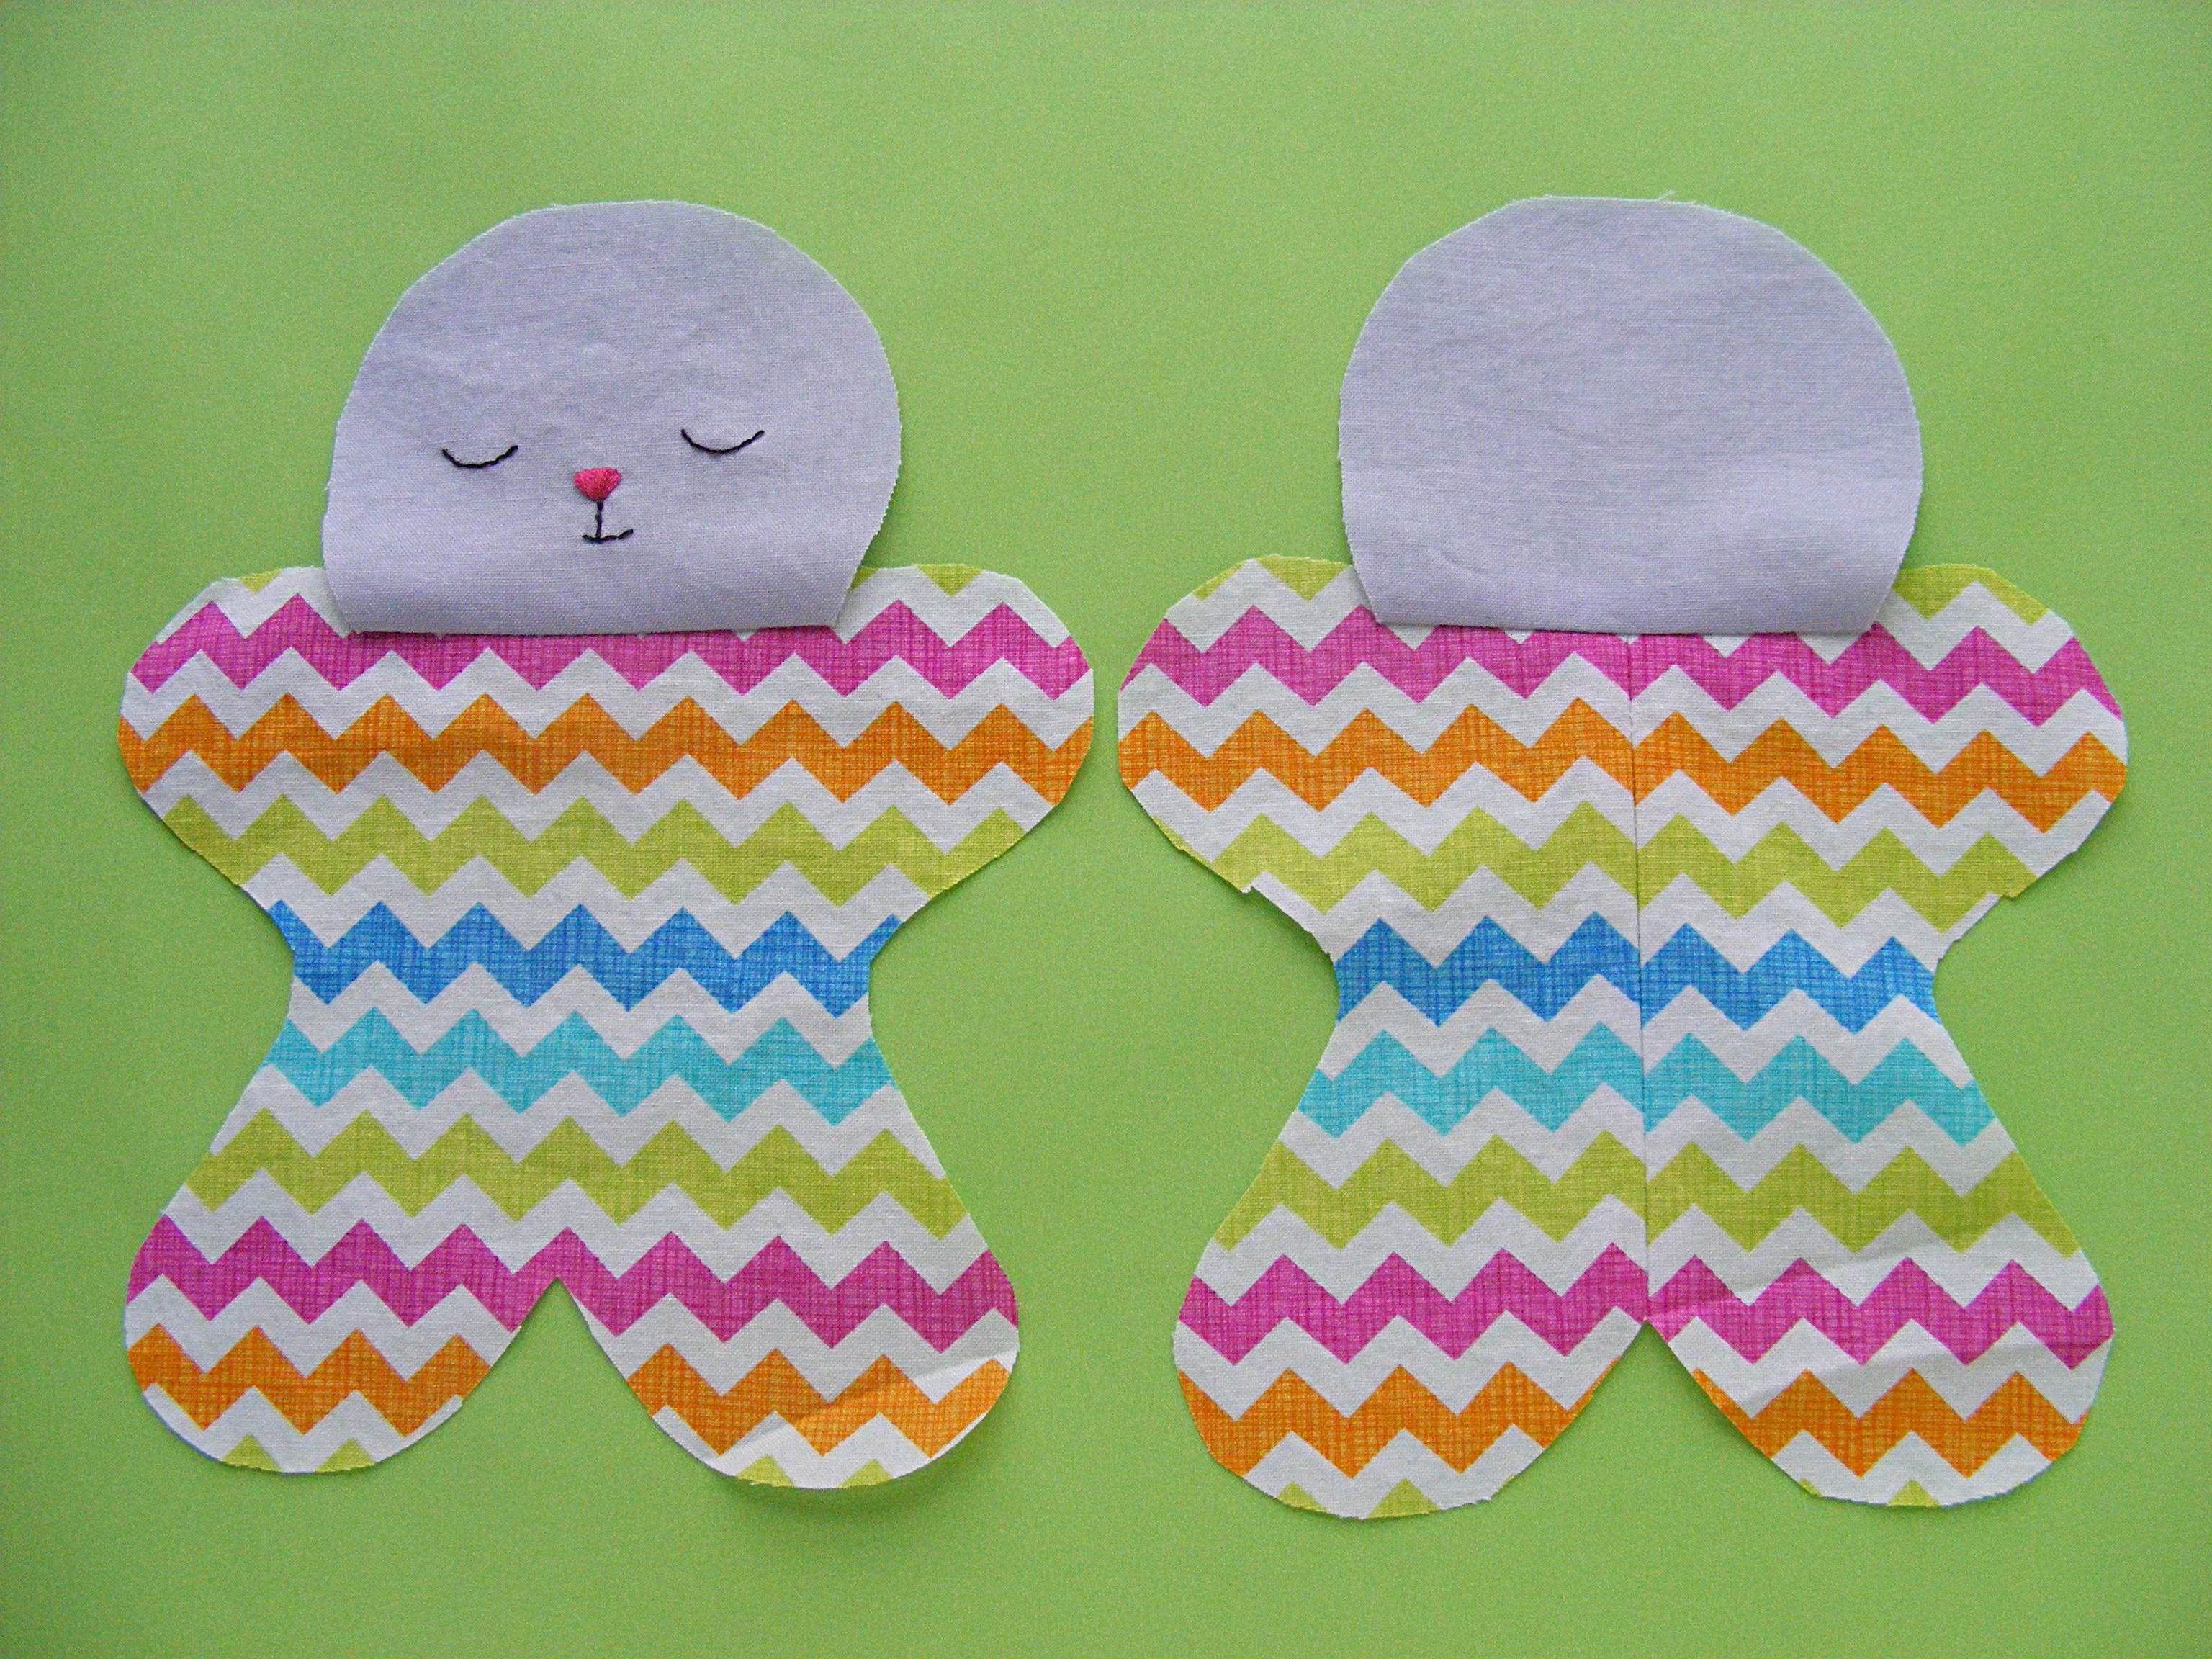
The seam allowance should be pressed toward the head so the body remains flat.
Step 8
Lay the body front face up on a flat surface.
Lay the ears face down over the face as shown in the photo. Don’t worry about making them perfectly even crooked is cute. :-)
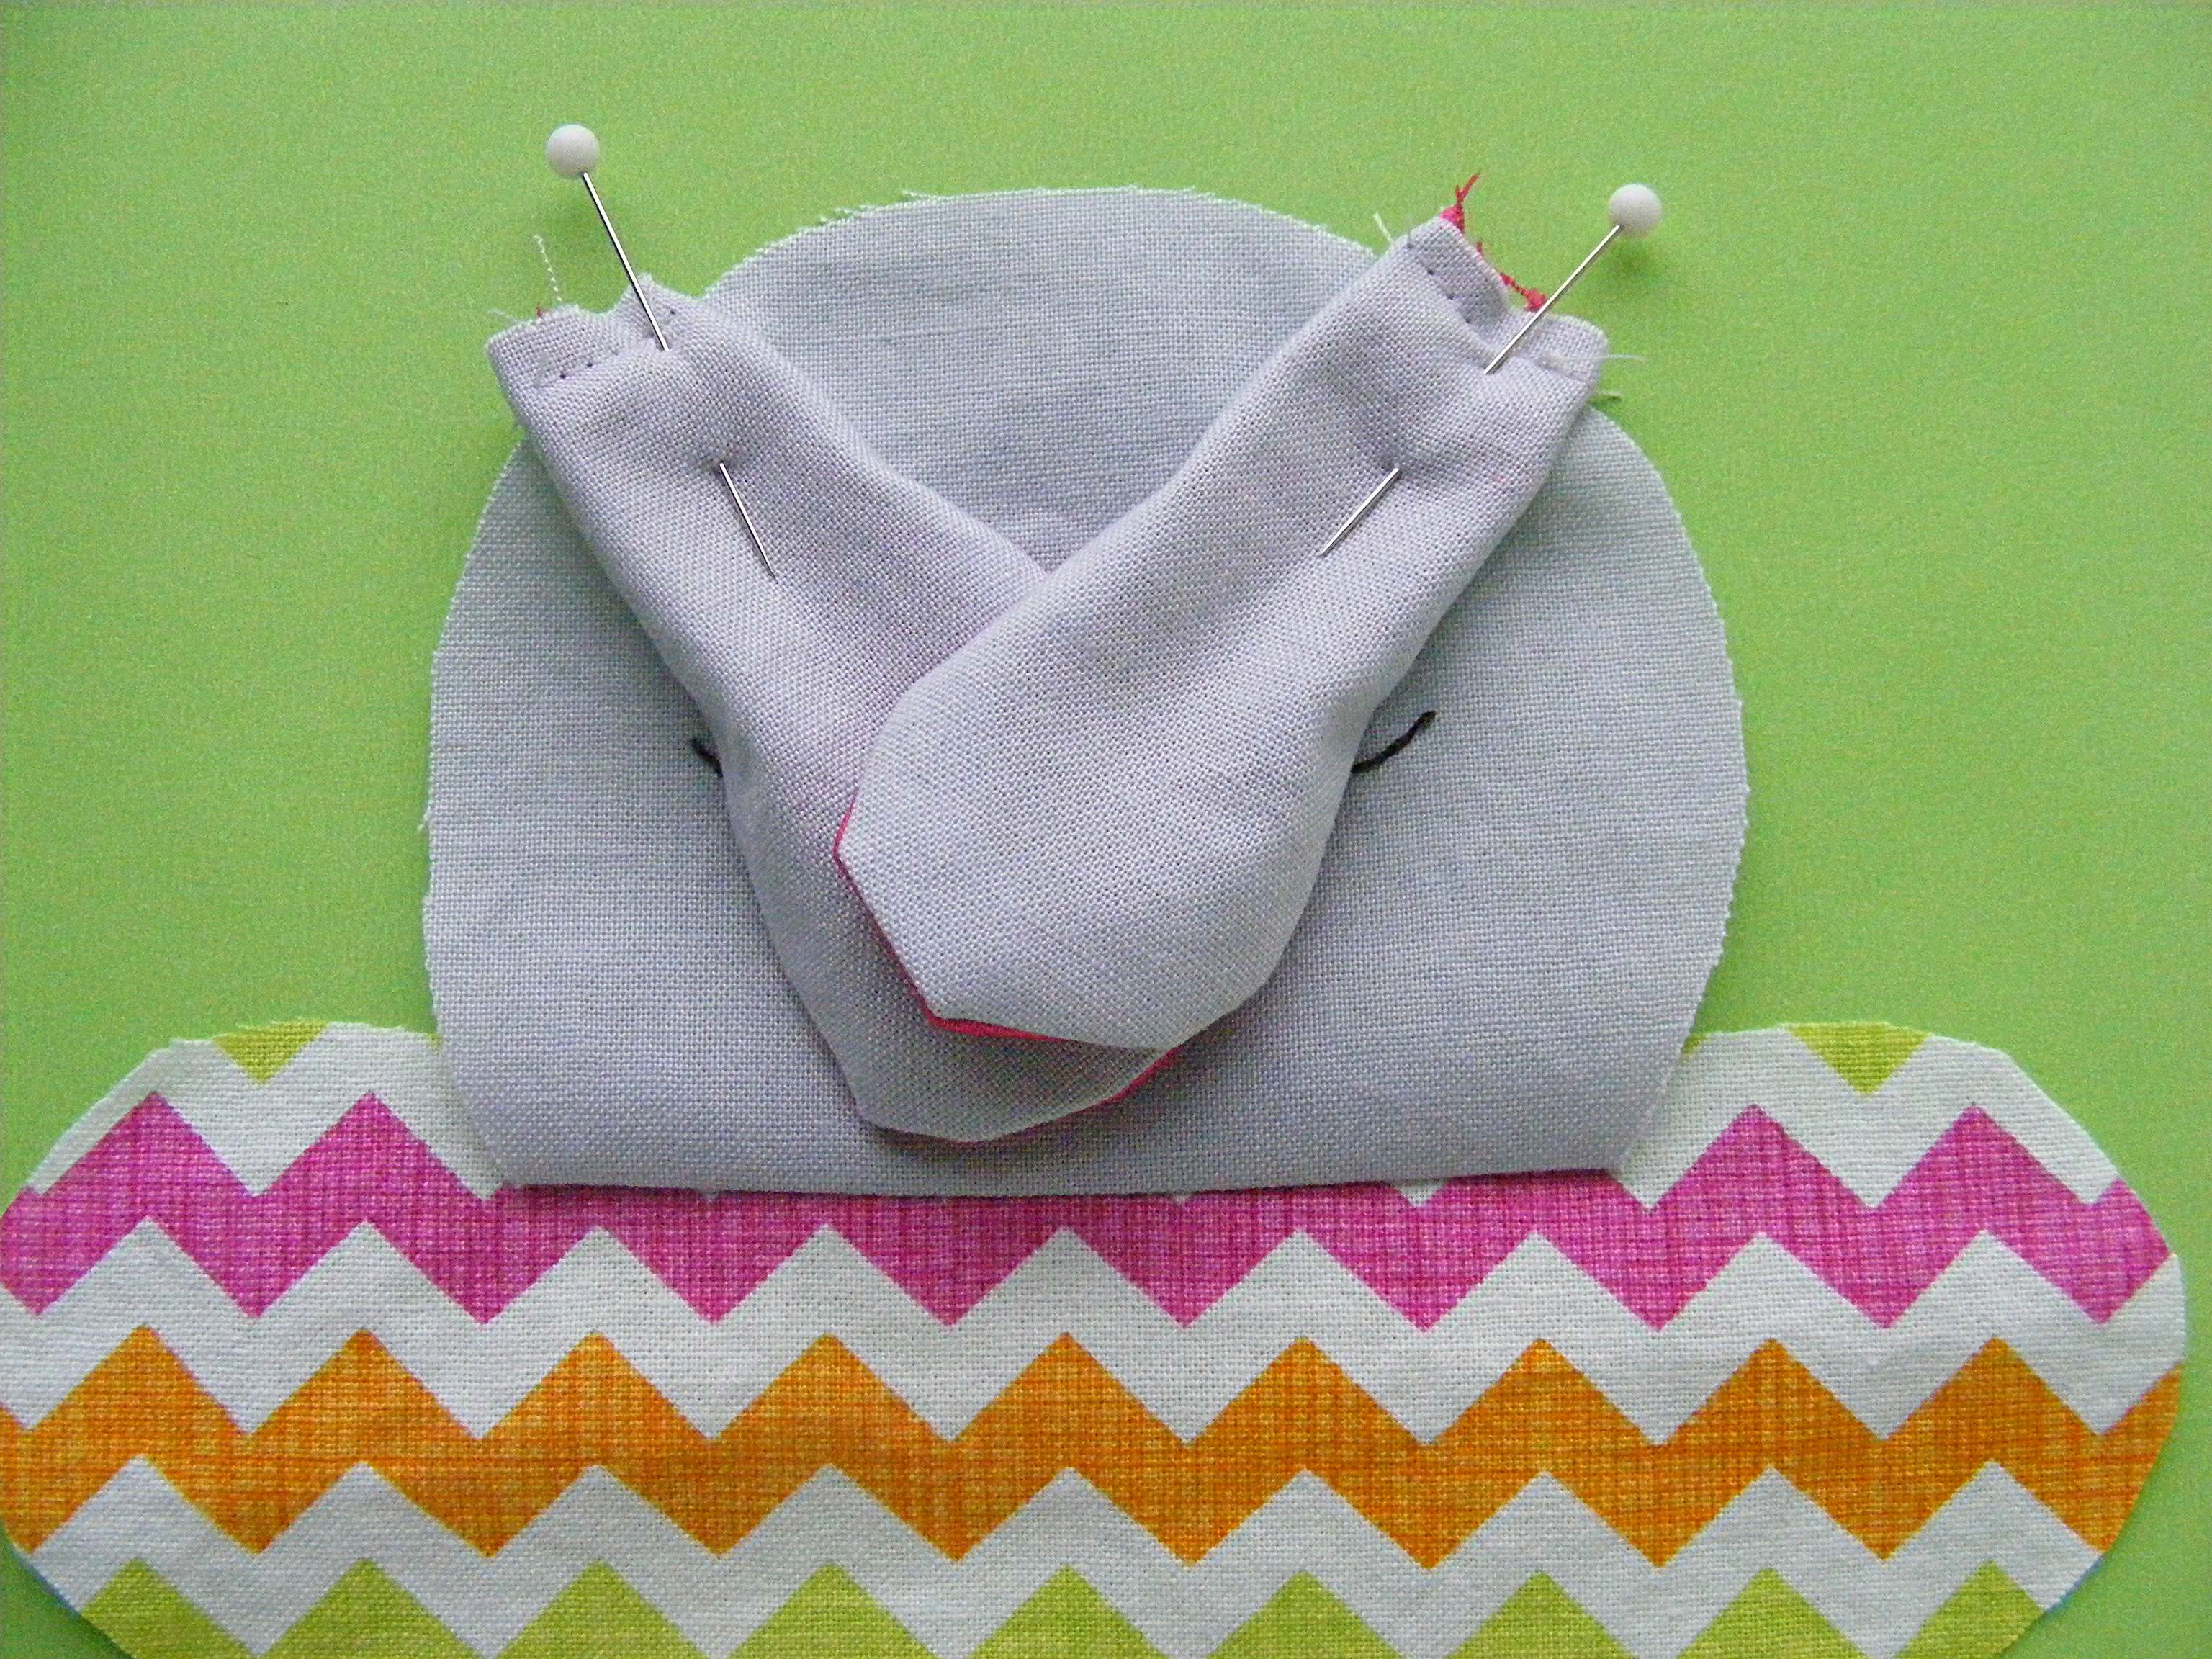
Pin in place.
Step 9
Place the body back face down over the front, sandwiching the ears between the layers. Pin or clip the layers together carefully.
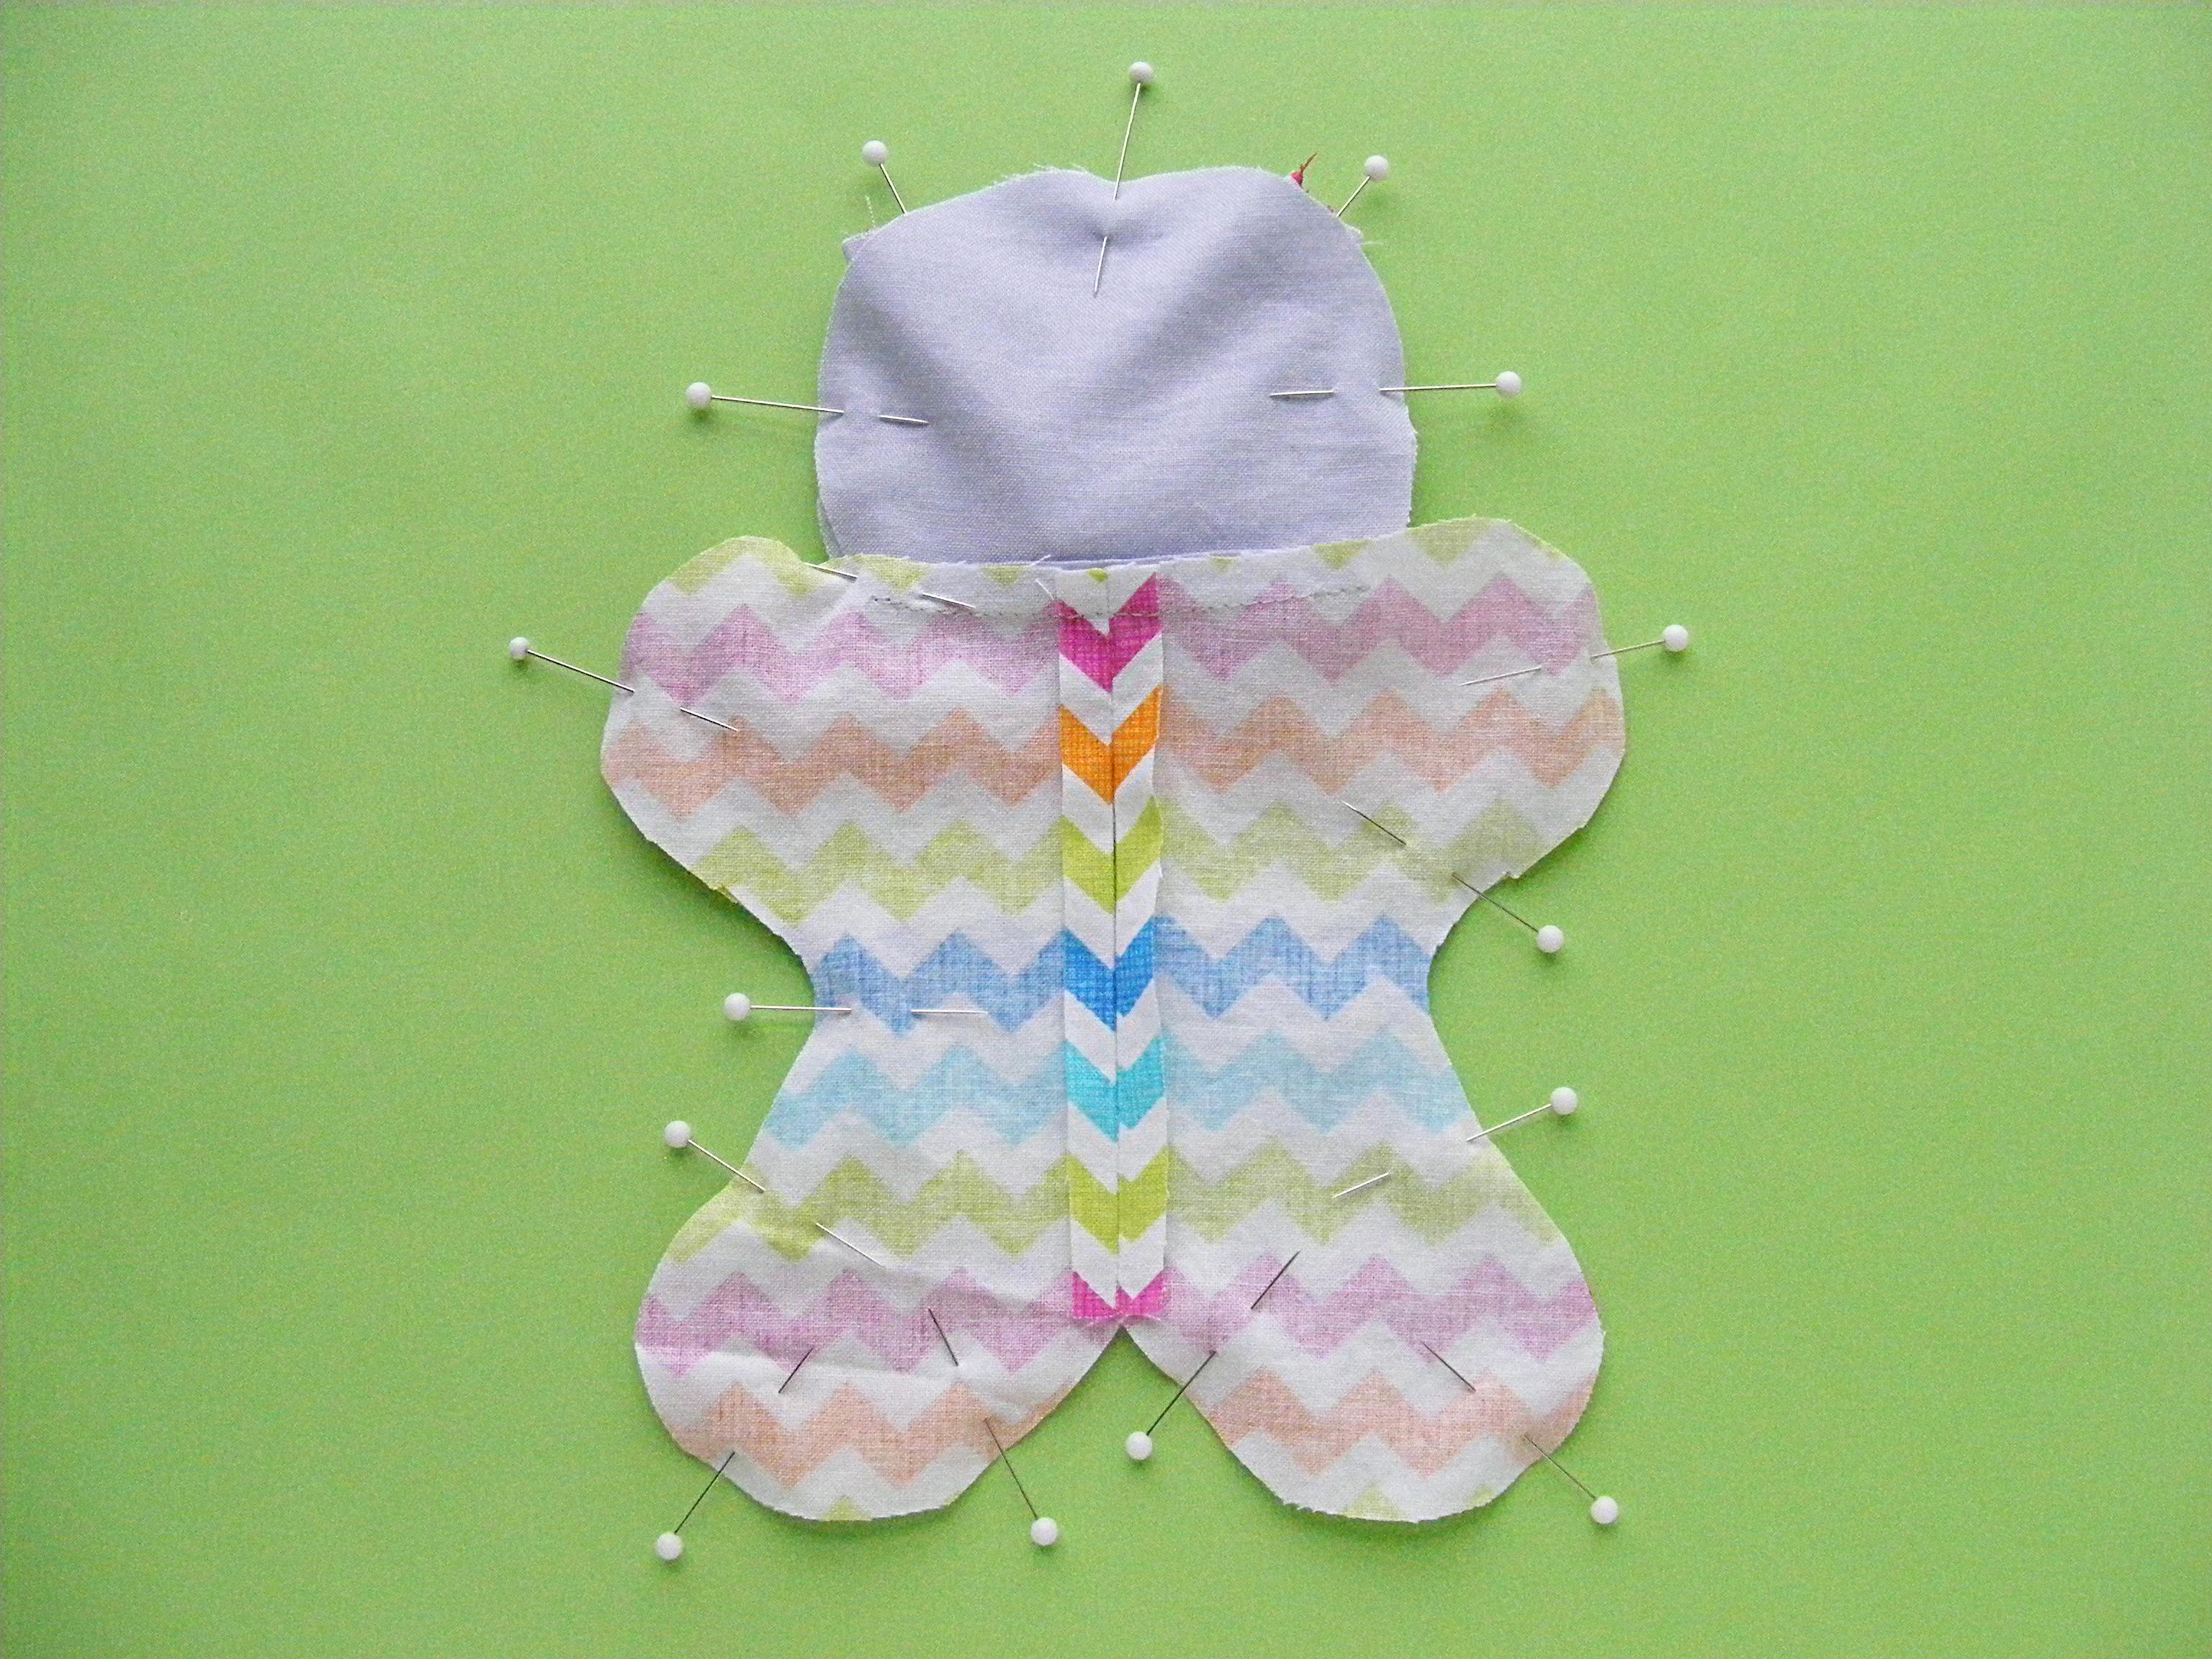
I match the neck seams first, then the center bottoms, then the dips at the sides and then the tips of the arms and legs and the head.
Step 10
Sew all the way around the body using 1/4 inch seam allowance. Make sure you’re catching the ears.
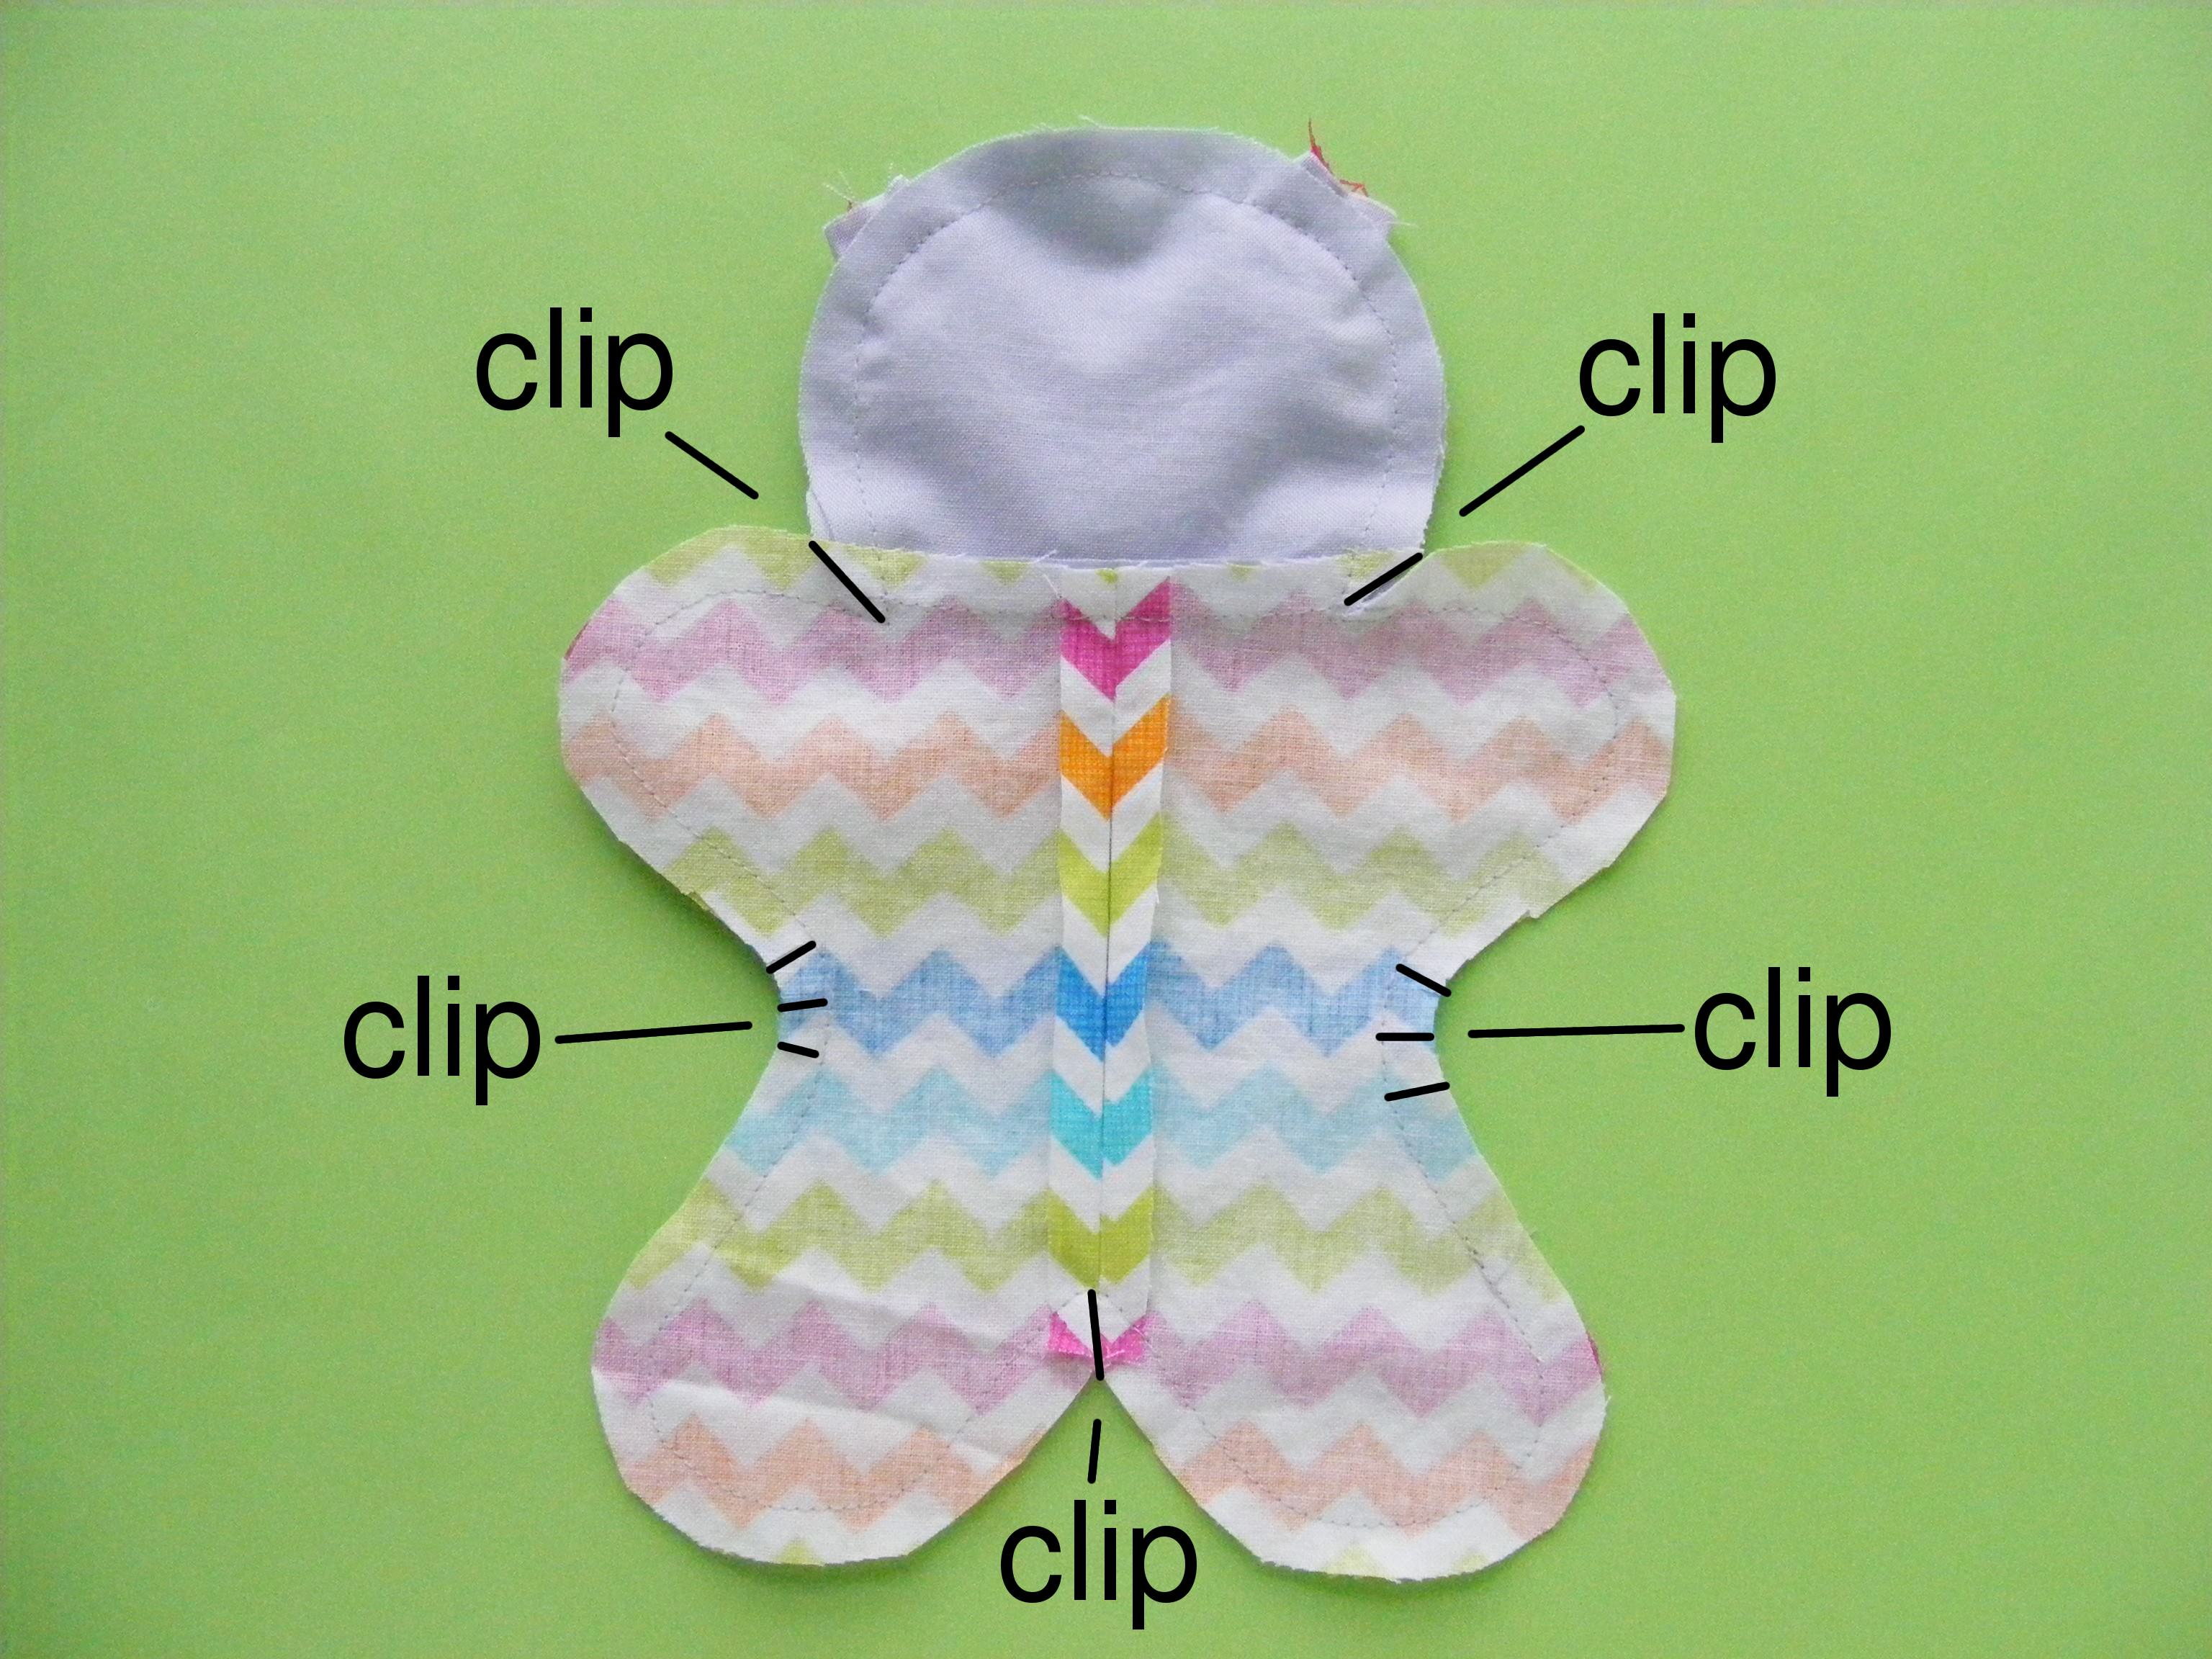
Clip into the seam allowance at all the concave curves and points as shown in the photo.
Step 11
Turn the body right side out.
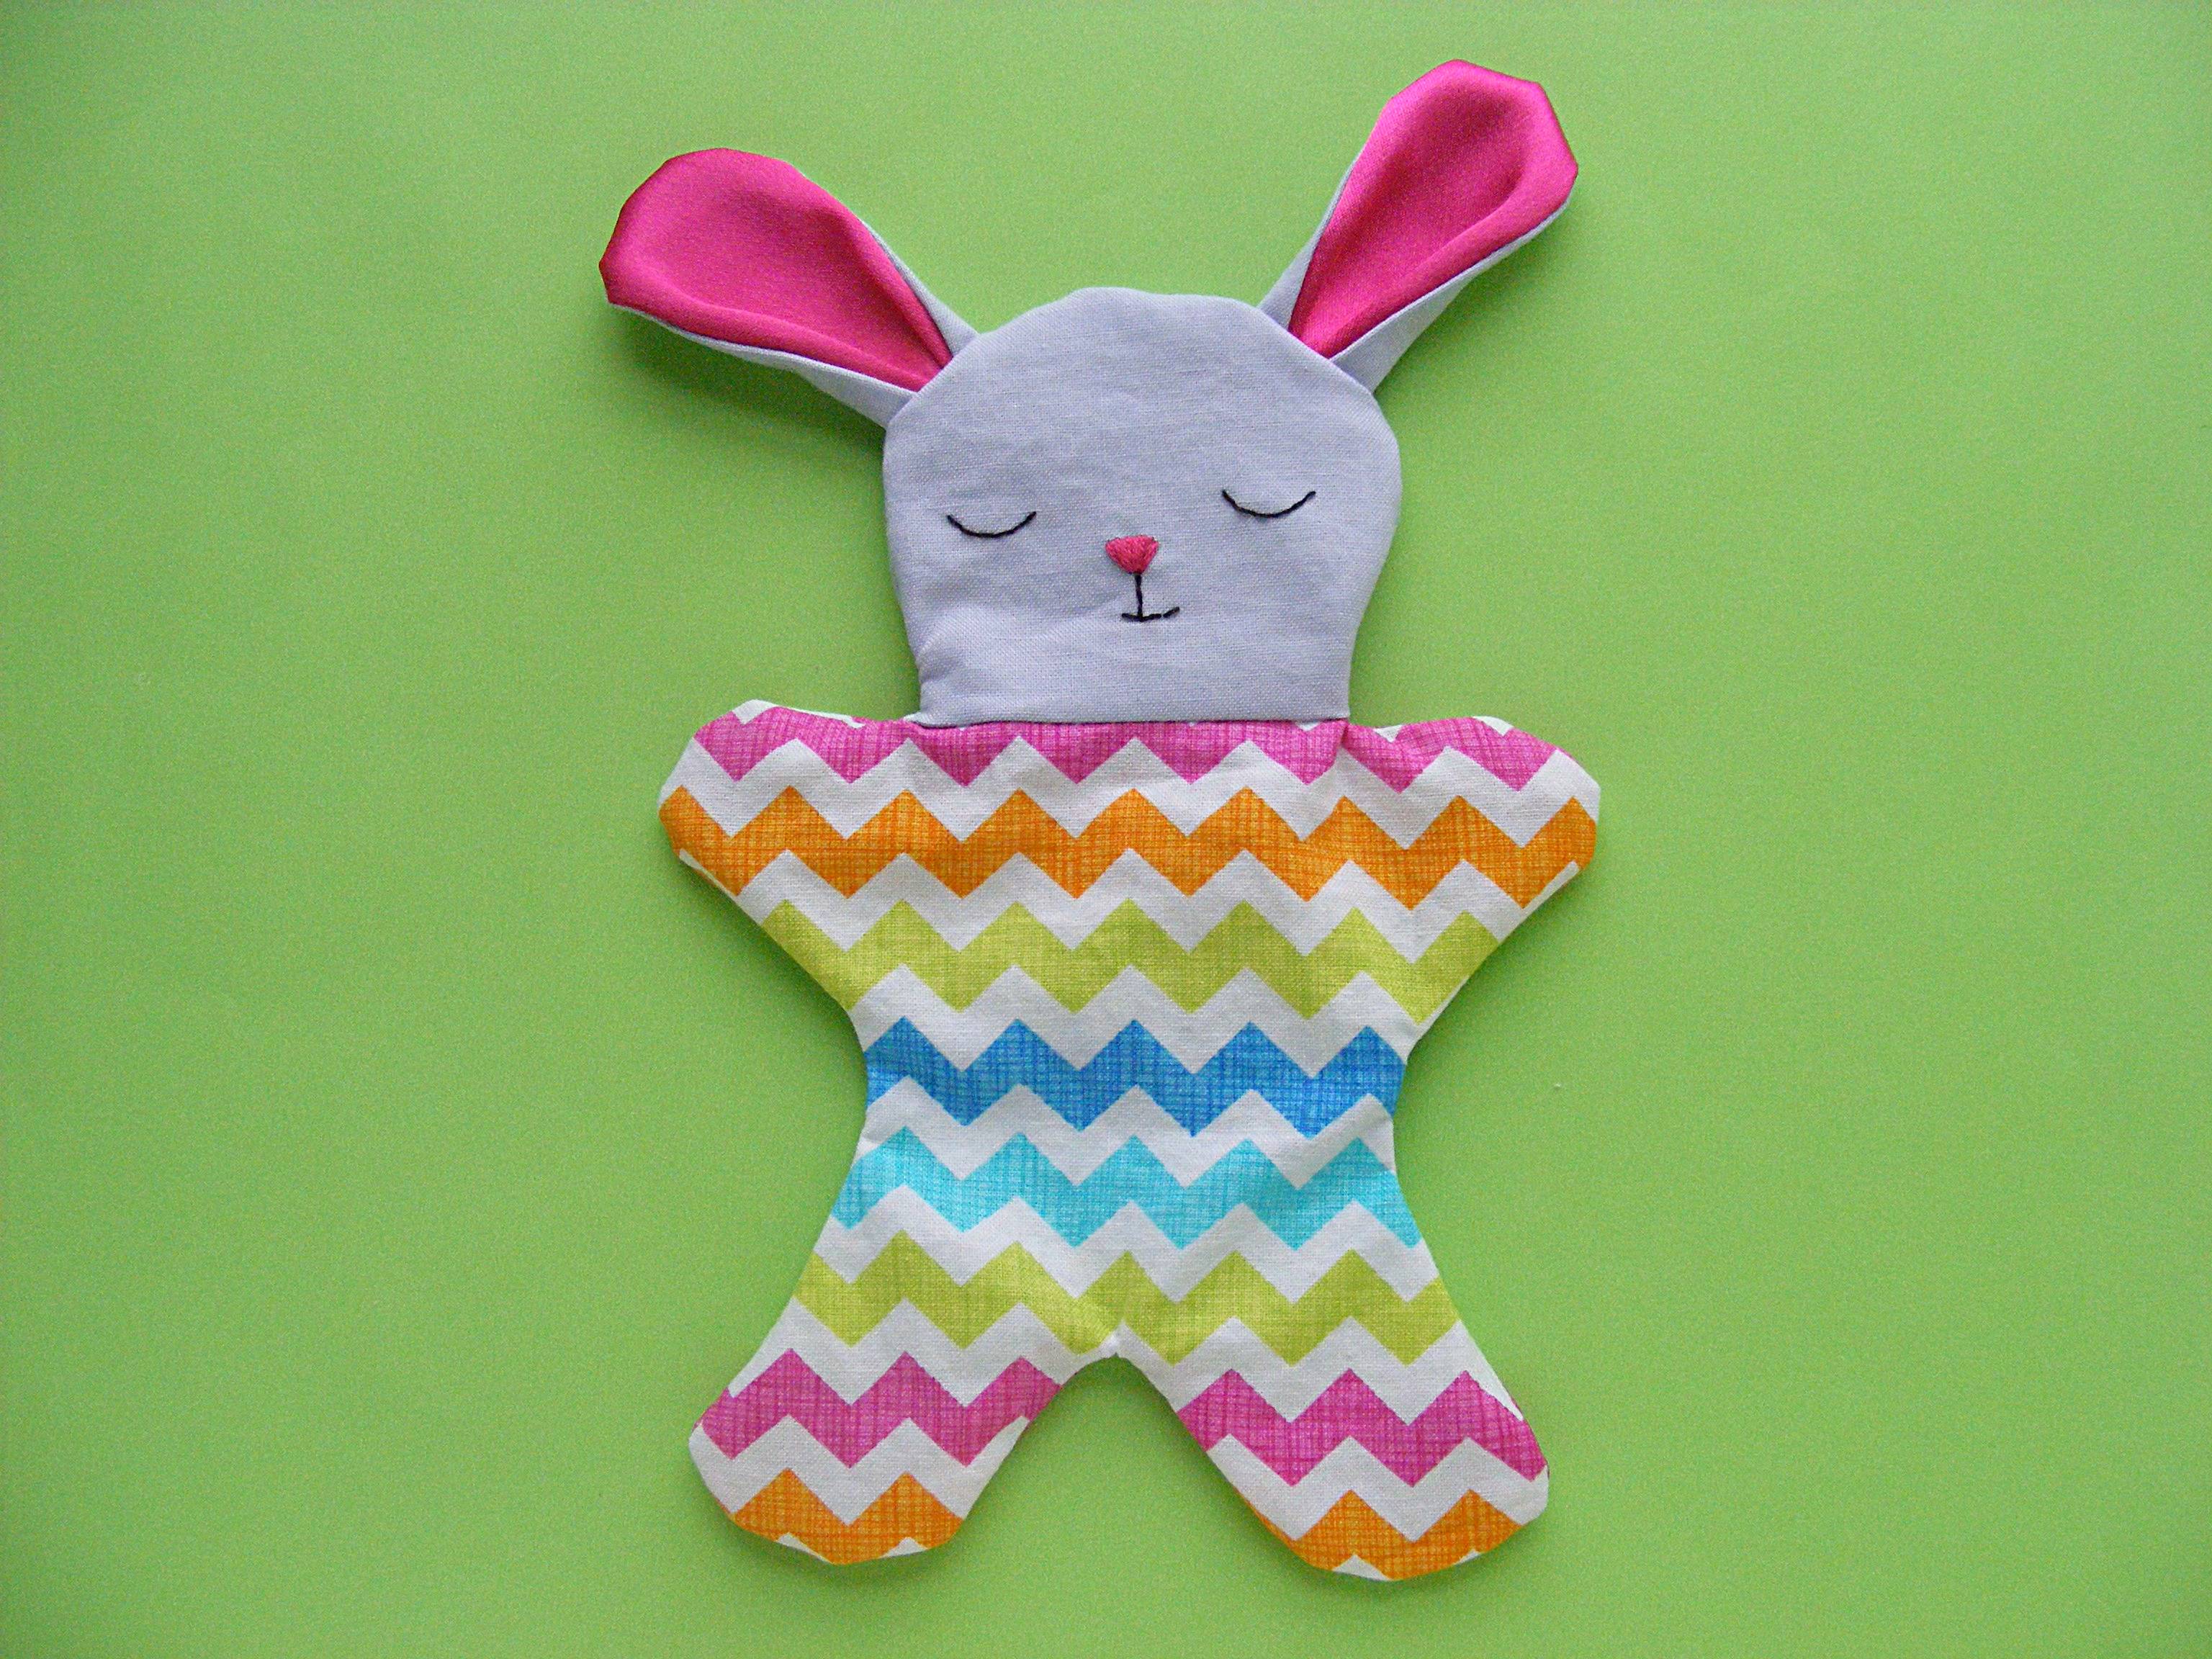
Awwww! Isn’t that a cutie? Take a moment to admire your work so far. You’re almost done!
Step 12
Stuff the head pretty firmly with fiberfill but not past the neck.
Pour 1/2 cup of plastic pellets into the body and sew up the opening in the back using ladder stitch.
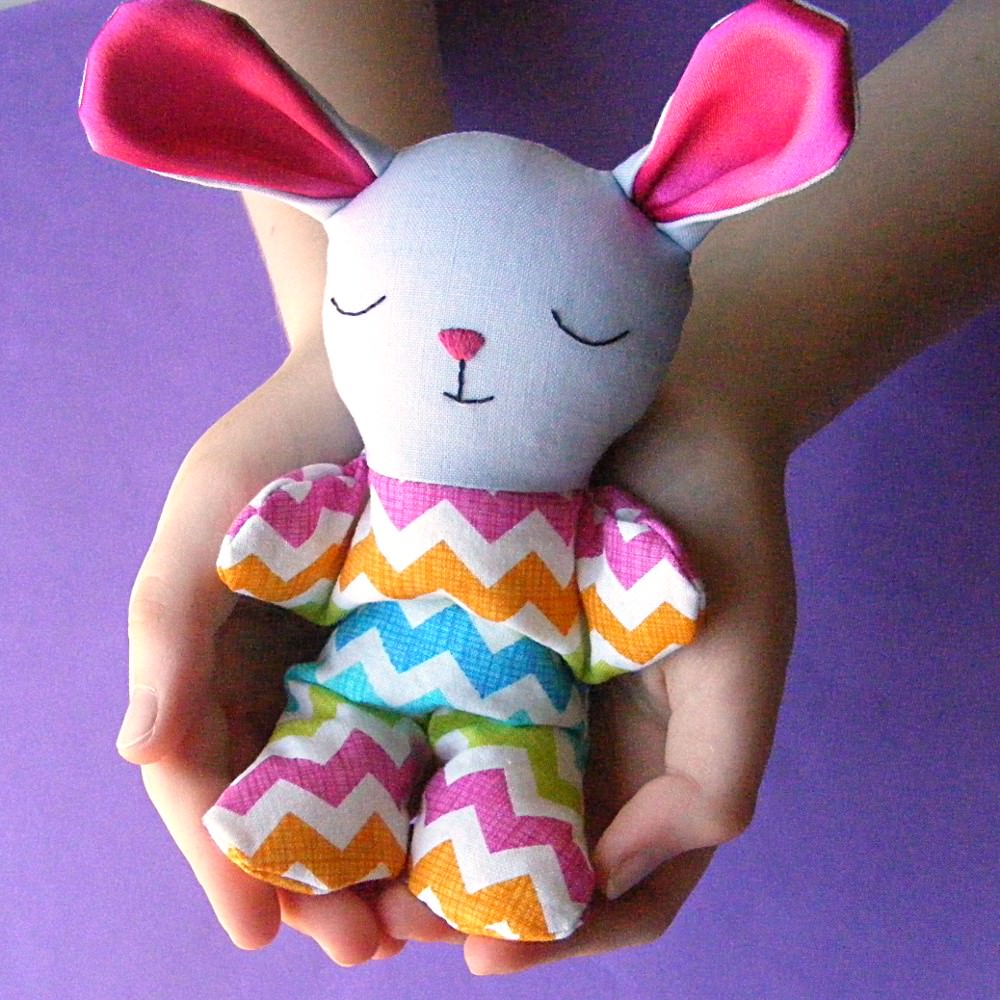
Finished!
All done! Give it an itty bitty hug and then slip it into a special someone’s pocket. :)
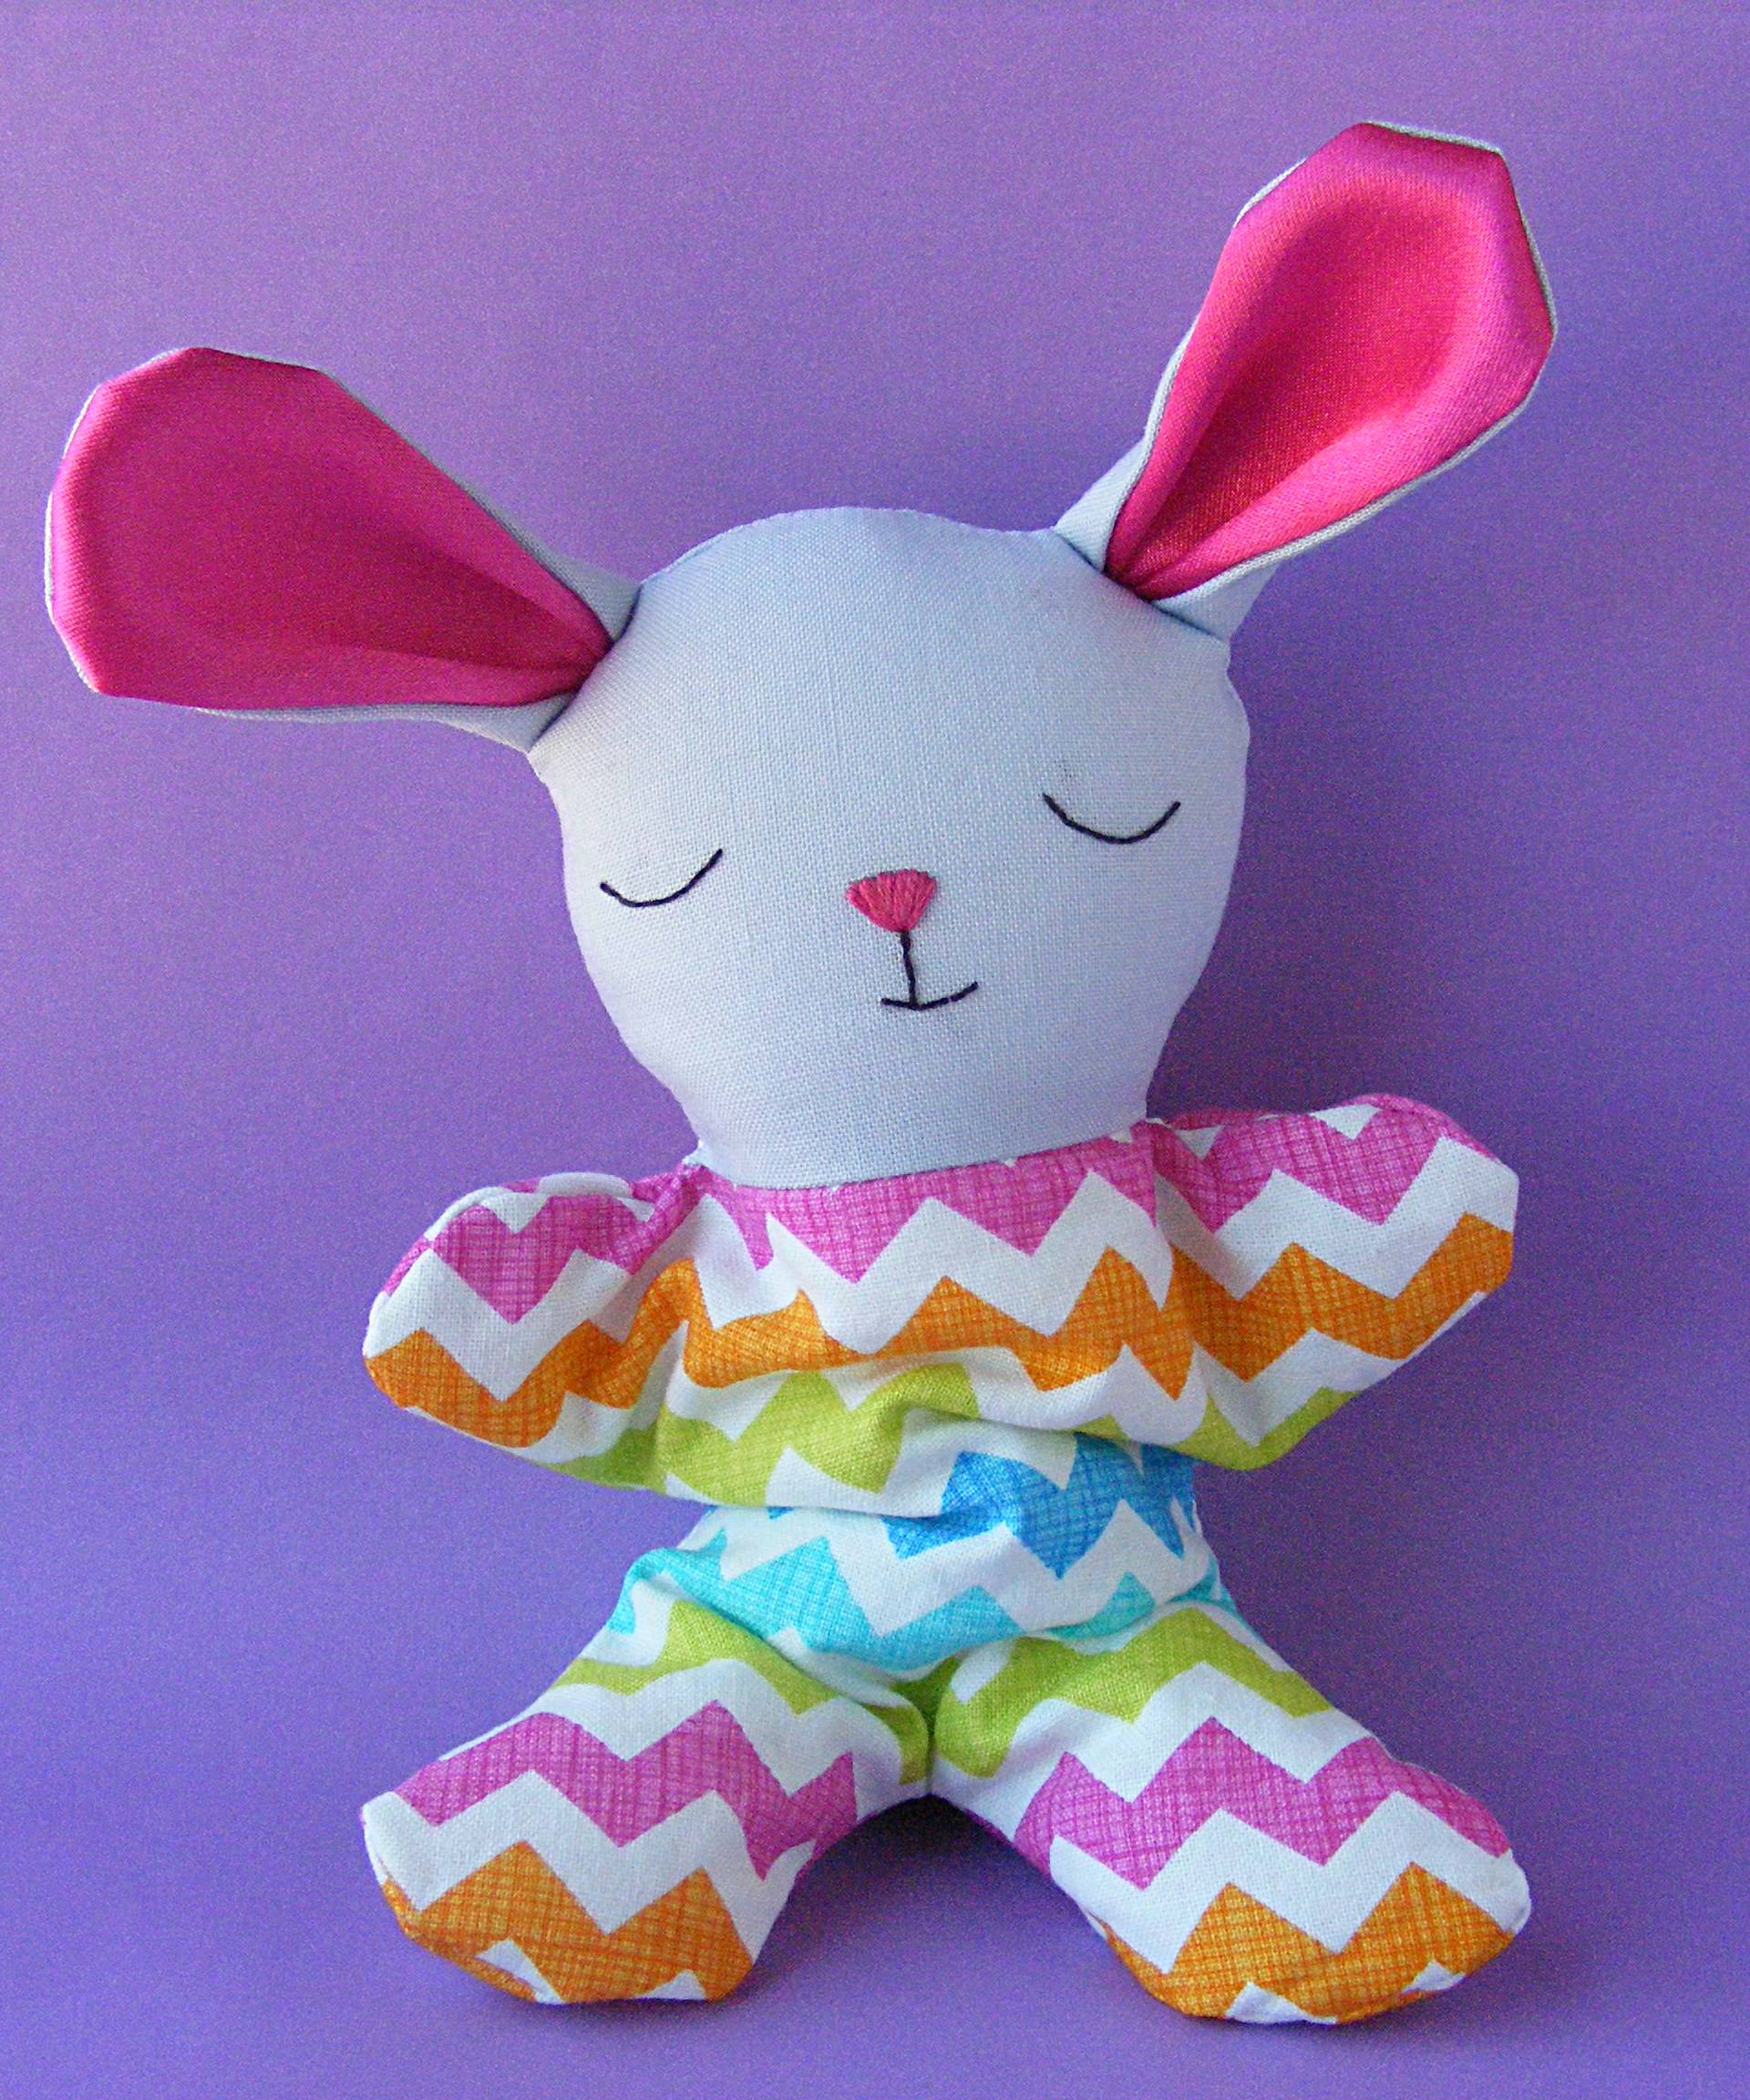
It’s a pocket-sized softie for your kids – and a snuggly bedtime softie for your kids’ dolls. Take a look at the Itty Bitty Bunny with one of the Dress Up Bunch dolls.

Because dolls need softies to play with, of course. :-)
Have a great weekend, everyone!
Best,
Wendi


The Dress Up Bunch is a collection of cute and cuddly rag dolls. Get patterns for the dolls, plus all their fun outfits and accessories!