


Why would you need to learn how to crochet an oval?
Well, I love making softies with oval bases. They require shaping that’s a little different than your usual amigurumi rounds – but they’re not hard to do.
There are two basic techniques for creating an oval. Each one gives you a slightly different look, so I’ll show you both.
Start with a Chain
Chain until the piece is as long as you want. You’re creating the center of the oval, so keep in mind that this piece will grow in all directions!
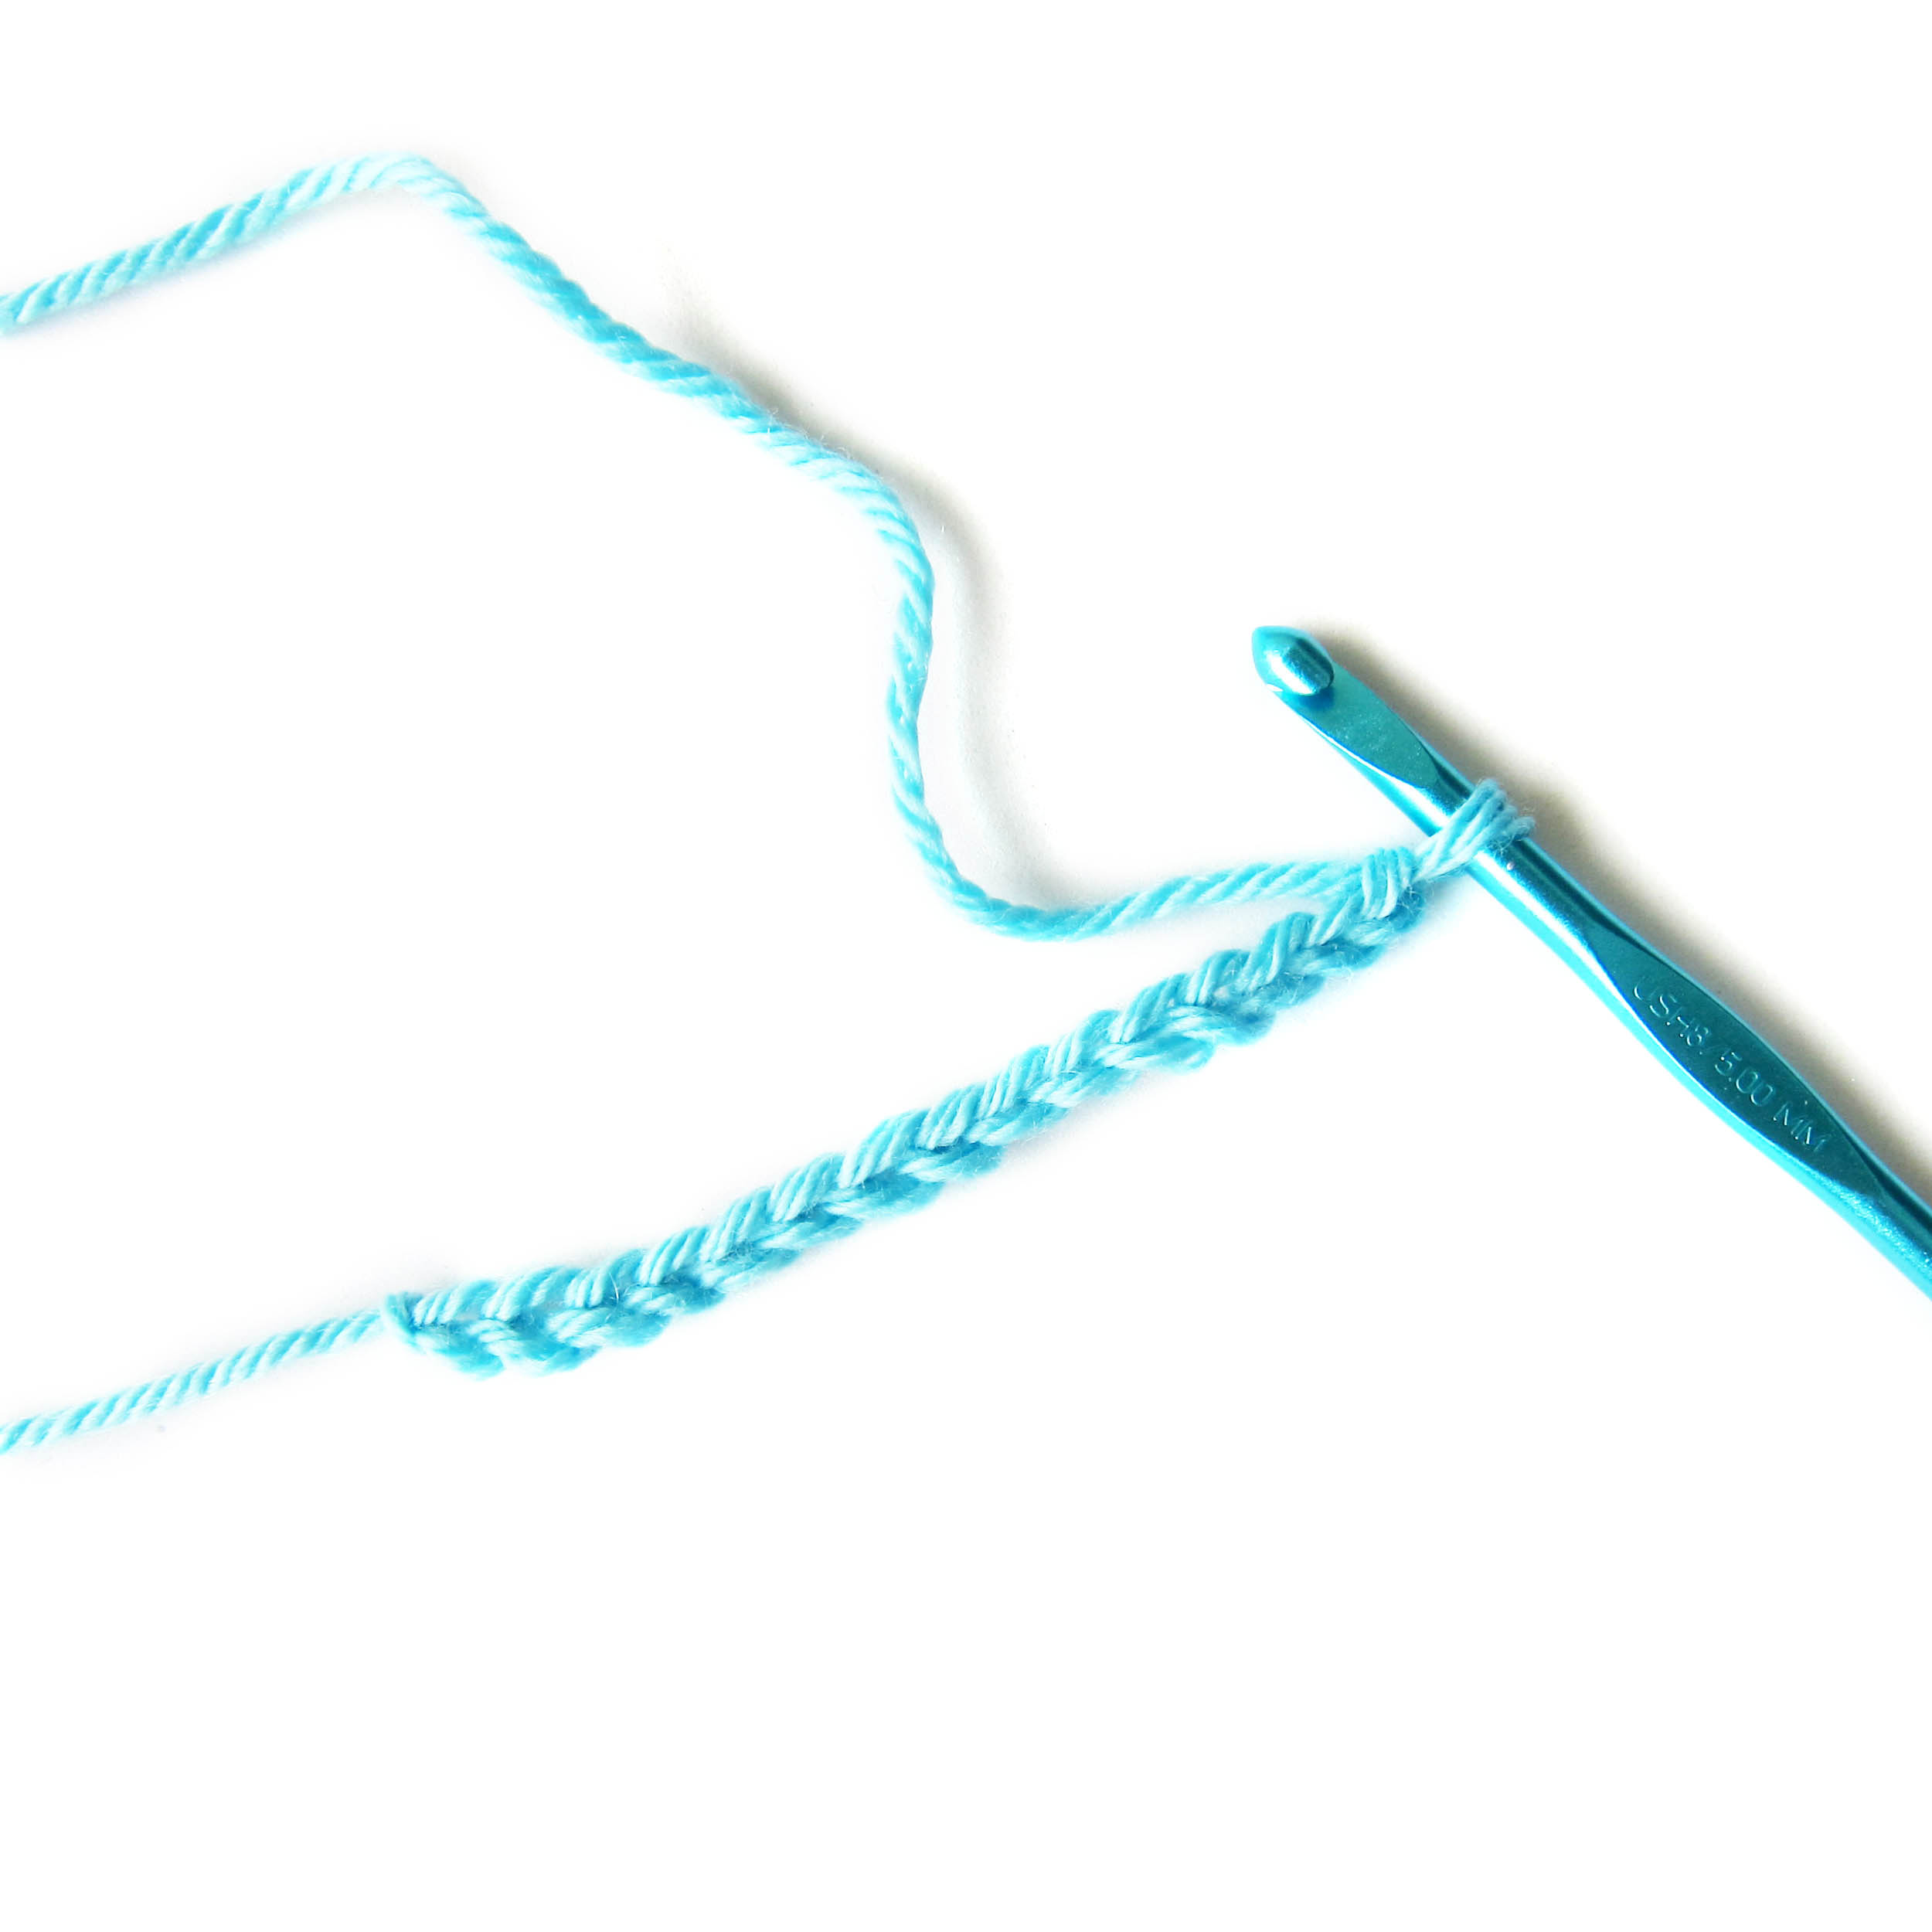
Crochet around the Chain to Grow Your Oval
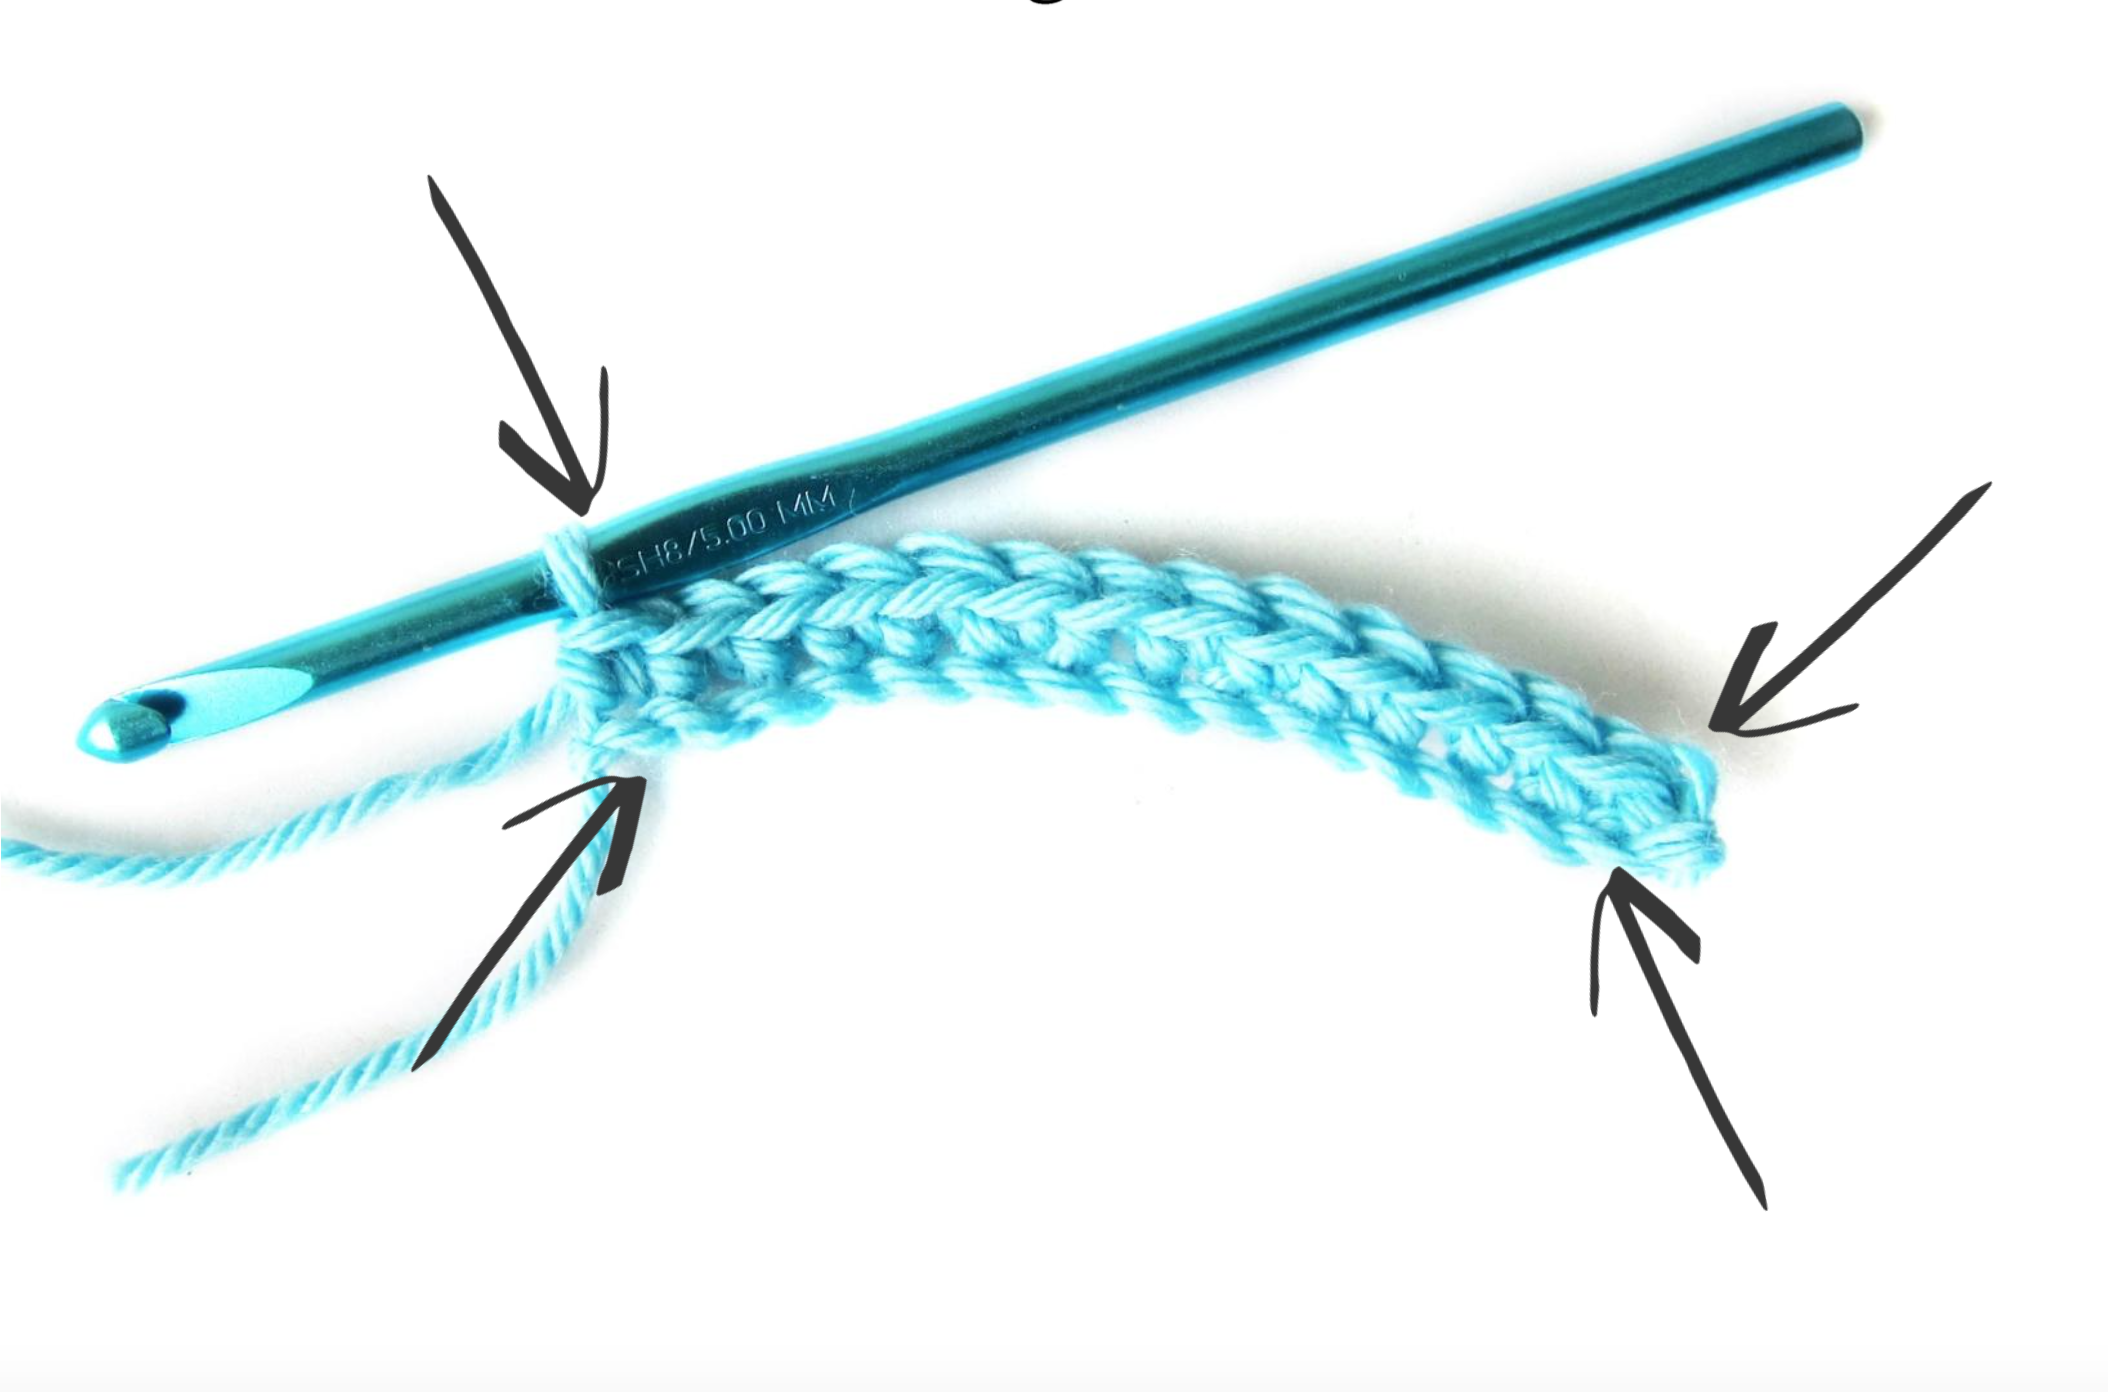
Turn and sc in 2nd stitch and each remaining stitch.
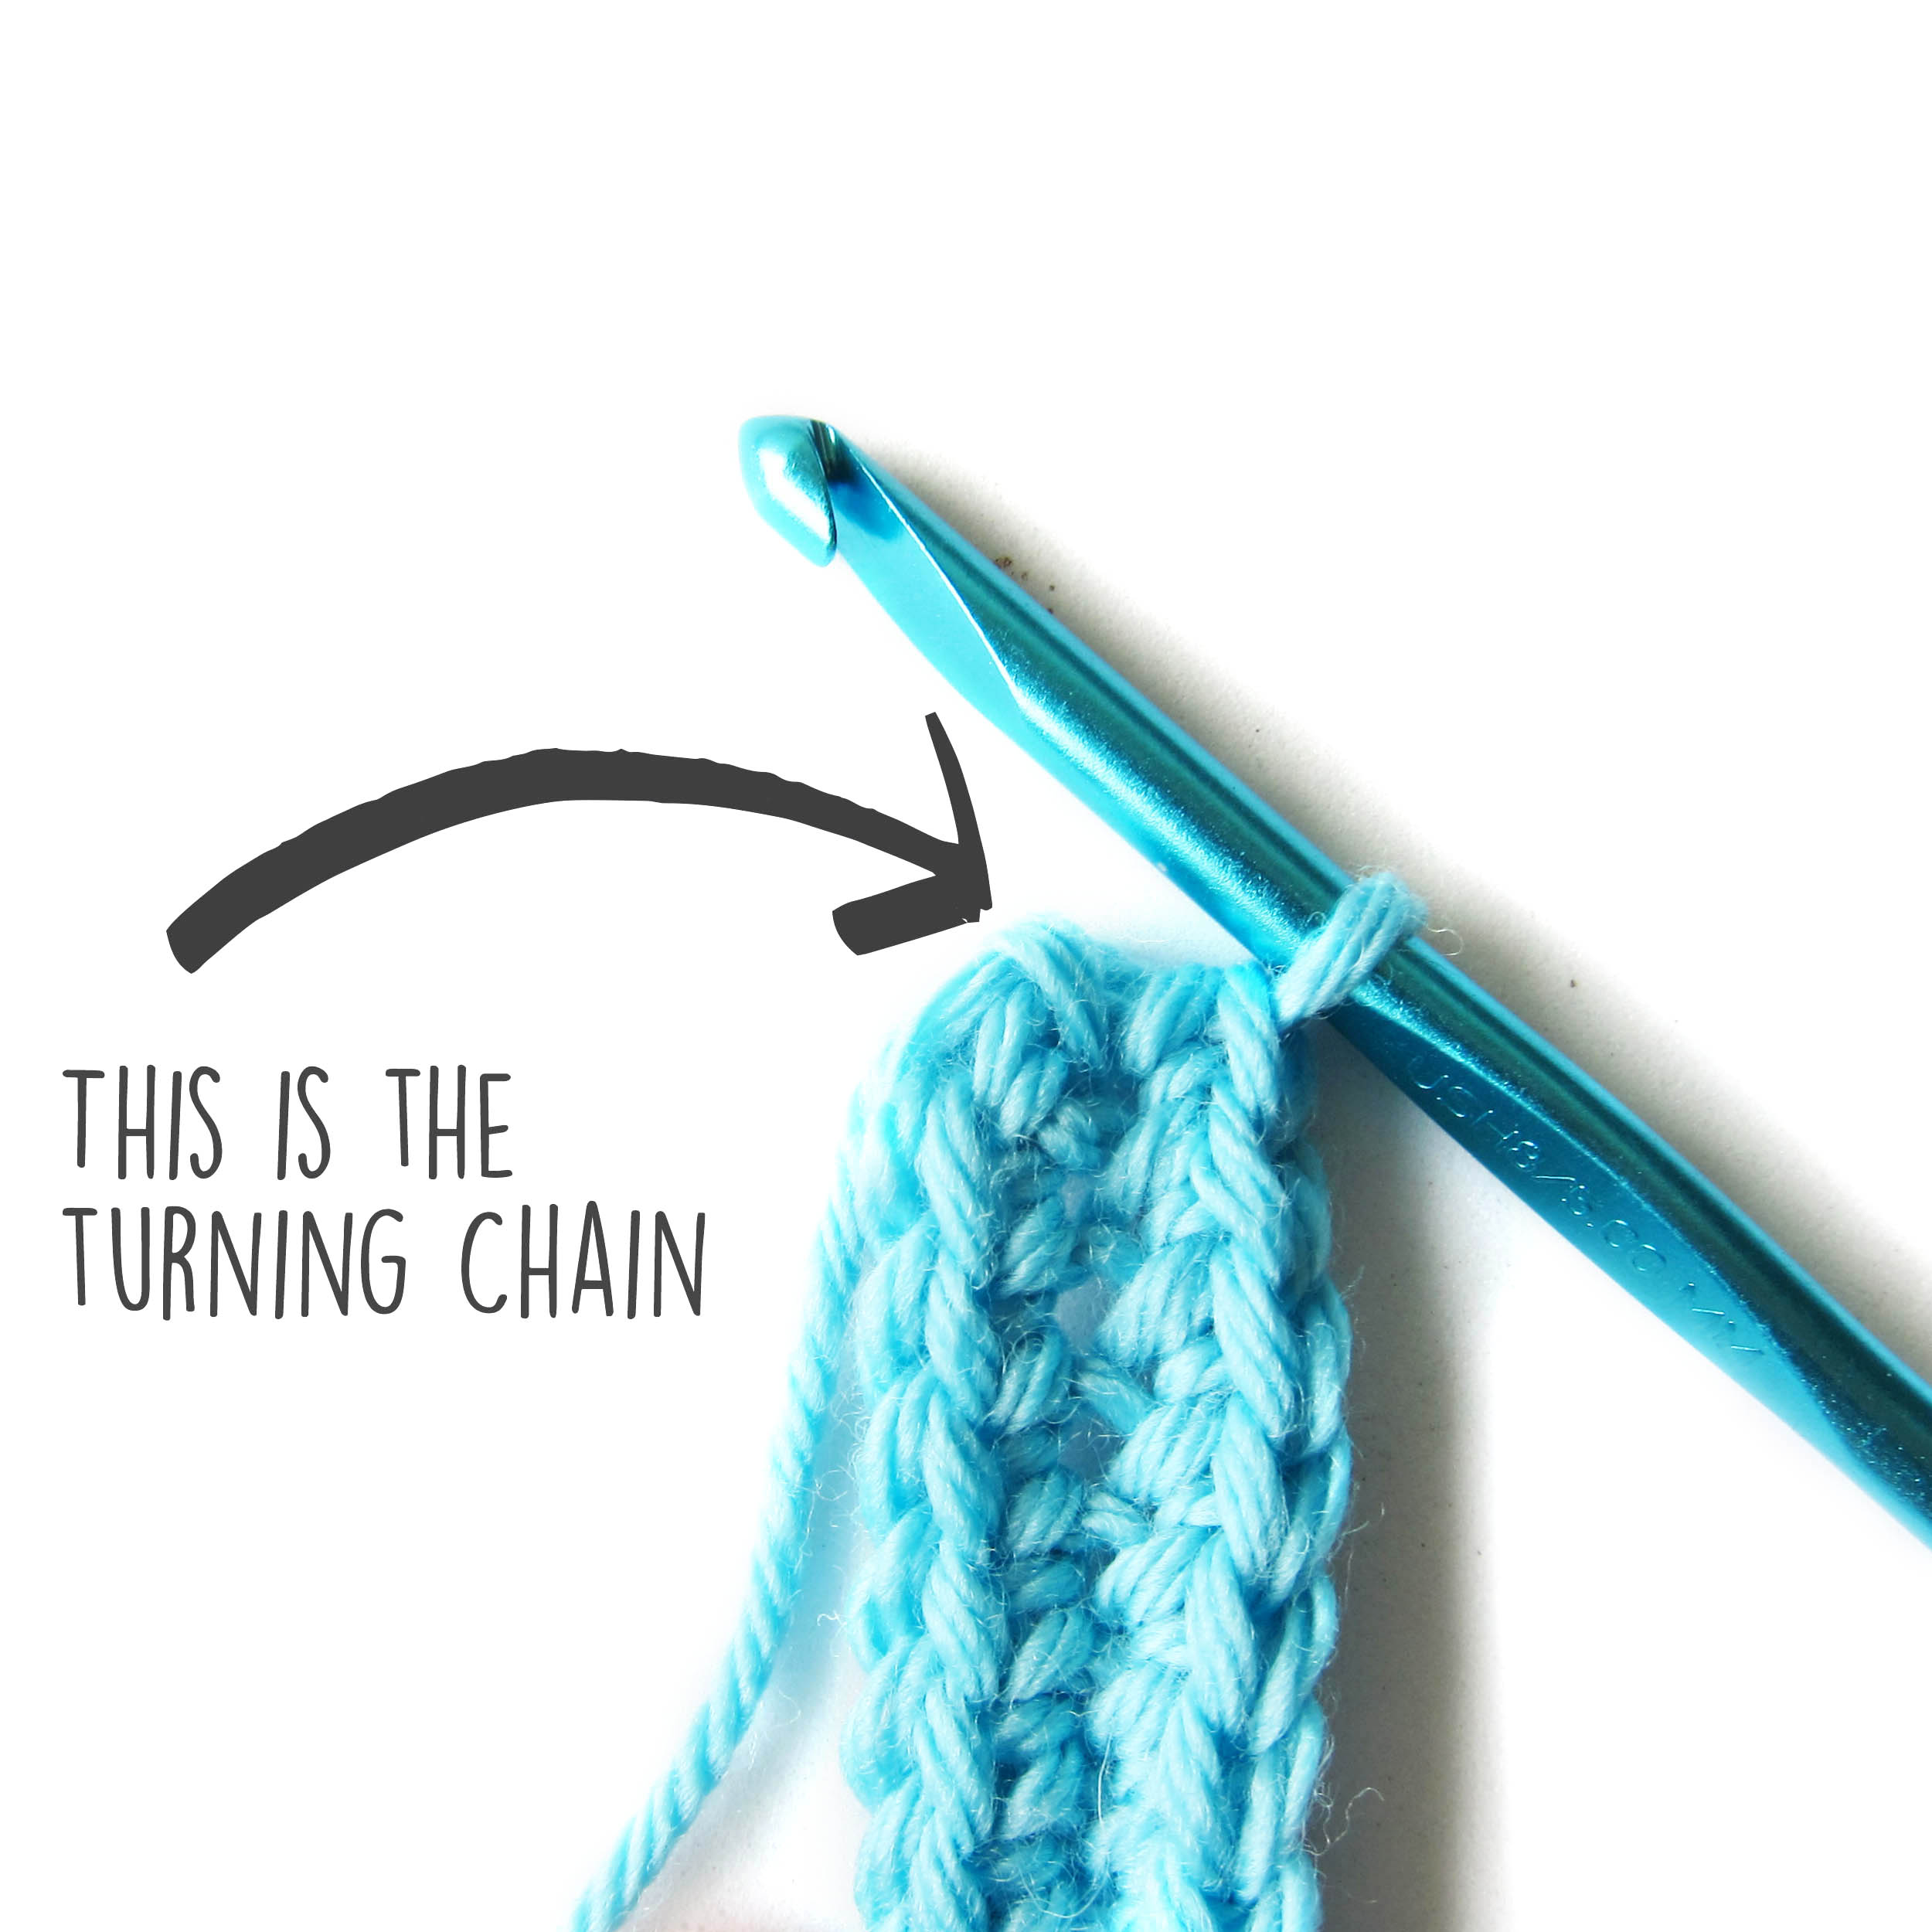
You will end up with one stitch fewer than the number of chains you started with. (That’s because one of those chain stitches became a turning chain.)
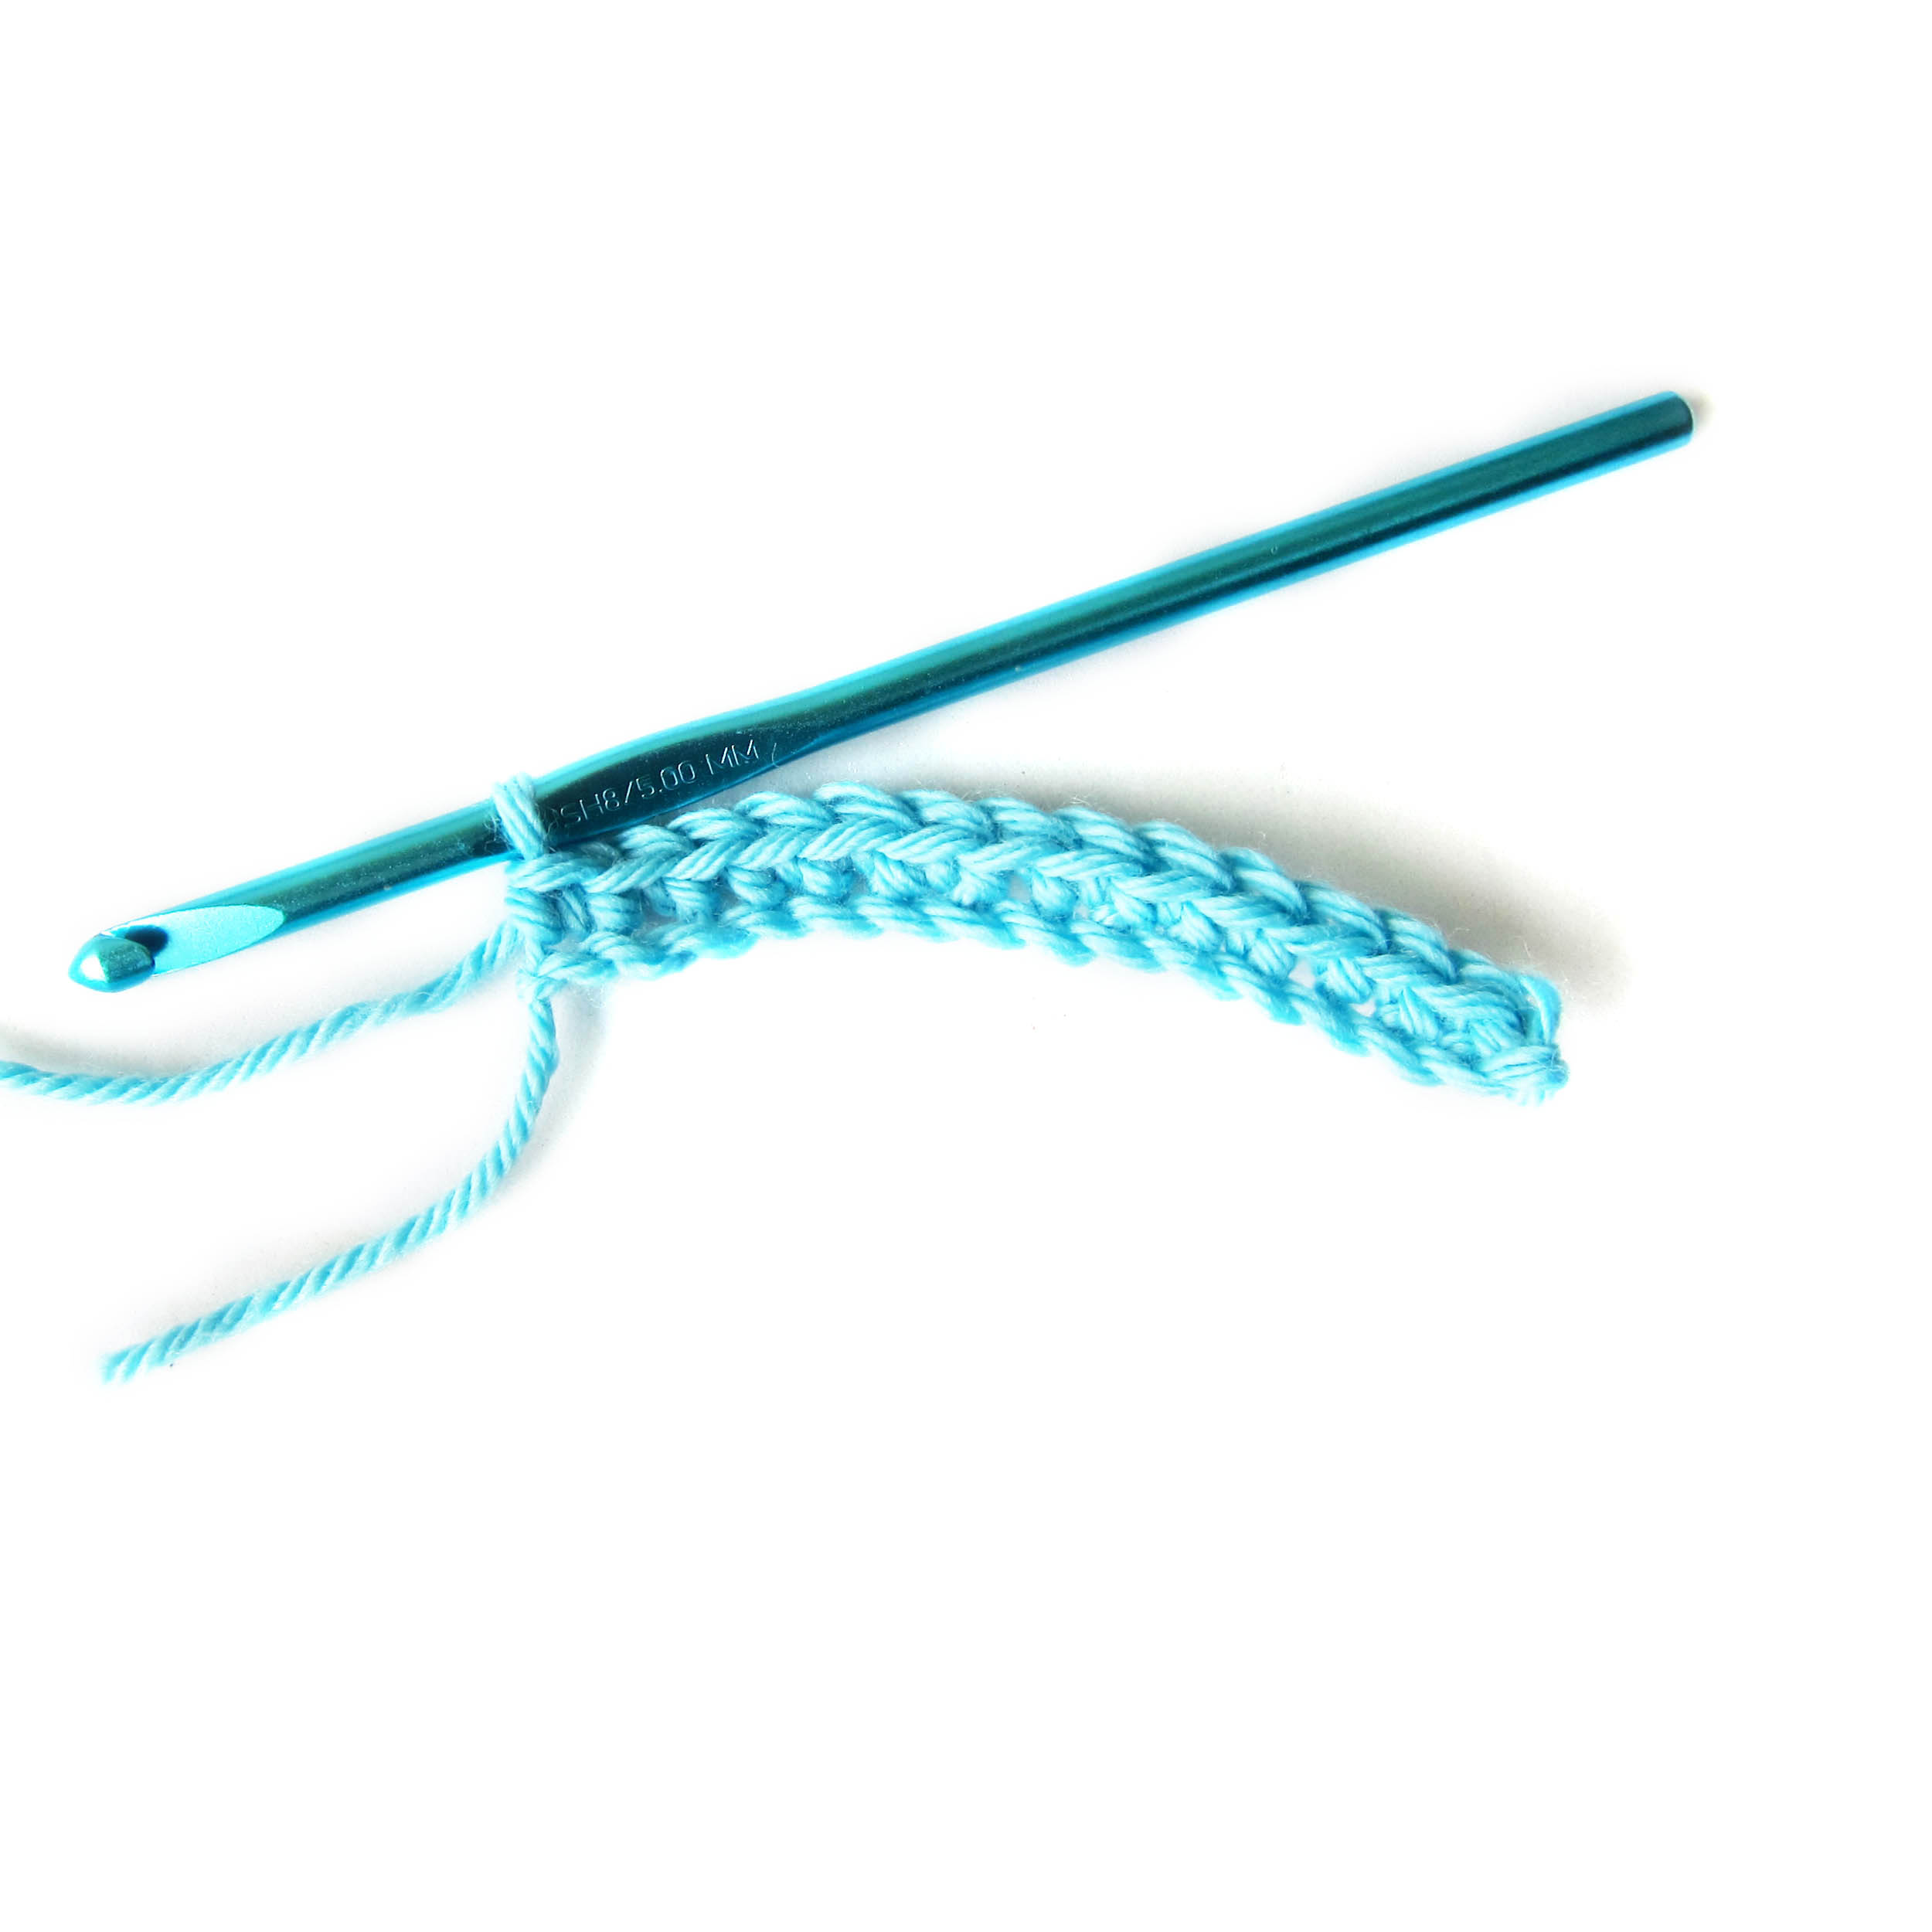
That grew one side of your oval. To grow the other side you’ll need to work the bottom side of the foundation chain
If you aren’t sure how to do that, hop on over to this blog post – How to Work the Bottom Side of a Foundation Chain.
Now we’re going to start looking at the two different ways to crochet an oval. Each results in a slightly different shape.
Technique 1: Increase at ends
One way to achieve an oval is to sc 3 times in each of the end stitches. You want to use stitches *directly* on the ends to get an even oval.
To do this, single crochet into the turning chain and the starting knot (unusual, I know!)
Put a locking stitch marker in the center of the 3 single crochet stitches, and increase (3 stitches in 1) on each side every round.
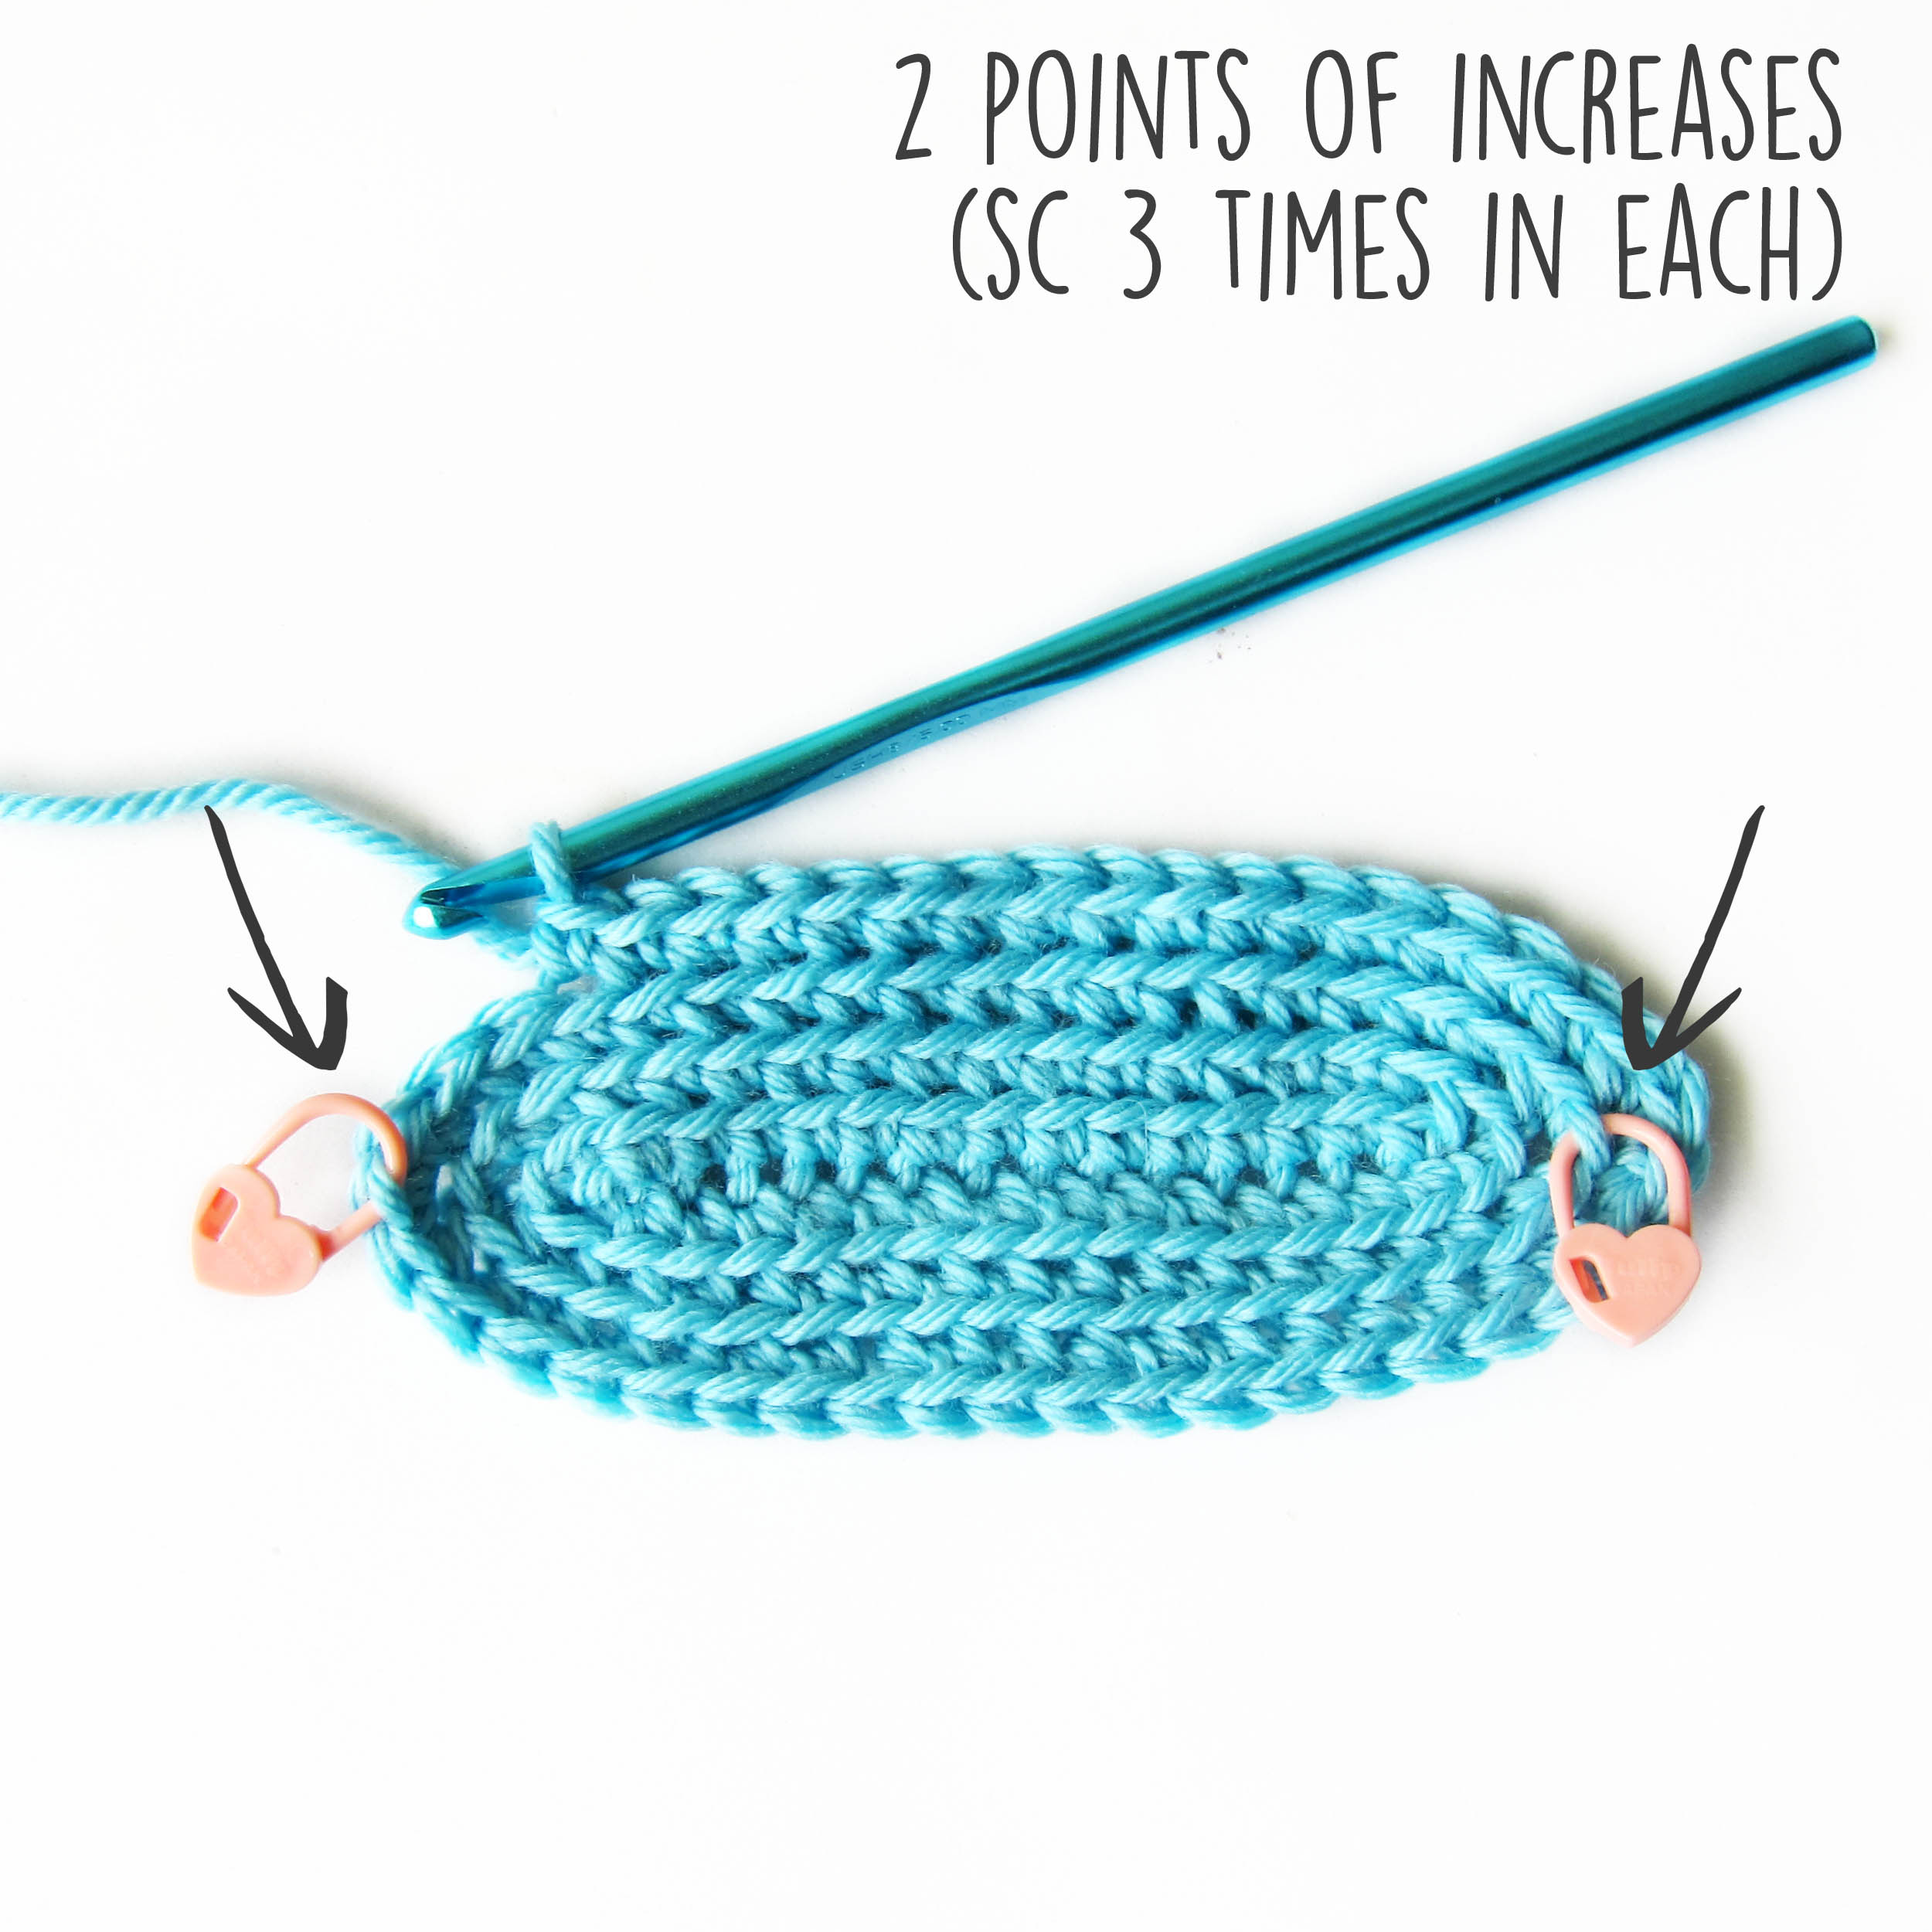
You increase 4 stitches each round. The result is a flatter oval with more pointy-looking ends.
Technique 2: Increase at ‘corners’
To begin this technique, sc twice in each of the 4 ‘corners’ of your piece, that is the first and last stitch of each side.
Do not work the turning chain or knot.
Place a locking stitch marker in the increase stitch furthest away from the end points.
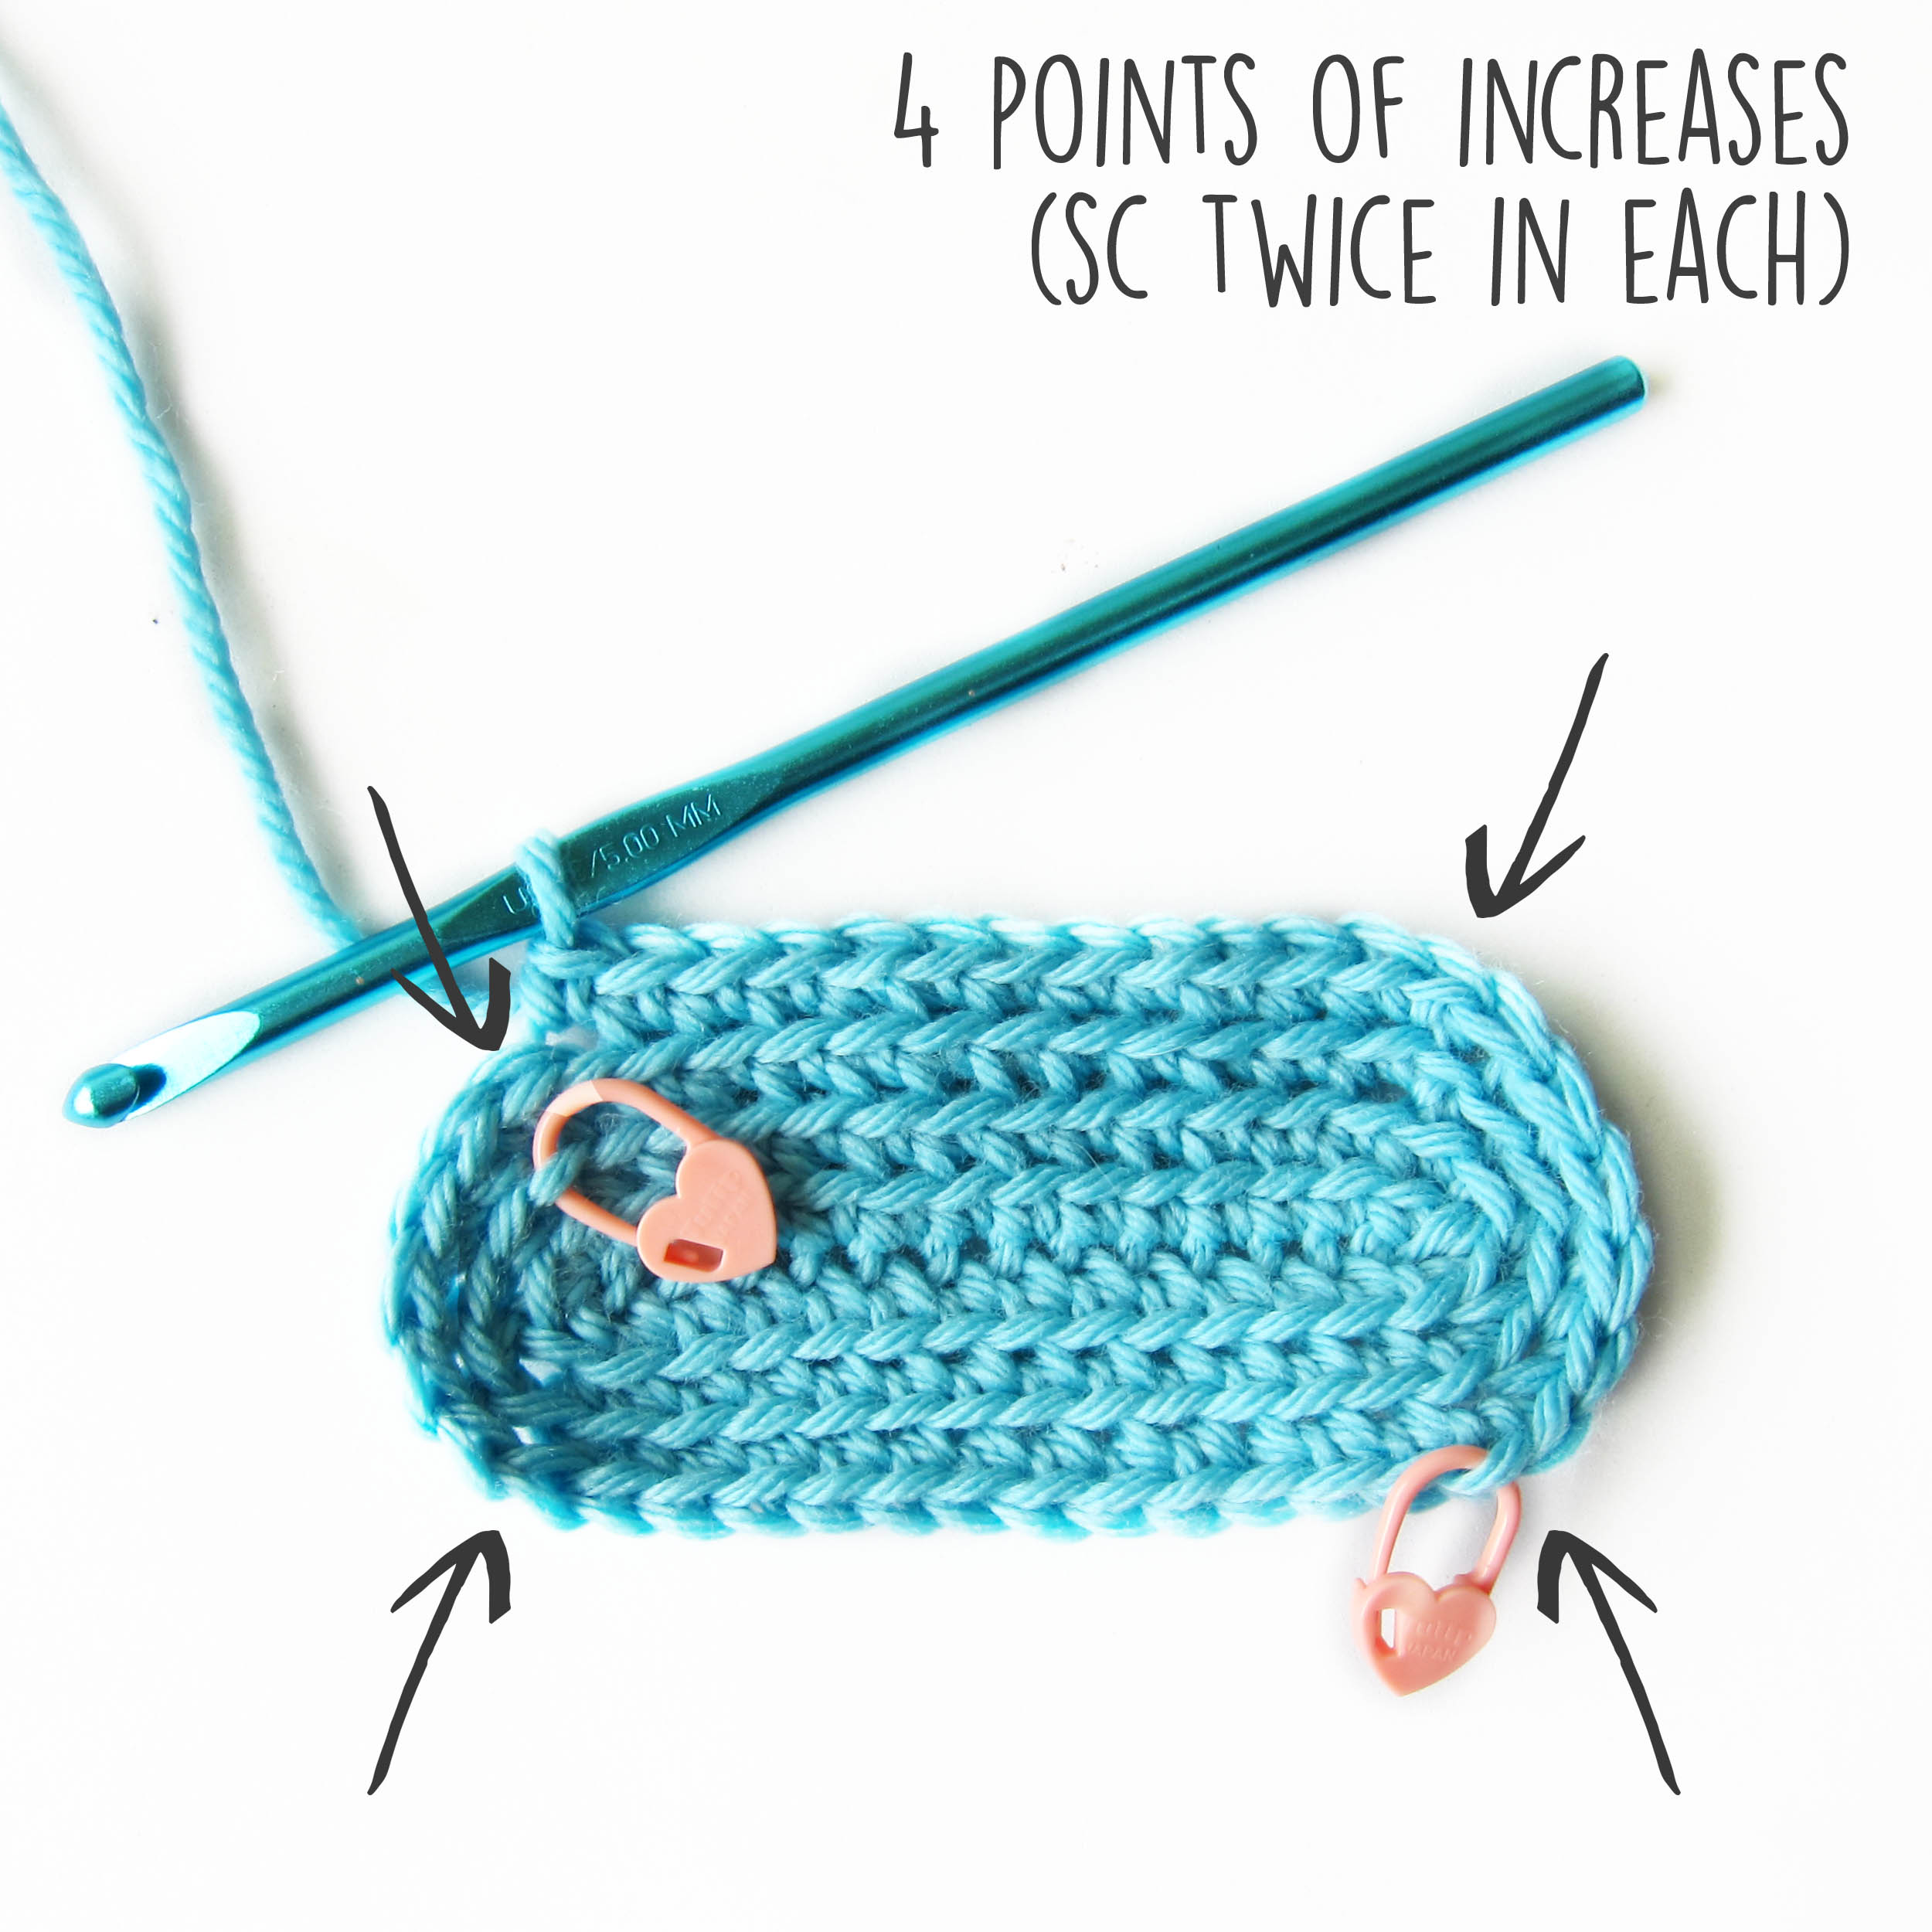
The result is a nicely rounded oval. Just like technique 1, you are increasing by 4 sts/round.
Continue increasing (sc twice in 1 stitch) at the stitches with the stitch marker. The stitch markers will move apart by 2 stitches each round (put differently, the ‘increased stitch’ goes towards the short side of the rectangle).
Crocheted Ovals in Use
I used this method to create an oval base for this cute crocheted cat pattern.

See? You can see the crocheted oval at his base.

I also used it to give Duke the Dog here his oval feet.

See?
Once you learn how to crochet an oval you can stitch up all kinds of cute critters!

Here are handy links to all the posts about crocheting more advanced shapes. . .
- How to Work the Bottom Side of a Foundation Chain
- How to Crochet an Oval
- How to Stitch One Row Below
- How to Crochet an Underbite
- How to Crochet Scallops
- How to Crochet a Pocket Mouth
- How to Crochet Two Rounds Together that Are Separated by a Foundation Chain
- How to Add a Ruffle to Amigurumi
- How to Crochet a Donut Shape
- How to Crochet the Mane on a Lion
Return to the main table of contents for Let’s Learn to Crochet Amigurumi.
Move on to the posts about troubleshooting common problems.
Happy stitching!


This is great. Thank you, Stacey.
What do you call your little yellow critter? It’s so cute.
That’s Oakley the Oak Leaf. 🙂
Pingback: 28 How To Crochet - Step by Step Instruction - DIY Crafti
This saved me I started working on a Yoshi for my boyfriend and I wanted to crochet the pupils instead of using felt like the pattern but it’s been a while since I’ve crocheted ovals thank you for this