Review of The Big Book of Knitted Monsters by Rebecca Danger

Love knitting cute monsters? Rebecca Danger’s Big Book of Knitted Monsters has been on the wish-list of every monster-knitter I know! And for good reason: it’s packed full of adorable monster patterns. This book isn’t for every knitter out there, so you’ll want to skip down to reading my review to see if it’s for you. But first, I want to show off the cutie I knitted from the book!

Hugo the Couch Monster

I couldn’t wait to break into the book and make a monster of my own! I chose Hugo the Couch Monster… he’s a real cutie! Since all of the patterns in the book are ‘any size, any yarn’ patterns… I was pleased to use up some of my stash! Hooray!

The book recommends using magic loop, but I’m a two-circulars sort-of-girl, and that technique worked out just fine!

And I’m very happy with my resulting cutie!

What do you think?

The Review

If you’re familiar with Rebecca Danger and her adorable monster patterns, then you know what this book is about! Big Book of Knitted Monsters contains 20 patterns for cuddly monsters that you can customize to be any size you’d like.

Besides the cuteness of the monsters, one of the big strengths of this book is the variety of yarns that are used to make the samples. Rebecca says in the introduction that the monsters can be knitted with any thickness yarn (and the appropriate sized needle), and she demonstrates the flexibility of her patterns throughout the book. Every monster in the book is knitted in at least two yarns: often a bulky yarn and a worsted weight yarn. It’s really great that you’re able to see how the pattern works up in different yarn choices… gets your creativity flowing!

One of the weaknesses of this book is the lack of detailed introductory and finishing information. I know why there isn’t: Martingale (the publisher) imposes an 80 page limit on its books. So of course, if you have a book with 20 different patterns, there isn’t much room for details. There are very helpful photographs sprinkled throughout the book, which I appreciate… but there are a few spots where you’re left to fill in the gaps. You’ll be instructed to ‘sew the arms on using a whipstitch’, but the exact positioning of the arms is up to you to sort out from the photograph (or maybe, your own creativity!).

Pros

  • The writing in the book is whimsical, playful and enjoyable to read.
  • The monsters are adorable.
  • Each pattern can be knitted in a variety of yarn thicknesses and colorways, so there’s lots of options!
  • Tricky knitting techniques are demonstrated through photographs: which are much clearer than an illustration.
  • If you can knit on double points (or two circulars, or magic loop), you can do almost any of the patterns in this book. Most of the monsters are fairly simple to knit.

Cons

  • The introduction is sparse. It contains information about how to do the magic loop technique, but you’ll need to look at an outside resource if you need help with other knitting techniques.
  • Other reviews I’ve read have been disappointed in the similarity between the various monsters in the book. I, personally, am not too bothered by this… they’re knitted in Rebecca’s signature style, and each one demonstrates a different shape/feature. However, each monster has a glued-on mouth, and I would have liked to have seen one that doesn’t- since glued-on mouths aren’t safe for small children to play with. She mentions in the introduction that the monster would be just as cute with an embroidered mouth, but we don’t ever see one knitted up.

So, if you like monsters and are comfortable with basic knitting techniques (or, at least, feel confident looking for outside help if you need it), then this book is for you! Happy monster knitting!

Tips for storing knitting & crochet projects

Most of us have a couple of knitting or crochet Works-in-Progress going on at one time. For today’s Tip Tuesday blog post, I’ve gathered ideas about different ways to store in-progress works. Store them neatly, and you’ll avoid the perils losing your hook or spare yarn associated with the project!

I gathered ideas by asking my twitter friends how they store WIPs. They all agreed… storing WIPs needn’t be expensive, but the storage has to keep the project together and tidy.

Questions to ask yourself before selecting a storage mechanism

  • Where do you crochet/knit? If you store and work on your WIPs in the living room, then portability might not be very important. If you tend to carry a few projects around in your purse, then you’ll need to make sure your method is travel-hardy!
  • What’s important for you to keep on hand? Some stitchers keep only the current work stored. Others like to gather up all of the yarn they’ll need for the project, plus that extra needle. Knowing how much you like to store will help you determine the kind of storage you’ll need.
  • What size are the projects you work on? If you love making afghans, you’ll need a larger tote or basket. If lacey shawls are your fave project, then a smaller bag will do. Most knitters/crocheters need a variety!
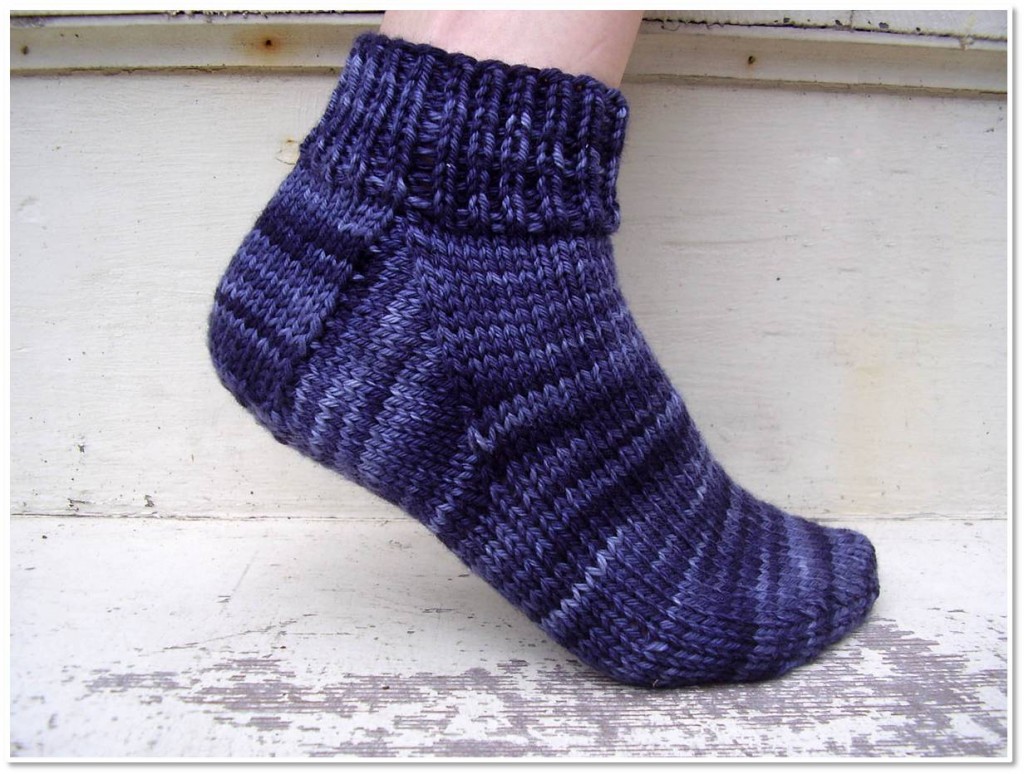
  • Do you need any extra accoutrements? In this post, I’m showing off different bag/holder ideas, but storage doesn’t end there! Think about if you need any extra tools for storing. For example, if you want to carry around a pair of socks on double points, you’ll probably also want to invest in some point protectors or a DP tube so that your socks don’t fall off of your needles while in your bag.

Storage Options

Ziplock bags
The most popular way of storing WIPs was hands-down the Ziplock bag. They come in various sizes (try the gallon size for projects like scarves, quart size for socks and mittens), are inexpensive and see-through. Since they’re transparent, you can instantly see what project is inside (a must when you start to gather WIPs). As an added bonus, you can either write on the bag itself, or stick a note inside that reminds you of crucial project info.

Cloth tote/ Reusable grocery bags
Many of us have reusable grocery bags in our home. These make great storage bags.

These bags often have handles, which makes them easy to carry around. They’re also suitable for larger projects because of their size. Lululemon bags (pictured above) come along with any purchase you make, and have a snap at the opening that’s great for keeping projects inside.

Plastic shoeboxes
If you aren’t interested in portability, then plastic shoeboxes are a great storage idea. They stack (meaning they’ll fit nicely in a corner of your room) and they’re often transparent.

For your larger projects, you can grab plastic boxes in larger sizes that are still stackable and tidy.

Your yarn store’s bag
You’re already buying the yarn… why not use the bag as a project bag?

Many yarn stores actually keep future-use in mind when ordering their bags… so make use of it!

Fancy project bags
I, of course, advocate re-using bags and making do with what you have. But, every once in a while, you need to get yourself something nice… so why not make it a lovely project bag?

You can purchase project bags in every shape, size and fabric! Check your LYS (they’re bound to carry a few styles) or have a look around Etsy (search for ‘project bag’). Erin Lane stocks a large selection of project bags- including the adorable drawstring bag pictured. I also love the square zippered bags from JessaLu. Have a look around… you’ll probably want to treat yourself to one!

How do you store your WIPs?

Please share! I’m always on the lookout for new ideas!

Stacey’s in Knitty!

I’m very excited to announce that my pattern for an intarsia slouchy beret made it into Knitty! I’ve been nearly bursting trying to keep the news quiet… but the Deep Fall version of Knitty was released today, so I can spread the news!

I really wanted to make a slouchy beret that was an easy introduction to intarsia- but that looked really complicated. Combining self-striping yarn and a really simple intarsia pattern, you can get a hat that looks like you’re doing a zillion color changes… a great pattern to try if it’s your first time doing intarsia. The pattern has two versions: a fingering weight (my favorite) and a worsted weight version (a perfect quick-knit).

Click here to view the pattern! Hope you enjoy!

Knit & Needlepoint: Boston, MA

  • store: Knit & Needlepoint
  • address: 11 Newbury Street, Boston, MA 02116 now moved, see update at bottom
  • website: http://www.needlepoint-boston.com
  • date of visit: August, 2010

Knit & Needlepoint is located on Newbury street- the ‘high fashion’ street of Boston- less than a block away from the Boston Common. It’s a long street, so don’t despair… as long as the street numbers are decreasing, you’re going to find it!

Although the store isn’t your typical American yarn shop (as it is also a Needlework shop, like many of they yarn stores in Australia), that doesn’t mean it skimps on the yarn! Knit & Needlepoint has a fun & unique selection of yarn… including their own line of yarn! Their line of yarn contains yarns that are hand-dyed and custom made from a number of indie yarnies across New England. That means you’re guaranteed to find yarns you won’t find anywhere else (and isn’t that always what you’re looking for when you’re yarn shopping on vacation?)

A large proportion of the yarns in stock are ‘fancy fibers’: wonderful for making a creative scarf or artistic project. In addition to yarns, they also provide free knitting instruction (with purchase)… so even if you’re rusty, you can grab some fantasy yarn and get started.

Next time you’re in Boston, add this shop to your list of stops! And, keep an eye on our store spotlight, we’re going to be visiting two more yarn shops in Boston!

As of 2012, the store has moved locations. It’s new address is: 244 Newbury Street, Boston.

Help for sore wrists

As knitters and crocheters, we use our hands (and wrists) a lot… and it’s not uncommon to read about developing painful wrists as a result of doing needlework. In this post, I want to share a couple of simple moves that I just learned- designed to get the fluid in your wrist joints moving, and alleviate some pain.

I, personally, have had a fair amount of wrist trouble for about 10 years. I get Ganglion Cysts, which are a buildup of joint fluid that has crept out of the joint (ick!). They’re quite painful, and I get them most often after I’ve been crocheting or knitting with bulky yarn for long periods of time… bigger yarn means bigger needles and more moving! And, since I crochet as a living… I’m very concerned about keeping my wrists healthy!

Last week, I was in yoga, working on crow pose, which (at least to those of us not super-experienced) feels very intense on the wrists. Afterward, my yoga teacher (Margot, at Breathing Room, if you’re local!) showed us some wrist maneuvers – and my wrists felt so much better!

And, they’re really simple! First, squeeze your wrist, applying pressure on the top and bottom. Second, rub the top of your wrist with the thumb of your opposite hand. Then, rub the bottom of your wrist with the thumb of your opposite hand (click on the photos above to enlarge them). Easy! I did each of these for about 30 seconds, and noticed a difference.

Be nice to your wrists… they’re important for your knitting and crocheting! And if they’re sore, give these simple moves a try.

SHARE THIS

Free Knitting Pattern: Easy Peasy Socks!

I just designed a pair of socks for my beginning sock knitting class… and have made the pattern a free download! These socks are designed with the first-time sock knitter in mind. Sock knitting can seem daunting, but it doesn’t have to be. All you need to be able to do is work in the round, decrease and pick up stitches, and you can make these socks!

free easy knitting sock pattern


Click here to download!


These are worsted weight socks, which means that they’ll be warm, and work up quickly. They may not be the socks that you want to wear every day, but I think that you’ll be a less discouraged sock knitter if you learn the basics on a project that you’ll finish quickly. Save your pretty self-striping sock-weight yarn for your next pair.

Warning: This pattern is annotated with lots of helpful hints & notes… it’s sorta like a transcript of what a sock class with me is like. This is probably very boring if you’ve knit socks before!

Notes on the pattern for those interested in teaching: I designed this pattern to teach first-timers to knit socks, so there are a number of simplifying design features:

  • Short cuff, so it’s quick to get started learning ‘sock-y’ things
  • No leg, same reason as above
  • No need to keep track of ‘needle 1 and needle 2’ like some sock patterns… because everyone always looses track!
  • Heel flap is worked in stockinette, no fancy pattern to remember
  • Only one round to remember for gusset decreases, so you don’t need to keep track of what round you’re on
  • Worsted weight goes fast!

As with all of my patterns, you’re welcome to sell anything you make with the pattern. Please do not sell or repost the pattern itself without permission. 🙂

This sock pattern makes use of the ‘ssk’ decrease. This is a decrease over two stitches, and is not achieved by ‘slip 1, slip 1, knit 1’. If you are unfamiliar with this decrease, please check out this video.

Need more help?

Need more sock help? I recommend the visual-oriented learners take Donna Drachunas’s Knit Sock Workshop on Craftsy. It’s a video course, so you’ll learn everything you need to know!

Happy stitching!

Best,
Stacey
Stacey from FreshStitches

A finished Clapotis and some tips

Tips for knitting Clapotis
Just the other day, I finished my clapotis, a wonderful scarf/wrap pattern by Kate Gilbert available as a free download on knitty. Clapotis is a wrap that makes use of dropped stitches for a great finished texture. It’s a very popular pattern (over 14,000 people on ravelry have made it), and no wonder! The pattern is easy to remember and it’s fun to do!

tips for knitting clapotis
After a successful Clapotis attempt, I learned a couple tips and tricks to share. These tips will be most useful once you’ve familiarized yourself with the pattern.

  • selecting a yarn Keep in mind that you’ll need to drop lots of stitches (on purpose) for this pattern. That will be easier to do if your yarn isn’t fuzzy or sticky. I used a 50% wool 50% silk for mine, which I loved, but dropping the stitches took a bit of effort because it clung to itself. If a yarn is hard to unravel, then it’s going to be hard to drop stitches.
  • switching yarns If you’re using multiple balls of yarn, you’ll have to change yarns at some point. Some folks are ‘switch yarns at the end of the row’ people, but I’m a ‘switch yarns in the middle of the row’ sort. If you’re like me, it’ important to switch yarns in the middle of a k3 sequence. This will ensure that your change isn’t near a stitch that will be dropped, and also give you solid surroundings to weave in your ends.
  • customizing Don’t forget that you can change the size from what is called for in the pattern (either by changing the number of increase repeats- to alter width- or the number of straight repeats- to change length)! Mine is much longer than what is called for, so I can wrap it around me oodles of times! If you’re looking for a quick project, you can do a skinny scarf version.
  • knitting through the back loop Don’t forget to knit through the back loop… especially the row after you’ve done your yarn overs! If you forget on this particular row, it will look very sad when you drop the stitches. And, the saddest part is… you will have knitted lots of rows before you find out!
  • instead of stitch markers If you’re low on stitch markers, you can purl the stitch that you’re going to drop. This will remind you when to knit through the back loop without oodles of little rings. (thanks, Ravlery, for that tip!)

If you’re interested, you can check out the full details of my clapotis project. I loved it so much, I’ve already started a second one!

How to work with two yarns at once

I often get asked about the best way to work with two yarns at once. So, in this post, I’ll talk about the pros and cons of three different ways of working with a double yarn.

Big owl crocheted cuddly

Of course, for any amigurumi pattern, you can crochet with two yarns at once, use a bigger hook and follow the pattern… and you’ll end up with a bigger animal! Fun! (shown above: a giant Nelson the Owl!)

Working with two balls of yarn

how to work with two strands of yarn at once

The most obvious way of working with two yarns at once is to simply hold two strands of yarn together from two separate balls of yarn.

advantages

  • If you purchase your yarn already in balls, you don’t have to do much… just find the ends and go!
  • If you want to do some interesting yarn combinations (such as hold one strand of plain yarn together with one strand of beaded yarn- which I’ve done when knitting a felted bag), no additional work needs to be done.
  • Since the balls of yarn are independent, it’s okay if one ball is longer/shorter than another. Just work on a new second ball when one runs out.
  • You can hand-wind your balls of yarn. Since you can work from the outside of the yarn, there’s no need to make center-pull balls (which either require a ball winder or a specialized hand-winding technique).

disadvantages

  • Balls can sometimes be unruly. With this technique, some people struggle with keeping both balls of yarn in the same place, or keeping them from becoming hopelessly tangled. If you want to avoid this, consider winding two center-pull balls, and only working from the center. This eliminates (at least lessens the amount of) the ‘rolling-around factor’.
  • If you purchase your yarns in skeins, you’ll need to wind two skeins at a time to work in this technique. This can sometimes be inconvenient.
  • If you’re working on a small project that doesn’t need two balls worth of yarn, this technique requires modification. You can divide your yarn in half, and work with two smaller balls, but in my opinion, this eliminates the ‘easy advantage’ of this technique.

Work from two ends of a center-pull ball

how to work with two strands of yarn at once
A second technique is to work from both ends of a center-pull ball: holding the yarn that comes from the center together with the yarn that comes from the outside.

advantages

  • You only need to wind one ball of yarn at a time: particularly great if your project requires only one ball of yarn, or an odd number of balls.
  • You can do this ‘straight off the shelf’ with many yarns packaged as balls – most are center-pull.

disadvantages

  • You’ll need to make center-pull balls… which either require a ball winder or a specialized hand-winding technique.
  • This, like working with two balls at once, can sometimes become tangled and a little unruly.

Winding two balls of yarn together

together-300x225
A third technique is to wind two balls of yarn together, and then knit or crochet with the two ends.

advantages

  • This technique is easy to work from: no ends or stray balls to get tangled.
  • You can hand-wind your balls of yarn. Since you can work from the outside of the yarn, there’s no need to make center-pull balls (which either require a ball winder or a specialized hand-winding technique).
  • If you purchase your yarn in skeins, winding two yarns together takes half the amount of time as winding two separate balls of yarn.

disadvantages

  • If you purchase your yarn already in balls, this technique takes extra time to get started.
  • If you’re working on a small project that doesn’t need two balls worth of yarn, this technique requires modification. You can divide your yarn in half, and then wind these two smaller balls together…but that makes this technique more time-intensive.

So, there you go! Hopefully, one of these techniques will be right for you!

Best,
Stacey

How to uncurl the cord on your circular knitting needles

how to fix a curly circular needle cord

It’s one of the biggest problems with circular knitting needles: the cord is often all twisted! When too curly, the needle is difficult to work with… and it’s often in it’s curly state when it comes out of the package or after being stored for a while (as pictured in photo 1, above). Fortunately, it’s an easy problem to solve.

To untwist a curly needle cord, just soak it in warm water (photo 2, above)!

How to fix a curly circular needle cord

The warm water relaxes the cord, and it will come out nicely uncurled… all ready for you to begin knitting! How easy is that?

Free Pattern: Persephone slouchy beret

Free Slouchy Beret knitting pattern

This slouchy beret is deceptively simple to knit, and makes use of one color-changing yarn and one complimentary solid color to create a gorgeous design. In this sample, I used handspun yarn as the colorful yarn, but any number of commercial yarns would look wonderful, including: Noro Silk Garden, Crystal Palace’s Mochi Plus or Noro Kureyon.

For this pattern, you will need:

  • 100 yards of a variegated worsted weight yarn (I used handspun, but see suggestions above)
  • 100 yards of a complimenting solid color (I used Stonehedge Fiber Mill’s Shepherd’s Wool… super soft merino!)
  • size 5 (3.75mm) 16 inch circular needle
  • size 5 (3.75mm) double point needles for the top
  • a stitch marker
  • tapestry needle
  • a length of 1mm elastic (optional)

Persephone Slouchy Beret: the pattern
Gauge: 6 sts/in
MC: solid color
CC: variegated color

free slouchy beret pattern

With MC, CO 100 sts
Rounds 1-6: * k1, p1. Repeat from * until end of round.
Round 7: * k2, m1. Repeat from * until end of round.
Round 8: * k6, m1. Repeat from * until end of round. (175)
Rounds 9-10: With CC, knit in each st.
Rounds 11-12: With MC, knit in each st.
Repeat rounds 9-12 (essentially, knit while switching colors every two rounds) until piece measures 5.5″ from end of ribbing. This is approximately 50 rounds. Add more rounds for more ‘slouch’, fewer rounds for less.

Helpful Tip: twist the strands of yarn when you are switching colors (as when working intarsia). This will prevent a gap from forming between the color changes.

Now, begin your decreases
Decrease Round 1: * k2tog, k23. Repeat from * until end of round.
Round 2: * k2tog, k22. Repeat from * until end of round.
Round 3: * k2tog, k21. Repeat from * until end of round.
Continue in this pattern (one fewer knit stitch between decreases per round) until 7 sts remain.
Cut yarn, and thread tail through remaining sts and knot!

This brim is slightly loose. To assure a snug fit, run elastic through the brim, or use a smaller size needle when working the ribbing. Wear proudly!

I was inspired by the changing of the seasons in designing this hat. I love the variation in color across the beret, and it’s versatile enough to be used as a winter hat, or a stylish spring beret. Hence the name.

According to Greek myth, Persephone was abducted by Hades and (making a long story short) was tricked into spending 3 months of each year in the underworld. Her mother, goddess of fertility of the Earth, was so distraught at losing her daughter that nothing could blossom on Earth in her absence. Upon Persephone’s return, her mother delighted, and the Earth blossomed with new fruits and vegetation. (Get it? Winter and spring!)

Enjoy!