Do you need sharp-tipped knitting needles?

Do you need sharp-tipped knitting needles? Some recommendations from Shiny Happy World and FreshStitches

I’ll level with you. I don’t like sharp-tipped knitting needles.

Do you know why? I’m a pusher:

Point pusher with knitting needles callous

That means that I push on the tip of the needle as part of executing my knitting stitch. A sharp tip means a major ouchie.

But, even I’ll admit: there are times when you need a sharp-tipped knitting needle.

When to use sharp-tipped knitting needles

Some folks love using super-pointy needles all of the time. These folks will tell you that every knitting project is the right time to use sharp-tipped needles.

Knitting with Karbonz needles from Knitter's Pride Review

But what about those of us who have a knitting style that makes using sharp-tipped needles painful? When is it really helpful to use a sharp needle?

Here are a few cases where I reach for my sharp tips:

  • when working with a yarn that’s fuzzy (for example, containing mohair)
  • when using a lace-weight yarn (the tips help you navigate a super-thin yarn)
  • on any pattern that calls for ‘big’ decreases (like k3tog, common in bobbles), since the tip helps you get through all those stitches at once
  • any other time I’m having difficulty manipulating the stitches, perhaps passing one stitch over another

Selecting a sharp-tipped needle

For those of us who don’t love pointy needles, selecting one for occasional use is a pickle. You want a nice, quality needle… but since it’s only going to come out of the cupboard infrequently, you also don’t want to pay too much.

A few that didn’t make the cut…

When I first started knitting, I made my sister-in-law a lace mohair cabled scarf. It was impossible to knit with my regular needles (do to the lace-weight and mohair combo), so I bought a pair of Addi Lace needles.

I absolutely adore Addis, but I sold this Lace circular on ebay the minute I was done with them. Why? The smell of brass as I was working (that was also left behind on my hands) was too much for me to bear.

I’ve also heard fabulous things about the Stiletto tip on Signature needles. Very pointy! But, these needles are an investment… and to get your money’s worth, these needles are best suited to those who like a sharp-tipped needle for everyday knitting.

Knitter’s Pride Karbonz

Just the other week, the perfect solution happened across my desk. Knitter’s Pride’s new line: Karbonz.

carbonz needles

They meet my criteria for a lovely needle: they’ve got a good feel, a smooth join and they’re reasonably priced. And they’re available in circulars, double points and straights. At around $15, they’re a fabulously high-quality needle that’s not out of range for (my) occasional use.

join

I can’t say for sure whether sharp-tip-lovers will find their new favorite needle in these, but my suspicion is that they tick a lot of boxes. They’re very lightweight (made from carbon fiber), have more flexibility than other metal needles and are warm to the touch.

Downsides? At current, they’re only available in sizes 0 to 4 (but are available in the myriad of half sizes in that range, have a peek here to see the full line). And while the surface of the needle is slick (and certainly smoother than most wood and some aluminum needles), they’re not quite as slick as the nickel-plated Addis.

So, if you’re like me and need a sharp-tipped needle for occasional use that won’t break the bank, give Karbonz a try. And if you like sharp-tips and want a warm light-weight needle, then give them a try, too!

Enjoy the remainder of your weekend, everyone!

disclaimer

Adorn Anew Blog Tour: How to dye a gradient yarn with kool-aid!

Today I’m going to show you how to dye gradient yarn in two fabulous colors – with Kool-aid! But first, a little background. . .

I was excited when Laura Nelkin asked me to be on the blog tour for her serialized ebook, Adorn Anew. It’s a beautiful collection of knitted & beaded jewelry and accessories, with a new pattern released each month in 2012.

Adorn Anew by Laura Nelkin - book cover showing yarn and beads

Laura is well-known as the ‘knitting with beads’ goddess (okay, I made the title up, but that’s an accurate description!), and is the instructor of the crazy popular Knitting with Beads course on Craftsy.

I had never knitted with beads before, so the reason I was so stoked to be on the blog tour is that I knew it would give me a push to give knitting with beads a try. Beads add such a beautiful bling to your project without increasing the difficulty by too much. Besides, I know Laura’s work. The instructions in her patterns and accompanying videos on her site are fabulous. I wouldn’t run into any trouble.

Four hand-knitted Stellani shawls draped over a wall - all made with gradient yarn

So, anyway… (this is one of those stories where my husband would say, “where’s the point of this story?” And I would say, “I have to tell the story chronologically!”) I signed up to be on Laura’s blog tour back in early summer, when only half of the patterns had been revealed. I was anxiously awaiting November, so I’d discover which pattern I’d be knitting. I nearly fell off my chair when I found out that November’s pattern is Stellanti! It’s an amazingly beautiful shawl… and I spotted Laura wearing it at Rhinebeck, but I had no idea it would be part of Adorn Anew! I had been coveting it… and I am so excited to be knitting it!

What is a gradient yarn?

A gradient yarn is a yarn that slowly shifts from one color into another. Although Stellanti would be beautiful with any fingering weight yarn… the gradient yarn used for the sample gives it a little extra pizzazz.

The samples were knit in Nightfall by Fibro Fibers, which is absolutely stunning. But since each skein is hand-dyed (and there’s currently a huge demand for Stellanti!), this particular yarn can be hard to get your hands on.

And since this shawl requires 490 yards, purchasing a standard 440 yard skein (of Noro or another commercial gradient yarn) won’t work… since you’d run out of yarn and would need a 2nd ball… which would mess with the gradient.

Sound like a pickle! No worries! I’m going to show you how to dye gradient yarn, using Kool-Aid! It’s fun, cheap and easy!

How to dye a gradient yarn

Let’s do it! You’ll need:

  • 490 yards of undyed yarn (details below)
  • 2 colors of Kool-Aid, 5 packets each
  • 4 mason jars or containers

Prepare your yarn

To begin, you’ll need 490 yards of an undyed fingering weight yarn, mostly wool (a little bit of nylon is fine, but avoid plant fibers, since these won’t take dye the same way). I’m using LB 1878 from Lion Brand, but I’ve also had great success with the bare skeins from Knit Picks:

Roll your yarn into a cake… this step is important!

Select your Kool-Aid

I’ve blogged about dyeing with Kool-Aid before (read the different techniques here!), but today we want to dye gradient yarn, which means selecting only 2 colors. For the effect I want, I need to make sure one of my colors is noticeably darker than the other.

I chose Tropical Punch (red) and Grape (purple). I discovered that there’s a special Halloween color called ‘Ghoul-Aid’, which is closer to black and would work amazingly, but I didn’t know about it when I was dyeing!

Prepare your yarn and Kool-Aid

First, prepare your yarn by separating it into 4 approximately-similar-sized chunks. This is easy because you wound your ball… pull out one center chunk, then another…

Line your mason jars up in a row. Pour 2 packets of color 1 into the far left one, then 2 packets of color 2 in the far right one. For the center two jars, combine the colors to create your gradient. For example, my 2nd jar contains 1 packet of Tropical Punch and a teaspoon of grape:

Setting up the colors to dye gradient yarn

Next, pour very hot water into your jars:

Four mason jars, each holding a different blend of colors to dye gradient yarn - with a bundle of white yarn sitting in front of each jar

At this point, it would be wise to stick a little sample yarn into each jar… just to make sure you like the color. You can add more Kool-Aid to alter the color at this point.

Dye!

Stick the yarn in the jars! One yarn ball per jar. . .

Four mason jars holding a blend of dye shading from red to deep purple - each with a ball of yarn soaking up the dye

Use a utensil (remember, the water’s hot!) to poke at the yarn and make sure every bit of yarn is getting wet. If there’s a section that doesn’t absorb yarn, you’ll end up with a white blotch!

detail of yarn being dyed red

Do you notice a little section of white yarn between the jars? Be sure to dunk those sections into the dye as well!

Let dry

Remove the yarns and squeeze out the excess water:

How to dye gradient yarn - four balls of yarn each dyed a different color, shading from red to deep purple

Let these dry completely before you do anything else… you don’t want any tangles!

You have a gradient yarn!

Once dry, wind into a cake:

Finished cake of yarn dyed in a  gradient from red to purple

Ta da! Isn’t it beautiful!

Want to see my progress?

I think my Stellanti is knitting up beautifully!

And look at my beads! Aren’t they fabulous?

Knitting with beads isn’t too complicated… the most difficult part (in my opinion) is that once pre-strung, you have to keep scooting the beads down your yarn as you work. No biggie.

Want to get started?

Now you can dye gradient yarn yourself – no special tools or supplies needed, just two colors of Kool-aid! You can grab the Adorn Anew ebook (for the whole collection of fabulous patterns), or just the Stellanti pattern.

Happy stitching!

Save yourself a knot by working your yarn from both ends of the skein!

Has this ever happened to you: you’re crocheting along, but discover that you need to use your yarn for another piece? Do you have to cut the yarn? Not if you know this little trick! This one will work for both crocheting & knitting.

As you can see here, I’ve been crocheting with the yarn from the center of the skein of yarn. And here’s the thing that’ll help you: every ball of yarn has 2 ends!

You can use this second end of the yarn to start your new item… while leaving the existing piece in tact! To do this, you’ll want to pull out your crochet hook:

And fasten a safety pin into your loop to keep it from unraveling (if you’re knitting, you’ll want to use a stitch marker as you pull out your needle):

With your previous work secured, you can pick up the second end of the yarn and make a new piece!

Once you’ve completed your urgent 2nd project, you’re free to return back to your first project… and all without needing to cut your yarn!

How’s that for a handy trick?

This is particularly helpful if you have a slow-moving project happening on a very lovely skein of yarn!

Book Review: The Knitter’s Curiosity Cabinet

I’m no stranger to keeping mementos out around the house. They’re pieces that serve as decorations, but also contain little memories… organized in my favorite manner: by color. There’s my ‘Poppop corner’, which contains my Grandfather’s magnifying glass, a cancelled check that he wrote and a lovely Wedgewood dish of change that fits the color scheme:

I have a collection of ‘clear glass & silver’: an old insulator cap, a weird thing-y from an old tv, a platypus spoon from Australia and some vases:

And of course, there’s some blues… a paperweight I got from a glass-blowing shop in Bermuda, a bell from Holland and some candlestick holders that were my Grandmother’s:

They’re things I look at every day: reminders of pleasant memories and conversation points when friends come to visit.

The Curiosity Cabinet

In contrast to my mementos out for all to see, Curiosity Cabinets (a tradition dating back to the 17th century) contained personal collections usually kept closed in a cupboard. These cabinets contained trinkets from exotic locales (like my Bermudan paperweight!) or perhaps an interesting sketch.

I didn’t know about curiosity cabinets until Hunter Hammersen’s delightful description of the concept in her book, The Knitter’s Curiosity Cabinet. Hunter has unlocked the secrets of these oft-mysterious collections and developed a series of knitting patterns based off of the botanical illustrations one could expect to find inside.

The book contains 10 botanical illustrations, each inspiring a sock and an accessory pattern. What transpires inside this book is part history lesson & part botany lesson, inside a book of knitting patterns teeming with Hunter’s passion for vintage botanical prints.

Interview with Hunter

Don’t you want to get to know the woman who’s clever mind created an entire book of knitting patterns… inspired from the vintage botanical illustrations found in curiosity cabinets? I do!

I love the idea of a Curiosity Cabinet! Tell us about a few items in yours.

I have such conflicting feelings on this one. A big part of me is almost alarmingly minimalist. I have a habit of going around my house and getting rid of stuff I don’t need whenever I’m in a bad mood. The vast majority of the house is more or less totally free of little bits of stuff. But, I also have magpie tendencies. I am forever picking up all sorts of wee treasures. I indulge this tendency to collect in my office. I’ve got one bookcase in particular that we refer to as the home for wayward knitting props. I have a whole array of old hat forms and old glove forms. They’re totally practical (by far the best way to block and display hats and cuffs), but I love them just as art objects. I’ve more or less convinced myself I have enough hat forms, but I’m still officially on the look out for more of the hands.

I can totally relate! If it’s a display item that has a function… then it’s okay, right?
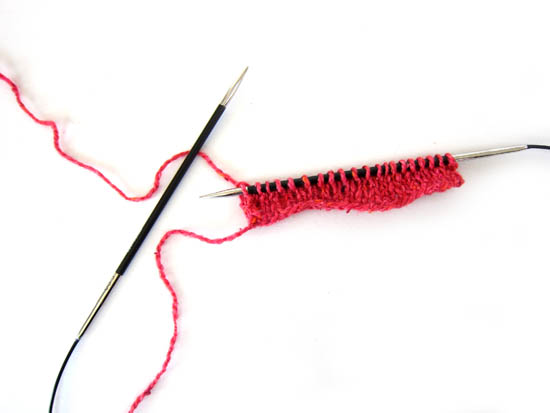
This book contains a lot of sock patterns, so I have to know: what’s your favorite way to knit socks? Dpns? Two circs? Magic Loop?

DPNs all the way! I’ve tried both (Cat Bordhi herself snatched my DPNs away, put circulars in my hands, and supervised the process), but I just like the feel of DPNs better. The circulars always seem too small and flimsy. Besides, all those sharp points and flailing sticks look suitably impressive to non-knitters!

Wow! Dpns despite explicit instruction from a sock-goddess… you’re hard-core! What characteristics do you look for in a good sock yarn?

Tight twist! It makes all the difference. Also, I’m a big fan of nylon in sock yarn. It dramatically extends the life, and I don’t find that it compromises the look or the feel. If I’m making socks, I more or less insist on it (though I will occasionally hold a strand of woolly nylon along with the yarn for the sole of the foot if I’m overcome by the beauty of a slightly unsuitable yarn).

I also like what I tend to call fat sock yarns. Something with a bit more heft to it (I have big feet and I’m impatient…fat yarn helps the socks go faster). The secret to long lasting socks is making a tight fabric. That’s easier to do (for me at least) if I use a fatter yarn. Some of my favorites are Nichole by Schaefer, Casbah by Handmaiden, and Everlasting by Dream in Color (that one doesn’t have nylon, but it’s so yummy it’s worth it).

Describe a bit about the process of designing lace patterns inspired by botanical designs. Did you draw your own sketches? Or just get straight to knitting/charting?

It’s sort of a hard process to describe. It usually starts with doodling on the botanical print (well…on a photo copy of it…not on the print itself). That lets me see which parts of the print I want to play with. After that, there’s a long period of playing with graph paper (sometimes with the aid of a handy collection of stitch dictionaries) to try and capture those aspects of the print in stitches. The best of the graph paper doodles eventually get worked up in yarn.

That leaves me with some neat stitch patterns, but that’s only half the project. Then you have to figure out what to do with them…how to take the stitches and turn them into knitted objects. That means a bit of math and quite a bit of planning. Somewhere along the way it’s also important to pick out yarns and swatch the stitch with the actual yarn you plan to use for the piece itself (don’t ever ever ever skip this step).

The whole thing happens in sort of a non-linear fashion too. It’s not like you can plow through each print in turn from start to finish. There’s a fair bit of scattershot experimentation and switching from one project to the next with wild abandon. In the end it all gets done though!

Do you have any advice for knitters who might be new to charts? Tell us a bit about why you used charts (over written directions).

I am a huge proponent of charts. They just make so much more sense than written directions. I know they can seem a tiny bit intimidating the first time you see them, but I promise they’re worth getting used to. I really think learning to use charts is the trick to becoming a comfortable and confident knitter.

Remember, charts are stylized pictures of what your knitting will look like. So you can look at a chart and see…actually see…’oh hey, look, this line of decreases goes like so and it’s a mirror image of that line of decreases over there.’ That means you’re less likely to make mistakes in your knitting, because you know ahead of time what sort of shapes and lines you should be expecting. It also makes it easy to get into that lovely zen state where you’ve really understood the stitch pattern and you can just sit back and knit, rather than struggling to read a list of abbreviations. You totally owe it to yourself to try them, you’ll be glad you did!

Tell me a bit about your workspace!

Alrighty…for you, I’ll vacuum and dust! My office is a long, narrow room, painted a lovely rich red, and filled to the brim with books and yarn. The red part means it’s awfully hard to take a decent picture, but maybe this will do. What you see there is the view from my desk (if you, you know, stand up and peer over the computer monitor).

I wasn’t kidding about the books part…there are a few more bookcases behind the desk that didn’t quite fit into the picture. Acquiring books is something of a family curse. Not one of us can leave a bookstore unscathed.

Given these tendencies, I think the card catalog makes perfect sense. It’s one of my favorite things in the whole house. It holds my sock yarn. Well…most of my sock yarn. It’s actually quite well suited to the job. Each drawer holds 2 big skeins. I may just possibly have been known to organize it in rainbow order when I had the flu and needed to pet yarn but was too sick to do anything more useful. The closet holds the rest of the stash (it is not nearly so tidy) and other crafting supplies like my poor neglected sewing machine.

Then, of course, there is the all important comfy chair. If I’m in the graph paper stage of working on new patterns, that’s where you’ll find me, (colored pencils in hand and cup of tea by my side). It’s where I do a fair bit of my swatching too, hence the crock of various needles at the ready. Barry the Wonder Cat has graciously offered to keep my seat warm for me while I’m not there.

What’s currently on your knitting needles?

Will you think I’m terribly boring if I confess that I’ve only got one lone pair of socks going at the moment? And that they’ve been waiting for the toe (of the second sock) for the better part of a week now? Shameful I know. In my defense, I did just finish up a project for the next book! It’s a lovely smooshy purple thing, that must (alas) remain secret for a bit longer yet. I’m starting to feel a hat-knitting urge though. I’ve got some yarn on hand that is destined to become a hat for my husband, and it’s been whispering to me for the last few days.

That’s not boring at all!

Thanks so much for coming over and having a chat, Hunter!

Find Hunter and the book!

Get the book here!

Picking needles for knitting your sock…

A lot of folks get intimidated by sock knitting… and one of the things that’s so scary is picking what kind of needles to use! There are so many choices!

The truth is that the choice of which needles to use is completely personal preference, so you’ll probably have to try out a few. In this post, I’ll talk about the 4 main needle options for sock knitting, as well as the pros and cons of each one. Then, it’s up to you to pick your fave!

Double Point Needles

Options Available: material (metal, wood or plastic), length (ranging from 5-8″)

Double point needles (often abbreviated dpns) are a very common way to knit socks, and probably the most common way you’ll learn when you’re starting out. In fact, it’s the method I use in my Easy Peasy Sock pattern.

Pros:

  • Many sock patterns are written for dpns, so using them for these patterns is a lifesaver! (unless you’re already experienced with tweaking sock patterns)
  • They’re not very expensive.
  • Almost every needle company makes dpns (or a few!), so you have lots of options.

Cons:

  • There is a high probability of ‘laddering’, a funny gap that happens when moving from one dpn to another. You’ll have to knit carefully to avoid it.
  • The skinnier ones (which you use for socks) have a tendency to break. You might want to consider metal or needles with a replacement policy.
  • You’re using 4-5 needles to make once sock. Losing one (or dropping it under an airplane seat) is sad.

Are you going to be tossing your socks in a purse? Think carefully about how likely your stitches are to fall off, your needles are to break or get lost. If you love dpns, you might want to consider getting double pointed needle tubes so your in-progress socks don’t get into any mischief.

Two Circular Needles

Options Available: all of the options usually available for circular needles: material (metal, wood or plastic), length (ones ranging from 16″ to 32″ are usually used), pointiness of the tip

You can use two circular needles knit socks… they basically behave like 2 giant bendy double point needles. This is the way I knit my first pair of socks, and I love it! It’s a wise idea to use two circulars of different length (or different colored tips) so you can distinguish them while knitting. An added bonus is that this method makes available knitting 2 socks at one time (Knitting Circles around Socks, pictured).

Pros:

  • Because there are only 2 spots in between the needles (compared to 3 or 4 with dpns), laddering is less of a problem.
  • You may already have the circulars in your needle stash.
  • The ability to do two at a time? Rock on!
  • The project can easily be tossed in a bag without much risk of stitches falling off.

Cons:

  • If you don’t already have the needles, buying two circulars for one pair of socks can be costly.
  • Not many patterns are written for this technique, so you may have to do some adaptation.

It’s true, knitting on two circulars (especially two-at-a-time) has a little bit of a learning curve… but if you stick with it, you’re rewarded with less laddering and a more portable project. I also enjoy that you’re able to use your favorite circular needles (like my super-slick Addi Turbos), and don’t have to switch to another brand/style.

One circular needle (aka Magic Loop)

Options Available: material (metal, wood or plastic), pointiness of the tip

Magic Loop works very much like knitting with two circulars, except that you use one very long circular (usually a 40+ inch). The actual knitting technique is very similar, and has the same bonus is that this method makes available knitting 2 socks at one time (2-at-a-Time Socks uses one circular needle).

Pros:

  • Just like 2 circulars, less laddering (as compared to dpns) occurs.
  • The ability to do two at a time? Still rock on!
  • Also like 2 circulars, the project can easily be tossed in a bag without much risk of stitches falling off.

Cons:

  • Unless you knit shawls (or really like knitting your socks this way), you’re unlikely to use your 40″ needles on many projects.
  • Also like 2 circulars, not many patterns are written for this technique, so you may have to do some adaptation.

To me, knitting on 3 circulars and magic loop (1 long circular) have very similar pluses and minuses. More than anything, it’ll come down to your preference. For me personally, having extra cord drives me nuts. Therefore, magic loop drives me crazy! But for others, remembering which of the 2 circulars to use is endlessly confusing.

A 9″ circular

Options Available: material (metal or wood), pointiness of the tip

I’ll confess: this is my favorite way to knit socks. No laddering, no need to switch needles… just smooth knitting!

Pros:

  • No ladders!
  • Very easy to toss in a bag and travel with.

Cons:

  • You will need to switch to a different technique (either of the above 3 mentioned) to knit the toe, because there are too few stitches to fit around the circular.
  • Again, almost no patterns are written for this technique, so you’ll have to do some adaptation.
  • Many people say the smaller size gives them a hand cramp.
  • The needles aren’t yet widely available, and won’t be a part of any interchangeable kit.

I travel a lot, and I always bring a sock with me to work on. I absolutely adore the ease and portability (because I’ve had the traumatic experience of a dpn rolling under my airplane seat), and since my hands are small, I don’t mind the knitting. But, I also know a number of people who can’t stand them, so the only way to find out is to try them! The leading manufacturer in making 9″ needles is Hiya Hiya, who has 3 styles available: bamboo, metal and sharp.

Which are your faves?

What’s your preferred method of knitting socks?

If you’re a newbie… I hope I’ve given you a (not stressful) review of the options that are out there!

Insights on Expertise and Learning Knitting & Crochet

Right now, I’m reading Moonwalking with Einstein: The Art and Science of Remembering Everything. Want to know one thing I’ve learned? Experts can’t store more individual items in memory than beginners… but they can store more information overall because they divide content up into useful chunks.

What experts look like

Ever heard someone describe their project as, “Oh, I don’t need to look at the pattern. It’s just a basic top-down sweater with a raglan sleeve and waist decreases worked in stockinette with ribbing at the edges”? This causes most beginners to gasp… what? No pattern?!?

An expert is able to store the entire pattern for a sweater in memory because they’ve chunked big pieces of relevant information. Some examples of chunks:

  • Stockinette is knitting every row (when worked in the round) or knitting the RS row and purling the WS row (when worked in rows).
  • A Raglan sleeve is worked by increasing on each side of a stitch marker, every other row, until piece reaches desired size.
  • A top-down sweater is worked starting at the neck, down to the body.
  • Waist decreases are achieved by inserting a decrease on the sides of the sweater, and repeated every 4 rows.

And so on…

None of these items are secret knowledge. But they’re bits of information that has been acquired sweater after sweater, pattern after pattern.

What this means about beginners

If you’re a new knitter or crocheter, I don’t need to tell you how hard it can be to start! But, if you’ve been at it for a while, it’s easy to forget how tough it once was. But, when you’re teaching newbies, it’s incredibly important to remember how hard it is, in order to avoid a frustrating experience for everyone!

You have 7 (plus or minus 2) spots in your short term memory. That’s it. And that’s all people, even if you’re a genius. It’s how brains are built.

Now, let’s look at someone who’s beginning to crochet… starting with the basic stitch, the single crochet. The steps are:

  • Insert hook into the next stitch.
  • The next stitch is the one that hasn’t been used, and looks like a sideways V.
  • Wrap the yarn around the hook.
  • Pull the hook, catching the yarn, through the loop on the hook.
  • Don’t forget to rotate the hook down so you can catch the yarn!
  • Wrap the yarn around the hook again.
  • Pull the yarn through both loops on the hook.

That’s it! They’ve already used their 7 memory slots!

It’s pretty much useless to say to a (complete) newbie: “single crochet 3 stitches, then double crochet 3 stitches”… because there’s not enough spots in their memory to do it! They used all of their spots remembering the single crochet!

This sounds like a trivial point until you’ve run into a few less-than-gifted teachers. You know, the people who tell their (30-minute-old) knitters to ‘work a 2×2 rib’… when they don’t even have a grasp of the basics of successfully completing a knit stitch.

When teaching, channel the difficulty encountered by newbies, and keep their memory space in mind. Then, you can lead them to becoming experts!

Becoming an expert

All it takes to become an expert is one thing: practice.

Boring, right? No tricks, no secrets. Just doing the same thing over and over again until it becomes second nature.

After you’ve single crocheted for a while, you’ll no longer have to run through all 7 individual steps to complete the action. You’ll just ‘know’ the stitch, and it’ll only take up one slot in memory. Giving you space to start working on larger chunks!

For teachers, this means allowing students to work on a skill until they ‘get it’, and are ready to move on to the next concept. It may sound harsh, but I’ve been known to tell some students in my beginning knitting classes that they’re not ready to learn to purl. Their memories were still filled with the 7 steps of doing the knit stitch… and those were just going to be washed away by learning 7 new steps for purling. They thanked me, because it meant that, at the end of class, they had a skill they were solid on- instead of leaving confused.

What are you working on becoming expert at? Has it taken more or less practice than you expected?

Flash your awesome Kool-Aid dyeing results!

I hope you’ve had an awesome time with Kool-Aid Dye Week… I know I’ve had a blast experimenting! Did you give any of the techniques a try? If so… show it off!

In case you missed it…

I’ve posted tutorials for quite a few ways of using Kool-Aid to dye your yarn! If you missed them, don’t worry… here’s a wrap-up:

Click on any of the following links to zip to the tutorial!

Check out what I made!

While I made a few knitted & crocheted swatches for Dye Week, I couldn’t wait to get started on a project! And since my favorite technique is dyeing the long colorways, I started with that skein, first!

Check out my socks!

EEE! Don’t you love it! In retrospect, I might have dyed smaller sections to get narrower stripes, but I’m not complaining… I think these are super-fun!

Show me what you’ve got!

I wanna see it!

Share your experiences with Kool-Aid dyeing in the comments section!

Better yet, write a blog post showing off your awesome yarn, and share the link in the comments! Then we can all see what awesome work you’ve done!

Tips for Knitting Wingspan

Have you heard about Wingspan by Tri’Coterie? It’s a trending knitting pattern on Ravelry recently… and I’m seeing it pop up everywhere!

I just finished knitting my first one and I’ve cast on for a second. It’s no wonder it’s a popular pattern… Wingspan is both fun and easy, and it’s a great yarn for showing off long color-repeats.

In this post, I’ll share a couple of tips I’ve learned… so you can get started on one for yourself. (trust me, you want to!)

Choosing a Yarn

This pattern is fabulous because it gives you the option of making a fingering, dk or worsted weight scarf… meaning you have lots of yarns available to choose from!

My personal favorite is to select a self-striping or gradient yarn. Yarns with long colorways will give you a shawl where each wedge is a different color (more or less), resulting in a gradient-effect across the entire piece.

Some yarns with long colorways are:

  • Almost any Noro yarn: try Taiyo or Silk Garden Sock for fingering weight or Taiyo, Kureyon or Silk Garden for a worsted weight.
  • Zauberball (Fingering)
  • Knit Picks Chroma (available in fingering or worsted weight)
  • Play at Life Maki Yarn (available in a wide range of fingering weight options)

I’ve also seen some lovely versions on Ravelry knitted up with yarns with shorter colorways, or even in a solid color. Doing this makes the ‘wedges’ in the shawl less defined, but still results in a beautiful shawl. Check out all of the projects and see what strikes you!

How to skip using a traveling marker

I like to knit on the go… and so adding and removing a traveling stitch marker every row was too much for me. Fortunately, you can easily go without using one.

To accomplish the patterning for Wingspan, you basically want to turn 3 stitches before the last time you turned on the previous row. Fortunately (since the pattern recommends not wrapping before turning), you’ll see a giant gap in your work where you previously turned (the red arrow).

So, all you need to do for your current row is turn 3 stitches before that gap (at the blue arrow), and bye-bye traveling stitch marker!

I recommend knitting one wedge by following the pattern before attempting working without the traveling stitch marker. Once you get the hang of it, you’ll only to add one marker every time you finish a wedge… much easier to manage!

The Cast-On

For this pattern, you’ll need to cast on stitches to the end of a piece you’re already working. Since there are already stitches in action (with yarn attached), your cast-on choices become more limited (for example, using the long-tail cast-on would require a second piece of yarn).

For this part, I use the Cable Cast on. It’s a simple way of adding stitches to a piece you already have. Check out KnittingHelp.com or consult a reference guide (like The Knitting Answer Book) to find out how to do it.

Have you started yours, yet?

It’s a fun, easy and portable pattern. I’ve just cast on for my second… a fingering weight version where I’m using up all of my leftover sock yarn pieces to create a rainbow effect. I’ll keep you posted on my progress!

Best,
Stacey

Knook (knitting with a crochet hook): is it worth learning?

Have you heard of the Knook (pronounced ‘nook’)? It’s a very clever hook/technique that allows you to form a fabric that looks like knitting by using a special crochet hook.

While it’s a very interesting idea, it requires learning new stitches (not crochet stitches or knit stitches), so isn’t exactly a short cut for learning to knit. I’ll show you know knooking is done, then chat about the pros and cons, so you can decide whether you’d want to learn to knook, or would rather just learn to knit.

How to knook

The knook is a crochet hook with an eye at the non-hook end (exactly like a locker hook, if you’re familiar with one) accompanied by a nylon cord. I haven’t seen knooks for sale alone in the store, so you’re probably best off grabbing The Knook Beginner Set, which comes with a variety of hooks, cords and a beginners book. Videos about how to knook are available on the Leisure Arts Website, and they’re pretty clear and easy to follow.

You begin knooking by threading the cord into the eye in the hook. The first row is done by crocheting a single chain, nothing tricky!

To Knook the first row, you insert your hook into the chain stitches and pick up your working yarn… similar to how you would work in Tunesian Crochet. Then, you slip all of your loops onto the cord:

To continue, you use the hook to pick up a new row of stitches, inserting the hook into the loops that are now held on the cord. Whether you make knit or purl stitches depends on which way you wrap the yarn around the hook.

The fabric looks pretty impressively like a knit fabric!

The Advantages of Knooking

The advertisement is true: you can accomplish a fabric that looks like a knit fabric by using only the knook (crochet hook + cord). For crocheters, there are some big advantages:

  • If you’re already familiar with using a crochet hook, the movements will feel very natural, most likely making the technique easier to learn.
  • The first row is done by crocheting a chain, so there’s no need to learn a cast on.
  • Stitches remain on the cord while you’re working, so there’s less danger of dropped stitches (but see my exception to this in the next section).

The Downsides to Knooking

There’s no doubt that it’s a clever tool, but there are some downsides to learning knooking, especially if your goal is to make knitted items that you’ll see in patterns:

  • You need to learn how to wrap the yarn to knit and purl- these aren’t the same stitches that you already know from crochet.
  • A fair amount of translation is required if you wanted to make an item from a knitted pattern. There are knooking books available, but you’d be limited to that small selection of patterns.
  • The stitches are kept on a nylon cord with no method of securing the stitches. If you were to toss your knooking in a bag, you’ve have oodles of dropped stitches if the cord came out.

Is it worth it?

I’m going to start with an interesting statistic that I’ve gathered after years of teaching knitting and crochet. Knitters, when first learning crochet, typically do no better than the rest of the novice crocheters. (sorry, knitters!) However, crocheters, when learning to knit, typically learn much faster than newbie knitters!

Crocheters already know how to tension the yarn, hold things in their hands, and all they really need to learn (in order to knit) is how to pass a stitch from one needle to another. In my experience, with a good teacher and when learning to knit continental (i.e. holding the yarn in the left hand, which is how a crocheter holds it when crocheting), crocheters have a fairly easy time learning to knit.

So, if you’re deciding whether to learn to knook, it’s important to think about your goals. Do you want to knit socks? Learn to knit. Do you want to knit sweaters? Learn to knit. Do you just love the look of knitted fabric and want to make small projects? Maybe knooking is for you.

One main factor is that the knook is a product manufactured by one company… so you only have one hook style available to you and a limited selection of pattern books. Both crocheting and knitting have available lots of different hooks/needles to suit your particular style, and patterns made my thousands of designers. In order to invest time in learning to knook, you’ll have to be sure that you’re happy being limited to the options available.

I have spoken with some people who love that the action uses a crochet hook, and much prefer knooking over learning to knit. Wonderful! I’m happy whenever someone finds what works for them!

But if you have a hankering to knit… I’d recommend giving knitting a try!

Best,
Stacey

Wrist Exercises for Knitters and Crocheters

If you knit/crochet a lot (or embroider!) . . . chances are you suffer from some achy wrists! I know that during last week, when I was crocheting up a storm, I certainly did!

Here are a few exercises that I do to relieve my sore wrists. Try to give these a whirl every hour or so while you’re working.

1. Swirl your wrist around! I don’t even know if this counts as an ‘exercise’… but moving your wrist in all sorts of directions (especially the directions it doesn’t move while you’re knitting/crocheting) really helps it out.

2. Prayer position. This is a little move I picked up from yoga class… it’s just like prayer position, but you’ll want to raise your elbows a little (while keeping your wrists still) to get a nice stretch in your wrist area.

3. Reverse wrist stretch. This one is the opposite of the stretch in point 2. Lay the back of your hand on a table, and press down lightly with your arm.

4. Rub those wrist bones! Use your thumb and massage all those little bones and tendons (and whatever else) that are in your wrist.

5. Squeeze. With your opposite hand, just squeeze your wrist. This gets all of your joint fluid flowing around.

Update! Stacey added a video showing some of these stretches here.

Happy wrists make a happy stitcher!

SHARE THIS