Free downloadable tags for your amigurumi!

My free holiday gift tags were such a hit that I’ve made some more!

For your downloading and printing pleasure, I introduce to you… the amigurumi tag collection!
ree download gift tags for amigurumi crochet

Making some amigurumi? You’ll want to download these adorable tags!

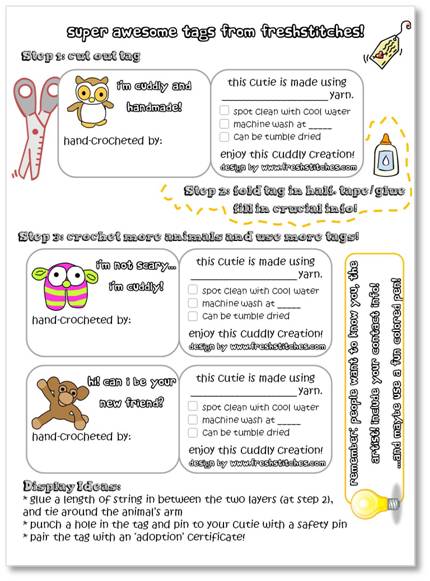
I designed these tags specifically for your cutie stuffed animals… and even included a few tips for display!

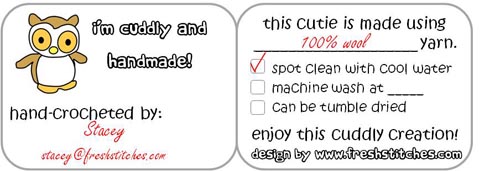
Once you download and print the tags, you’ll want to fill out the tag with all the crucial info. Check out my example:

example tag for your amigurumi

The tag easily folds in half… and is ready to adorn your cutie!

Enjoy!

How to fix an incorrectly-attached amigurumi part

It’s inevitable. We all make mistakes. Maybe you attached a part on your amigurumi in the wrong place. Maybe you crocheted the piece in the wrong color. No problem! I’ll show you how to fix it!

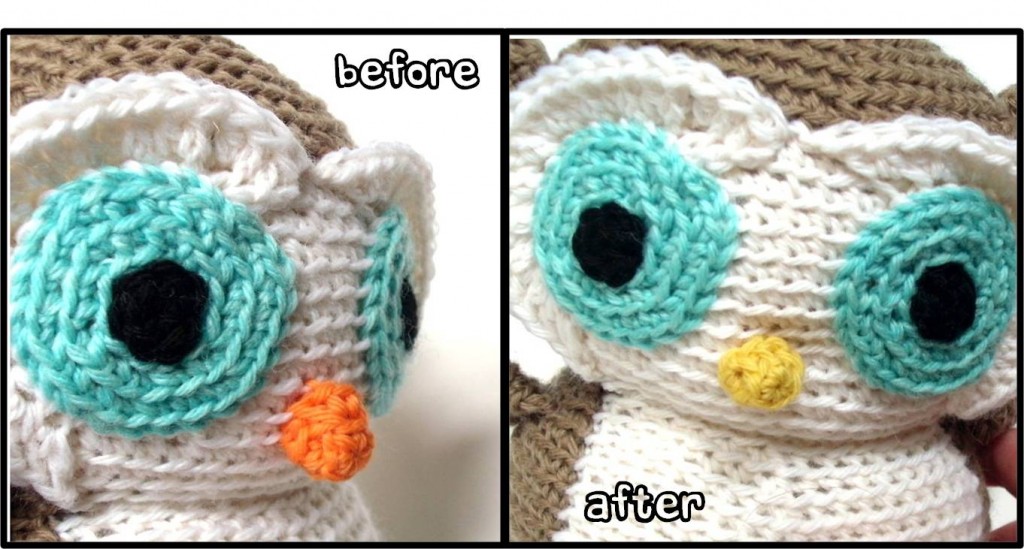
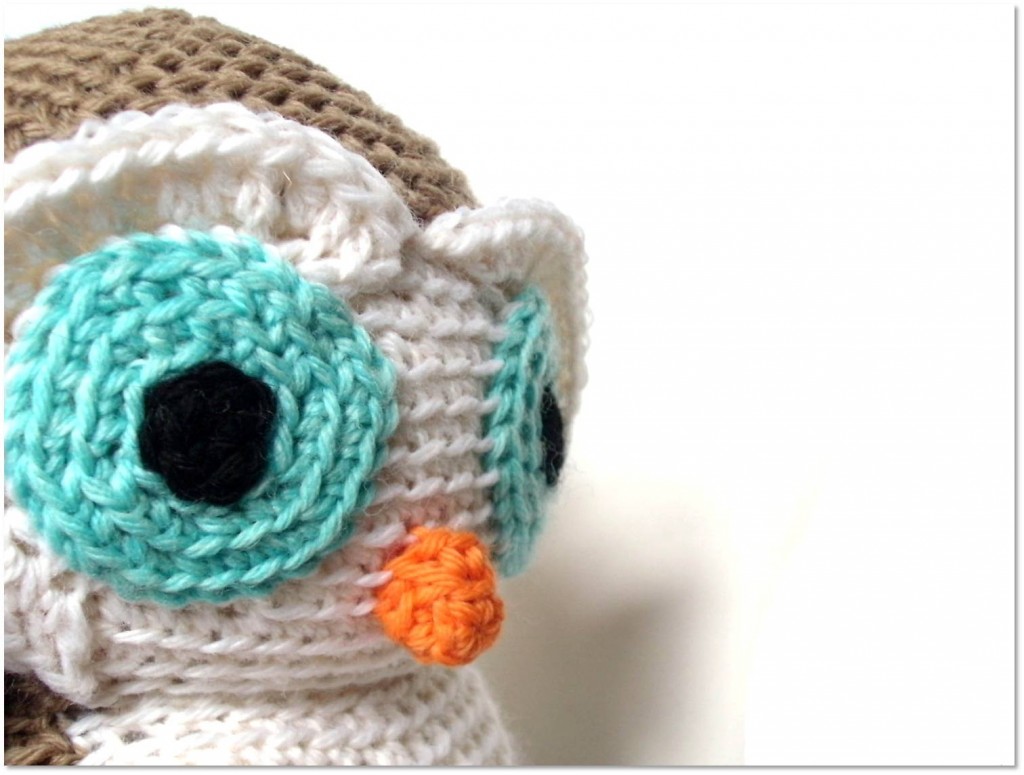
In the example I’ll be showing you today, I attached an orange beak on my owl… when the customer actually wanted a yellow beak. Ooops! But as you’ll see, it’s a problem that’s not too hard to solve.

Step 1: Remove the incorrect piece

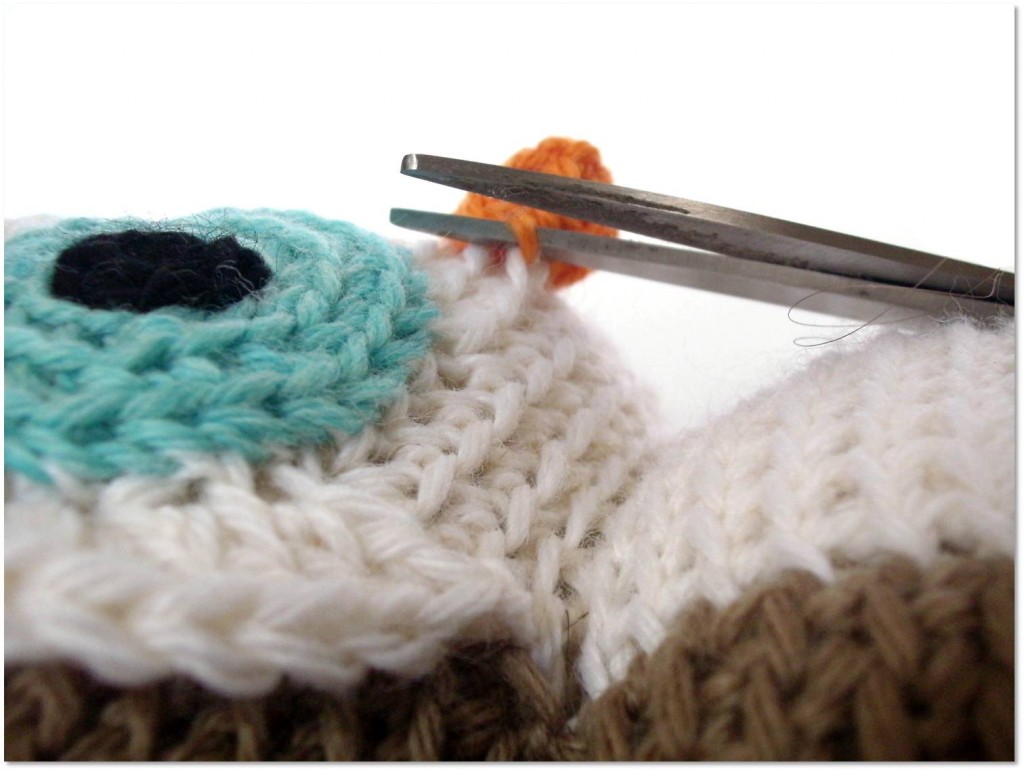
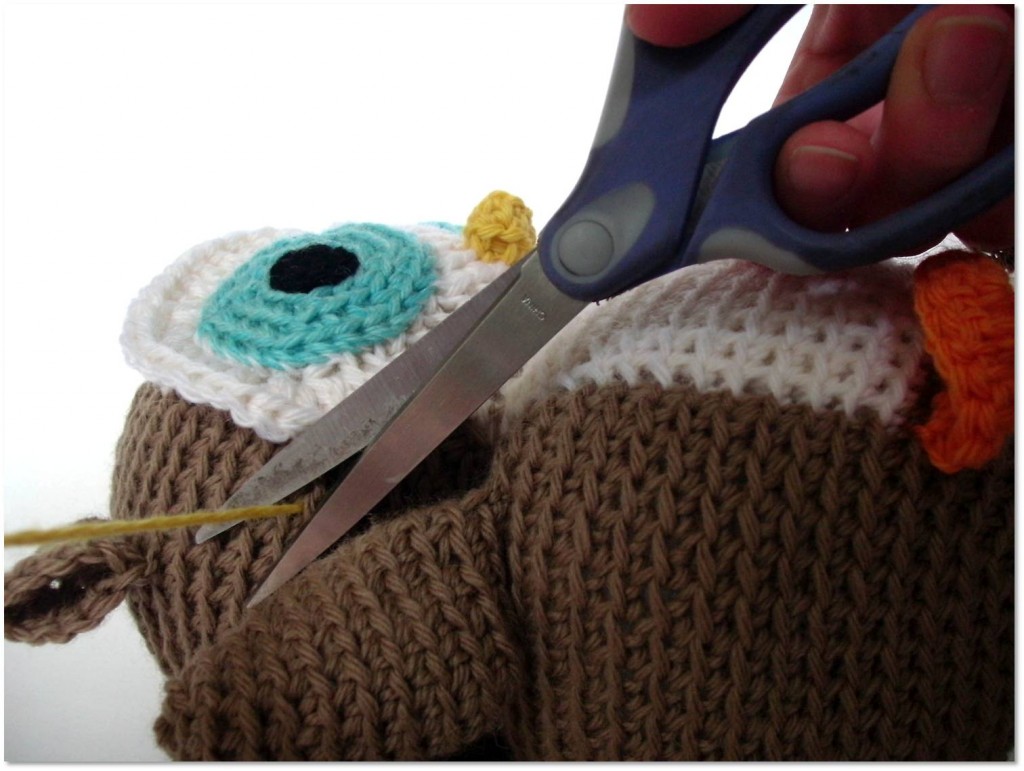
The first thing you need to do is cut off the incorrect piece:

If you’re very careful, you can cut through the attaching thread, and preserve the piece (here, a beak) for re-use. However, the most important thing is to not cut your main body (here, the head). If you cut through the stitches on the head, it will be nearly impossible to repair.

Therefore, I err on the side of caution: I would much rather cut through an important piece of my beak (and re-crochet it), than to cut a stitch on the head.

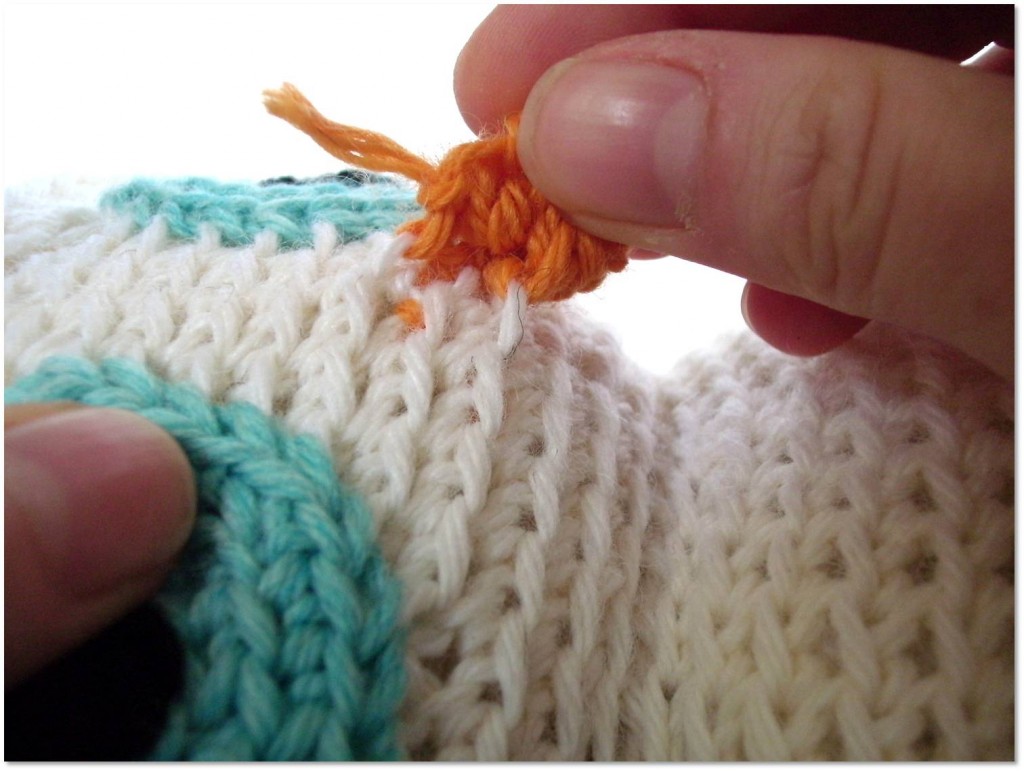
Once you’ve cut the piece, pull it off:

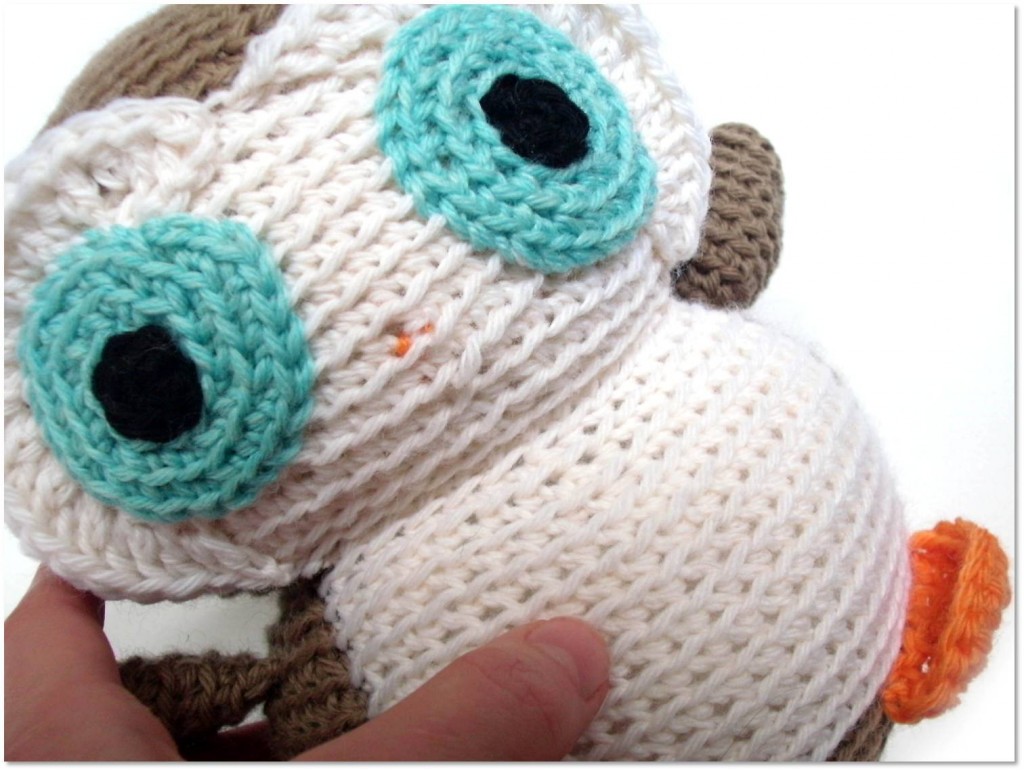
Ta da!

You’ll notice that a little bit of orange remains, that’s where I tied the knot to secure the beak. It’s okay that it gets left behind: it’ll be covered up by the new beak. Remember: the most important thing is to not cut through body stitches, and the risk of doing so would be too high if I tried to remove this knot.

Step 2: Attach the new piece

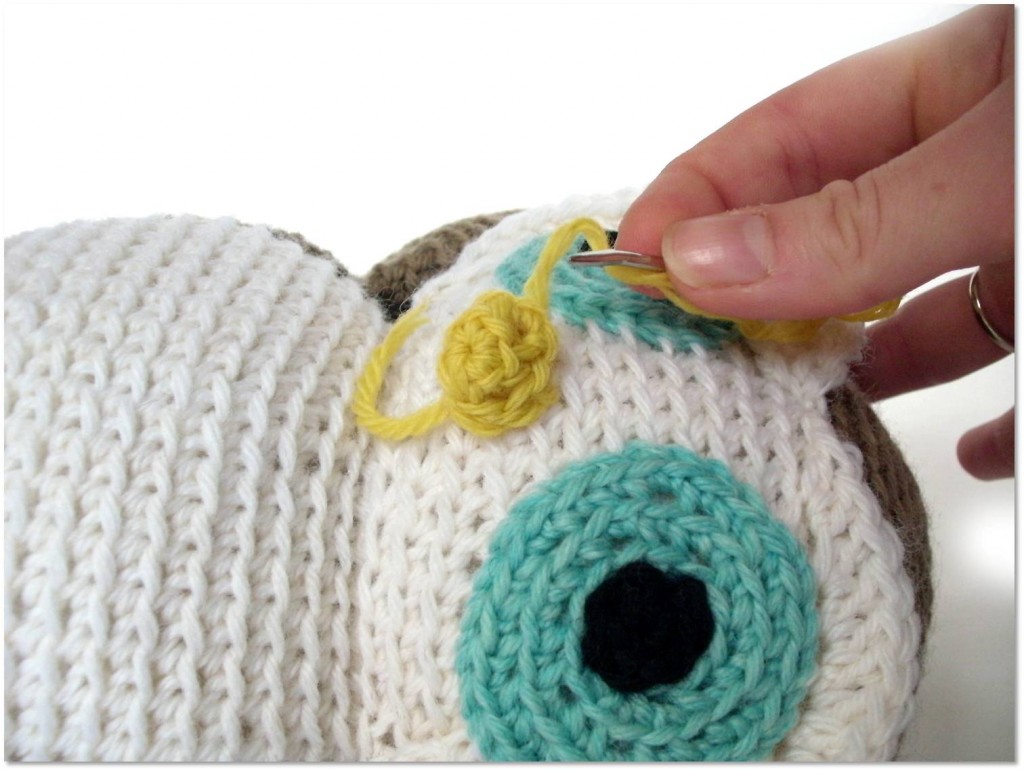
Attach your new piece where you’d like it to go:

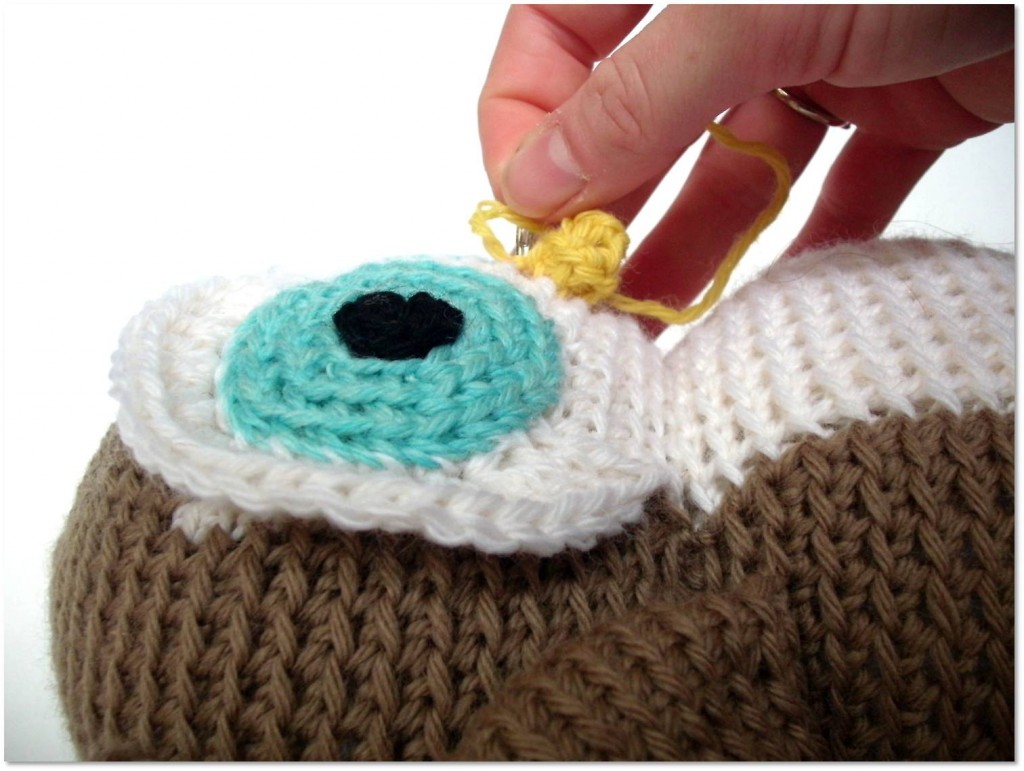
When you’re finished attaching, tie a knot. It’s not possible to attach the knot on the inside (the preferred way of making sure the knot is invisible), since the piece has been stuffed, so you’ll have to do your best to make the outside knot as invisible as possible.

Now, insert your needle through the body, and pull… this will pull the tail in and help to hide the knot a bit:

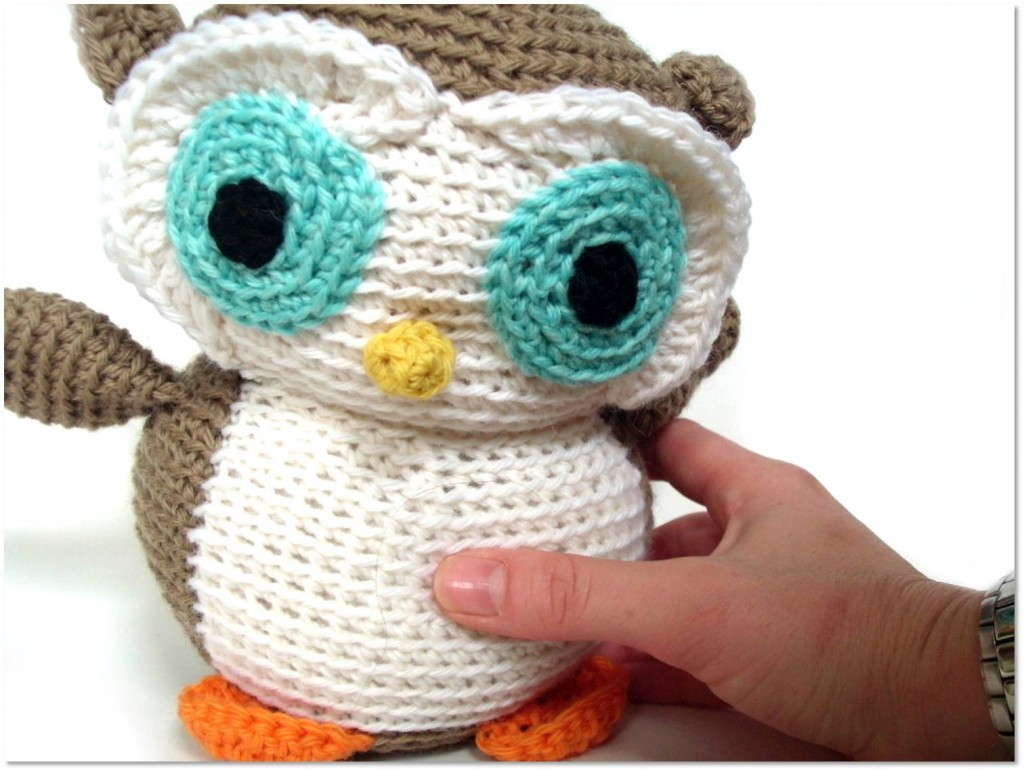
And you’re finished! No one will ever know!


What does ‘amigurumi’ mean?

Today’s guest post is written by Alyssa, MonstersToyBox on Ravelry.

Alyssa is a student in Linguistics and Japanese, as well as a very talented knitter and crocheter. Who better to tell us what ‘amigurumi’ means?

What does the word ‘amigurumi’ mean?

You probably know that amigurumi are incredible cute toys made from yarn. And you probably know that amigurumi was originally Japanese.

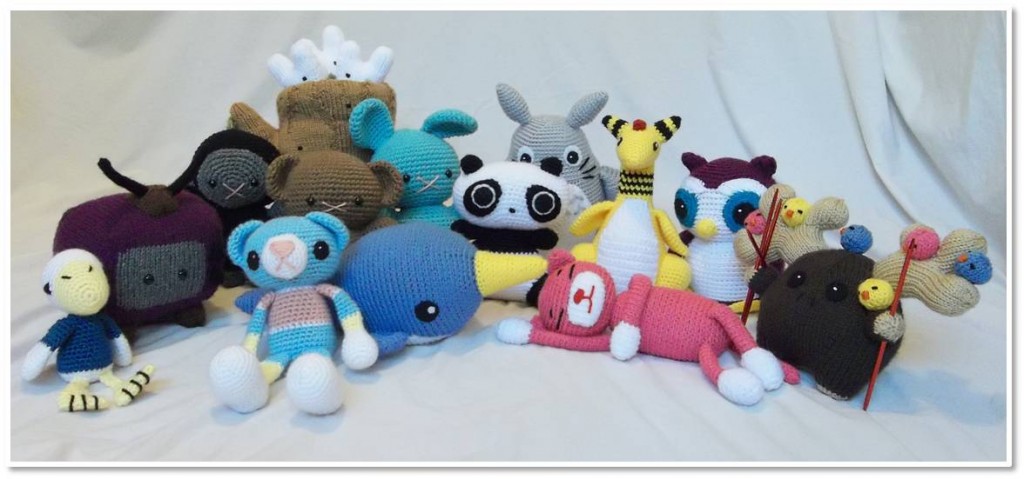
A collection of amigurumi knit & crocheted by Alyssa
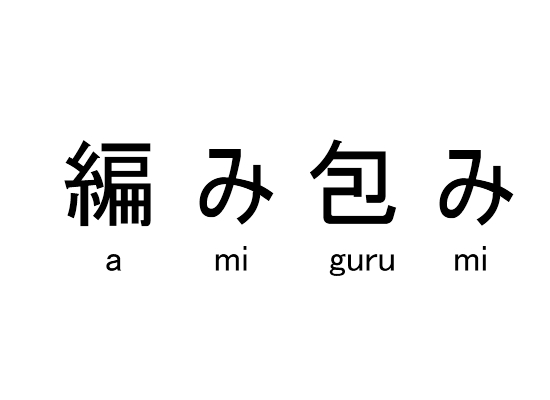
But what exactly is amigurumi? There are a couple different answers for that, and one of them is looking at what it originally meant in its native Japanese:

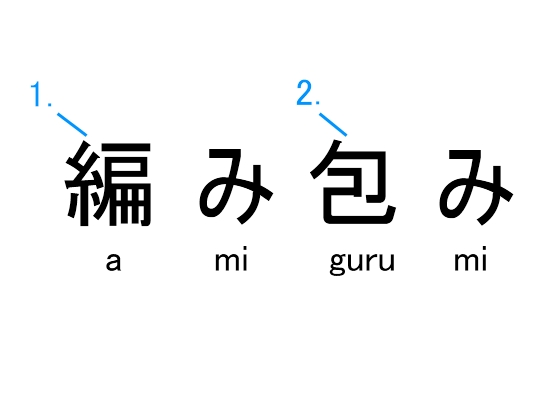
The first kanji (Japanese symbol of writing) is the character for “knit”; it can also mean several other things, but the knitting is what is important here.

And it is not just knitting; this character can apply to both knitting and crocheting. Japanese does not have two different words for knitting and crochet like English does. In fact, to crochet in Japanese is actually “to knit with a hook”.

So now we have the “knitted and crocheted” part of amigurumi. However, the second kanji is a bit trickier. One of its meanings is “wrapped”. At first, it doesn’t seem to have a lot to do with toys, however, “wrapped” implies that there is something being put inside. What is put inside amigurumi? Stuffing, of course! So perhaps a better meaning for this part, at least as it applies to amigurumi, is “stuffed”, although a native Japanese speaker told me that it is not limited to just stuffing. All sorts of things could be put inside amigurumi to give them shape, rubber balls, for example. The toy part here is assumed… what other knitting or crocheting is stuffed?

Does it have to be worked in the round?

Almost all translations will say that amigurumi means “knit or crocheted stuffed toy”, however, the majority of amigurumi (and especially Japanese amigurumi) is crocheted. That doesn’t exclude knitting as a valid form of amigurumi nor does amigurumi have to be worked in a particular style. I have found that many Japanese amigurumi are worked in joined rounds, but not all amigurumi has to be worked that way, and it certainly does not make it any less of an amigurumi!

Ready to start looking for Japanese amigurumi?

In Japanese, amigurumi is rarely written using the kanji anymore. Instead, it is written using the much simpler, syllabic hiragana (a phonetic alphabet):

If you are interested in looking for amigurumi in the original Japanese, this is what you are most likely to see.

Highlight this piece of text: あみぐるみ and pop it into Google… it’s your trick to finding oodles of images and even Japanese amigurumi books. Most Japanese books are charted, so they’re accessible to you even if you don’t speak Japanese!

How to Use Poly Pellets in Amigurumi

Have you ever picked up a stuffed animal with a nice, weighty feel? Ever wondered how to achieve that feel in your handmade animals?

Use Poly Pellets!

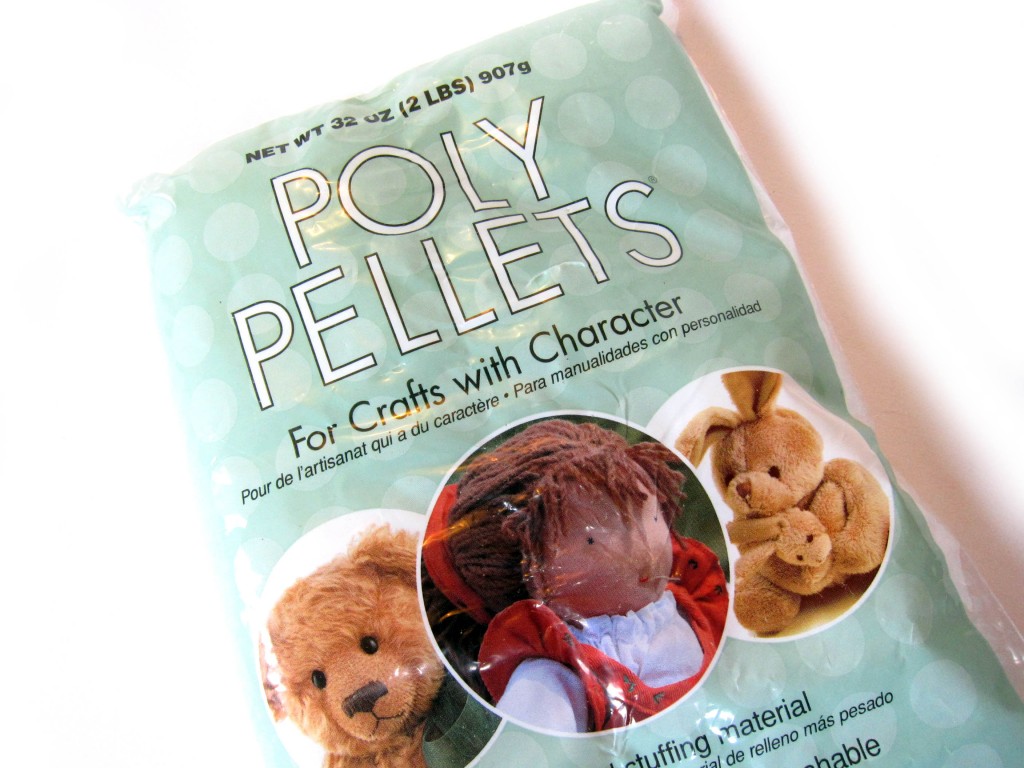
Poly Pellets are small plastic-y beads that can be used to weight your stuffed animals. Today, I’ll tell you how to use them effectively.

How to use Poly Pellets

The trick to using Poly Pellets with a crocheted stuffed animal is to put the pellets inside a stocking or some other container. You see, the pellets are quite small:

If you simply pour the pellets into your amigurumi, then they will work their way through the stitches over time… not good! I’ve heard that there are larger pellets (that won’t come out) available in Europe, but I haven’t been able to find them on the American market.

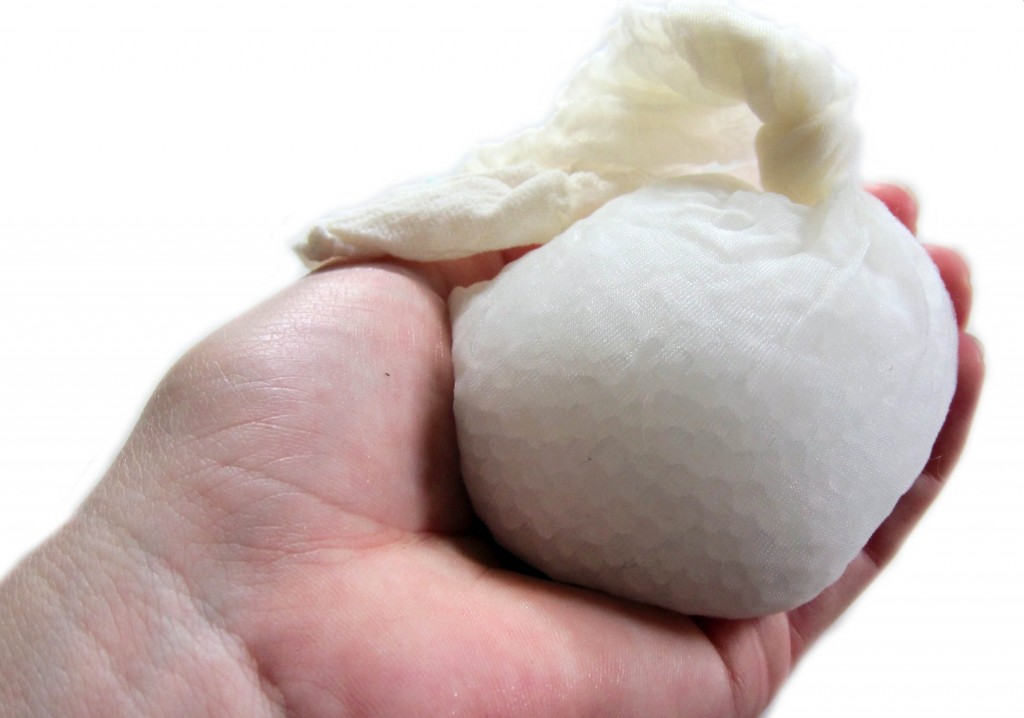
Fortunately, it’s easy to put the pellets into a little stocking. I bought a pair of really cheap knee-high stockings (a light color is preferred if your animal is a light color), but you could also sew a little pouch if you desire. Once you have your vessel, poured the desired amount of pellets inside, and close up!

With the stocking, I tied a little knot… easy!

Now, place the bundle inside your amigurumi, and fill the remainder of your animal with stuffing, as usual!

Tips for using Poly Pellets

  • Use a stocking or some sort of fabric to keep the pellets contained.
  • Use the pellets sparingly. A fist-sized bundle is enough for an 8″ stuffed animal. Filling the entire animal with pellets will make it too heavy.
  • Try using pellets in the bottom of an animal, so that it will sit upright more easily. Use plain stuffing for the head.
  • Try using a small amount of pellets in dangling-style arms.
  • Remember that Poly Pellets are not recommended for use with small children.

Update – Wendi designed this free Squishy Monster pattern especially for the fun feel that poly pellets can give. Have fun with it!

Best,
Stacey

Looking for a great textured stitch? Bobble stitch tutorial!

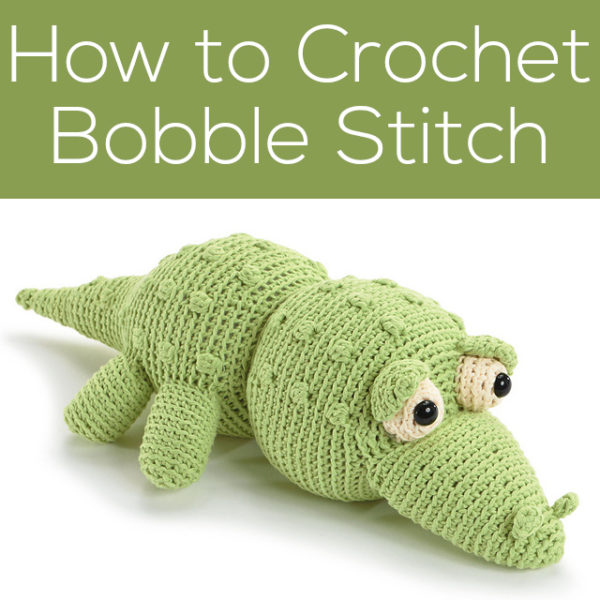
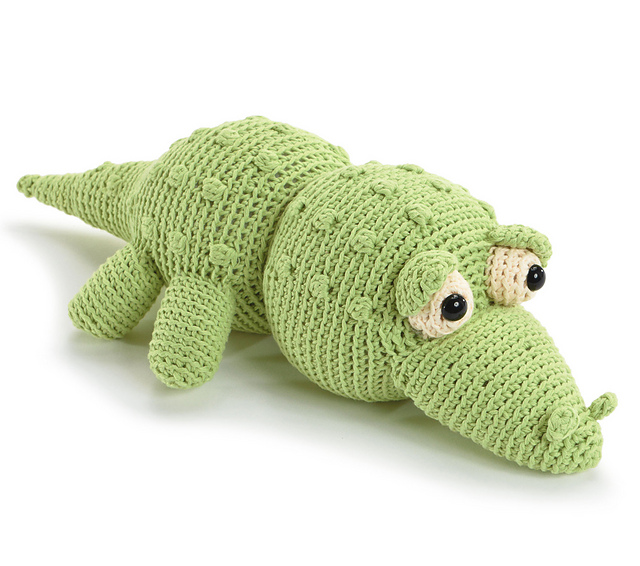
crochet alligator as sample for how to crochet bobble stitch

I adore the bobble stitch: it’s such a great texture! I developed this stitch because I wanted a puff… but the traditional ‘popcorn stitch’ (used in a lot of sweaters, hats, and afghans) leaves a hole in your work that isn’t suited for amigurumi.

crochet alligator with bobble stitch bumps on his back

The bobble stitch (bbl st) creates a puff… but by using the front loop of the previous round, creates a hole-less fabric just as plain single crochet would!

The Bobble Stitch Video

Interested? Learn how to do it!

To view the video in a larger screen, press ‘play’, then click the square icon in the lower-right-hand corner of the dialog box!

You can use this stitch in some really unexpected ways!

Of course, you can use it to give an alligator a bumpy back like you saw above. (That pattern is in the book Crocheted Softies.)

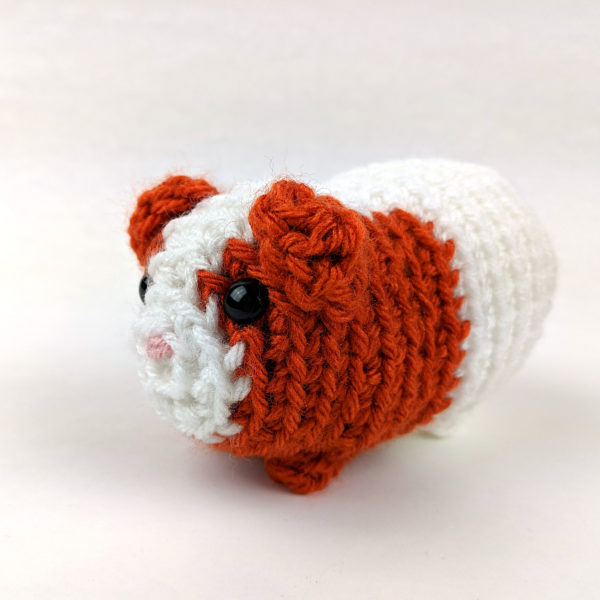
But take a look at this guinea pig.

crocheted guinea pig with bobble stitch feet

See how the feet are just itty bitty bumps? Those are bobble stitches!

(You can get that guinea pig pattern here.)

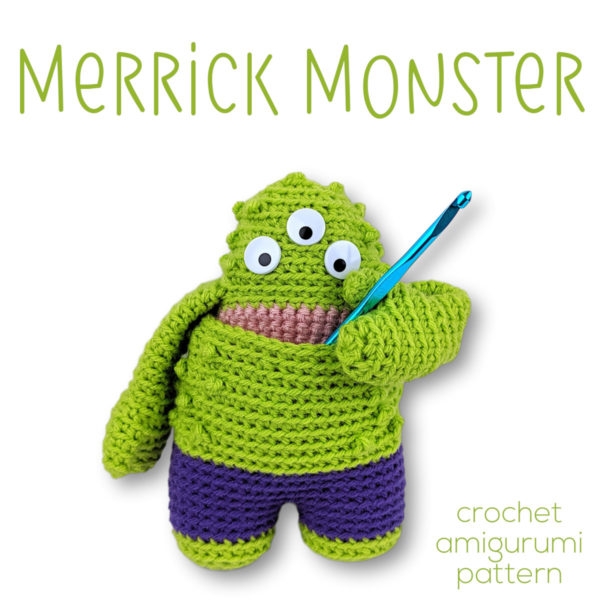
If you want smaller bumps, you might want to try a picot stitch instead. That’s what Wendi used to give Merrick Monster his warts. 🙂

Merrick Monster crochet pattern

There’s a video here showing how to crochet picot bumps.

What do you think? Want to give it a try?

Here are handy links to all the posts teaching more fancy crochet stitches. . .

Return to the main table of contents for Let’s Learn to Crochet Amigurumi.

Move on to the posts about working with crochet patterns.

Happy stitching!

How to strand yarn in color changes: a video tutorial

Every Tuesday, I post a helpful tip… and this week, I’ve been getting a lot of questions about how to handle the unused yarn while crocheting with two colors. (It’s funny: you wouldn’t think there would be trends in customer questions, but there certainly are!)

For today’s post, I’ve made a video showing you how to strand your yarn while working color changes.

Which technique should you use?

When you’re working with two colors in crochet, there are a quite a few ways that you can handle the color changes. You can:

  • Cut and re-join the yarn at every color change
  • Use separate balls of yarn for each section of color (called ‘Intarsia’, this technique works best with large blocks of color and when working in rows)
  • Carry the unused yarn along the back of the work (called ‘Stranding’, and works best over short color-changes)
  • Strand, then cut and tie the yarns (a technique I developed for handling long color changes, worked in the round)
  • ‘Crochet over’ the unused yarn (this resolves some problems caused by stranding, but the unused yarn is often visible through your crochet)

That’s a lot of choices, right? Which technique you use will depend on how many stitches are between your color changes, and whether you’re working in the round or in rows.

How to use the stranding technique: the video

Stranding is best used for short color changes, and can be used in rounds or rows. Therefore, it’s a technique that comes in handy, often!

Here’s the video where I show you how it’s done!

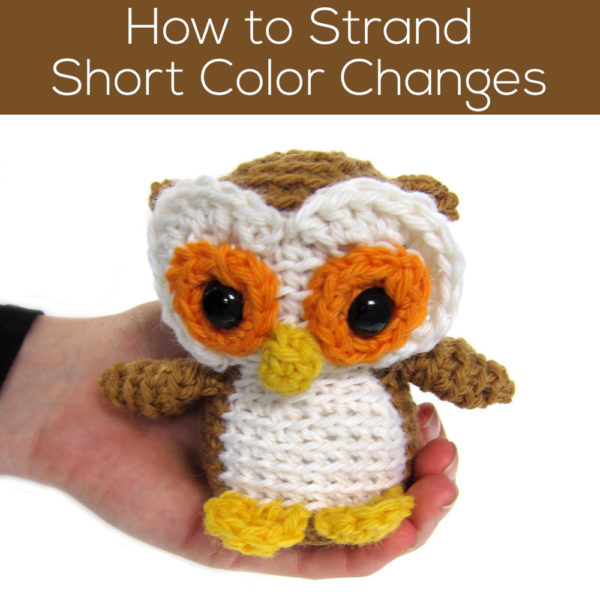
Pattern: Nel, the Tiny Owl

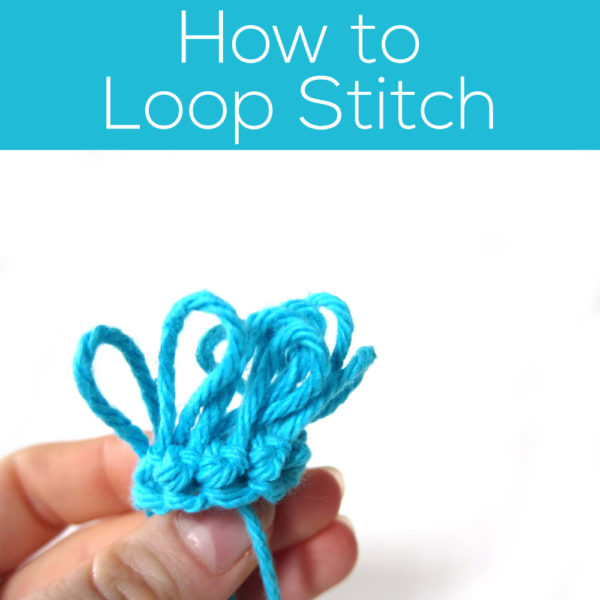
Master the loop stitch, and bring a fun texture to your crochet!

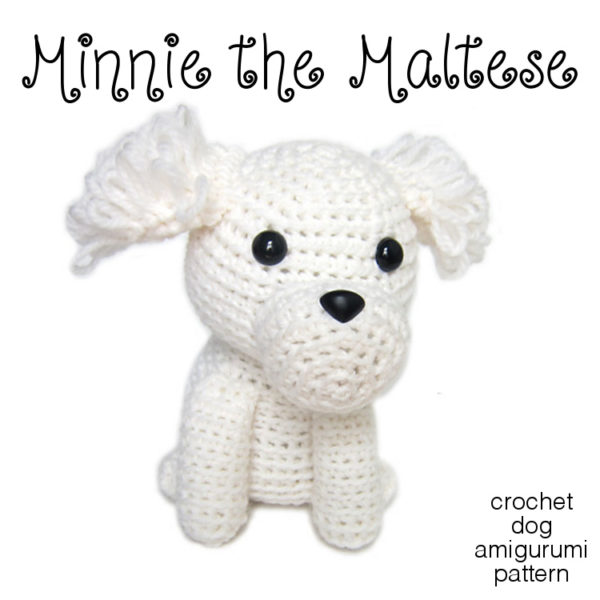
I love the loop stitch. It’s a fabulous textured stitch that you can use to add loops to any crochet work. It’s a stitch I’ve used to make a squirrel tail and fluffy ears on a Maltese.

cute white crocheted Maltese dog

Unfortunately, I think a lot of people are scared by the loop stitch, thinking it’s too complicated or tricky. But I’m here to help… because I want everyone to feel confident with the loop stitch!

Here’s the lowdown: there’s one very common mistake that many people make when crocheting the loop stitch. And, it’s a mistake that will cause your work to get big holes in it.

The good news is that I’ll show you how to avoid this mistake, and then the stitch will be easy-peasy! Plus, you can even snip your loops for a fabulous ‘hair’ texture… so keep reading!

How to do the Loop Stitch, in photos

First thing’s first… let me show you how to do the loop stitch (lp st). For those of you who prefer videos, keep scrolling!

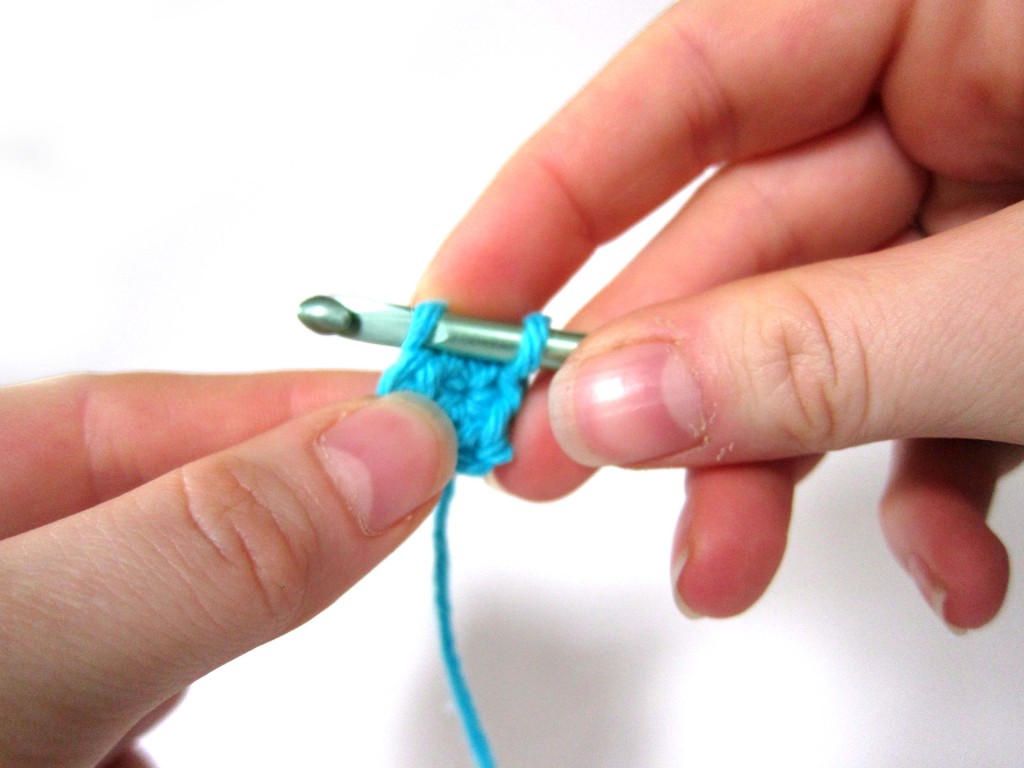
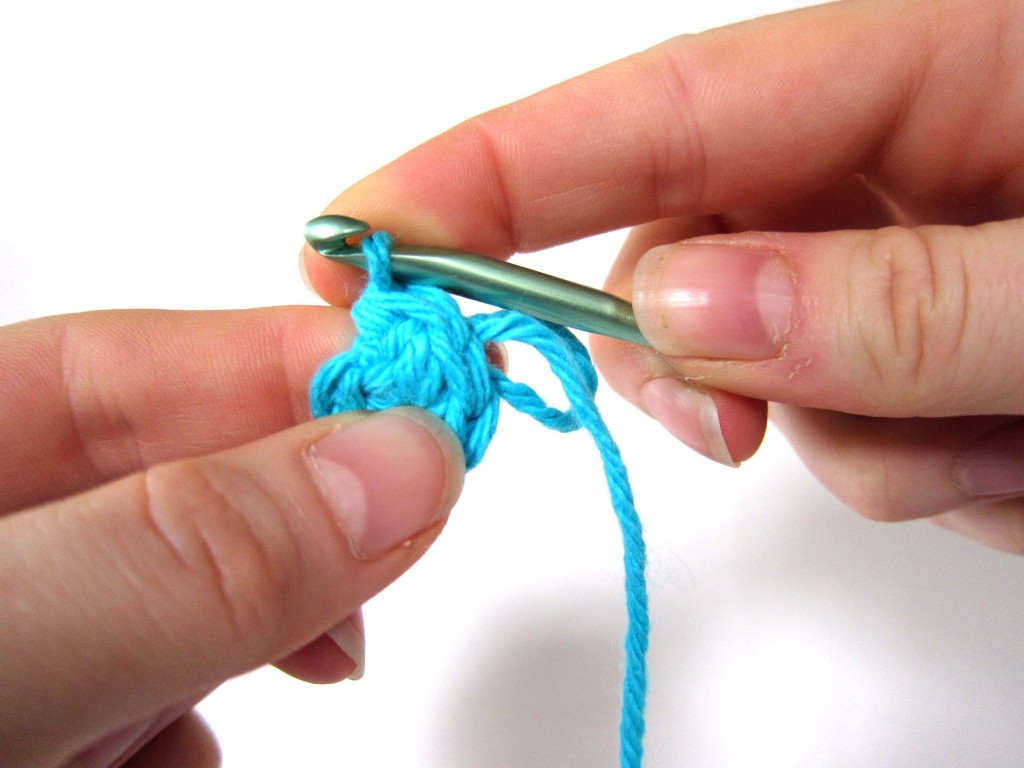
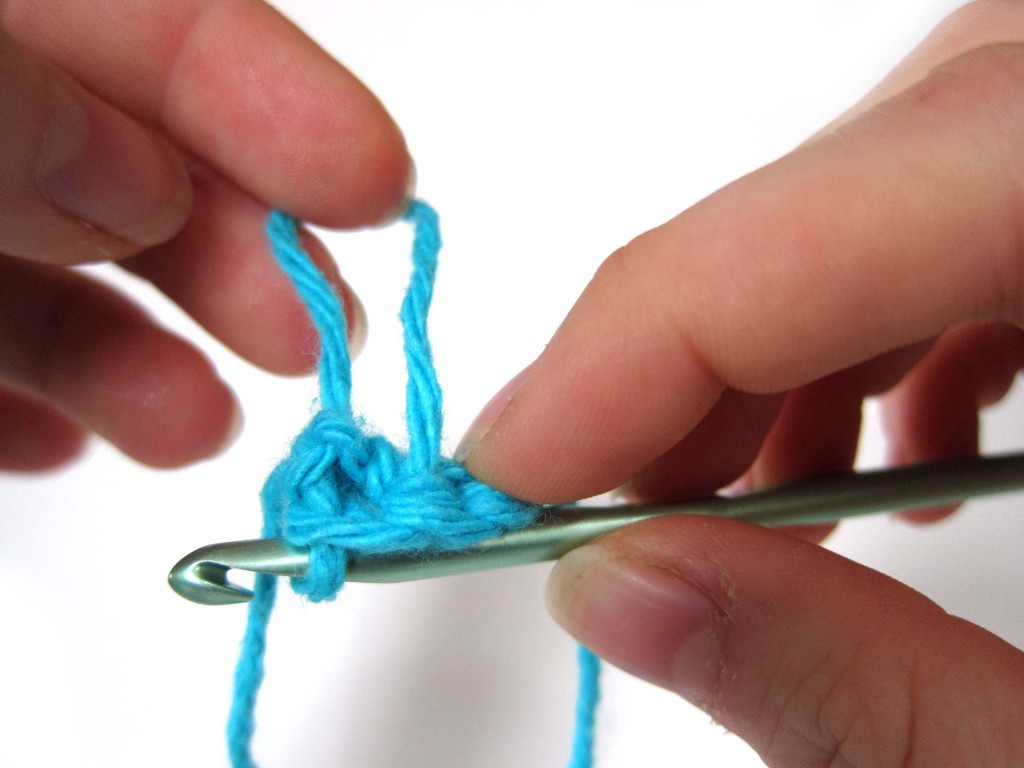
To do the loop stitch, insert your hook into the next stitch, just as you would for a single crochet.

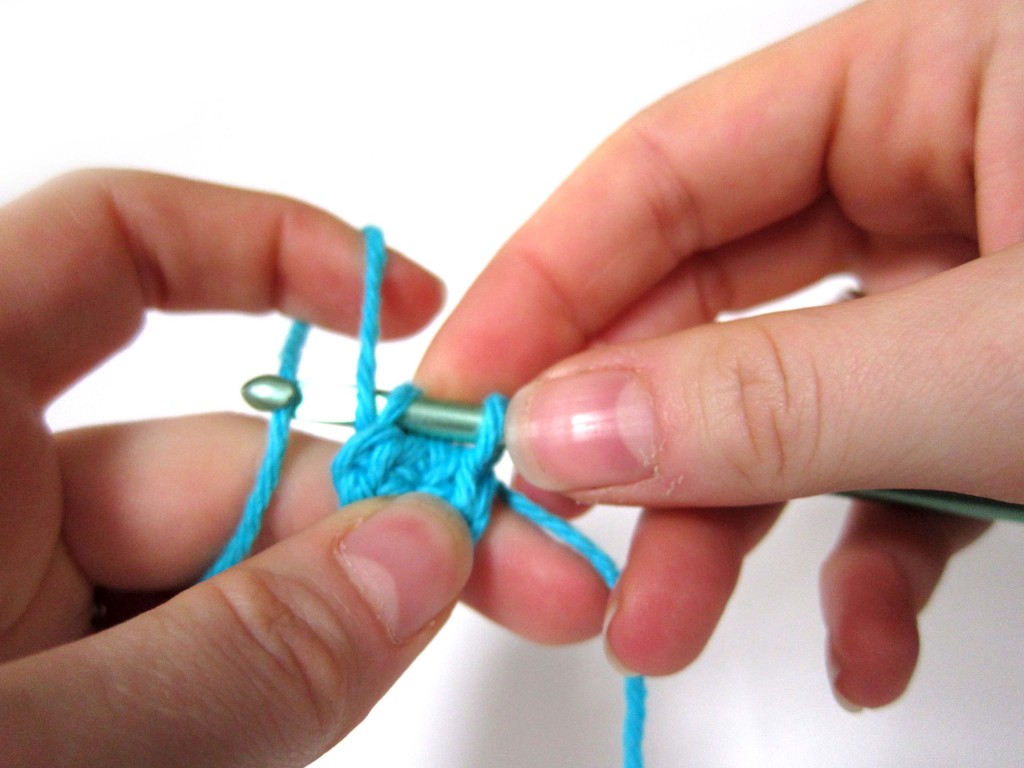
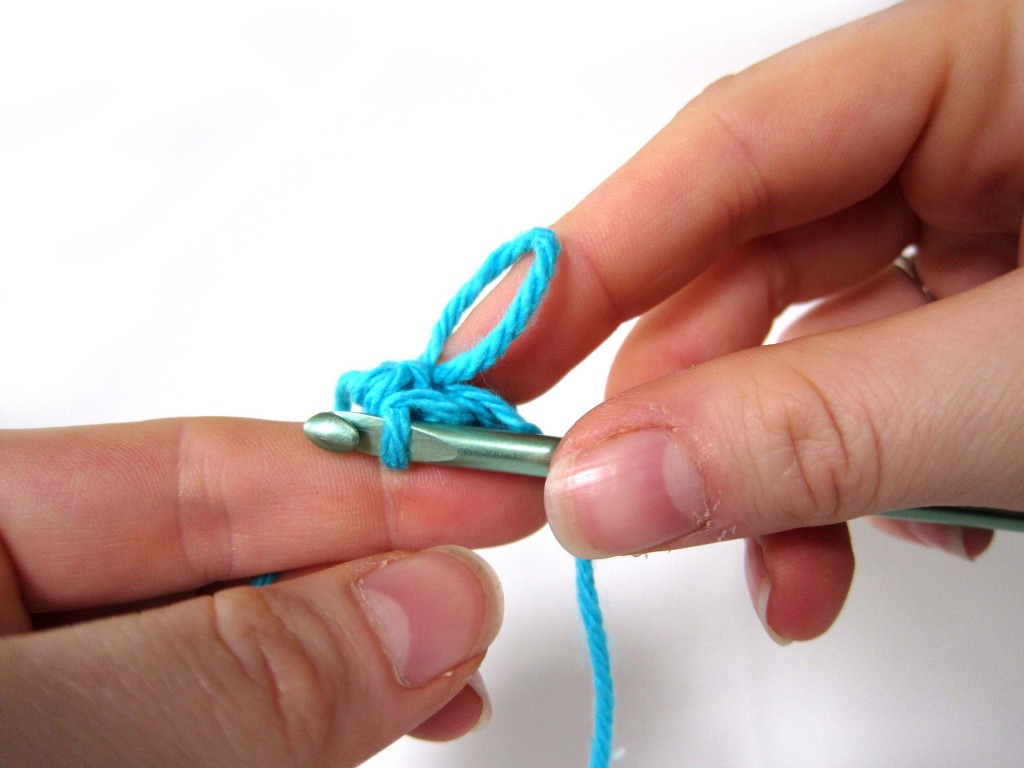
Now, here’s the key part: we’re going to make the loop! Wrap the yarn around the index-finger of your non-hook-holding-hand (that’s my left hand, because I’m a right-handed), and plop that loop totally on top of your hook:

See how the there are two strands of yarn (the ‘start’ and the ‘end’ of your loop) on your hook? That’s what you want! Now, pull both of these strands making up your loop through the loop on your hook.

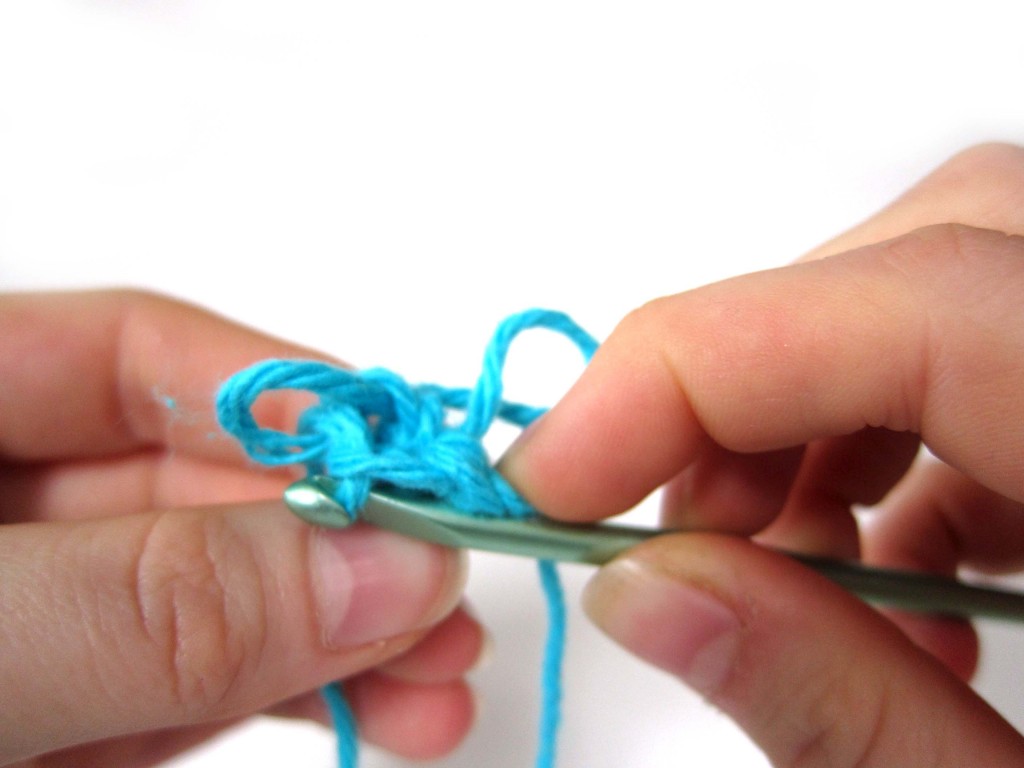
Your work should look like this:

Notice how it’s like there’s a twin-loop on the left, and a lonely loop on the right? That’s perfect. I know it looks different from other crochet stitches, but don’t let that scare you.

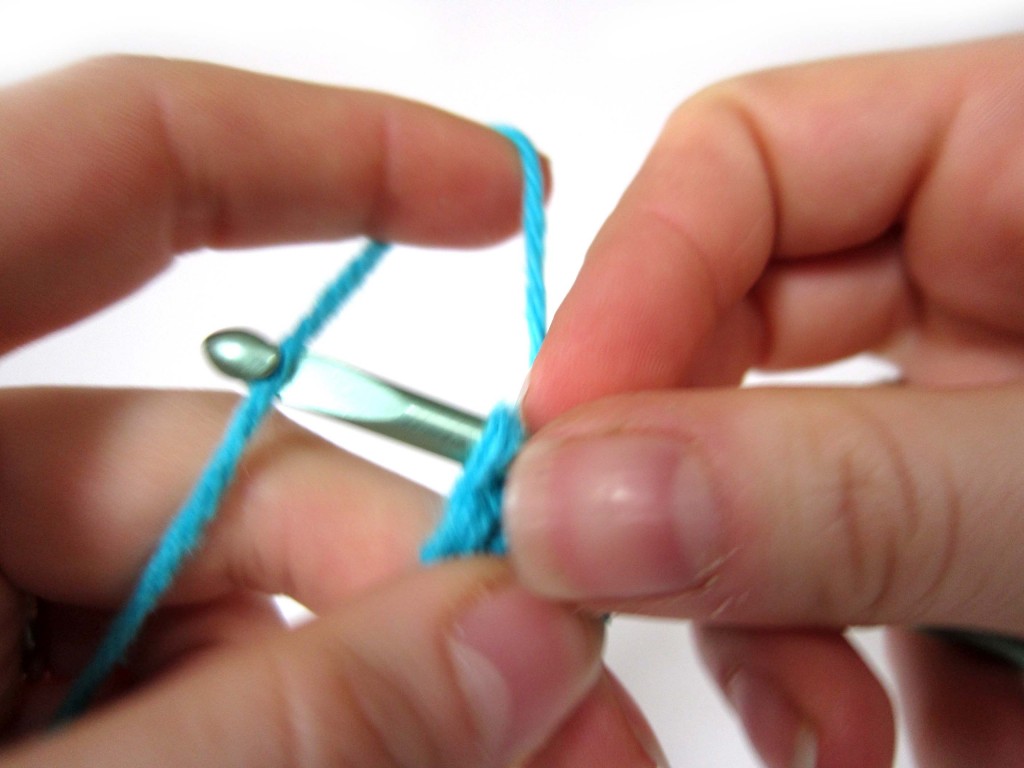
Now, wrap the yarn over your hook:

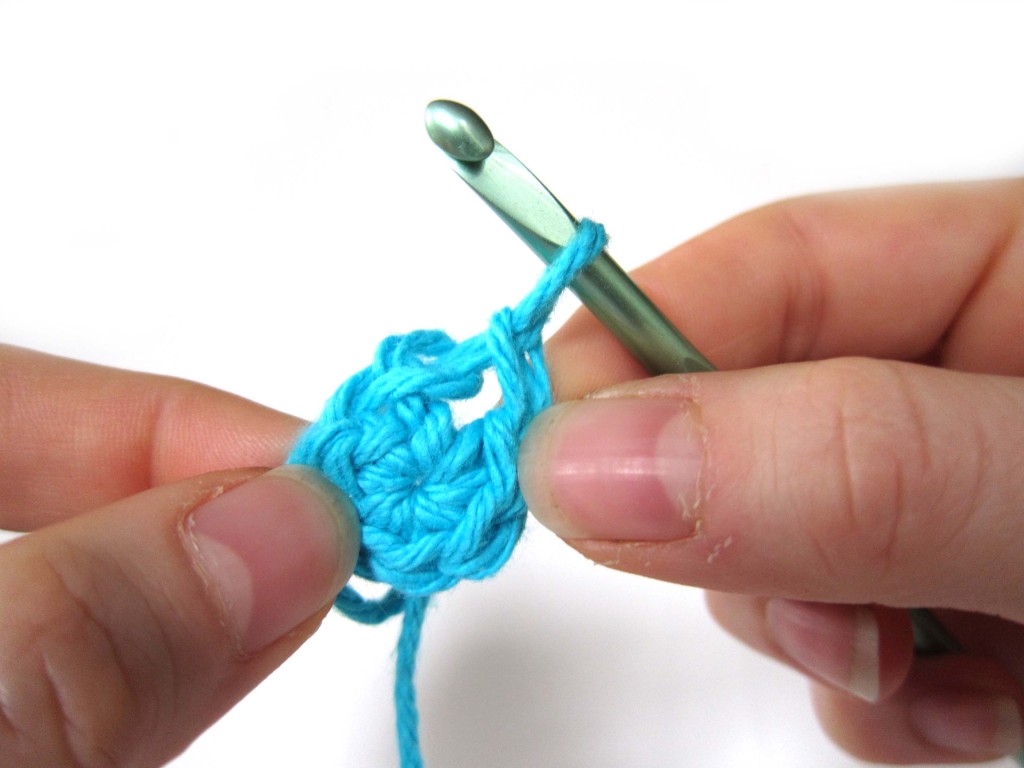
And pull the yarn through all of the loops on the hook. The right-side of your piece will look like this:

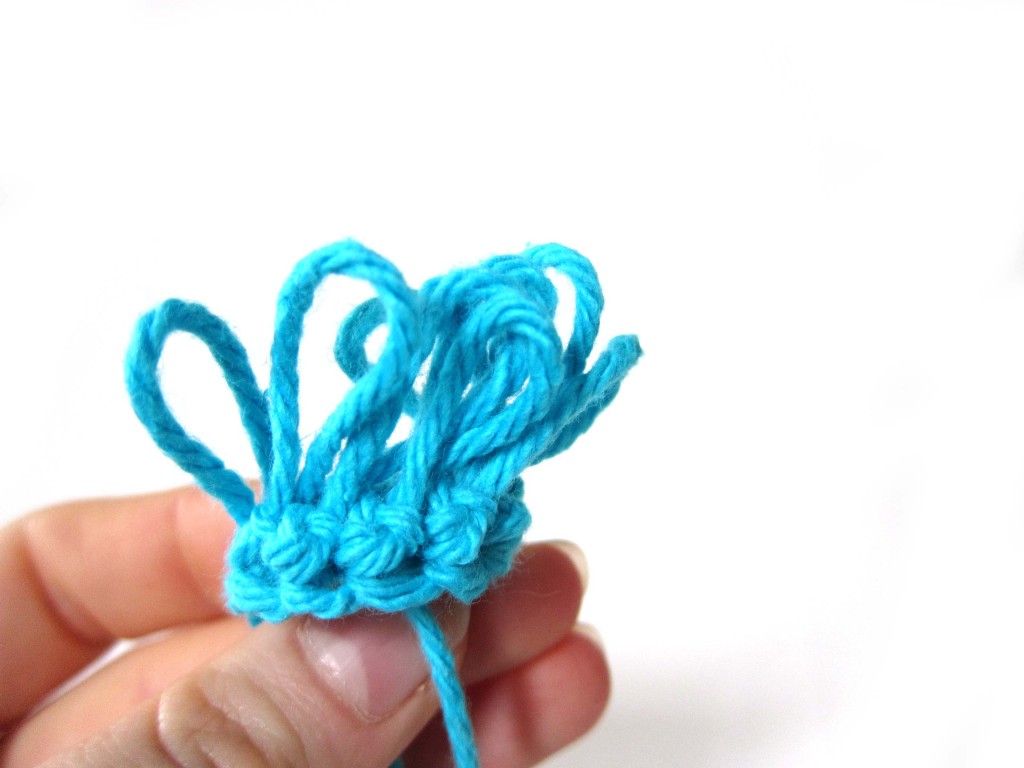
What?!? Where’s the loop? It’s on the wrong side of the work. I know, that’s weird. But it’s how the loop stitch rolls. Here’s a view of the back:

And here’s what it’ll look like if you keep crocheting…

How to do the Loop Stitch, video

I know some of you learn better through videos, so I made one for you!

The video begins after you’ve already inserted the hook into your next stitch, and are ready to make the loop…

What usually goes wrong…

Whenever I get an email asking for help with the loop stitch, I can usually guess what the problem is before reading the email. That’s good news! It means that there’s really only one part that usually goes awry.

And once you know that tricky spot, you can avoid it!

So, let’s have a look. Most people are pretty good at the ‘insert hook into next stitch’ part. It’s the ‘making the loop’ that causes the trouble.

Let’s see what happens if instead of catching both sides of the loop with your hook, you only catch one, like this:

Your finished loop will look okay at the start:

But, as you move your piece, you’ll notice that the loop will come undone:

And this will make a big hole in your work:

That’s sad. It’ll make your piece all holey… and there won’t be any loops left. So, don’t do it this way!

Go one step further… snip your loops!

Ever thought of making ‘hair’ for your amigurumi? Just do the loop stitch, and snip your loops!

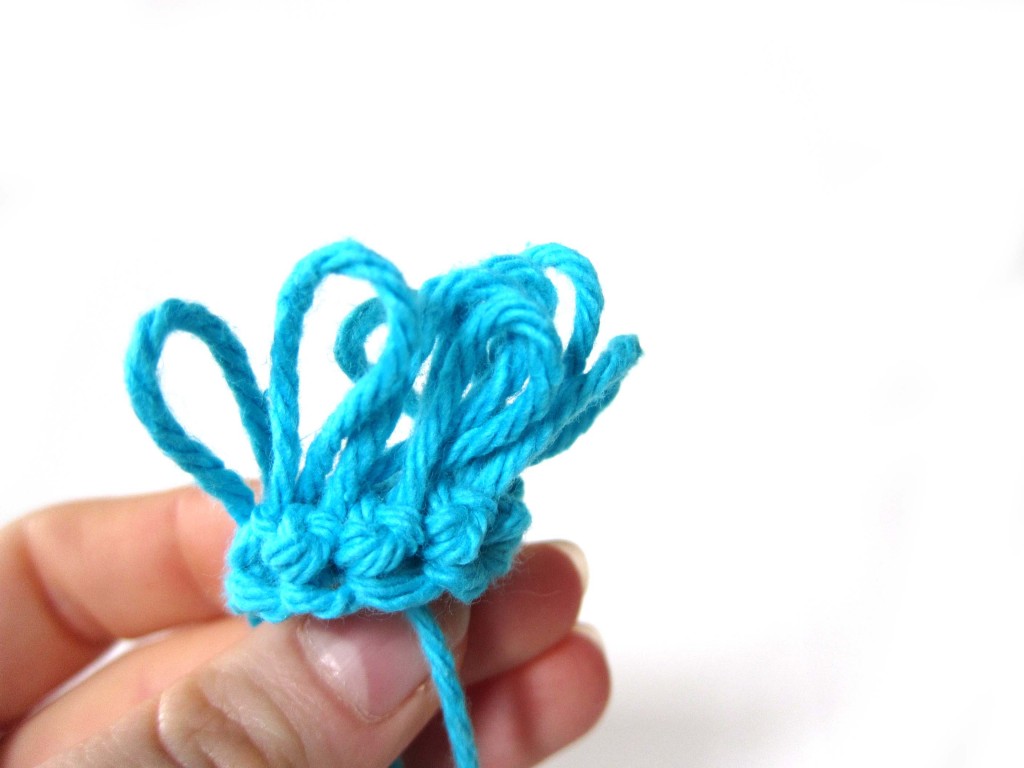
So, let’s say you have your finished piece:

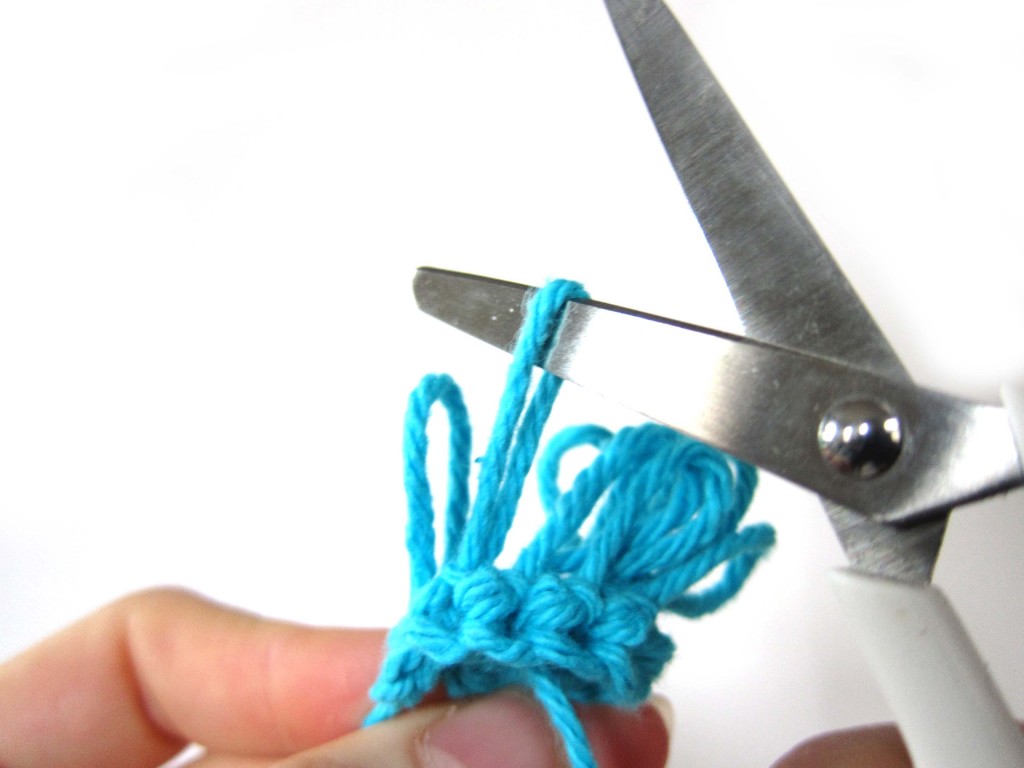
Grab your scissors, and snip each loop in half (at the ‘top’ of the loop):

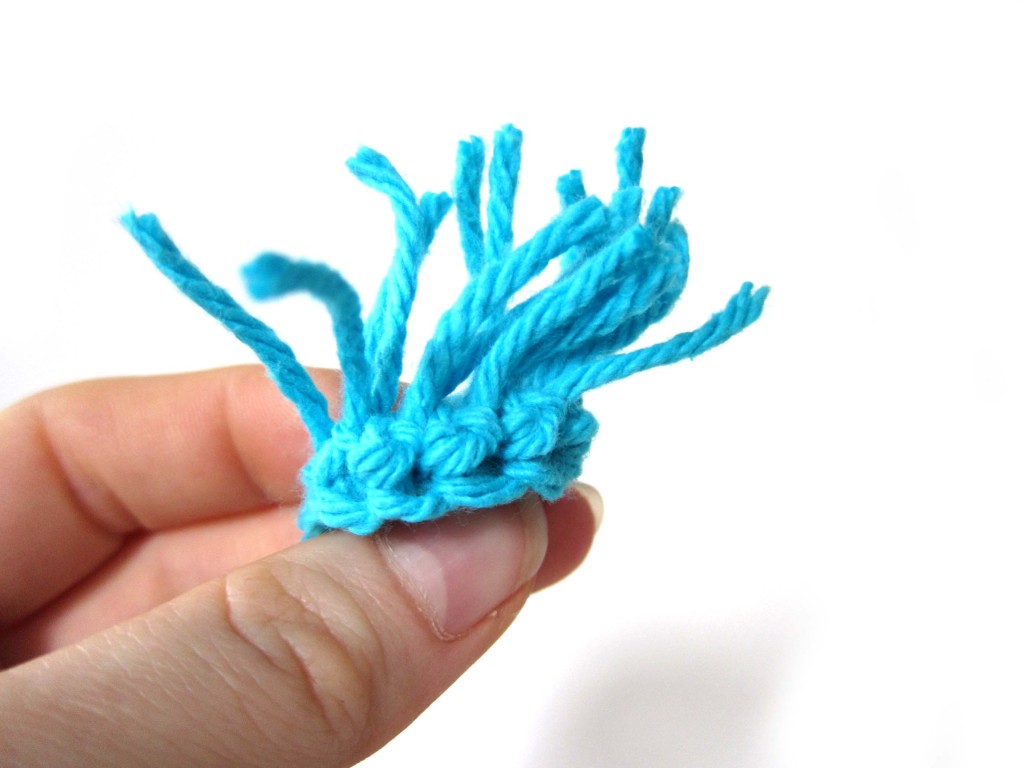
And you’ve got hair!

If you’ve done the loop stitch correctly (by catching both sides of the loop as you crochet), then the pieces shouldn’t come loose!

Will you loop?

Maybe you’ll give a loop stitch pattern a try… or maybe you’ll be daring enough to add the loop stitch to a pattern you’re already working on! Report back about your results!

Here are handy links to all the posts teaching more fancy crochet stitches. . .

Return to the main table of contents for Let’s Learn to Crochet Amigurumi.

Move on to the posts about working with crochet patterns.

Happy stitching!

Patterns & the sale of finished items, one designer’s perspective

I began designing crochet patterns 4 years ago this month (whoa!). Soon after I began selling patterns, I received the question:

Oh, dear. I hadn’t thought about that! So, I looked online to see what other designers did.

The majority of designers did not allow customers to sell the finished items made from their patterns. In fact, the policy seems to spread beyond indie designers: take a peek at the copyright notice in a pattern book or the small print on a McCall’s sewing pattern that you buy from the craft store.

The message is the same:

Surely these experienced companies must know something really important, right?

I, a newbie designer, followed suit. I replied to my customers that my patterns were for personal use, only. (don’t worry… this story has a happy ending, so keep reading!)

The Fear Factor

Why don’t many designers permit customers to sell finished items from their patterns? Let’s take a look at some of the reasons I read:

  • Allowing customers to sell finished items allows factories in China to mass-produce your design, making millions of dollars and stealing your potential customers.
  • If you allow a customer to sell finished items from your pattern, they could make thousands! And they only gave you $5! That’s not fair!
  • What if you allow a customer to sell items made from your pattern, but the crocheter has very poor craftsmanship. Then this will reflect poorly on your design.
  • If someone sells items from your pattern, it takes away customers who will buy the finished items you make!
  • Allowing people to sell items from your pattern promotes the illegal copying/distribution of your pattern.

Boy… the designing world is suddenly a very scary place, isn’t it?

Everything I read suggested that if you allow customers to sell items made from your pattern, you’re signing the death certificate of your design company. Scary stuff!

But… do any of the items listed above seem a bit extreme? Uh, yeah… they did to me, too.

Having a serious think about the problem

After a while (as I gained confidence as a designer), it became less clear to me that prohibiting the sale of finished items from my patterns was the right thing to do. So, I looked at all of the reasons I read about, and had a really serious think about them.

Below are my thoughts about each of the points mentioned above.

Allowing customers to sell finished items allows factories in China to mass-produce your design, making millions of dollars and stealing your potential customers.

This is a really common fear amongst designers: that a factory in China (or Vietnam or wherever) will snatch up your design and mass-produce it without your permission. We see these knock-offs happening to designers of red-carpet gowns the day after an awards show.

But, here’s the important question for our discussion: is allowing customers to sell items made from your pattern make knock-offs any more likely? My opinion is: no. Firstly, the knock-offs that happen are knock-offs precisely because they are copying your design, meaning they don’t care if they have your permission or not. Put differently, your design can be stolen at any time. Secondly, if you allow customers to sell finished items, you are not also licensing out the mass-production of your design.

Finally, crochet is notoriously difficult to mass-produce. So even if a factory fell in love with my design, it’s unlikely it would be profitable for them to reproduce it. They would turn to a knitted/sewn design, instead.

If you allow a customer to sell finished items from your pattern, they could make thousands! And they only gave you $5! That’s not fair!

Let’s get serious. No one is becoming rich by hand-crocheting items from home. In fact, I frequently talk about how to make a profit at all!

The fairness issue is something to mull over. Some designers license their patterns to crafters. For example, if you wanted to sell owls, you might be charged a ‘cottage-industry fee’ (maybe $50) to get permission to sell items made from my owl pattern.

To resolve this issue for myself, I had to think about my customers. I made up a customer, Zoe:
Zoe represents my typical customer. She loves to crochet, and her family and friends have asked her to make some stuffed animals for them. Because she values her time, she wants to charge for making a stuffed animal. Let’s pretend that I charge her a fee. One of three things will happen:

  • Zoe will think the fee isn’t worth it, and will use another pattern that permits her to sell the finished items without a fee.
  • Zoe will decide that the fee is too expensive, so instead of charging for her hard work, she will give the animals away so that she isn’t ‘selling’ them.
  • Zoe will pay the fee, significantly reducing her profit.

You see… most of my customers want to sell just a few finished products. Charging a fee would significantly impact their product.

And realistically, I want them to use my pattern! I love seeing people make items from my patterns. Why drive them away from my patterns by charging?

What if you allow a customer to sell items made from your pattern, but the crocheter has very poor craftsmanship. Then this will reflect poorly on your design.

Hmm… I suppose this is true. But frankly, people will crochet what they crochet and post the photos online regardless of whether or not they are selling them. And they’ll link to your pattern. Not sure what you can do about that.

The flip side is true, too! Customers will post beautiful photos as well! And oftentimes, the crocheter is happy to let you post the photo on your company’s Facebook page.
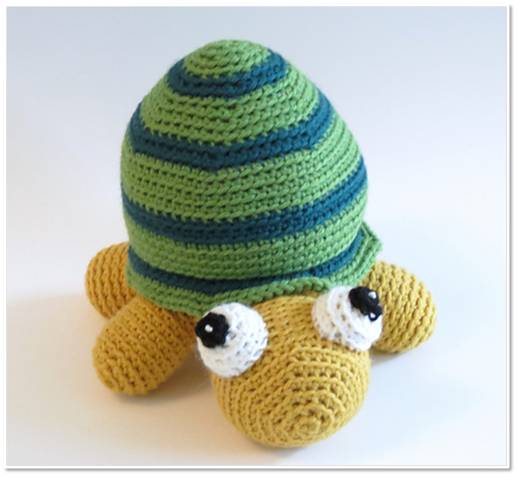
A photo of my Tino the Turtle, crocheted by Adriana. Just one of the many beautiful customer photos I get!
In my opinion, the solution is to promote the lovely photos instead of attempting to disconnect yourself from your patterns.

If someone sells items from your pattern, it takes away customers who will buy the finished items you make!

How severely this ‘scare’ affects you depends on your business model. My business is to sell patterns. I actually don’t have time to make many finished items for sale. So, if others sell finished items, it doesn’t take business away from me!

In fact, others selling finished items actually increases my business, because more crocheters are buying my patterns!
Allowing people to sell items from your pattern promotes the illegal copying/distribution of your pattern.

Uhh… I’ve read this a lot, but I just don’t understand how it could be true. People make illegal pdfs. But this is totally unrelated to whether or not you allow crocheters to sell finished items.

My policy

Have I busted all of those scary scenarios? I hope so!

I decided that, for my business, it was actually beneficial to allow customers to sell finished items from my patterns. Why?

  • It results in increased pattern sales: from customers who choose my patterns over others because I permit the sale of items.
  • I benefit from the increased number of projects connected to my patterns. If a crocheter makes 20 owl for sale, those 20 owls are listed on Ravelry, making my pattern more popular.
  • Customers are often keen to share their photos with me, and posting these additional photos on my Facebook page shows the variety of colors that look great in my pattern!
  • I am personally passionate about helping crocheters make a fair wage from their handiwork. By not charging a licensing fee, I am contributing to making stitching a viable wage-earning job.
  • I couldn’t find any reason not to allow folks to sell the items!

So here’s my policy: You are welcome to sell items from my pdf patterns. I ask that you include a note about the item being a ‘FreshStitches Design’ on the tag (at a craft fair) or a link to my shop (in an online store like Etsy).

It makes me happy. It makes my customers happy. What could be better?

Chime in!

Are you a designer? What’s your policy and why?

Are you a crocheter? How does the ability to sell finished items affect your pattern purchases?

I want to hear!

Best,
Stacey
How I designed 10 monsters (without getting bored)!

Do you want to know the question I’m asked most often?

No kidding. Almost everyone asks me this. It was actually the only downside that my husband brought up when I began designing. “Aren’t you going to run out?”

In fact, the inverse is true: the more I design, the more ideas I get!

The key: flourish in the constraints

Do you watch Project Runway? Most of the time, the participating clothing designers are given difficult constraints: like designing a garment using $250 of candy.

And what challenge to contestants usually say is hardest? The one with the least constraints. While you might think it’s freeing to be able to do whatever you want… it’s actually debilitating. How do you know what to do? What criteria do you use to make your choices?

In my designs, I set a lot of constraints:

  • The yarns must be commercially available and easily substituted.
  • There can be no more than one technically complicated stitch (for example, the loop or bobble stitch)
  • Overall, the design must be accessible to a crocheter who has accomplished one simple amigurumi, and is open to learning a new skill.
  • Any new technique that I use must be accompanied by a video/descriptive blog post to assist my customers.

Why do I do this? I began placing these constraints so that my customer would receive the best possible pattern. With these constraints in place, my customers are guaranteed that:

  • they won’t get lost in a pattern due to insufficient photos/videos/help.
  • the quality of the finished product isn’t dependent on non-quantifiable artistic skills (because I have none!). If they follow the directions (attach to round 25), then their finished product will look lovely!
  • the pattern is accessible to their skill level and fun (uh… no color changes with a loop stitch and attaching felt pieces at the same time!)

This makes customers happy. But, over time, I discovered… the constraints make my designing happy!

The tale of 10 monsters

A few months ago, I was asked by Knitting Fever (the distributor of Ella Rae Classic, a yarn I frequently use in my designs) to design 10 monsters for distribution on their site.

Now… you get to ask that gem of a question: how do you design 10 monsters without getting bored?!? And, how do you come up with 10 different monsters?

I’m not going to fib… the number 10 even had me a little worried. After all, I’ve taught a course on designing your own monsters (which included patterns for about 7 monsters), and I couldn’t repeat any of those!

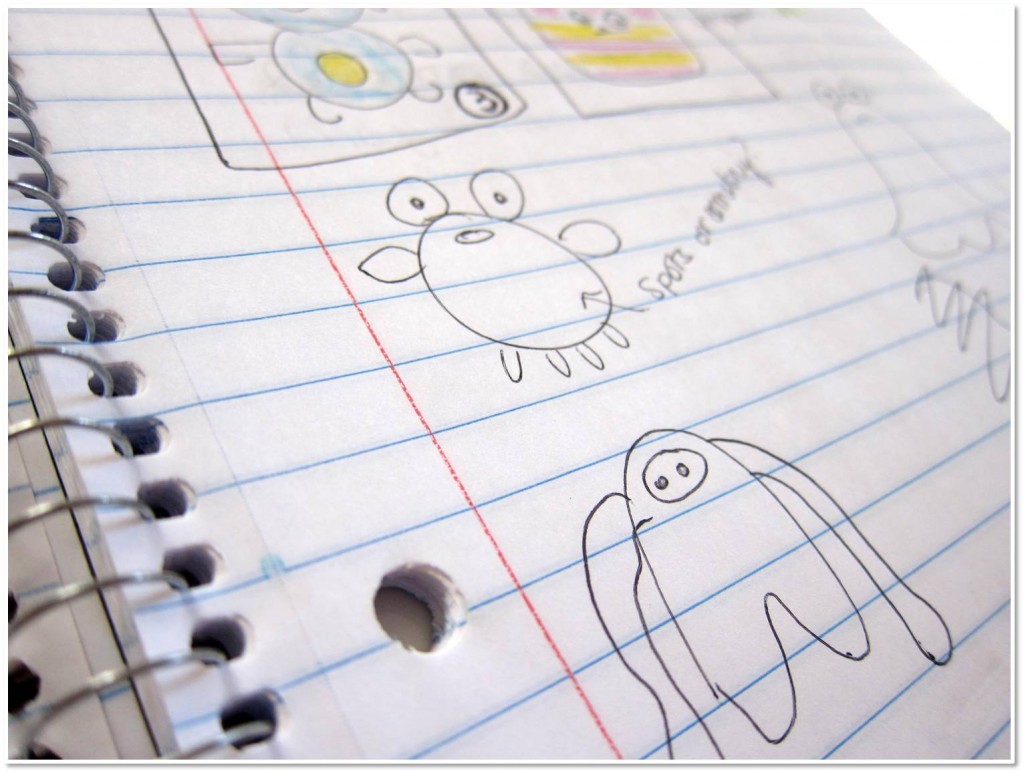
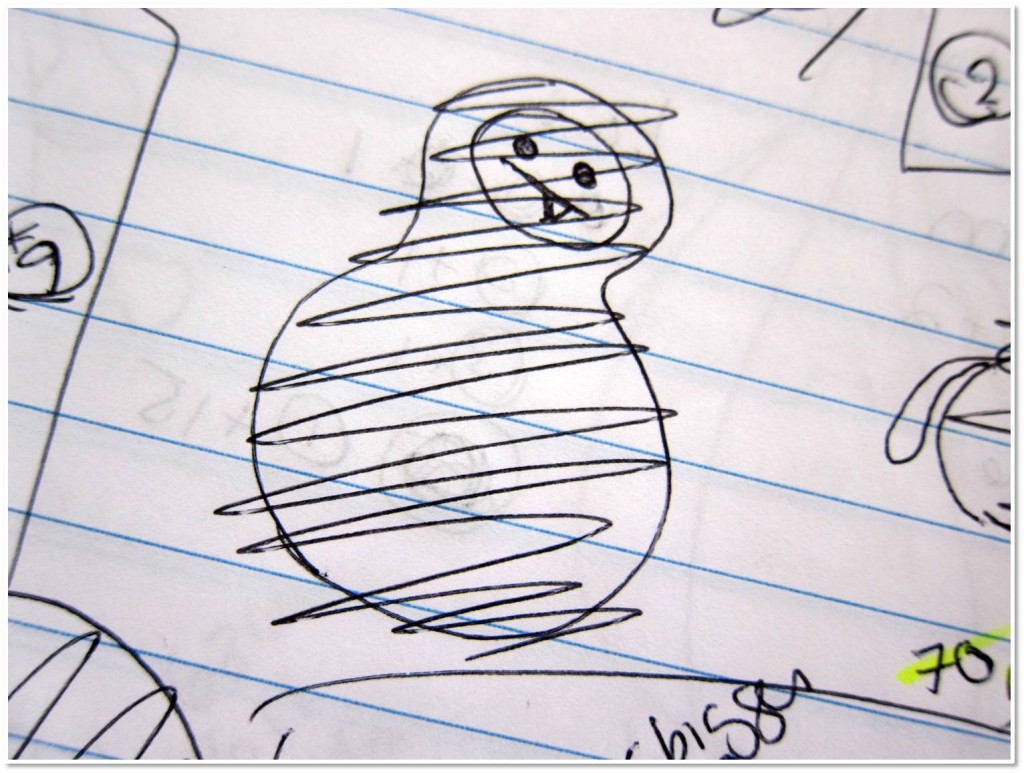
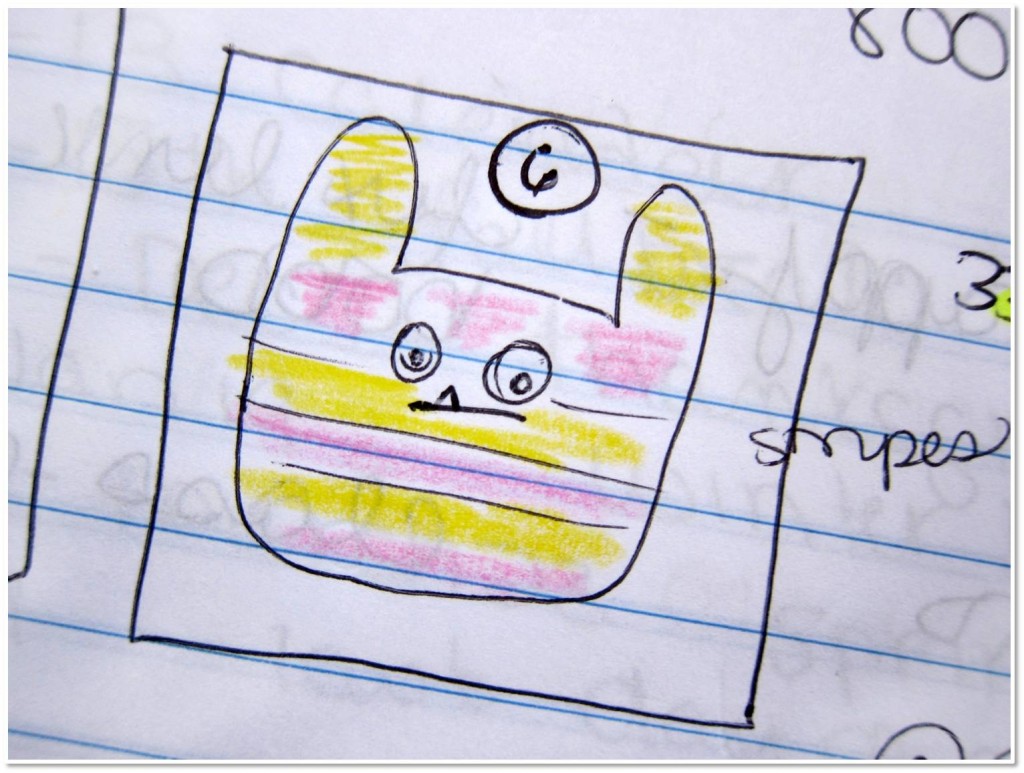
I started sketching…

As I was sketching, I knew it was not only important that I didn’t feel bored with my monsters, but that a customer would really want to crochet all 10… and love every minute of it! That meant that every monster needed a purpose: a novel shape or technique. And what’s that? More constraints!

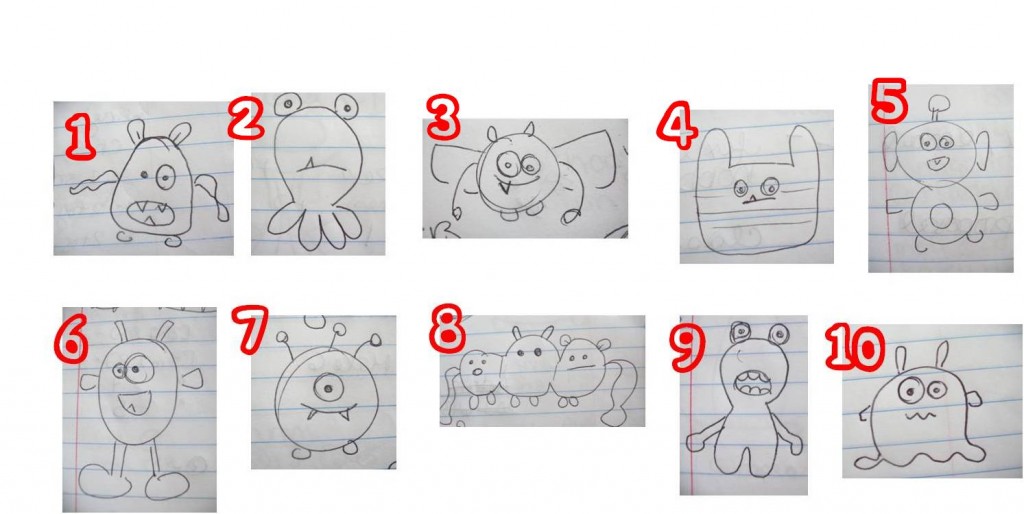
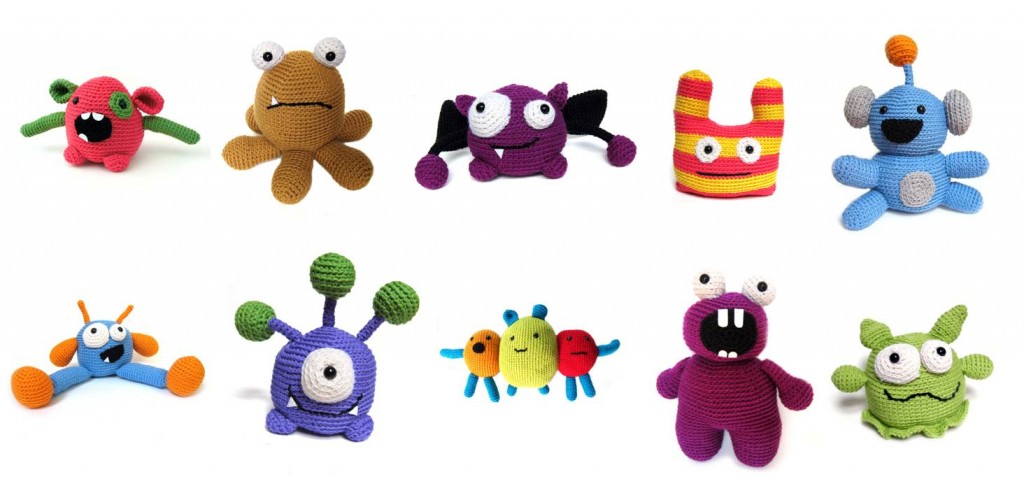
In the end, I came up with 10 that I really loved:

And some that didn’t make the cut:

Among the winners were some great techniques, shapes and skills that I new customers would be excited about:

  • Legs that are joined as you crochet, instead of the usual stitch-them-on-afterwards
  • A ruffle!
  • Stripes that make use of stranding as you change colors
  • A fun rectangular-shape that uses working the bottom side of the foundation chain to begin
  • A monster that begins with a long chain: and not the standard circle
  • Funny antennae that make use of pipe cleaners for structure
  • Crocheted-on mouths with (simple triangle) felt teeth

All of these features (at least I hoped!) would make the crocheting exciting, but also teach the crocheter a skill that they could apply to other animals. Don’t like the mouth on a pattern? Now you’ll know how to crochet a smile and stick on a felt tooth!

Once I had my faves, I colored in my sketches so I could figure out which colors of yarn I’d like to use:

So does this mean that I could design another 10 monsters? I don’t know… maybe! But I can say that what helped me is coming up with specific goals (aka constraints) that I wanted each design to accomplish.

The finished monsters

Here’s the whole gang… do you like them?

I hope you do!

And you can have them all!

All 10 of these patterns are available as free downloads from Knitting Fever! Isn’t that awesome?

I really hope that you grab them and enjoy the process of crocheting these fun monsters!

Thanks for stopping by and reading!

If you want to see more great finished items… make sure to visit Tami’s Amis blog, the organizer of this great FO Friday theme!

I hope you have an awesome and craft-filled weekend!

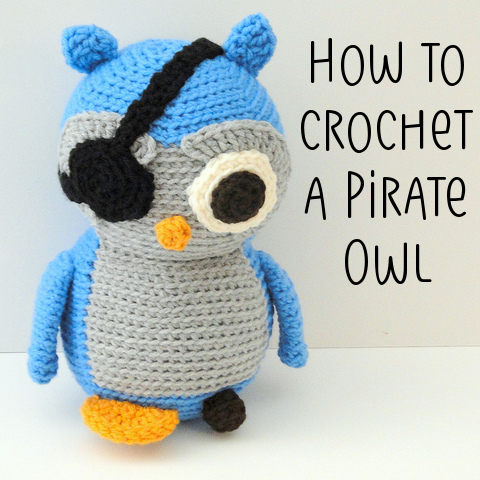
How to crochet a pirate owl!

Have I told you how awesome my customers are? I don’t mean to brag but… I’m pretty sure that my customers are the sweetest and most creative crocheters around!

Just this week, Adriana was featured on Martingale’s blog for crocheting all 18 critters from Crocheted Softies!

And today’s Tip Tuesday post? Brought to you by the super-creative mind of Casey from Plus 3 Crochet! Love!

So, there. That proves it. My customers rock. Thank you guys, for being such rock stars!

How to crochet a pirate owl

Casey took the Nelson the Owl pattern and came up with a few tweeks to turn it into an adorable Pirate Owl!

And she’s sweet enough to share how to do it! Follow these instructions, and you can have your own pirate!

Peg Leg

Instead of making two feet, you’ll want to make one foot, and one peg leg.

Instructions for Peg Leg

With black, ch 2.
Rnd 1: Sc 6 times in 2nd ch from hook. (6)
Rnd 2: Sc twice in each st. (12)
Rnds 3-4: Sc in each st. (12)
Fasten off with long tail. Stuff, and attach.

Eye Patch

To make an eye patch, you’ll make one eye circle in your usual color (shown here in white, but is orange in the original Nelson pattern) and one in black. Then, you’ll crochet a strap.

Instructions for Eye Patch Strap

With black, ch as many stitches as it takes to fit from one side of the eye circle, around the head to the other side.
Row 1: Turn, sc in 2nd ch from hook and each st across.
Rows 2-3: Ch 1, turn, sc in each st across.
Fasten off and attach to head.

Enjoy your pirate owl!

It’s that easy!

Thanks so much, Casey, for sharing how to make a pirate owl! I’ll bet some of you out there will come up with ideas for applying these tips to make some other great pirate-animals!