Want to learn how to make a quilt with an easy online workshop – totally free?
Sign up for Let’s Make a Quilt here. You’ll learn how to get started, the tools and supplies you’ll need, and how to make a quilt from start to finish using Quilt As You Go and applique with fusible adhesive.
It’s the easiest, most fun way to make an applique quilt. You can do it!
Couching is a method of sewing 3-dimensional “stuff” (cord, braid, strings of beads or sequins, etc.) to fabric by zigzagging over it. It allows you to sew down things that can’t be sewn through. 🙂
You do need a special foot for couching. I the video I show you the one I use with my Bernina, and point out the features you need to look for when you’re buying one for your machine. They’re usually pretty inexpensive and it’s a nice foot to add if you do any decorative stitching.
You could use it to add raised whiskers on cats, raised stripes on a snake, pearly snow on the ground, and lots more. I can’t wait to see what you do with it!
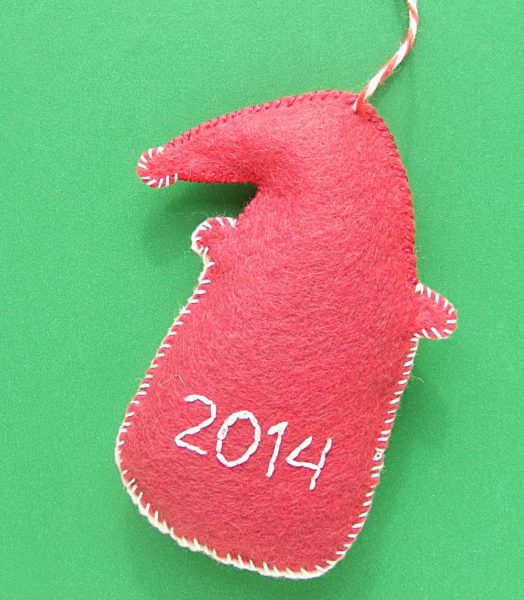
All my ornament patterns have solid felt backs – no applique or embroidery. That makes it the perfect spot to add a name or date using this free alphabet embroidery pattern!
In my family and in my husband’s family, it was a tradition to give handmade ornaments to the kids every year. Having our names on them somewhere was absolutely necessary since we both have siblings. 🙂
Now that I’m a grown-up with my own daughter it’s fantastic to have those dates too. She loves knowing how old we were when we got each ornament and who made them for us. 🙂
It’s easy to add a bit of embroidery to the back of your felt ornaments. Here’s how.
Download the free alphabet embroidery pattern I used here. You can also choose to type up your name and date and adjust the size and choose the font – but be sure to choose a font that’s mostly straight lines with minimal tight curves so it’s easy to embroider.
This is a great use for any small scraps you’ve saved. 🙂
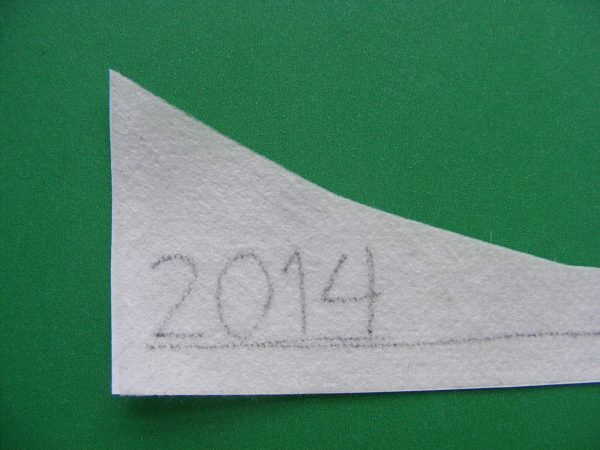
Draw a straight line to use as a guide to line the letters or numbers up, then trace them onto the stabilizer.
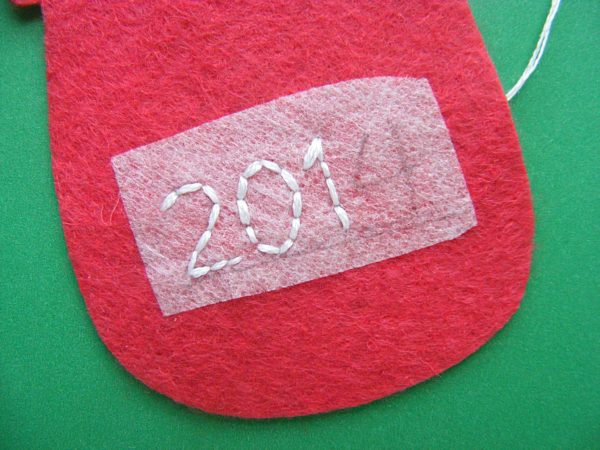
Peel off the backing, stick the stabilizer to the felt, and stitch right through it.
I used backstitch with three strands of white thread.
I traced the date in pencil. It can be a bit hard to see, but there’s NO chance of it bleeding on the white thread. Most pens bleed a lot – test yours or use a pencil.
After you’re done stitching, soak off the stabilizer in cold water and lay the piece flat to dry.
This is the last of the BIG embroidery projects I did for the Sulky booth at Spring Quilt Market.
Did I say big? It’s HUGE – 18 inches tall and 28 inches wide! It’s in one of those big oval quilt hoops you can find at Joann’s. The biggest one they had. It’s crazy big.
Here’s how I made it. . .
I sewed the strip of green solid fabric to the bottom of a strip of blue solid fabric. Easy peasy.
I appliqued the letters onto the blue fabric using fusible adhesive, and machine stitched around the edges in matching thread. No zigzag or satin stitch – just a simple straight stitch.
I stitched in all the flowers using the repeating floral pattern in the Continuous Stitches embroidery pattern.
But wait! How do you use printable embroidery transfer paper on a really big embroidery project – bigger than a sheet of paper?
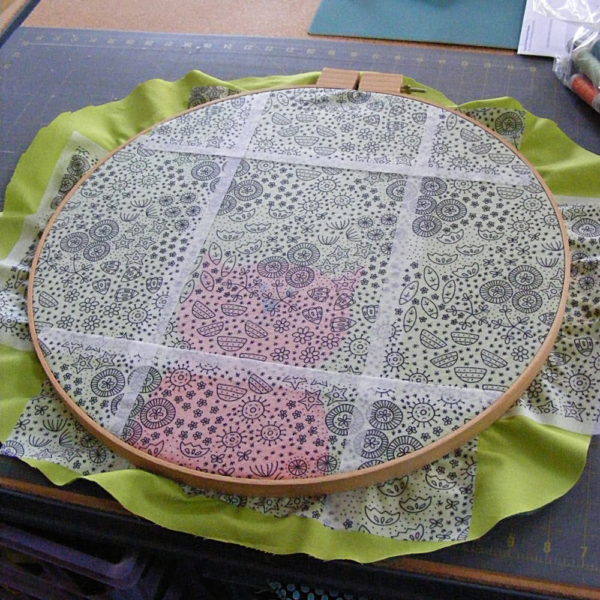
I printed the floral pattern on multiple sheets of Sulky Sticky Fabri-solvy, laid them out in a repeat and stuck them to the fabric. It’s the same method I used on this cat, and I shared lots of detailed instructions and photos in that post.
I made the flowers fill the green area and spill up into the blue as if they were growing up into the sky.
Finally – I stitched the raindrops in dark blue on the light blue background. I wanted the raindrop stitches to be REALLY regular – more regular than my hand will do on its own – so I used the graph paper pattern in the same Continuous Stitches embroidery set to space them out. The raindrops themselves are just long lines of running stitches.
Then I printed out a single page of the flowers in the Continuous Stitches embroidery pattern onto Sulky Sticky Fabri-solvy. The pattern is designed for seamless repeats, but it only took one sheet to cover all her hair.
I used a single strand of Sulky Petites 12 wt. thread and only stitched the flowers that sat over her hair. You can see that I ignored the printed pattern for larger flowers that would have gone outside her hair. I just filled in those spaces with some of the smaller flowers.
After all the stitching was done it was time to soak away the stabilizer.
Look at that pretty face being revealed. 🙂 And that’s me and my camera reflected in the water!
But I’ve heard from people who want a teeny bit more guidance. They liked the improv style, but had a hard time visualizing the “spokes of the wheel” – especially if they were making a bigger piece.
I hear ya!
So I designed a simple radial grid that could be printed on Sulky Sticky Fabri-solvy and used as a guide for any mandala.
Here’s how I stitched the sun. 🙂
First I appliqued a circle and some rectangle rays around the sun. I used fusible adhesive and machine-stitched the edges down with matching thread because that’s not the stitching I want noticed on this piece.
I printed the circle grid from my Continuous Stitches pattern onto Sulky Sticky Fabri-solvy, cut it out, and stuck it over the sun.
Time to start stitching!
I always like to stitch around the edges first, so I started with a very simple zigzag that repeated every two spaces.
I created a grid with 96 total spaces because that’s evenly divisible by a LOT of numbers. I can create any pattern I like as long as it fits into 2, 3, 4, 6, 8, 12, etc. spaces. As long as the number of spaces used for the repeat goes evenly into 96, I’ll end up with a perfect match as I make my way back to the beginning of the circle.
Here’s the next round. I added some French knots to the first zigzags, and then stitched a much bigger zigzag. The repeat on this row is 8 spaces.
I liked how the second row of stitching created flower shapes, so I filled in the middle of each flower with a little heart detail.
Another deeper zigzag – another 8-space repeat. Now I feel like I need to fill up those new spaces I created.
I like it! It makes me think of peacock feathers.
Remember – all of this is unplanned. Just keep stitching in circles and then filling in the spaces created.
I went back to smaller repeats for the center of the mandala.
I just stitched some simple diamonds and French knots on each ray.
All of this is stitched with a single strand of dark orange Sulky Petites thread and the only stitches I used are back stitch and French knots. Easy peasy.
Time to soak off the Sulky Sticky Fabri-solvy.
Ewwwww.
But also yay because this soaks away all those grid lines. You get the comfort of having a “pattern” but you don’t have to stick to it to cover up your lines. The lines all disappear! Meditative, almost-freestyle stitching at its finest.
You don’t have to make a sun or do any applique – you can just stick on the grid and hoop up any fabric in a round hoop and start stitching! It would be fun to do a bunch of 3 – 4 inch hoops for Christmas ornaments. 🙂
Here are the other BIG pieces I stitched for the same project.
Now that Quilt Market is over I can finally share details about some of those BIG embroidery projects I was working on back in April. 🙂
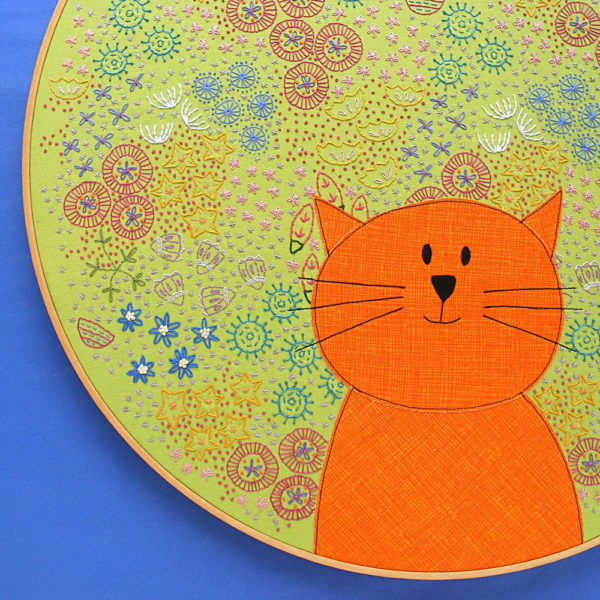
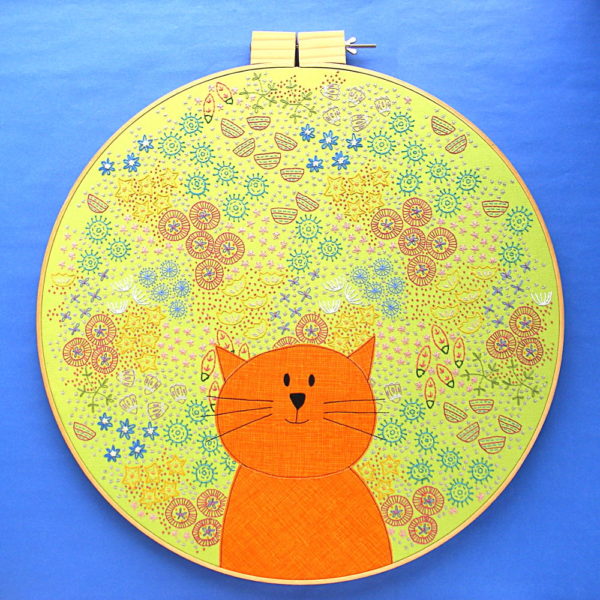
This post is all about how I made this cat surrounded by lots and lots of embroidered flowers. It’s in an 18-inch hoop!
I started out by enlarging my favorite cat (Maurice) from my Cats Quilt pattern and appliquéing it on a big square of fabric. I enlarged him just a bit (printed the pattern page as big as I could and still get it to fit on a single page) and used my normal fusible adhesive method.
I stitched down all the edges, but I did NOT stitch the whiskers yet. They’re just drawn in for now with a fine-tip Sharpie.
Then it was time to add the flowers. It doesn’t matter that the full piece is bigger than a single sheet of paper because the Continuous Stitching pattern is a seamless repeating pattern. See how you can overlap the edges for a continuous pattern? That means you can make BIG embroidery. As big as you want!
It took me several sheets of Sulky Stick & Stitch (the new – and much better – name for Sulky Sticky Fabri-solvy) to cover the whole hooped area.
I just stuck the sheets right over the cat. So many flowers!
I don’t normally have problems with the Sulky Stick & Stitch pulling loose, but I don’t usually stitch this large, so I started stitching in all the overlapping areas first, just to keep things secure.
Here are some details of the different kids of flowers. . .
One of the things I love about working with Sulky Stick & Stitch is that I can change my mind about things partway through stitching. All the markings will wash away, so I don’t really have to stick with my original drawing. Take these tulips. . .
Those little purple dashes were supposed to be dots, but when I got to them I changed them to dashes. No big deal.
All the stitching is finally finished! I just skipped right over that applique cat – it was easy to see him through the stabilizer.
Here it is having its soak.
Yep – that’s the messy back. Here are some more shots of the back of the piece.
I do NOT believe that that back of your work should be as pretty as the front. 🙂 I’m a thread-carrier and it would drive me batty to tie off my thread after each individual flower!
But – recognizing that I’m a thread carrier means I do something a little different with pieces like this. See how dark green that fabric is? That’s not the same lime green you see on the front of the piece! That’s because I backed the piece with a second layer of darker fabric behind the main fabric. It keeps my thread carries from showing through to the front! Tricky. 🙂
I soaked the piece for about an hour in cold water, sprayed off the bits of mushy stabilizer, gave it another quick swish in clean water, then ironed it dry. One more step before finishing. . .
Remember how I didn’t stitch those whiskers when I appliquéd the cat? Time to do it now. I waited because I wanted the black whisker lines to go over the embroidered flowers. This part was totally nerve-wracking, but it did just fine. 🙂
I hooped the finished piece in a quilting hoop using this method. No way was I letting glue anywhere near a piece that took this long to stitch!
Finished!
That is one BIG embroidery piece!
I’m super happy with this piece! Sulky had it hanging in their booth for Quilt Market and they’ll be exhibiting it at a few more shows, but Jo has already claimed it for her room when it comes home. 🙂
Here are the other BIG embroidery pieces I stitched for the same project.
I love instant delivery. I love being able to print directly onto specialty papers like Sulky Sticky Fabri-solvy, freezer paper, and fusible adhesive. And I love being able to click through to additional resources and tutorials.
But they’re new territory for a lot of people!
I get a lot of questions about digital patterns and have heard some heartbreaking stories that could have been avoided if people had known just a few good practices when working with this kind of file.
So here are some simple suggestions for you.
When you download your digital pattern file, make sure to save it where you know you can find it.
Most computers have a factory-created folder called downloads and all downloaded files are automatically saved there. You can change your computer settings to save downloads to your desktop or another folder, or you can just open the downloads folder after you download your pattern, and then move it to where you want it to live permanently. I suggest a folder called Shiny Happy World Patterns. 🙂
Save a backup!
I can’t count the number of heartbreaking emails I’ve gotten from people whose computers crashed and they’re trying to replace all their digital patterns because they didn’t have a backup. 🙁
If you have a free Google account, you have a HUGE amount of free storage space on Google Drive. You can also save a backup to an external hard drive, another cloud service, or even a flash drive. I know a couple of people who store a backup of all their digital patterns on a flash drive – which makes it super easy to take to a copy shop for printing if you don’t have a printer.
Saving the email with the download link is NOT a safe way to back up your files.
A lot of shopping cart services have an expiration date on those links – some as short as a week.
Many shopping cart services have a limit to the number of times you can download a pattern – a few limit it to a single download!
Digital delivery services change and companies go out of business. Download links don’t remian functional forever. A pattern actually saved to your computer (and backed up) is yours forever.
Only print the pages you need
As a designer, one of the things I love about digital patterns is that I can include loads of additional information and photos – way more than I could possibly justify if I had to think about the printing costs associated with books and paper patterns. And I can include links to video tutorials going into more detail teaching every single skill used in the project.
The only pages you really need to print out are the pattern pages – the actual templates that you’ll be cutting out or tracing. And many times you don’t even need to print all of those. All of my applique patterns, for example, include a regular version of the image which you can use for needle-turn applique and as a placement guide for other techniques, plus a whole separate set of templates with all the pieces reversed and exploded and ready to print on fusible adhesive or freezer paper. You don’t need both sets! Choose your technique and then print only the pages you need.
Some people print all the instruction pages and keep them in a binder, but a lot of people skip that step too. You can set your computer, phone or tablet next to your sewing machine and work directly from the screen if you like.
Print at 100% size – no scaling
The exact look and wording of the printing dialog will vary depending on your computer and your printer, but it will look something like this.
I drew a big pink arrow pointing to the stuff you need to look for – language about size or scaling. Unless the instructions state otherwise, you want to print at 100%.
Sometimes a PDF won’t print. It’s usually a problem with needing an update – either your browser, your version of Adobe Reader or your printer driver. It’s hard for me to help with that because the problem is usually specific to the software on your computer. I can tell you that there are no “protections” of any kind on my PDF patterns – if you can download the pattern you should be able to print it. One workaround that can help is to print it as an image. There are instructions here for how to do that, as well as some more troubleshooting tips for weird printer problems.
Updating your browser can fix a whole host of weird problems. It’s the “Have you tried changing your sewing machine needle?” fix of the tech world. Any time I run into tech difficulties on ANY site, my first stop is always to visit www.whatismybrowser.com. It will tell you if there’s an update available for your browser. Running that update has helped solve really weird problems more times than I can count.
Those tips address the most common questions and problems people run into with digital patterns. If you have any more tips or suggestions for people – please include them in the comments!
Having trouble downloading a pattern? Want to know how you can work with digital patterns if you don’t have a printer? You’ll find answers to lots of tech questions on the FAQ page.
Here’s a list of links all about choosing a quilt pattern – and even designing your own!
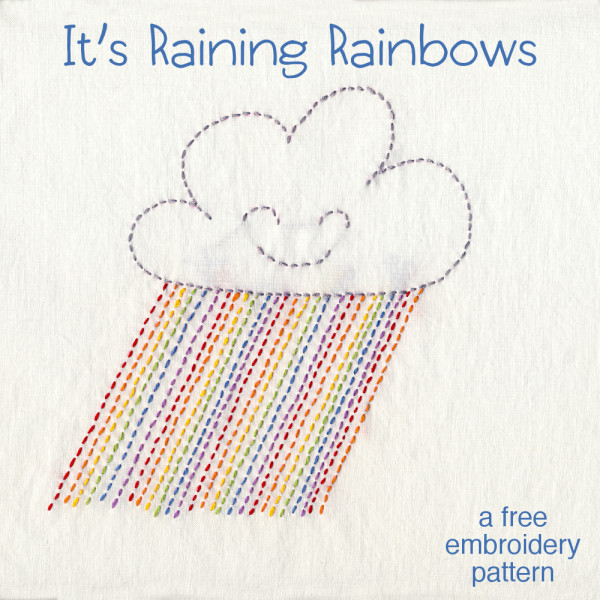
I used running stitch for the whole thing – learn how to stitch a running stitch here. It’s the easiest embroidery stitch there is – the first one I teach to beginners.
You don’t have to use just one stitch. It would be adorable to use the lazy daisy stitch for the raindrops. Or maybe rows of French knots. Have fun with it! (Those links go to how-to videos.)
You can use any thread colors you like.
You don’t have to stitch it on white fabric. I love the “Lite-Brite” effect I got when I stitched it on a black T-shirt for my daughter.
Find tips for embroidering T-shirts here. Again – Sulky Sticky Fabri-solvy is my favorite product for that. It transfers the pattern and stabilizes the stretchy fabric in one step – and washes away completely. That stuff is magic!
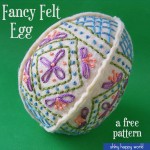
You (yes, you!) can stitch up a lovely felt egg just like this one. What do you need? Some felt. Preferably wool felt. It’s dreamy to stitch on and you can find it in hundreds of gorgeous colors.
You’ll need embroidery thread. Use any colors you like – either an assortment of colors like the sample above, or one color for a very simple, classic egg.
You’ll need a needle. I stitched my sample with three strands of thread – for that I recommend a #5 or a #8 embroidery needle.
You’ll need the pattern – of course. Download that here. It’s full-sized, so no enlarging needed.
You’ll need a bit of stuffing. A handful of cotton balls will do the trick.
Finally, there are a couple of optional items that I strongly recommend to make your stitchy life better. Sulky Sticky Fabri-solvy is fantastic for transferring patterns to felt (as you’ll see below) and Thread Heaven just makes your thread behave really nicely.
You can find a list of my favorite tools and supplies (with links to sources) here.
Rough cut around each piece and stick it to the felt.
Step 3
Embroider the design. You’ll be stitching right through both the stabilizer and the felt. I used a combination of the following stitches – the links below take you to videos teaching you how to do them if you’re new to embroidery.
I used three strands of thread for all my stitching. It’s all white thread on Norwegian blue felt. The top sample used straw felt.
Repeat for all four wedge shapes.
Step 4
After you’re done with all the embroidery, cut the four pieces out neatly on the outline.
Step 5
Soak off the stabilizer. This is the magical part! Drop the pieces face down in a bowl of cold water and let them sit there for about an hour. The stabilizer will get all mushy and soft. Rinse it off under cold running water. If any bits are stubborn, just hit them with a kitchen sprayer and that should do the trick. Don’t rub the surface of the felt – just let the running water do its thing.
Set them flat on a towel and let them dry. Don’t wring them out, twist them, or even smoosh them. Just lay them sopping wet on a towel and let them dry.
Step 6
Place two egg pieces wrong sides together and stitch them together along one edge. I used running stitch, which leaves a nice ridge that I like along the seams of the egg. If you want a smoother finish you can use whipstitch instead.
Repeat for the second pair of pieces.
It’s easy to mix up the ends – one is a little pointer than the other and has a bit more lattice. Make sure you put matching ends together.
Step 7
Put your pairs together (make sure the matching ends are together) and sew the last two seams. Leave a couple of inches of the last seam open for stuffing.
It will be easiest to sew your egg together if you let it collapse into a deflated football kind of shape.
If you like this free pattern, sign up for the Shiny Happy News! Subscribers get a weekly newsletter full of sewing tips and tricks, free patterns, special discounts, and other things to make you smile. 🙂
Easter is early this year – March 27 – so it’s time to start thinking about your Easter Crafts. What do you want to make?
I could just link to the Easter section of my shop – but then you wouldn’t see all the fun free patterns that are available!
(And there are a lot of them.)
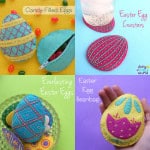
So I created this handy dandy round-up post with all the patterns for all my favorite Easter crafts. Just click on the image to go to that project!
Easter Stuffed Animals
Some are big and huggable. Some are small and pocketable. They’re all easy and fun to make.
Easter Felt Projects
Spend a lovely spring afternoon stitching one of these by hand.
Easter Quilt Blocks
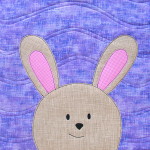
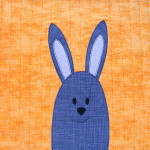
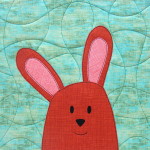
Make a kajillion bunnies with a fun mix & match pattern.
Easter Embroidery patterns
Stitch them on tea towels, baby onesies and more.
Other Easter Sewing Patterns
Including Dress Up Bunch dolls and clothes!
Of course, there are lots of spring-themed patterns too – but I stuck to Easter crafts for this post. 🙂
So whether you like to sew, quilt or embroider – stitch by machine or by hand – I’ve got an Easter craft pattern for you. Have fun with them and be sure to share what you make in the Shiny Happy People group on Facebook!