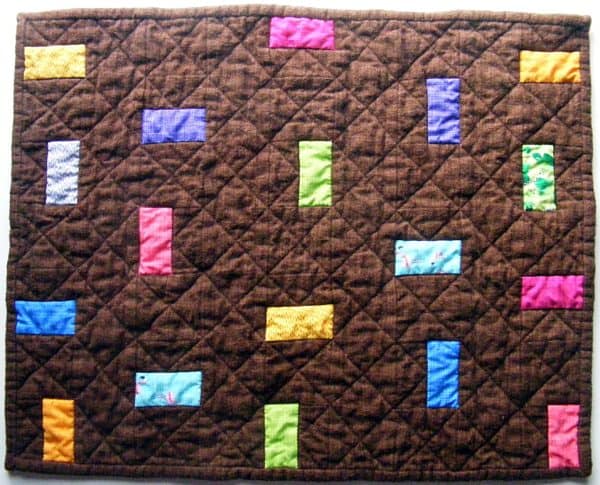
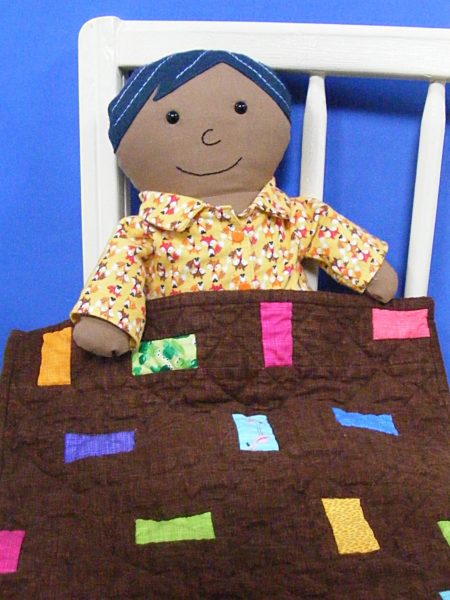
The easy charity quilt I made for Craft Hope is finished and on its way. I love how it turned out!

Craft Hope is an organization that partners with different organizations to collect handmade items for donation. I know lots of crafters like making items to donate and there’s always a demand for patterns for easy charity quilts, so when I made my Craft Hope Quilt I decided to share the how-to so you could make one too, if you’re so inclined.
It’s an easy and fun technique – great for beginners of all ages. I’ve been posting lots of in-progress photos as I go and I’ve been getting a ton of questions, so I’m going to answer them here all in one place. . .
How are you piecing and quilting the blocks all at once?
That is the magic of Quilt As You Go. It really is the perfect no-stress way to make a scrap quilt of this kind.
You can see a full tutorial for the process here.
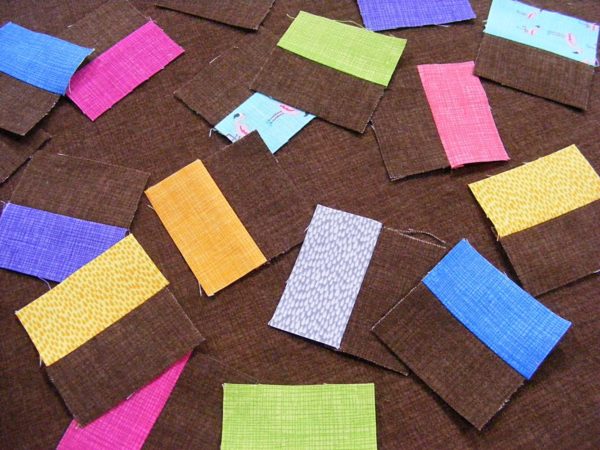
Did you really make it all from scraps?
Yep. I have (had) a lot of scraps and I store them in baskets sorted by color – which made it really easy to make this kind of quilt without making a HUGE mess in my studio. It was more of a manageable mess. 🙂
If you did all the quilting while you pieced, how are you backing it? Do you have to quilt it again?
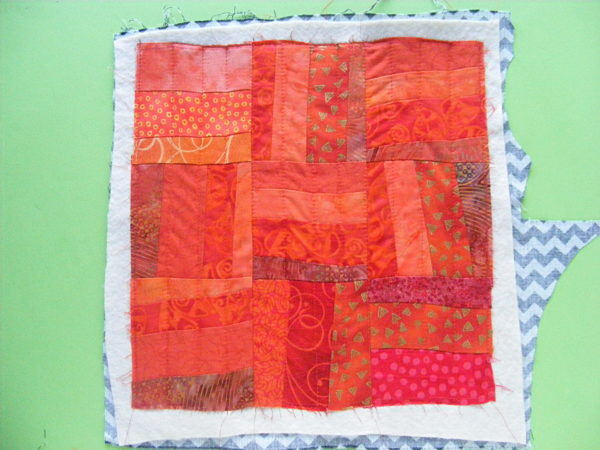
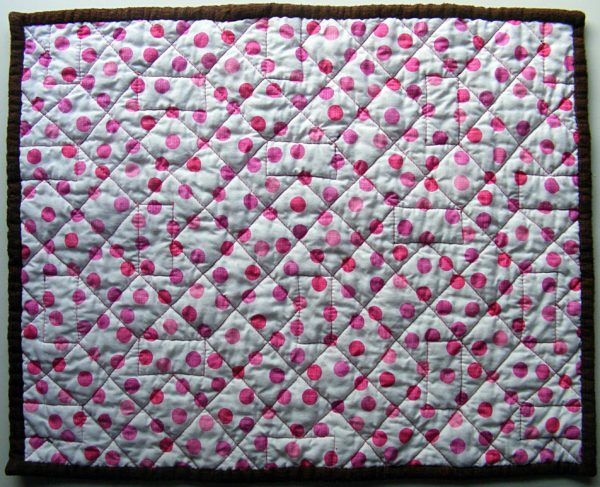
Here’s what the back of the quilt looks like.

I backed it in Cuddle Fleece – delightfully soft, cuddly, and easy to work with. I used it as the back of a quilt for my daughter a little over a year ago and she loves it so much that she basically told me I should never use anything else. 🙂
You can see that the front is nice and crinkly after washing – every seam is also quilted so it crinkles up nicely.
The back has a lot less quilting. I sewed all the finished, quilted blocks together, pressed the seams open, backed it with the fleece, basted it (I use safety pins) and then quilted 1/4″ from each block-joining seam. I like the kind of frame-ish effect around each block and I like the big grid on the back.
There’s a video here showing that technique in more detail.
How big is the finished quilt?
Each block is a 10″ square, finished, so the full quilt is 60″ wide and 90″ tall. You could very easily make it bigger or smaller just by adding or removing blocks. You could also change the size of the blocks, but I don’t think I’d make them much bigger – a 10″ grid on the back of the quilt works very well but there might be some bagging or sagging if you went a lot bigger. I’ve done some quilts with 12″ blocks and that works fine too.
Why don’t you spray baste?
I tried it once (many years ago) and it was a disaster. The fumes are pretty intense and you’re supposed to do it outside – but there’s no clean place in my yard to do it and I don’t have a clothesline to use for that method. So I tried it inside where the fumes almost killed me. I got overspray in my carpet (which was very hard to wash out) and then the adhesive gummed up my needle the whole time I was sewing. The product has probably improved a lot since then (I don’t even remember what brand I tried) but it will be a while before I’m ready to try it again. 😛
How do you pick your binding on a quilt with so many colors?
I really love to use black and white or dark grey bindings with a rainbow quilt like this. I actually would have preferred a nice crisp black and white stripe for this, but I didn’t have enough of that and I needed to ship the quilt out to make the deadline so I went with the black and white gingham-ish print you see in the photo above. I love black and white with bright colors!
That’s it!
With winter and the holidays coming, a lot of organizations are calling for quilts – especially twin quilts and crib quilts for kids in need and lap quilts for seniors. This is a fun technique for an easy charity quilt that even beginning quilters can make successfully. Kids can do it too! Give it a try!
Happy quilting!
Best,
Wendi![]()