How to Make a Scrap Quilt – Video 3 – How to Join Pieced Strips (and keep the seams lined up)

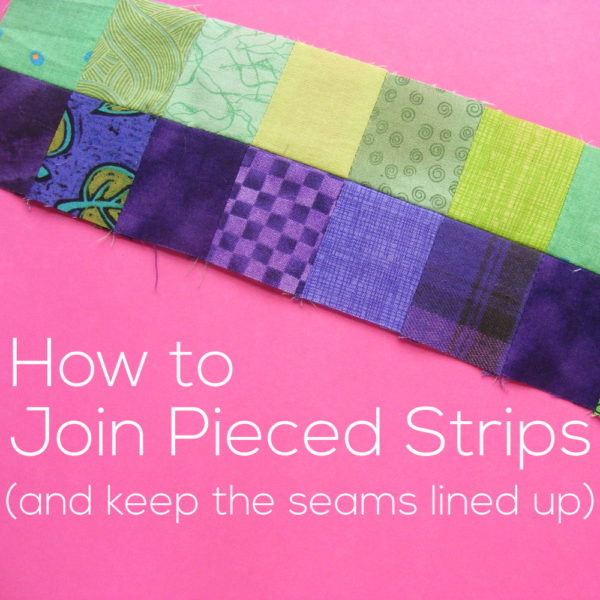
How to Join Pieced Strips - and keep the seams lined up - a video tutorial from Shiny Happy World

This is the last video you need to learn how to make a scrap quilt. Mine is a Controlled Chaos scrappy quilt and you’re welcome to sew along. I’m sharing a new block every week.

The whole quilt is a simple collection of two-inch squares.

Watch the video here showing how to cut those squares from scraps. I show two different techniques.

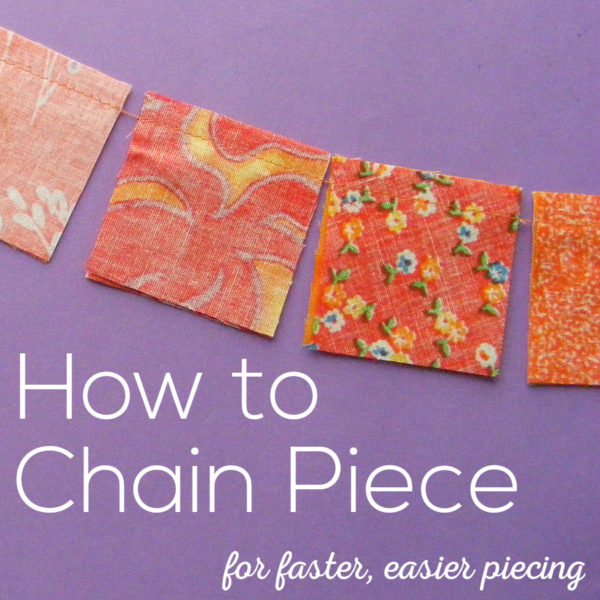
Watch this video to see how to sew them together quickly using the chain piecing technique.

This newest video shows how to join those pieced strips together while keeping the seams lined up for nice, neat intersections.

Here it is!

See? Pins are your friends. 🙂

You’ll use this technique in all kinds of quilts – not just scrap quilts.

I specialize in designing quilts that have no intersecting seams (like this Buttonholes quilt), but most quilts have them and not getting a good intersection is the most obvious “mistake” in any quilt.

So any time you want your seams to line up – grab your pins!

You can see all the posts in the Controlled Chaos series here.

Happy quilting!

Best,
Wendi

Block 5 in the Controlled Chaos Scrappy Quilt-Along

Block 5 in the Controlled Chaos Scrappy Quilt-Along at Shiny Happy World

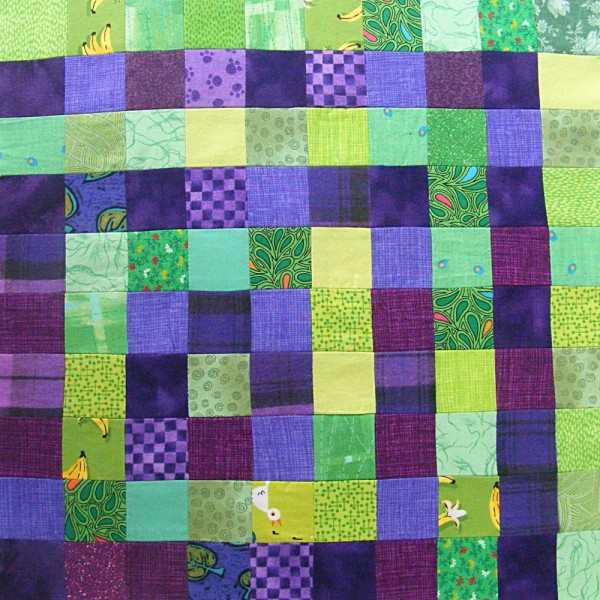
Here’s block five in the Controlled Chaos scrappy quilt. I still had lots of purple scraps out from last week, and I love purple and green together so I went with that pairing. I love it!

I know I say that every time – but I really love how this quilt is coming together.

Here’s how the blocks look so far. . .

Controlled Chaos five blocks with no sashing

Barely controlled chaos. I like it!

I love the way the blocks blend together with no sashing. It’s hard to tell where one stops and the next starts and I really like the unruliness of it. One quilter who’s playing along mentioned that she might put sashing between her blocks – so I thought I’d share that version of the mock-up here too. . .

Controlled Chaos five blocks with sashing

This chaos is definitely more controlled. I like it too!

I think both versions look terrific. How much chaos are you comfortable with? 🙂

Ready to make block #5?

What You’ll Need

  • 49  two-inch squares in color A (shown in purple)
  • 51 two-inch squares in color B (shown in green)

Instructions

Use 1/4″ seam allowances for all sewing.

Arrange your squares according to the diagram below and sew them together into rows.

Press all the seams. I’m pressing mine open for this quilt. I think it will make things simpler in the end.

Sew the rows together to make the finished block.

Here’s the exploded view. . .

Controlled Chaos block 5 exploded

I have to be away from my studio all next week, so we’ll be taking a week off of Controlled Chaos. But check in tomorrow for a new video! This one shows how I match seams to sew the blocks together when I’ve pressed the seams open.

Click here for all the Controlled Chaos posts.

Happy piecing!

Best,
Wendi

Controlled Chaos Quilt Block #4

Controlled Chaos quilt block #4 - a scrappy quilt-along with Shiny Happy World

Block #4 is finished for the Controlled Chaos quilt!

I realized all my blocks so far included blue – so this time I grabbed some purple and orange. I’m loving how they look together!

So far. . .

Speaking of how they look together, here’s a quick mock-up of the first four blocks. . .

Controlled Chaos Scrappy Quilt-Along - the first four blocks from Shiny Happy World

Love!

I’m so happy with how this is coming together!

Ready to make block #4?

What You’ll Need

  • 70  two-inch squares in color A (shown in purple)
  • 30 two-inch squares in color B (shown in orange)

Instructions

Use 1/4″ seam allowances for all sewing.

Arrange your squares according to the diagram below and sew them together into rows.

Press all the seams. I’m pressing mine open for this quilt. I think it will make things simpler in the end.

Sew the rows together to make the finished block.

Here’s the exploded view. . .

Controlled Chaos block #4 exploded

A Word About Randomness

It’s really HARD to be random when you’re sewing blocks together. The inclination is always to put two fabrics together that look good together, but if you do that you’ll have two things happen. . .

  1. It will take longer to make your quilt because you’re making decisions with every single square.
  2. You’ll tend to put the same fabrics together over and over again and a pattern will emerge. It’ll be a subtle pattern, but your scrappy quilt will look just a little less scrappy.

Some people throw all their blocks in a paper bag and draw them out without looking. I like the idea of that, but it makes my squares wrinkly and that bugs me.

Instead, I lay out one stack of squares for each fabric. I just stack them up near my sewing machine as I cut them, and I don’t go for any kind of order. Then when I sew, I just take them in order, regardless of what comes up together.

Did you see the video yet about chain piecing? Even if you already know what chain piecing is, take a look. I show my randomness method at the beginning of the video.

Block #5 coming next week! I don’t have any yellow or green yet, so I’ll definitely be using one of those colors.

Click here for all the Controlled Chaos posts.

If you’re stitching along – please send photos of any finished blocks! I’ll include them in future posts. You can email them to me at blockhead[at]wendigratz[dot]com.

Happy piecing!

Best,
Wendi
That's me!

Video – How to Chain Piece Quilt Blocks

In this video I show you how to chain piece quilt blocks for speedy piecing.

This is a really common technique in the quilt world, so I know a lot of you will be familiar with it already.

If it’s new to you – prepare for your world to be rocked.

Seriously.

It’s just amazing how much time you save by not snipping threads on each set of blocks as you go.

I don’t just use this technique for quilting. I use it any time I’m sewing more than one set of things together.

If I’m working on a puppy softie and I have four sets of paws, a tail and two sets of ears to sew up, I chain them all together. I do backstitch at the beginning and end of each of those sets – but I don’t cut the threads until I’m done with the whole chain.

Here’s the video. . .

See how easy?

This is the technique I’m using to sew up all those itty bitty blocks in the Controlled Chaos Scrappy Quilt-Along. I’ll be sharing the next block in that quilt tomorrow!

Happy quilting!

Best,
Wendi
That's me!

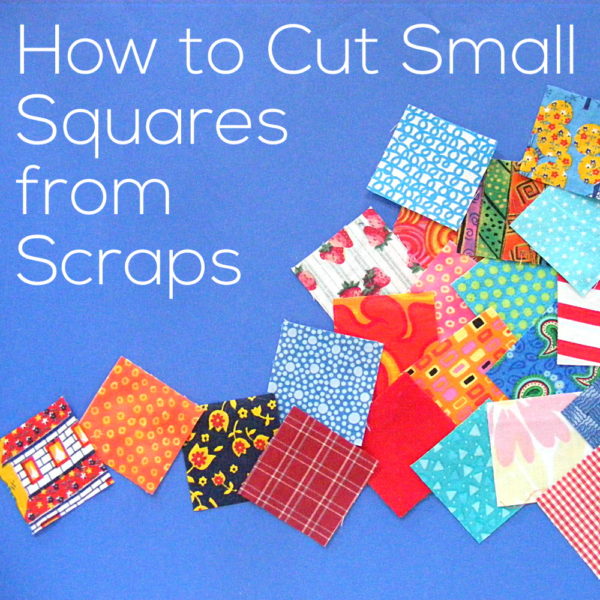
Video – How to Cut Small Squares from Scraps

How to Cut Small Squares from Scraps - a video tutorial from Shiny Happy World

I think everyone has a favorite method for cutting small squares from scraps.

In this video I share the two methods (and tools) that I use – depending on the size and shape of the scraps I’m cutting.

Of course, you can use these methods for any size squares. Right now I’m working on the Controlled Chaos quilt and that uses 2 inch squares, so that’s what I showed. 🙂

Here’s the video.

Coming next week. . . a video showing how I chain piece these squares together. It’s fast!

You can see all the Controlled Chaos posts here.

Happy quilting!

Best,
Wendi
That's me!

Controlled Chaos Block #3 – a scrappy quilt-along

Controlled Chaos Scrappy Quilt-Along at Shiny Happy WorldHere’s block #3 in the scrappy quilt-along.
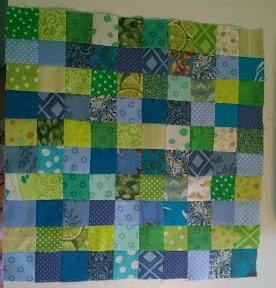
I love it!

This time I went for a classic checkerboard in pretty blues and greens.

My inspiration?

A block sent in by a reader!

Ann shared her first block and wrote. . .

Blue and green stripes – not as noticeably ‘stripy’ as I had hoped for – will try for greater contrast in next block.

Here’s Ann’s block.

Controlled Chaos block #1 made by Ann

I have to say right here that I love this block! So much that it inspired the color combo in my own block #3.

But I see what’s Ann’s talking about so I’m going to share a little color lesson here.

The Official Quilters Rule (which you may choose to ignore at any time) is to choose your lights and darks carefully.

Ann has her rows divided by color, but within each stripe there’s a full range from very light to medium dark.

Sometimes your eye wants to see contrast because of color, and sometimes it wants to see contrast because of shade.

The best example in this block is that stack of three very light colored blocks right in the middle of the bottom three rows. See how your eye wants to group them together as one tall rectangle? That’s because they’re very similar in shade, even if some are blue and one is green. And they’re surrounded by noticeably darker blocks of both colors. That breaks up the desired stripey effect by creating a competing shape that the eye likes more.

I happen to LOVE this dapply effect and I reproduced it in my own block. But if it’s not your cup of tea, here are a couple of things you can do to help bring up the contrast.

1. Be more mindful of your darks and lights. If it’s hard for you to “see” the effect you’re getting, try using your camera to help. Lay out the blocks you think you want to use, snap a photo, then convert the image to black and white.

Here’s Ann’s block converted.black and white version of low-contrast Controlled Chaos block

Without the distraction of color you can more easily see that it’s a random assortment of light and dark.

Use this tool to help you really see which blocks are lightest and which are darkest. If Ann had used only her darkest blues and only her lightest greens, she would have gotten the more stripey effect she wanted.

You can get the same help by looking through a red lens – faster than taking photos and fiddling with filters. Quilt shops used to carry them, but I haven’t seen them in a long time. Get some red acetate from a florist and look through it to make a cheap and easy red lens for yourself.

2. Use the distraction of color to your advantage. If I’m pairing two colors in a block I almost always go for a warm color and a cool color. That helps your eye see contrast between the colors where there’s very little (or no) contrast in the shade. Take a look at my first block.

Controlled Chaos contrast lesson - block 1

If you look at the grayscale version it’s very clear that this is a big wash of medium tones with almost no contrast except a handful of randomly-placed very dark squares. (A total failure according to Official Quilter Rules.)

But in color you can clearly see the stripes! Thank you warm and cool contrast! 🙂

The reason Ann’s block didn’t feel stripey enough to her was because it had a range of shades in both color stripes and blue and green are right next to each other on the color wheel.

Again – I love it! But now you have some tools to help you out if you feel like you’re not getting the contrast you want. Thanks, Ann, for letting me use your block as an example! And for inspiring my third block. 🙂

Ready to make your own Block #3?

What You’ll Need

  • 52  two-inch squares in color A (shown in green)
  • 48 two-inch squares in color B (shown in blue)

Instructions

Use 1/4″ seam allowances for all sewing.

Arrange your squares according to the exploded view.

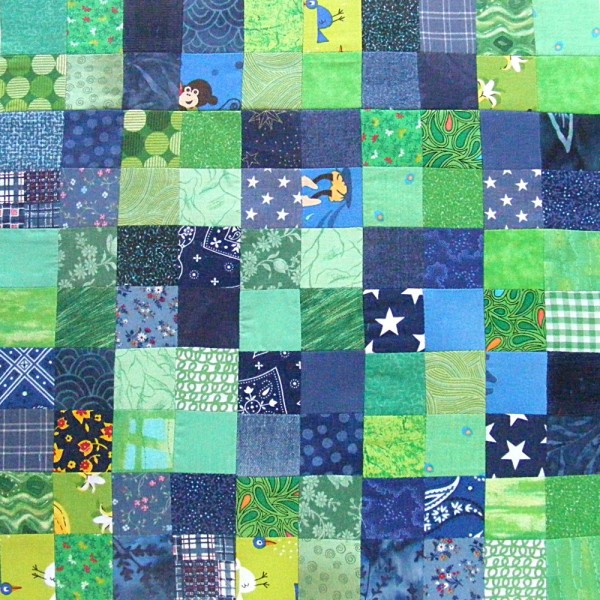
Controlled Chaos Block 3 exploded

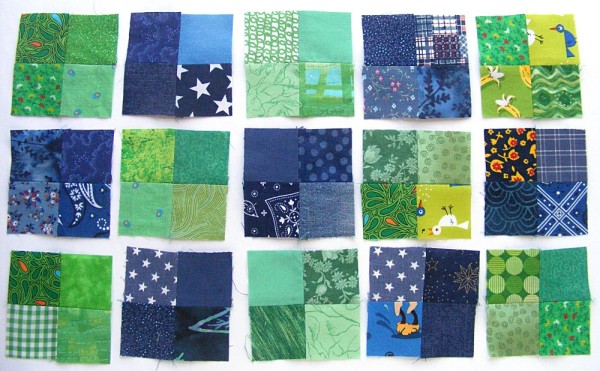
Sew sets of four blocks into squares. Then arrange those squares in rows.

Controlled Chaos Block 3 in progress

Doing it this way will keep the edges of the color blocks perfectly straight, even if your seams and intersections aren’t perfect.

Sew the larger blocks together into rows.

Press all the seams. I’m pressing mine open for this quilt. I think it will make things simpler in the end.

Sew the rows together to make the finished block.

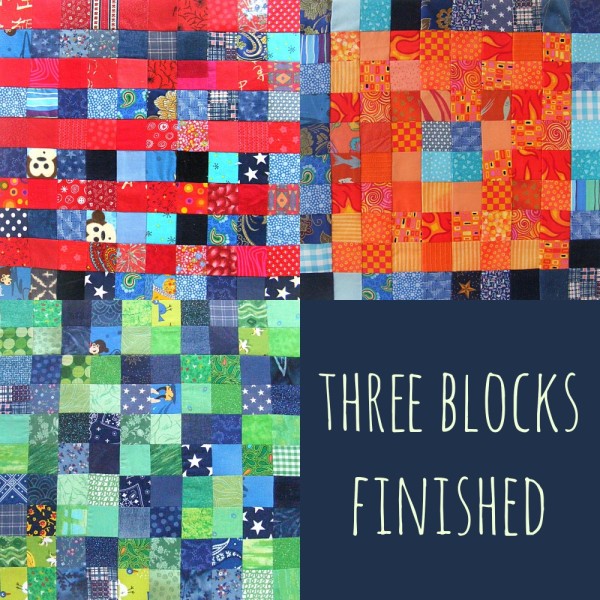
Here’s what my quilt is looking like so far.

Controlled Chaos Scrappy Quilt-Along: 3 blocks finished

I love it! But I have to NOT use blue in the next block. 🙂 I didn’t realize until I had put them all together that every block has blue so far!

Block #4 coming next week! And take a look at this video showing how I cut my squares from scraps.

Click here for all the Controlled Chaos posts.

If you’re stitching along – please share photos of any finished blocks in the Shiny Happy People group! We’d all love to see what you’re making!

Happy piecing!

Best,
Wendi
That's me!


Controlled Chaos: Scrappy Quilt-Along #2

Controlled Chaos - a scrappy quilt-along at Shiny Happy World

I’m so glad that some of you will be joining me in this scrappy quilt-along!

Here’s block #2. This time I used orange and mostly turquoise-ish blues.

Controlled Chaos Block #2

I really like how it turned out!

And here’s a quick mock-up of what it will look like if it ends up next to block #1 in the final quilt.

Controlled Chaos Scrappy Quilt-Along

I like the way the horizontal blue stripes of the first block kind of feed into the blue border of the new block.

What You’ll Need

  • 40  two-inch squares in color A (shown in blue)
  • 60 two-inch squares in color B (shown in orange)

Instructions

Use 1/4″ seam allowances for all sewing.

Arrange your squares according to the diagram below and sew them together into rows.

Press all the seams. I’m pressing mine open for this quilt. I think it will make things simpler in the end.

Sew the rows together to make the finished block.

Here’s the exploded view. . .

Controlled Chaos Block #2 - exploded

I’m really happy with the contrast in this one. 🙂

I’ve had a couple of questions about my process on this. . .

  • What’s the best way to cut squares from scraps?
  • Is there a tricky way to sew all the blocks together?
  • Is there a special way to make the seams line up just right?

I’m working on a short series of videos to answer these questions and hope to have the first one ready to post next week. Keep any questions coming and I’ll do my best to answer them as we go. 🙂

Block #3 coming next week! Click here for all the Controlled Chaos posts.

If you’re stitching along – please post photos of any finished blocks. We love to see!

Happy piecing!

Best,
Wendi
That's me!

Controlled Chaos Scrap Quilt Along #1

Controlled Chaos - a scrappy quilt-along at Shiny Happy WorldRaise your hand if you’d like to empty your scrap bins and make a pretty spectacular quilt along the way!

*hand raised and waving around madly*

I’m making a scrap quilt and I’d love for you to join me!

I had originally thought about just cutting all my tiniest scraps into two inch blocks and then sewing them together completely at random. That would be fun – in a way – but the call of pattern is too hard for me to resist.

Plus I know that that is one HUGE project and it will feel like a smaller project if I can have lots of “finished” bits along the way.

So then I decided to do a bunch of 10 x 10 square blocks, each one using only two colors.

I’m calling it Controlled Chaos. 🙂

This is going to be a regular series (that will help me actually finish it) with a goal of one block a week. We can make one block a week, right?

I’d love for any of you with overflowing scrap bins to join in!

Here’s Block #1. Simple. Classic. Stripes made out of itty bitty scrappy squares.

Controlled Chaos Block #1

What you’ll need

  • 50 two-inch squares of color A
  • 50 two-inch squares of color B

Instructions

Use 1/4 inch seam allowance for all sewing.

Choose one color and sew 10 blocks together into a strip. Repeat until you have 5 strips of each color.

Press all the seams. I’m pressing mine open for this quilt. I think it will make things simpler in the end.

Sew the strips together, alternating colors.

Here’s the exploded view.

Controlled Chaos Block #1 - exploded

I think this block would have been more successful if I had tightened up the colors a bit more. I think the reds are good – they’re all red or very dark pink. But there’s a bit too much variety in the blues. I wish I had made them all dark blue or all light blue. It’s ok here because there is so much contrast between the red and the blue that it still clearly reads as stripes (and no way am I taking them apart) but it’s something I’ll keep in mind going forward.

Block #2 coming next week! Click here for all the Controlled Chaos posts.

Happy piecing!

Best,
Wendi
That's me!


Tips and Tricks for Working with Cuddle Fleece

Tips and Tricks for Working with Cuddle Fleece - from Shiny Happy World

I loooove using Cuddle Fleece for making softies!

I discovered it at Quilt Market last year and fell in love – and then couldn’t find it in any shops. It was even hard to find online! So I ordered a few bolts to carry in my shop and I’ve been using it for softies and quilt backs ever since.

Update – I’m not able to carry Cuddle Fleece in the shop anymore, but I found a good substitute! More details here.

It’s mostly very easy to work with – similar to polar fleece – but I do get some questions about it. Here are the answers to the most frequently asked questions. . .

It’s so shifty! How do you keep the layers from moving around?

The layers come in two times in the process – when you’re cutting and when you’re sewing. I prefer to cut mine one layer at a time instead of folding and cutting through two layers. That way I get the most accurate cut possible. Do be sure to flip the pattern pieces for the second cuts so you’re still getting one reversed!

When you’re sewing two layers together you have to deal with layers. There’s no way around it. That’s when I use Wonder Clips. You can use pins instead, but Wonder Clips handle the fat fabric really well and without distorting the layers at all. You can clip them really close together (every inch or so) and just sew slowly, unclipping each one as you get to it.

It’s so fat! Do I have to do anything special to sew through it?

Cuddle Fleece shares one of the same challenges as polar fleece.

It’s fat.

The thickness of the fabric can make the layers shift while you’re sewing – especially when you’re sewing through two layers plus the additional layers of an arm or leg in there. There’s a video showing how I deal with the fatness here. It’s specifically about polar fleece, but all those tips also apply to Cuddle Fleece.

Do I need a special needle?

I sew mine with a basic universal needle and have no problems. If you find your machine is skipping stitches I recommend switching to a stretch needle.

If you have a walking foot – use it!

If you don’t have a walking foot – pin like crazy.

Which is the right side of the fabric?

Cuddly Bailey Bear - fabric and pattern from Shiny Happy World

They’re both good – but they are different. You just have to choose what works best for you for a particular project. One side has a shorter, smoother pile. That’s the one I often choose as the “right” side. It’s what you see on the bunny up there.

The other side is a little shaggier looking. The pile is a bit longer, and a teeny bit more irregular. Use this as the right side when you want a rougher look.

You can also combine the two textures in one softie like I did with that green Bailey Bear. I used the shaggier side on his belly patch.

How do you mark on it?

Cuddle Fleece, like polar fleece, can also be difficult to mark on. With polar fleece the problem is that it’s basically made out of plastic, so markers tend to bead up on it, take a long time to dry, and smear easily when wet.

The problem with marking on Cuddle Fleece is that it has a bit of a nap to it.

Marking eyes is easy – I just punch holes in my pattern piece and then mark through the holes with a fabric marker.

Marking lines is a bit trickier. For them I turn to The Magical Embroidery Stuff (aka Sulky Sticky Fabri-Solvy).

Seriously – is there anything this stuff isn’t good for?

For the bunny you see at the top of the post I marked the eyes as mentioned above. I could have eyeballed the nose and mouth, but I wanted to make sure I got those whiskers balanced. That meant sticking to my pattern piece exactly as drawn. 🙂

I traced the entire face on a scrap of Sulky Sticky Fabri-Solvy and then stuck it down to the fabric, using those eye markings to guide my placement.

Yes – it sticks just fine to the Cuddle Fleece. It’s amazing stuff!

Sulky Sticky Fabri-Solvy is great for transferring a face to cuddle fleece.

I embroidered right through the stabilizer, then soaked it away in cold water and tossed it in the dryer for a quick dry and fluff.

Sulky Sticky Fabri-Solvy is great for transferring a face to cuddle fleece.

Perfect! And since I used a fabric marker to mark those eyes, the dots are still there after rinsing The Magical Embroidery Stuff away.

The fluff! Is there any way to keep the fluff under control?

That’s the most common question people have. Cuddle Fleece is fluffy and soft – and when you cut it that fluffiness can go everywhere!

When I cut pieces to make a softie, I walk them straight to the dryer and toss them inside. I tumble it all with no heat for about 10 minutes. When I pull them out – all the fluff is gone. The edges won’t fray after cutting, so once you get that initial cutting fluff off, you can continue work on the rest of the project with no more shedding.

Awesome!

If you have any other questions about this lovely fabric, just let me know in the comments. I’ll either update this post or (if there are enough additional questions) I’ll do a follow-up post.

Here’s one of those follow-up posts. 🙂 A video answering lots of reader questions about using cuddle fleece for quilt backs. Watch it here.

Happy sewing!

Buzz – a Free Bird Applique Pattern

Free Buzz the Bird applique pattern from Shiny Happy World - blue bird with zigzag stripes on a green background

Here’s a free bird applique pattern for you to play with!

The Chirp Quilt pattern has thirteen different applique birds in it.

I usually do twelve, but this time I added one more because I wanted to balance out right, left and forward facing birds.

So I decided to make one of the blocks available as a free bird applique pattern – and I let you all choose which one would be free!

Thanks so much to everyone who voted!

The winner was Buzz, this cardinal-ish, blue jay-ish bird. 🙂

Here’s how to make him. (This video shows all the steps for working with fusible adhesive – if you’ve never done it before you’ll find it helpful.)

Step 1

Download the template pieces here.

Step 2

Trace or print the pattern onto the paper side of the fusible adhesive.

Free Buzz the Bird applique pattern from Shiny Happy World

I use this printable fusible adhesive so I just printed out the page. No tracing!

The image has already been reversed, so just trace or print. If you’re tracing, be sure to trace the eye too. You’ll need that there for Step 6.

Free Buzz the Bird applique pattern from Shiny Happy World

Step 3

Rough cut around each shape.

Leave a little bit extra all the way around ­- a little extra extra (at least 1/4 inch) where there’s a dotted line ­- the base of the tail and the edge of the beak.

Step 4

Free Buzz the Bird applique pattern from Shiny Happy World

Fuse each pattern piece to the wrong side of the fabric.

Step 5

Cut around each piece. Cut directly on the solid lines.

Free Buzz the Bird applique pattern from Shiny Happy World

Leave a little seam allowance on the dotted lines ­- the base of the tail and the beak will tuck under the main body piece.

Step 6

Remember when I told you to make sure you traced the eye in Step 2? Now you’re going to use that. Hold the face up to a window so the light shines through it. You’ll be able to see the eye, and the adhesive will stabilize the fabric so you can trace on it without it crinkling up.

Free Buzz the Bird applique pattern from Shiny Happy World

I traced just inside the eye.

This eye is pretty small. You can absolutely do it with applique, but if you prefer, you can use fabric paint or markers. This post has more info.

Step 7

If you’re doing Quilt As You Go (I did) then you can quilt your block before adding the applique. So easy!

Free Buzz the Bird applique pattern from Shiny Happy World

Cut your background fabric and a piece of 100% cotton batting 11 inches square.

Layer the block with a piece of 100% cotton batting. Quilt any pattern you like!

Find all the Quilt As You Go tutorials here.

If you’ll do the quilting later, simply skip this step.

Step 8

Peel off the paper backing and arrange the pieces on a background block. Tuck the tail and beak behind the body.

Remember -­ all the dotted lines indicate where pieces tuck behind other pieces.

Free Buzz the Bird applique pattern from Shiny Happy World

Fuse the pieces in place.

Step 9

Stitch around all the pieces.

Free Buzz the Bird applique pattern from Shiny Happy World

I just did simple straight line stitching in black thread. I love the cartoony effect. This video has some tips for outlining those tight curves.

Done!

One bird applique pattern – complete!

If you’re making a one-block project, go ahead and finish it up.

If you’re making a bunch of Buzz blocks to join into a quilt -­ have fun!

What can you do with just one block pattern? Tons of things! Check out this page I’ve been slowly building – 100 Things to Do with an Applique Pattern. 🙂

Have fun! And share a photo of what you make! You can share it in the Shiny Happy People group or tag it with #shinyhappyworld on Instagram.

If you like this free pattern, sign up for the Shiny Happy News! Subscribers get a weekly newsletter full of sewing tips and tricks, free patterns, special discounts, and other things to make you smile. 🙂

Happy sewing!