Free Pattern from a Failed Tooth Fairy – Tooth Fairy Pillow

I’d like to have a few words with whoever invented the Tooth Fairy.

Seriously.

Let’s start a tradition where a child places a teeny, tiny tooth under their pillow and parents have to retrieve it in the middle of the night without waking the child.

This is madness.

The night after Jo lost her first tooth she caught me frantically scrabbling around under her pillow in the dark, looking for a tooth the size of an apple seed.

She (naturally) asked me what the heck I was doing.

“Ummmmm. . . nothing. Just checking to see if the tooth fairy came yet. I. . . ummmmm. . . couldn’t wait until morning.”

Which she bought, but only because it was her first tooth and she was six years old.

After that somebody gave her a tiny little tooth fairy box that hung from her bedpost. It was just the right size for holding a tooth, but the money still had to go under the pillow.

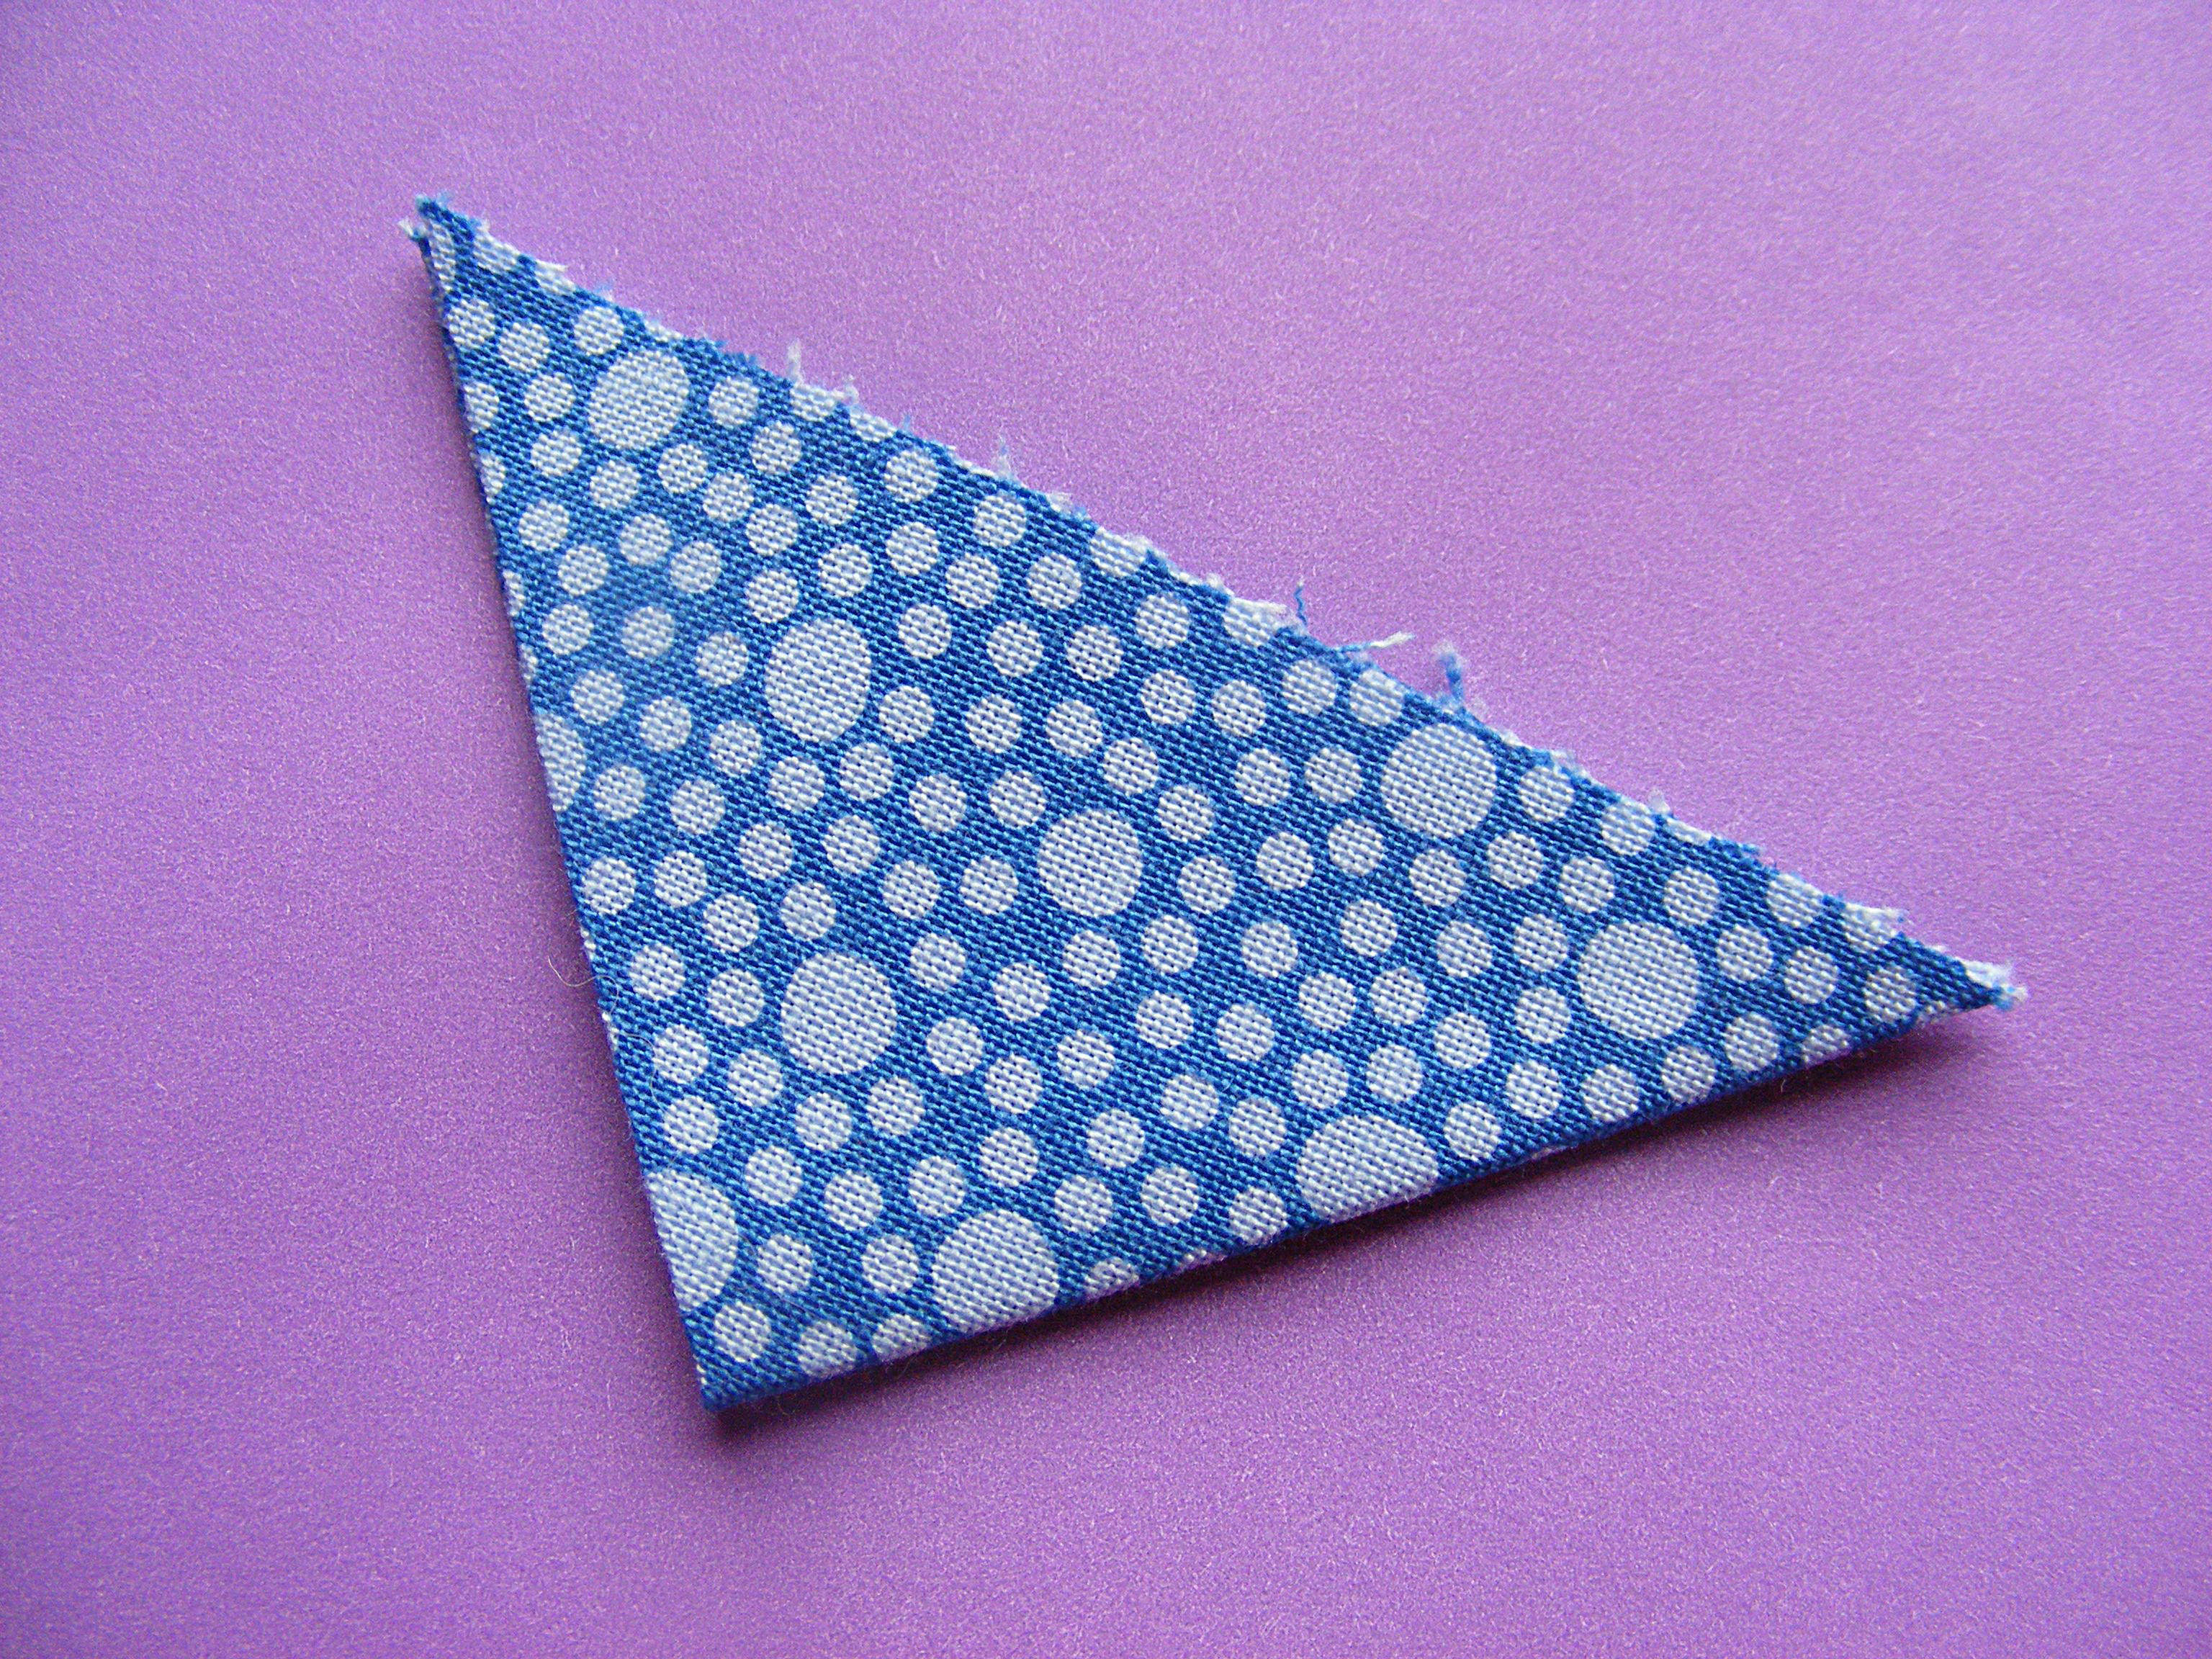
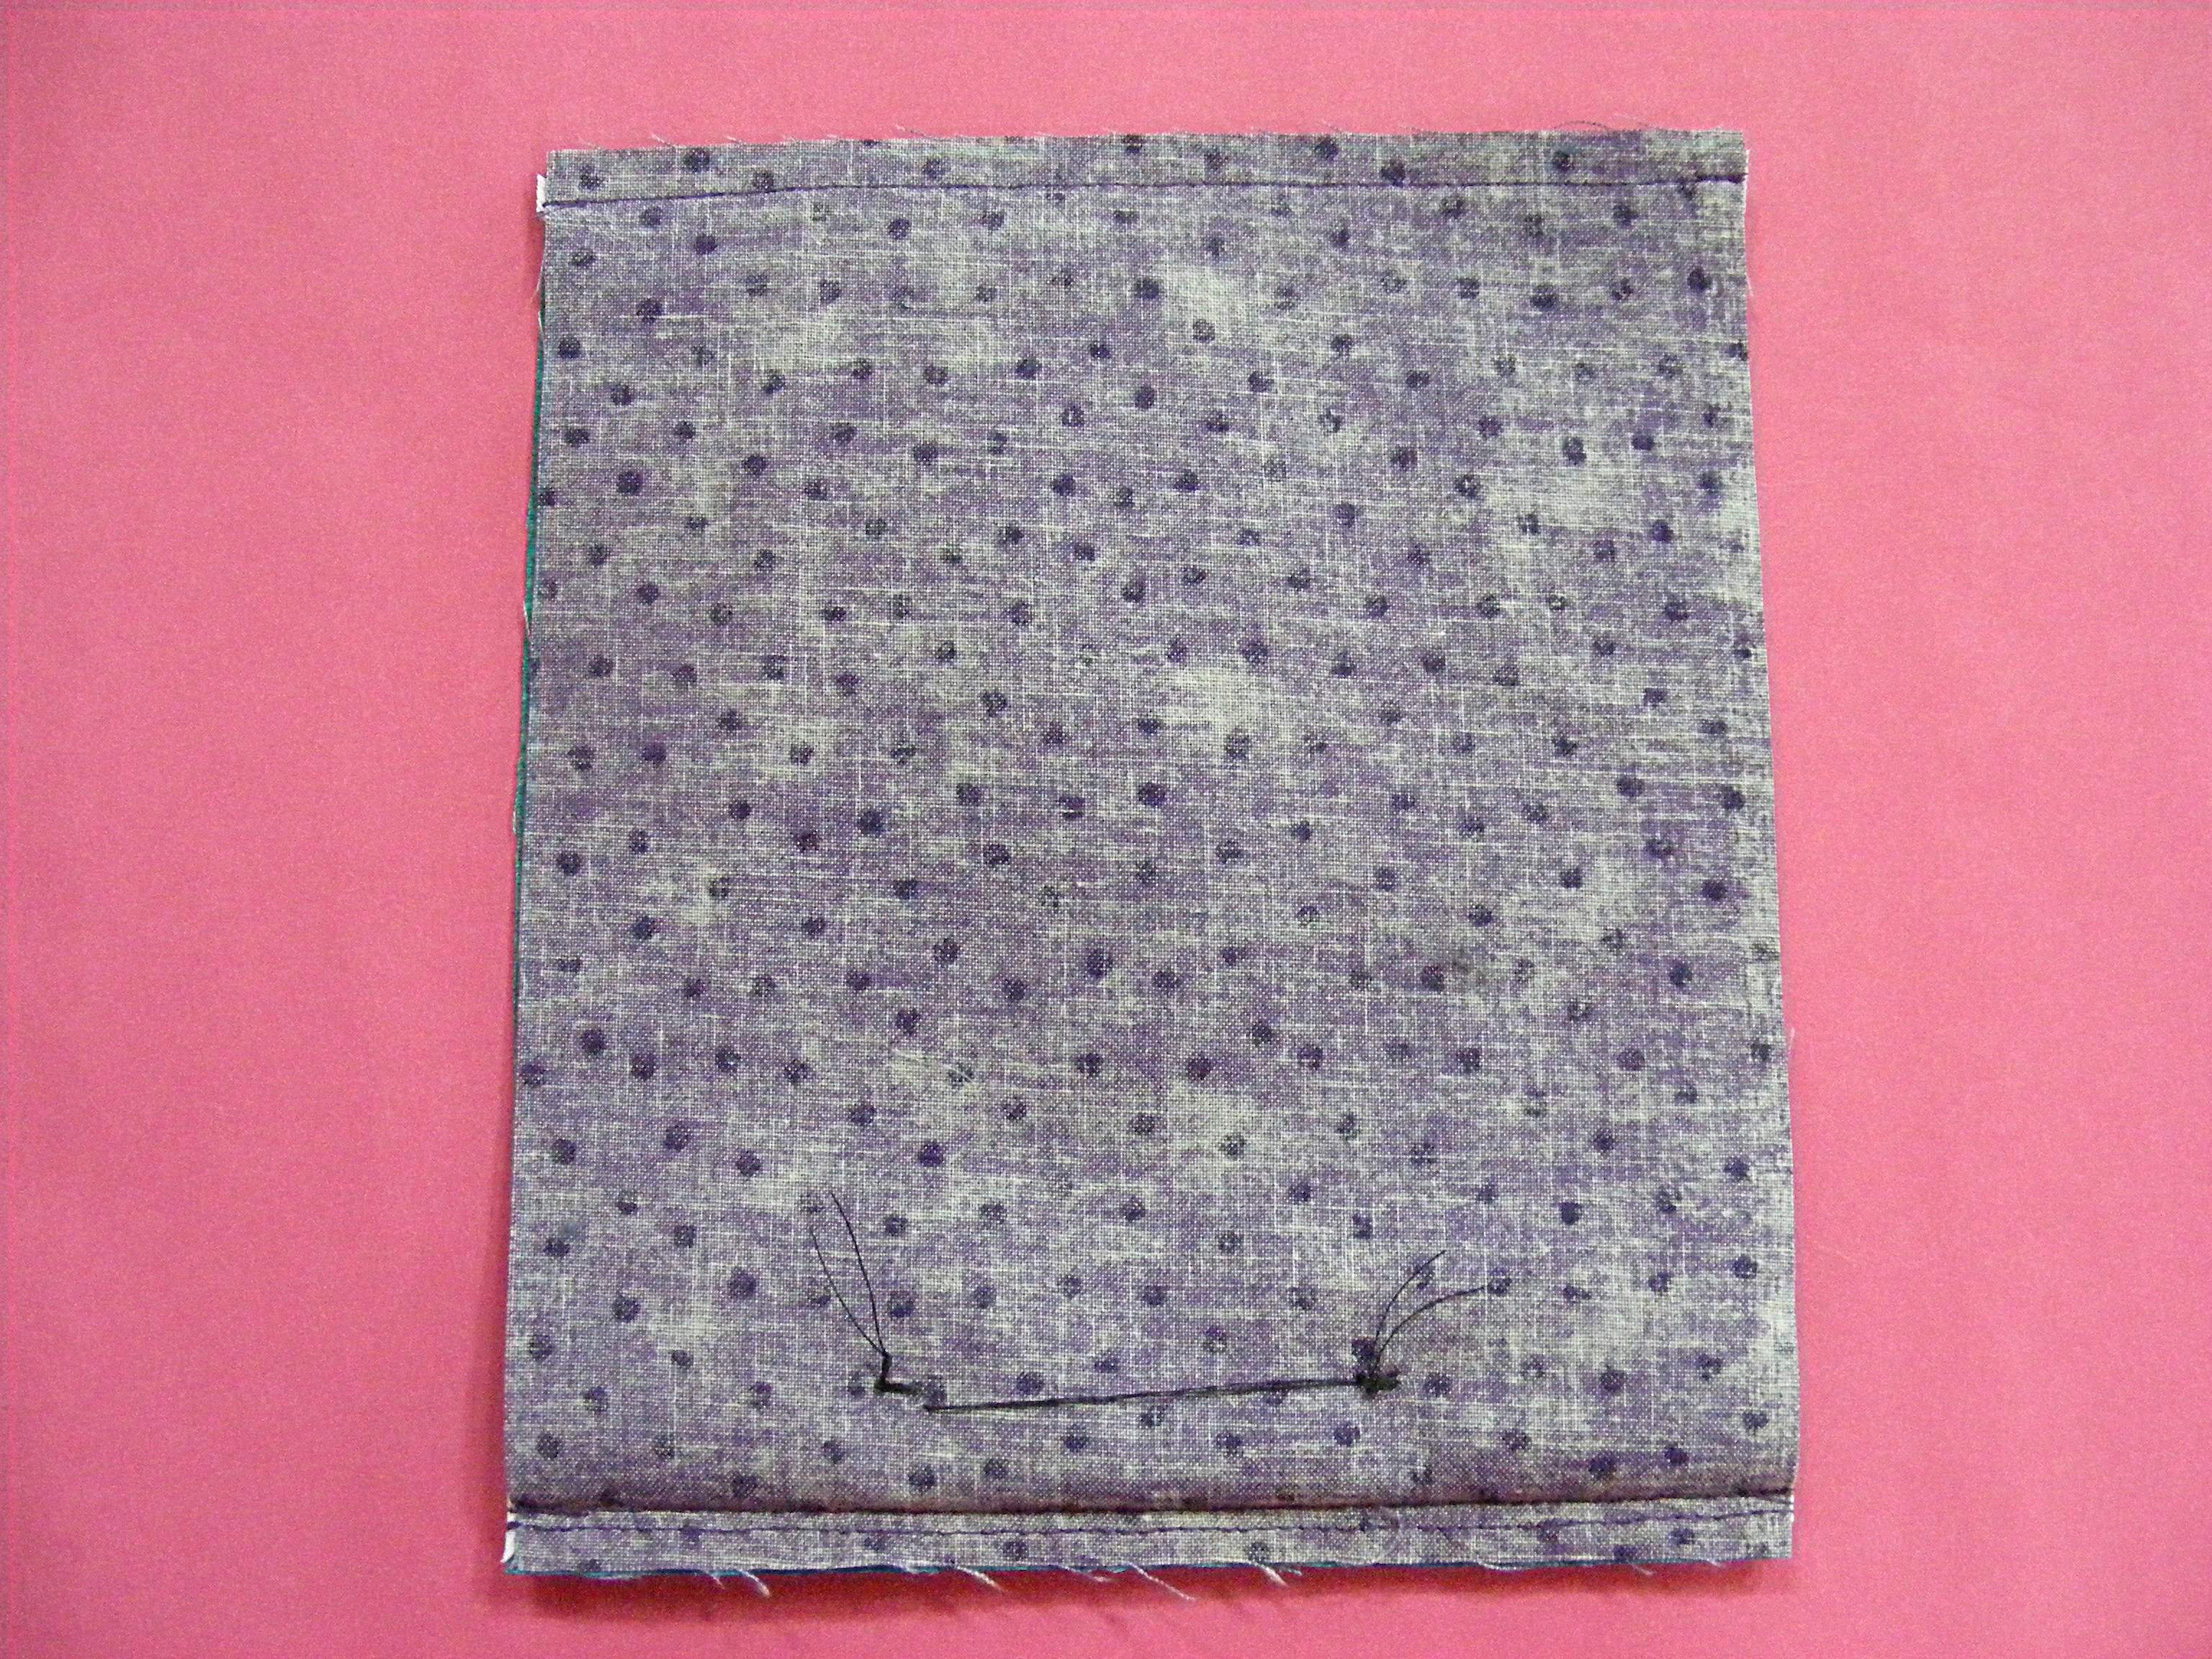
I kept thinking about making a tooth fairy pillow that would hold tooth and money, but I couldn’t figure out exactly what I wanted to do. By now she’s lost all of her baby teeth, but as soon as I saw this cute new fabric I knew right away that it would make a perfect tooth fairy pillow.

Luckily, you all give me an excuse a reason to keep designing things that Jo outgrew years ago. 🙂

Free Tooth Fairy Pillow Pattern from Shiny Happy World

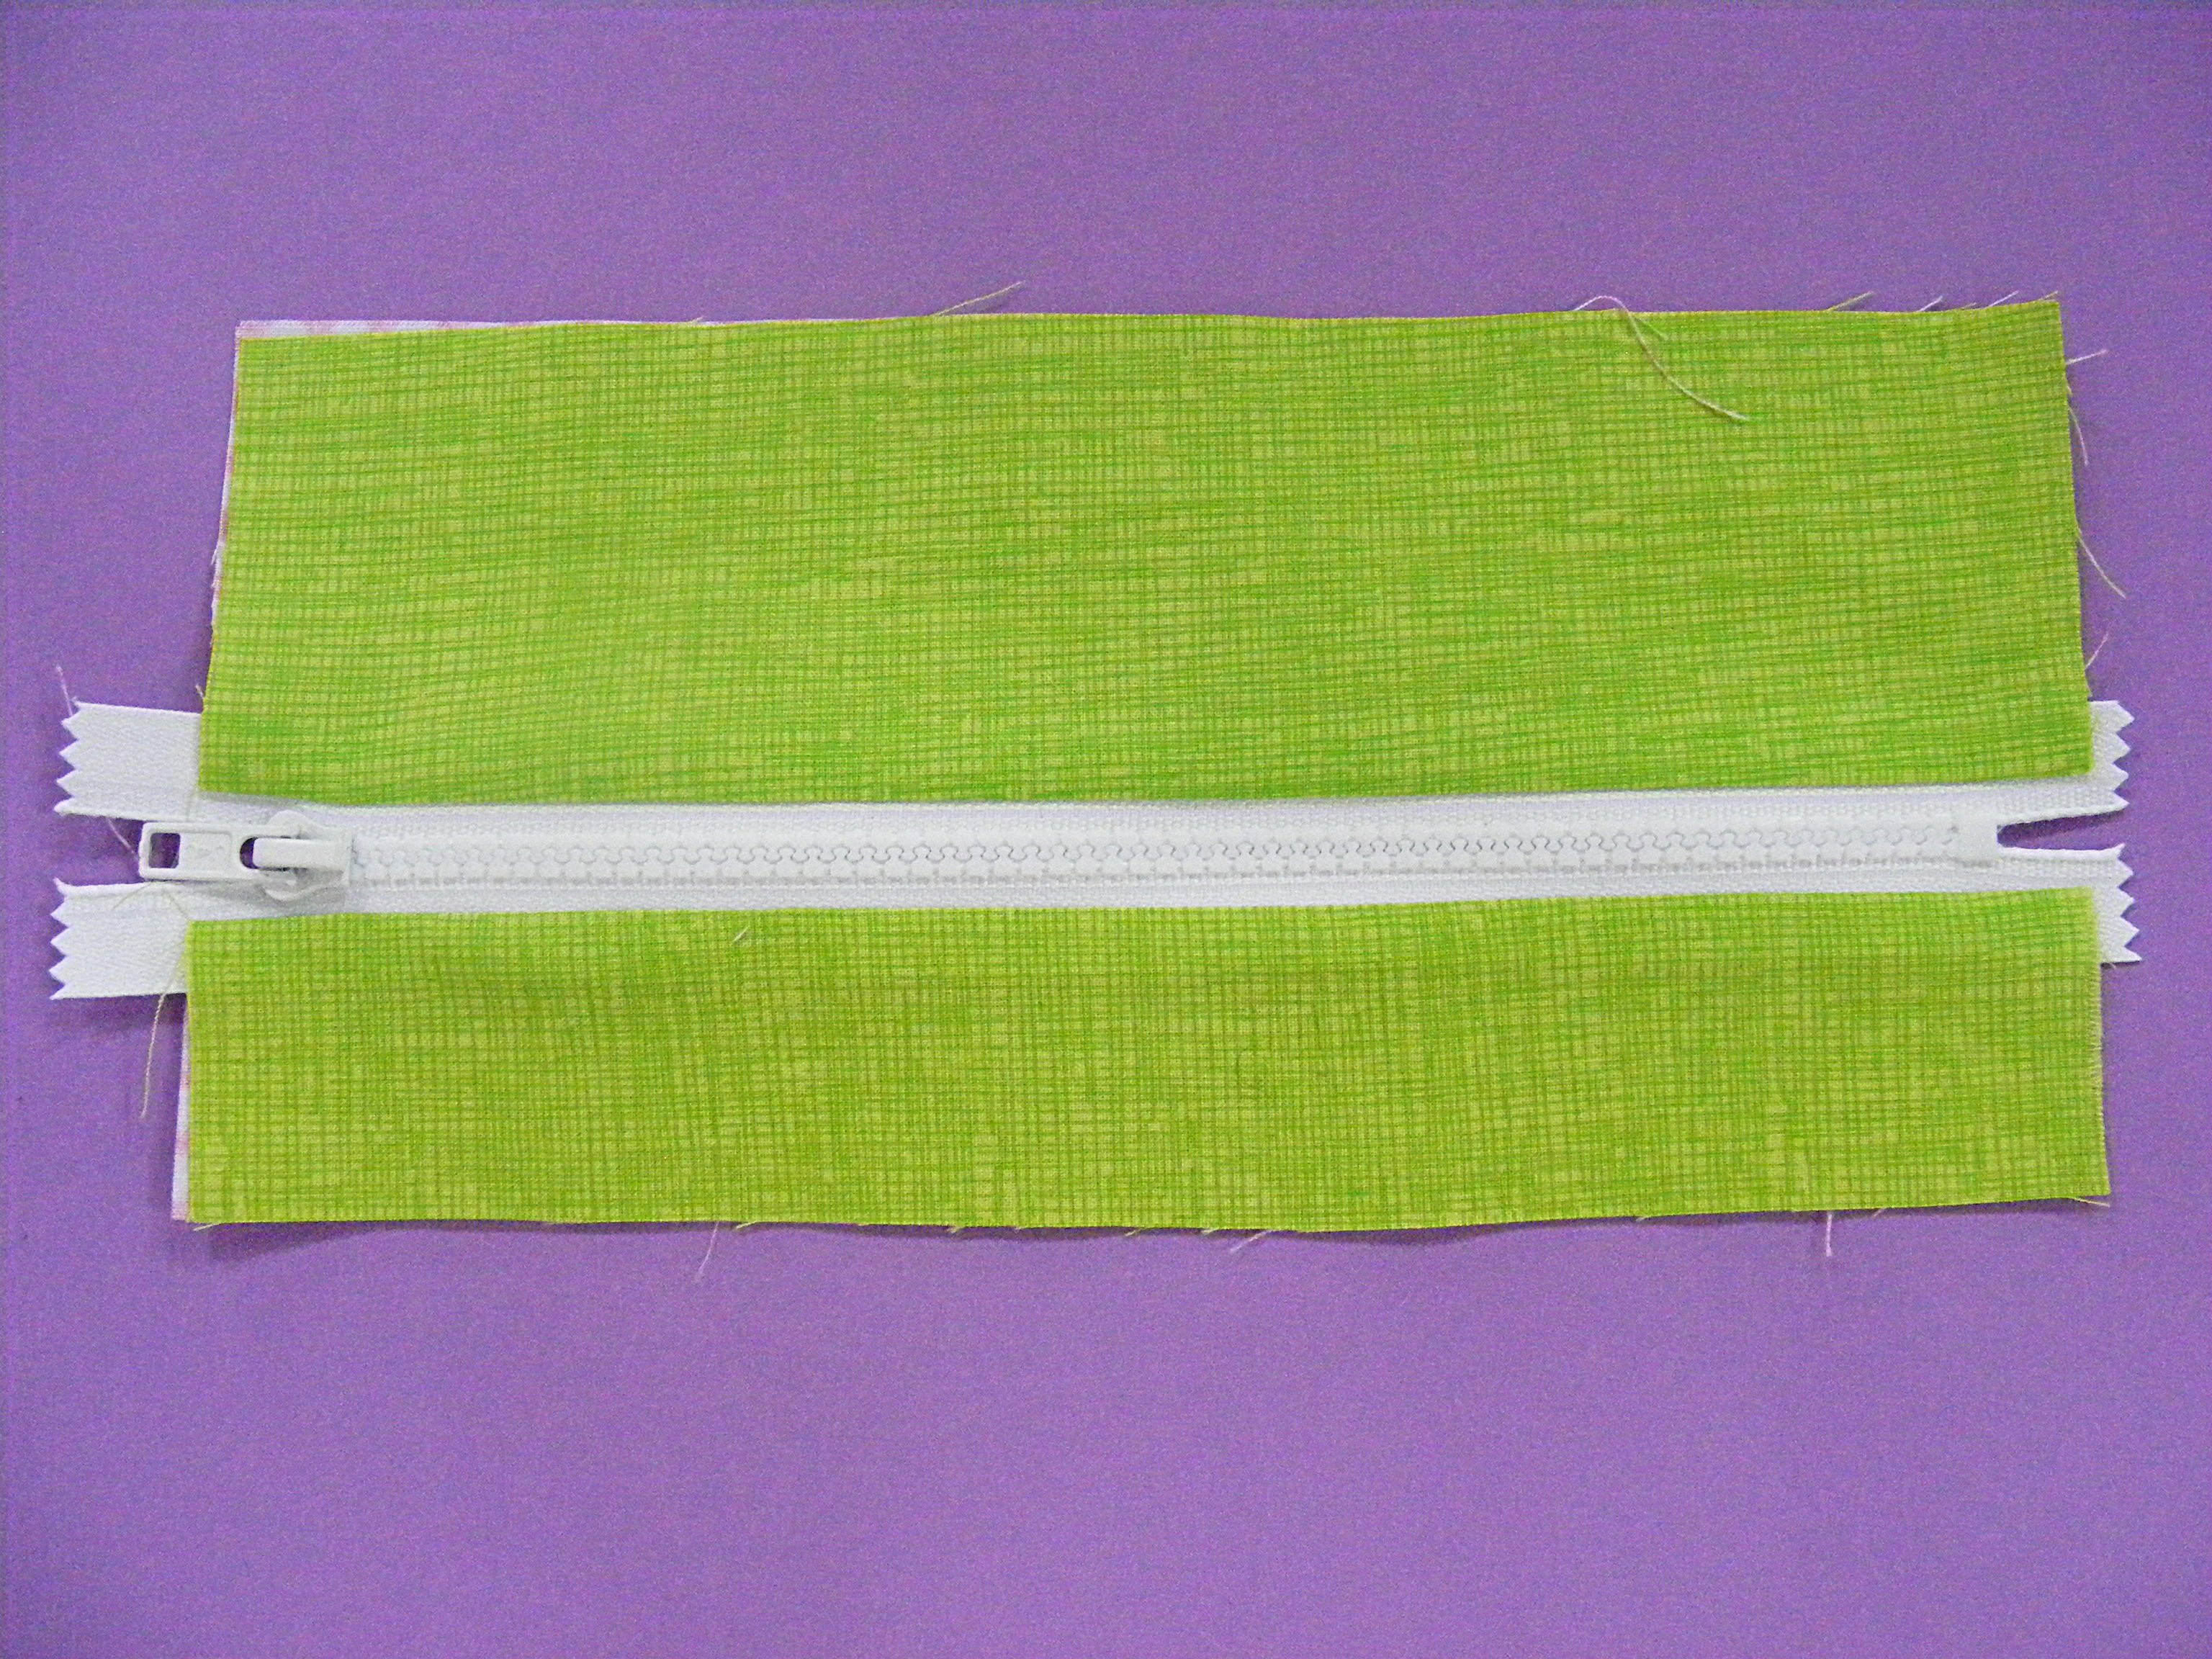
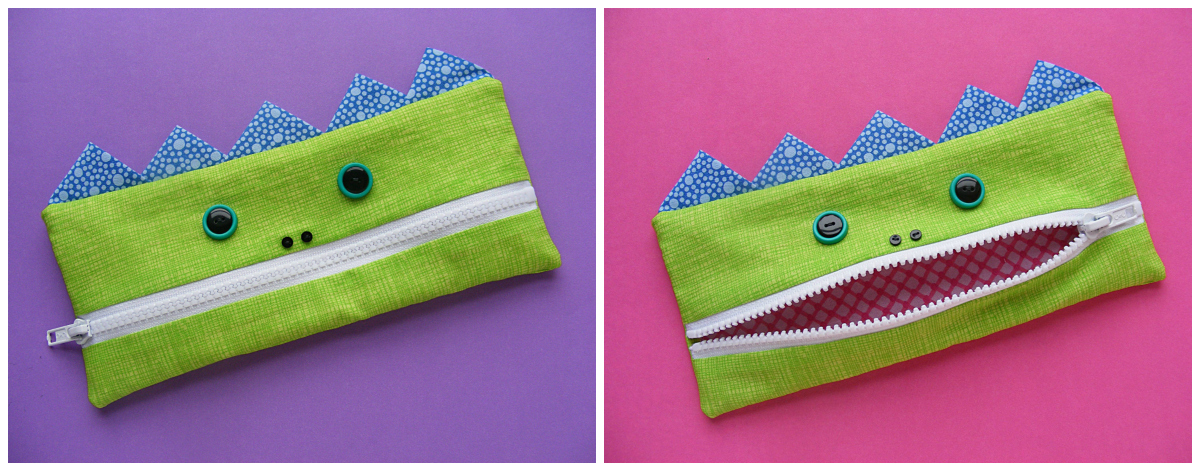
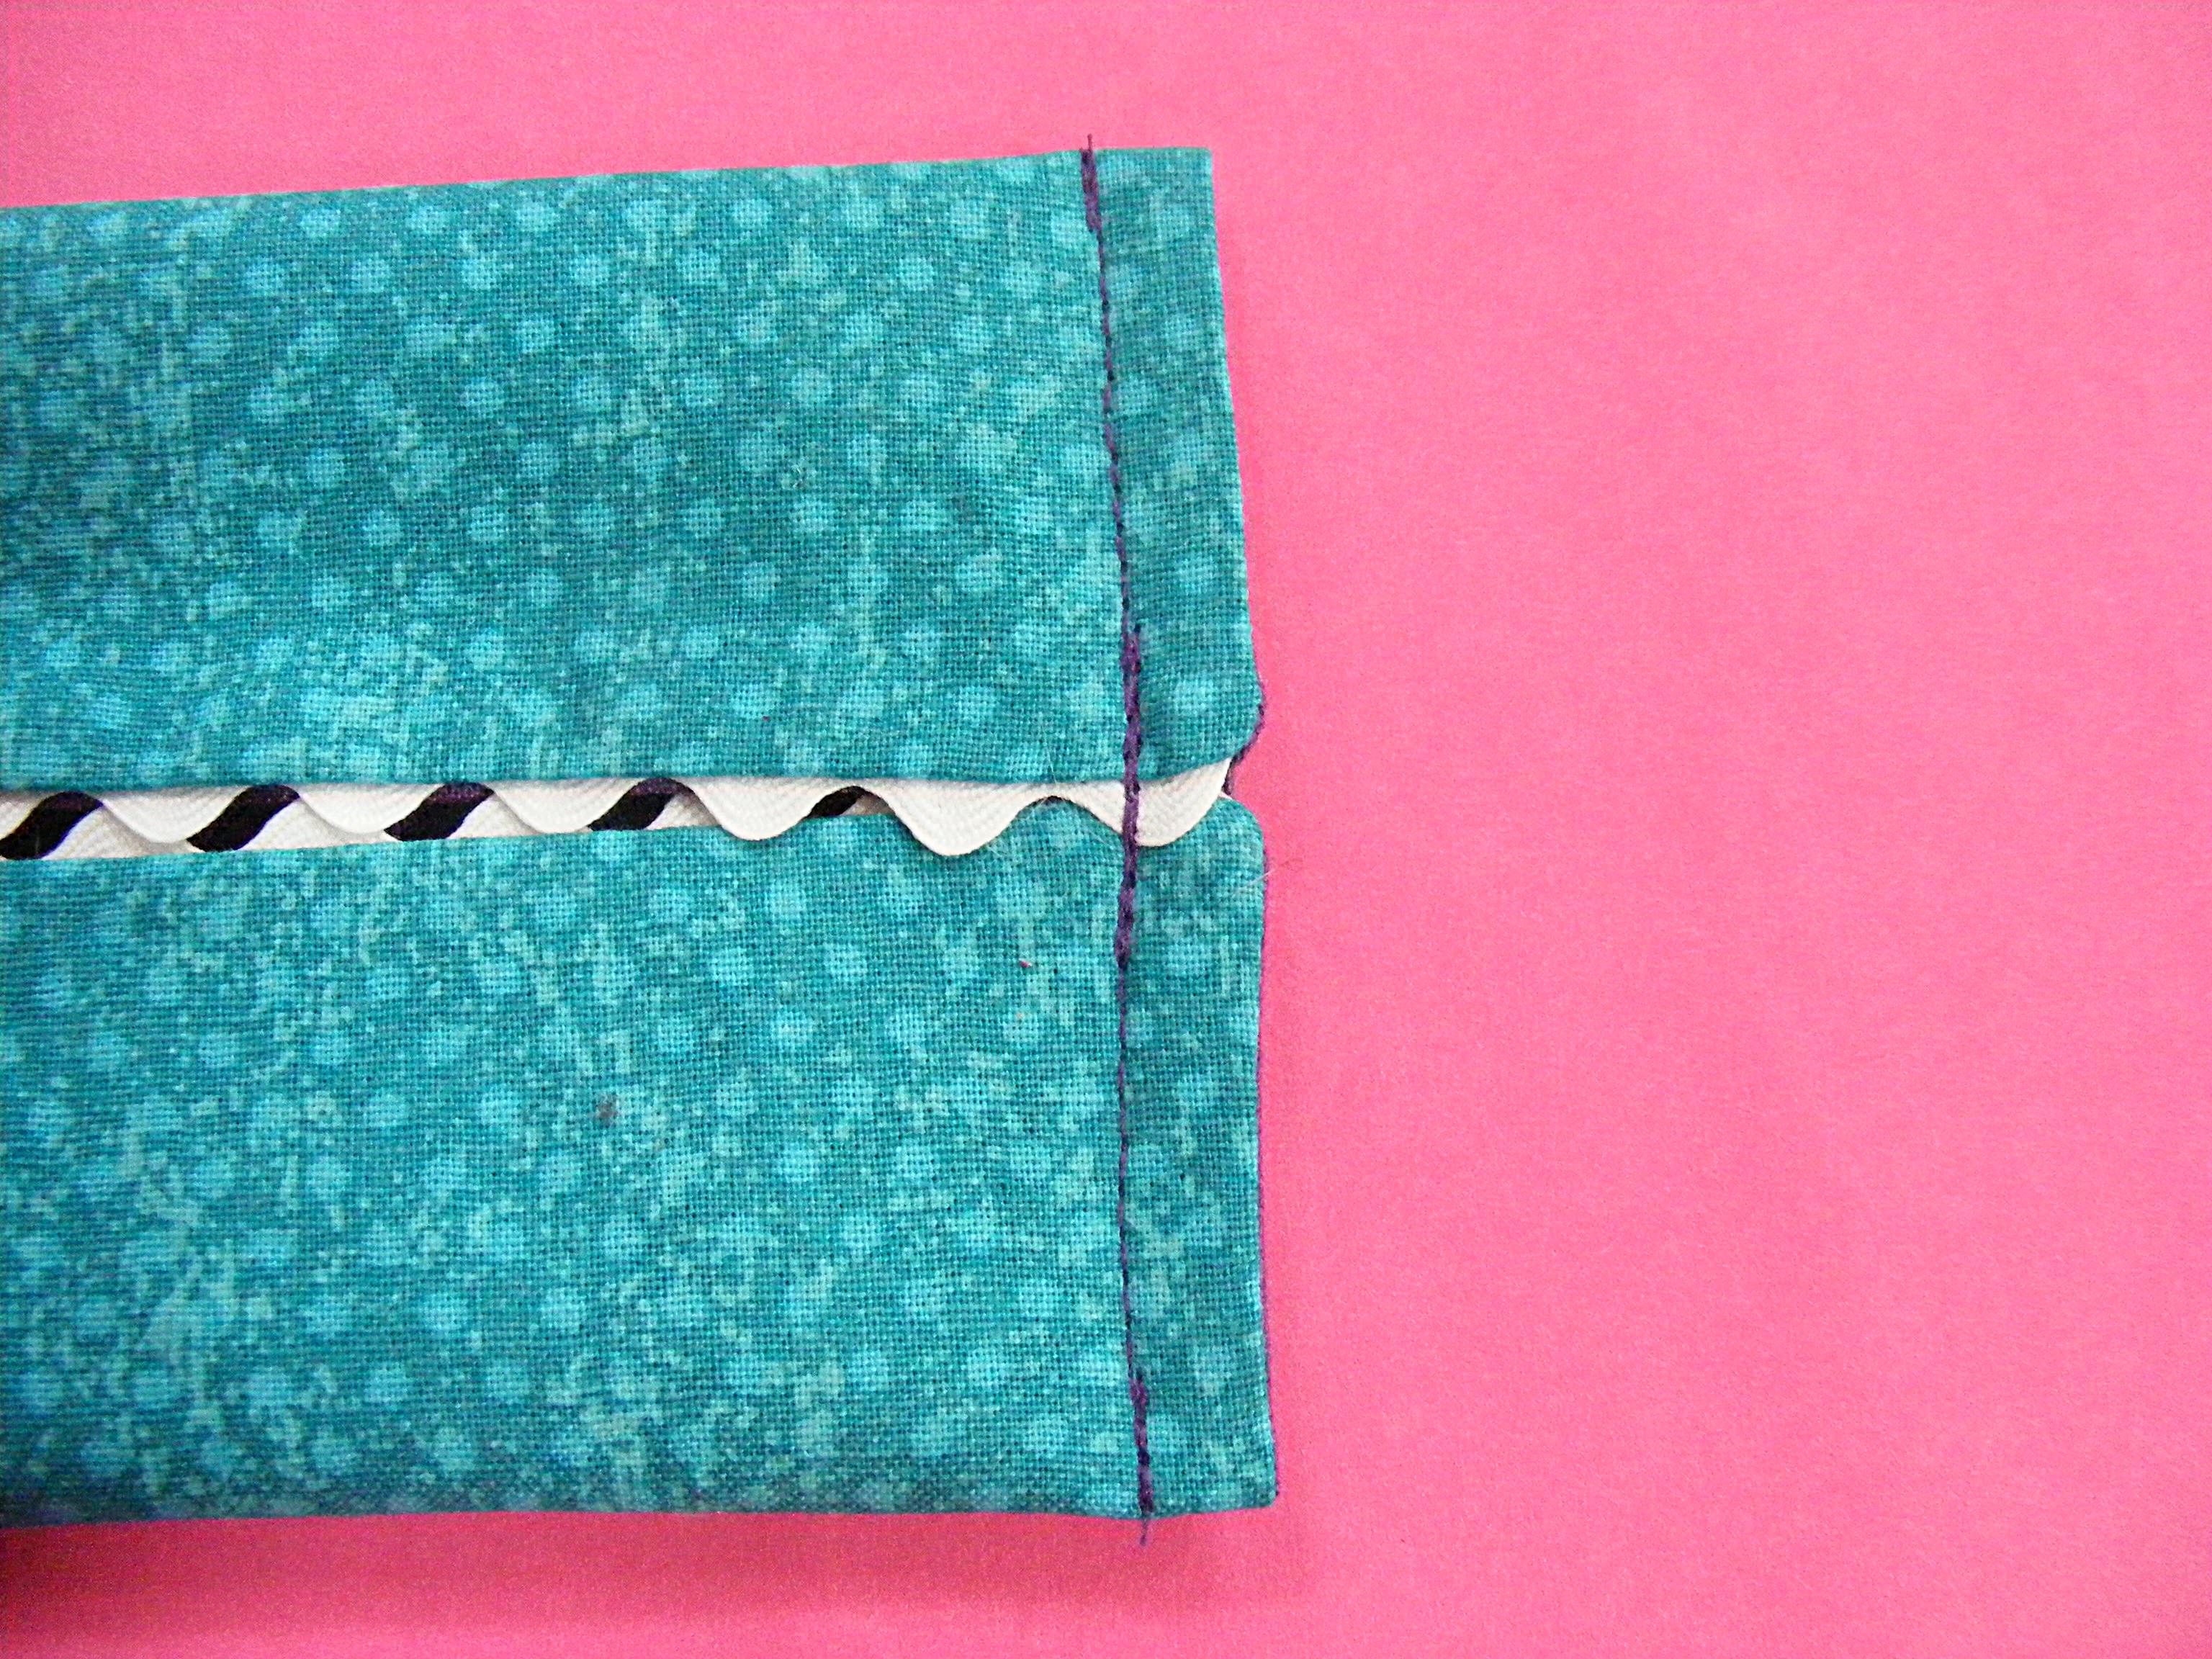
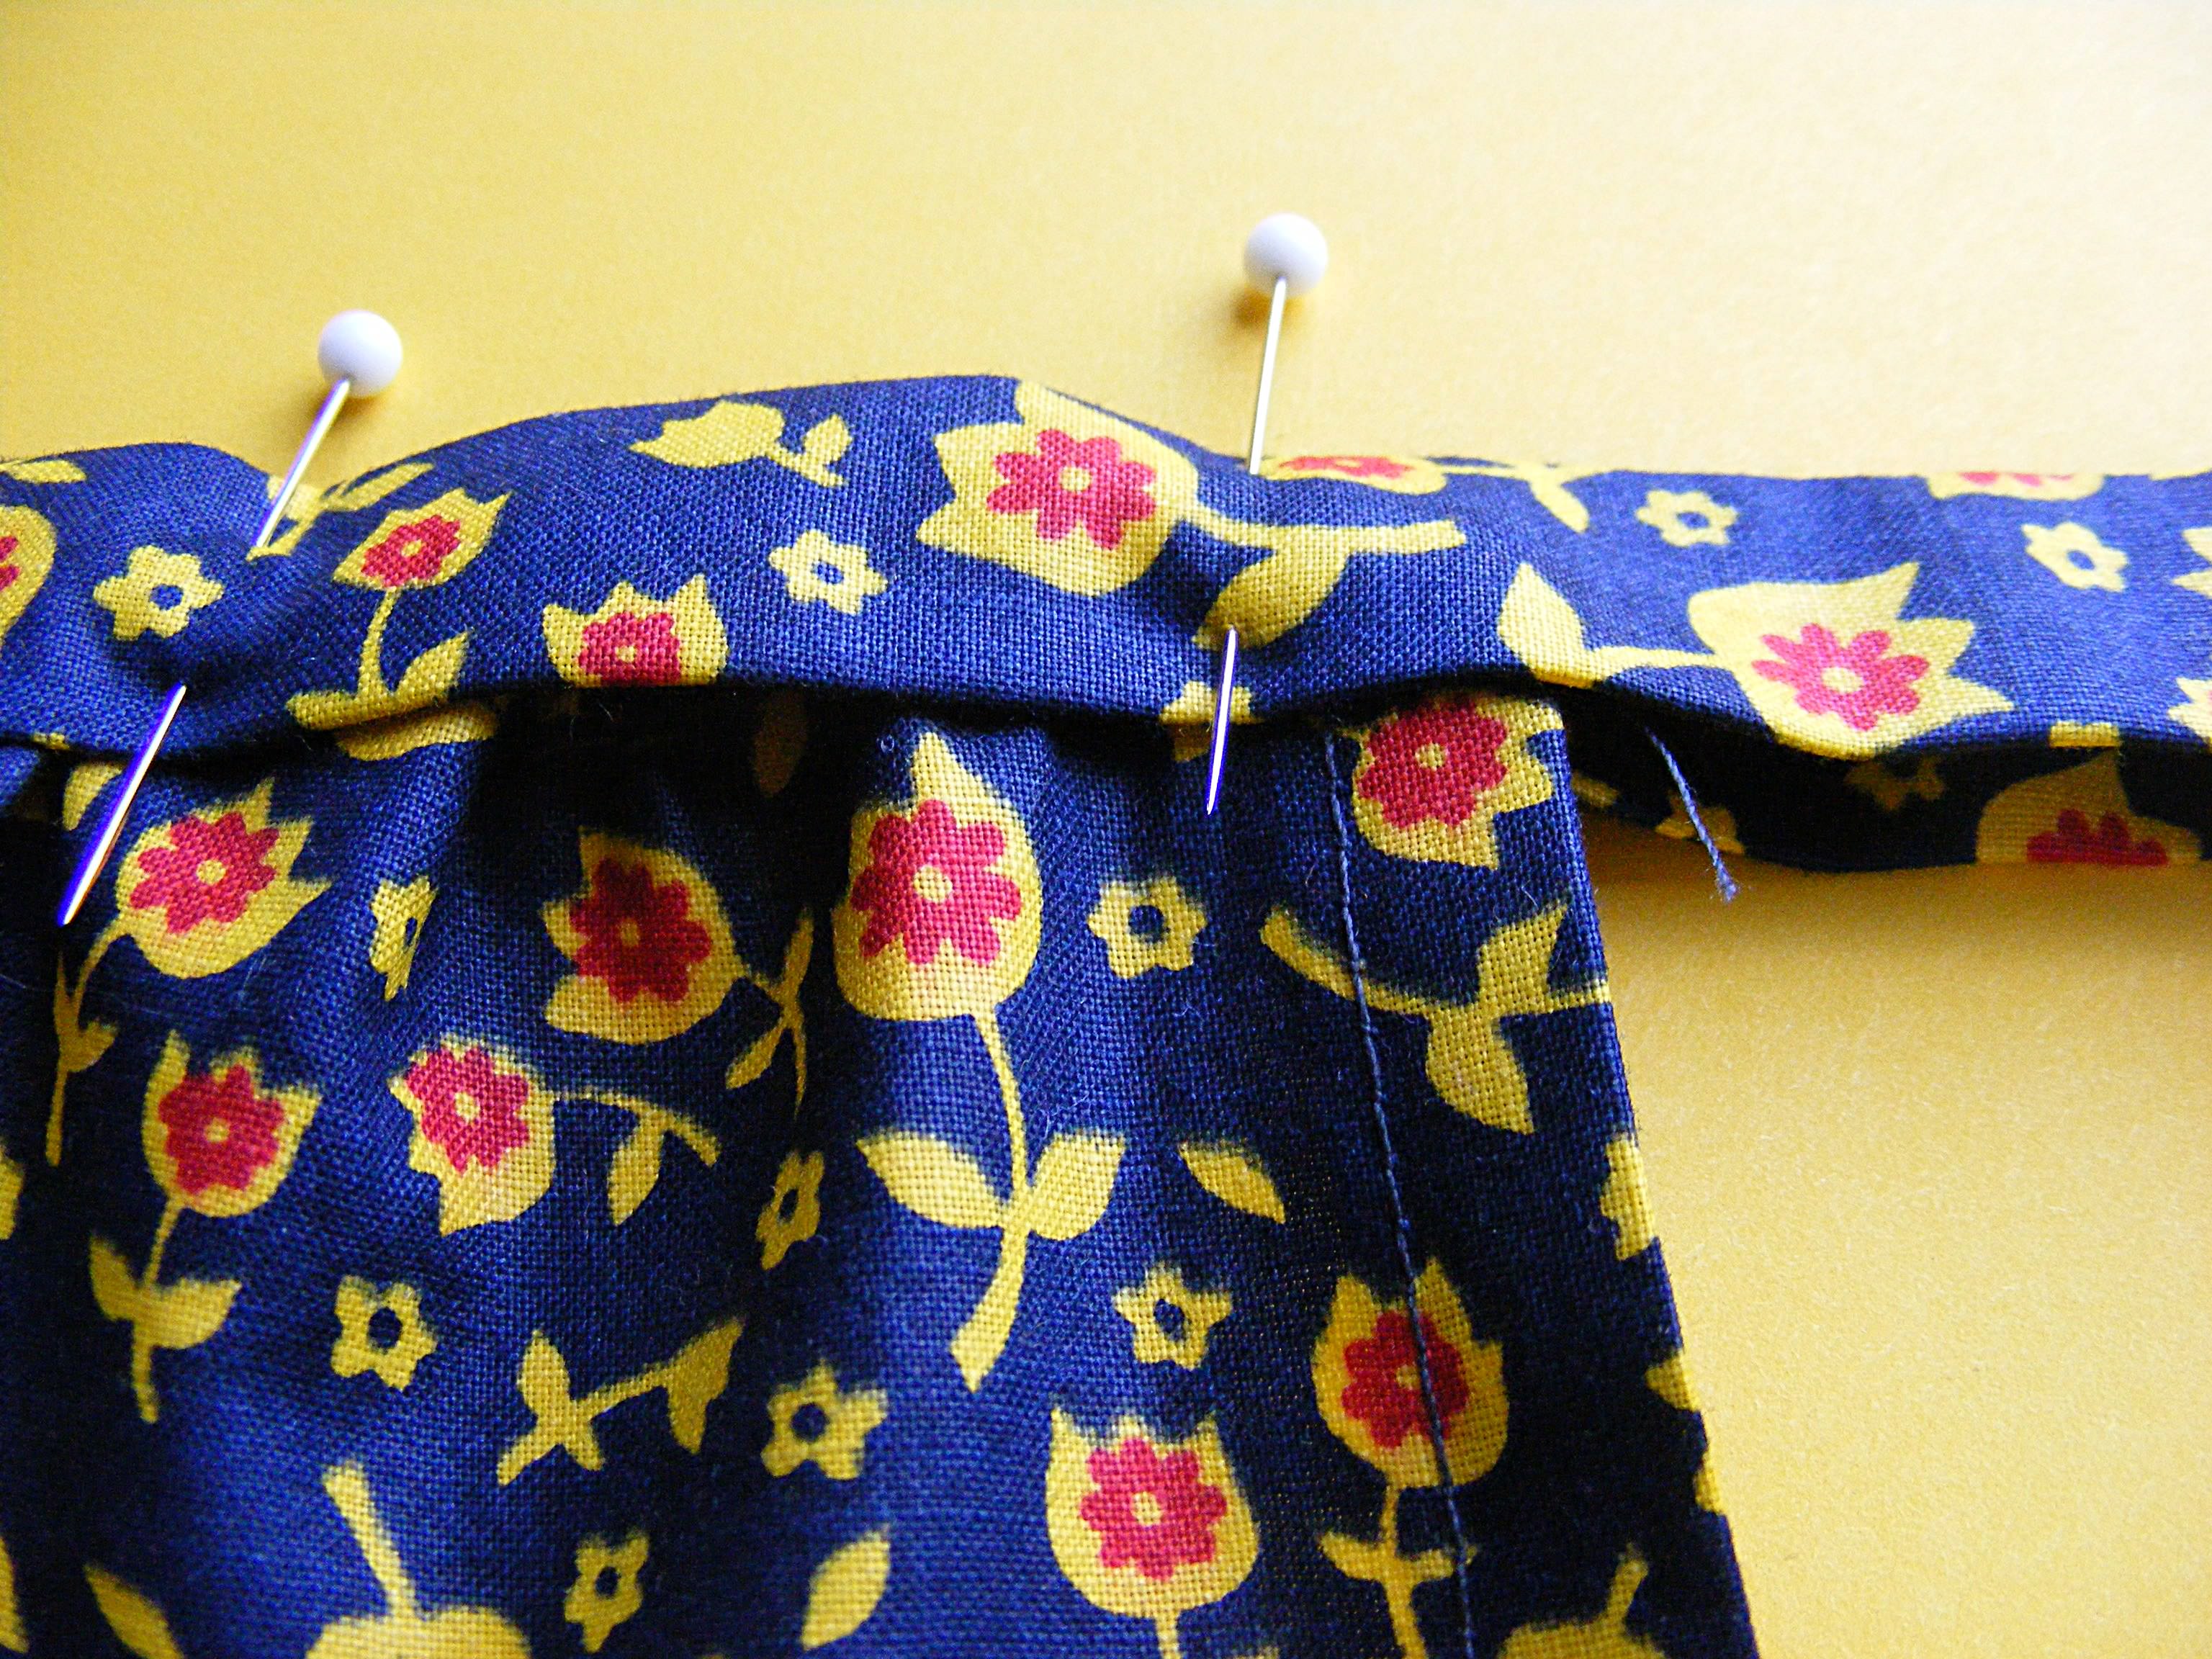
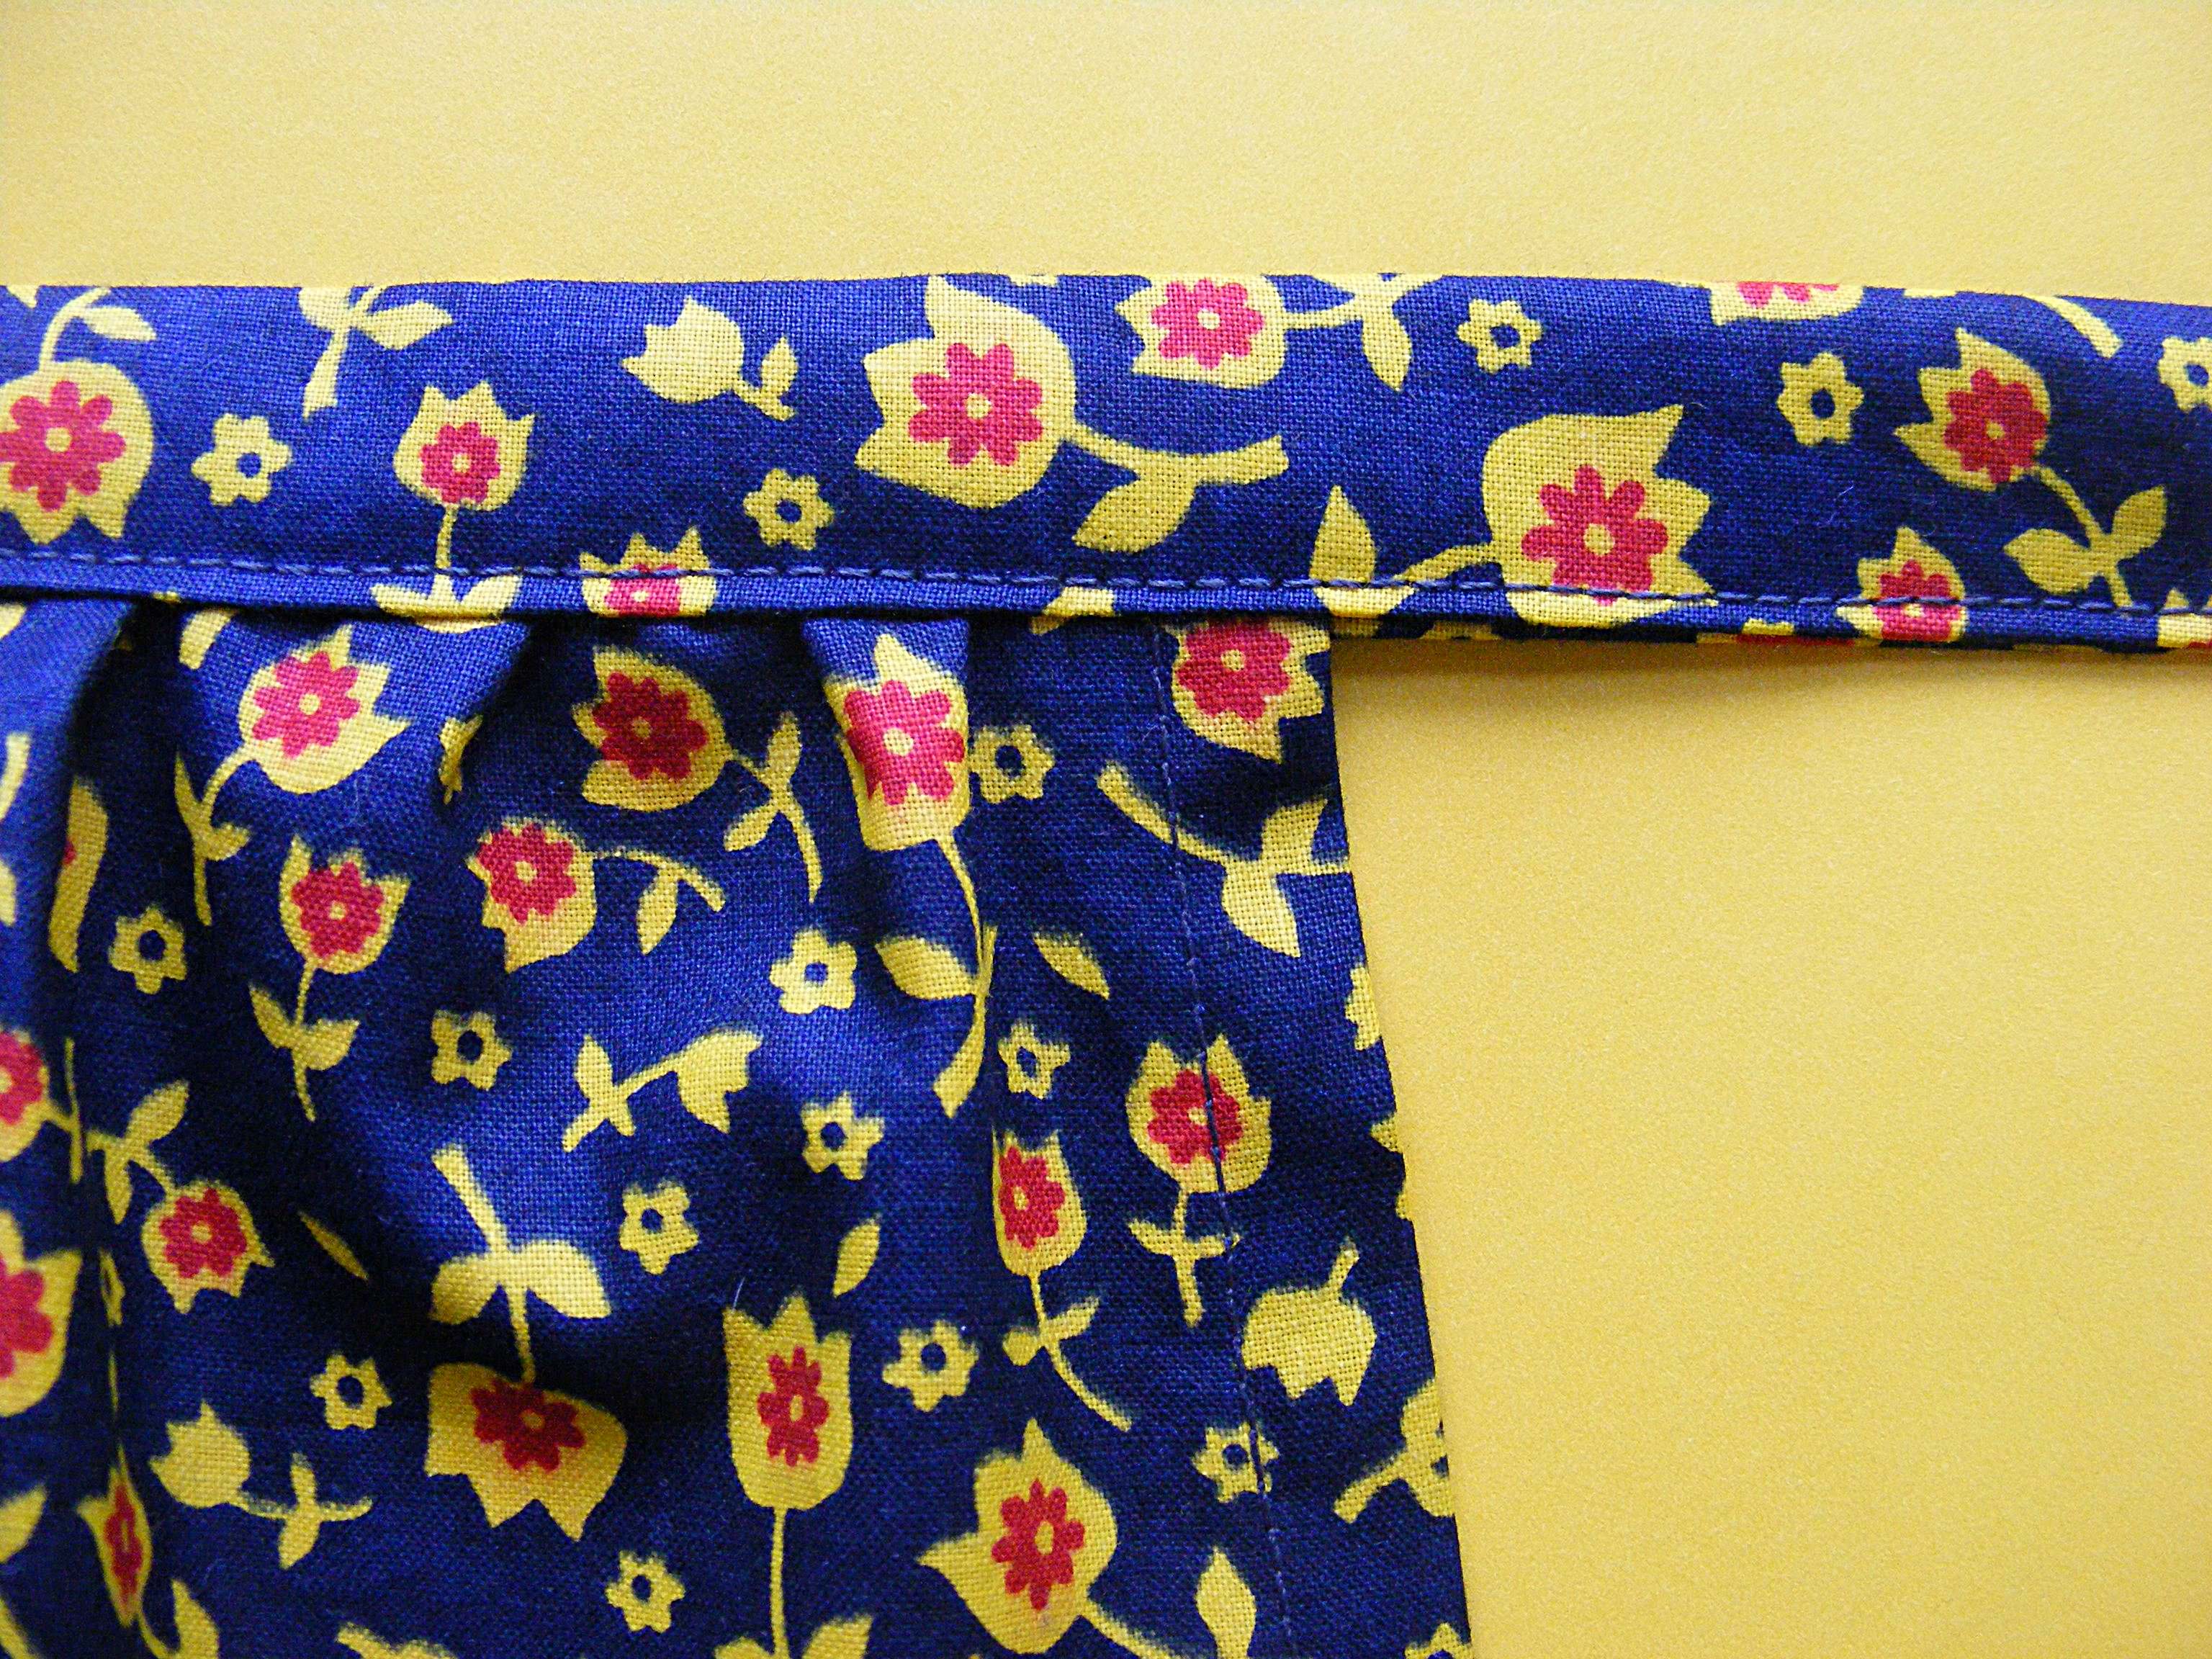
The pocket is big enough for grown-up fingers to reach in and find a tiny tooth. It’ll hold paper money or fun coins (Jo got a dollar coin for every tooth). And being snug up against a plump pillow means teeth and coins won’t just fall out.

The pillow is also big enough that it won’t get lost in the mountain of stuffed animals that help our kids hide those lost teeth. 🙂

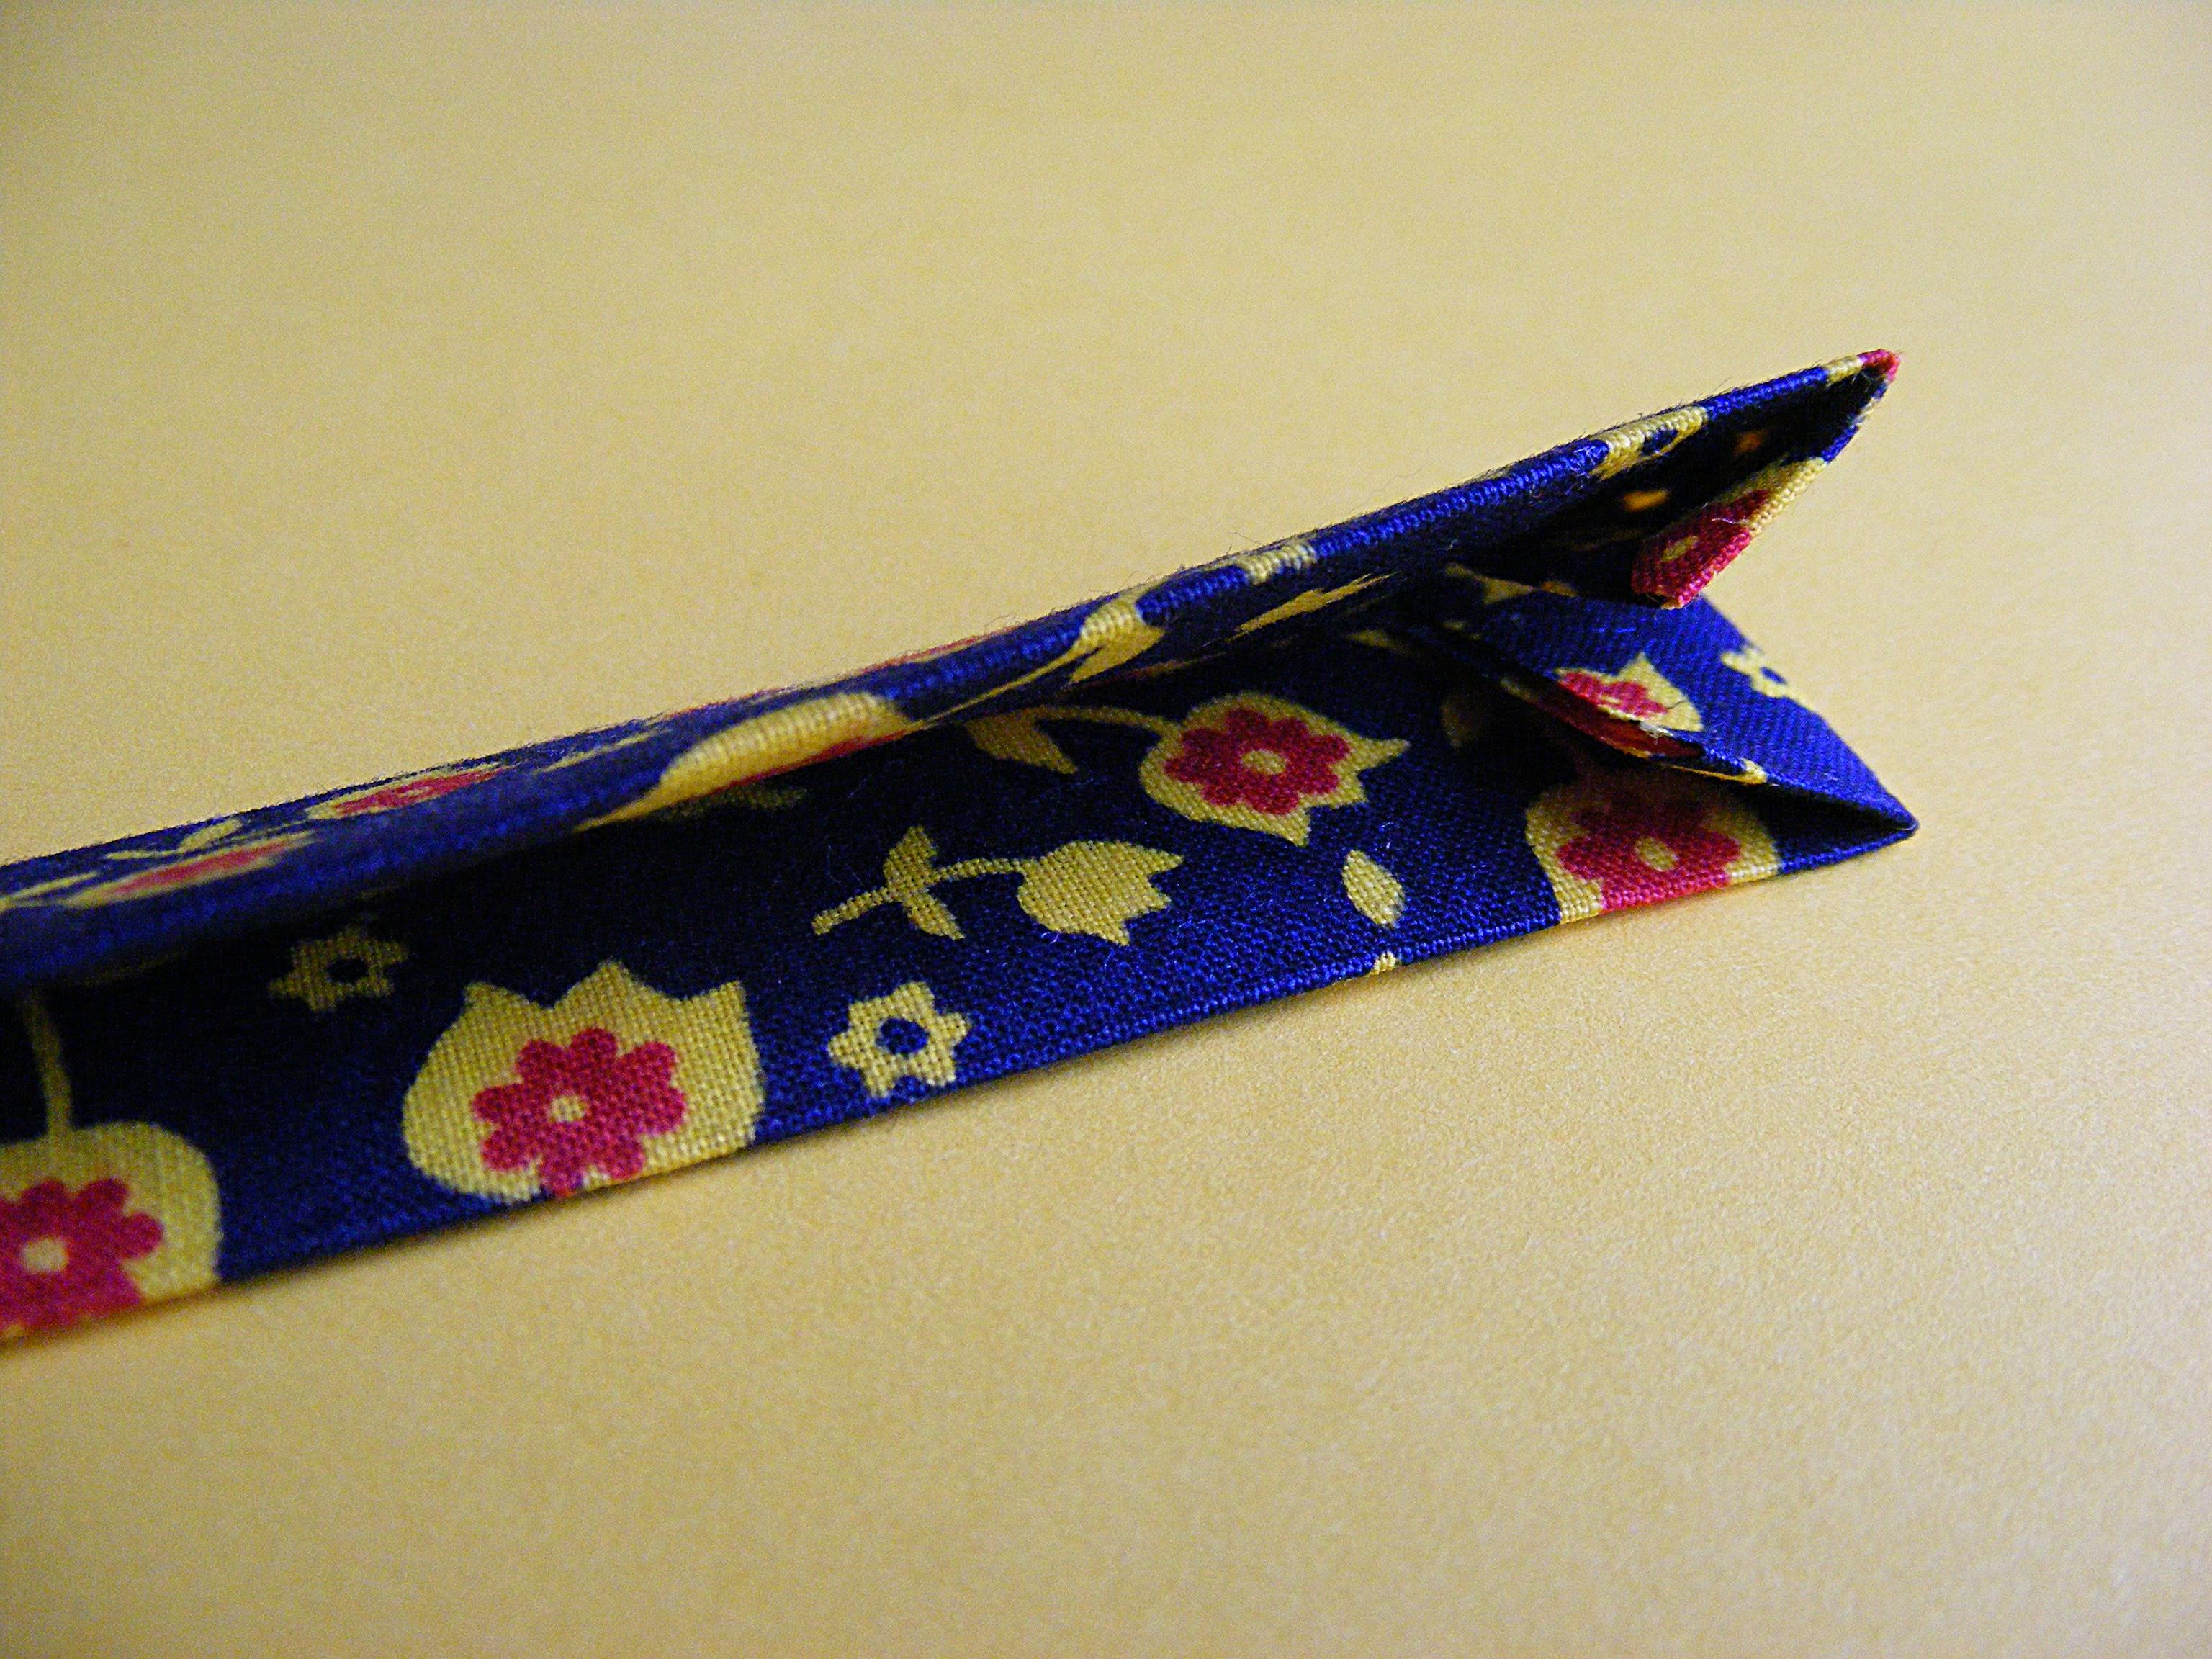
If you have an especially light sleeper, you can add that ribbon loop so you can hang the pillow from a bedpost or door handle. It’s easy and the pattern has instructions.

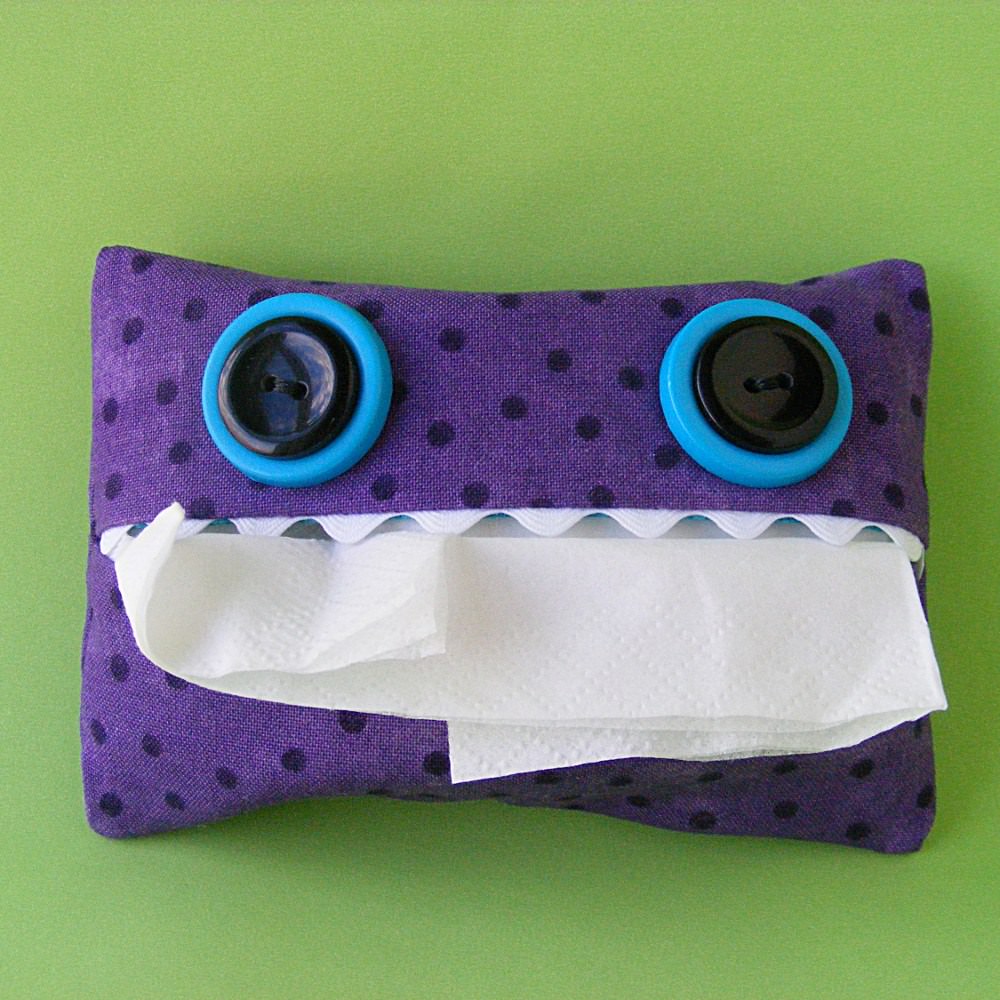
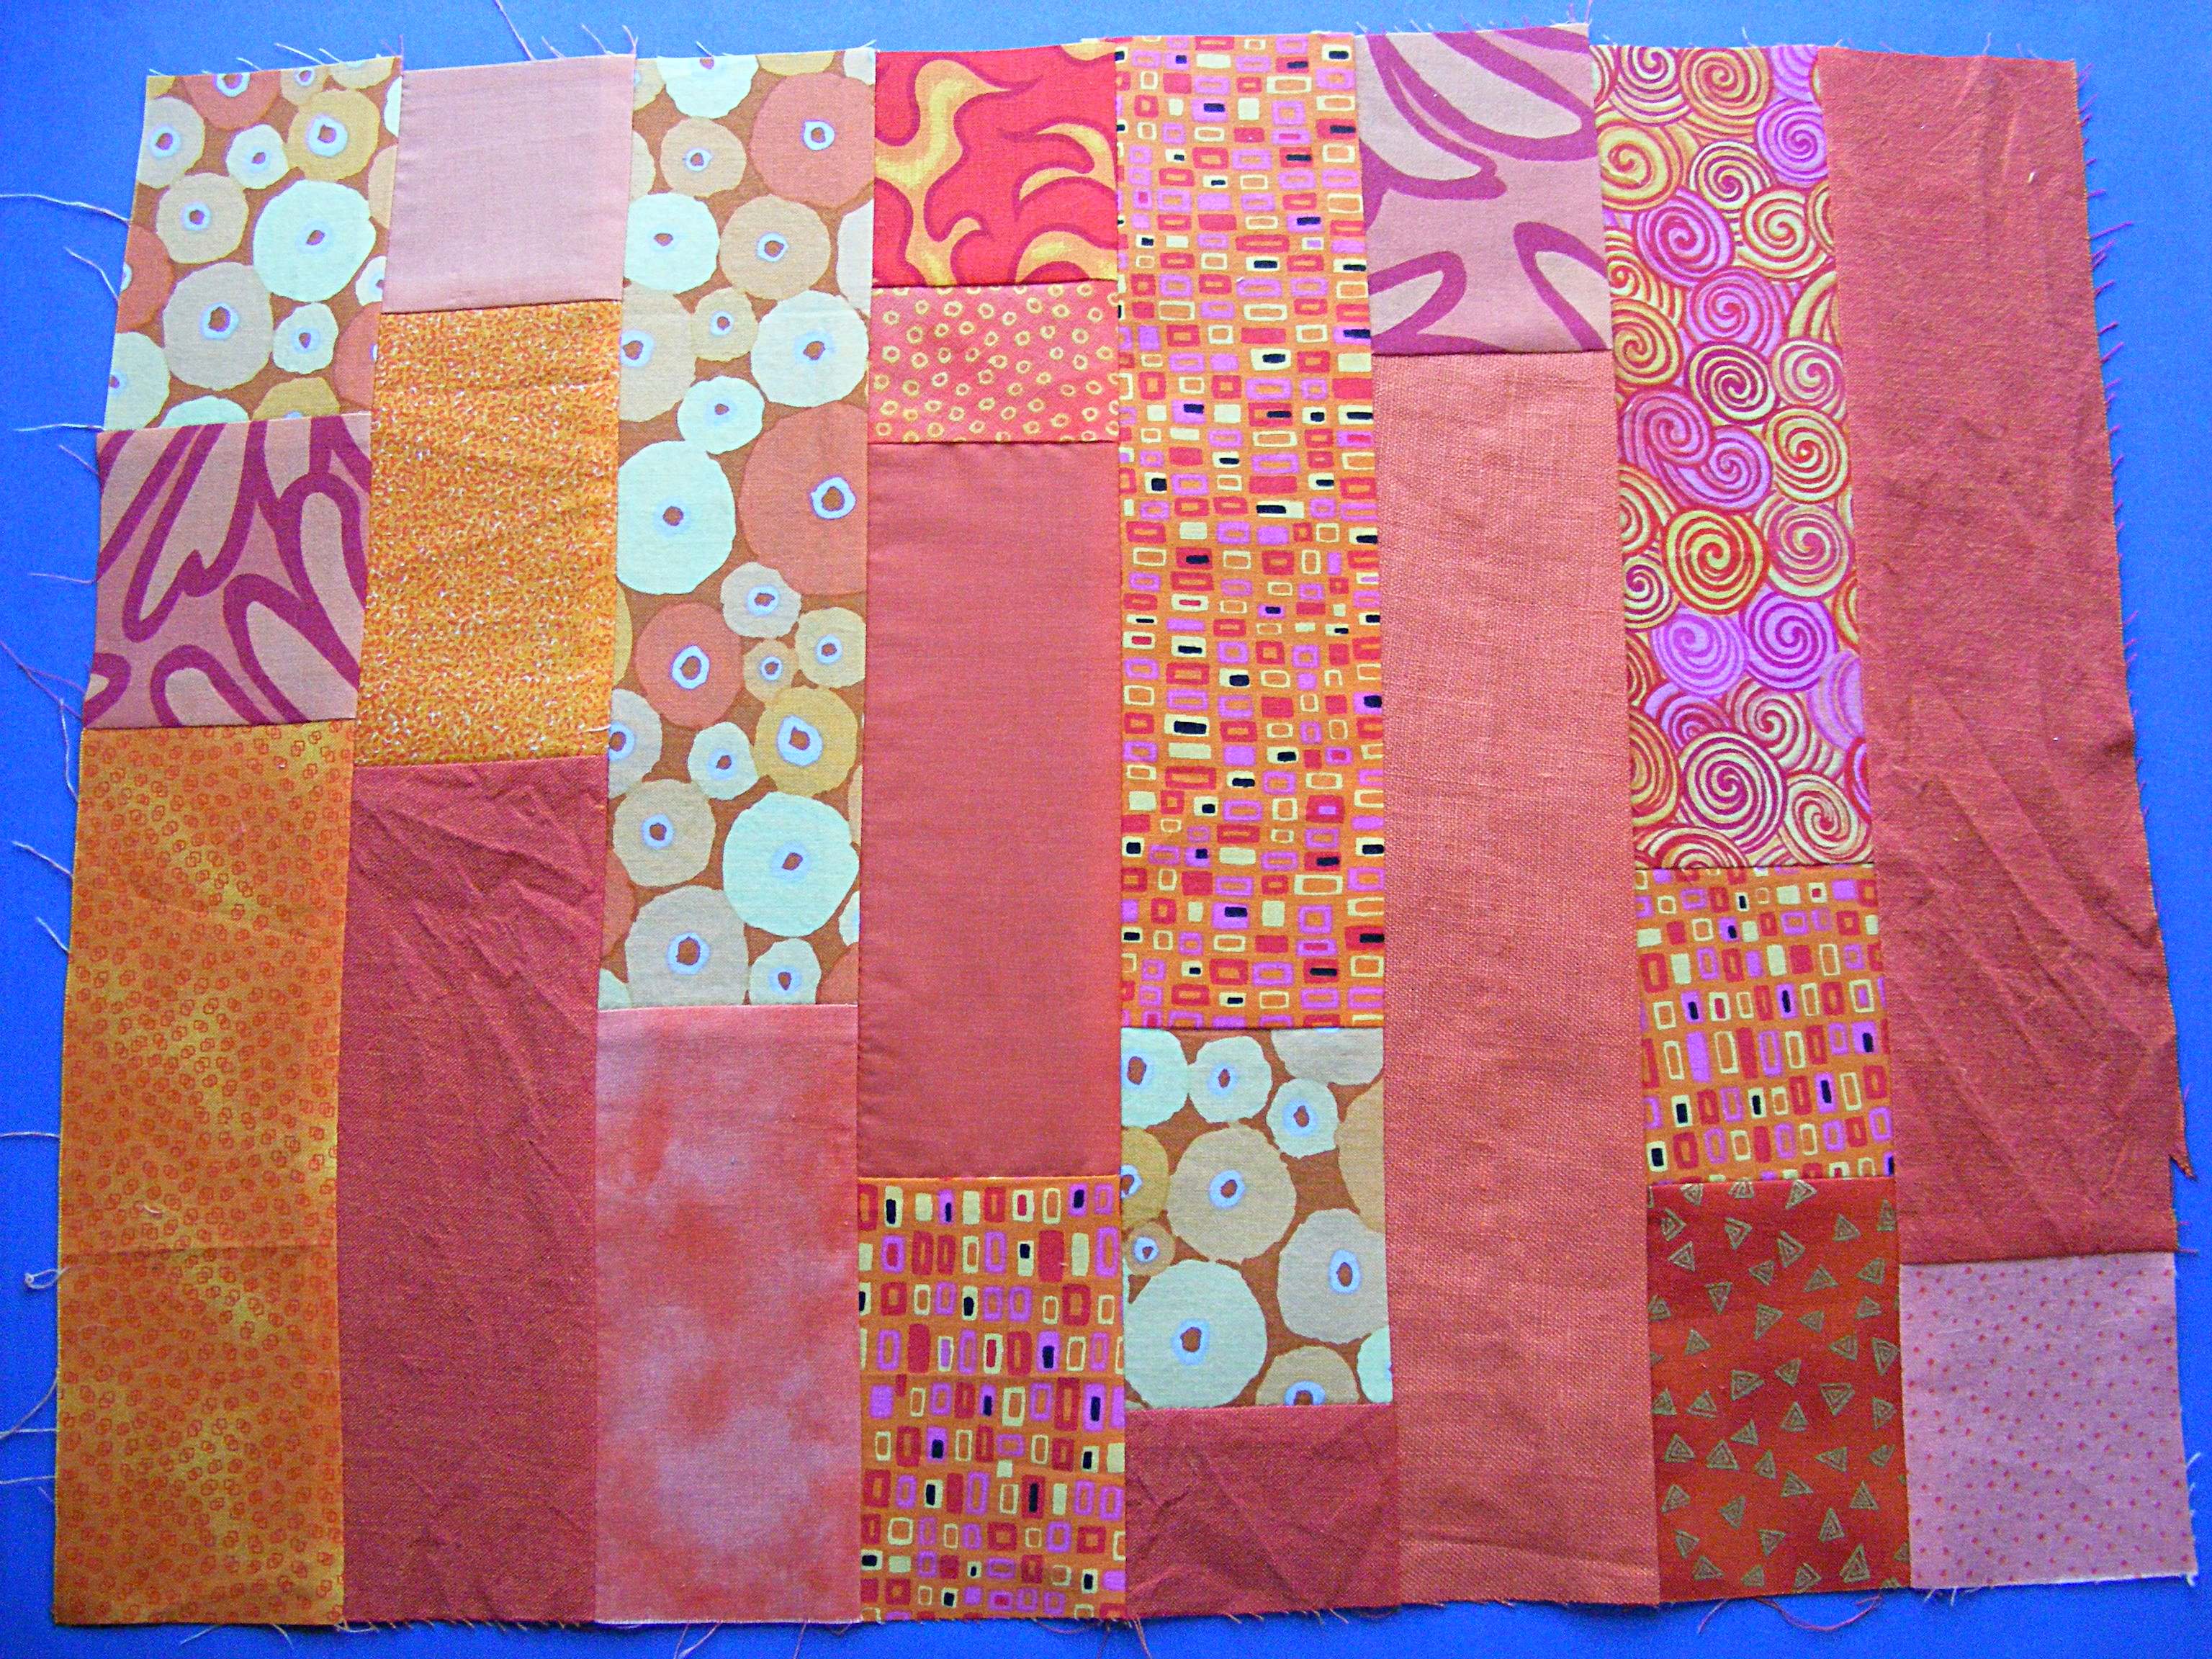
The best part of the project is that you can position the tiny pocket anywhere on the pillow you like. Make sure not to cover up your favorite bit! I especially like this little block showing how many teeth dogs and cats have. (Sorry – this fabric is discontinued now.)

Free Tooth Fairy Pillow Pattern from Shiny Happy World

Jo would have latched right on to fun facts like this! She also would have liked the grossness of the picture of tooth decay. 🙂

Ready to make your own?

Download the free tooth fairy pillow pattern here.

And I’d love to hear some tooth fairy stories from others! Surely (hopefully) I wasn’t the only abject failure out there?

Happy stitching!

Free Pattern – The Gobbler – A Pencil Eating Monster

The Gobbler - a free monster pencil case pattern from Shiny Happy World

I call this pencil-eating pouch The Gobbler.

It’s so much fun to choose fabrics and sew this project! If you can sew a straight line and sew on buttons – you can make The Gobbler.

You can make it even if you’ve never sewn a straight line – the pattern has links to videos teaching you everything you need to know. 🙂

This video shows how to cut fabric using rotary cutting tools.

This video shows how to sew a straight line and turn corners.

Materials

  • 1 fat quarter of fabric for the outside of the pouch
  • 1 fat quarter of fabric for the inside of the pouch
  • scraps of fabric for the hair/spikes
  • two 7/8 inch buttons for the eyes (I stacked smaller black buttons on top of these buttons)
  • two 3/16″ buttons for the nostrils (optional)
  • 9 inch zipper

The hardest part of this project is getting the fabric facing the right direction, so pay special attention to those parts of the instructions.

Step 1

Cut out all materials.

For the top of the face cut one wide rectangle 3″ tall and 10″ wide. Cut the same size from the lining fabric.

For the bottom of the face cut one narrow rectangle 2″ tall and 10″ wide. Cut the same size from the lining fabric.

Wait to cut the pieces for the back of the pouch. The size will vary depending on the width of your zipper, how close to the teeth your zipper foot lets you get, etc.

For the pointy spikes cut five 3″ squares.

Step 2

Lay the wider rectangle in the outside fabric face up on a flat surface.

Lay the zipper face down over the fabric. Make sure the teeth of the zipper (not the zipper tape) are centered over the rectangle. Line the edge of the zipper tape up with the edge of the fabric and pin in place.

Click here for a video showing how to do this kind of zipper installation.

Step 3

Lay the wider rectangle in the lining fabric face down over the rectangle from Step 2, with the zipper sandwiched between the two layers of fabric.

Pin or clip the layers in place.

Step 4

Sew the three layers together (outer rectangle, lining rectangle and zipper) getting as close to the teeth of the zipper as possible. You’ll want to stop partway along the seam to move the zipper pull out of your way. Watch this video for tips.

If you have a zipper foot, that will let you get very close to the teeth. If you don’t have a zipper foot, just get as close as you can. You’ll have a little more zipper tape showing in the finished pouch and it will be fine.

Step 5

Flip the fabric rectangles right side out and press.

On the right side of the zipper (where the pull is) you should have the right side of the outer fabric showing. If you flip the whole thing over you should have the right side of the lining fabric showing.

Step 6

Repeat Steps 2-5 with the narrower fabric rectangles and the other side of the zipper for the bottom of the face.

Remember ­- the right side of the outer fabric should be facing the right side of the zipper and the right side of the lining fabric when you sew.

You’re done with the front of the pouch!

Here’s the view of the same piece from the inside. You should be seeing the right side of the lining fabric.

Step 7

Sew on some fun features! I stacked black buttons on top of larger blue buttons for the eyes, and sewed on tiny black buttons for the nostrils.

Play around and have fun with these! Add one giant button to make a cyclops. Embroider on some eyebrows. Skip the nostrils. Make it your own!

You’ll be sewing all around the outside of the pouch using 1/2″ seam allowance ­- so make sure to take that into account when you position your eyes and other features.

Flip the lining piece out of the way so you’re only sewing through the outer fabric.

Step 8

Measure the finished piece. It should be 10 inches wide, but the height will vary depending on the chunkiness of the zipper you’re using, and how close to the teeth you were able to stitch. Mine was 10″ wide and 4 7/8″ tall.

Use the measurements of your finished face to cut two back pouch pieces to match it. Cut one from the outer fabric and one from the lining fabric.

Step 9

For the hair/spikes we’ll be making some prairie points. It’s really easy -­ just folding!

Fold one of your squares in half along the diagonal.

Press.

Now fold it in half again, so that all the raw edges are lined up along the longest edge of the triangle.

Press.

Done! Repeat for the other four squares.

Step 10

Ready to put it all together?

Pin the prairie points along the top edge of the face. I start by folding the face in half to find the center. Pin the center point in place first, then pin the two at the edges, then center the last two between them.

All the raw edges of the prairie points should be lined up with the raw edges of the outer and lining fabrics.

Step 11

Unzip the zipper mouth at least part way. This is very important! If you forget, you won’t be able to turn your pouch right side out after the next step!

Lay the outer fabric rectangle (the one you cut in Step 8) face down over the face, with the prairie points sandwiched between the two layers.

Lay the lining rectangle face up over the outer fabric. Pin all the layers together all the way around the edges.

Step 12

Sew all the way around the edge using 1/2″ seam allowance. That should have you sewing right up against the bumpy ends of the zipper.

Trim away your excess seam allowance with pinking shears. That will keep the fabric from fraying too badly -­ plus it looks cute. :­)

Leave about 1/4″ seam allowance.

Step 13

Turn the pouch right side out and poke out the corners with a chopstick. You’re done! See how cute the contrasting lining inside the mouth looks?

Do you like this? Get the weekly Shiny Happy News and never miss a free pattern! Sign up here.

Happy sewing!

Best,
Wendi
That's me!


Evolution of a Mouse – a Peek at the Design Process

I designed a cute little mouse pattern, and I thought I’d share a bit of the design process with you.

The Head

I knew that I wanted to have his head be part of the body structure, just folded over. The original inspiration was this owl.

Orville the Owl softie pattern from Shiny Happy World

I designed it especially for quick and easy sewing (I need to make them with twenty kids at a Harry Potter Camp I was teaching – you can see all the details here).

When I was playing with that design I noticed that sometimes the bit folded over for the top of his head looked kind of mouse-like. If I stuffed it before folding it over it just might work – and I filed that thought away for later.

Well – now was later!

The Bottom

I also knew I wanted his body to be fat – so that his feet would disappear when he sat up on his back legs. (He actually has no feet – but the shape of his body makes them look like they’re just hidden.)

Usually if I want a fat bottom I design a flat pattern piece for the base and set it in, but that can be fussy sewing on a softie this small – and I avoid fussy sewing whenever possible. 🙂

I decided to use a technique that I use on all my tote bags. You’ll see it too in pillow corners – to give the pillow more fatness. It’s a way of boxing in the corners to add depth. I’ve used it before on these monsters and it was really easy to sew, so I decided to try it here. The final result looks like this.

Mischief of Mice - softie sewing pattern from Shiny Happy World

He’s not dead – he’s just lying on his back so we can see his bottom. 🙂

See how the “corners” of the body are boxed in? This is very easy to sew.

The Ugly Part of the Design Process

So – that was two design decisions made. Time to start some prototypes.

I sew these out of a yucky white sheet with whatever thread I happen to have in my sewing machine. They’re not pretty, but they let me work out the details of the pattern pieces.

Three Mice - prototypes of the Mischief of Mice softie pattern by Shiny Happy World

Sometimes the very first prototype is just right, but usually I have to try at least a few variations before things get good. I lost track of the number of prototypes I tried for this “simple” mouse – but these were the three still sitting on my table when I was done. Sometimes I take out the stuffing and resew a couple of seams – like to take in the sides a bit – instead of starting a whole new prototype.

The proportions on the first one were pretty good. I would have done a second round to make his body a little wider – but overall he was just too big.

The second one was better size-wise. But when I stuffed him properly he was just too tall, and when I took out some of the stuffing to make him shorter, he just looked hunchbacked.

The third one was just about right.

Time to add some details – ears, paws and a tail. I usually leave them off in the first round so I can just focus on the basic body shape.

The Details

When I start to add all the other bits and pieces, I usually cut them out of paper first and pin them to the softie. That’s a quick and easy way to check proportion and placement. Then I use those as pattern pieces and make up another prototype all from fabric.

It usually takes a bit of tweaking to get things just right – the size of the ears, the length of the paws, the thickness of the tail. In this case my original tail was too skinny to turn right side out. I had to redesign it so these turning tubes would fit inside. 🙂

Mouse prototype - one step in the design process at Shiny Happy World
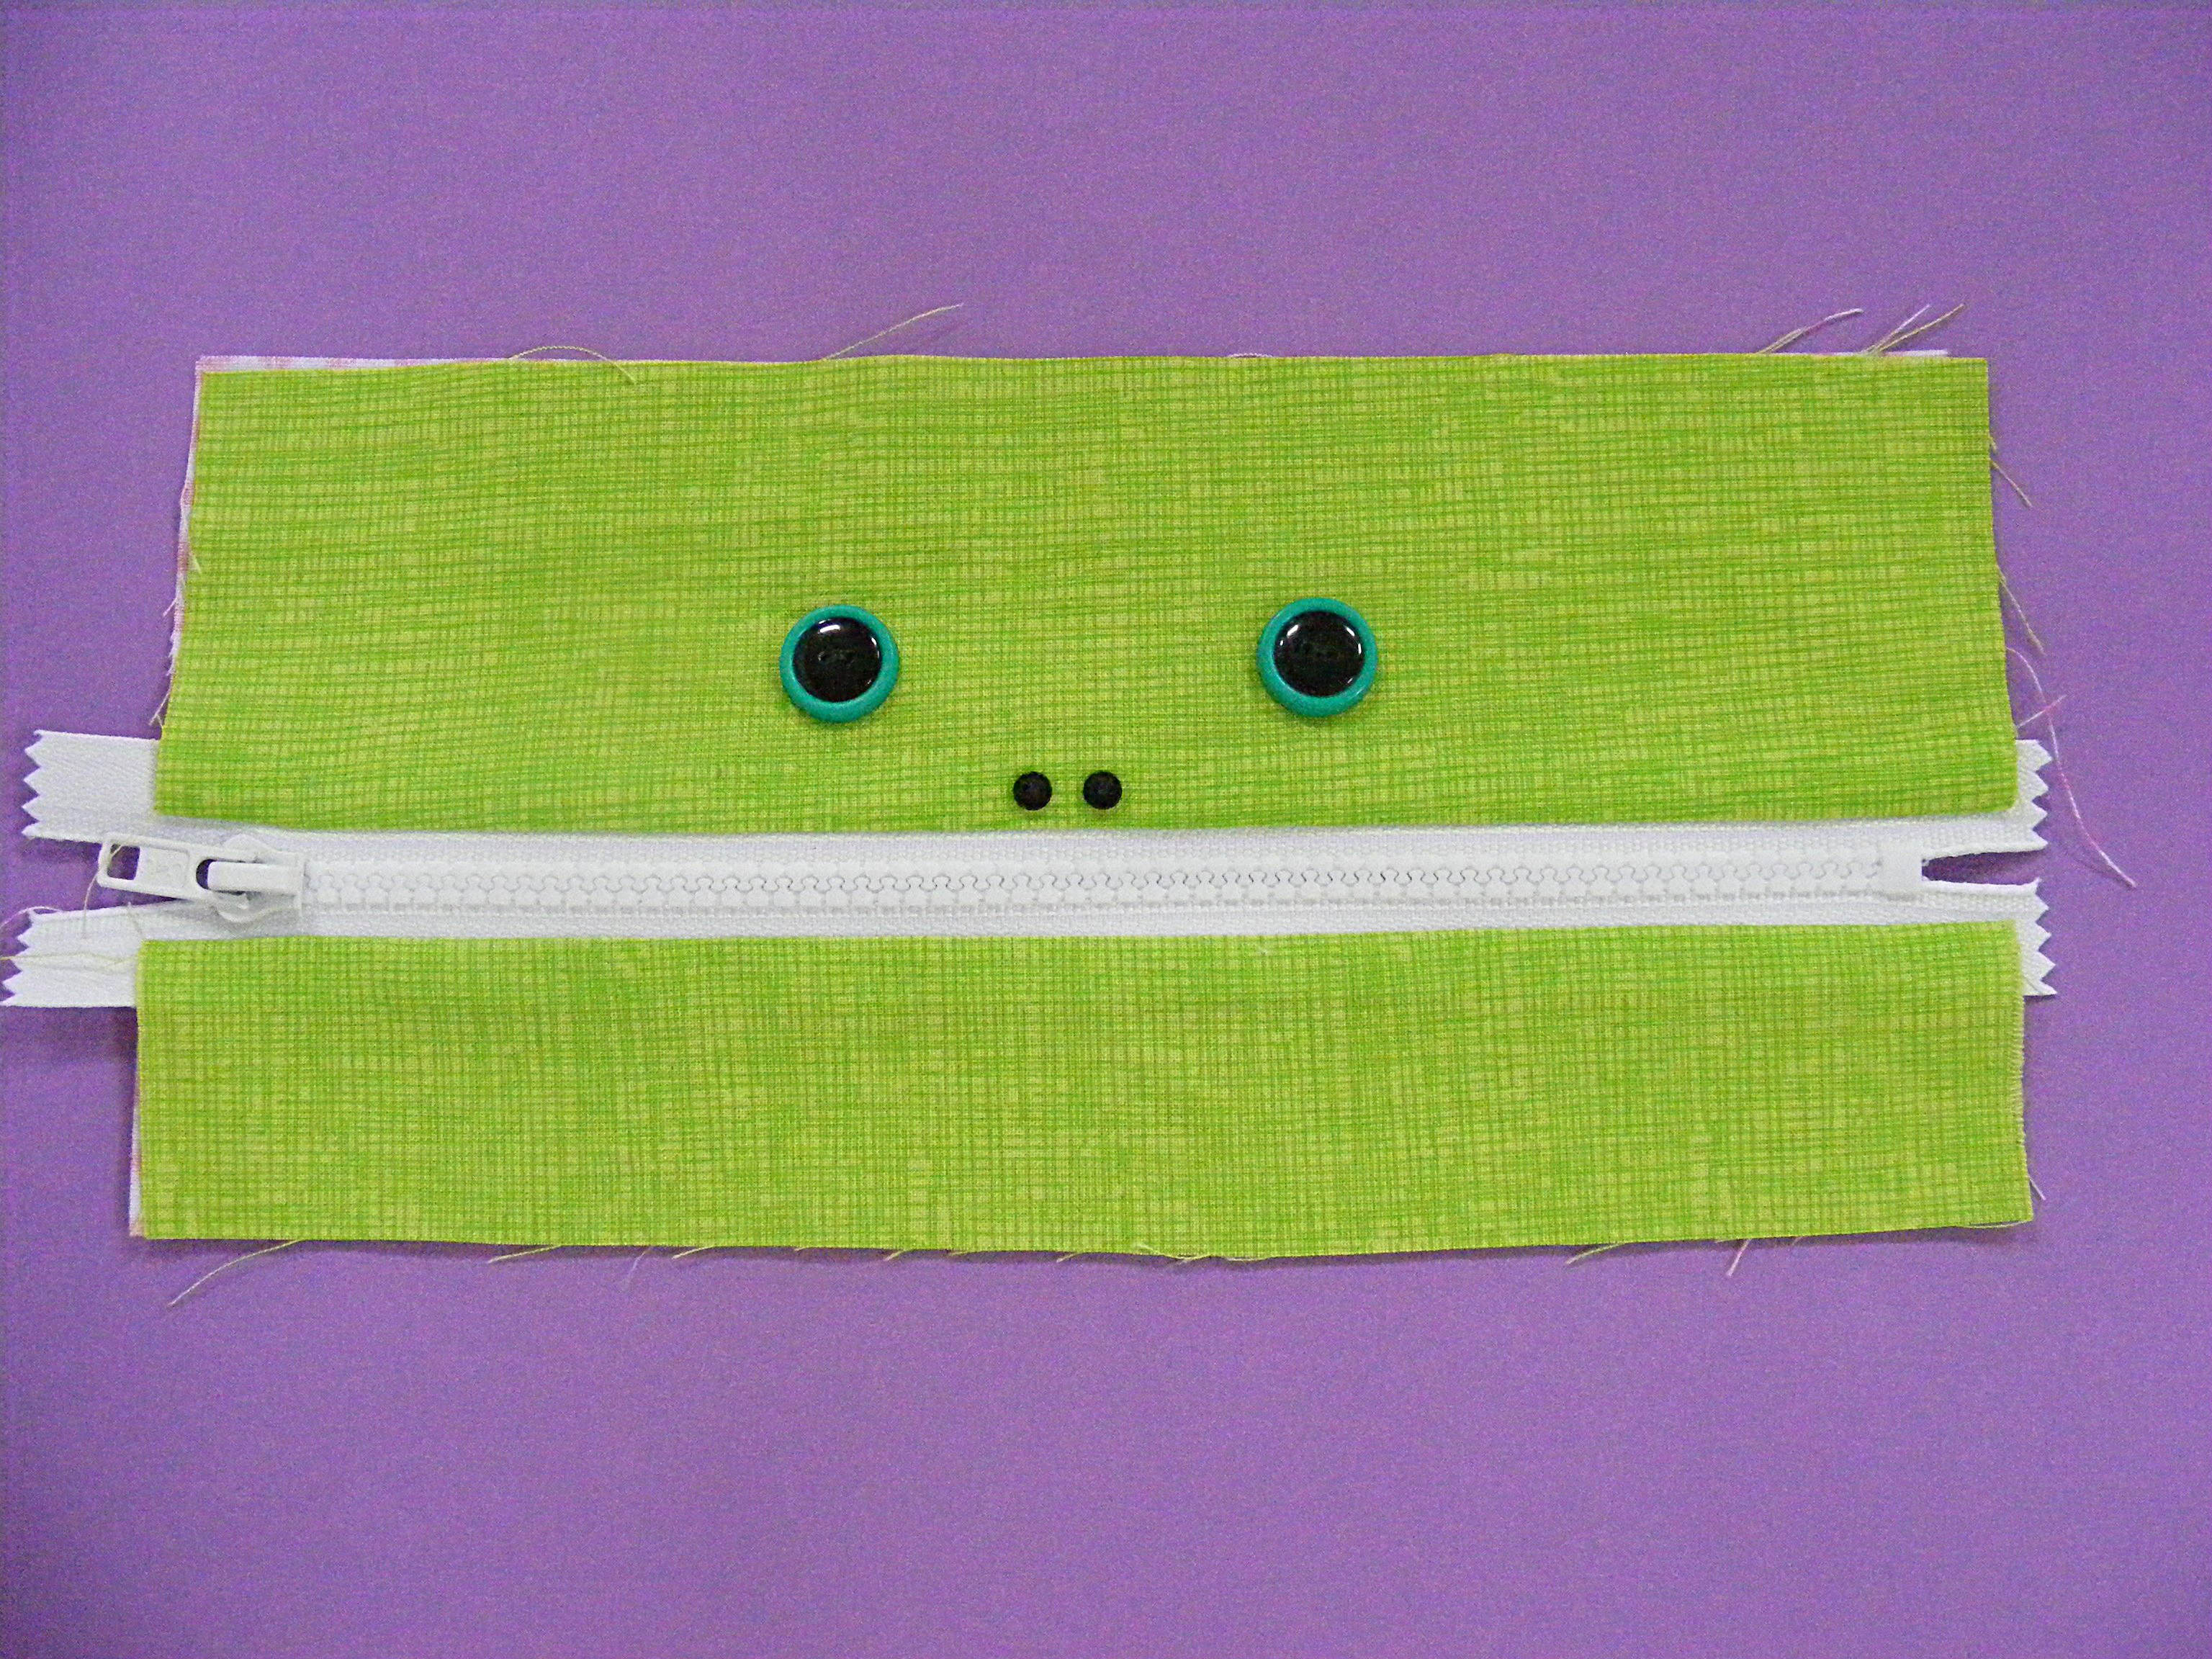
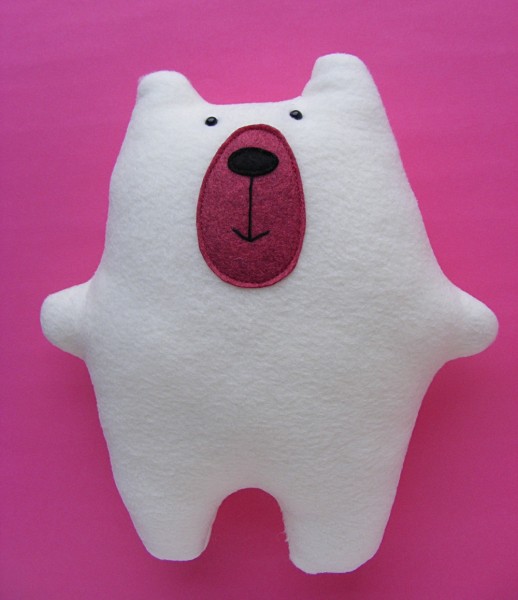
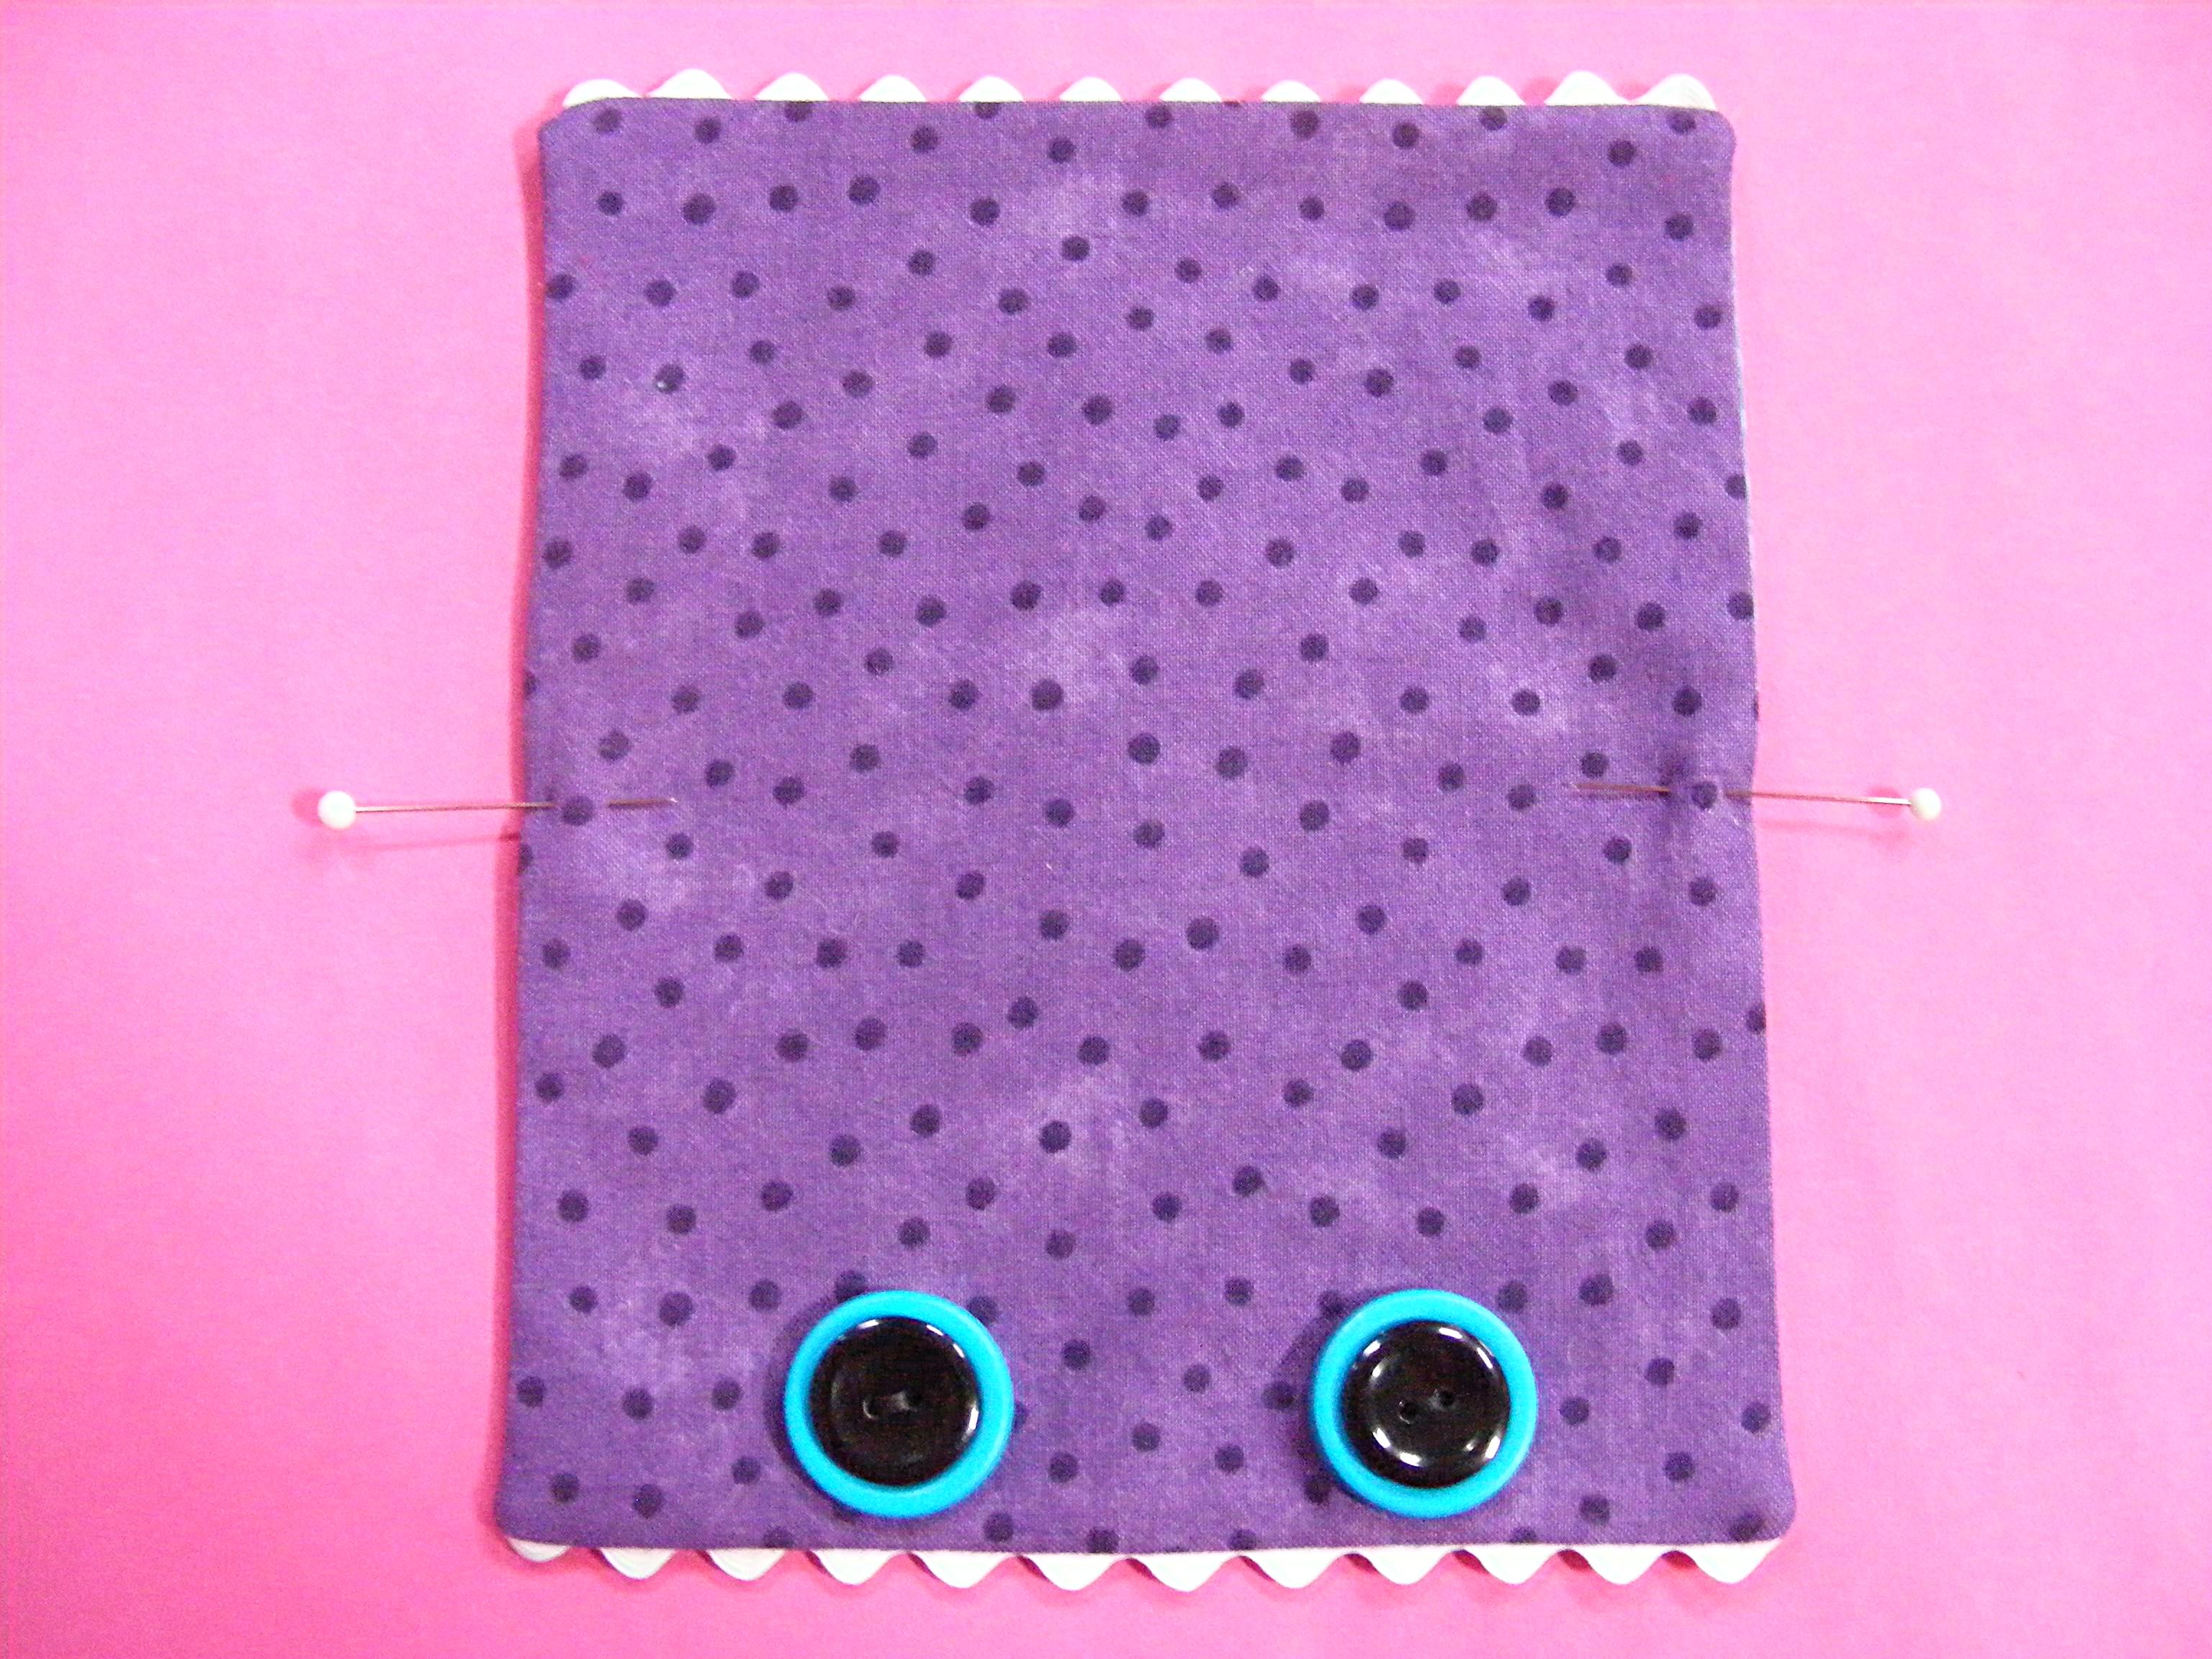
I’m picky about eyes – I’ve written about my obsession with eye placement
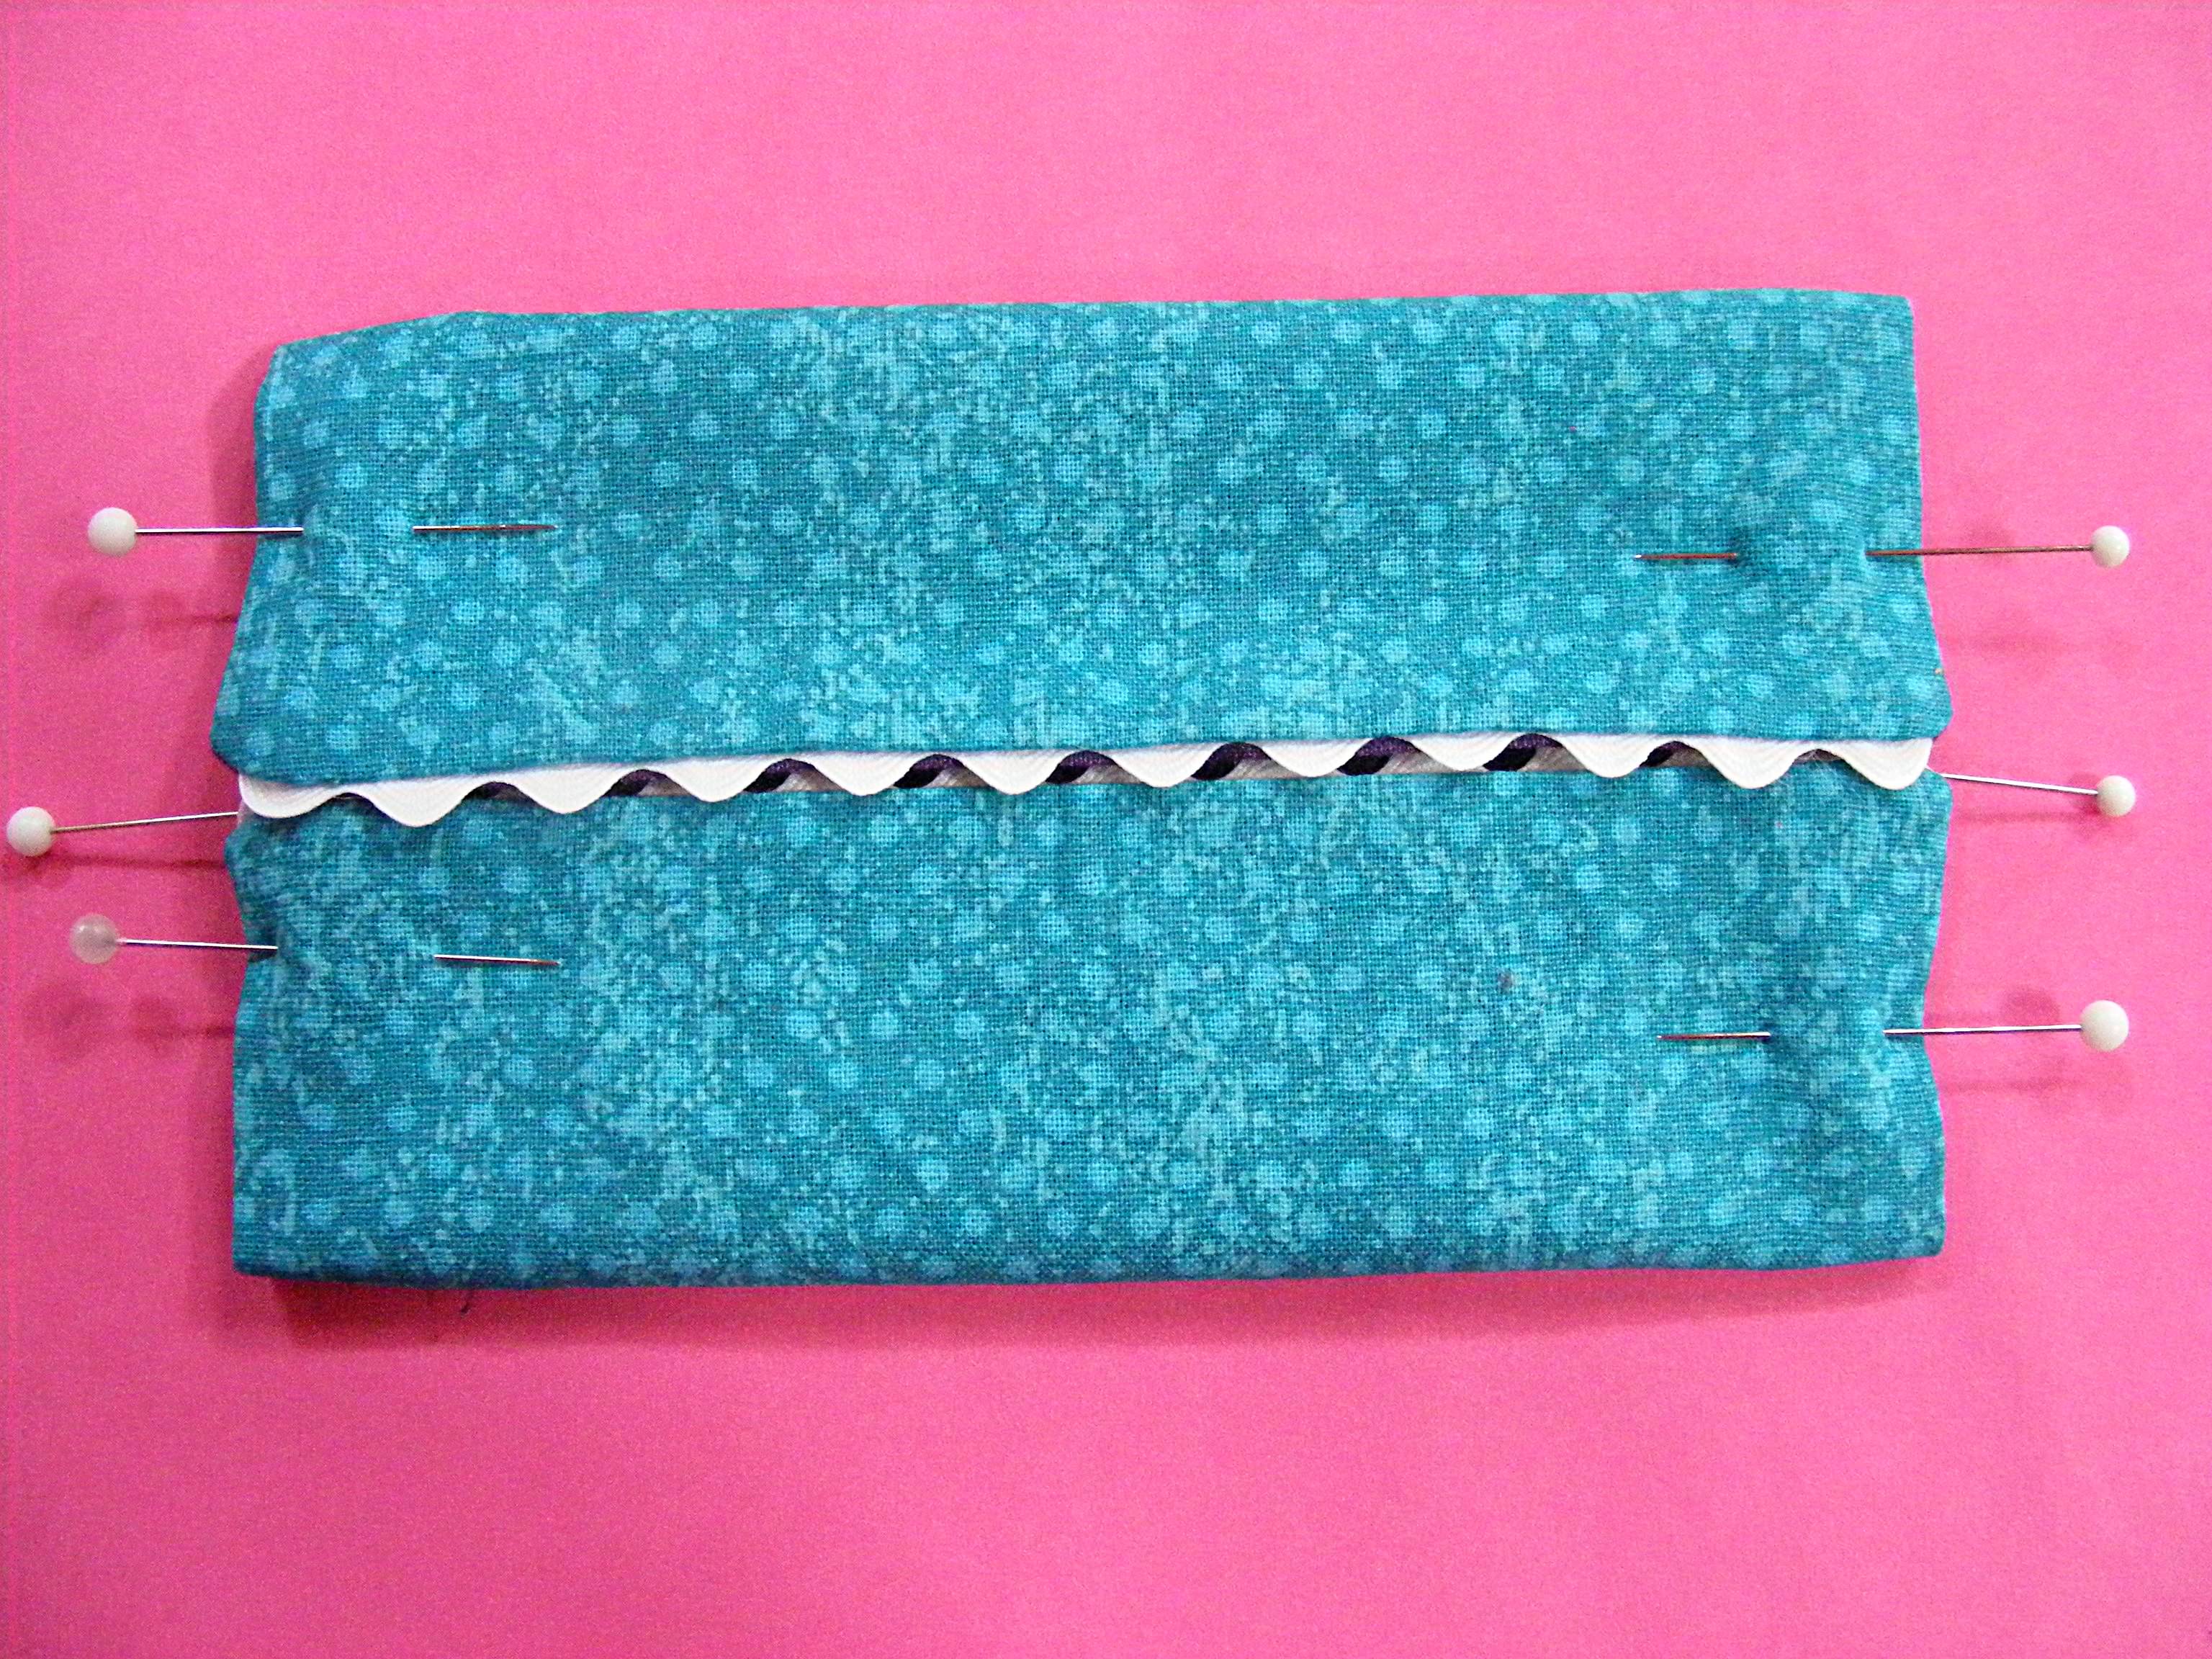
 here and here. The main thing to remember is that the shape of the face can change a lot after stuffing – so I always just draw the eyes on a stuffed prototype. Usually I’ll also poke holes and try out a few different eye sizes. I pick the final prototype apart and trace that eye placement onto the final pattern pieces.

Cuteness!

The final step, of course, is to make him out of cute fabric. 🙂

I knew that I wanted him to be made of quilting cotton, because I wanted to use colorful, patterned fabric.

I couldn’t choose a color, and I couldn’t stop at one. I made a whole mischief of mice in a rainbow of colors – and I love them!

Mischief of Mice - an easy sewing pattern from Shiny Happy World

Finished!

So now you’ve seen the ugliness behind the scenes in the design process. 🙂

You can get the finished pattern here.

Happy sewing!

Best,
Wendi
That's me!

Warren the Charity Bear – a free teddy bear pattern

Warren the Charity Bear - a free pattern from Shiny Happy World

I designed the free Warren pattern especially for people who want to make bears for donations. I had a few goals in mind as I worked on his design. . .

  1. He had to be easy to make. Easy enough for kids to make.
  2. He needed to be a good, huggable size.
  3. I wanted him to have mix & match parts – so you could make a hundred of them and never get bored.
  4. He needed to be pretty foolproof – it doesn’t matter if his features are precisely positioned. It’s ok if he’s stuffed a little loose or a little tight. It’s all good. 🙂
  5. He needed to work well with easy-to-find polar fleece – but also work well with fancier fabrics like minky and cuddle fleece.

Jo and I tested this pattern a LOT – and then I used the pattern to teach softie-making to a bunch of kids – and then Jo and I made a bunch more. And now he’s ready to share. I can’t wait to see the bears that YOU make with him!

One note – I designed this pattern especially for charitable giving – but of course I’m giving it to you with no strings attached. Make bears for yourself and your kids and grandkids. Use the pattern when you teach. Sell finished bears. The pattern is yours! Make whatever you want with it! If you want to make bears to donate, I suggest the following places. . .

  • homeless shelters
  • battered women’s shelters
  • fire departments
  • police departments
  • children’s hospitals (check first to see if they have special requirements about the materials they’re made with)
  • Please suggest other places in the comments!

Here’s how to make him!

Prepare the Pattern

Download the pattern here. Print it out at 100%. Layer the two pieces together, overlapping so the edges of the pattern and the little hearts line up. Tape the pieces together into one large pattern piece and cut it out. I like to punch holes where the eyes are to make marking their placement easy.

Cut Out the Body

Lay the pattern on the fabric so the stretch of the fabric goes across the bear’s belly. You want him to stretch wide – not tall. 🙂

Cut two body pieces.

Warren the Charity Bear - a free teddy bear pattern from Shiny Happy World

Mark the placement of the eyes on the front piece.

Applique Any Parts

Cut any muzzles or belly pieces you want to use out of felt and applique them in place. Just stitch them close to the edge with a basic straight stitch. Nothing fancy. If you have trouble on the tight curves of some of the smaller pieces, watch this video for help.

Warren the Charity Bear - a free teddy bear pattern from Shiny Happy World

There are two different muzzle patterns so you can give your bear a wide muzzle, a tall muzzle or no muzzle. You can see the three nose sizes in these photos too. 🙂

Warren the Charity Bear - a free teddy bear pattern from Shiny Happy WorldYou can also give him a belly patch, a heart patch, or no patch.

Embroider the Mouth

Warren the Charity Bear - a free teddy bear pattern from Shiny Happy World

Thread a needle with a full six strands of black embroidery thread and knot the end. You’ll embroider the mouth in three stitches, always coming up at point A and going down at point B. If the A’s on the second and third stitches are above the B, your bear will be smiling. If the A’s are below the B he’ll be frowning. Don’t worry about making the sides exactly even. Crooked smiles are sweet. 🙂

Pop in Some Safety Eyes

I carry several sizes of safety eyes and three work well for these bears.

Warren the Charity Bear - a free teddy bear pattern from Shiny Happy WorldThe small ones are 6 mm, the medium are 9 mm, and the large are 12 mm.

There are more eye options too. . .

Warren the Charity Bear - a free teddy bear pattern from Shiny Happy WorldIf you want to use black eyes on black fabric, you might want to back them with a circle of colored felt so you can see them.

Mismatched eyes are always fun.

And even if the eyes don’t go exactly where they’re supposed to, the results are cute. 🙂

If you’re making your bears for kids under three, you’ll want to embroider the eyes instead of using safety eyes. Here’s a tutorial showing the stitch I use.

Sew Up Your Bear

Layer your bear front and bear back pieces right sides together and pin or clip the layers in place.

Sew around the edge using 1/4″ seam allowance, leaving a stuffing opening on the side of one leg.

Warren the Charity Bear - a free teddy bear pattern from Shiny Happy World

If you’re using a fabric that has no stretch, you’ll need to clip into all the concave curves. Watch this video for the why and how. Polar fleece, minky and cuddle fleece don’t need this step – they have a natural stretch that will allow the curves to turn smoothly without clipping.

Finish Your Bear

Turn your bear right side out and stuff it.

Make sure you get some stuffing in his ears and arms before you fill up the big body – once you block access to those bits it’s hard to get back in there. Watch this video for some stuffing tips.

Here’s a review of my favorite stuffing. I like Fairfield Brand Poly-fil Supreme Fiberfill – it really does make a difference.

Sew up the opening. Ladder stitch is totally invisible on fleece – here’s a video showing how to do it.

Warren the Charity Bear - a free teddy bear pattern from Shiny Happy World

Done!

If you like this free pattern, sign up for the Shiny Happy News! Subscribers get a weekly newsletter full of sewing tips and tricks, free patterns, special discounts, and other things to make you smile. 🙂

Happy sewing!

Best,
Wendi
That's me!

Free Tissue Pack Cover Pattern

Monster tissue case - a free pattern from Shiny Happy World

‘Tis the season for sniffles. Which means it’s the perfect time to pull out this cute little monster tissue pack cover pattern and whip up some cute gifts! It’s super easy and the pattern is free.

Oh – and if a little case of the sniffles turns into a full-blown cold with a cough and achy chest – take a look at this post for instructions to make a Vicks Vapo-rub scented rice bag – complete with this monstrous rice bag cover to help scare away the cough.

Monster Rice Bag Cover - a free pattern from Shiny Happy World

Here’s how to make the tissue pack cover.

Throughout the pattern, the links go to online video tutorials demonstrating the techniques used.

Materials You’ll Need

  • 6″ x 7″ rectangle of fabric for the outside
  • 6″ x 7″ rectangle of fabric for the lining
  • two 6″ pieces of white rickrack
  • 1″ colored buttons
  • two 5/8″ black buttons
  • sewing machine, thread, basic sewing tools

Instructions

Step 1

Draw a line 1/8 from the short edge on the right size one of your fabric rectangles.

Watch a video here showing how to embed rickrack in a seam.

Step 2

Position one of the pieces of rickrack so that the line you drew in Step 1 is just barely showing in the valleys at the top edge of the rickrack.

Step 3

Sew the rickrack in place, right along the line you drew.

Step 4

Lay the second rectangle of fabric face down over the first, with the rickrack sandwiched between the layers. Sew them together using a 1/4″ seam allowance.

Step 5

Open the piece up and flip it right side out. Press. See how the rickrack makes nice teeth?

Fold the piece in half and mark the midpoint with a pin. Arrange the button eyes on either side of the center point. I’ve stacked black buttons on top of blue buttons ­ but you can use any combination of buttons and felt you like to get the effect you want.

Sew the buttons in place, sewing only through the top (purple) layer of fabric.

Step 6

Repeat Steps 1 – ­4 to embed rickrack in the seam at the other end of the rectangle.

The two rectangles of fabric should be right sides facing, with both short ends sewn together (with rickrack embedded in the seams) and eyes sewn to the purple layer at one end only. At this point, the long sides of the rectangles should still be unsewn.

Step 7

Sew the long side seams. Leave a couple of inches unsewn in the center of one side so you can turn it right side out.

Clip the corners up to (but not into) the stitching to eliminate extra bulk.

Step 8

Turn it right side out and use a chopstick to carefully poke out the corners so they’re flat. Press the whole thing.

Fold it in half and mark the center points on both sides with pins.

Step 9

With the eyeball (purple) side facing up, fold the toothy edges into the center.

Pin in place.

Step 10

Sew the short edges using a 1/4″ seam allowance. This will close up the turning hole and sew the sides of your pack in one move.

Repeat for the other side.

Step 11

Turn it right side out. Ta daa! A tissue pack! Monstrous on the outside, nicely finished on the inside.

Fill it with a pack of travel tissues (I like to take them out of the pack first ­- all the different brands seem to open different ways) and he’s ready to go.

Get well soon!

If you like this silly tissue pack cover pattern, sign up for the Shiny Happy News! Members get a weekly email with crafty tips and tricks, links to free patterns, special discounts, and more. 🙂


Reusable Christmas Gift Bags

I don’t use paper gift wrap anymore. It’s expensive. It’s a pain to store. And the pile of it left after opening gifts always feels more than a little wasteful.

A couple of years ago I started making fabric bags for gifts. I love them! They’re so crazy easy to make – and they take no room at all to store when they’re not in use. Nice! Oh – and the ribbons are attached. No separate bows and no tape needed.

I make two different kinds. Ones that gather and tie at the top, like this one. . .

Reusable Fabric Gift Bags - a free tutorial from Shiny Happy WorldAnd ones that wrap around the gift and then tie, like this one. . .

Reusable Fabric Gift Bags - a free tutorial from Shiny Happy WorldWant to know how to make them? Be prepared for simplicity.

Cut two rectangles of fabric. Any size. I have a huge variety.

Sew them together around three sides (watch this video showing how to sew a straight line and turn corners if you’re a beginner). If you’re making the first kind of bag – the one that gathers and ties at the top – cut 1 yard of ribbon, fold it in half, and embed the fold in the side seam (video here), a few inches from the top of the bag. When you turn it right side out it will look like this. . .

Reusable Fabric Gift Bags - a free tutorial from Shiny Happy WorldHem the top opening. (Video here.)

If you’re making the second kind of bag, cut a ribbon 2 times the length of the bag plus an additional yard. Fold it in half and sew the fold at top of the bag in the center of one side. It should look like this. . .

Reusable Fabric Gift Bags - a free tutorial from Shiny Happy WorldDone!

Wrapping is easy. Pop in the gift. Fold the top of the bag over. Tie the ribbon. Here’s what it looks like from the back. . .

Reusable Fabric Gift Bags - a free tutorial from Shiny Happy World

And here it is from the front. . .

Reusable Fabric Gift Bags - a free tutorial from Shiny Happy WorldI don’t stick to holiday-ish fabric – we use these for birthdays and other occasions too.

Reusable Fabric Gift Bags - a free tutorial from Shiny Happy WorldA lot of mine use grosgrain ribbon because I have a lot of it on hand from some aprons I used to make and sell. But sometimes I use pretty gauzy ribbon.

Reusable Fabric Gift Bags - a free tutorial from Shiny Happy WorldAny fabric. Any ribbon. It all works well, looks pretty and folds up to store easily. Love!

Reusable Fabric Gift Bags - a free tutorial from Shiny Happy World

Update – I got a lot of questions about how we tag them. I started using easy reusable felt tags, and there’s a tutorial here showing how to make them.

Happy sewing!

Best,
Wendi
Wendi_Gratz_Shiny_Happy_World


My Awesomely Huge Ironing Board – An Ikea Hack How To

Awesome Extra Wide Ironing Board from Shiny Happy World

There are three things I LOVE about my awesome new ironing board.

One is obviously the fabric for the cover. This is The Land that Never Was designed by Lisa Congdon for Cloud9 Fabrics. I love the whole collection!

Two is the size. I can iron an entire piece of fabric – selvedge to selvedge – on this baby – with room to set my iron on the board too.

Awesome Extra Wide Ironing Board from Shiny Happy World

Please admire the vastness. 🙂

Three is the storage underneath.

Awesome Extra Wide Ironing Board from Shiny Happy World

I never take my ironing board down – so the easily collapsible X bottom was just a waste of space for me. This ironing board sits on some handy dandy Ikea Expedit shelving!

Here’s how I made it. . .

1. Start with your shelves. I was going to use a different piece from Ikea. When we went they had plenty in stock, but they were all on the top shelves of the storage area and they said they couldn’t get them down until after hours and we’d have to come back the next day. The Ikea is 2 1/2 hours away. Coming back the next day wasn’t an option – so we went with two of these instead, laid them on their sides and screwed them together in the back. It’s even longer than I had planned – but that’s ok with me! (Edited to add: Ikea no longer stocks the Expedit shelving. Their replacement is the Kallax, which would also be suitable for this project.)

I also added the wheels to the bottom for easy moving and vacuuming.

2. Now measure the top of your shelves. Find some small L-brackets and measure them too. You’re going to cut a piece of plywood big enough to hang over the edge of the shelf on all sides by the width of a bracket. These next pictures will make it clear.

Awesome Extra Wide Ironing Board from Shiny Happy World

Here’s a bracket (the ones I found were 1 1/2 inches) attached to the edge of the plywood. It’s attached to what will be the underside of my ironing board.

Awesome Extra Wide Ironing Board from Shiny Happy World

In this photo I’ve flipped my board over. It’s resting on the top of the shelving unit and the brackets are holding it in place so it doesn’t slide around. You could screw the brackets to the shelving unit too, but I wanted the whole top to be easily removable and I found that six brackets around the edge (two on each long side and one on each short end) held it in place nicely.

I wrapped the lower (not screwed in) part of the brackets with a layer of masking tape so they wouldn’t scratch the surface of the shelving unit. You never know – I might take this whole thing apart at some time in the future and use the shelves in another way.

Awesome Extra Wide Ironing Board from Shiny Happy World

Here’s the wooden top seen from above, before adding padding and the cover. Yes – that’s a seam down the middle. No – I don’t recommend doing the top in two pieces. I had a bunch of kids with me in the car the day I bought the wood and I couldn’t put the back seat down to accommodate a larger piece of plywood. I should have waited.

Awesome Extra Wide Ironing Board from Shiny Happy World

I rounded the corners of the wood just a tiny bit. I set a can of spray paint on the corner and traced that curved edge to use as a guide. This isn’t necessary – but I’m going to use a drawstring cover and it will wrap more neatly around a curve.

Now I’m ready to add some padding and the cover.

Awesome Extra Wide Ironing Board from Shiny Happy World

I covered the top with six layers of white cotton terry cloth. I usually use cotton batting, but I think this terry cloth might hold up better (compress less) over time. Cut the terrycloth so it hangs over the edge of the tabletop by 1-2 inches. Smooth out any folds or wrinkles.

Awesome Extra Wide Ironing Board from Shiny Happy World

Round the corners of the terrycloth too.

Awesome Extra Wide Ironing Board from Shiny Happy World

Now it’s time to add the pretty! A good selvedge on fabric makes me happy in the same way that good endpapers in a book make me happy.

From here on out it’s just like covering any ironing board. I’ve got a video here showing how.

Cut the fabric to cover the top plus 1-2 inches all around the edge – just like the terry cloth. Round the corners of the top fabric, too.

Sew bias tape all around the edge of the new cover. Use that bias tape as a tube and thread it with a long piece of cord. I like using a smooth nylon cord – it draws up easily.

Center your cover over your ironing board. Draw up the drawstring and use a toggle to hold it in place.

Awesome Extra Wide Ironing Board from Shiny Happy World

Ta daaaa! I love my new ironing board!

Here are handy links to all the posts about quilting tools and supplies.

Sewing Machine

Iron

Rotary Cutting Tools

Scissors

Other General Sewing Room Supplies

One More Hugely Popular Post that Seems to Fit Here Better than Anywhere Else

Return to the Let’s Make a Quilt main Table of Contents.

Move on to the posts about choosing your quilt pattern.

Happy sewing!

Free Hot Stuff Apron Pattern

Hot Stuff - Free Apron Pattern from Shiny Happy WorldHere’s a little gift from me.

A free pattern for an apron you can make entirely from scraps!

That’s right – a stash-busting project that comes together really easily and makes a great hostess or holiday gift. If you can sew a straight line, you can make this apron. The pattern has links to videos teaching all the skills you’ll need – including how to sew a straight line. 🙂

The pattern includes sizes for kids and grown-ups – so it’s totally versatile. Make a mother-daughter set! Package it up with some gardening tools and seeds, or some cooking utensils and a couple of your favorite recipes for a nice, personal gift. Have fun with it!

Materials

  • scraps of fabric for apron and tie
  • rectangle of fabric for the lining ­- amount depends on measurements
  • sewing machine
  • thread
  • basic sewing tools

Step 1

Calculate the dimensions of your apron.

Measure all the way around the waist, and measure from the waist down to the desired length (usually anywhere from mid-­thigh to the knee, depending on the look you prefer).

Length ____________ Waist _____________

You’re going to piece your apron front from 3 inch strips of fabric, so divide the total width of your apron (the waist measurement) by 2 1/2. That will tell you how many strips wide your apron top will be. If you don’t get an even number (and you probably won’t) round up.

Number of strips____________

From your scrap fabric, start cutting 3 inch wide strips. They can be any length you like ­ I usually just go with the length of my scraps. Try to have a variety of long and short strips. Rotary cutting tools are ideal for this ­- learn how to use them here.

Start joining the strips together into longer strips. I usually join a few together until I have a strip longer than the length of my apron. Then I trim it to the desired length and start attaching more strips to what I cut off. Keep joining strips and cutting to the desired length until you have the desired number of strips. For my 8 year old daughter that was 8 strips, each 15 inches long.

Step 2

Now play with the layout of your strips. For this one I made sure to spread out the larger solid bits so they’re not touching each other. You may have a greater range of lights and darks that you’re trying to keep balanced -­ it will depend on your fabric selection. Just keep rearranging the strips until it feels balanced and happy.

This is the fun part ­ so take your time and play a while. When you’re satisfied, sew the strips together using 1/4 inch seam allowance. Press everything nice and flat.

Step 3

You’ll want to cover up all those seam allowances. Basically, we’re going to make a quilt without the batting. Lay the backing fabric face down. Lay the patchwork rectangle face up over the backing fabric. Smooth it all out.

Trim the backing fabric to size -­ making sure it’s slightly bigger than the patchwork fabric all the way around.

Pin the two layers together.

Step 4

Stitch the two layers together by stitching as exactly as possible over your seam lines. This is called “stitching in the ditch.”

Also stitch the layers together 1/4 inch from the edge along both sides and the bottom. This will help you with a cheater­ pants hemming technique. No measuring!

Step 5

Now trim the backing so it’s even with the patchwork top all the way around.

Step 6

Hem each side of the main apron piece. Turn the edge under 1/4 inch. Press.

These hemming photos show the apron with the back side facing up.

See how I folded it right on the stitching line? That makes it soooooo easy to hem without measuring!

Step 7

Turn under another quarter inch. Press.

Stitch down very close to the folded edge of the fabric.

Repeat with the second side.

If you need a refresher on how to hem, watch this video.

Step 8

Now repeat with the bottom hem. Turn the bottom edge up 1/4 inch. Press.

The corners can get a little bulky here -­ so trim away an itty bit off the corner, from stitching line to stitching line.

Step 9

Turn the bottom edge under a second 1/4 inch. Press.

Stitch it down very close to the folded edge of the fabric.

The hems will give the back of your apron a nice frame around the bottom and sides.

Step 10

Time to make your apron tie. On a scrappy apron like this I especially like to make my tie out of scraps of fabric too. Cut enough 3 inch strips so that when joined together they are the desired length.

For a girl’s apron that ties in the back, you’ll need a total length of 58 inches. To double­-wrap and tie in the front you’ll need 84 inches.

For a woman’s apron that ties in the back you’ll need 72 inches. To tie it in the front you’ll need 96 inches.

Join your strips together on the diagonal so you don’t get thick, bumpy bits in your tie. You can see how in this video.

Step 11

That video also shows how to fold the strip into double-fold tape. In a nutshell. . .

  • Fold it in half the long way.
  • Press.
  • Fold each long edge into the center.
  • Press.
  • Refold the center.
  • Press.
  • Open up the center fold and turn the short end under 1/4 inch.
  • Refold and press. Now you’ll have a neat end to your tie.

Yes – the fabric in the photos is changing here. 🙂 These instructions are exactly the same as for finishing the Easy Apron pattern. There’s a free tutorial for that here.

Step 12

Gather up the top edge of the apron until it’s the desired width, usually a little more than half of the total waist measurement.

Easy Apron - a free pattern from Shiny Happy World

This isn’t rocket science, so don’t tear out your hair (or your stitches) if you end up a little longer or shorter than you wanted. A little bit of variation won’t look bad. 🙂

There’s a video here showing two methods for gathering fabric.

Step 13

Fold your double-­fold tape over the raw, gathered edge of the top of your apron. If you pin the center of your tie to the center of your apron piece and work your way out from that center point, it’s very easy to get everything even with no measuring.

Easy Apron - a free pattern from Shiny Happy World

Pin the double-­fold tape in place.

Step 14

Stitch the folded edges together, the whole length of the waistband/tie.

Easy Apron - a free pattern from Shiny Happy World

Start at one end. Stitch the short end together. Turn the corner and stitch all the way down the length of the tie, enclosing the gathered edge of the apron top in the fold. Sew slowly, making sure that you are catching the back fold of the tape in your stitching. Turn the corner and stitch the other short edge.

Finished!


You’re done! Step back and admire your awesome thriftiness. I bet you have more scraps hidden away somewhere. You should make aprons for everyone you know!

Happy sewing!

Best,
Wendi
Wendi_Gratz_Shiny_Happy_World

Show & Tell Time!

show and tell feature image
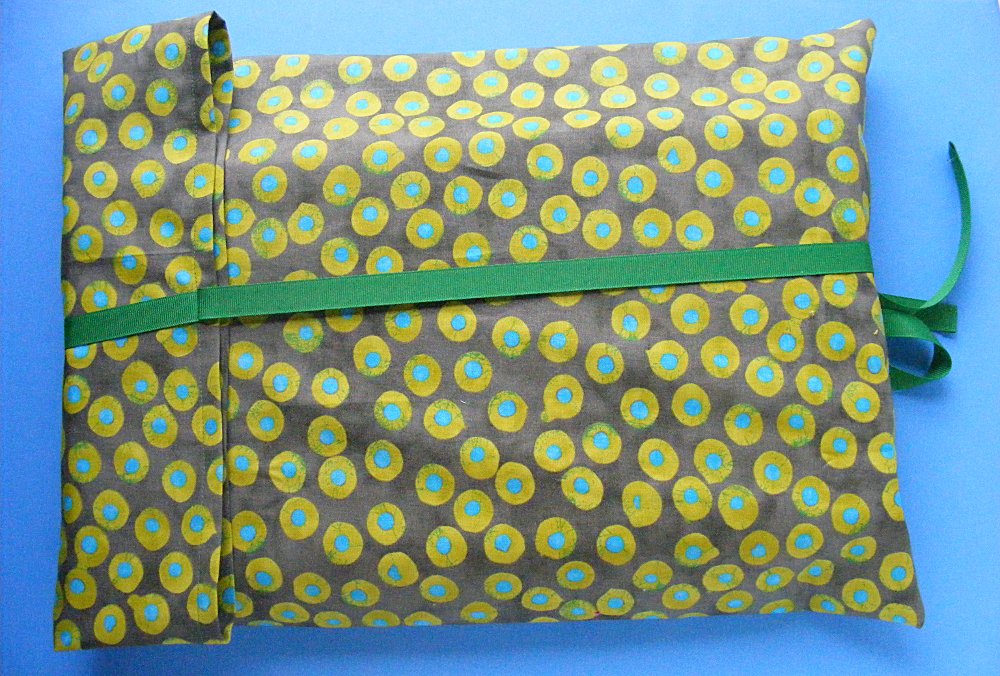
It’s one of my favorite posts every month – sharing what people are making with Shiny Happy World patterns! I love getting your photos!elephant_softie_pattern_Shiny_Happy_WorldFirst up are these cute elephant friends from Kris. Look how she made them hold hands for the photo! Awww! But wait – it gets better!

Elephant_softie_pattern_Shiny_Happy_worldShe made a fancy tutu for the pink elephant! So cute! She used the Napolean and Josephine pattern for the elephant – and the tutu pattern (with some really generous resizing) from the Flower Fairy pattern for the Dress Up Bunch. Read more about this Fairy Princess Elephant here.

dog_softie_pattern_pajamas_shiny_happy_worldLinda made a very cute Spot the dog in some awesome jammies. Look how perfect that fabric is! And look at that cute tail sticking out! You can find the Spot pattern here, and the pajamas pattern here.

monster_pencil_case_pattern_shiny_happy_worldRachel made these terrific pencil cases for her nieces. Didn’t she pick the best colors for them? So cute! The Gobbler pattern is a freebie for newsletter subscribers. You can get more info here.

snake_softie_pattern_Shiny_happy_worldVivienne made these snakes (and other creepy crawlies). She says. . .

I made some of your snakes. We like them so much I expanded to other bugs. They appeared in a play my girls did last week (from a book called “Wombat Stew”, with other home educating families). Thanks so much for your inspiration. I also used your tutorial on working with fun fur to make a costume (for my daughter to be a “platypus”) for the same play.

Fun! The snake pattern is free – and a real favorite. Get it here.

fat_cat_softie_pattern_shiny_happy_worldAnnette made this fabulous Franklin the Fat Cat. I think this is the first one I’ve seen in green and I love him! She writes. . .

I just finished making Franklin the Fat Cat. He is just the cutest ever! I plan to make many more for Christmas presents for my many grandkids. Thought you might like to see him.

So fantastic! He’s such an easy pattern – perfect for making in bunches for bunches of grandkids. 🙂 Get the pattern here.

And finally – go take a look at all the terrific projects coming in as part of the Finished Stitches Challenge! So many clever ideas for ways to use a bit of embroidery!

Want to be part of next month’s Show & Tell? Send me a photo of something you’ve made with a Shiny Happy World pattern! My email is blockhead[at]wendigratz[dot]com. I can’t wait to see what you’ve made!

Happy sewing!

Best,
Wendi

Applique Wendi (with fabulous hat)