So these are the new curtains I made for my studio. I love them! And I thought I’d show you how to make them. They’re so easy.
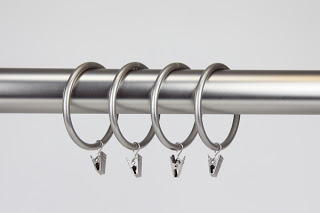
I’m pretty particular about curtains. I hate the ones that actually block light. 🙂 I’ve made lined curtains once – for Jo’s nursery when she was a baby. They were total blackout curtains and they were totally unnecessary. I love natural light and the only reason I have curtains is to block glare. So I like curtains that are light colored, not too heavy, and that open and close really easily. I do not like curtains that have the rod threaded through a pocket at the top. They are difficult to slide open and closed – and they never seem to open all the way. I love rings like this.
They slide really easily over the curtain rod. And because they clip on – really all you have to do is make a large rectangle. Easy peasy.
First – you need to measure the inside dimensions of your window and figure out how wide you want the contrasting band at the bottom. Mine is 5 inches, but you might need to adjust that to be proportional to your window.
Now calculate the size of your pieces.
For the main part of the curtain, make it roughly 1 1/2 times the width of the window. My window is 3 feet across and my fabric was 45 inches – close enough!
Calculate the length of the main piece. It should be the inside height of the window – 5 inches (for the lower band) + 1/2 inch for the seam allowance where the main part joins the bottom band + 1 inch for the top hem.
For the bottom band, it should be the same width as the main piece. The height should be twice the height of the finished band + 1 inch for the seam allowance where it joins the main piece.
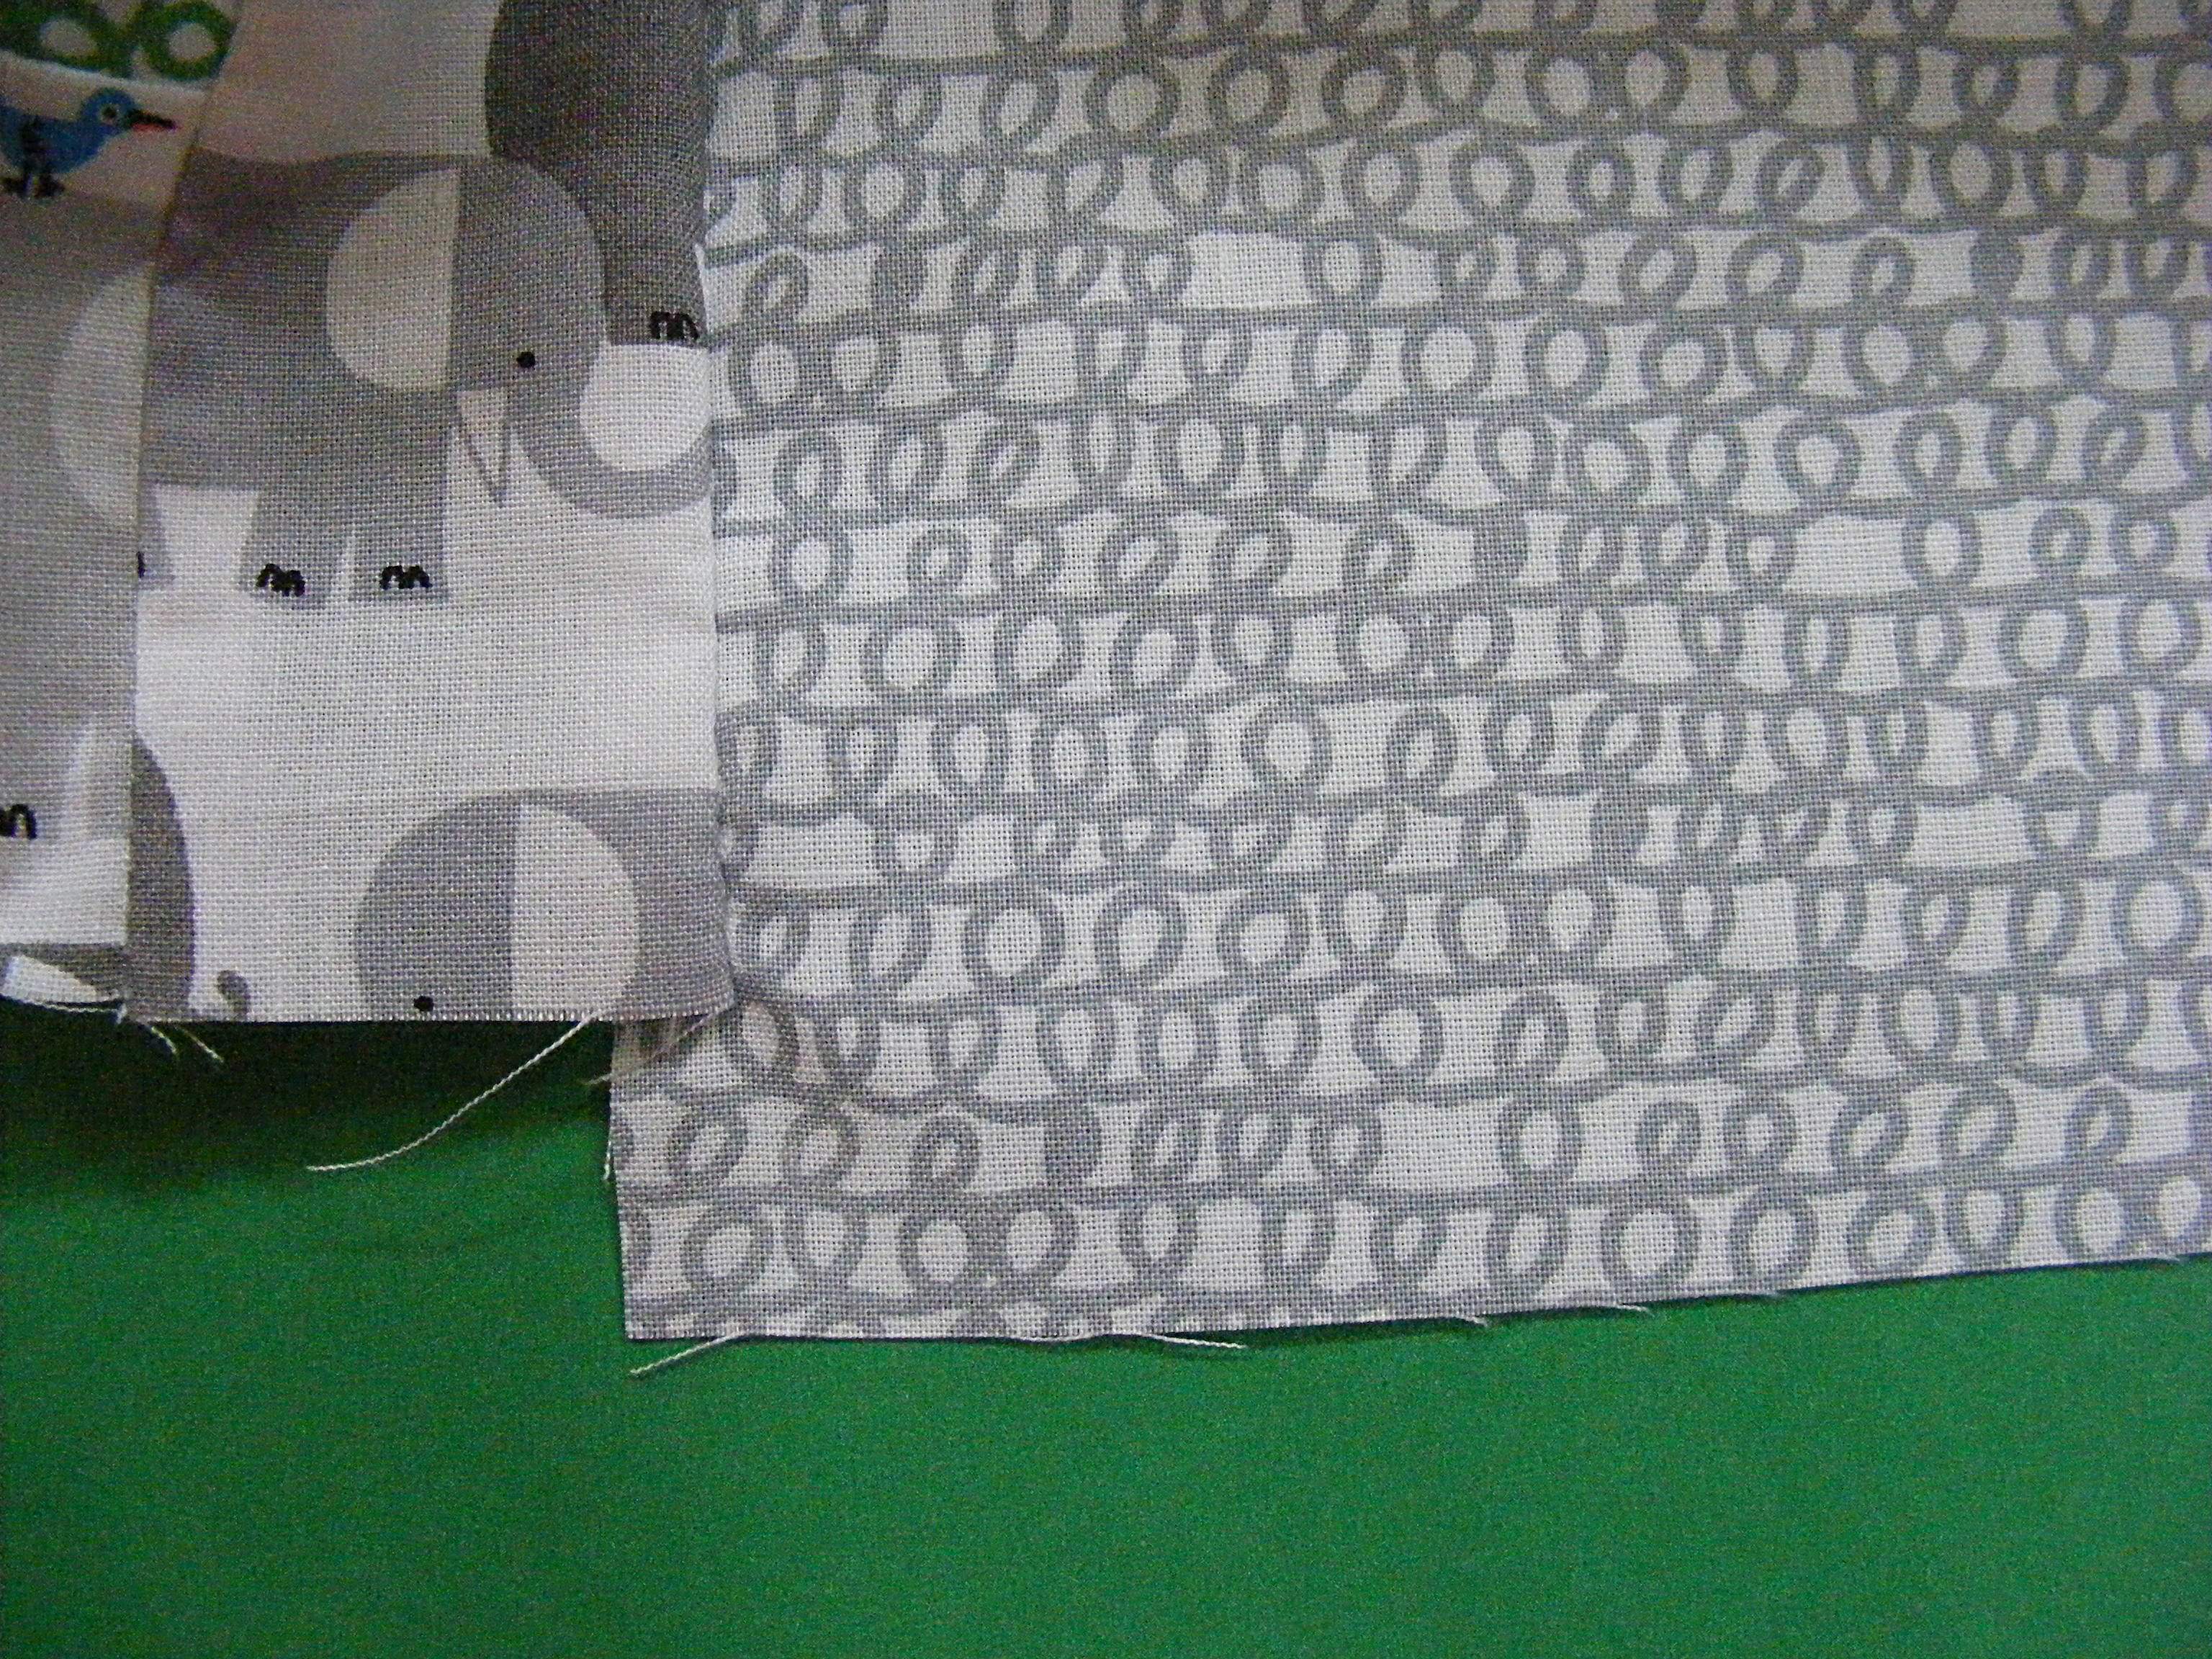
One more note. . . most people would want to cut off the selvedge edges and hem the sides. I happen to love selvedges – especially when they’re this cute. (I love this collection!)
Update – a couple of people have asked and you can still get the Happy Drawing fabric here. There are also lots of Etsy shops that still have it in stock too.
🙂 Plus I think it’s totally ok for the curtains in my sewing room to have visible selvedges. But if you want finished sides – do that now.
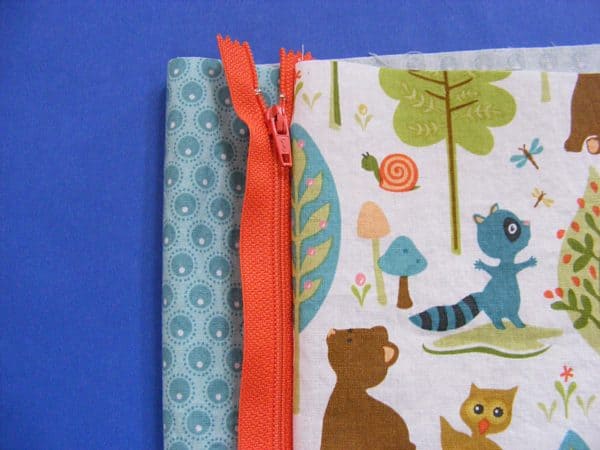
Ready? Time to put it all together.
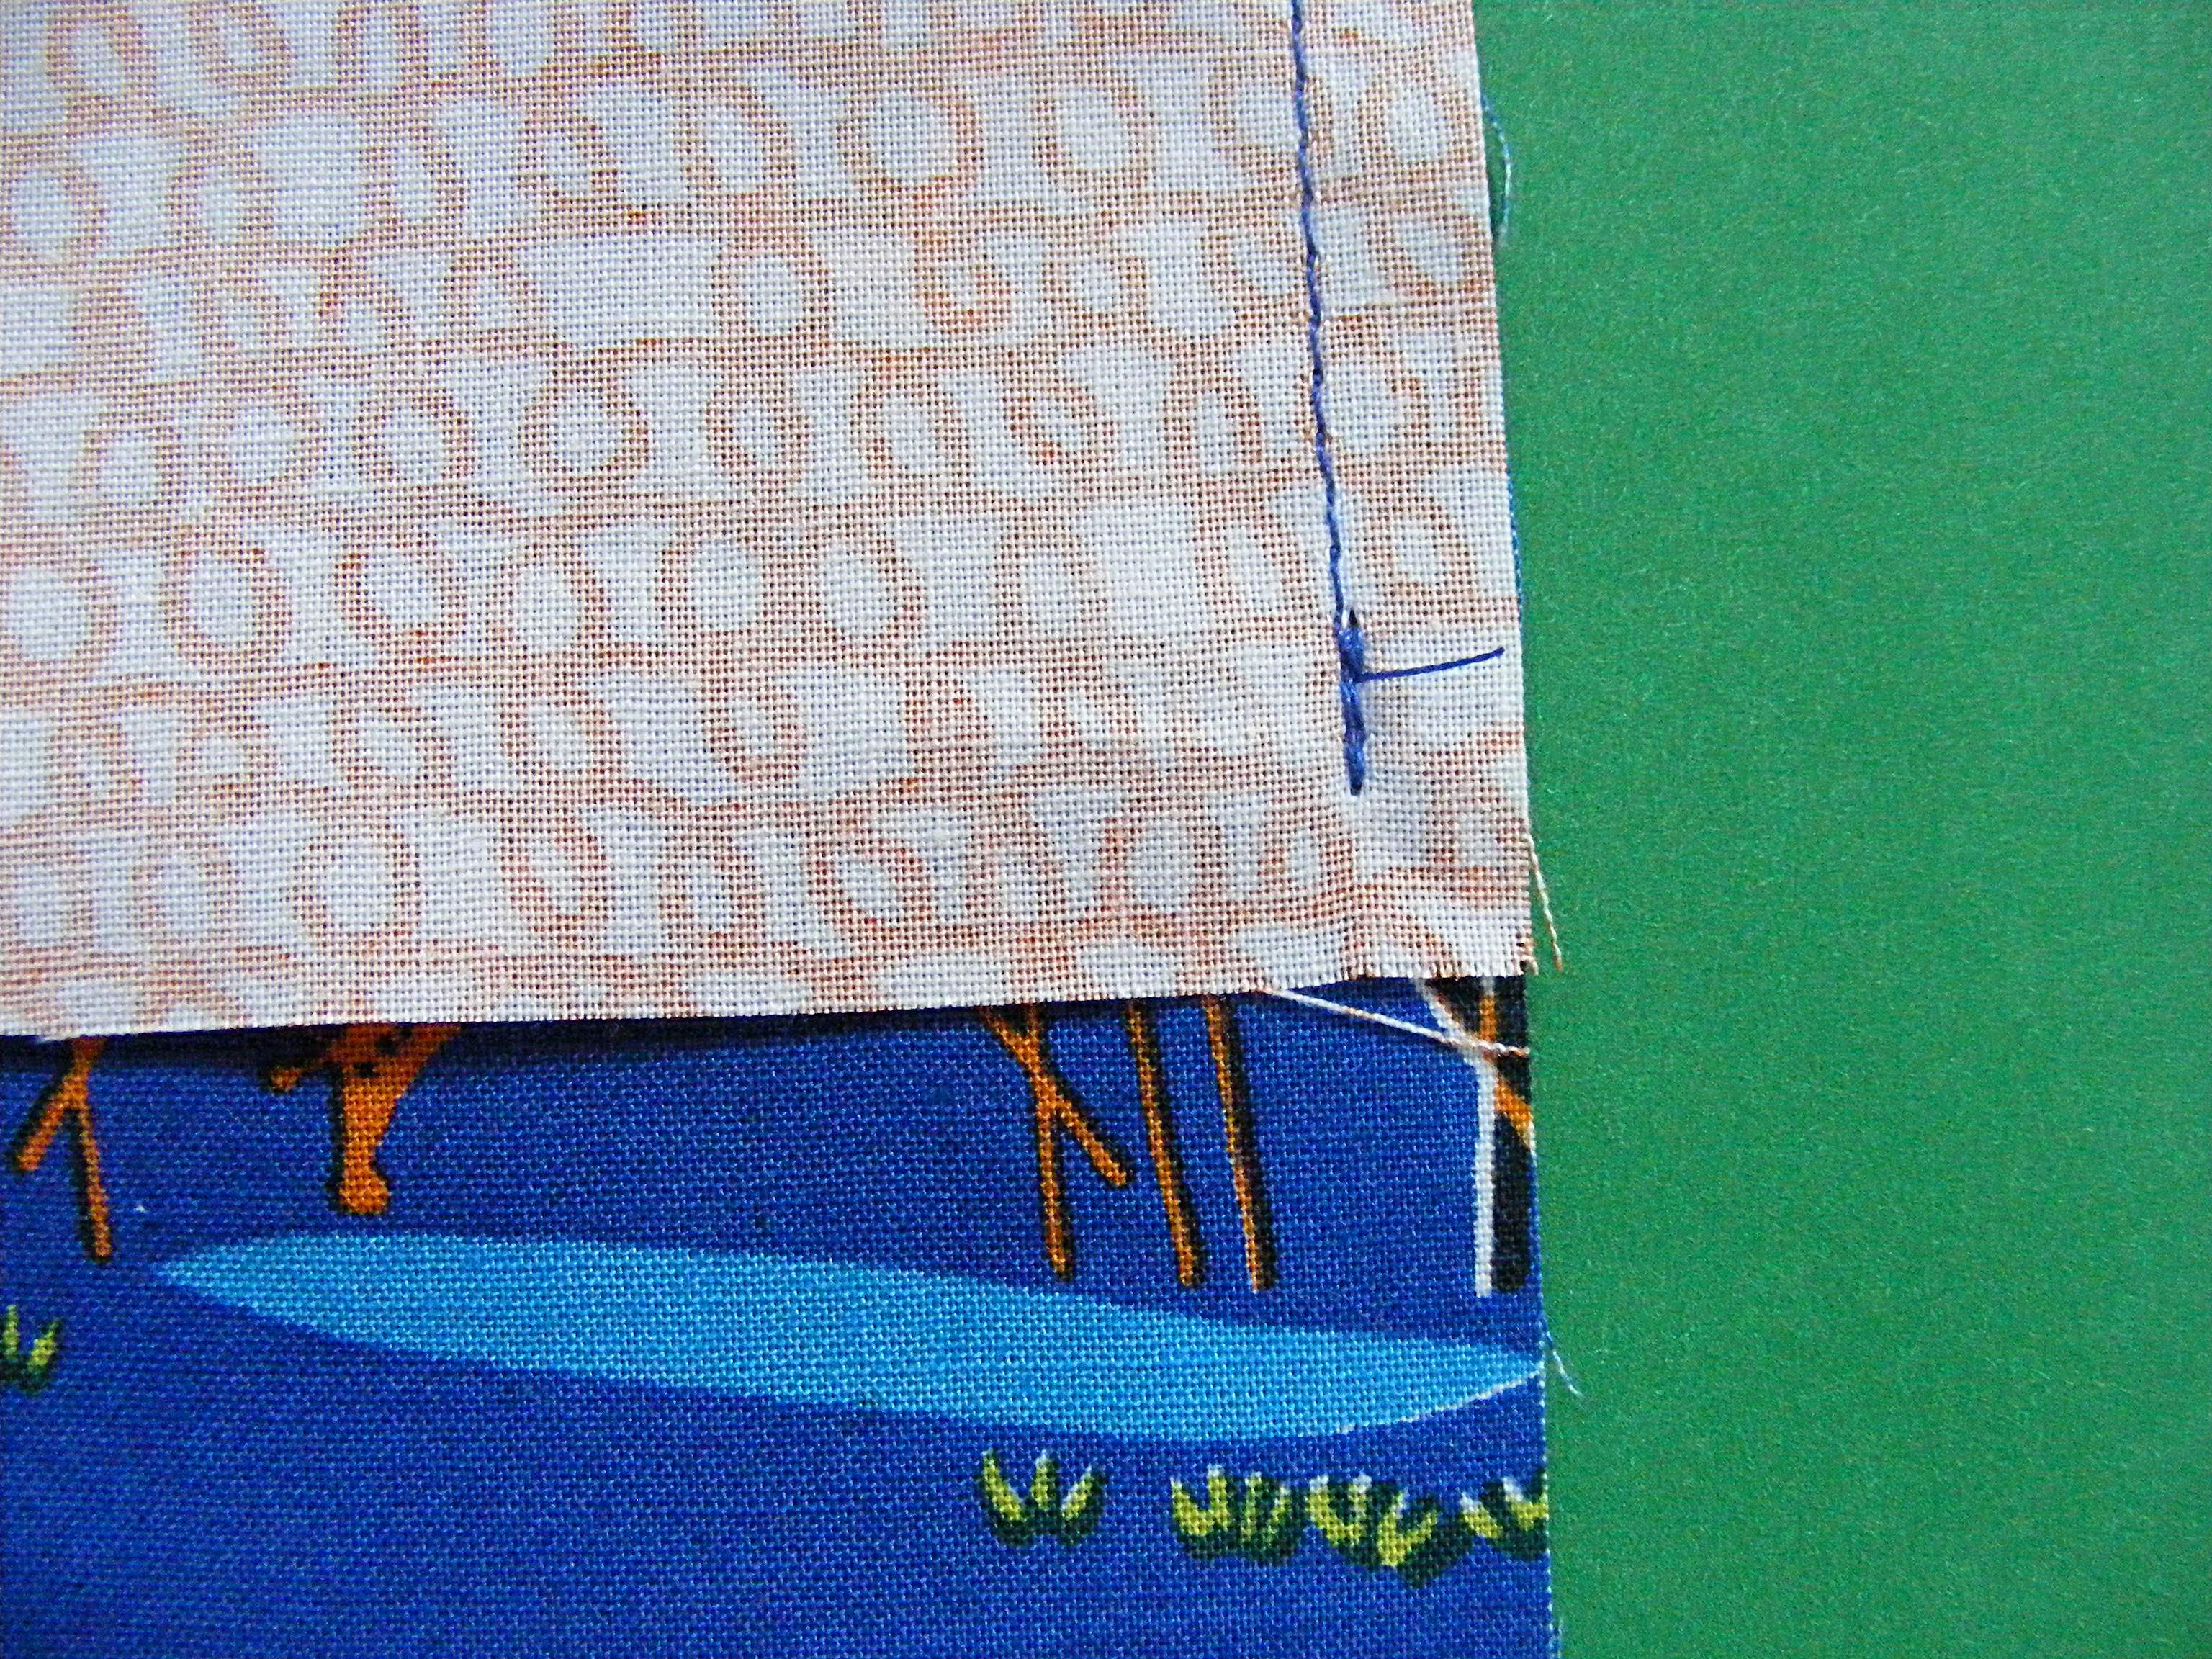
Turn the top edge down 1/2 inch and press. Now turn it down another 1/2 inch and press again. Stitch the top hem in place.
Fold the bottom band in half the long way and press a nice crease in it.
Sew the top edge of the band to the bottom edge of the curtain using 1/2 inch seam allowance. Press the seam allowance towards the contrasting band.
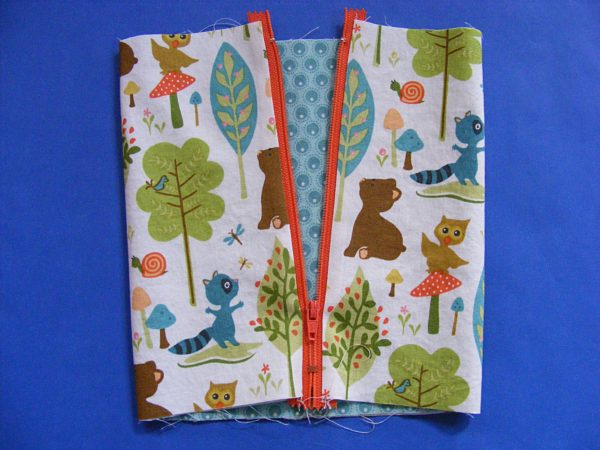
Now turn under 3/8 inch on the other end of the band and press.
That way, when you refold the band in half along that center crease line, the bottom fold comes just a smidge past the seam joining the main curtain to the contrasting band. Like this.
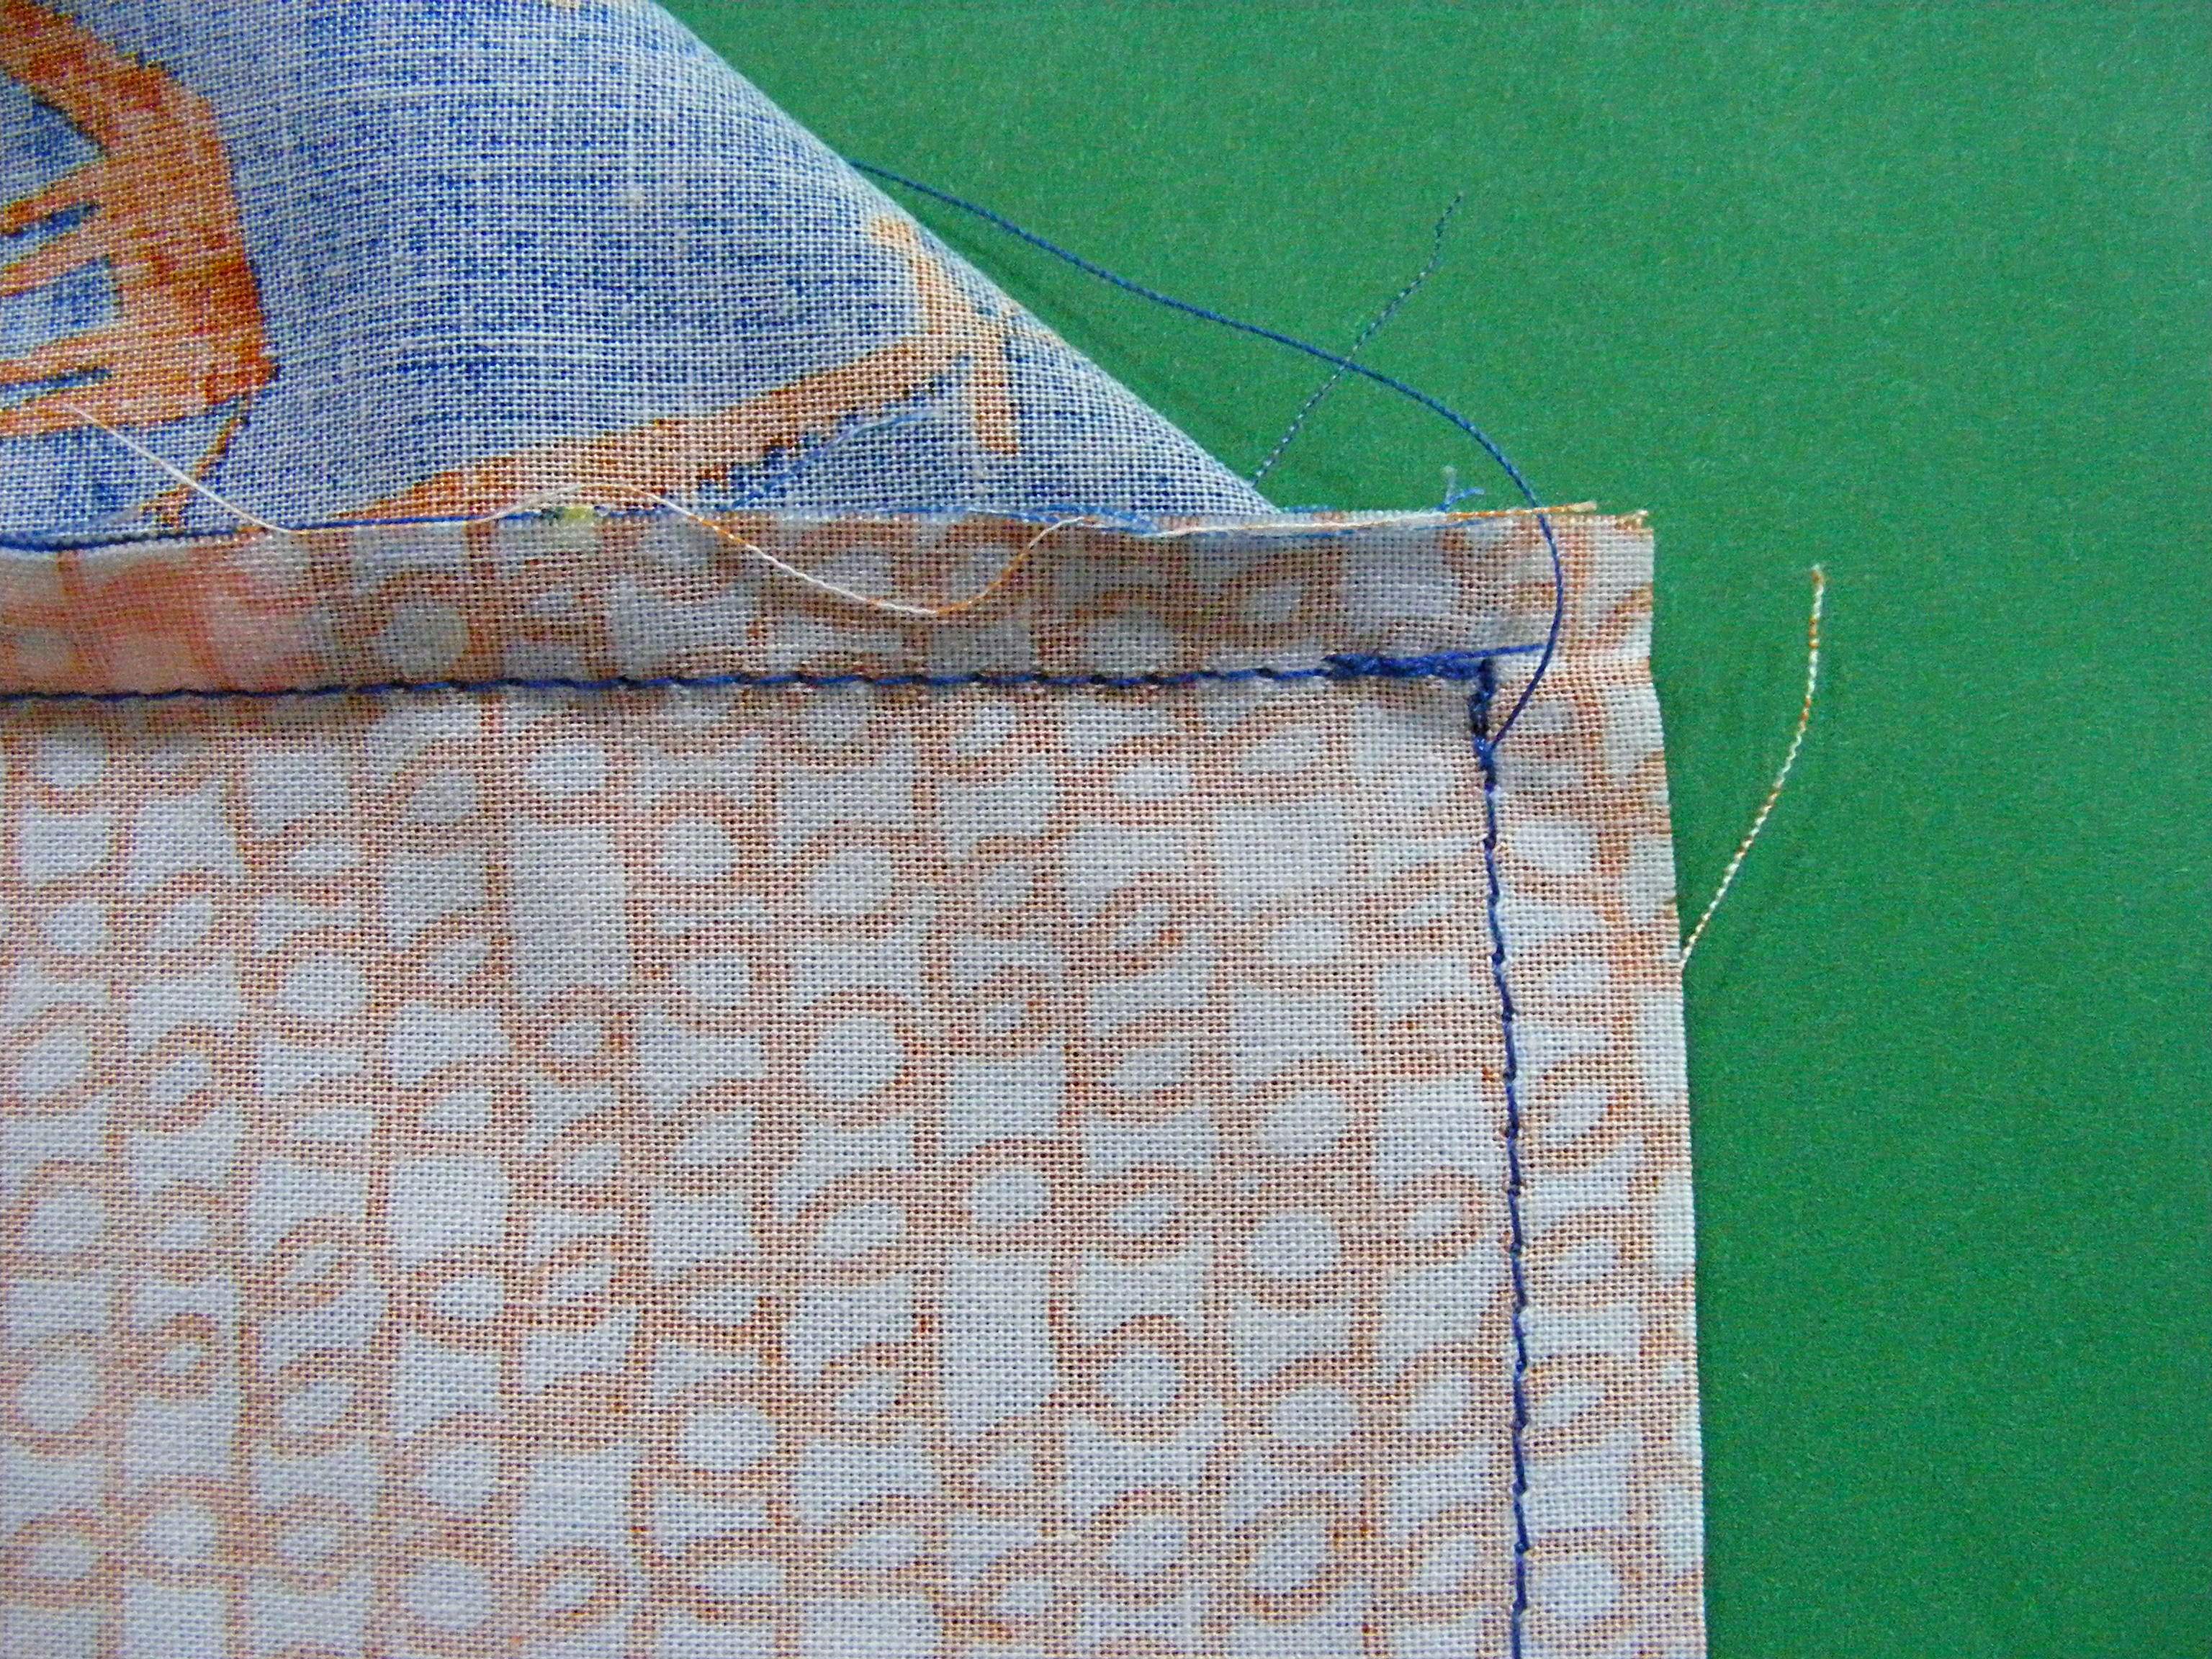
Now pin it in place. Flip the whole thing over and stitch right over the seam line joining the main curtain to the contrasting band. That’s called stitching in the ditch.
And here’s what it looks like from the back.
And see? All the seam allowance messiness is buried – hidden in the folded bottom band. Neat!
Give the whole thing one more good pressing and clip it to your curtain rings. Done!
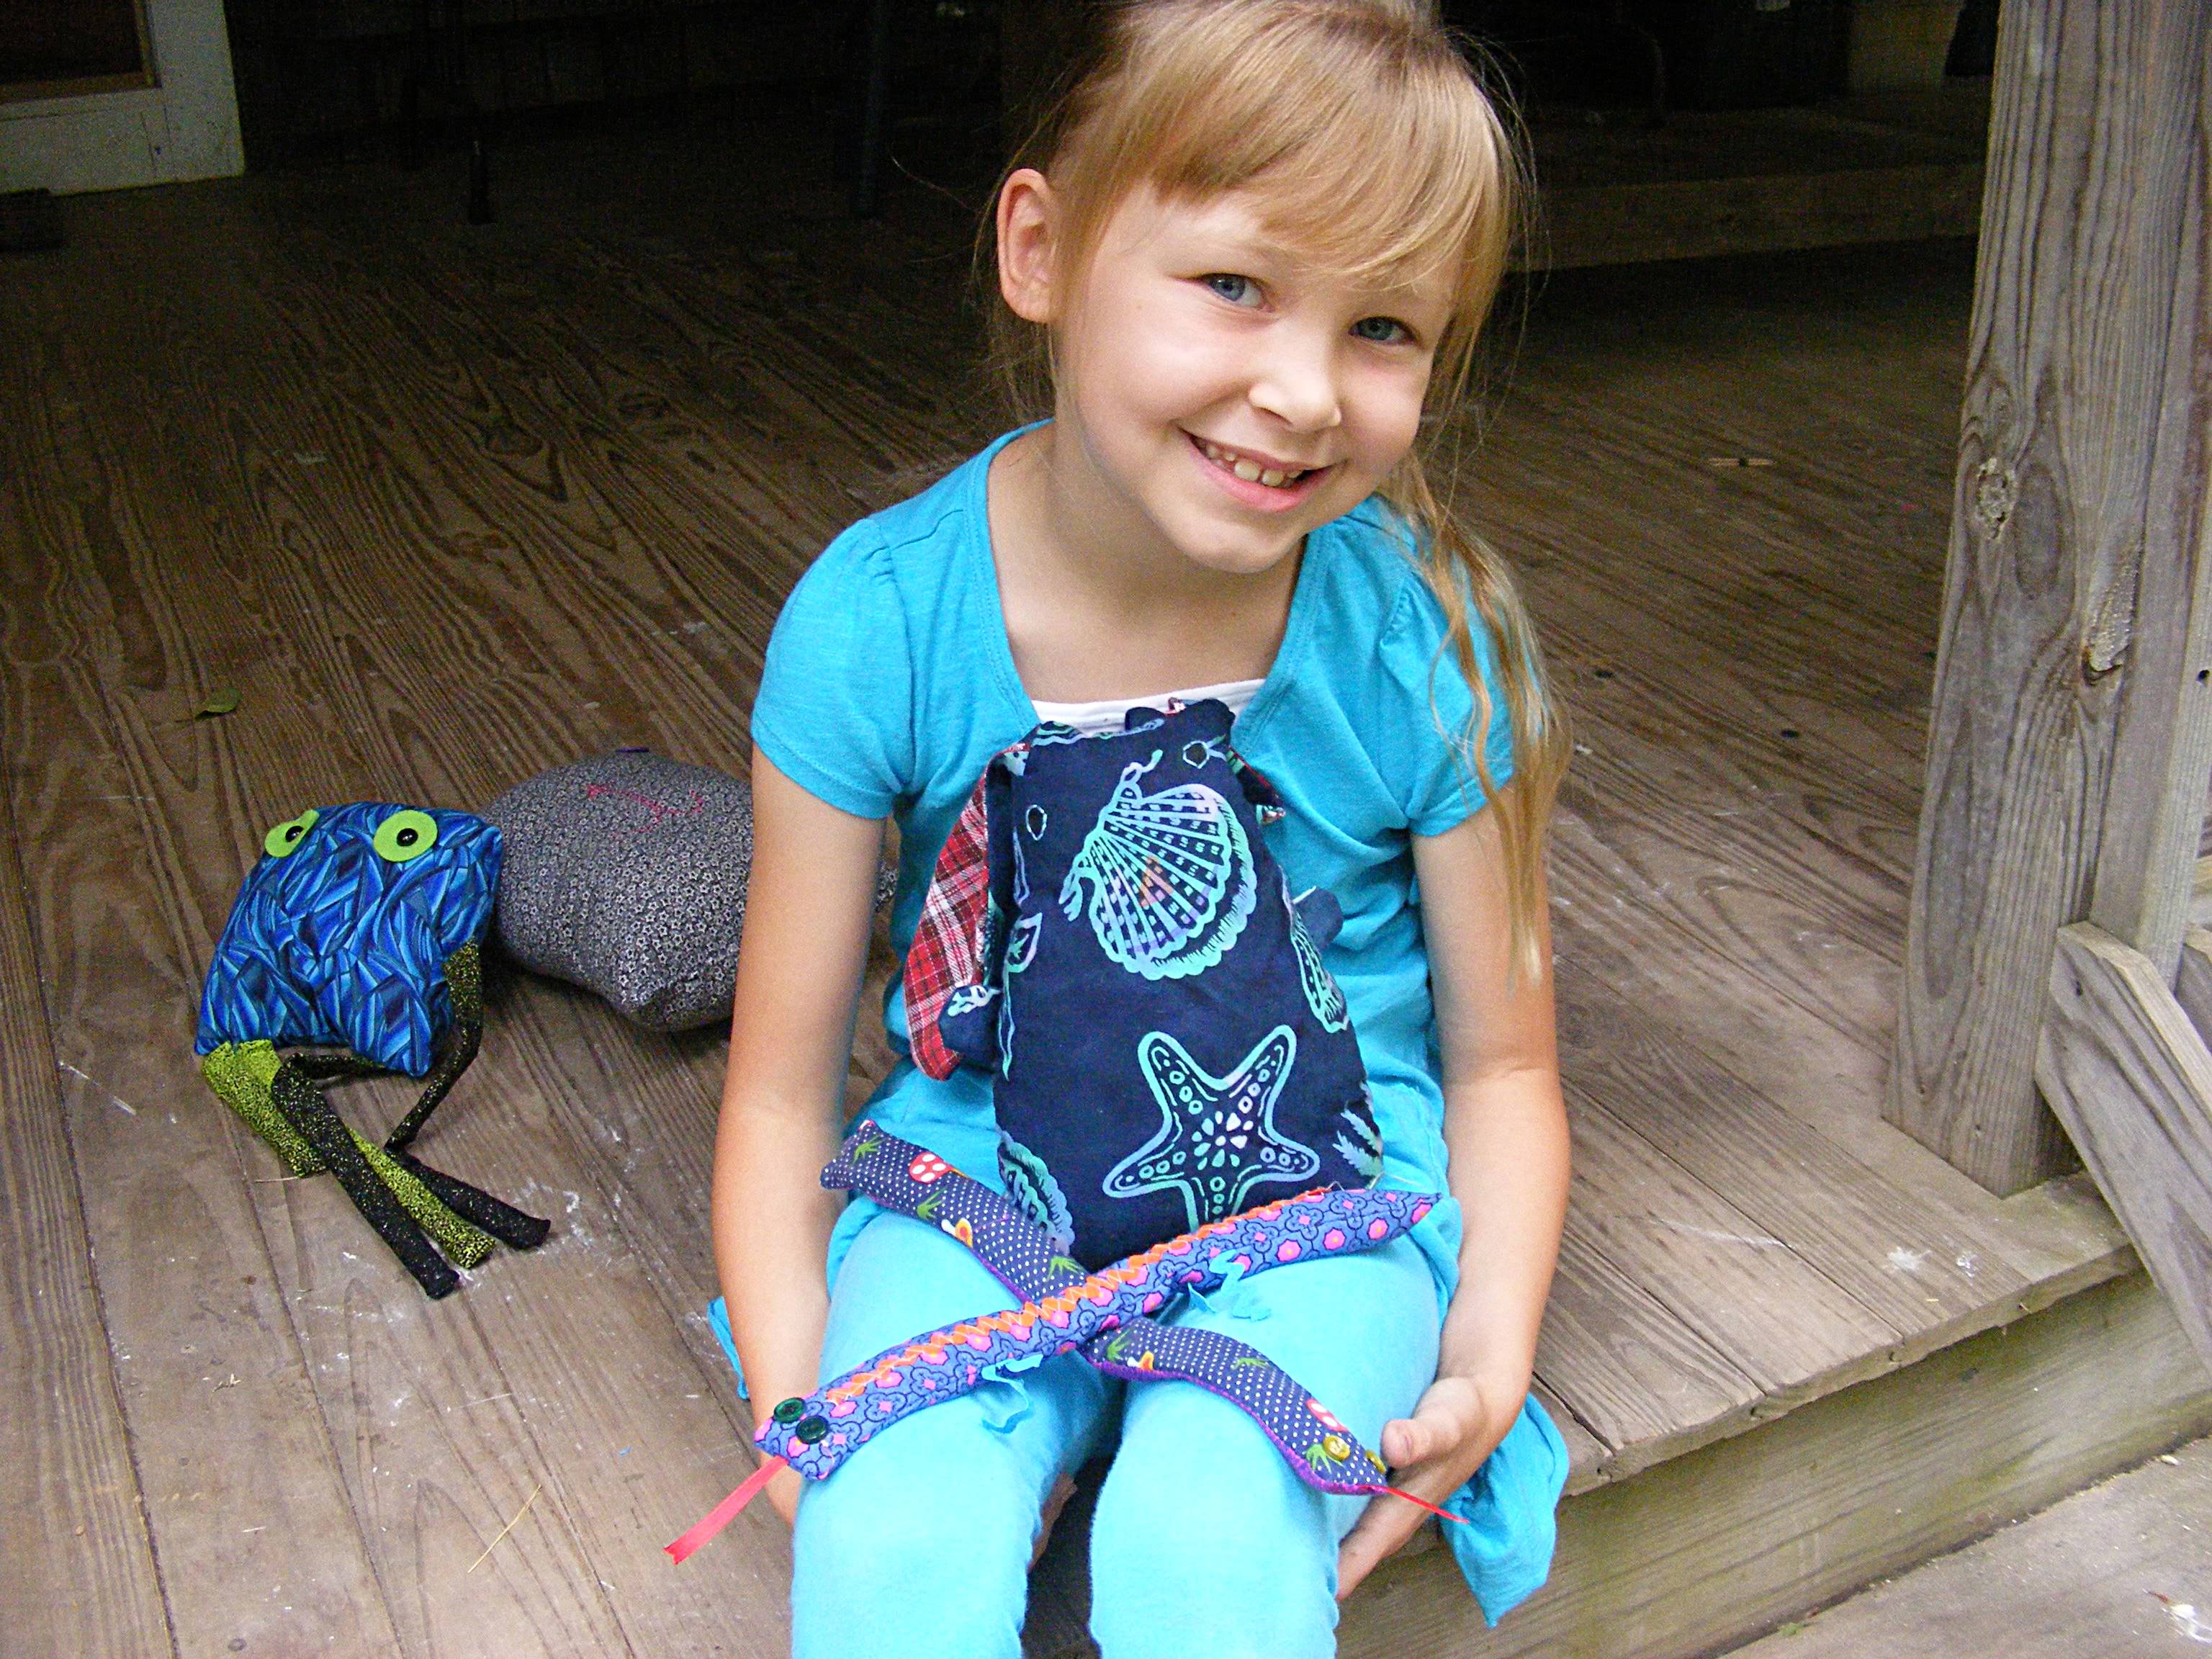
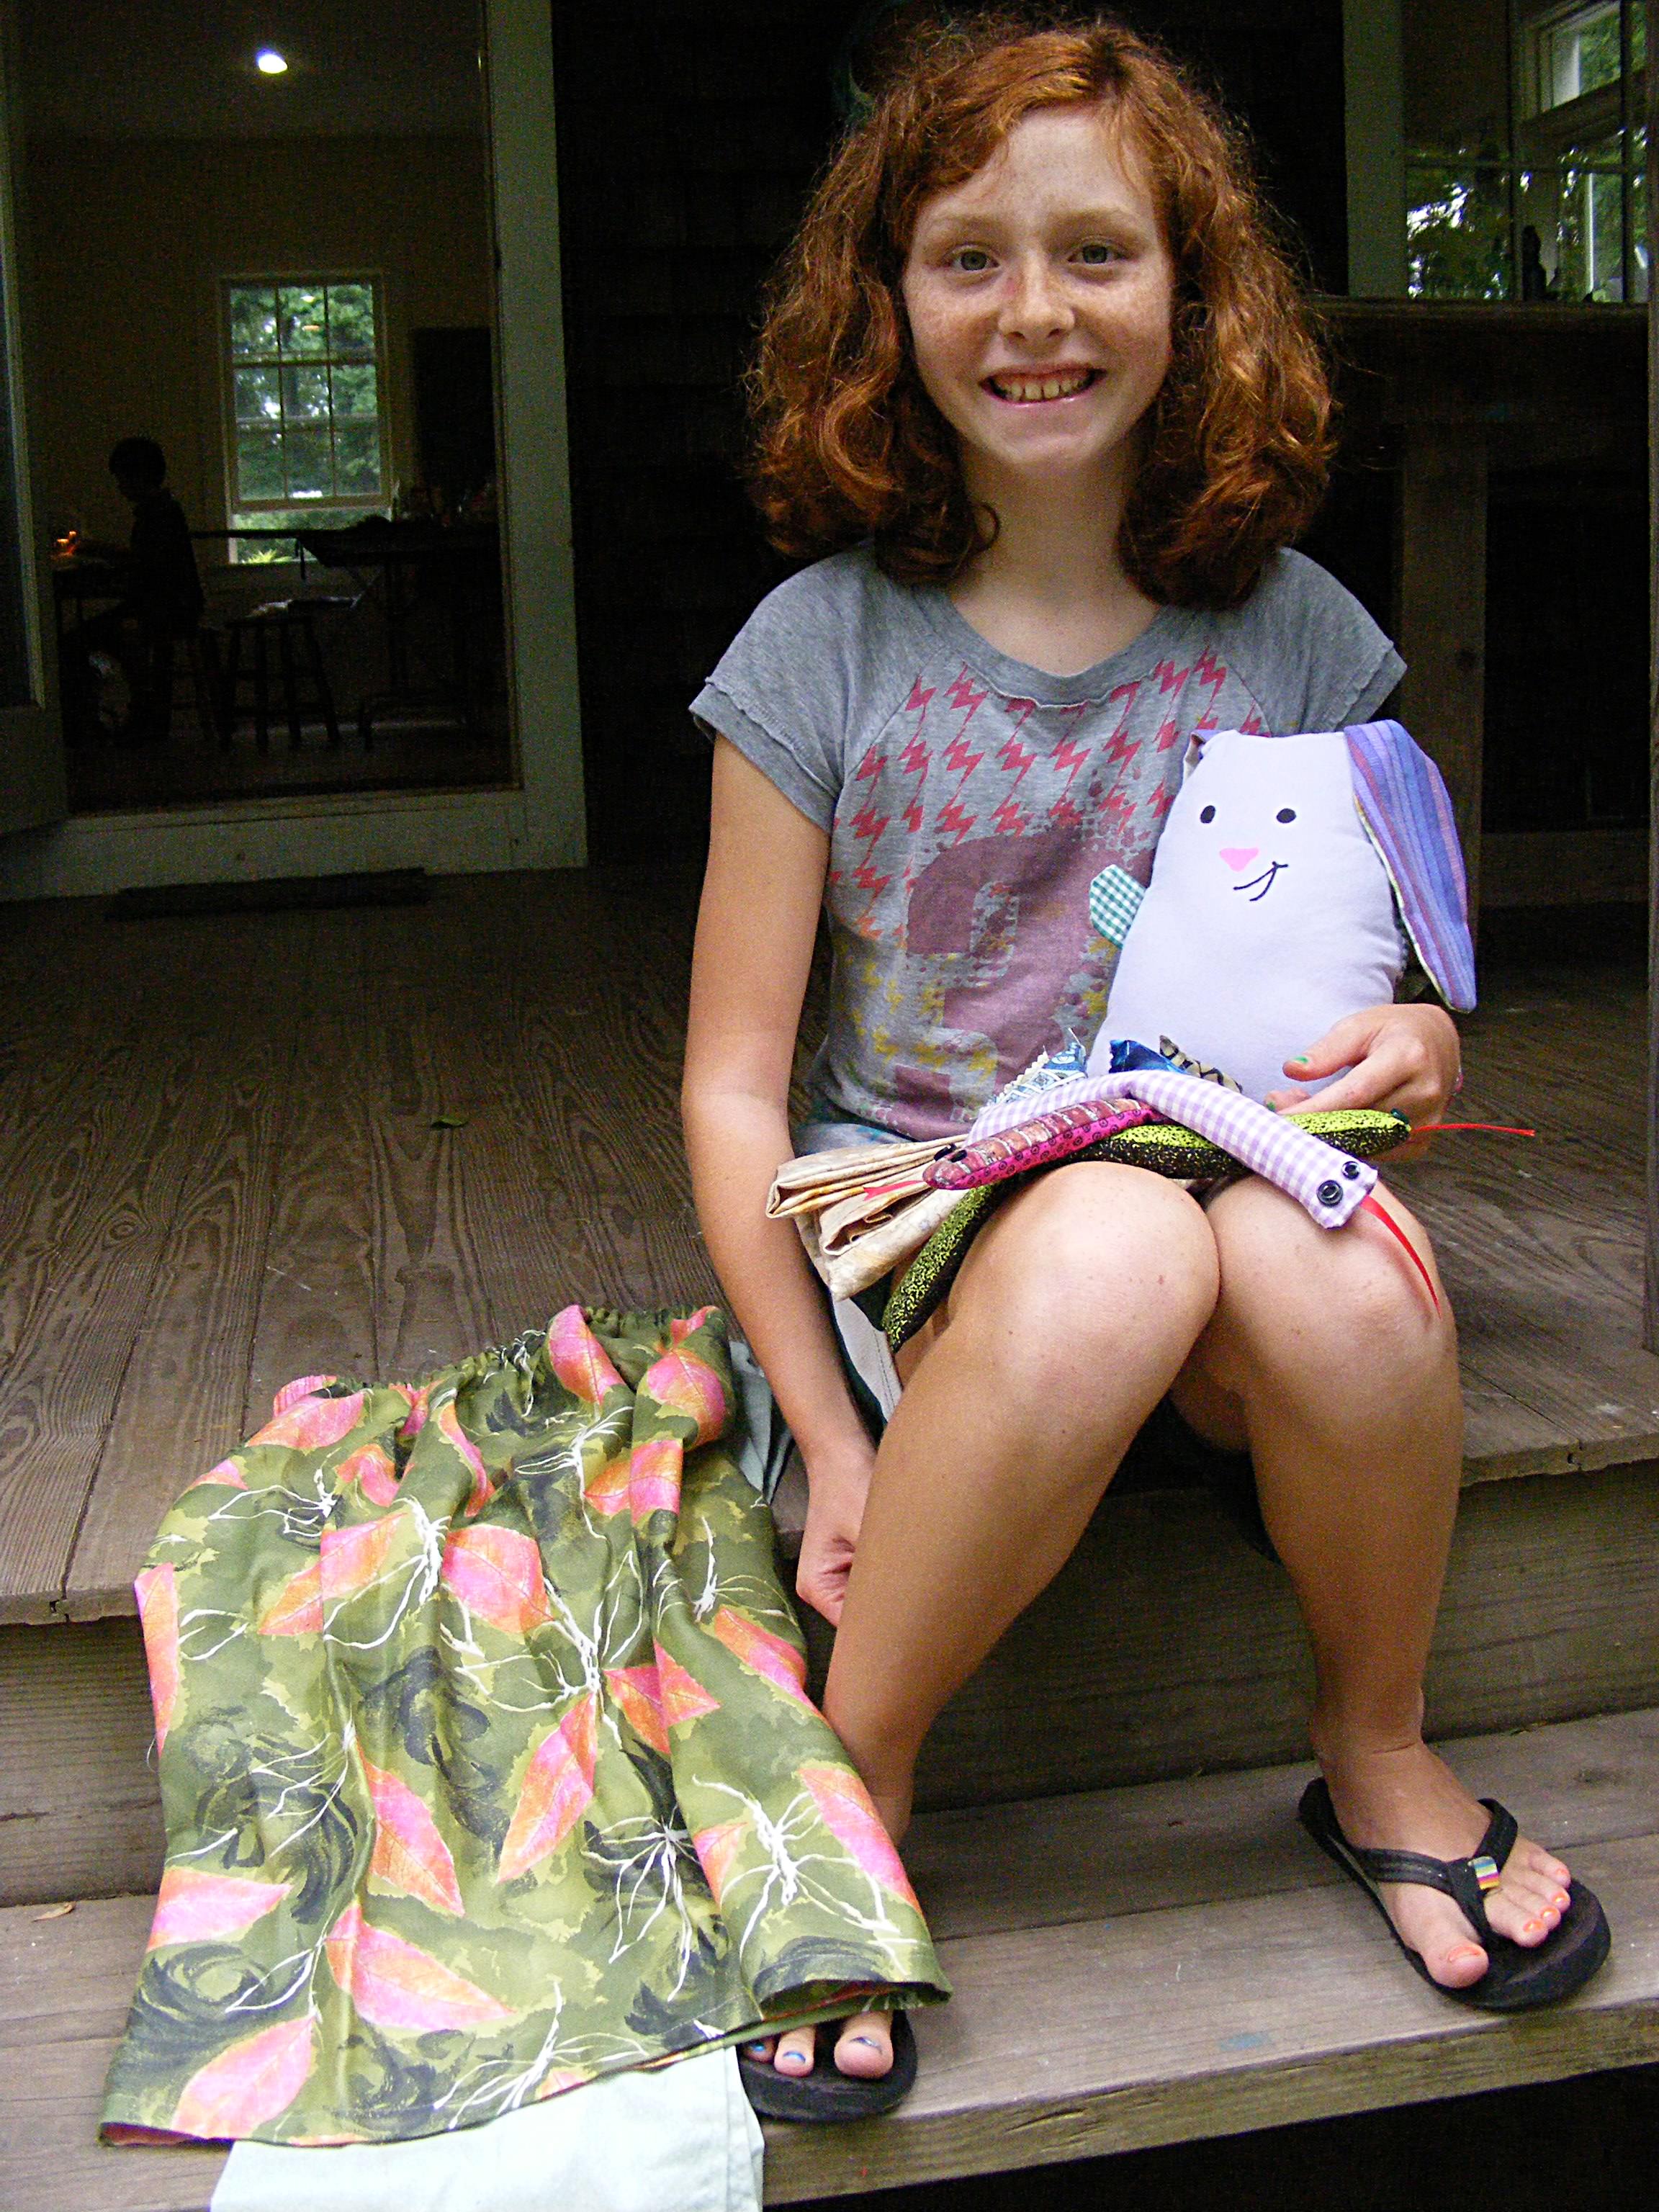
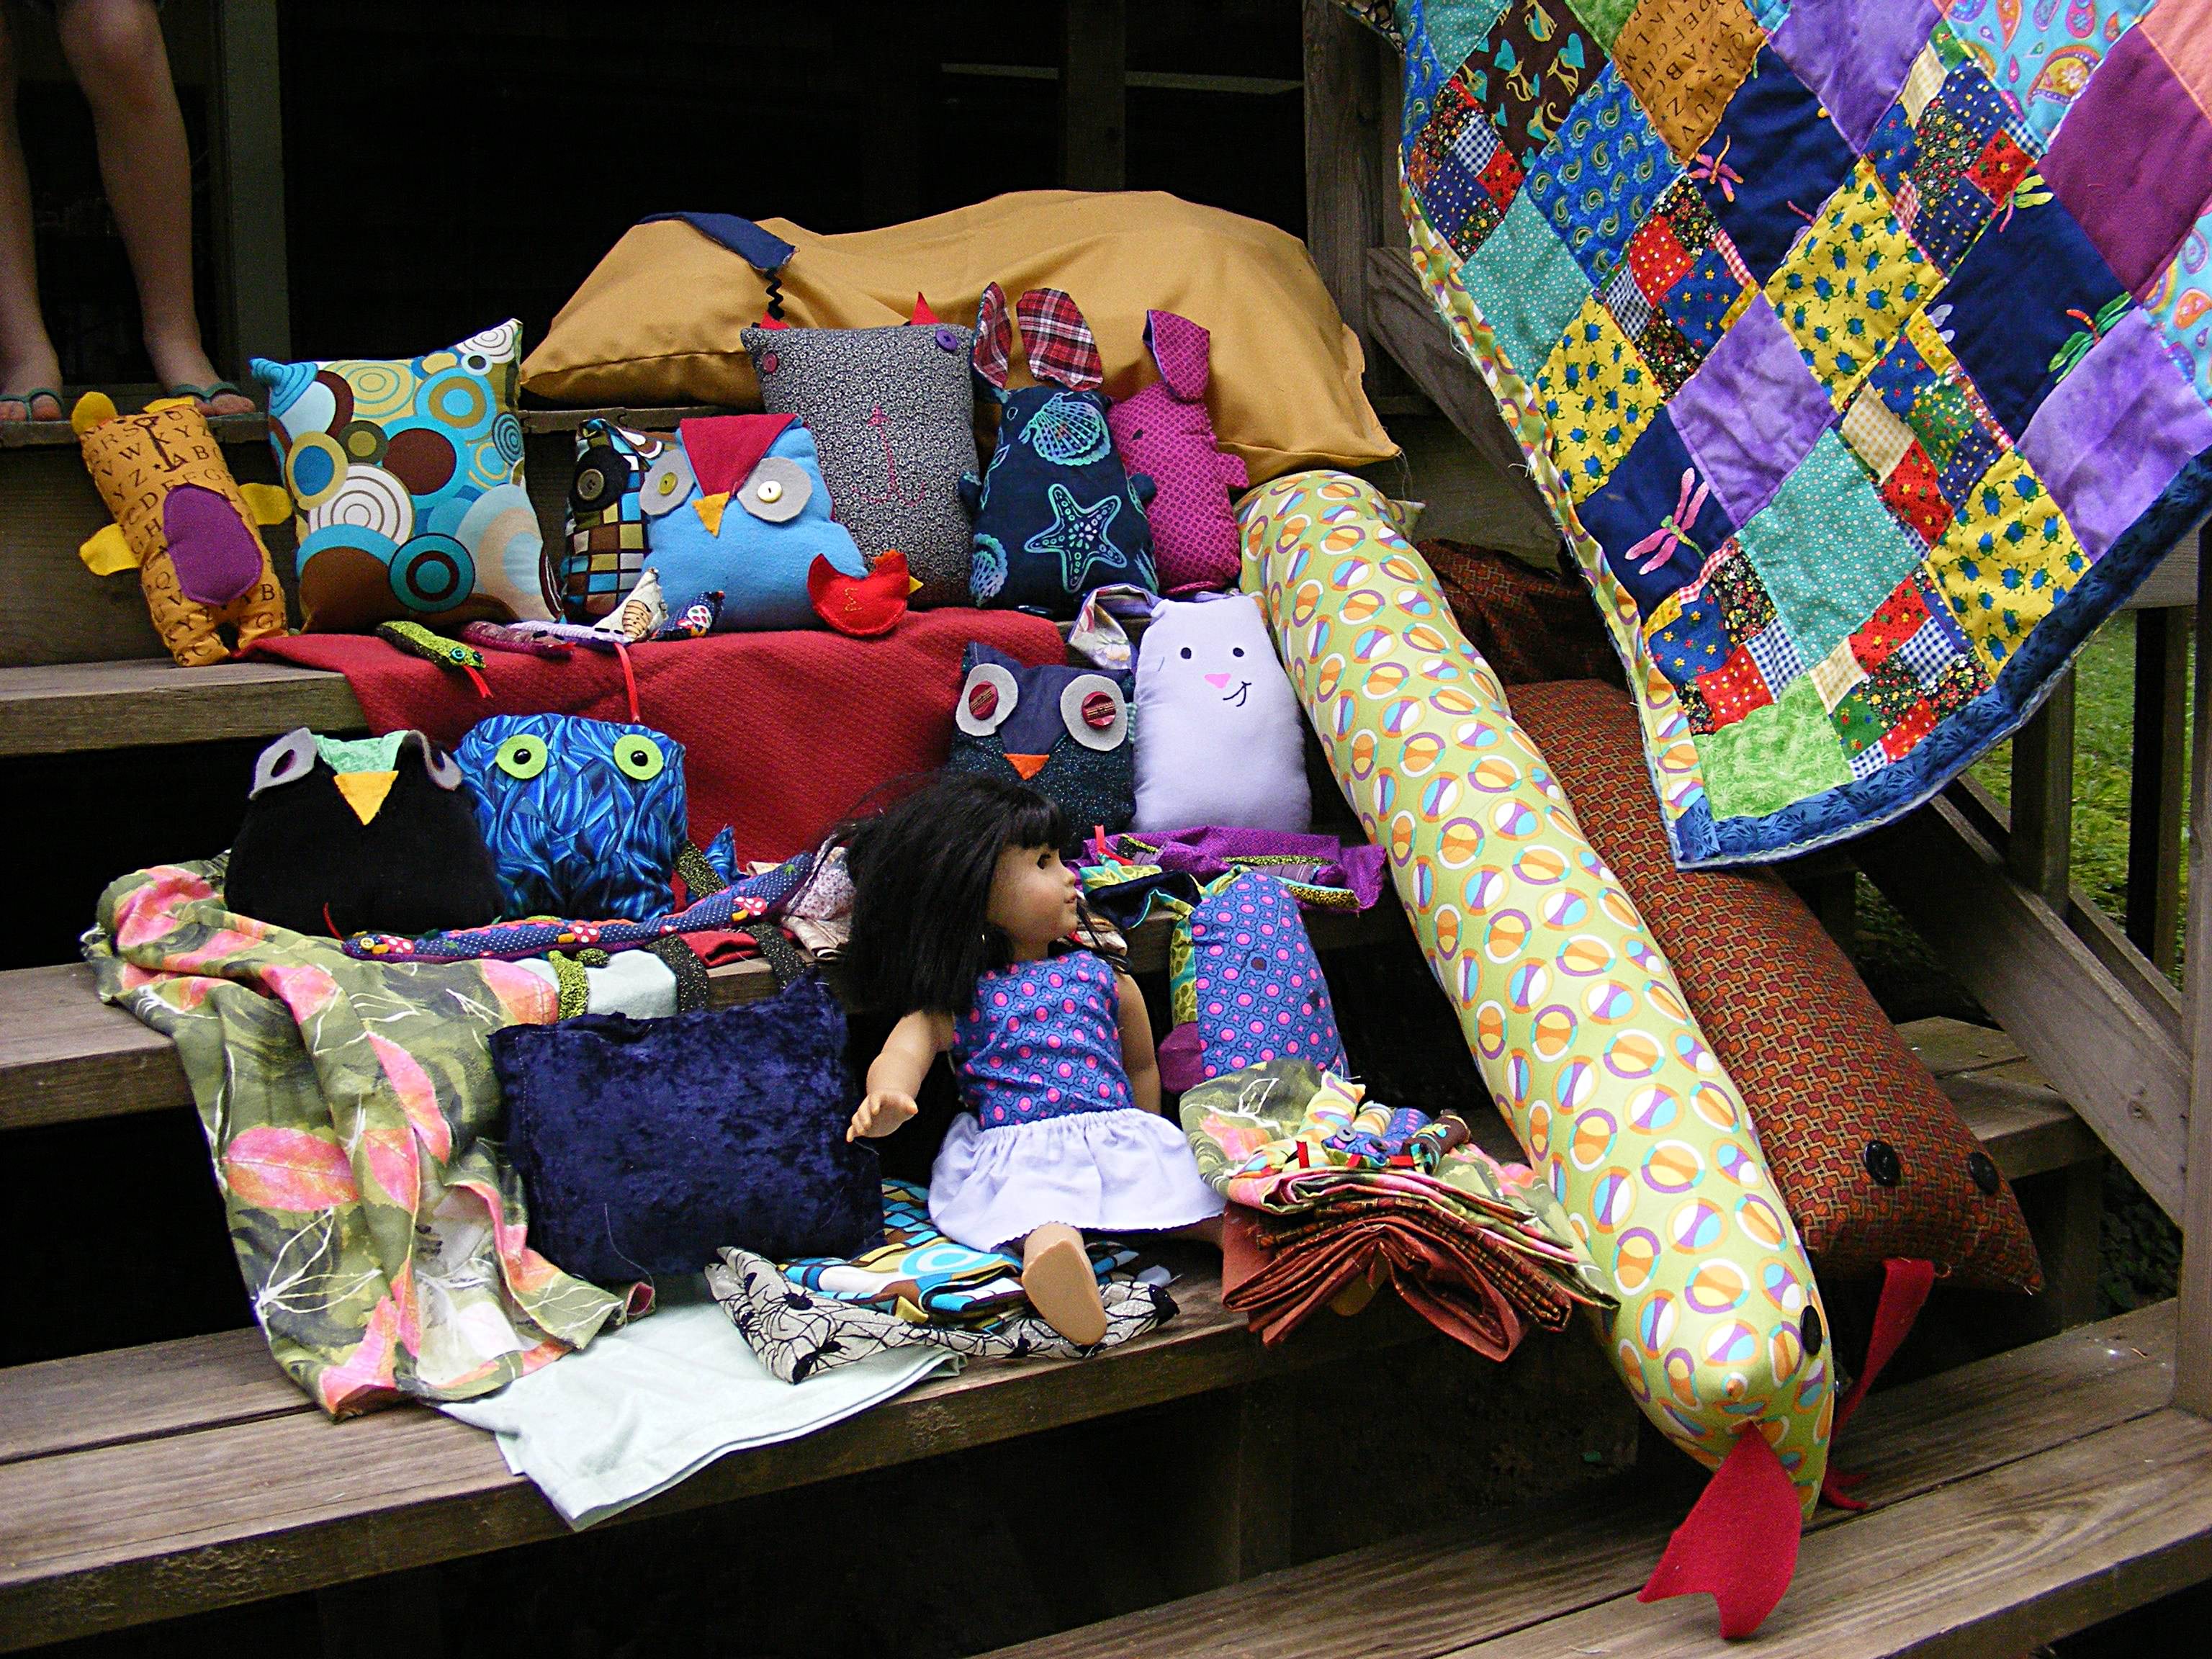
Sewing Camp last week was a huge success. I’m so glad I brought my camera and made time to snap some photos on the last day. Look at the fabulous things they made. . .
A cute bunny and some snakes in her lap – but don’t miss the silly monster on the floor near her. And that grey pillow is actually a cat pillow.
Another bunny, some snakes, a couple of skirts, a pillowcase, and some beanbags. Busy!
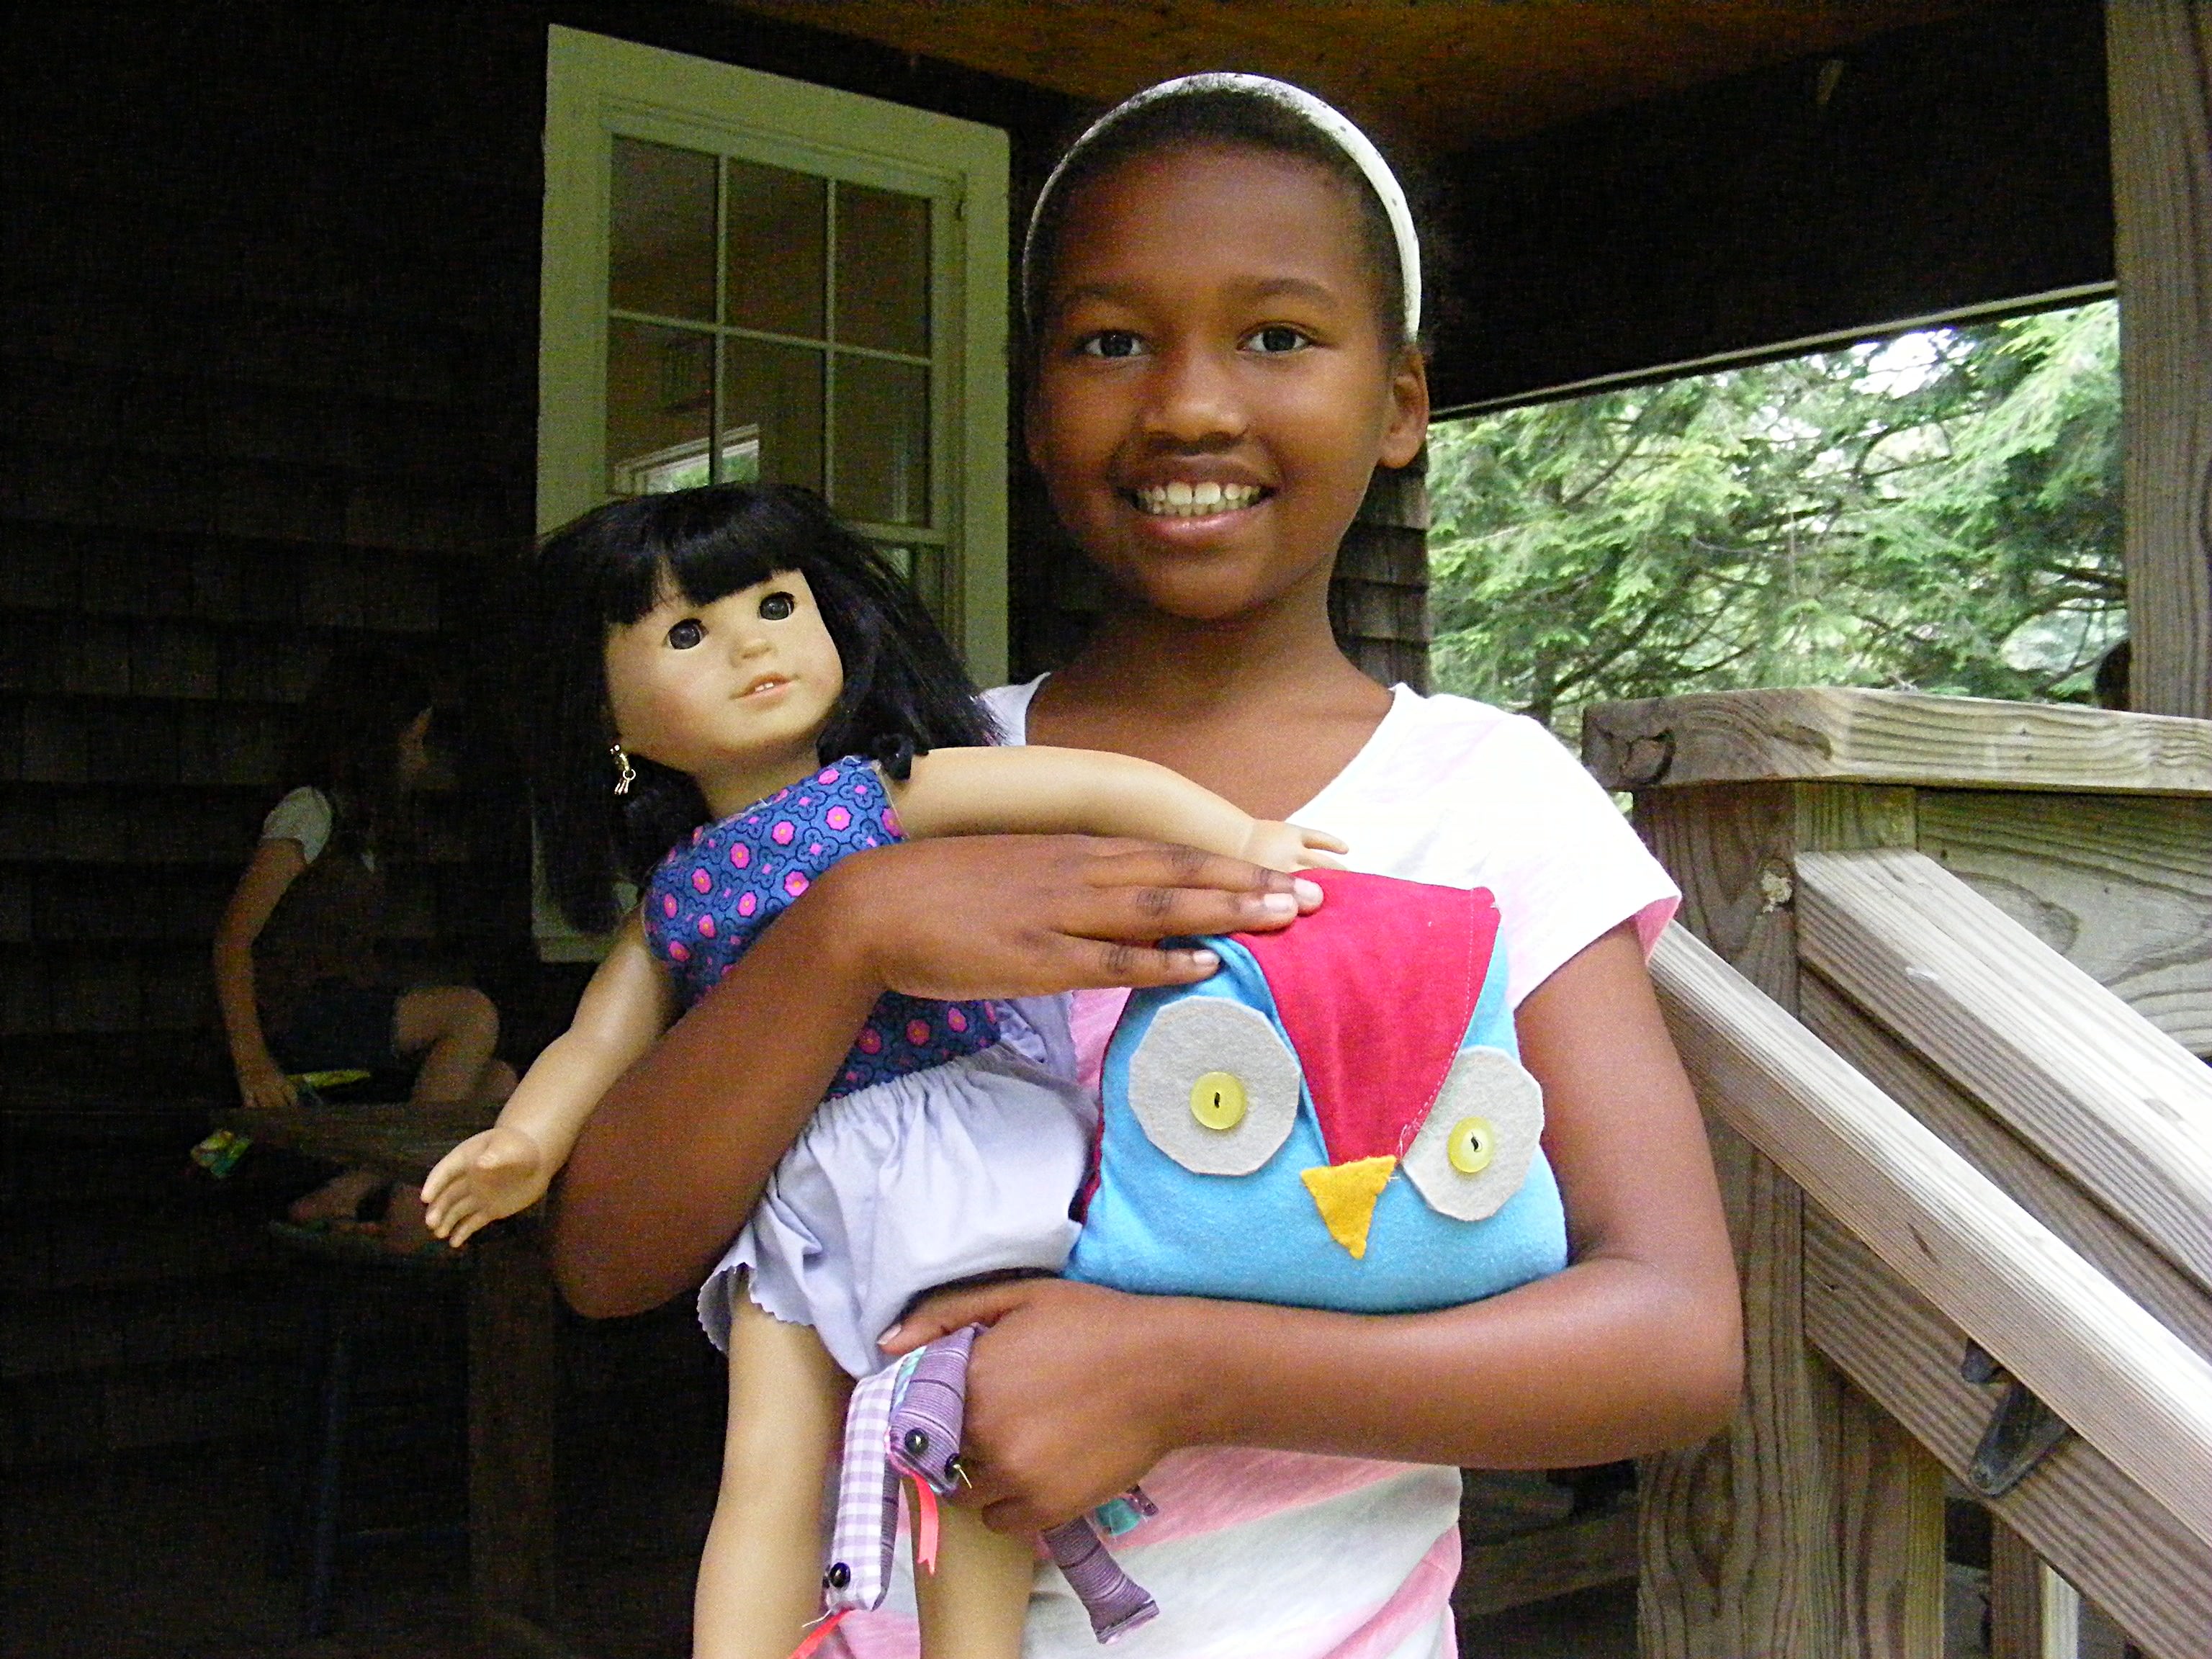
Some doll clothes, an owl, and more snakes!
More softies! She made a bunch of snakes and a few pillowcases too.
She wanted to make things for her pets, so that’s a dog bed and a cat toy.
That quilt. That wonderful quilt!
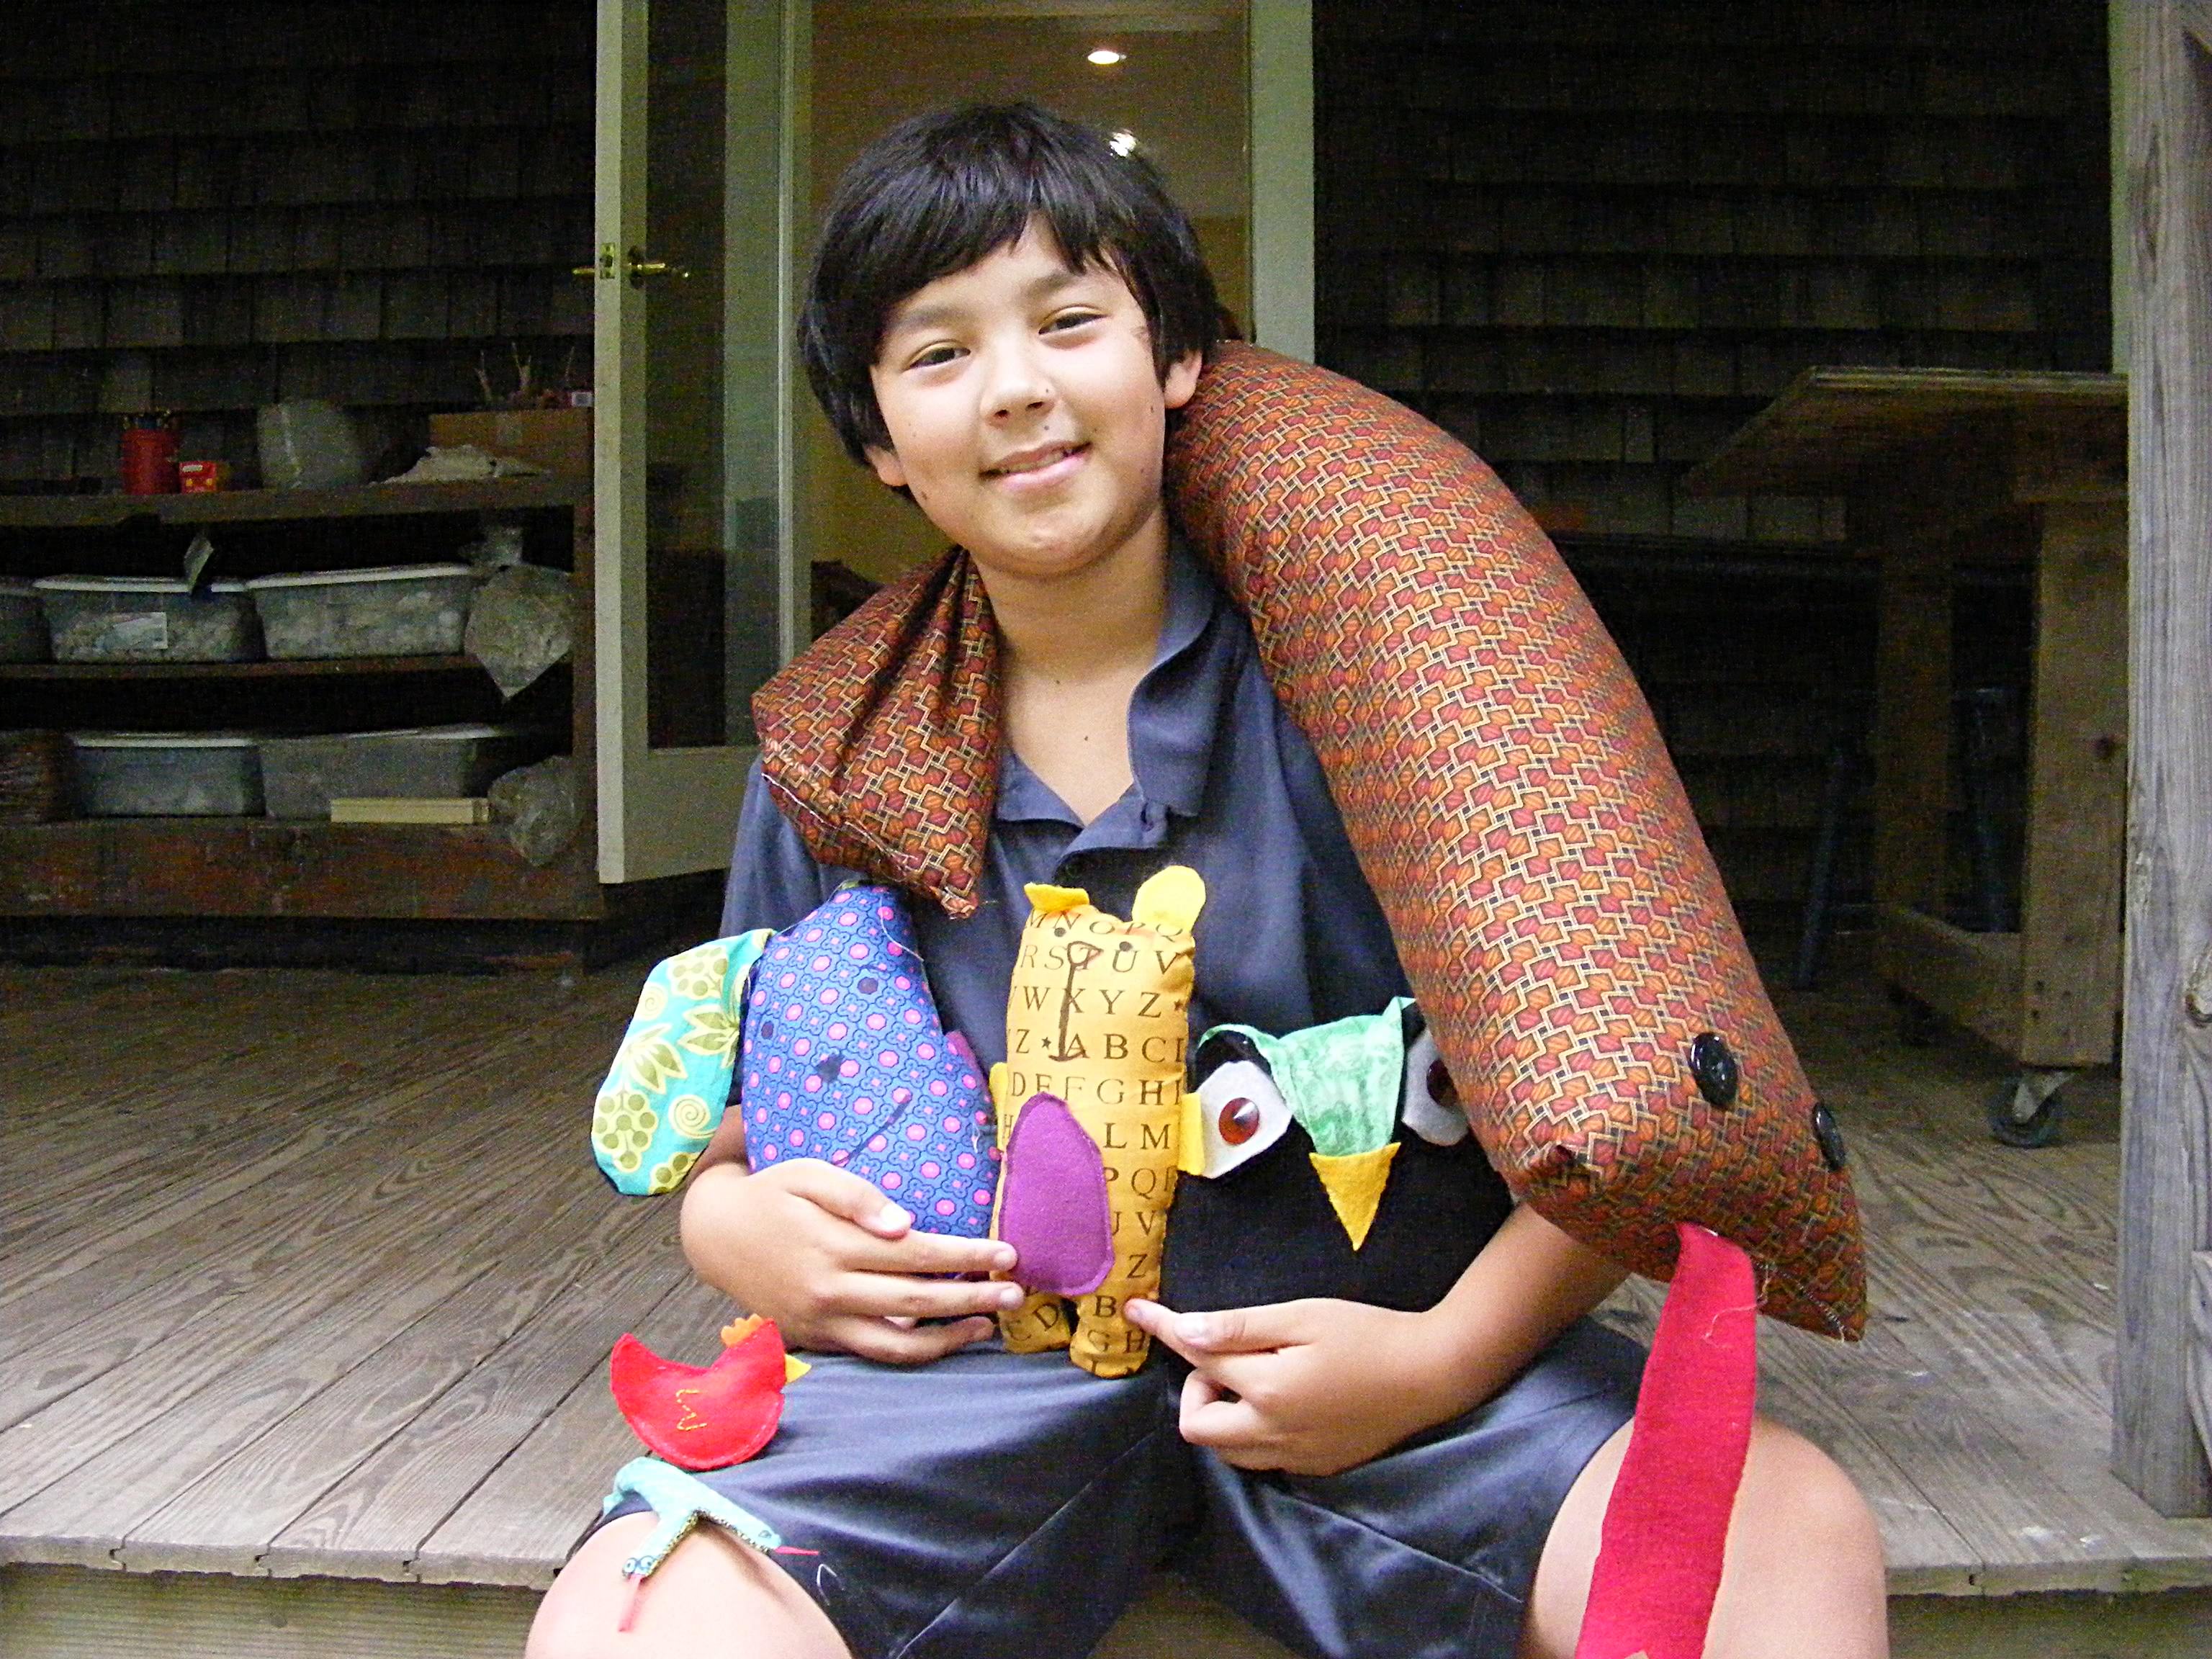
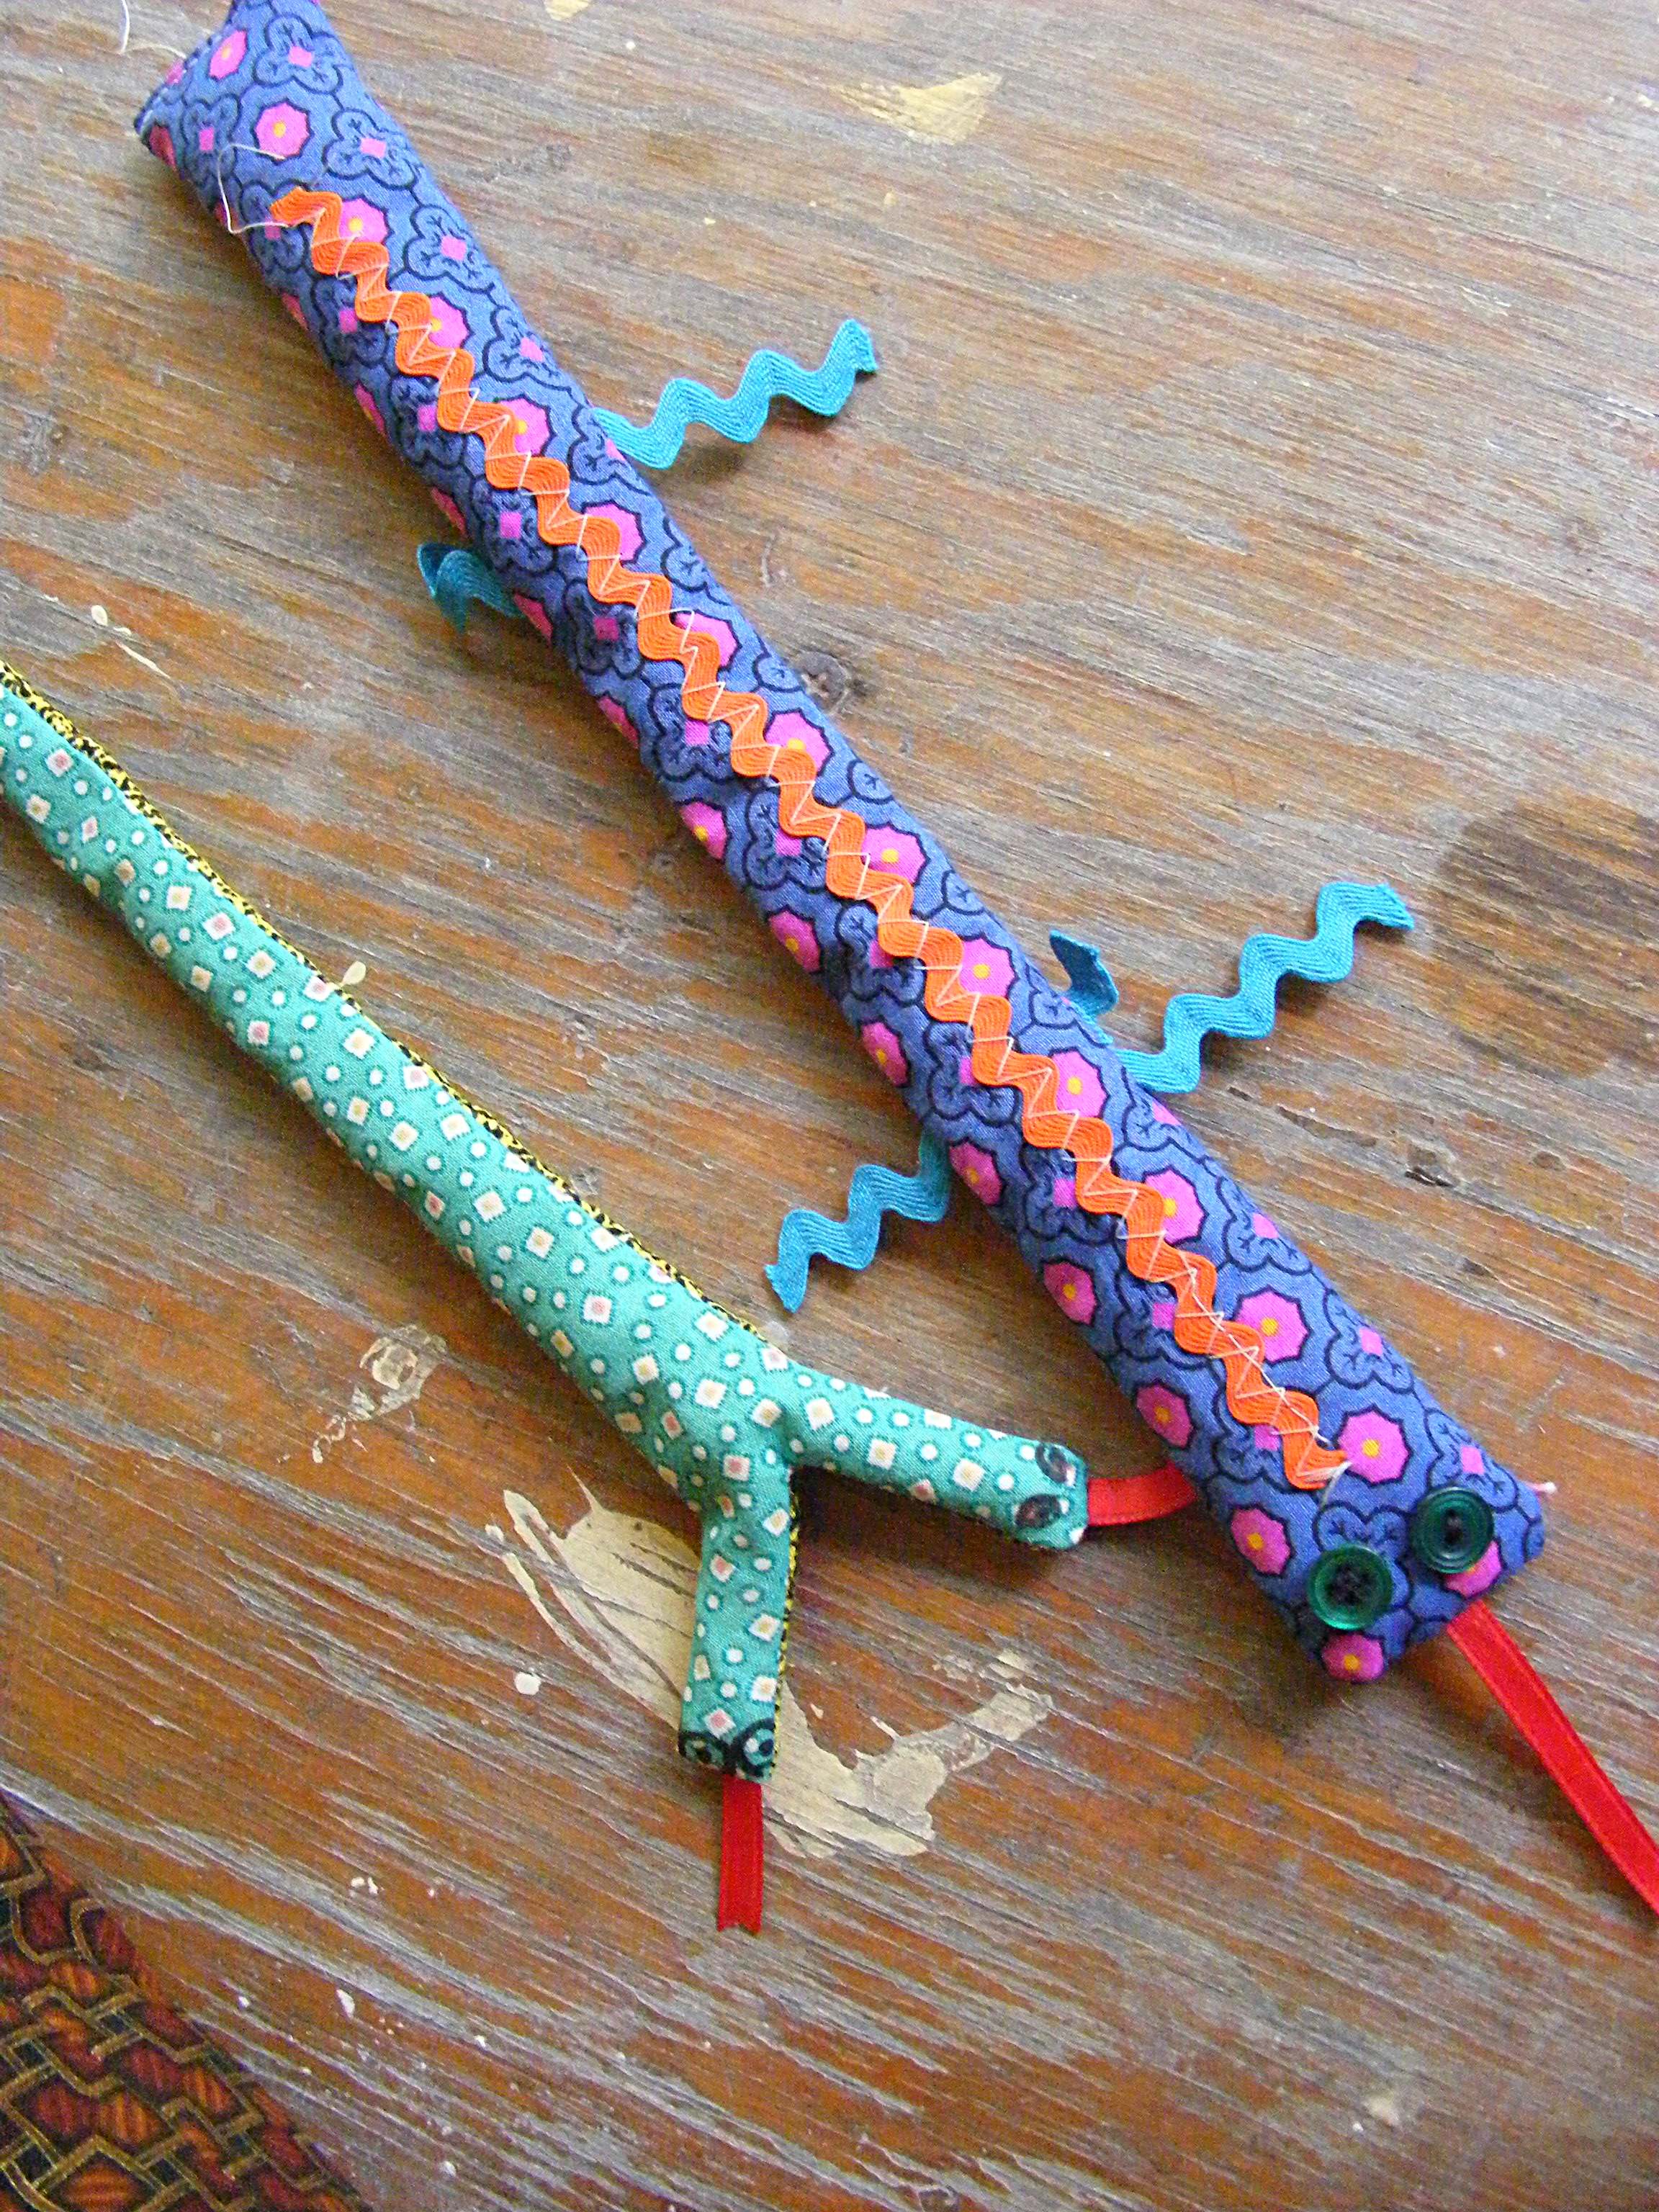
He was the softie-making king. That bear and bunny are for his sisters; the owl, hen and snake are for himself. Yes – that’s a GIANT version of the snake draped across his shoulders. 🙂
We haven’t had paper towels in our house for a couple of years now. Besides the environmental downsides to disposable towels (which really, probably isn’t all that bad when compared to take-out containers, excessive packaging in shipping and the oodles of other wasteful things us Americans do)… I just couldn’t bear paying money to wipe up an orange juice spill.
I have a stash of cotton crocheted dishcloths that do the job and have held up incredibly well. But I was looking to diversify.
Bring on the Cloth Towels!
I was chatting with my friend Ellen, who was experimenting with sewing unpaper towels. Ellen is extremely crafty, I usually wait until she’s done all of the hard work perfecting something brilliant, and then I jump in and give it a try (since she already knows it will work). Perfect arrangement, if you ask me!
Ellen’s unpaper towels work fabulously, so I’m going to show you what she showed me!
The Materials
The towels are made using one layer of cloth diaper fabric (makes sense, right? Absorbent and washable!) and one layer of flannel (the more fun the print, the better!). Diaper fabric is apparently called Birdseye… news to me.
The amount of fabric you need will depend on what size you want your towels to be, and how many you make. Mine are 9″ square, and I used 2 yards of the birdseye and 2 yards of flannel. I ended up with 24 towels. Ellen opted to make hers 12″ square… I think it’s just personal preference.
I recommend pre-washing the fabric (to make sure any shrinking gets out of the way) before you begin.
You’ll also need some standard sewing supplies: thread and scissors, a sewing machine (technically optional, but makes the process much quicker) and perhaps some pins and an iron if you’re the tidy type.
How to Make Unpaper Towels
I’m not a genius at sewing… so believe me when I say that these are pretty easy!
Step 1: cut your fabric
Cut your fabric into the size you want your towels to be. Remember that a little bit will get used up as seam allowance, so account for that in your cutting.
Here’s my shortcut for cutting: fold your fabric in half. Cut along the fold line. Repeat until you have squares that are the size you want! Easy!
Cut both the fabric and birdseye into squares (or rectangles if you want) of the same size.
Step 2: sew squares together
Pair up one square of birdseye with one square of flannel, right sides together. Ideally, they’ll line up perfectly… but mine didn’t. No big deal, you can trim them, later!
You need to leave a 3″ or so space unsewn, so that you can turn the towel inside-out.
Once you’ve sewn around (most of) the edges, trim any excess fabric and clip the corners.
Step 3: turn! (and maybe iron)
Turn your towels inside out. They’ll look a little puffy:
I ironed mine before top-stitching… because I’m picky like that. (I find that the ironing makes the top-stitching easier) Ellen didn’t iron… and hers turned out great, too!
Step 4: top-stitch
The top-stitching is how you’ll close up the hole that’s left from turning the towels inside-out. It also adds a tidy, finished look. I top-stitched around, about a 1/4″ from the edge:
So pretty!
Step 5: use and enjoy!
I’ve been using my unpaper towels all week long, and I love them! They’re lightweight and absorbent, and the birdseye is very slightly abrasive, which is good for wiping up stuck-on stuff.
Give it a try!
If you sew some of your own, you’ll have to report back and tell me how it went!
Give any old pincushion a good squeeze and you know what you’ll find buried in the middle?
A bunch of needles.
Seriously.
Tons of them!
Unlike pins, there are no heads to keep them from disappearing into the middle of the cushion – never to be seen again. I’ve tried leaving a bit of thread through the eye of the needle, but that just makes it messy and doesn’t help much.
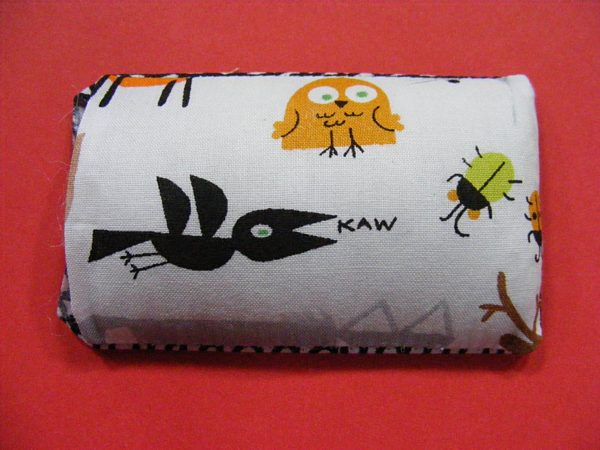
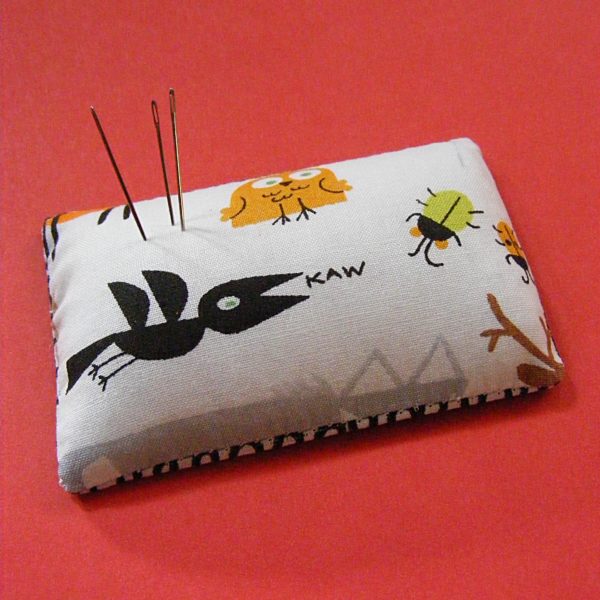
So I invented a needle cushion. 🙂 It’s shallow – so the needles can’t disappear inside. It has a hard surface on the bottom so it stays flat, and so the needles can’t poke through and scratch the table underneath.
I LOVE my new needle cushion! I need to make a couple more – including one to hold sewing machine needles. I usually have a stretch needle, a heavy duty needle, a fine needle and/or a standard needle sitting on the table next to my machine at any given time.
And they’re super easy to make. I’m not even going to do a PDF for this one because there are just a couple of steps. Ready?
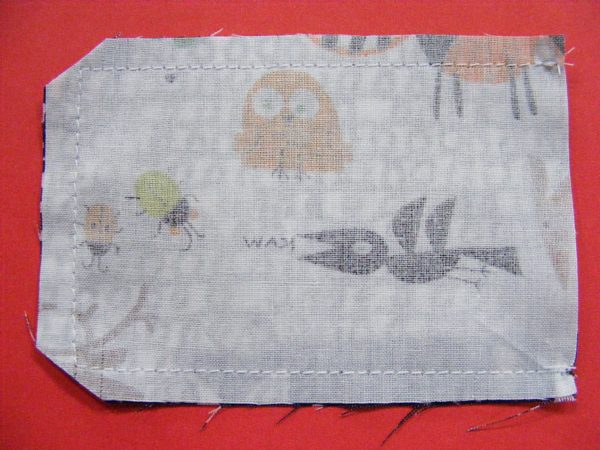
First – cut two fabric rectangles 4 inches wide and 2 3/4 inches tall. Put them right sides together. Using 1/4 inch seam allowance, sew it up around three sides. Trim off the corners close to, but not into, the seam allowance.
Turn it right side out. Turn the raw edges in 1/4 inch and press so you have a nice crease to follow when you do the hand stitching to close it up after stuffing.
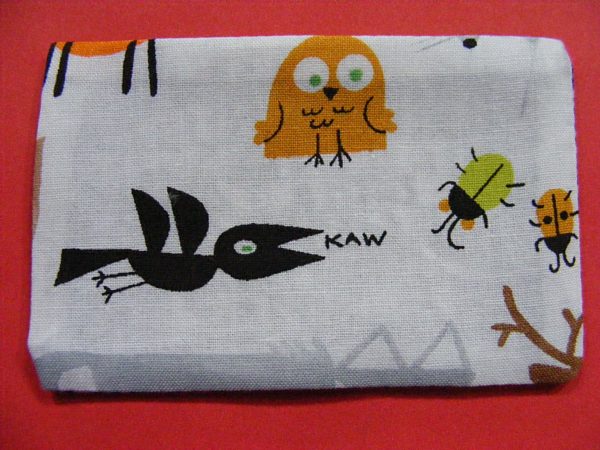
Slide an old credit card or gift card into the sleeve. Best use of a credit card ever. 🙂
Now – pack a few pinches of stuffing in on top of the credit card. Use a chopstick or other pointy tool to get it neatly into the corners.
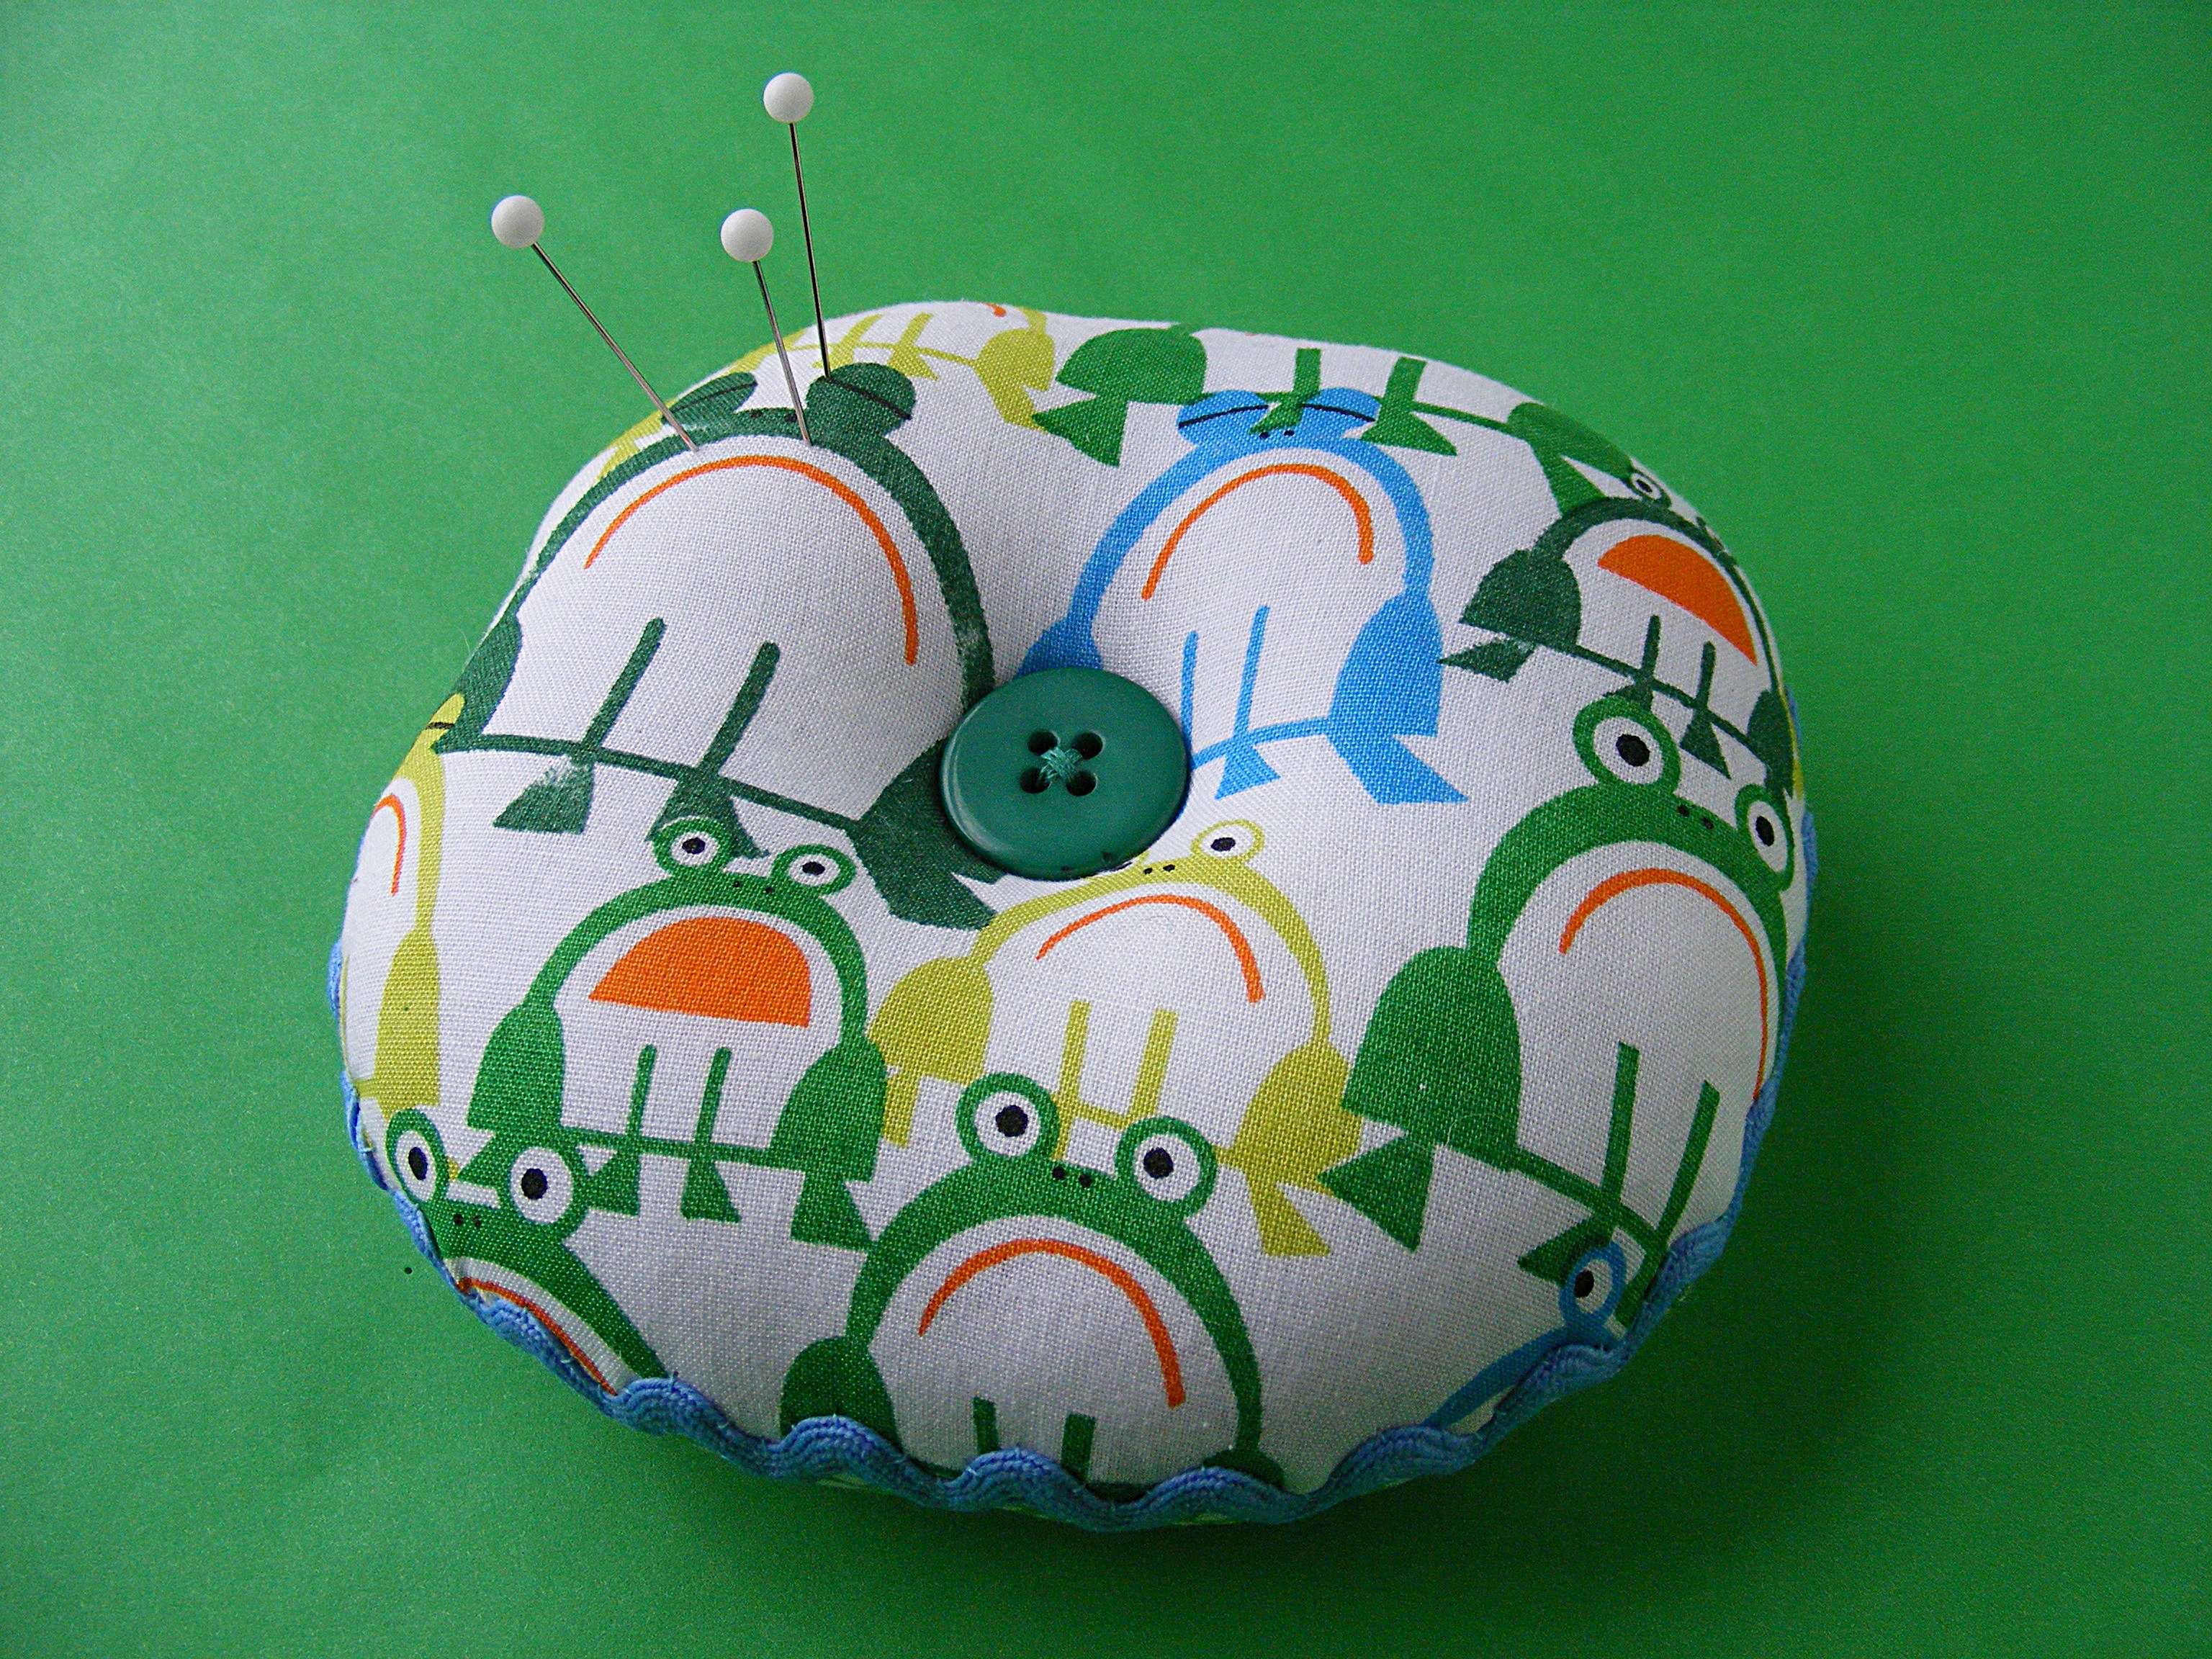
The button dimples on the top and bottom make it sit nice and flat.
The two colors for the top and bottom are fun.
And the rickrack around the seam?
Rickrack always makes me smile. 🙂
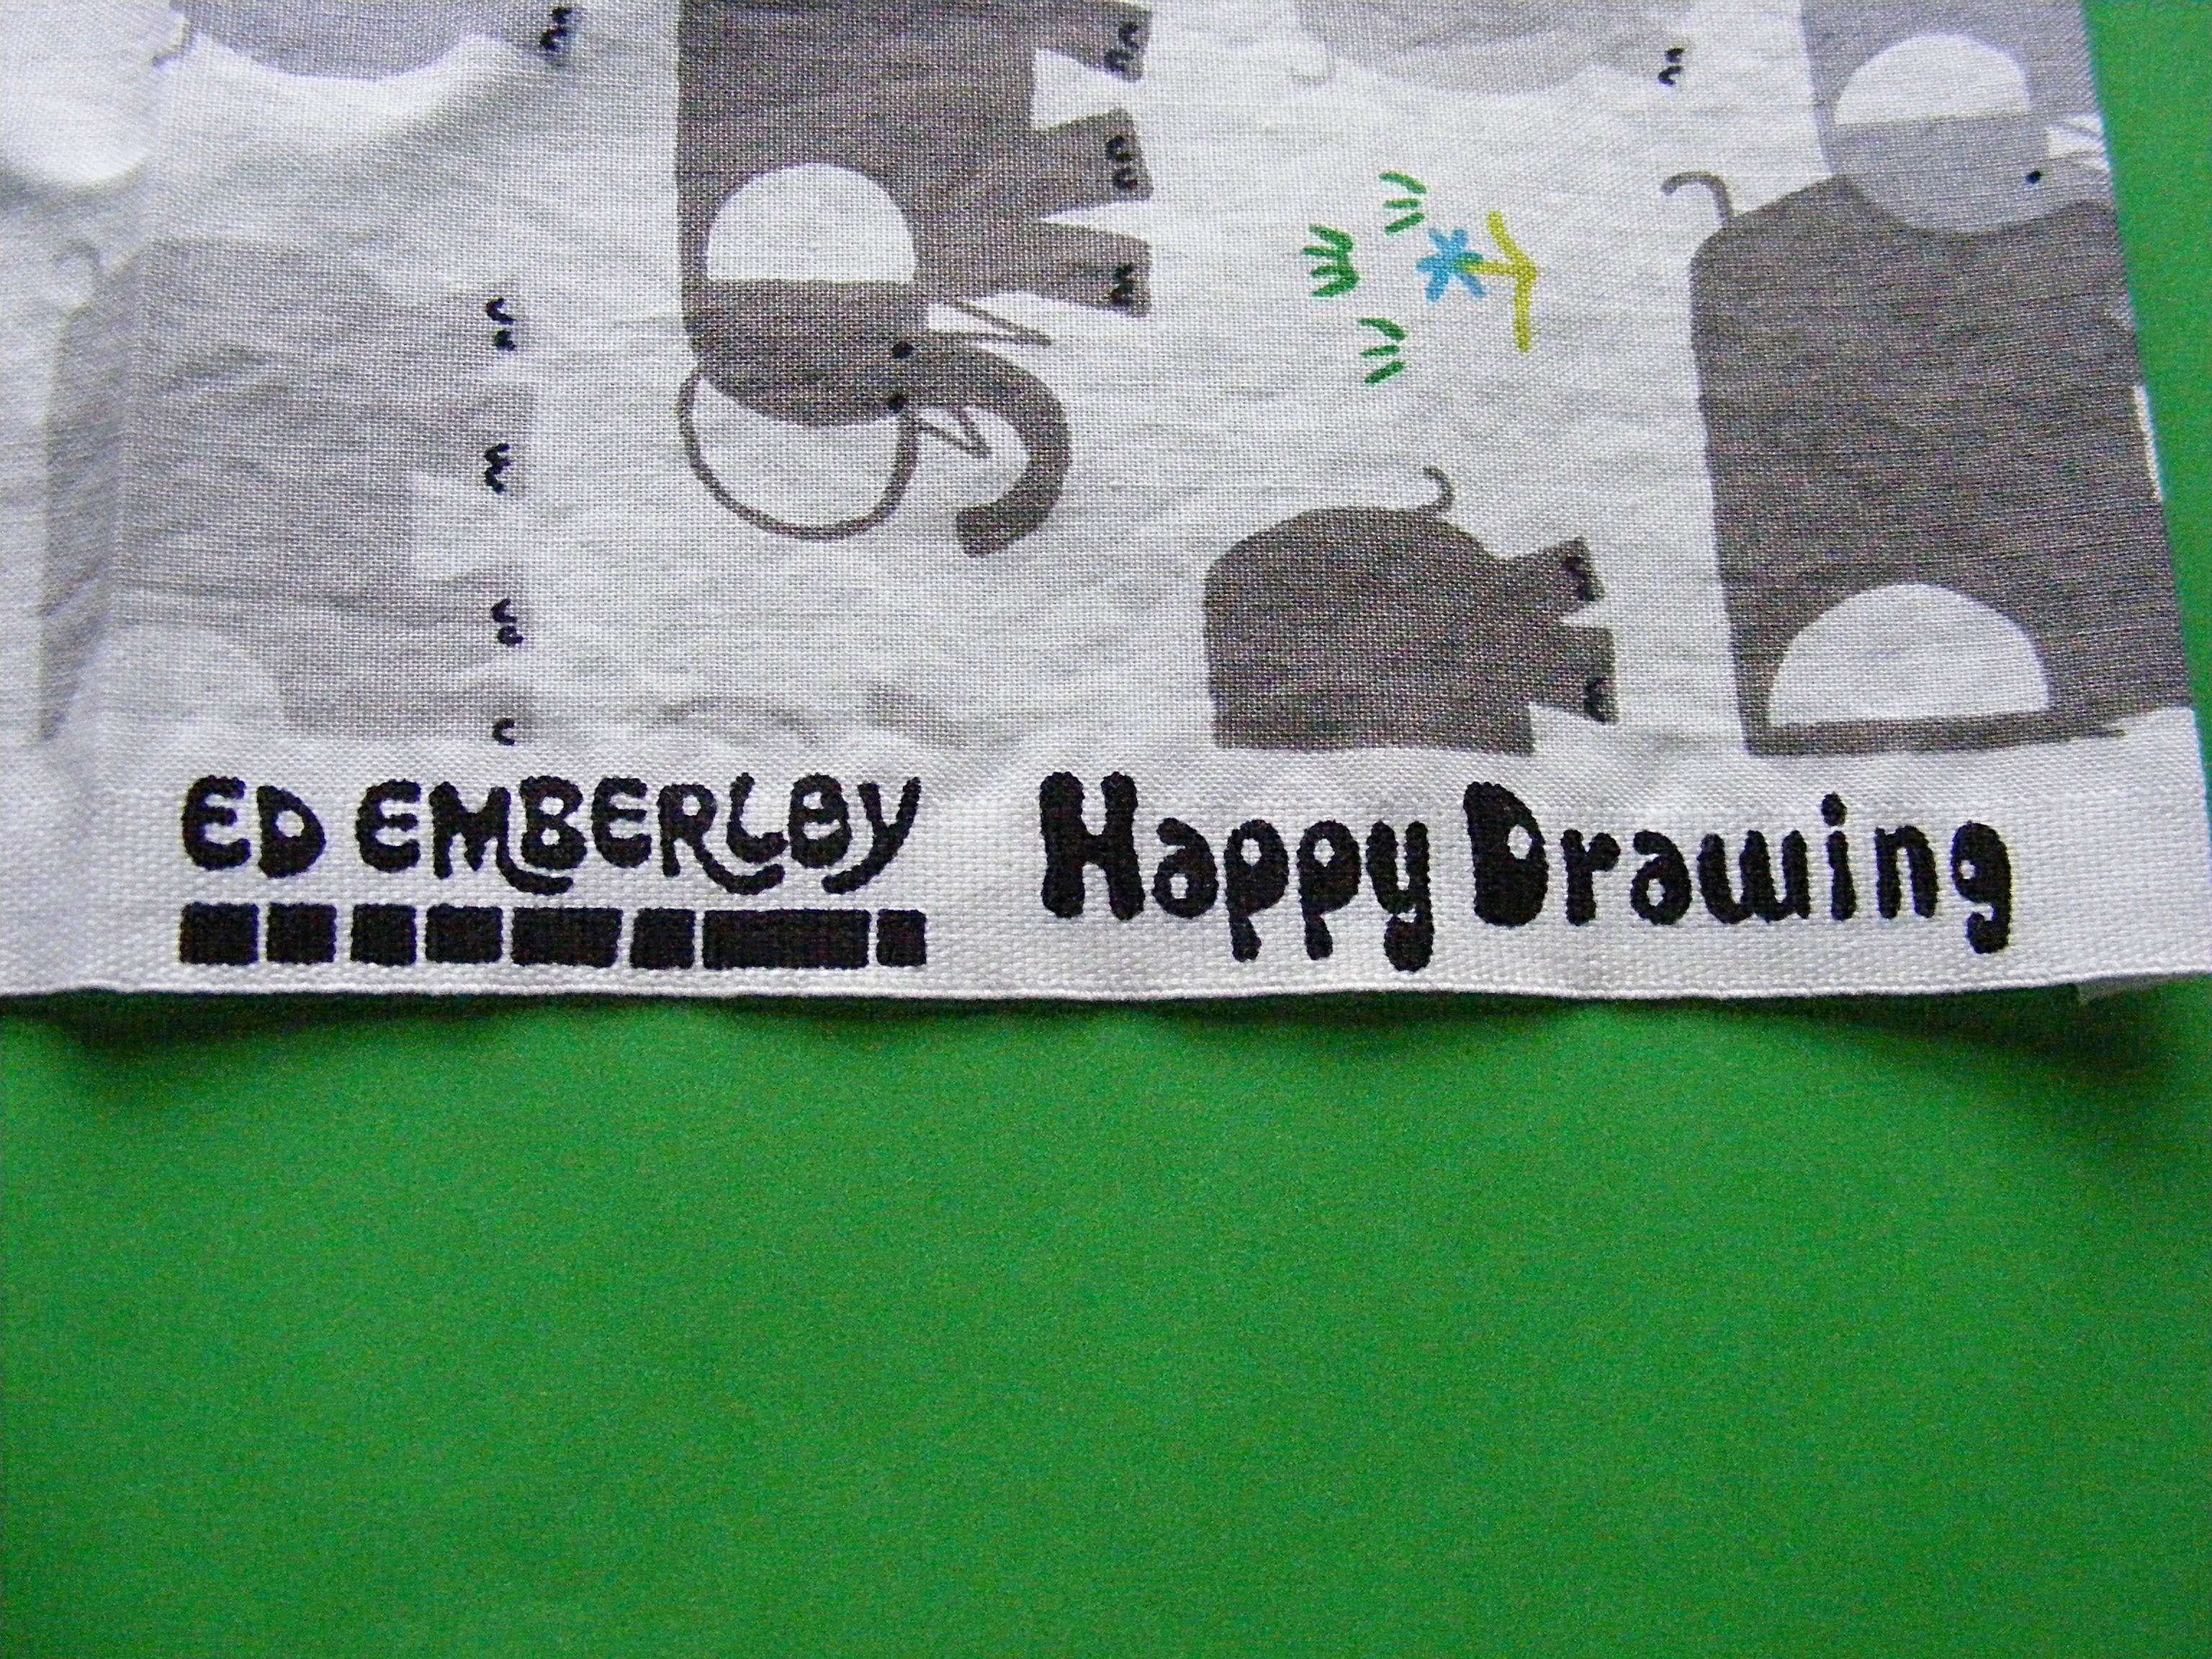
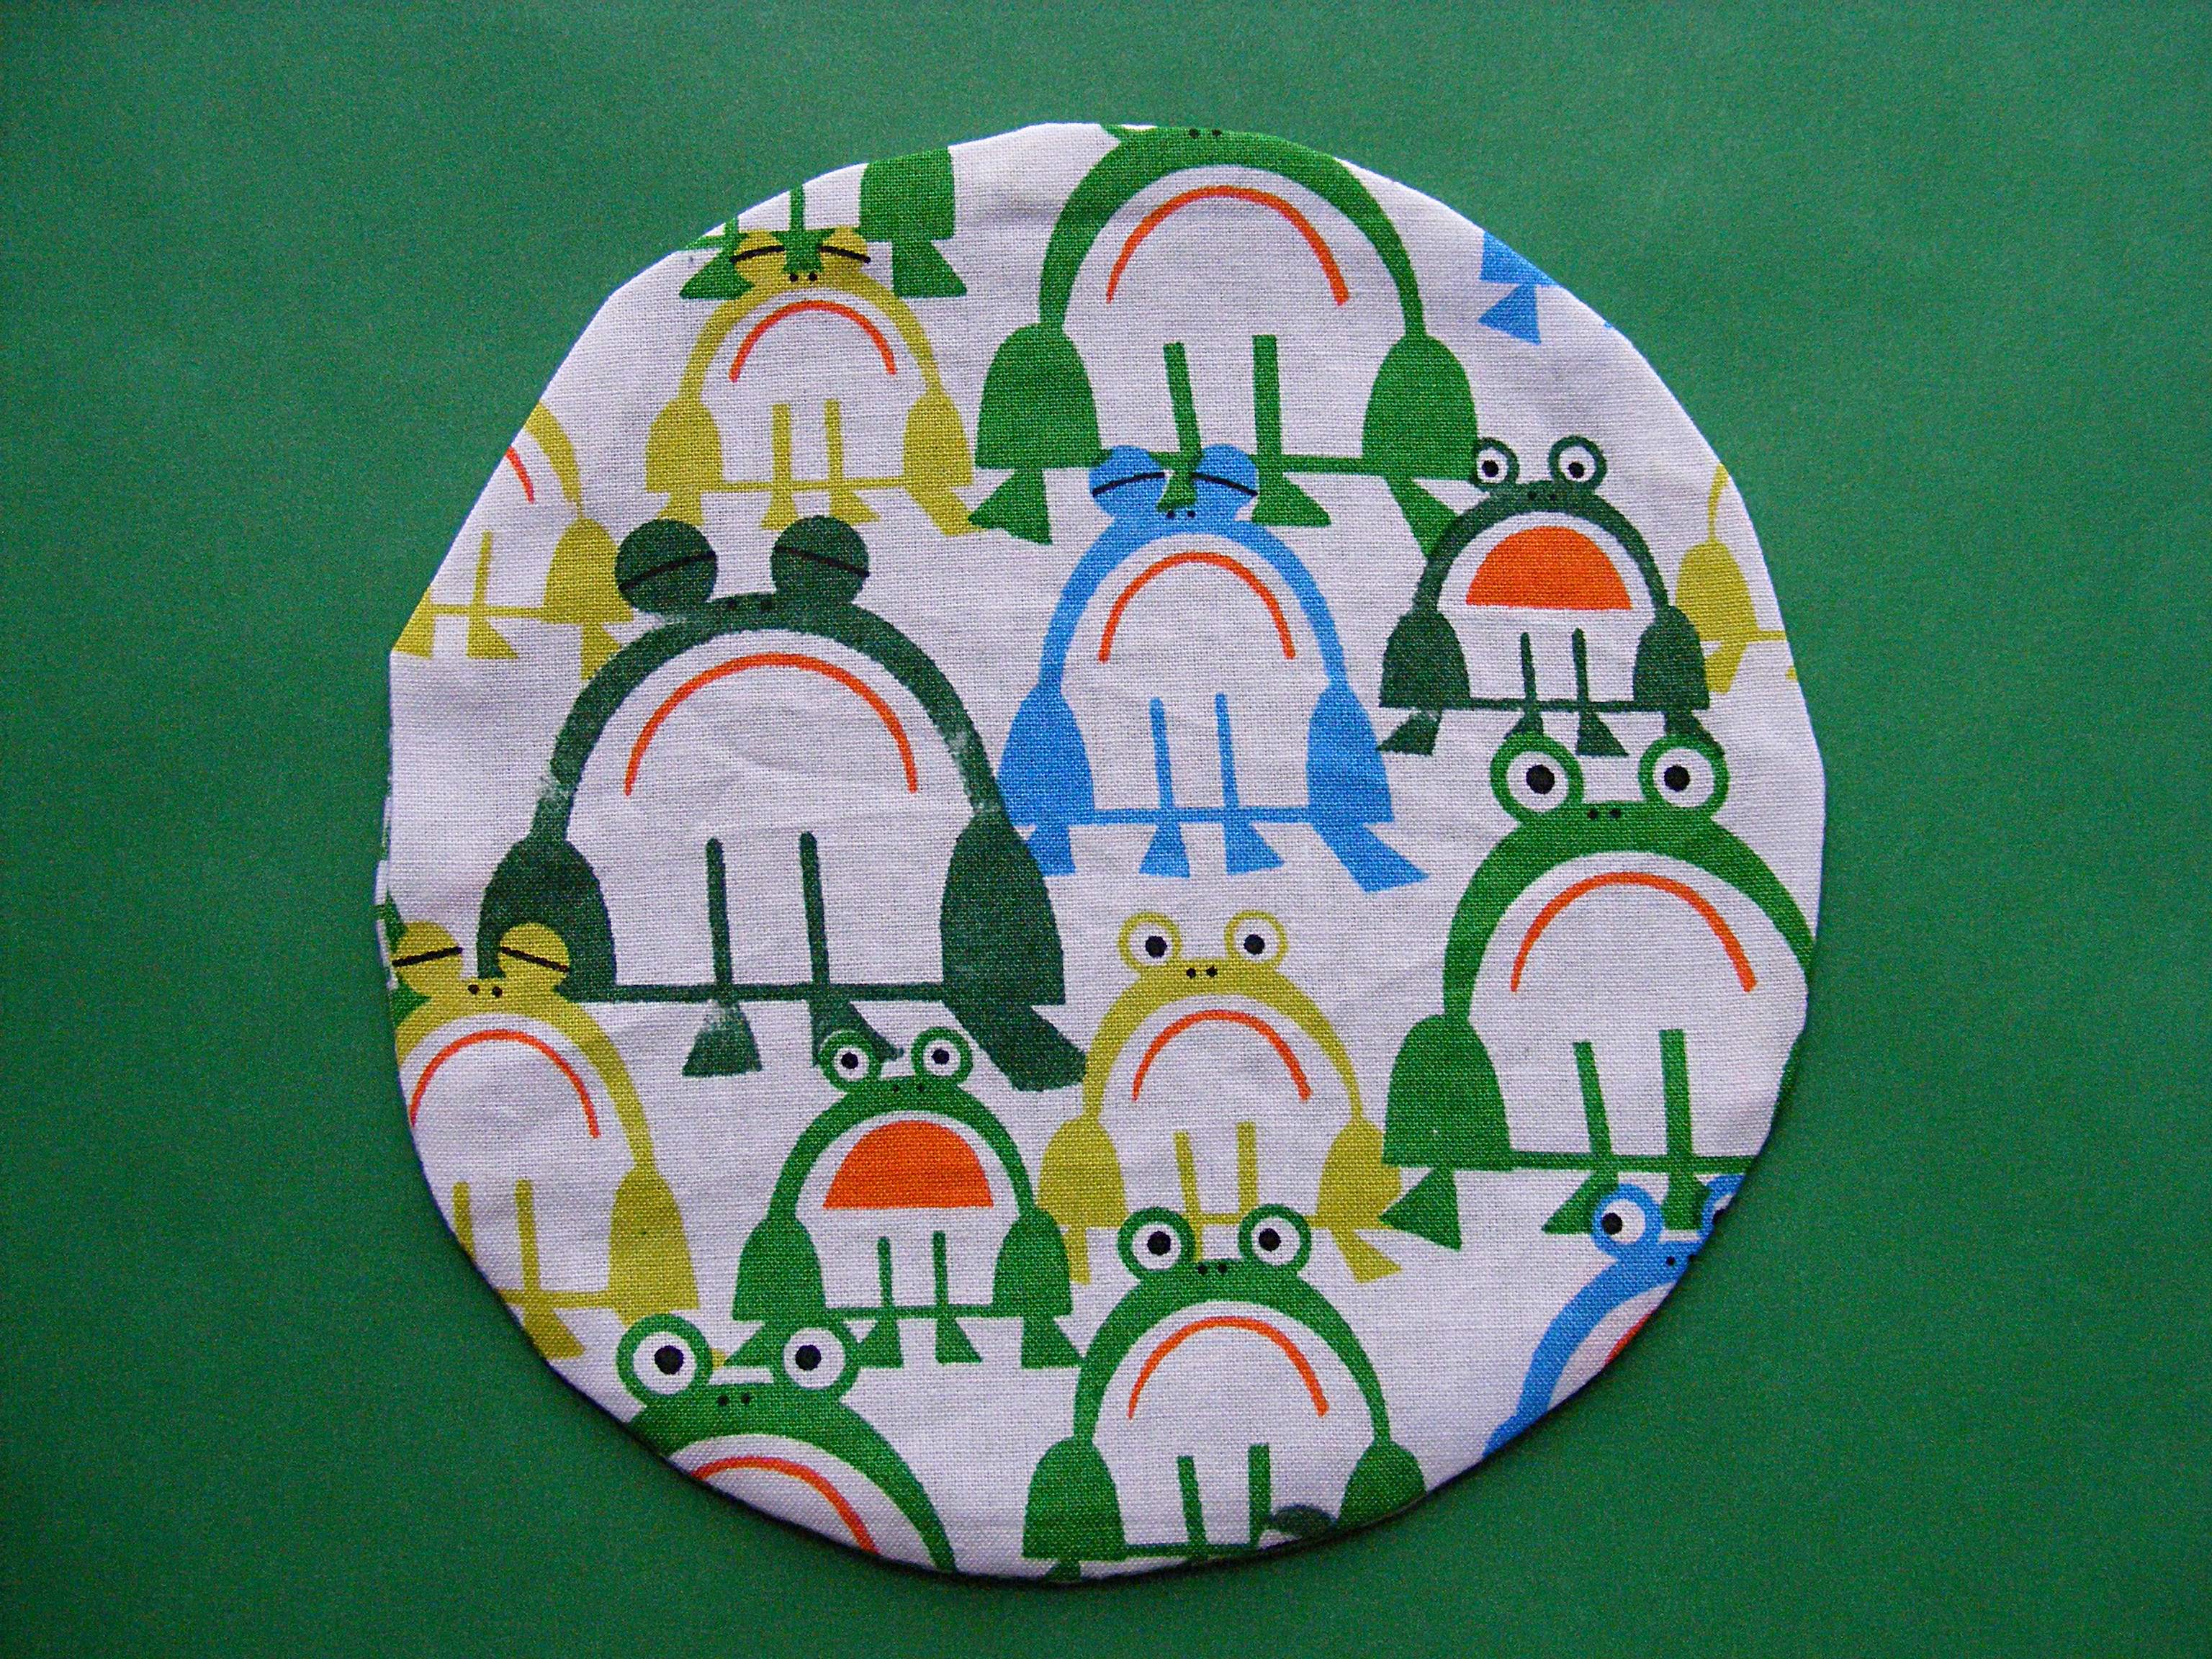
I’m love the Ed Emberley Happy Drawing collection from Cloud 9 Fabrics – it’s making my sewing room an even happier place. And you know I’m all about the happy. 🙂 This uses the frogs on one side, and the green scribbles on the other.
It’s an easy pattern – the hardest thing is packing in enough stuffing to make it really firm.
Here’s how to make it. . .
Materials
two scraps of fabric, at least 6 inches square
approx. 17 inches of rickrack (get the big or jumbo size – they’re easiest to work with)
lots and lots of stuffing
two buttons (I used 3/4″ and 5/8″)
sewing machine, thread, basic sewing tools
Step 1
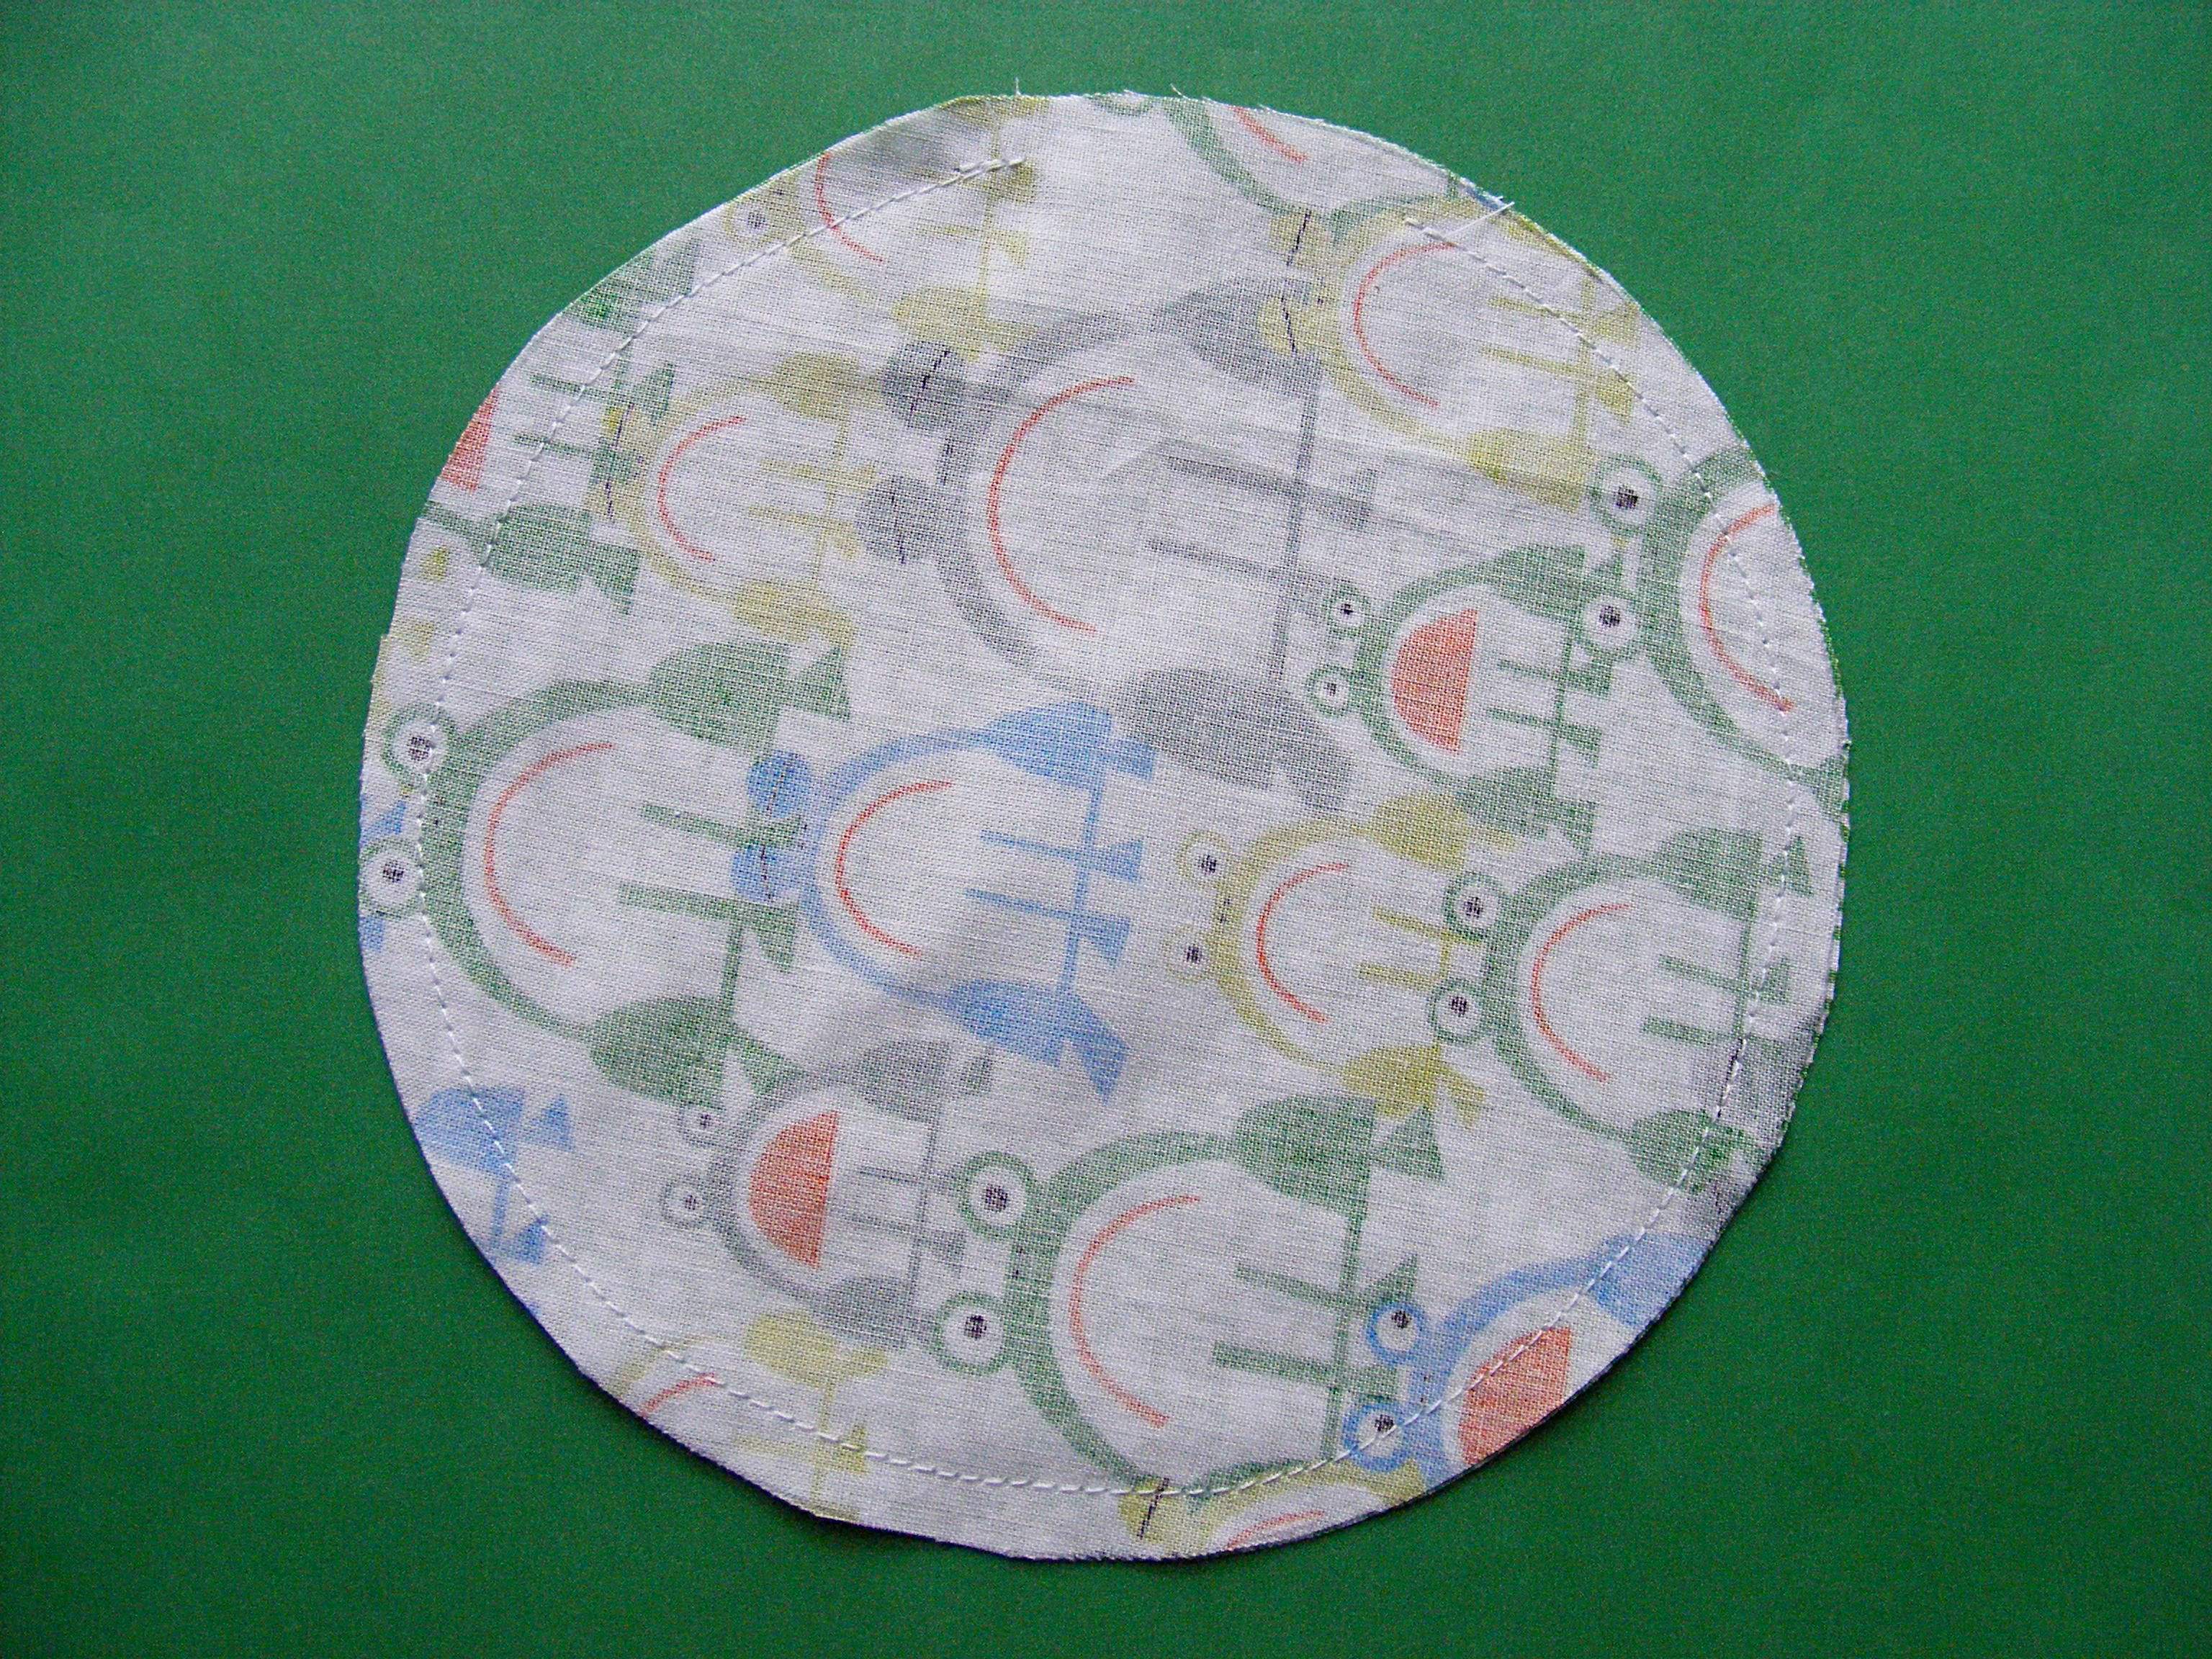
Cut one circle from each fabric. The circles should be about 6 inches in diameter. You can measure it with a compass or do what I did – trace around a dessert plate. 🙂
Step 2
Put the two circles right sides together and sew almost all the way around the edge. Use 1/4 inch seam allowance and leave a few inches open for stuffing.
Don’t forget to backstitch at the beginning and end of your stitching.
Step 3
Turn it right side out. Press the raw edges around the stuffing opening flat. This will really help you when you’re ready to sew up the stuffing opening.
Step 4
Fold your disk into fourths to find the exact center and mark it with a small marker on the top AND bottom.
Stuff the heck out of it. I’m not kidding here – the best pincushions are REALLY hard. It gives the pincushion weight AND makes the pins slide in and out with no resistance. A loosely-stuffed pincushion tends to “grab” the pins. Stuff. Stuff. Stuff until you can’t get any more stuffing in.
Sew it closed using whipstitch. You’re going to cover up the seam line with rickrack so there’s no need to get fancy with ladder stitching.
Step 5
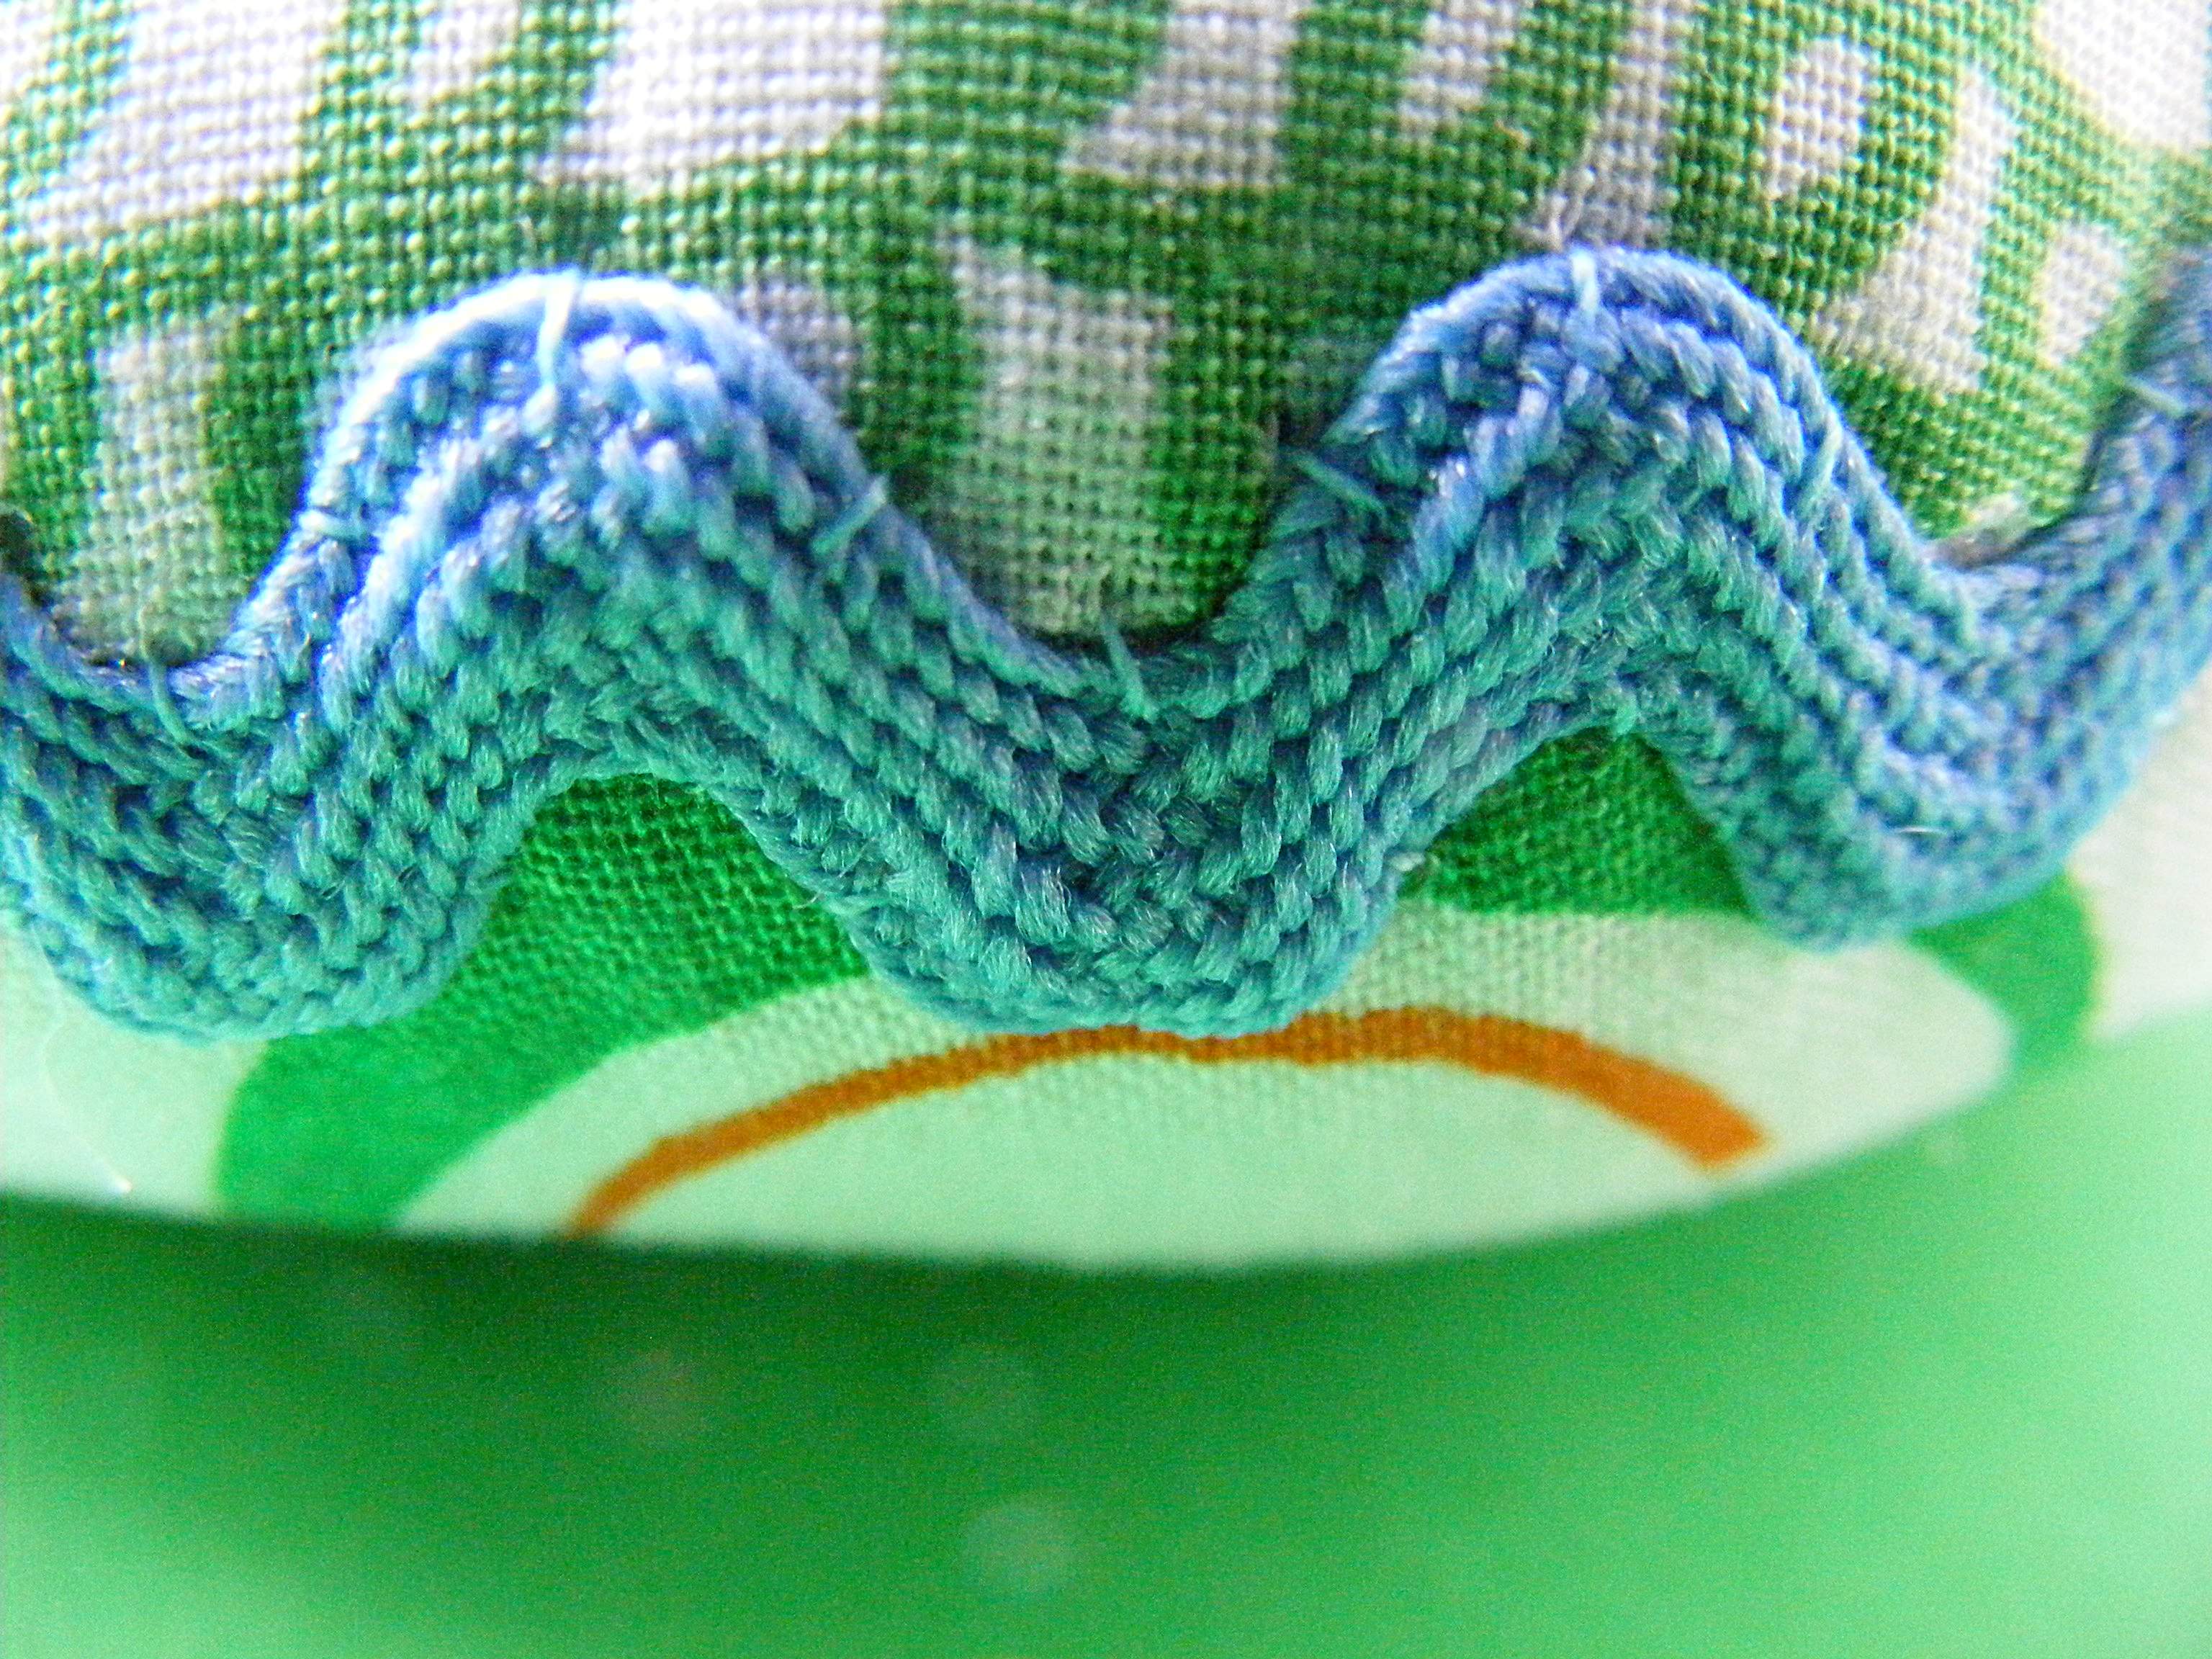
Hand sew the rickrack over the seam.
I take a tiny stitch at the top of each peak, the bottom of each valley, and midway up and down each hill. I do that on the top and bottom edge of the band of rickrack. Trim off the frayed ends of the rick rack and hit them with a dab of Fray-check or clear nail polish.
Step 6
Using the center marks you made in step 4, sew buttons to the top and bottom of the pincushion – pulling tight to make the pincushion dimple in at the center on both sides. This is the trickiest step of the whole project – watch this video to see how to do it without swearing.
Finished! Stick in some pins and put it to work. Then make another. I keep one at my sewing machine, one at my cutting table, and one at my ironing board. You can NEVER have enough cute pincushions. 🙂
You could even make yourself a pincushion to match your other sewing room accessories. Here are links to the free patterns for all those other projects. . .
a new shipping tote (which always hangs in my sewing room waiting to be filled with your lovely orders)
a new lap quilt for those chilly mornings
Michelle at Cloud 9 was kind enough to send me some early cuts of the fabric and I’ve been sewing away with it. (If you’re also following along on Facebook you’ve seen photos of some of the work in progress.)
Now I’m starting to finish layout on some of the patterns – so be prepared for a slew of patterns to help you make stuff for your sewing room. All stitched up in Ed Emberley awesomeness.
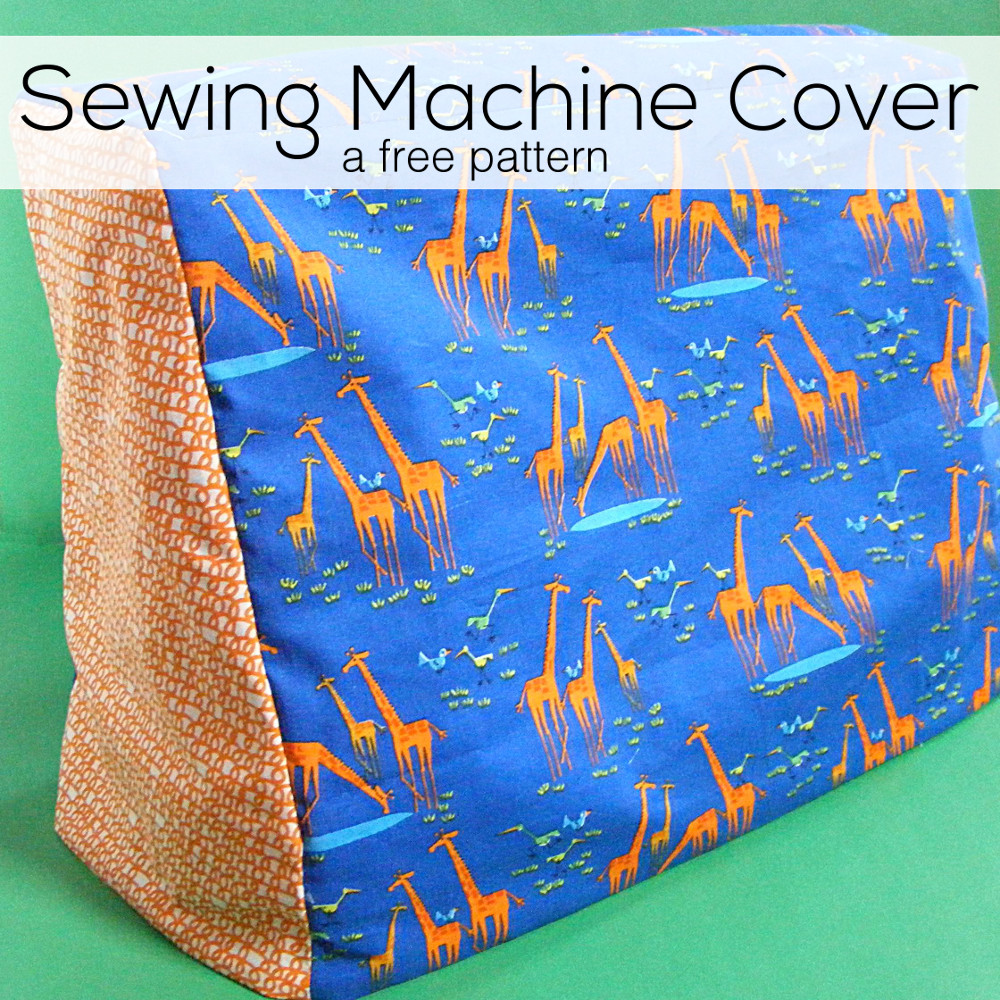
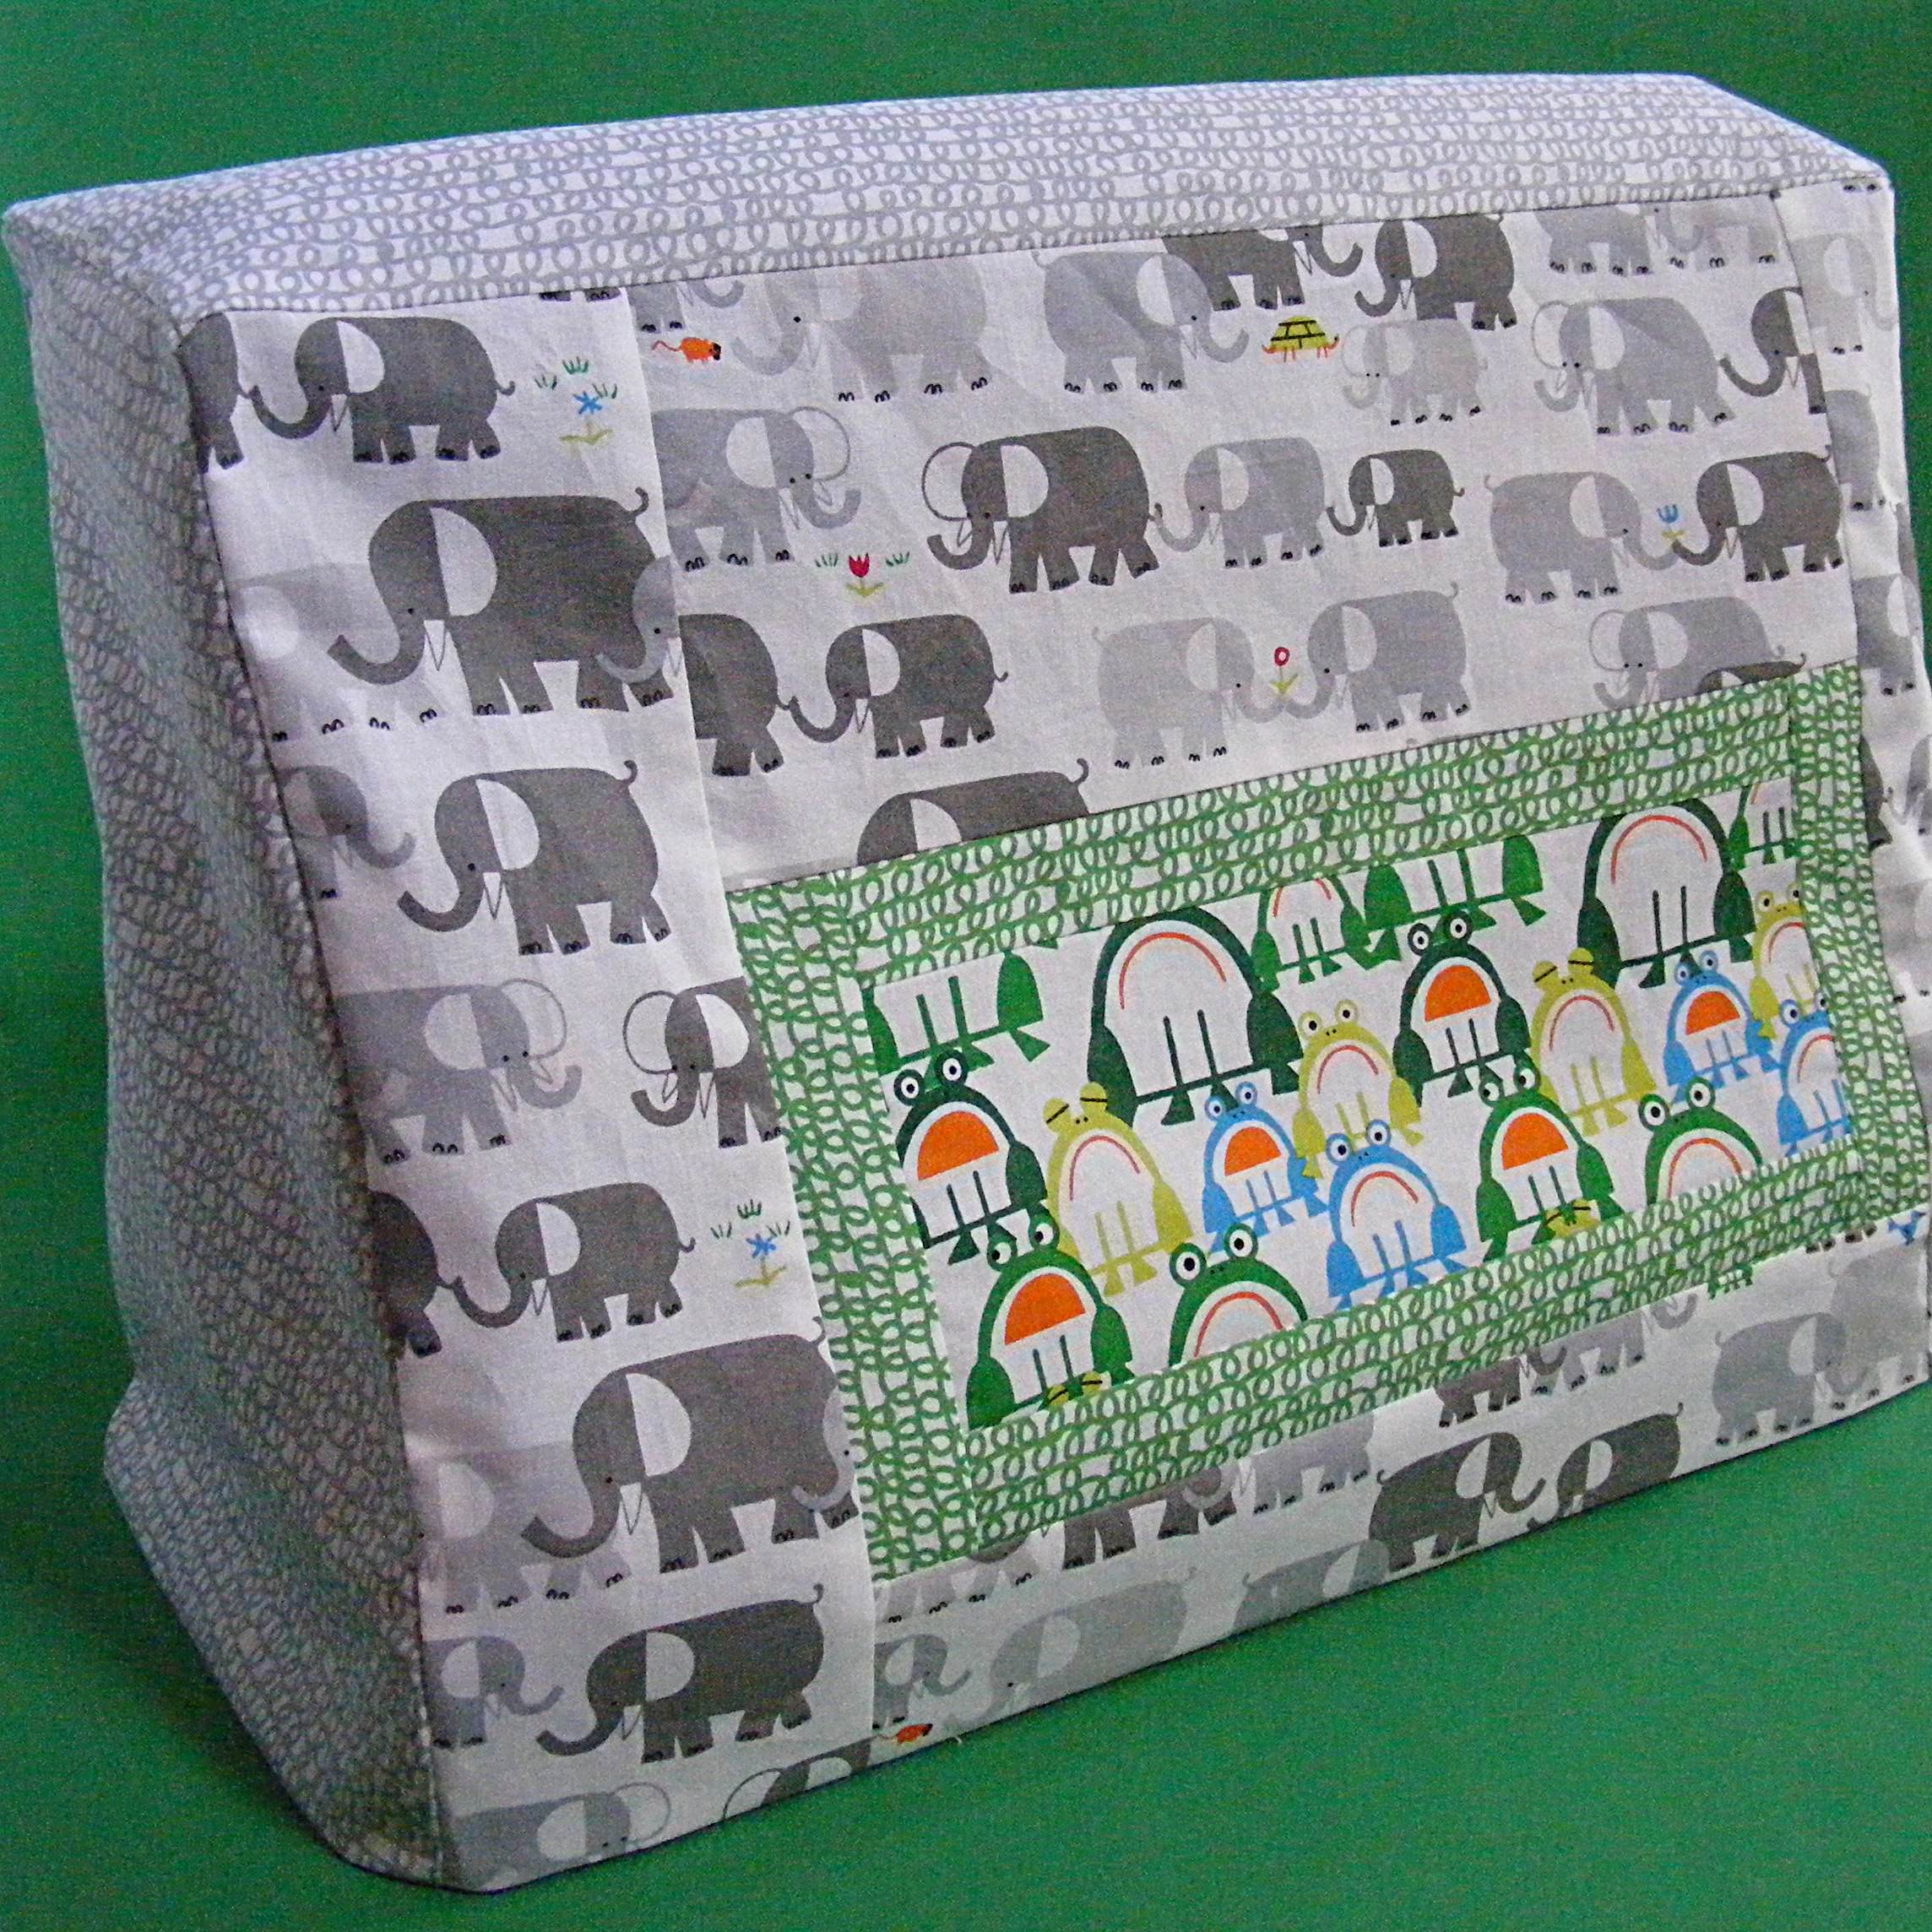
First up – a reversible sewing machine cover. Why reversible? Well – I wanted to make it in the giraffes fabric, but I also wanted to show you how you could use the basic pattern and really have fun with the front panel. You can piece it, applique it, embroider it, bedazzle it – play with it any way you like. (My daughter just got a Bedazzler. I have rhinestones on the brain.)
Making it reversible also gives the cover some heft without having to use interfacing. Nice! Plus it allows me to change my mind about which color I want to see. Here’s the reverse.
See? A totally different look. 🙂
Anyway – most sewing machine cover patterns are essentially boxes, but I show you how to make this slightly fitted. See how the top is a bit narrower than the bottom? It’s an easy extra step that makes the whole thing look nicer. Totally worth doing and still easy enough to be a beginner pattern.
Ready to make your own?
Materials you’ll need
depends on your design, but roughly 1/2 yard fabric for front and back, and 1/4 yard fabric for the sides
sewing machine, thread, basic sewing tools
Step 1
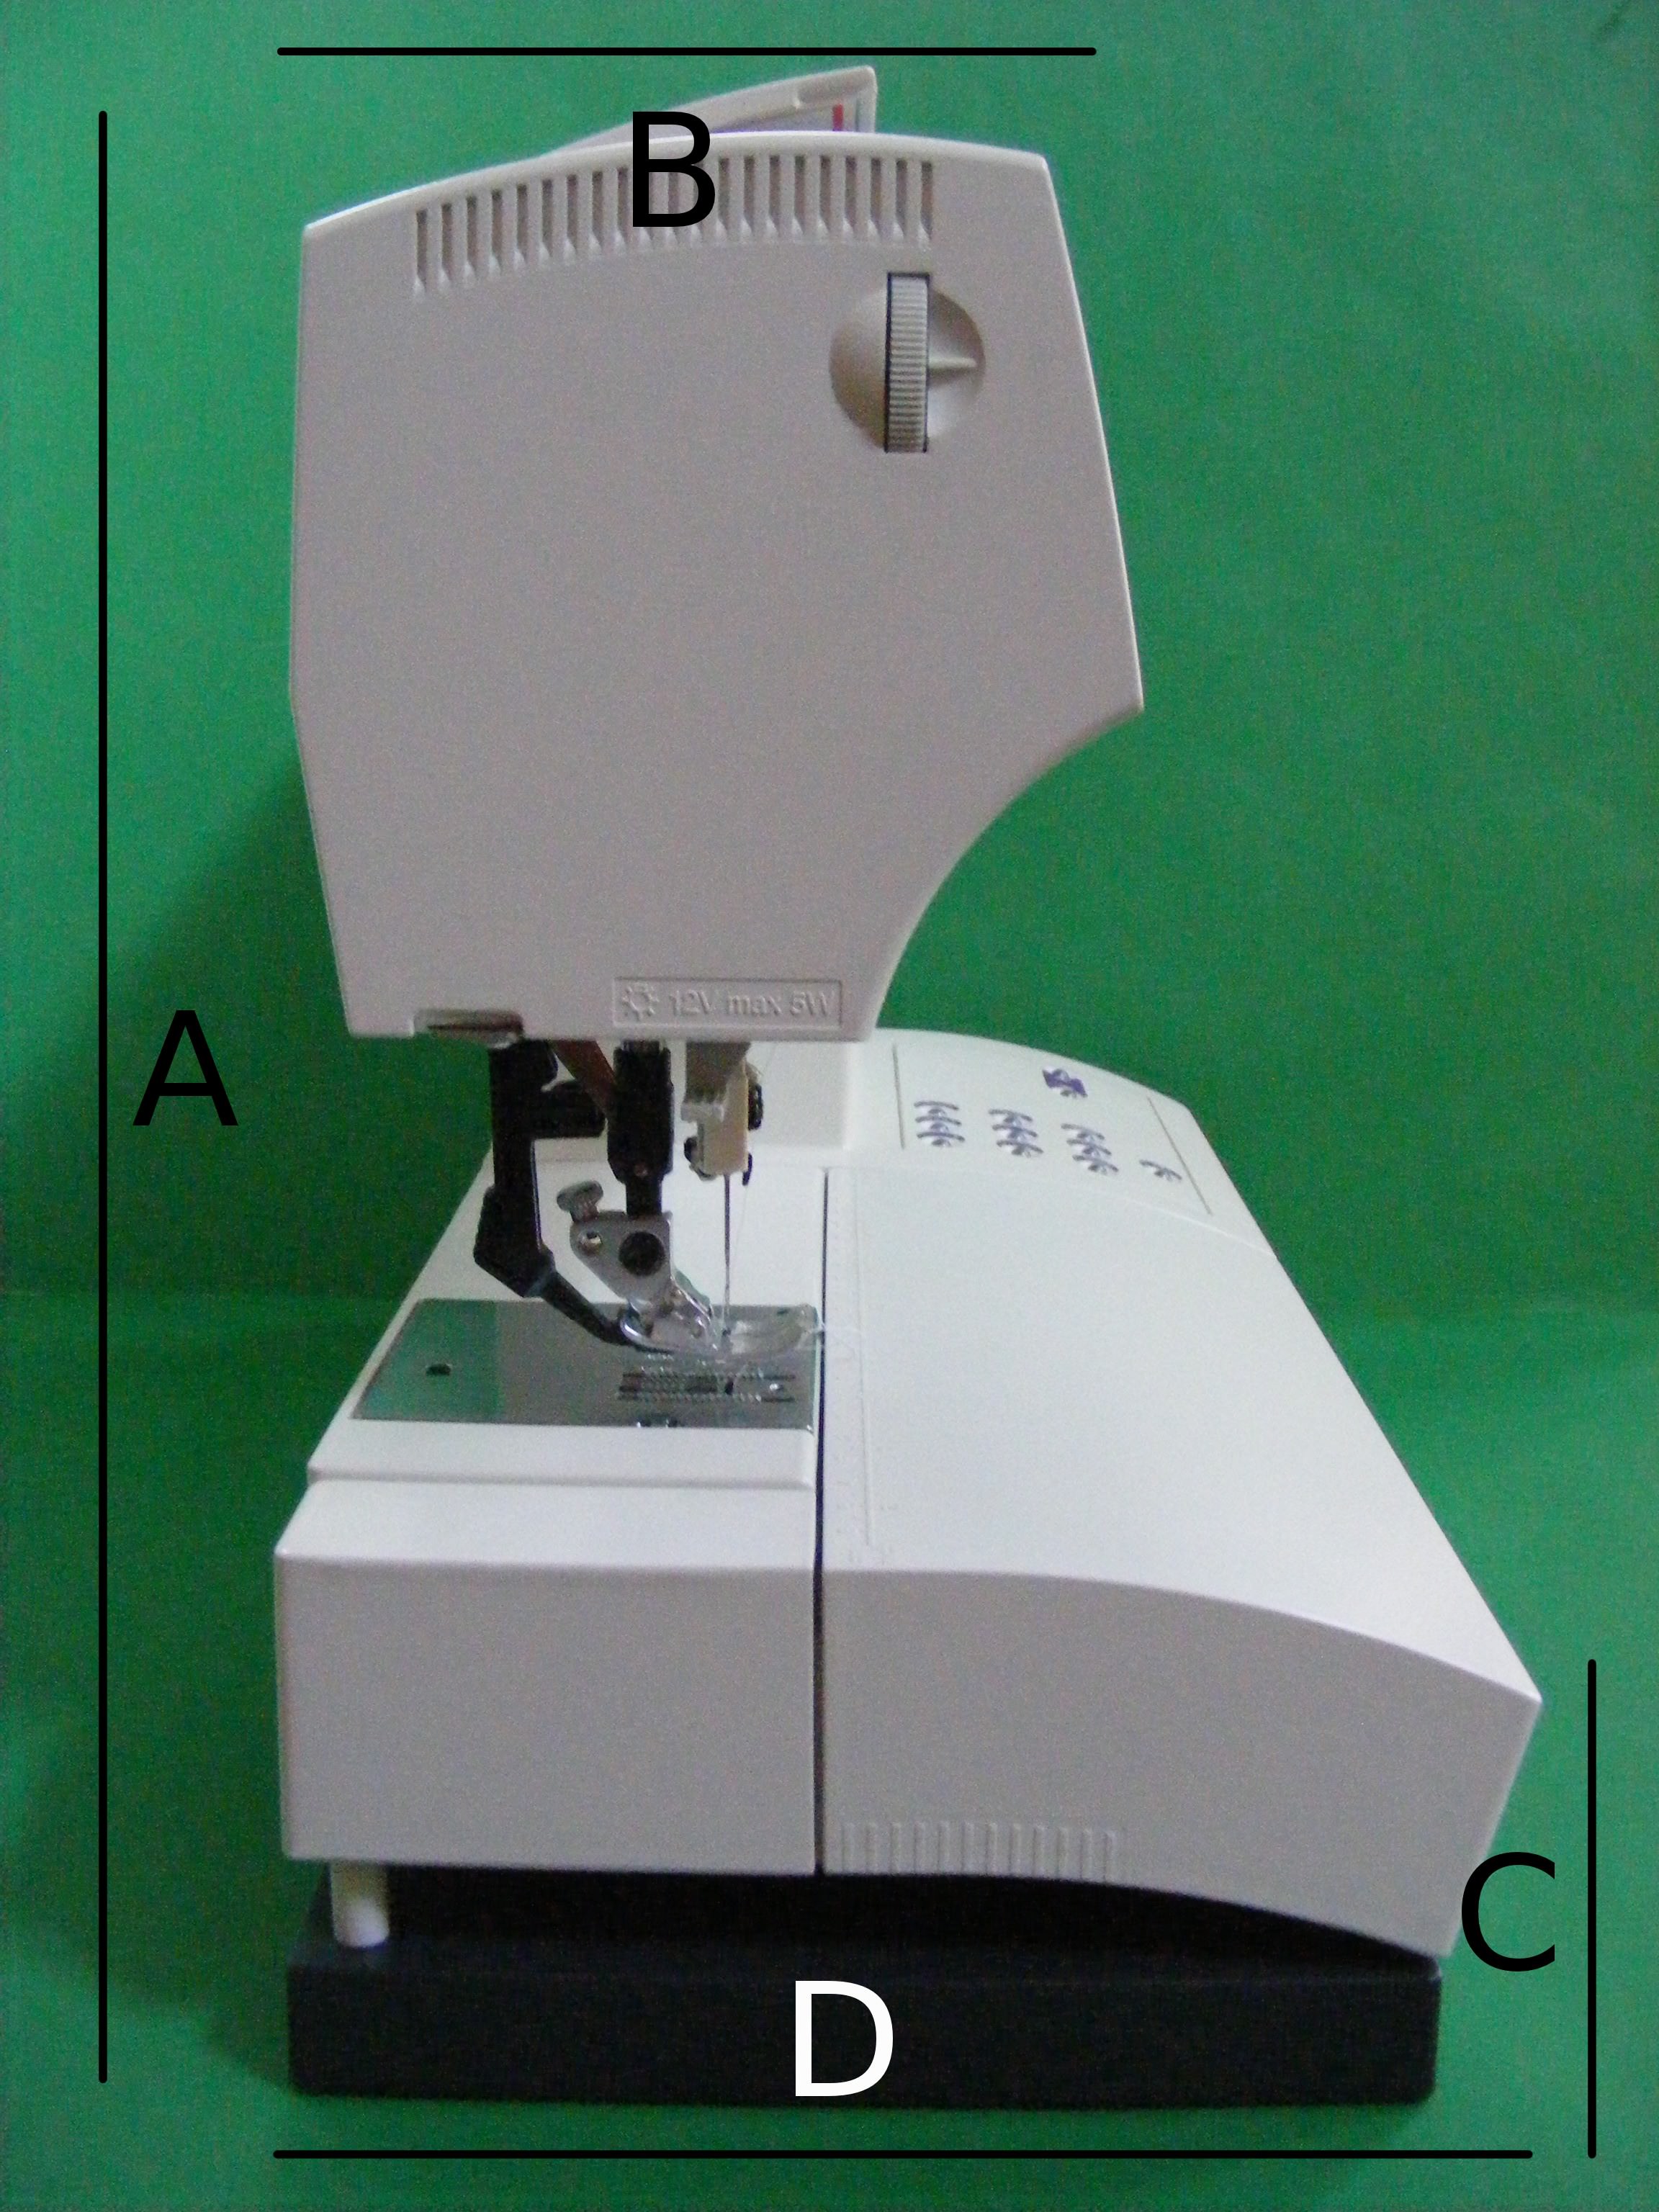
Measure your machine.
A __________ total height B __________ depth of the top C __________ height of the front D __________ depth of the bottom
E __________ total width (Not labeled – but be sure to include the wheel that controls the presser foot)
Step 2
Calculate the size of your pattern pieces.
Front and Back Pieces = E + 1 inch (seam allowance and ease) x A + 1 inch (seam allowance and ease)
Top Piece = E + 1 inch x B + 1 inch
Sides = A + 1 inch x D + 1 inch (you’ll cut the angle out of the front later)
Now you have some decisions to make. . .
You can cut your fabric to the dimensions in step 2 and skip ahead to step 8.
You can get fancy with any of these pieces. I’m going to go on and give you instructions for piecing the front panel, but you can really do anything you like. Piece it. Applique on it. Embroider it. Bedazzle it. Just make sure that when you’re done, the finished dimensions of your creation are what you calculated in step 2.
Whatever you choose, you’ll need a front, a back, a top and two sides for each version of your cover. Remember – this is a reversible cover so you’re really making two. Make them coordinate or make them wildly different. It’s totally up to you.
If you want to piece your cover like my elephants and frogs, move on to step 3. If you’re using solid fabric or doing your own thing, skip ahead to step 8.
Step 3
I’m going to have to give you some general directions here, because the measurements of individual pieces will vary from machine to machine.
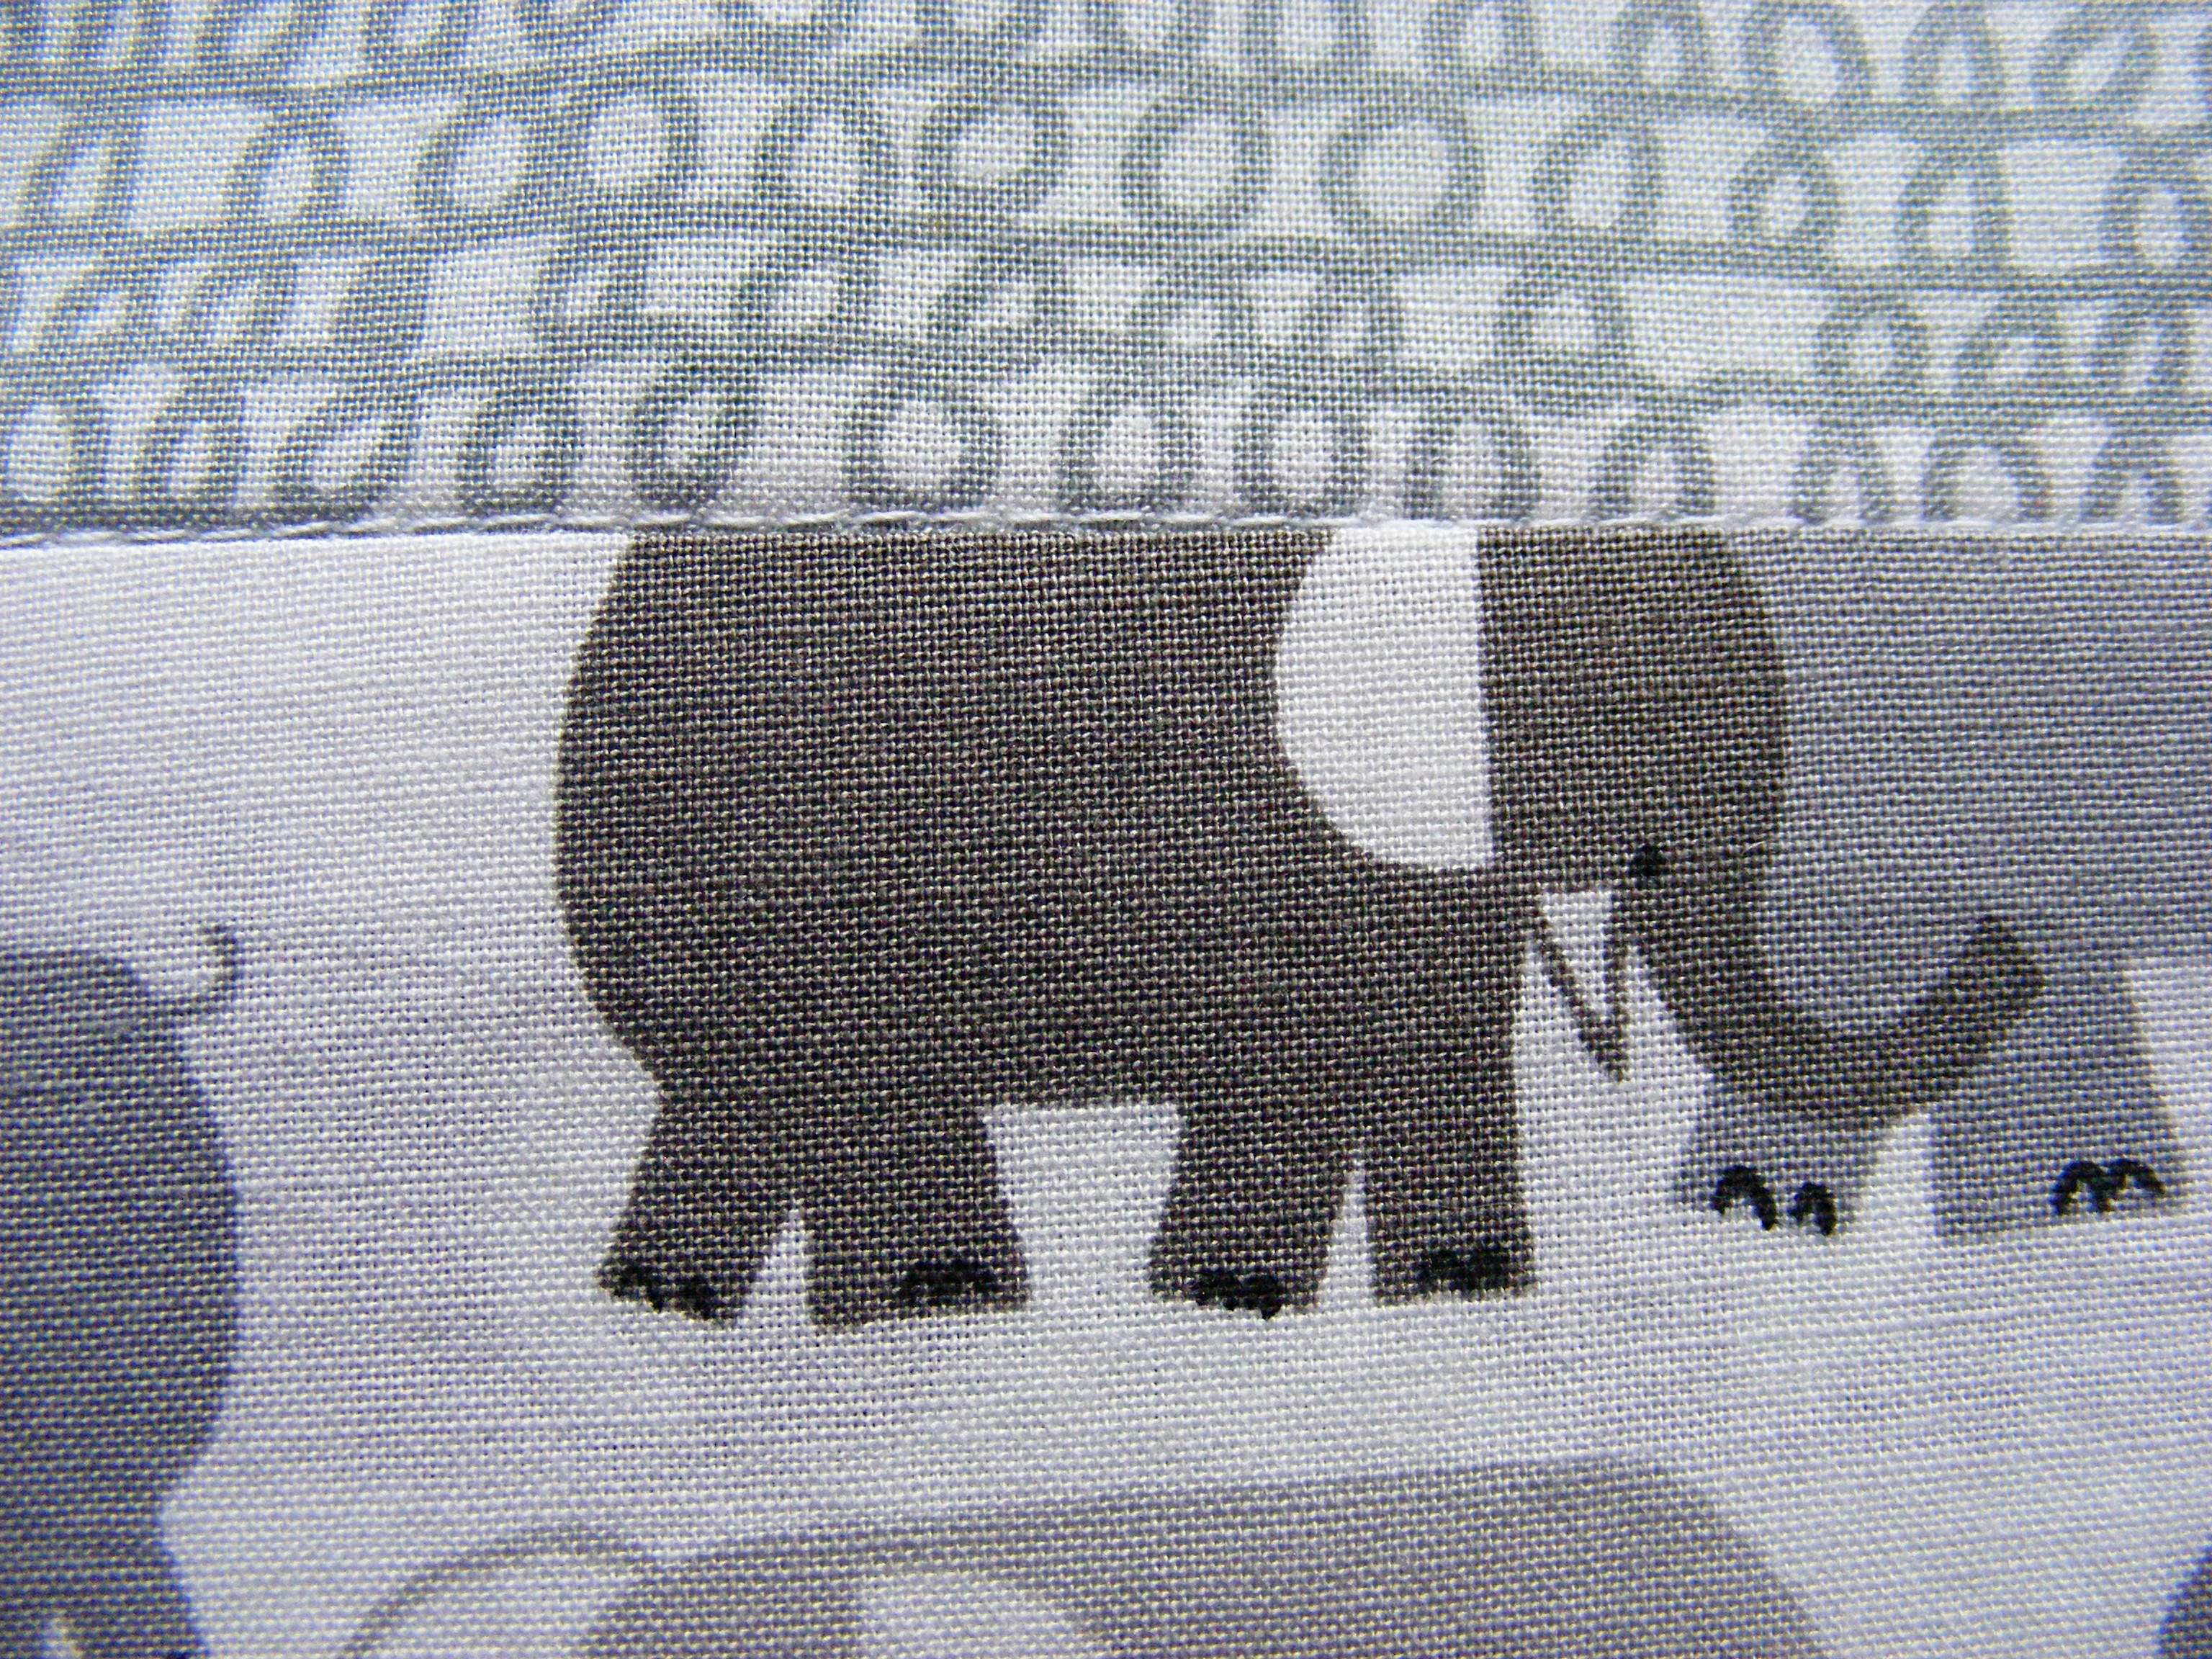
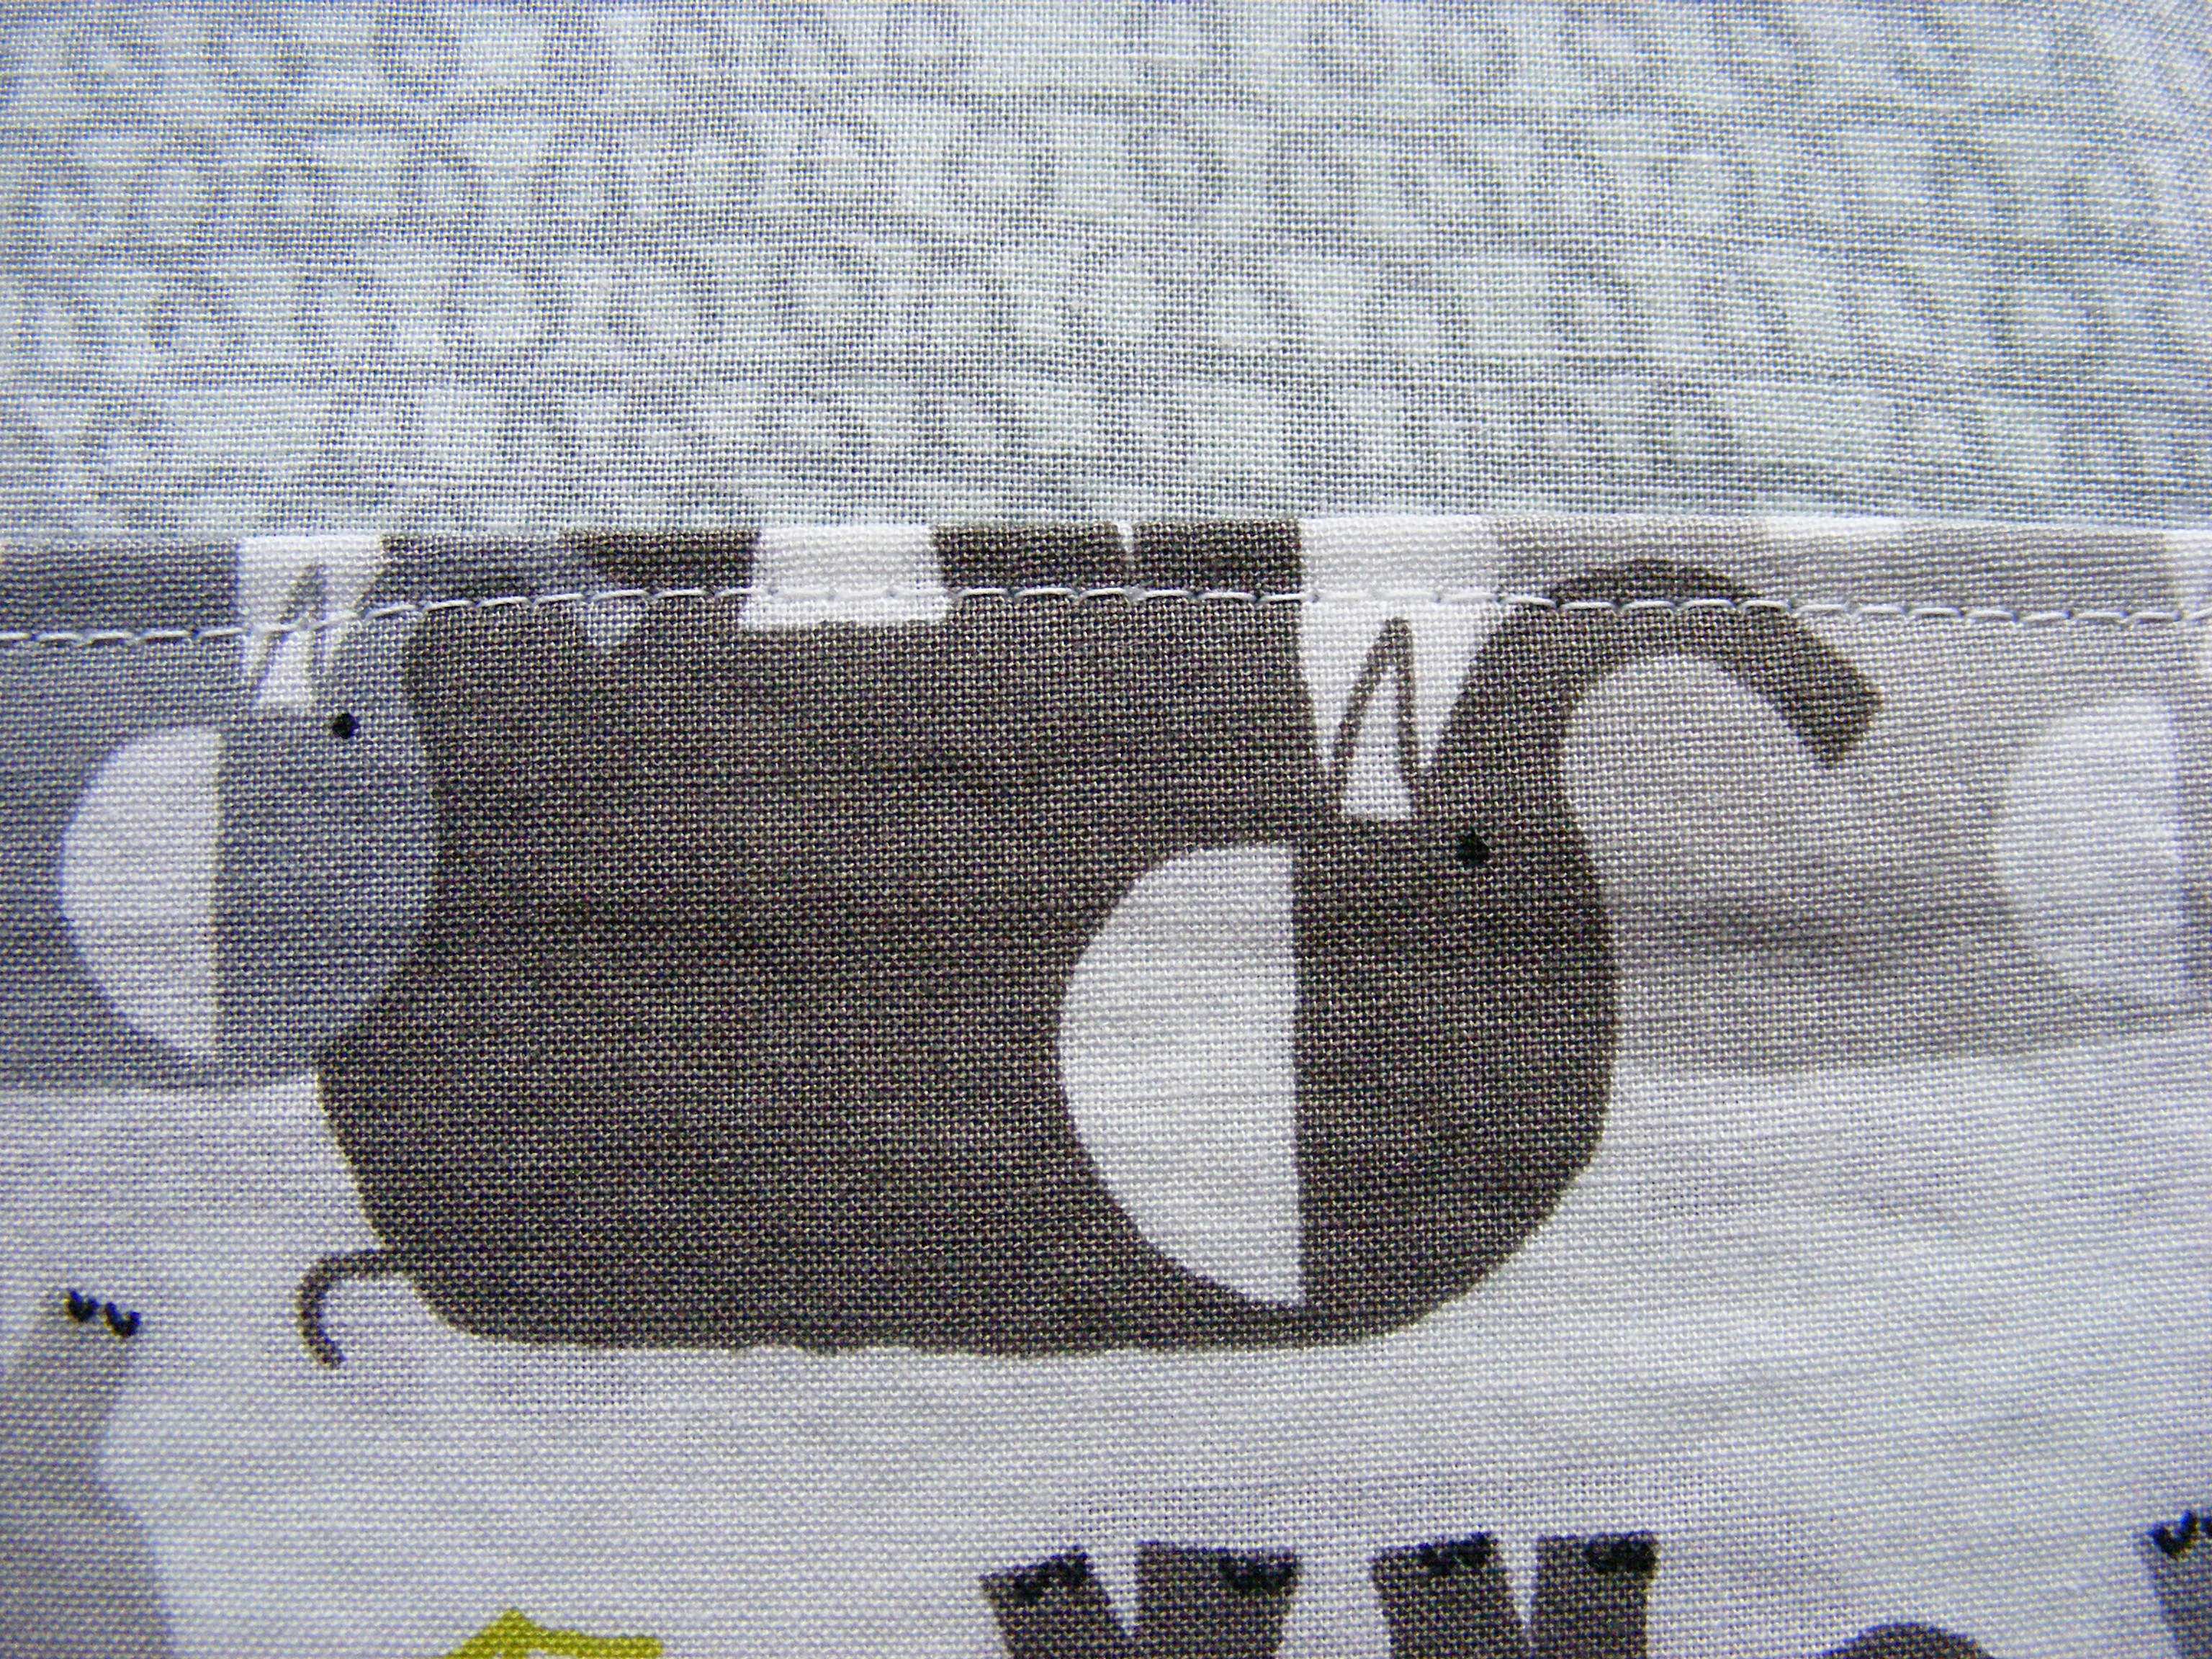
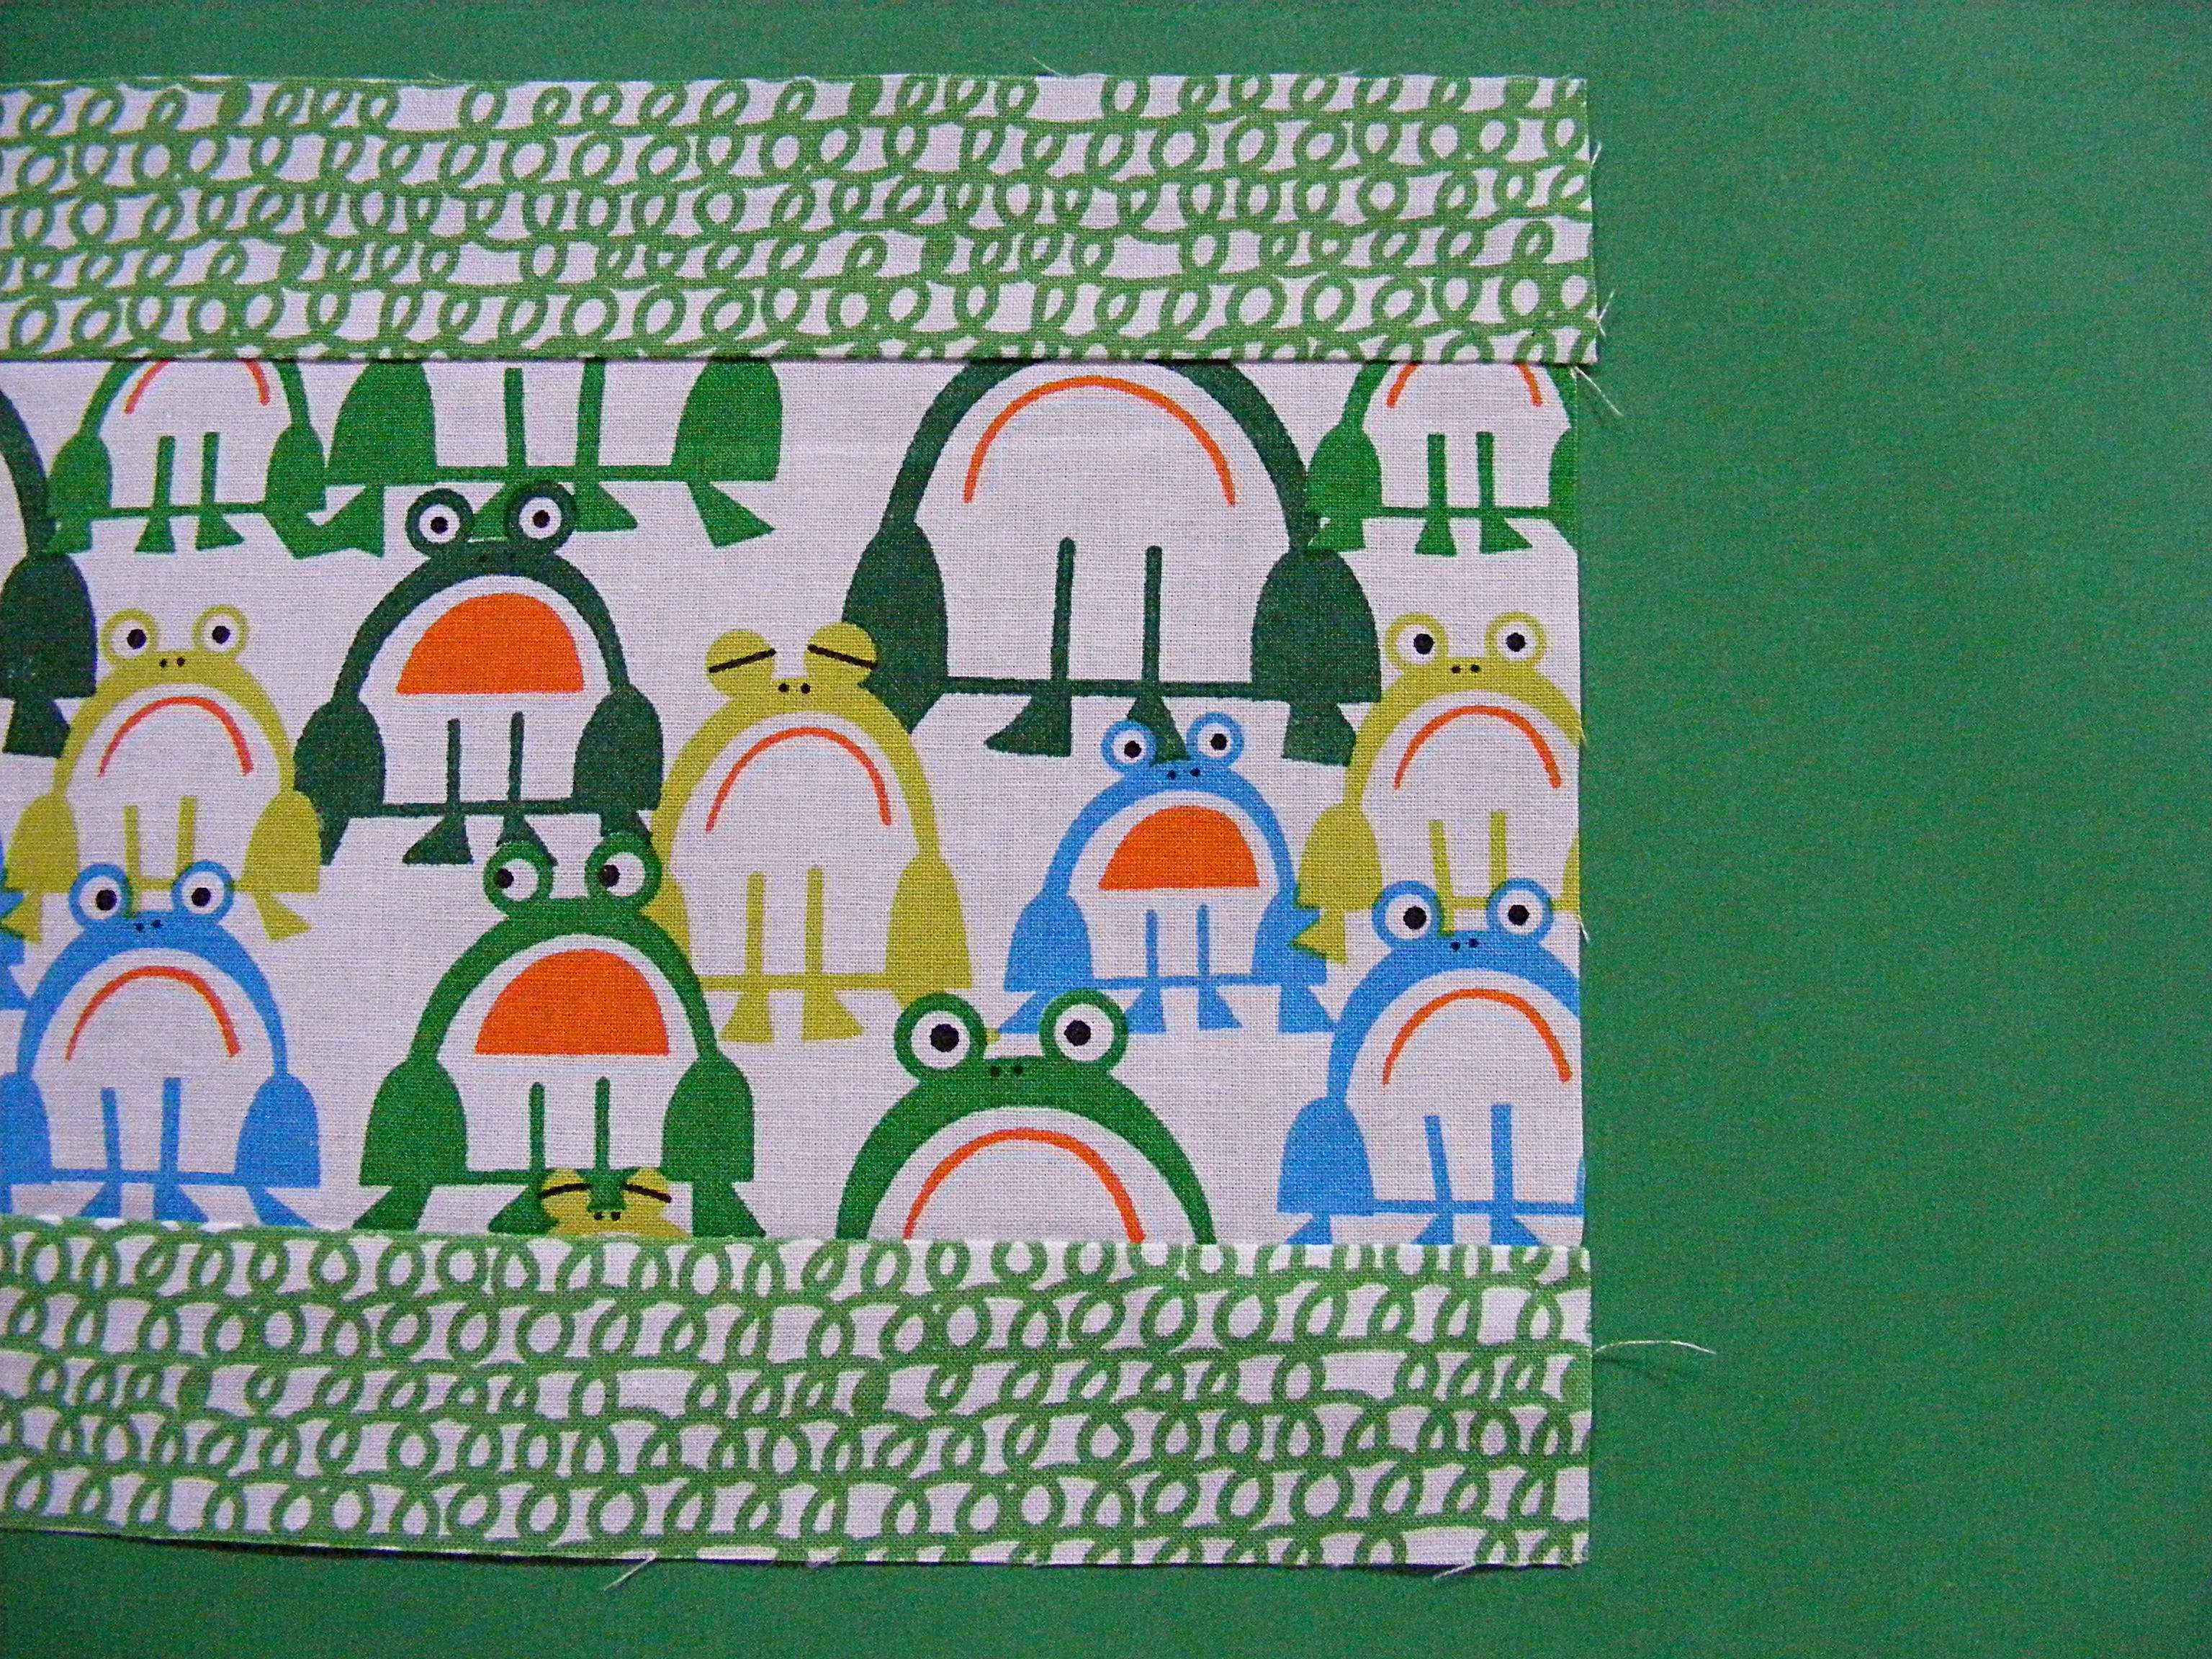
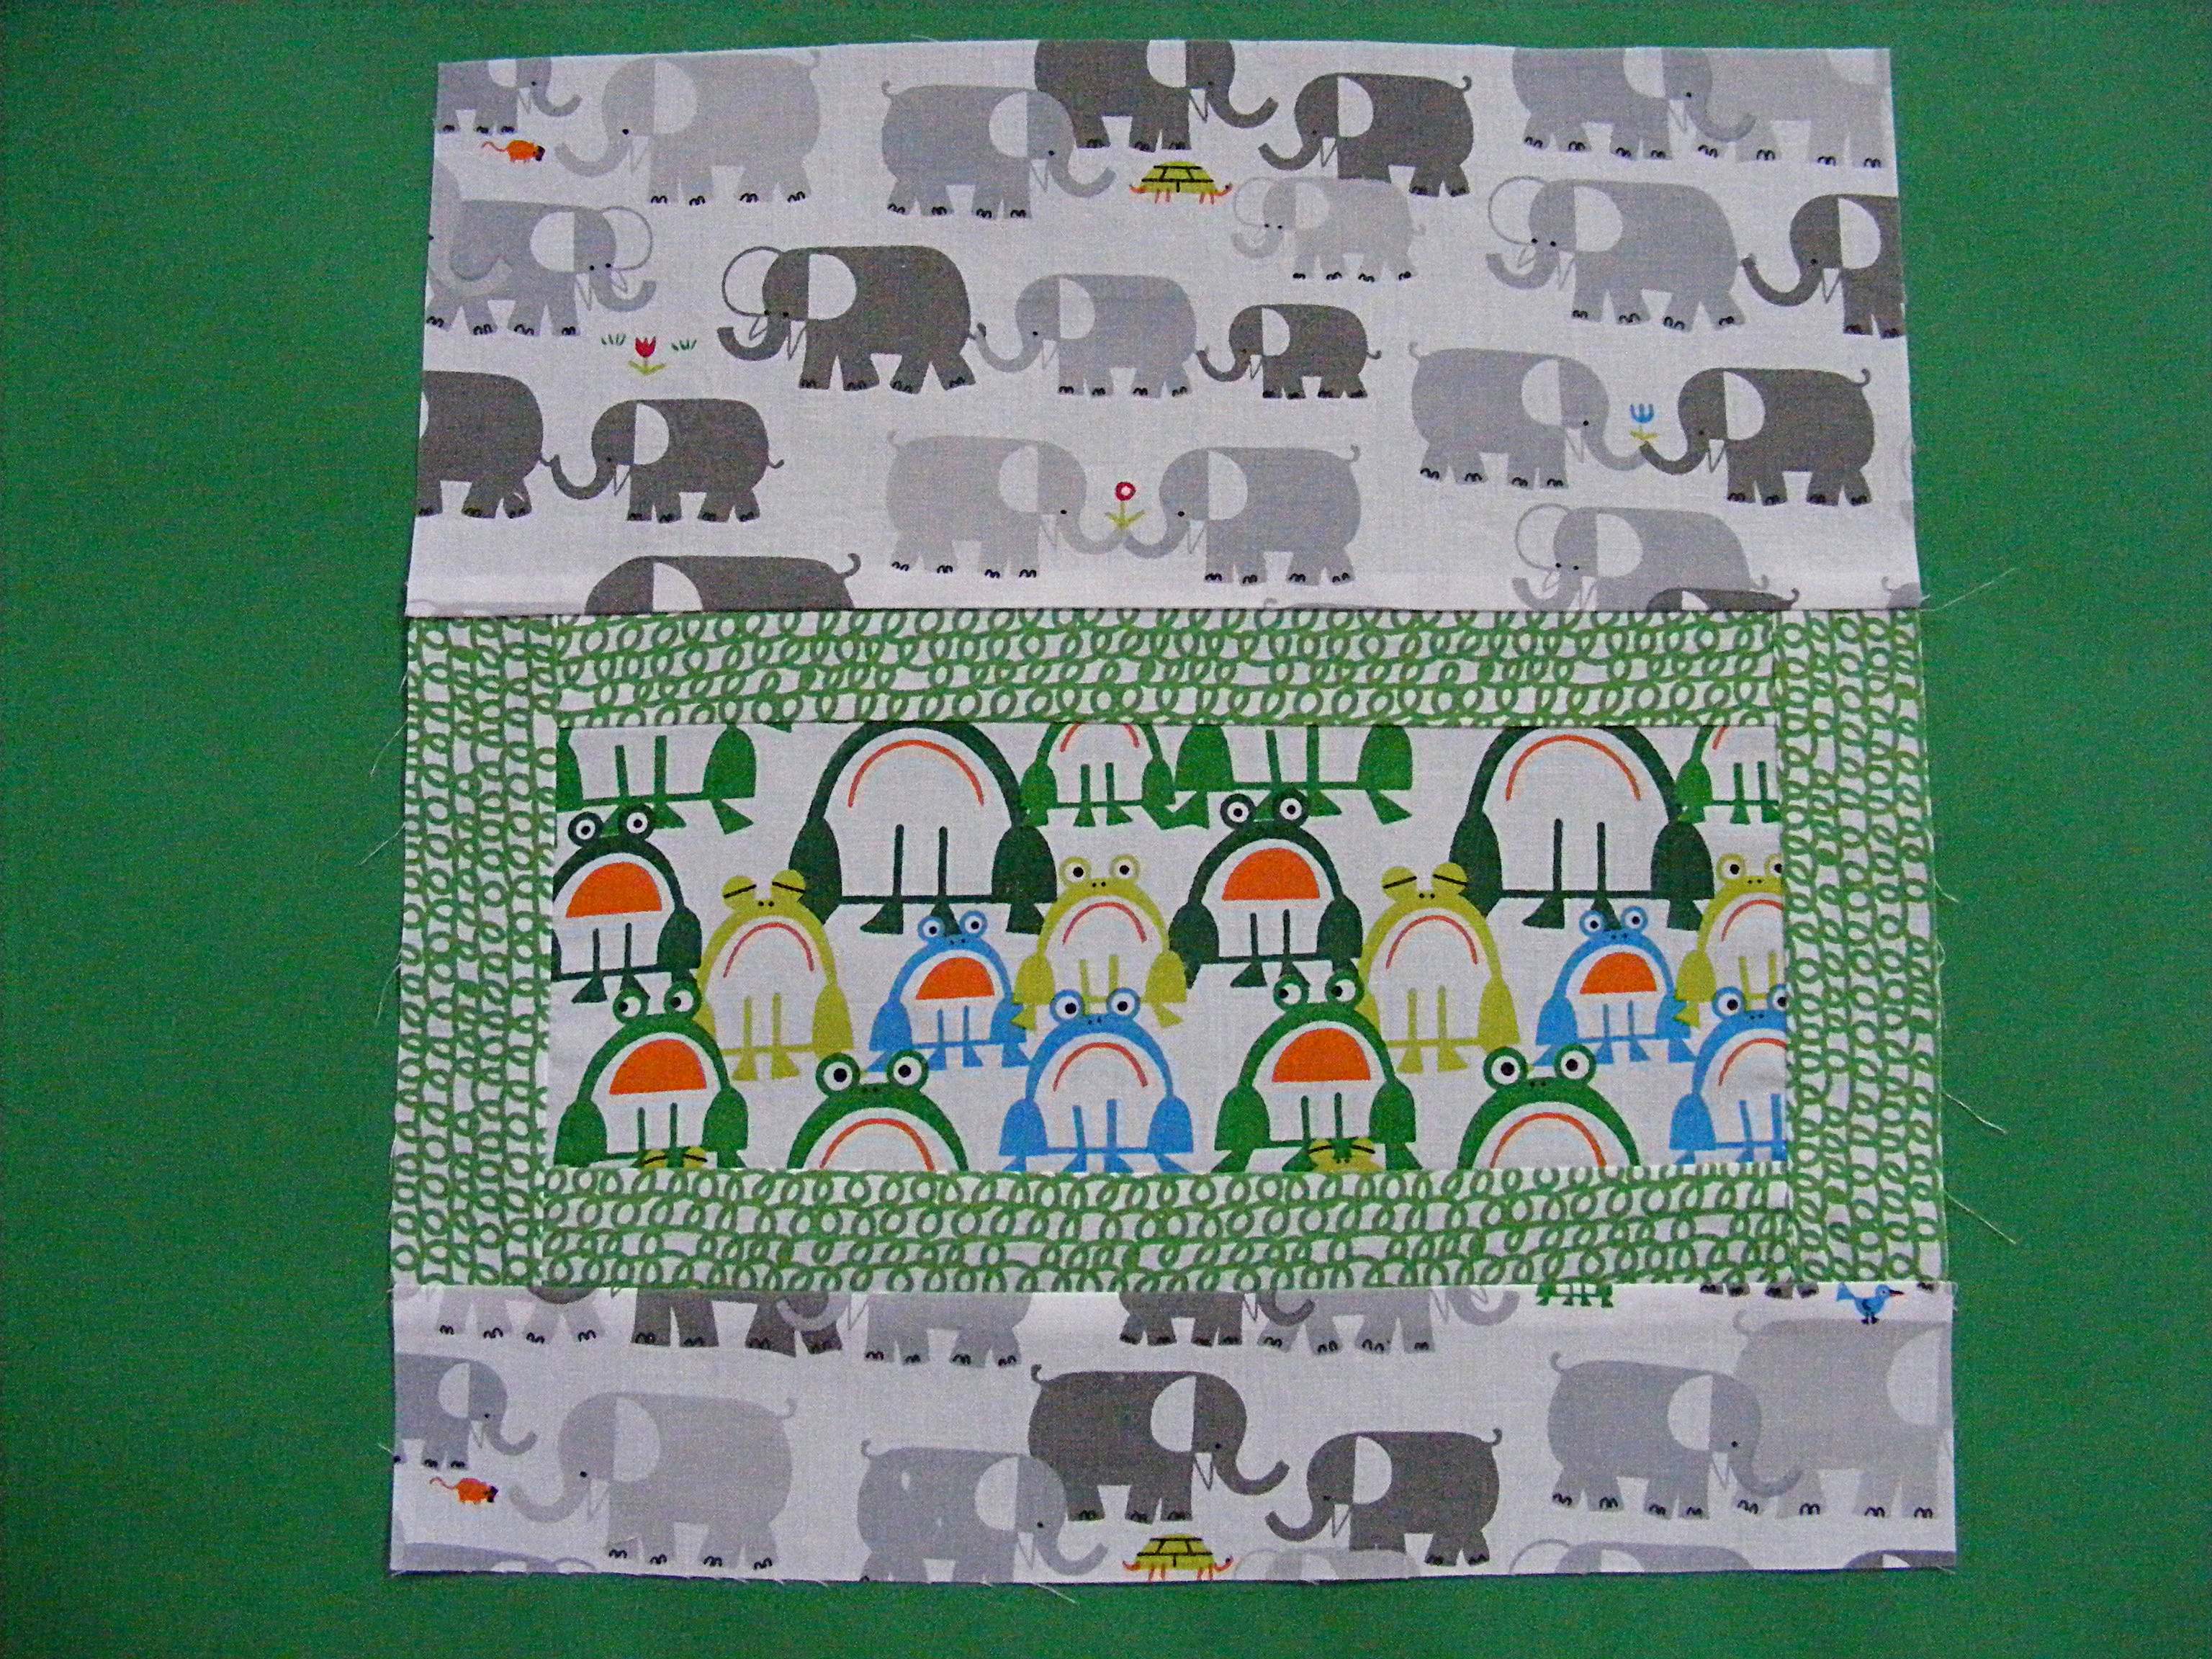
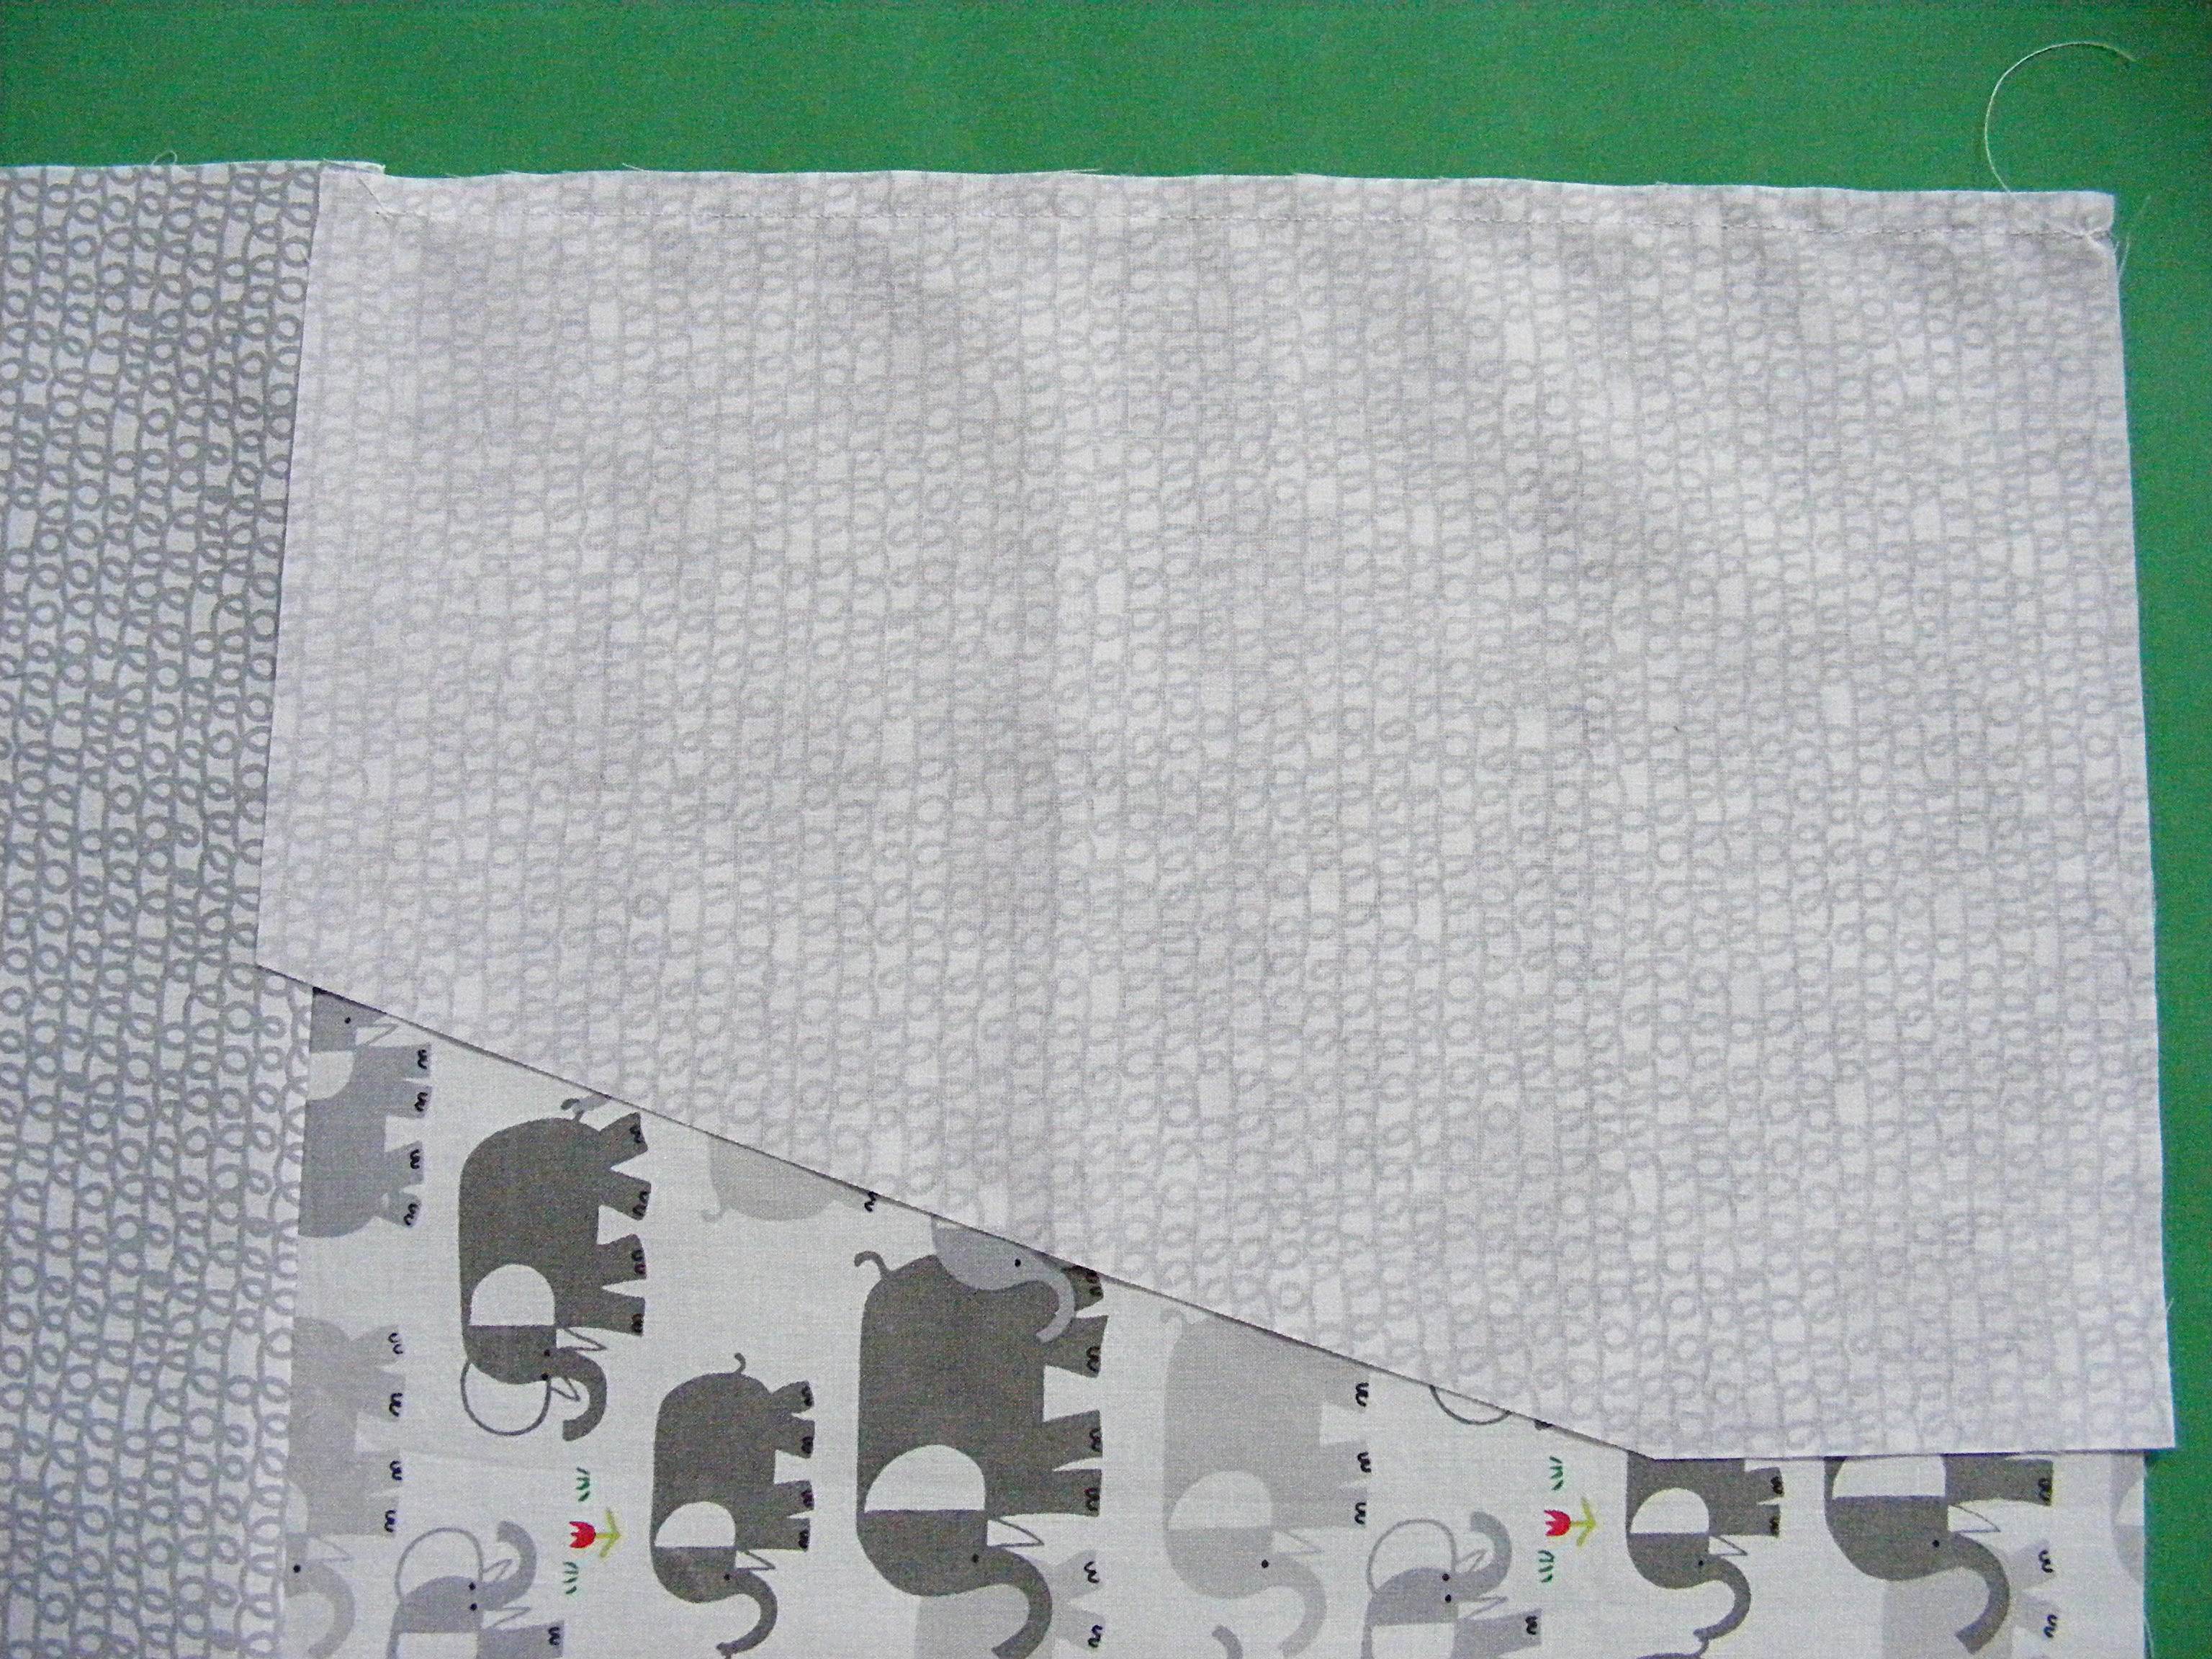
If you look at the finished pattern cover you’ll see a froggy rectangle surrounded by a thin frame of green scribbles, surrounded by elephants. Cut your inner rectangle (the froggy piece) 10 inches wide and 4 inches tall.
Cut 2 strips of frame fabric 10 inches long and 1 1/2 inches wide. Cut 2 more strips of frame fabric 6 inches long and 1 1/2 inches wide. Don’t cut the final (elephant) pieces yet.
Step 4
Sew the long framing strips to the top and bottom of the center rectangle. Use 1/4 inch seam allowance.
Press your seam allowance toward the darker color.
Step 5
Sew the short framing strips to the sides.
If your seam allowances in step 4 were exactly 1/4 inch, the strips should fit perfectly. If not, trim off the extra bits to even things up.
Press seam allowances to the darker color.
Step 6
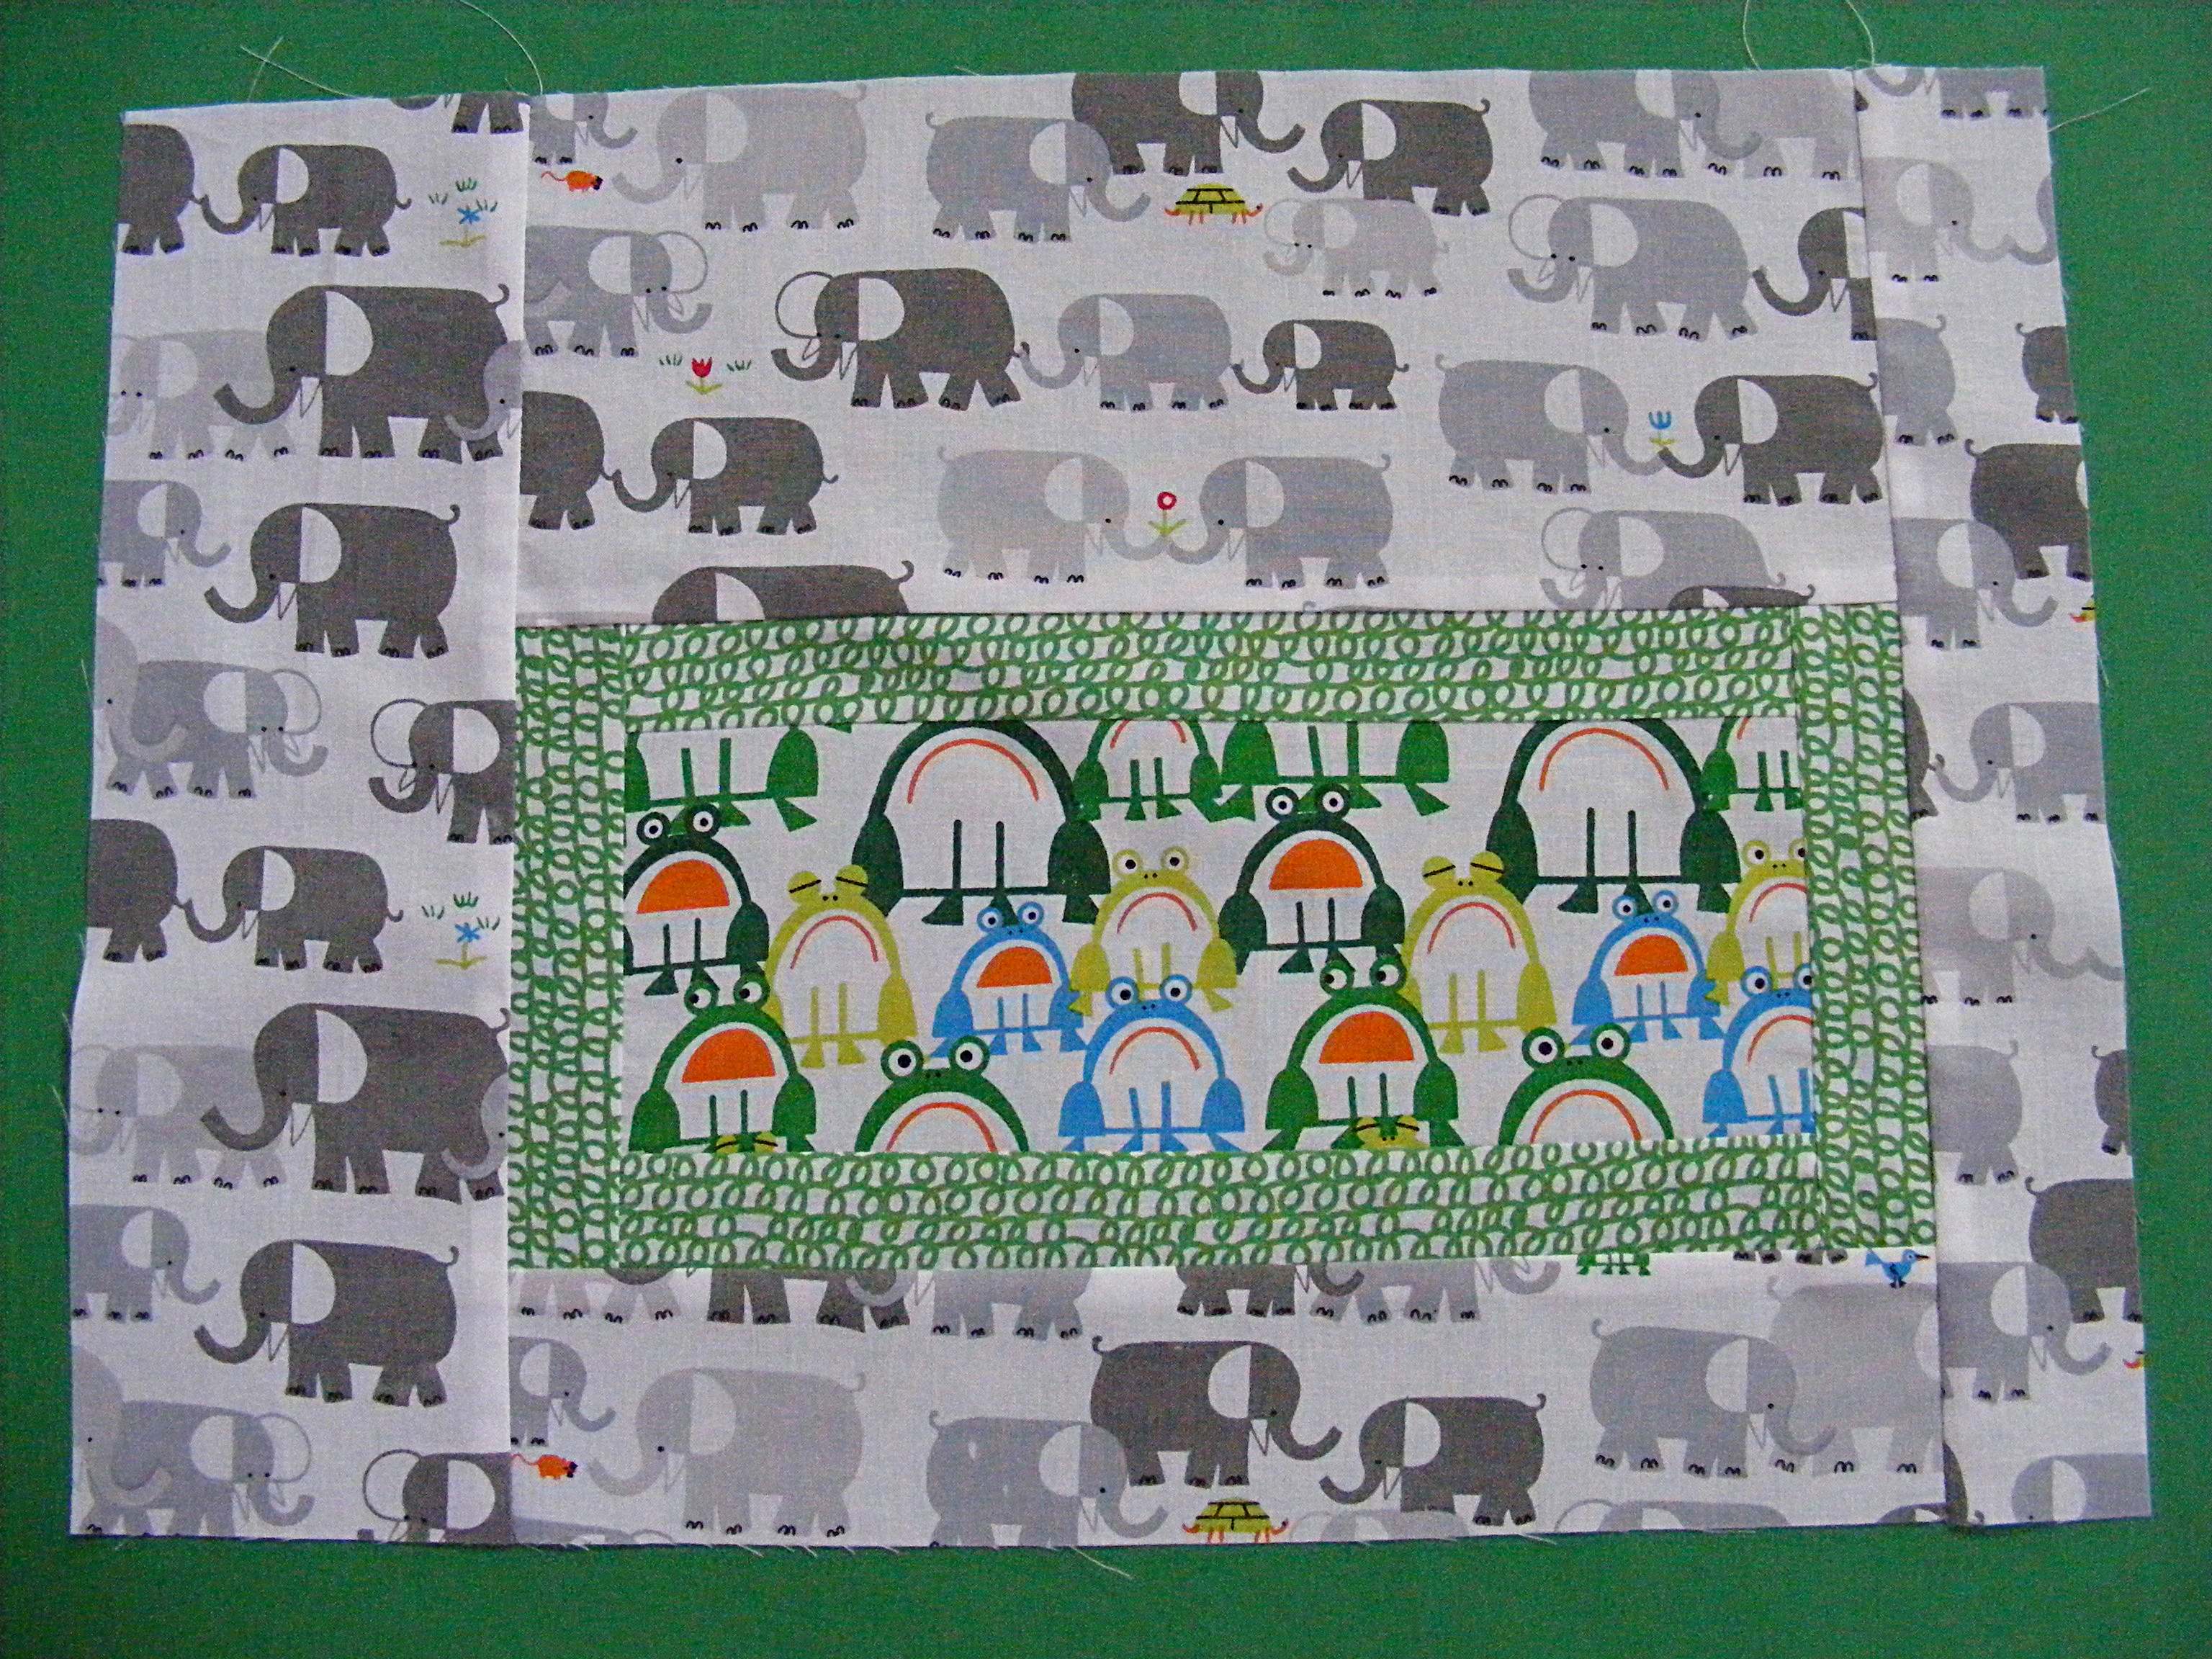
Now you’re going to need to do a little math to make this fit your machine. Add strips to the top and bottom of your inner rectangle to make it equal the total height of your machine + 1 inch for seam allowance and ease.
Notice that I didn’t add the same amount to the top and the bottom. I wanted the inset panel to sit a little lower than the center of the front.
Step 7
Now add strips to the sides to make the total width equal to the width of your machine + 1 inch for seam allowance and ease.
Again – I didn’t add the same width to each side. I wanted the inner panel to sit toward the lower right corner. Play with this and have fun.
You might want to add extra-wide strips in steps 6 and 7 and then cut it down to size, playing with the placement of the panel.
Step 8
One more piece to prep and then you’re ready to put it all together.
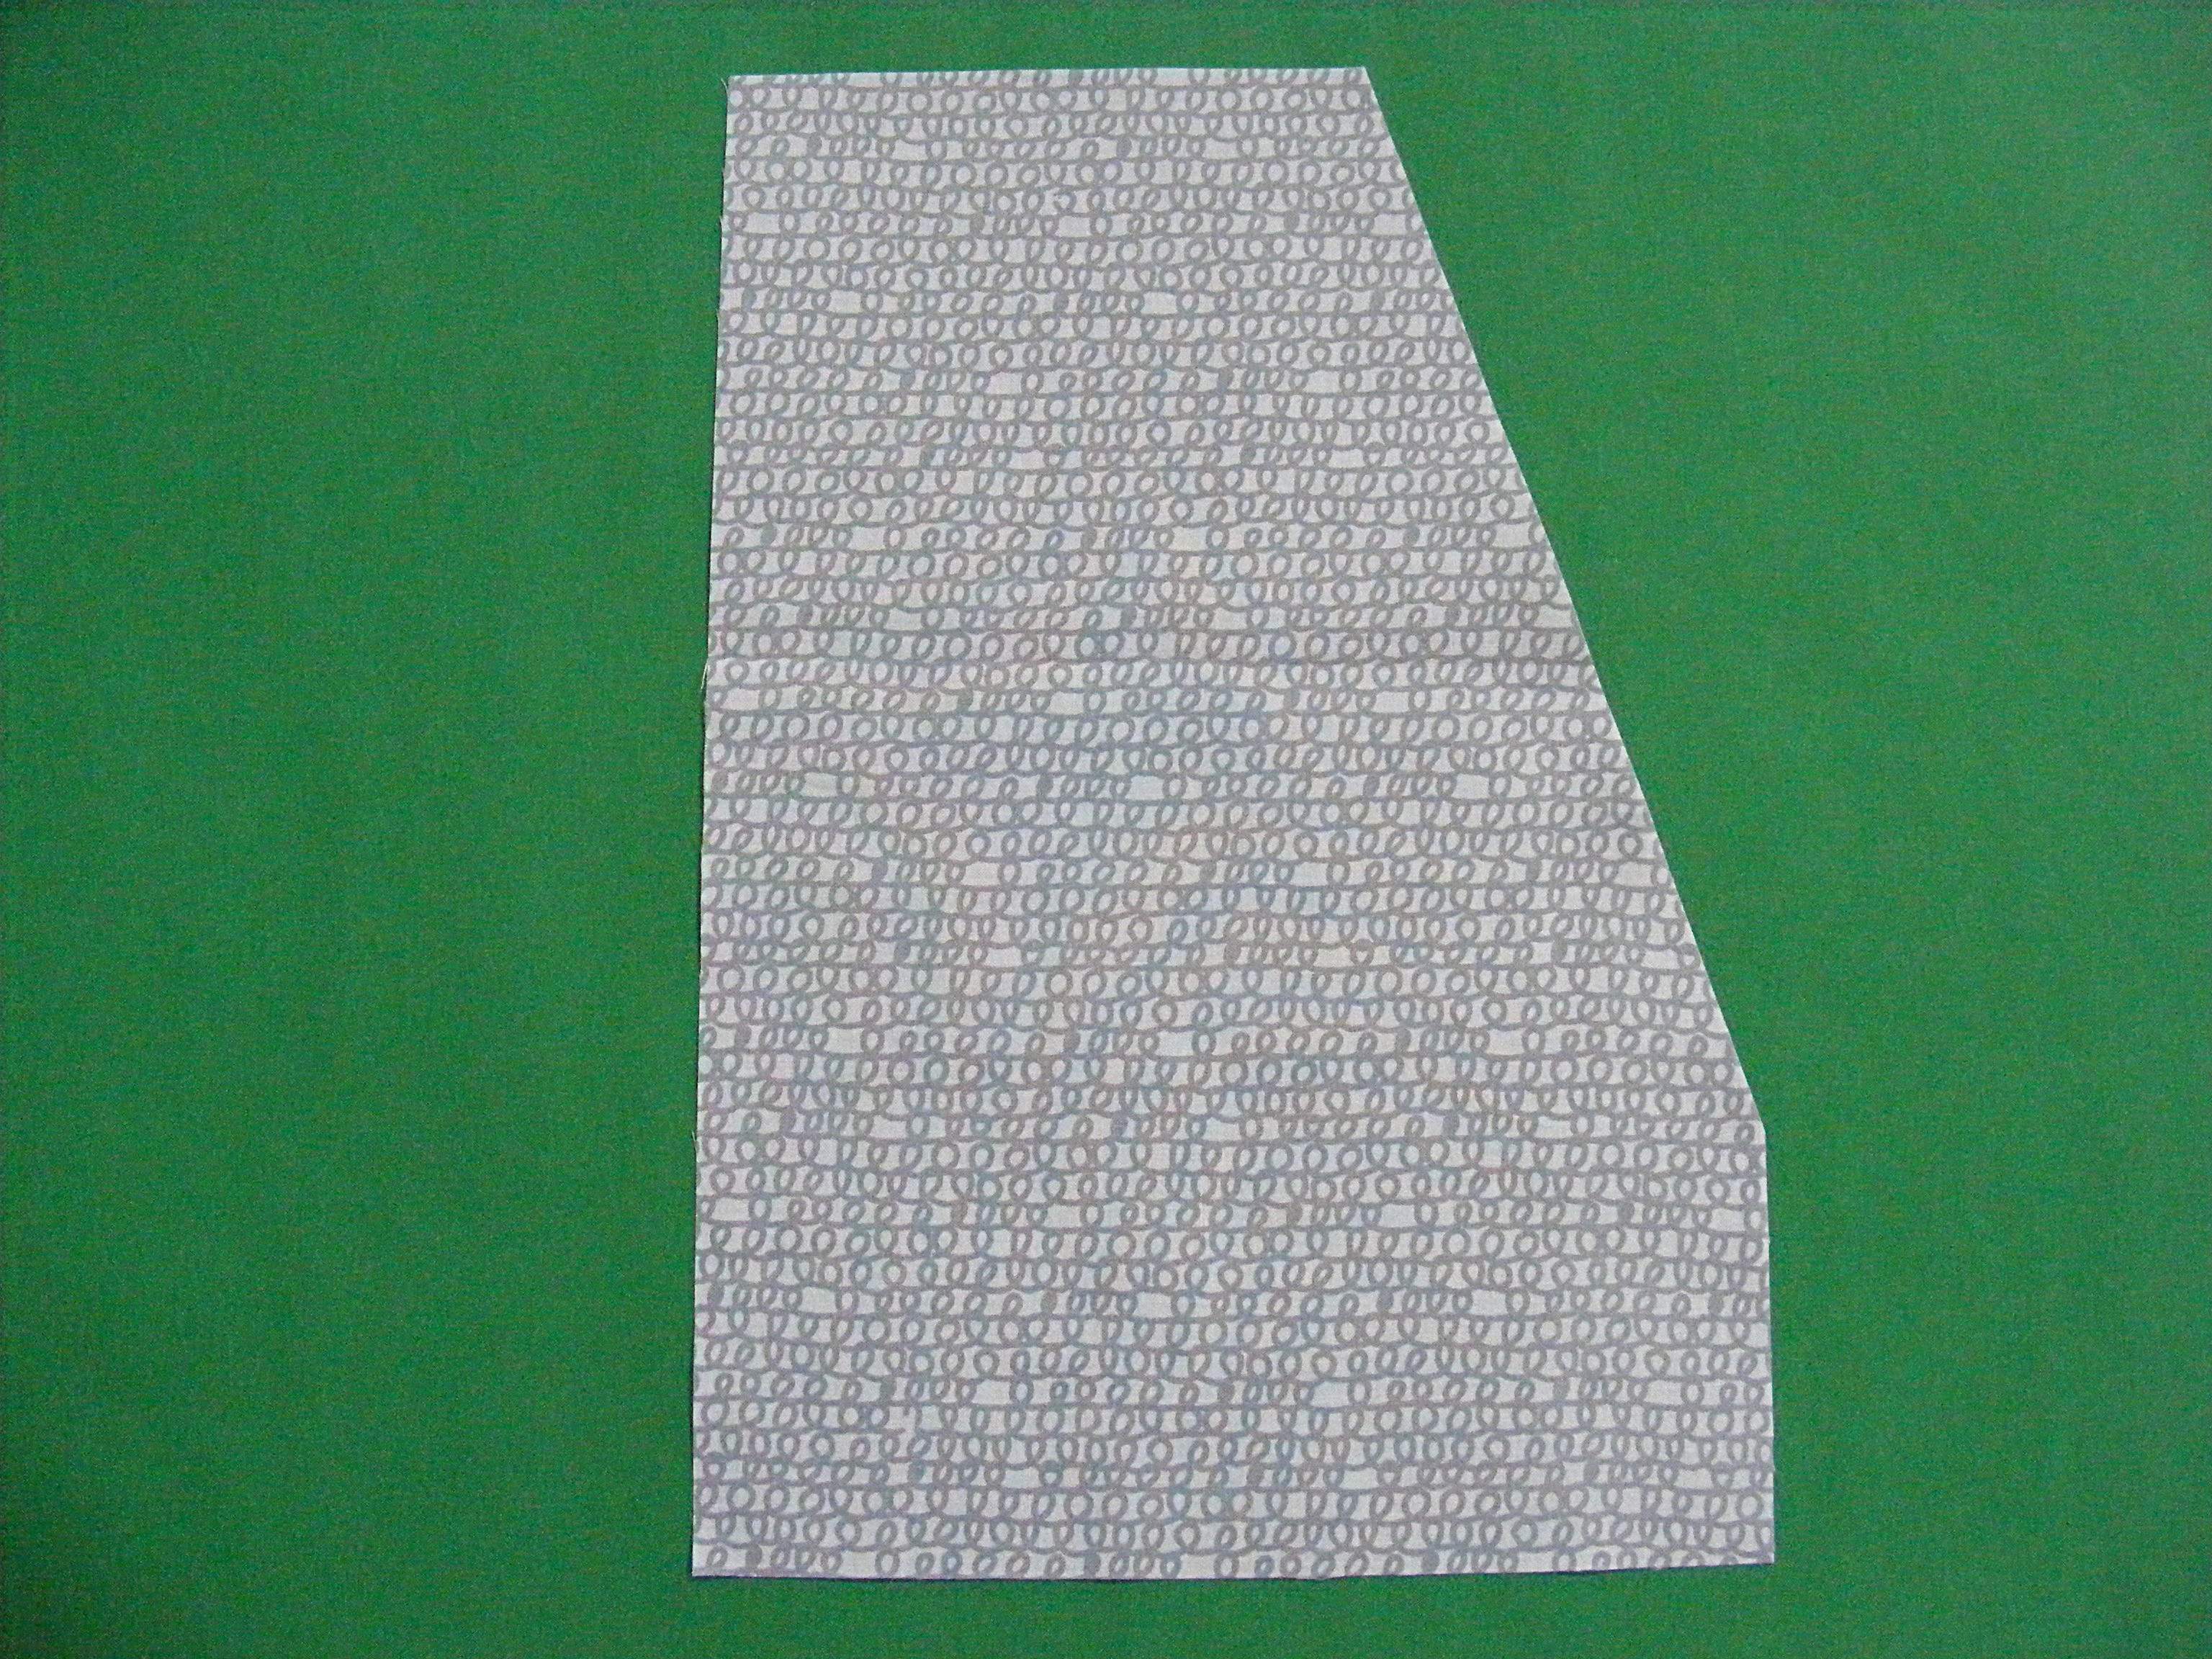
Put the side pieces face to face. From the top left corner measure over the depth of the top of your machine (B) + 1 inch.
From the lower right corner, measure up the height of the front of your machine (C) + 1 inch.
Connect those two points and cut the resulting triangle out of the top right corner of your side pieces.
Step 9
Using 1/4 inch seam allowance, sew the front and back pieces to the top piece. If your fabric only works in one direction (like these elephants) make sure you’re sewing the top of the panel to the top piece, so that the elephants are right side up on the finished cover.
Press seam allowances toward the darker color.
Step 10
Lay the side panel face down on the back panel, so that the long edge of the side panel is lined up with the short edge of the back panel.
Step 11
Using 1/4 inch seam allowance, sew the side panel to the back panel. Stop sewing 1/4 inch from the end of the side panel (this will be at the seam between the back and top panels). Backstitch and remove from the machine.
(I changed fabrics here because the colors worked better for showing the stitching line.)
Step 12
Flip your fabrics around so that the short edge of the side panels is lined up with the short (raw) edge of the top panel.
Start sewing where the previous stitching left off. Stop sewing 1/4 inch from the edge, just as you did in step 11.
Basically, you’re avoiding stitching in the seam allowances. This will let you get nice crisp points when you turn the whole thing right side out.
Step 13
Repeat steps 11 and 12 at the corners as you stitch across the top, along the angled front piece, and down the short bit at the bottom.
Your side panel will end up a little longer than your front panel (the amount of extra fabric depends on the angle that you cut into the side panel in step 8). Just use a pair of scissors to trim off the excess on the side panel and even things up.
Step 14
Repeat steps 10 – 13 for the other side panel.
Boom! You’re done with the outside of your cover.
Now repeat steps 9 – 14 to make another cover.
Everything should be finished on both covers except the bottom edge.
Step 15
Turn the inside cover right side out. Turn the outside cover inside out. Put the inside cover inside the outside cover so that their right sides are facing each other. Make sure the front panels are facing each other.
Line up the raw edges of the two covers, matching the seams all the way around. Pin.
Using 1/4 inch seam allowance, sew the two covers together at the bottom edge, almost all the way around. Leave about 4 inches open so you can turn everything right side out.
Step 16
Turn the whole thing right side out and flip things around so that the inner cover is the liner of the outer cover. Work at the bottom seam allowance and press it nice and flat.
Either hand sew the opening closed or topstitch all the way around the bottom edge to close it and stabilize the edge.
Step 17
Put it on your machine. Admire it. Reverse the cover and admire it some more. You’re awesome!
Here are handy links to all the posts about quilting tools and supplies.
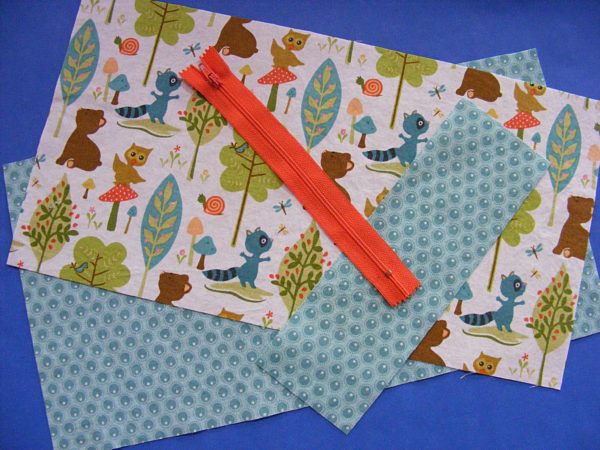
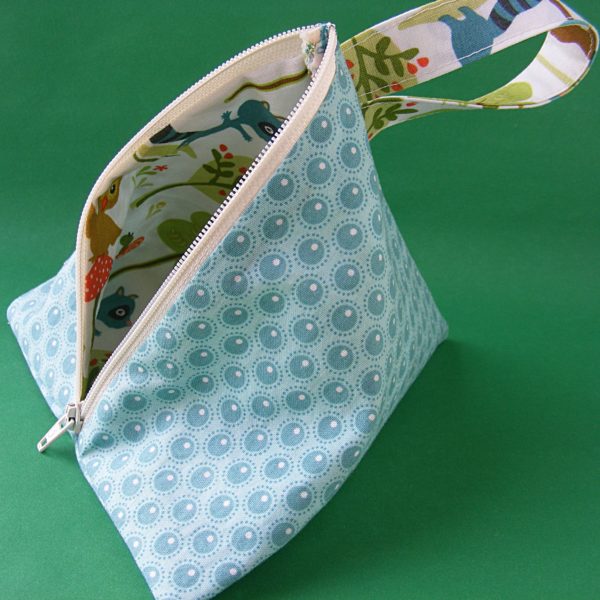
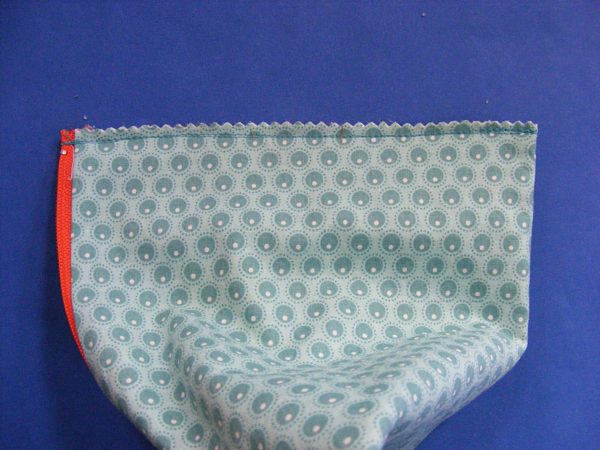
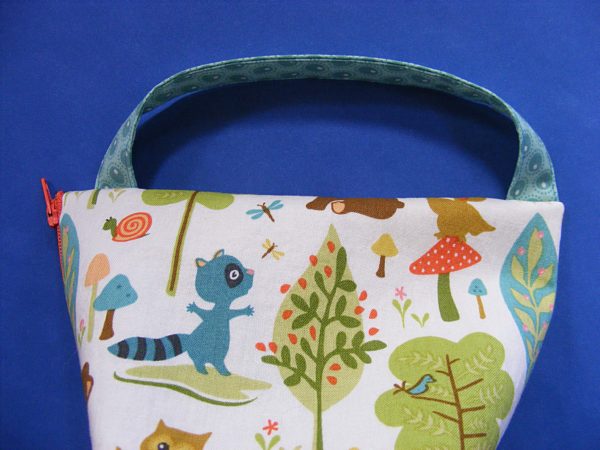
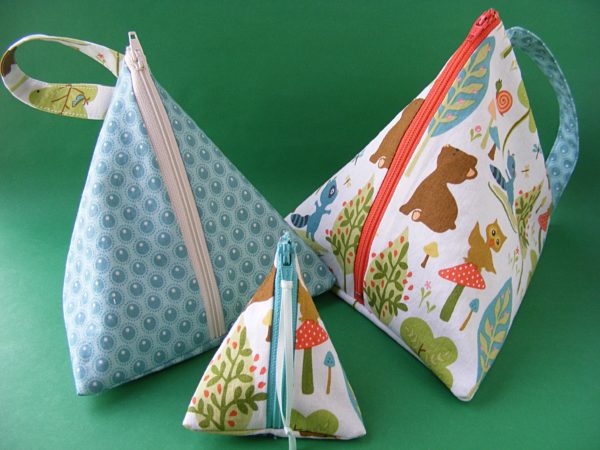
These triangle totes are handy-dandy little things. Use them to hold make-up, coins, little toys, a handful of crayons and a small notebook – anything you can think of.
Materials you’ll need for all three pyramid bags:
Two fat quarters of contrasting fabric
Three zippers – 7 inch, 5 inch, and 3 inch (follow package instructions to shorten plastic zippers if necessary)
sewing machine, thread, basic sewing tools
Skills you’ll need (links take you to video tutorials):
Gather your materials. For the large bag you’ll need two fabric rectangles, each 8″ tall and 15″ wide, one piece for the handle cut 3″ wide and 9″ long, and one 7″ zipper.
The medium bag pieces are cut 6″ x 11″ with the handle piece cut 3″ x 7″ and a 5″ zipper.
The small bag pieces are cut 4″ x 7″ with a 3″ zipper. The small bag has no handle.
Step 2
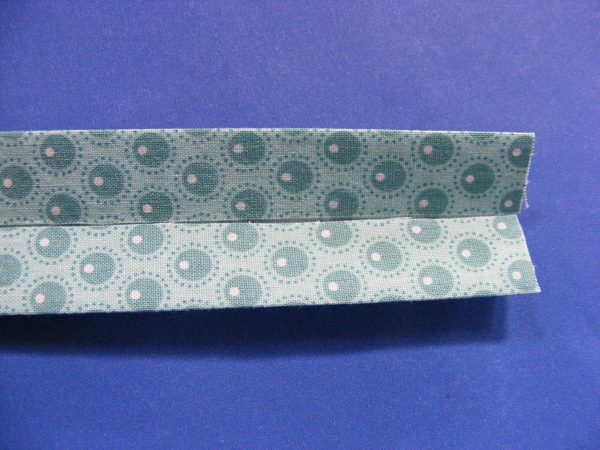
We’ll start by prepping the handle. Fold your handle piece in half the long way and press a crease down the center. Open it back up and fold each edge in to the center crease. Press. Refold down the center crease and press.
Step 3
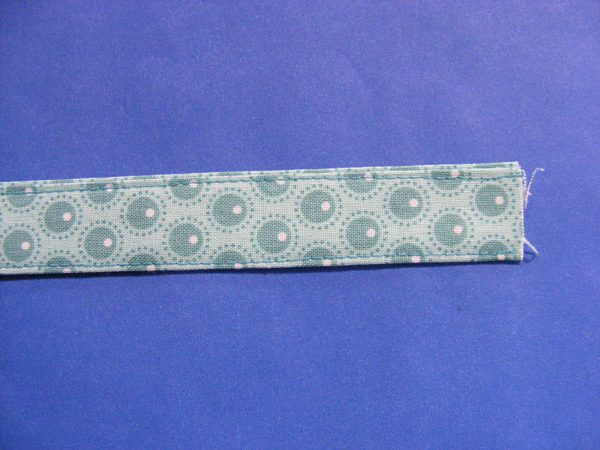
Now stitch down the length of the handle, about 1/8 in from each edge. Press with steam to make all those stitches settle in and look nice. Set the handle aside for now.
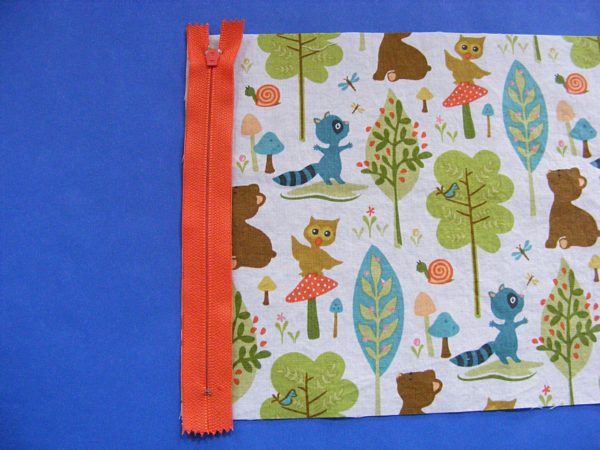
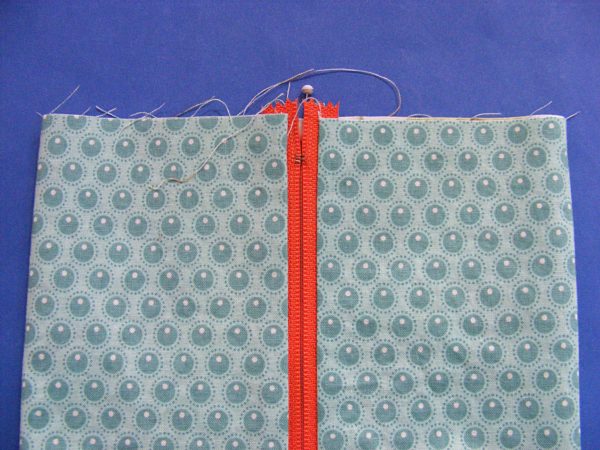
First, switch out your regular presser foot for a zipper foot. Now lay your outside fabric face up on your workspace. Lay the zipper face down over one short edge.
Step 5
Lay the lining fabric face down over the zipper. Line up all the edges and sew them together as close to the teeth of the zipper as your zipper foot will let you get. When you open up the layers, the zipper will be sandwiched between the right sides of the two fabrics, with the zipper pull facing the outside fabric.
Step 6
Now you need to attach the other ends of the fabric to the other flap of zipper tape. It will look weird when you get them all together – like a figure 8 with a zipper at the center. Don’t worry – it’s supposed to look like this.
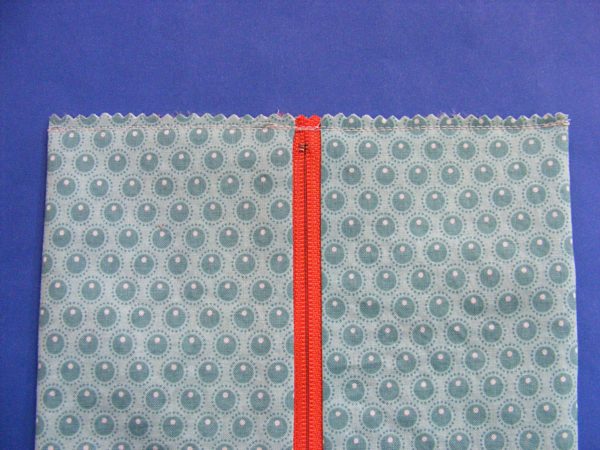
Step 7
See? When you turn it right side out you’ll have a tube with the main fabric on the outside, the lining fabric on the inside, and the zipper in between them.
Step 8
Now that you’ve admired your nice zipper installation, turn the tube inside out, so the lining fabric is on the outside. Flatten the tube so that the zipper is running down one side. Mark the fold opposite the bottom of the zipper with a pin. Basically, you’re just finding the center here.
Step 9
Reflatten the tube so that the bottom of the zipper is lined up with the pin. See? Now the zipper is exactly centered and you didn’t have to measure anything. Geometry is awesome!
Step 10
Using 1/4 inch seam allowance, stitch across the bottom of the bag. Stitch right over the zipper (if you’re using a plastic zipper) but do it slowly. Trim the raw edge with pinking shears.
I sewed this seam twice. I don’t know about other kids, but my daughter likes to stuff as much as she can into any bag and I don’t want the seam to split.
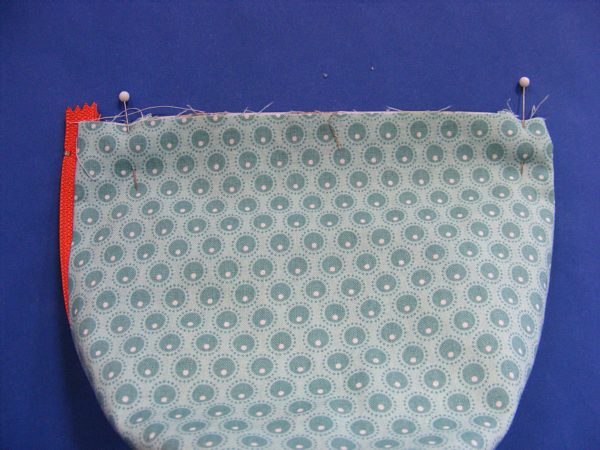
Step 11
Now we’re going to sew the top seam and attach the handle. First – unzip the zipper. You will be very unhappy if you forget this step so do it now! Reflatten the top of the bag so that the zipper is running up the side. Sandwich the handle between the two layers. Put one end at each edge of the bag for a handle like on the biggest bag (shown here – see the pins?).
Put the ends together as close as possible to the zipper for a handle like on the middle bag.
Make sure the raw edges of the handle are lined up with the raw edges of the bag and pin in place.
Step 12
Using 1/4 inch seam allowance, sew across the top edge of the bag. I double-sew the seam here too – and you might even triple-sew across the handles. Strong is good. 🙂
Trim your seam allowance with pinking shears. Not too close to your seam – just neaten things up a bit.
Step 13
Turn the bag right side out through the unzipped zipper opening. (See why you had to unzip it before sewing?)
Gorgeous! And so useful! Give yourself a pat on the back and make another. You can get all three bags out of a pair of fat quarters.
Here are all three together. The smallest bag has no handle – but I attached a bit of ribbon to the zipper pull.
Make a bunch for yourself, and to share with friends! When you make them, share photos in the Shiny Happy People group. We would love to see!
What on earth is that weird-looking thing up there?
That, my friends, is my newest free pattern. I call it a carrying can. It’s a terrific toy (and toy tote) for kids.
It’s a pineapple juice can, completely covered with fabric, with a small, elasticized opening in the top making it easy to reach in and grab toys, but hard for toys to fall out when you’re just carrying it around.
It’s fun to stuff large, squishy toys through the small, stretchy opening, and rocks dropped in the hole make a satisfying clanging sound when they hit the metal can. 🙂 The instructions are for a short carrying handle, but you could easily lengthen it to an over-the-shoulder strap.
(If you’d like to make the snake you see wriggling out of the can you can find the free pattern here.)
This was originally posted on Sew, Mama, Sew where a couple of commenters expressed concern about the sharp edge of the can. I find that most can openers actually leave a pretty clean edge on the can itself. (The lid that you remove is another story.) Check it, of course. But be aware too that the construction of the thing makes it pretty hard to get your hand on the edge of the can once it’s all put together. The fabric wraps around tightly enough that you can’t shift the elastic too far away from the center of the can. If you’re worried about it (or if your can opener does leave a jagged edge) you can substitute any straight-sided cylindrical container with a flat bottom – like an oatmeal container. I give instructions for how to measure for an alternate-sized container. But an oatmeal container won’t be as durable as a tin can – and rocks dropped in won’t make the same cool sound. 🙂
Here’s how to make it. . .
Supplies
One pineapple juice can (7 inches tall and 13 1/2 inches around)
One fat quarter of your favorite fabric
One 6 inch piece of 1/4 inch elastic
Step 1: Cut fabric. Cut one rectangle 10 1/2 inches tall x 13 3/4 inches long (or height of can + 3 1/2 inches x circumference of can + 1/2 inch, if you’re using a different sized can).
Cut one strip for the handle 4 inches x 14 inches.
Stitch all the way around the edges of the handle, as close to the edge as possible. Press to set the stitches.
Set the handle aside.
Step 3: Prepare the base circle. Place the two fabric circles right sides together. Stitch all the way around the edge with a 1/4 inch seam allowance.
Cut a small slit (about 2 inches) in the center of ONE of the circles. Be very careful not to cut through both layers.
Turn the circles right side out through the small slit. Smooth the curves with a chopstick and press. You have a neatly finished circle to sew on the base of your can. Set it aside.
Step 4: Prepare the main can cover. Turn the top edge of the fabric down 1/4 inch and press. (If you’re using fabric with a right and wrong side up, make sure you’re working with the top edge.) Turn it down another 1/2 inch and press. Stitch along the folded edge, creating a channel for the elastic.
Step 5: Add the handle. Place one end of the handle so that the bottom of the handle is 3 inches below the top (folded) edge of the can cover, and the edge of the handle is 3 inches from the edge of the can cover.
Repeat with the other end of the handle on the other side of the can. Make sure not to twist the handle between the two sides.
Sew the ends of the handles in place. I like to sew a box roughly 1 inch square, with an X across the middle of it. This makes a nice strong handle.
Step 6: Sew up the can cover. Thread the elastic through the channel at the top of the cover. Be careful not to pull the ends through.
When the ends of the elastic are flush with the raw edges at ends of the channel, fold the cover right sides together and stitch the side seam using 1/4 inch seam allowance. I like to start with the elastic end so I’m sure that’s lined up perfectly, sew through the elastic, backstitch back over the elastic, then sew through the elastic again and then on down the rest of the seam. This makes it extra strong at the stress point where the elastic is.
Press your seam allowance open.
Step 7: Cover the can. Slide the sleeve over the can. Center the elastic opening over the open end of the can.
Turn the can over and tape the raw edges of the bottom of the sleeve to the base of the can. The tape will be covered– so don’t worry about how ugly it looks here– but make sure the fabric is gathered neatly around the edge of the can.
Center the prepared circle over the tape and hand stitch it in place. I recommend using ladder stitch; you can find a video tutorial for that here.
Done! Hand it off to a small person and see what they stuff inside!
‘Tis the season for dry, itchy skin. For me, an oatmeal bath is the answer. You can just dump some oatmeal in the water, but I don’t really like to lay on the oatmeal bits, so I make these oatmeal bath scrubs. 🙂 They’re inexpensive and easy and very soothing.
First, for each scrubbie cut two 4 inch squares of fabric. I usually use super cheap cotton muslin – the cheapest I can find. Or use some really ugly cotton fabric out of your stash. (How does that stuff get in there?)
Sew the two pieces together around three sides. I use a 1/4 inch seam allowance, but it doesn’t really matter.
Fill each bag with 1/4 cup of old-fashioned oatmeal. Sew it together across the top.
Voila! You have a finished oatmeal bath scrub.
I usually make a bunch of these at one time – I can make about a dozen in 15 minutes. They’re terrific for any itchy skin issues. Toss one in the tub while it fills. Let the water pound down on it for a little while to mash out the oatmeal goodness. Once I get in the bath I also squeeze the bag every once in a while. Just having the stuff in the water is good, but it’s also great to rub the scrubbie directly on any itchy places. It helps sooth poison ivy, sunburn, dry skin, allergic reactions, and more. Last summer my daughter “forgot” that she was allergic to grass and repeatedly rolled down a freshly-mowed hill wearing a tank top and shorts. She was covered with itchy red welts, but one bath with an oatmeal scrubbie took care of it.
These oatmeal bath scrubs make terrific gifts too. Make a bunch for a friend when you’re making some for yourself. 🙂


 sewing pattern for pyramid bags")