


Most people tell me that they’ve got a handle on the crocheting part… but when it comes to assembling amigurumi pieces, they dread it! That makes me sniffle… making amigurumi should be 100% fun!
So, in this post, I’ll show you how to attach limbs easily and evenly… taking all the stress out of sewing. The trick to easy attaching is planning out your placement ahead of time. It’s a piece of cake after that!
Plan where to attach your limbs
I’m making Jackie the Cow and I’m about to attach the legs and arms.
The instructions say, “Attach legs to rounds 9-14.”
Of course, this is just a suggestion! You can attach limbs wherever you’d like… but I’ve told you where I attach mine so there’s no guesswork on your part!
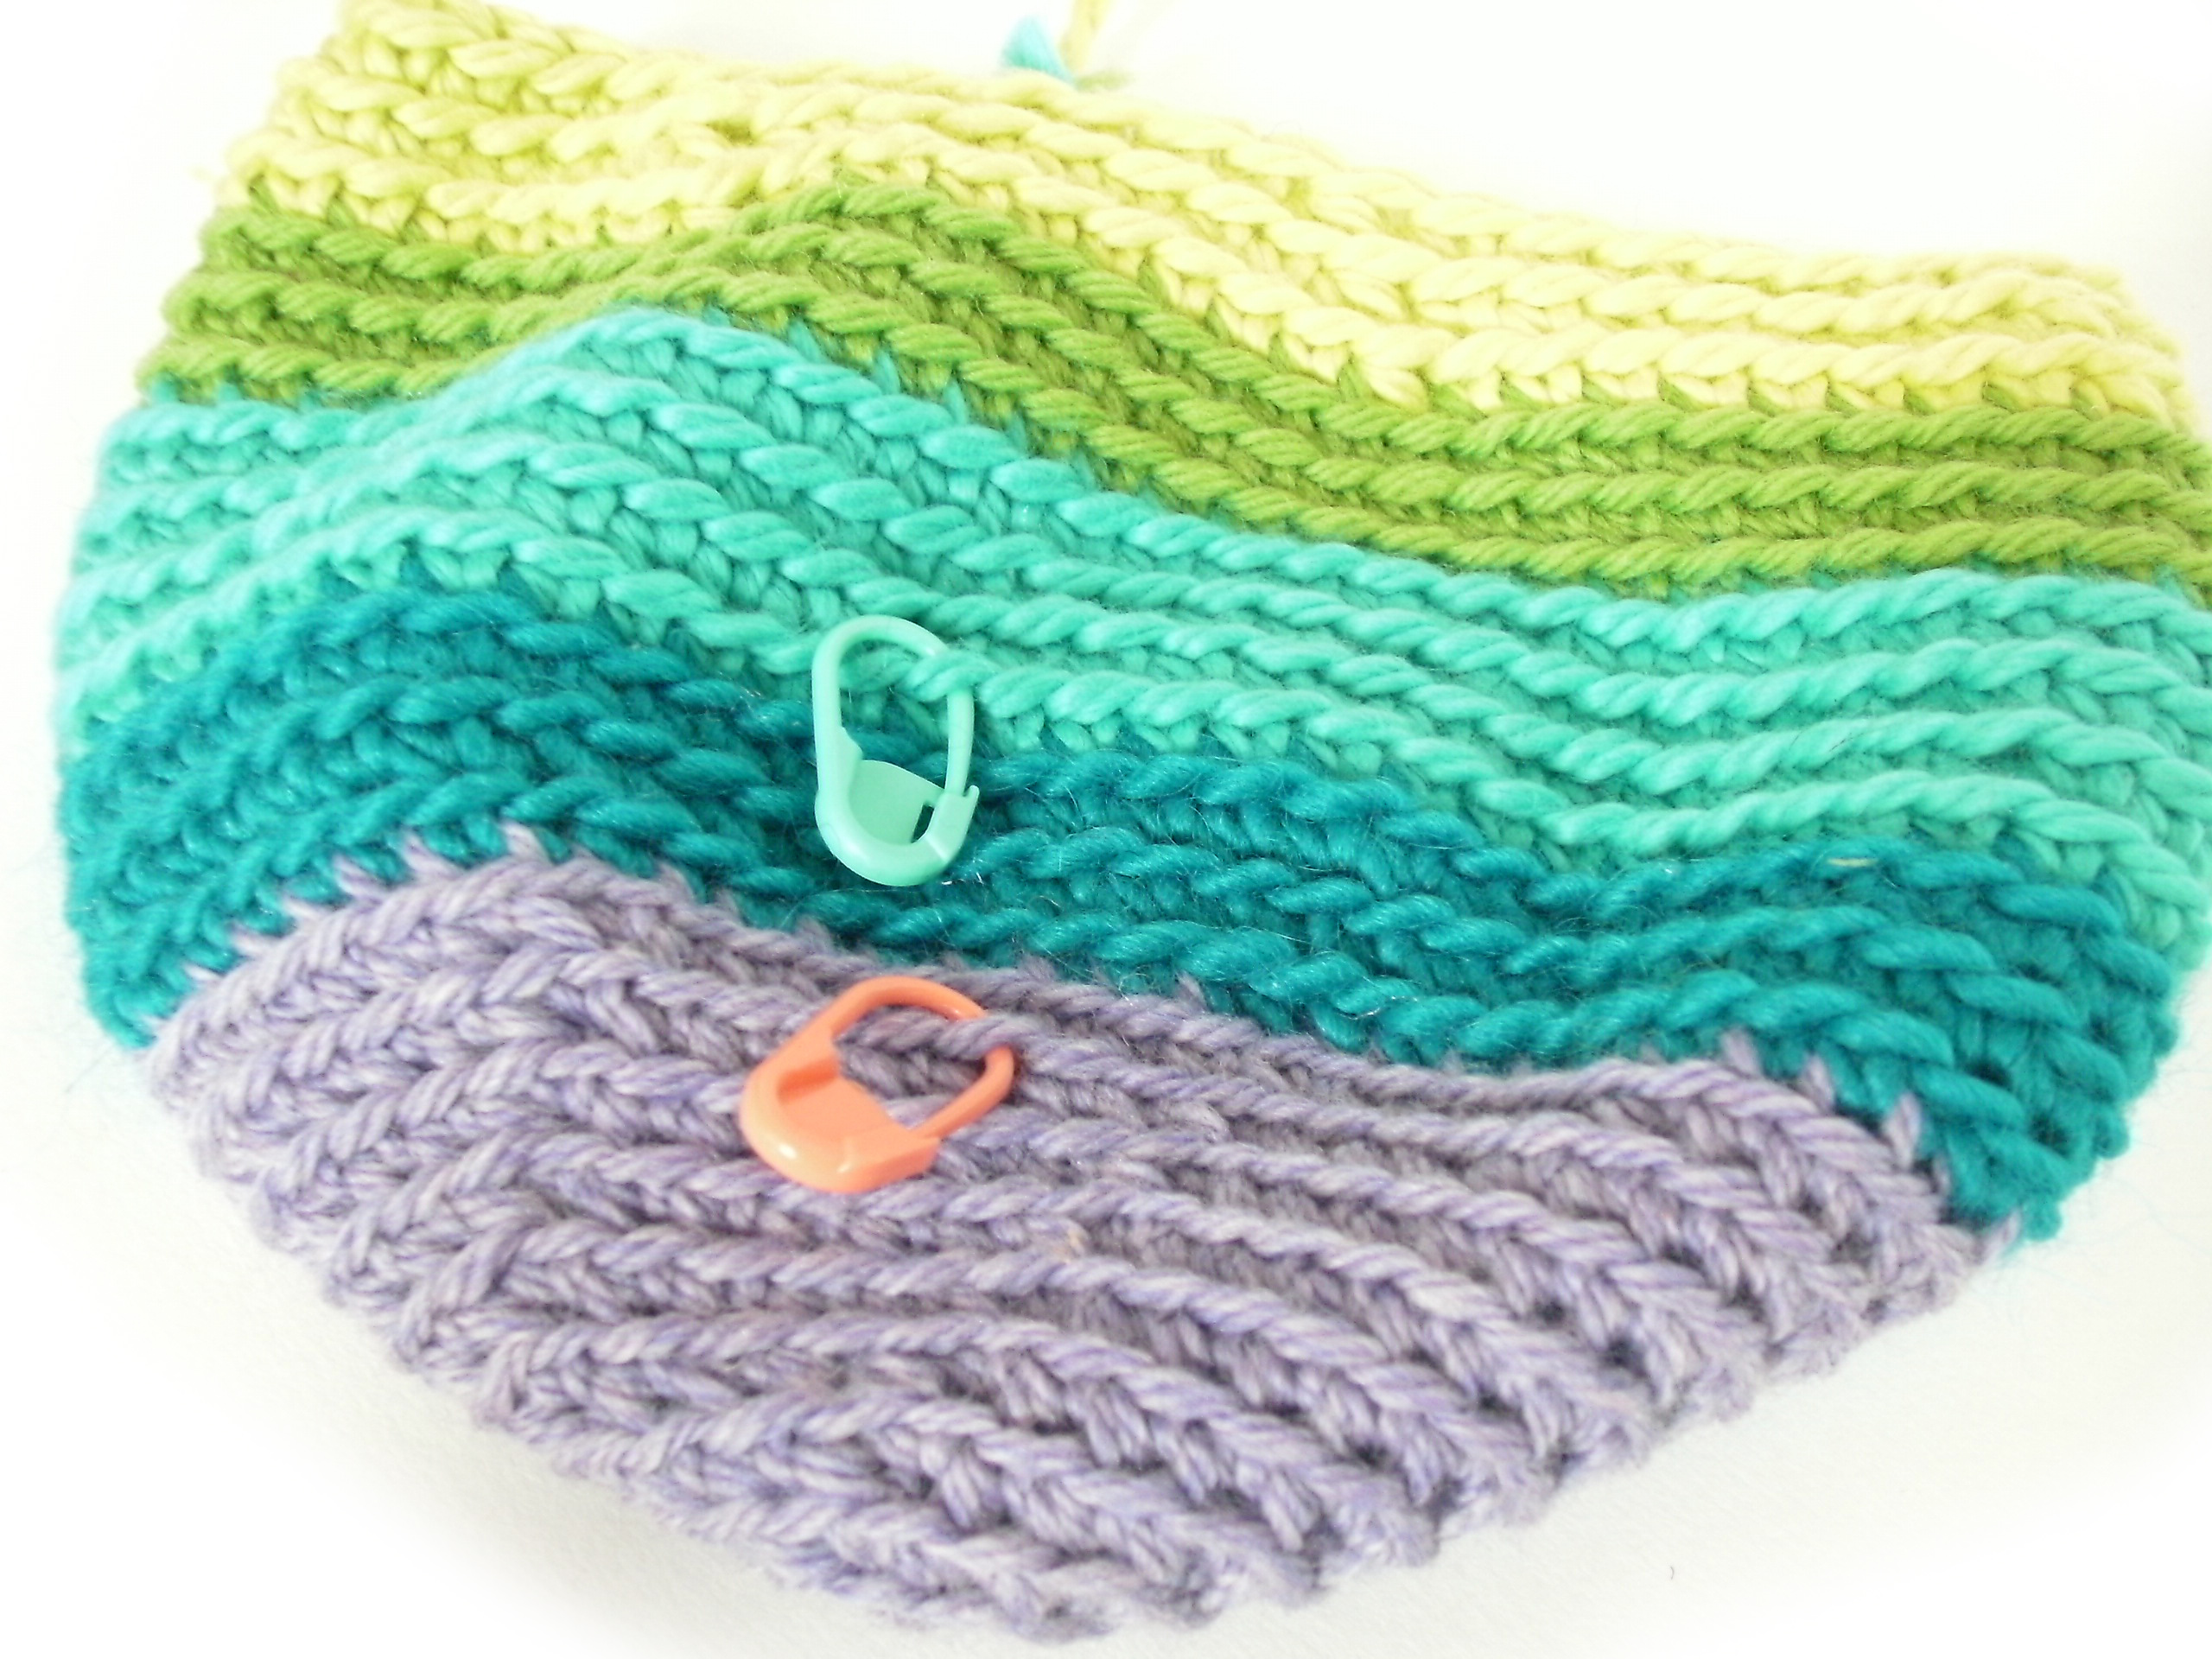
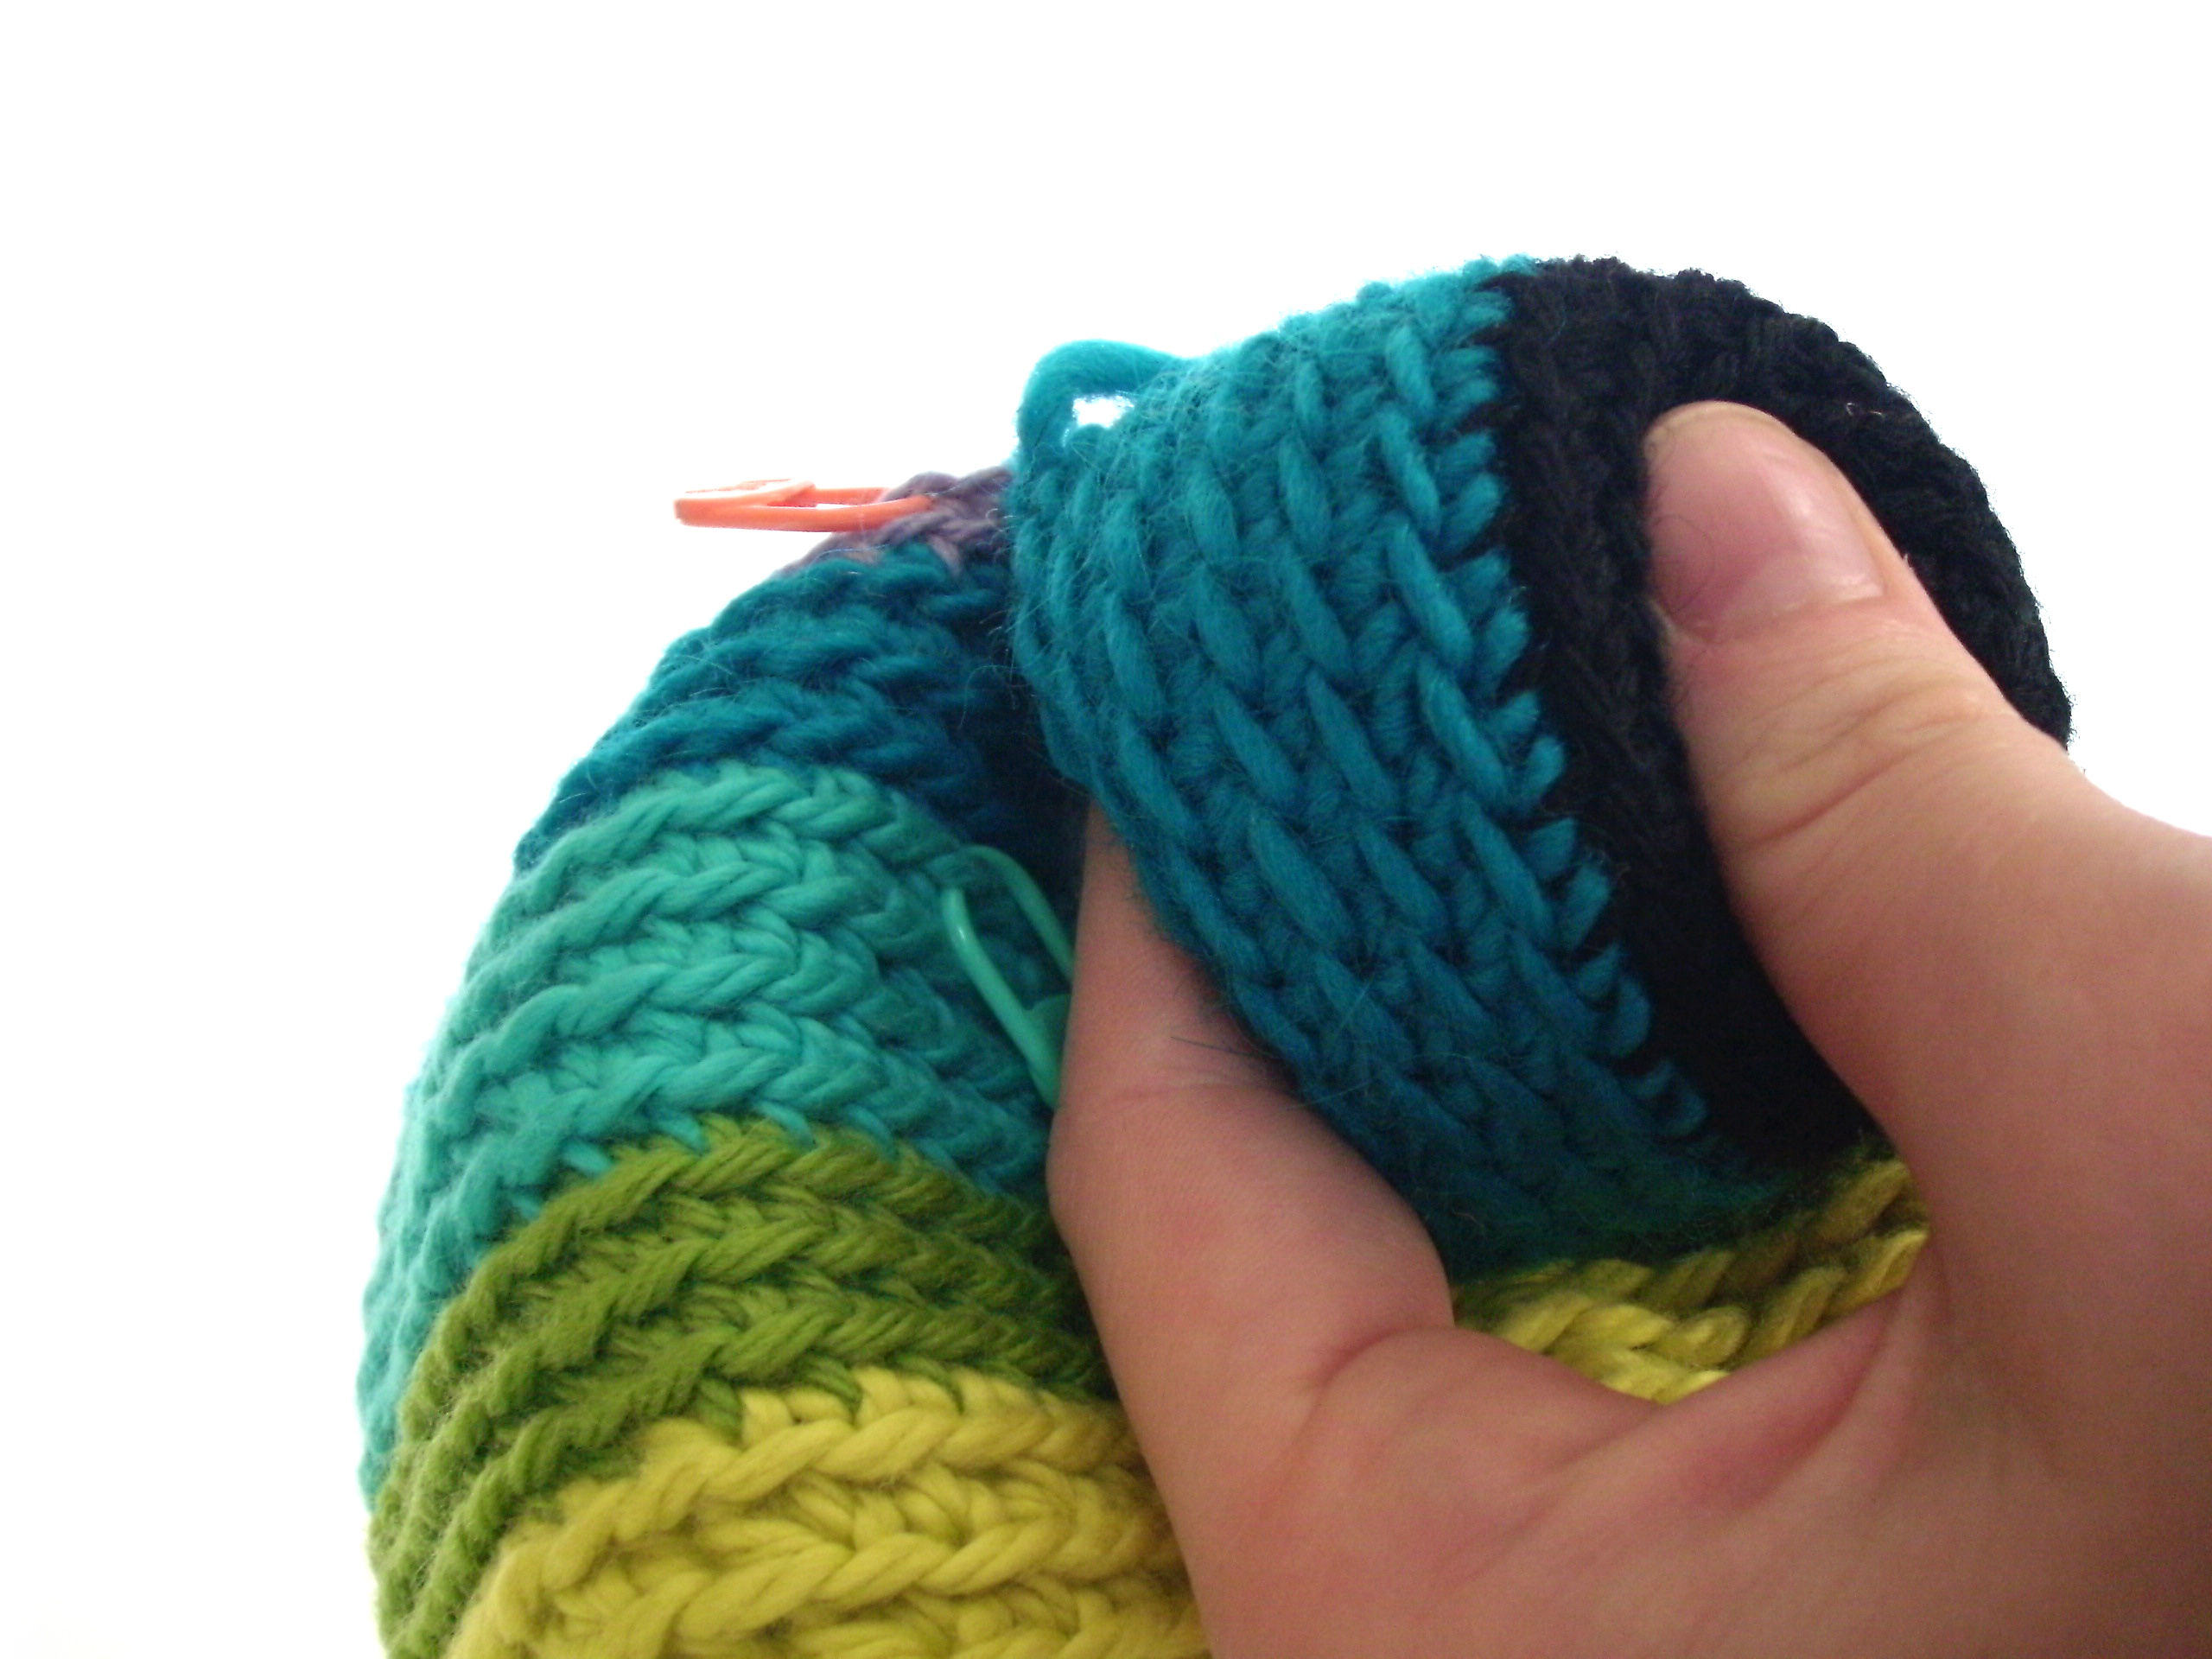
What you want to do is find out where round 9 is, and place a locking stitch marker there. Start counting (see the ridges?) from the center:
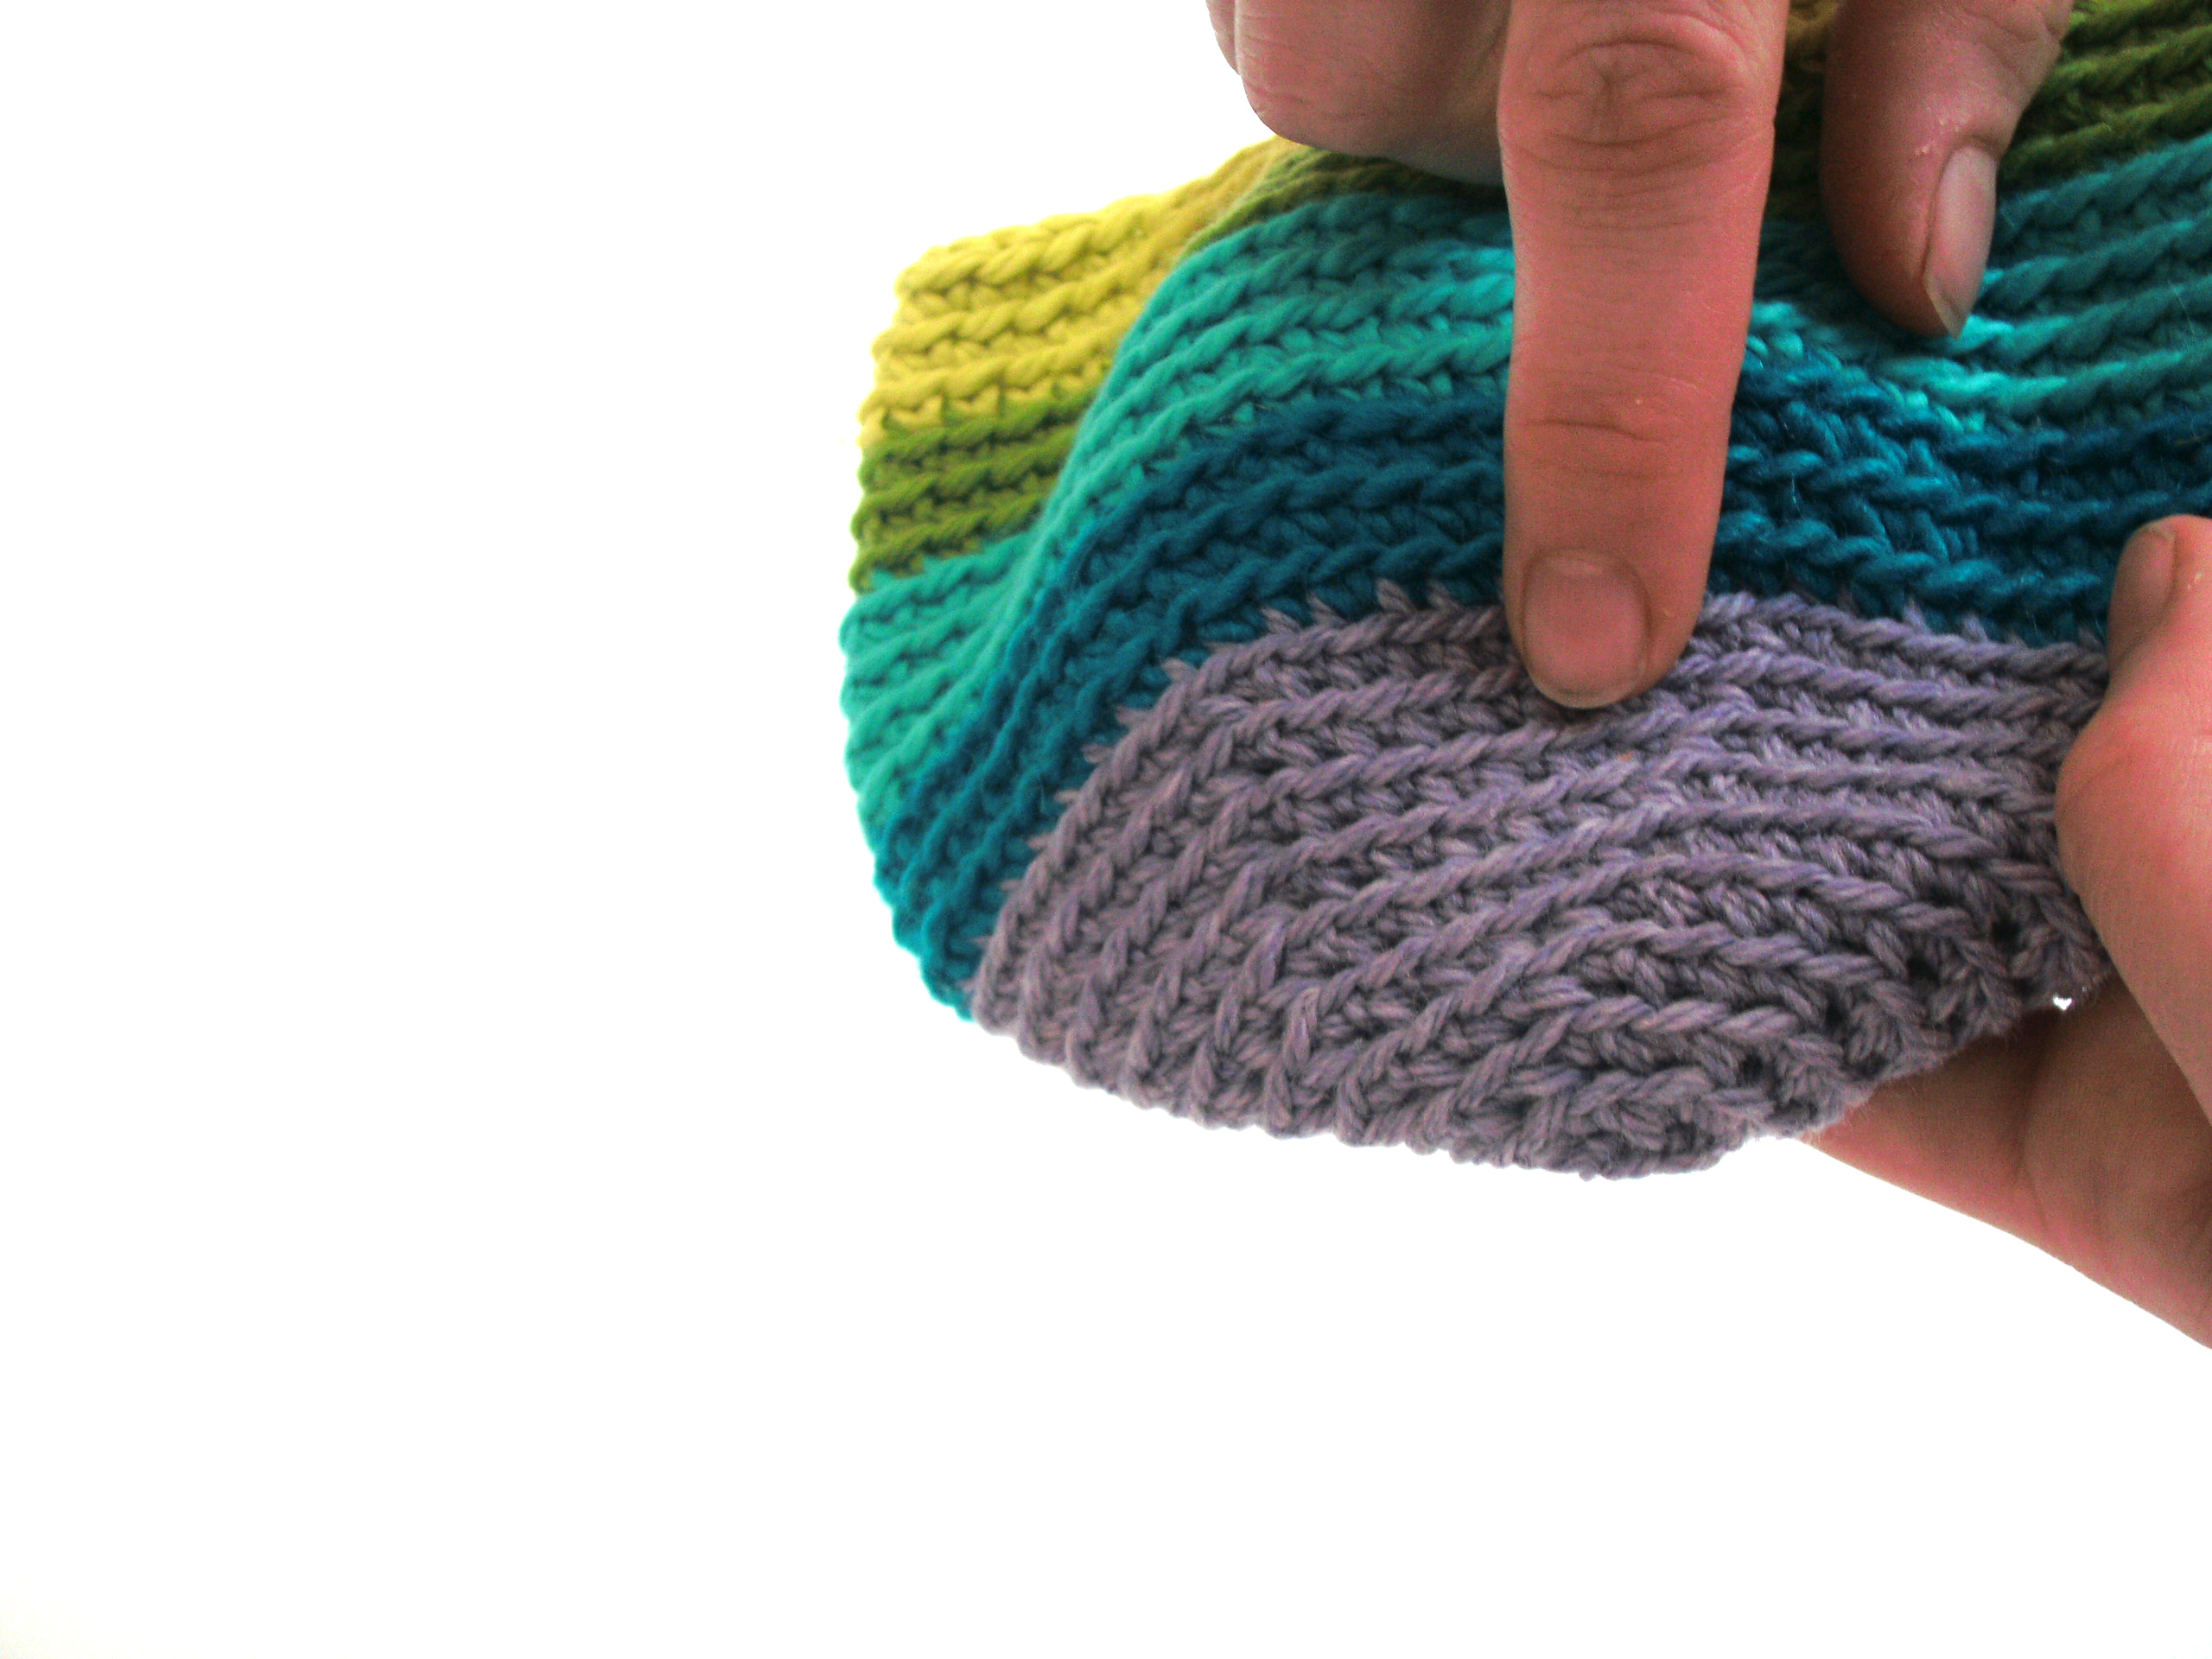
Count until you’re at round 9, and place a marker. Place another at round 14. Now you know where your leg should be located on the body!
If you find that your pieces tend to move around a lot when attaching, you might want to go one step further and use locking stitch markers to hold your piece in place. The more you prepare your pieces, the easier sewing will be!
Stuff your limbs
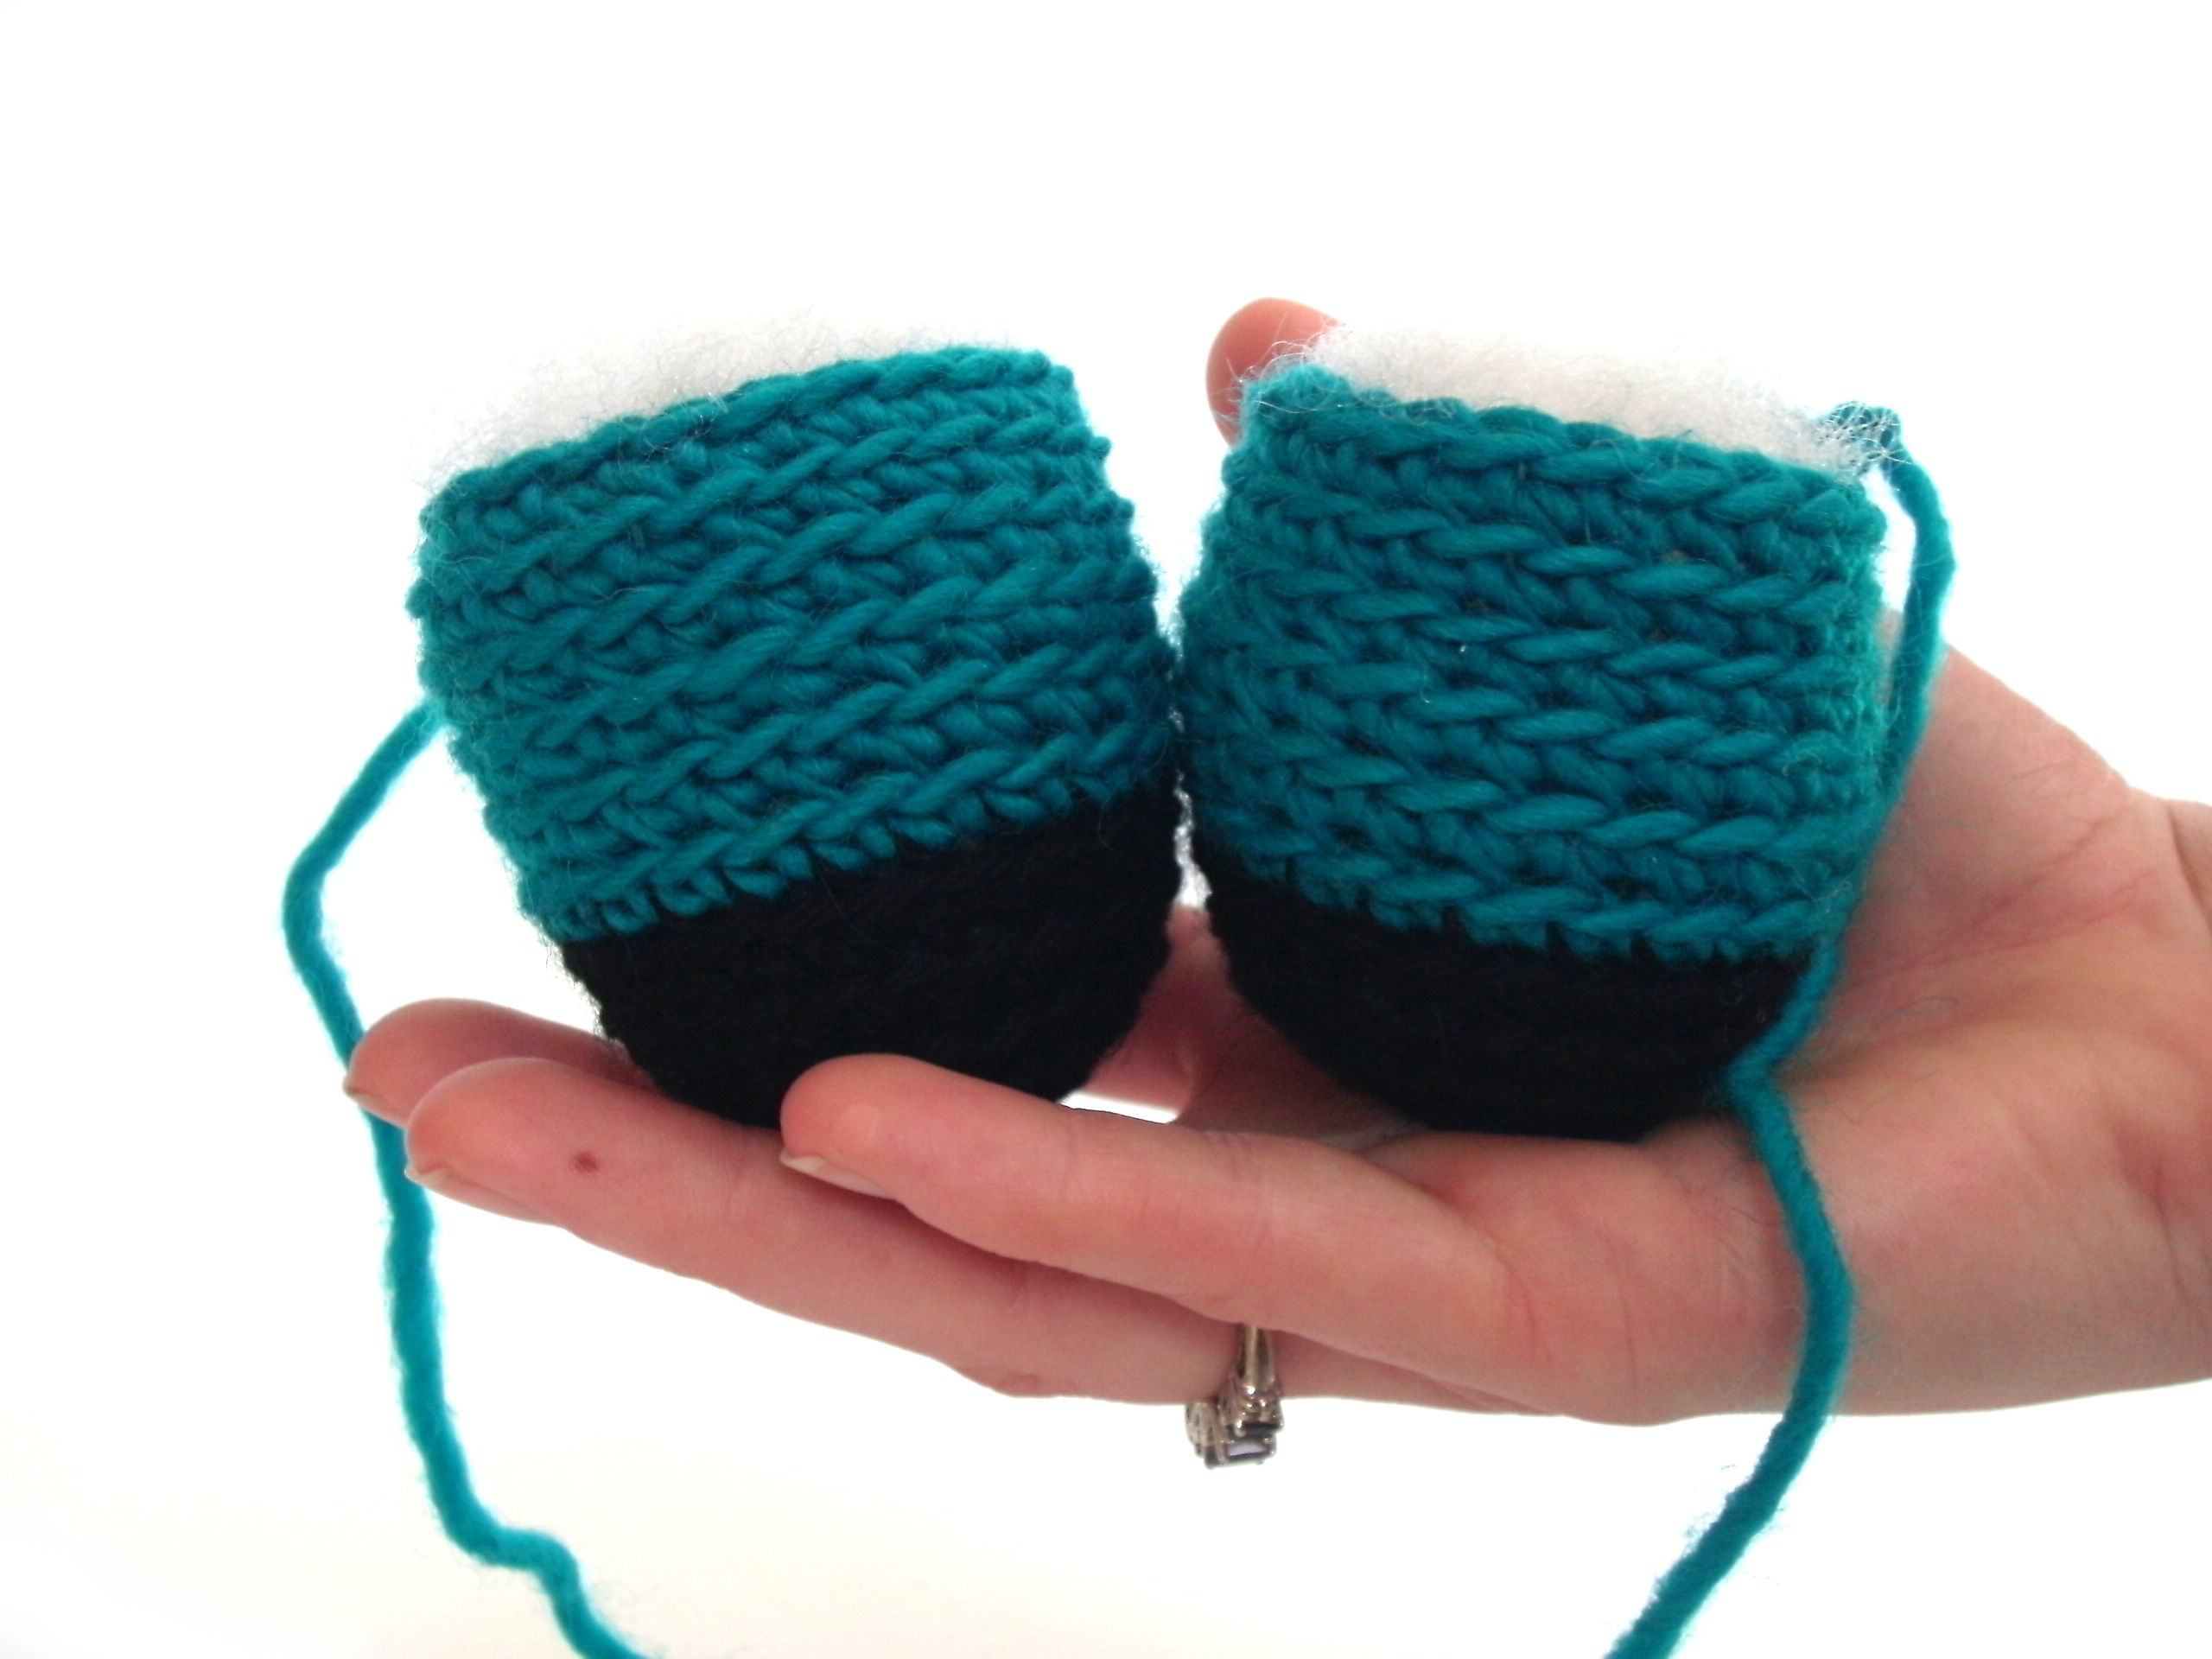
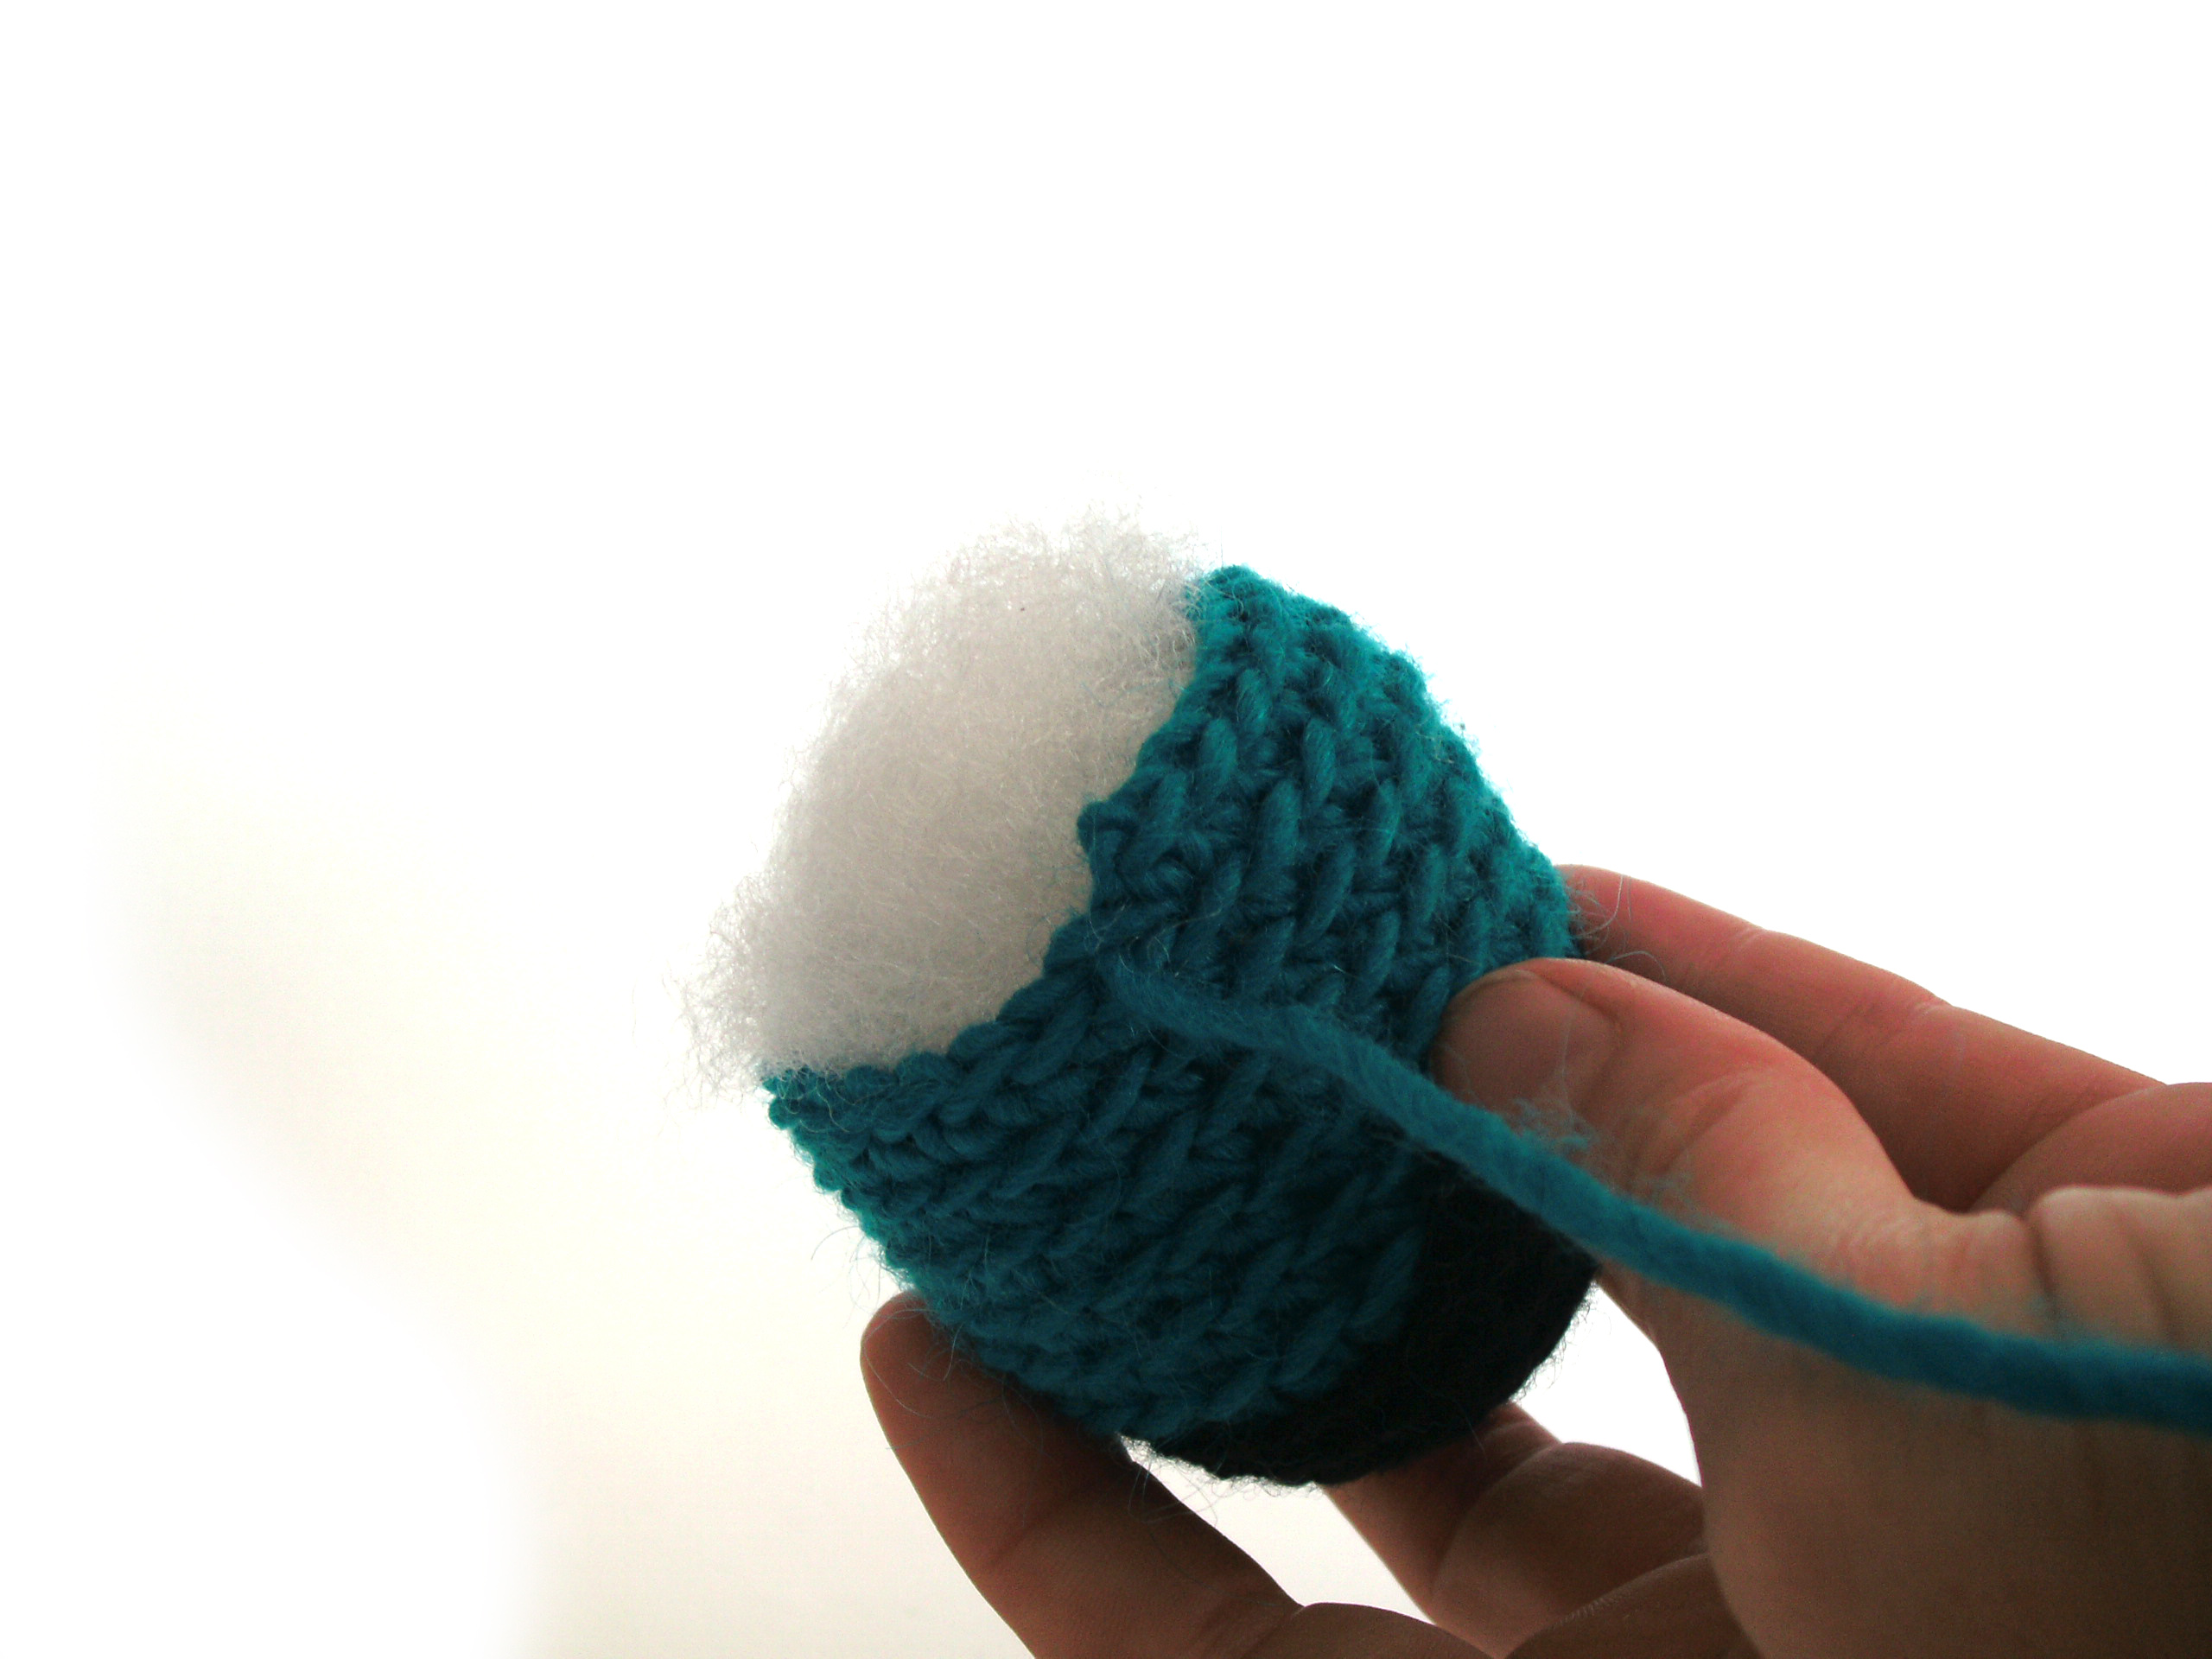
Grab some Polyfill and stuff your limbs:

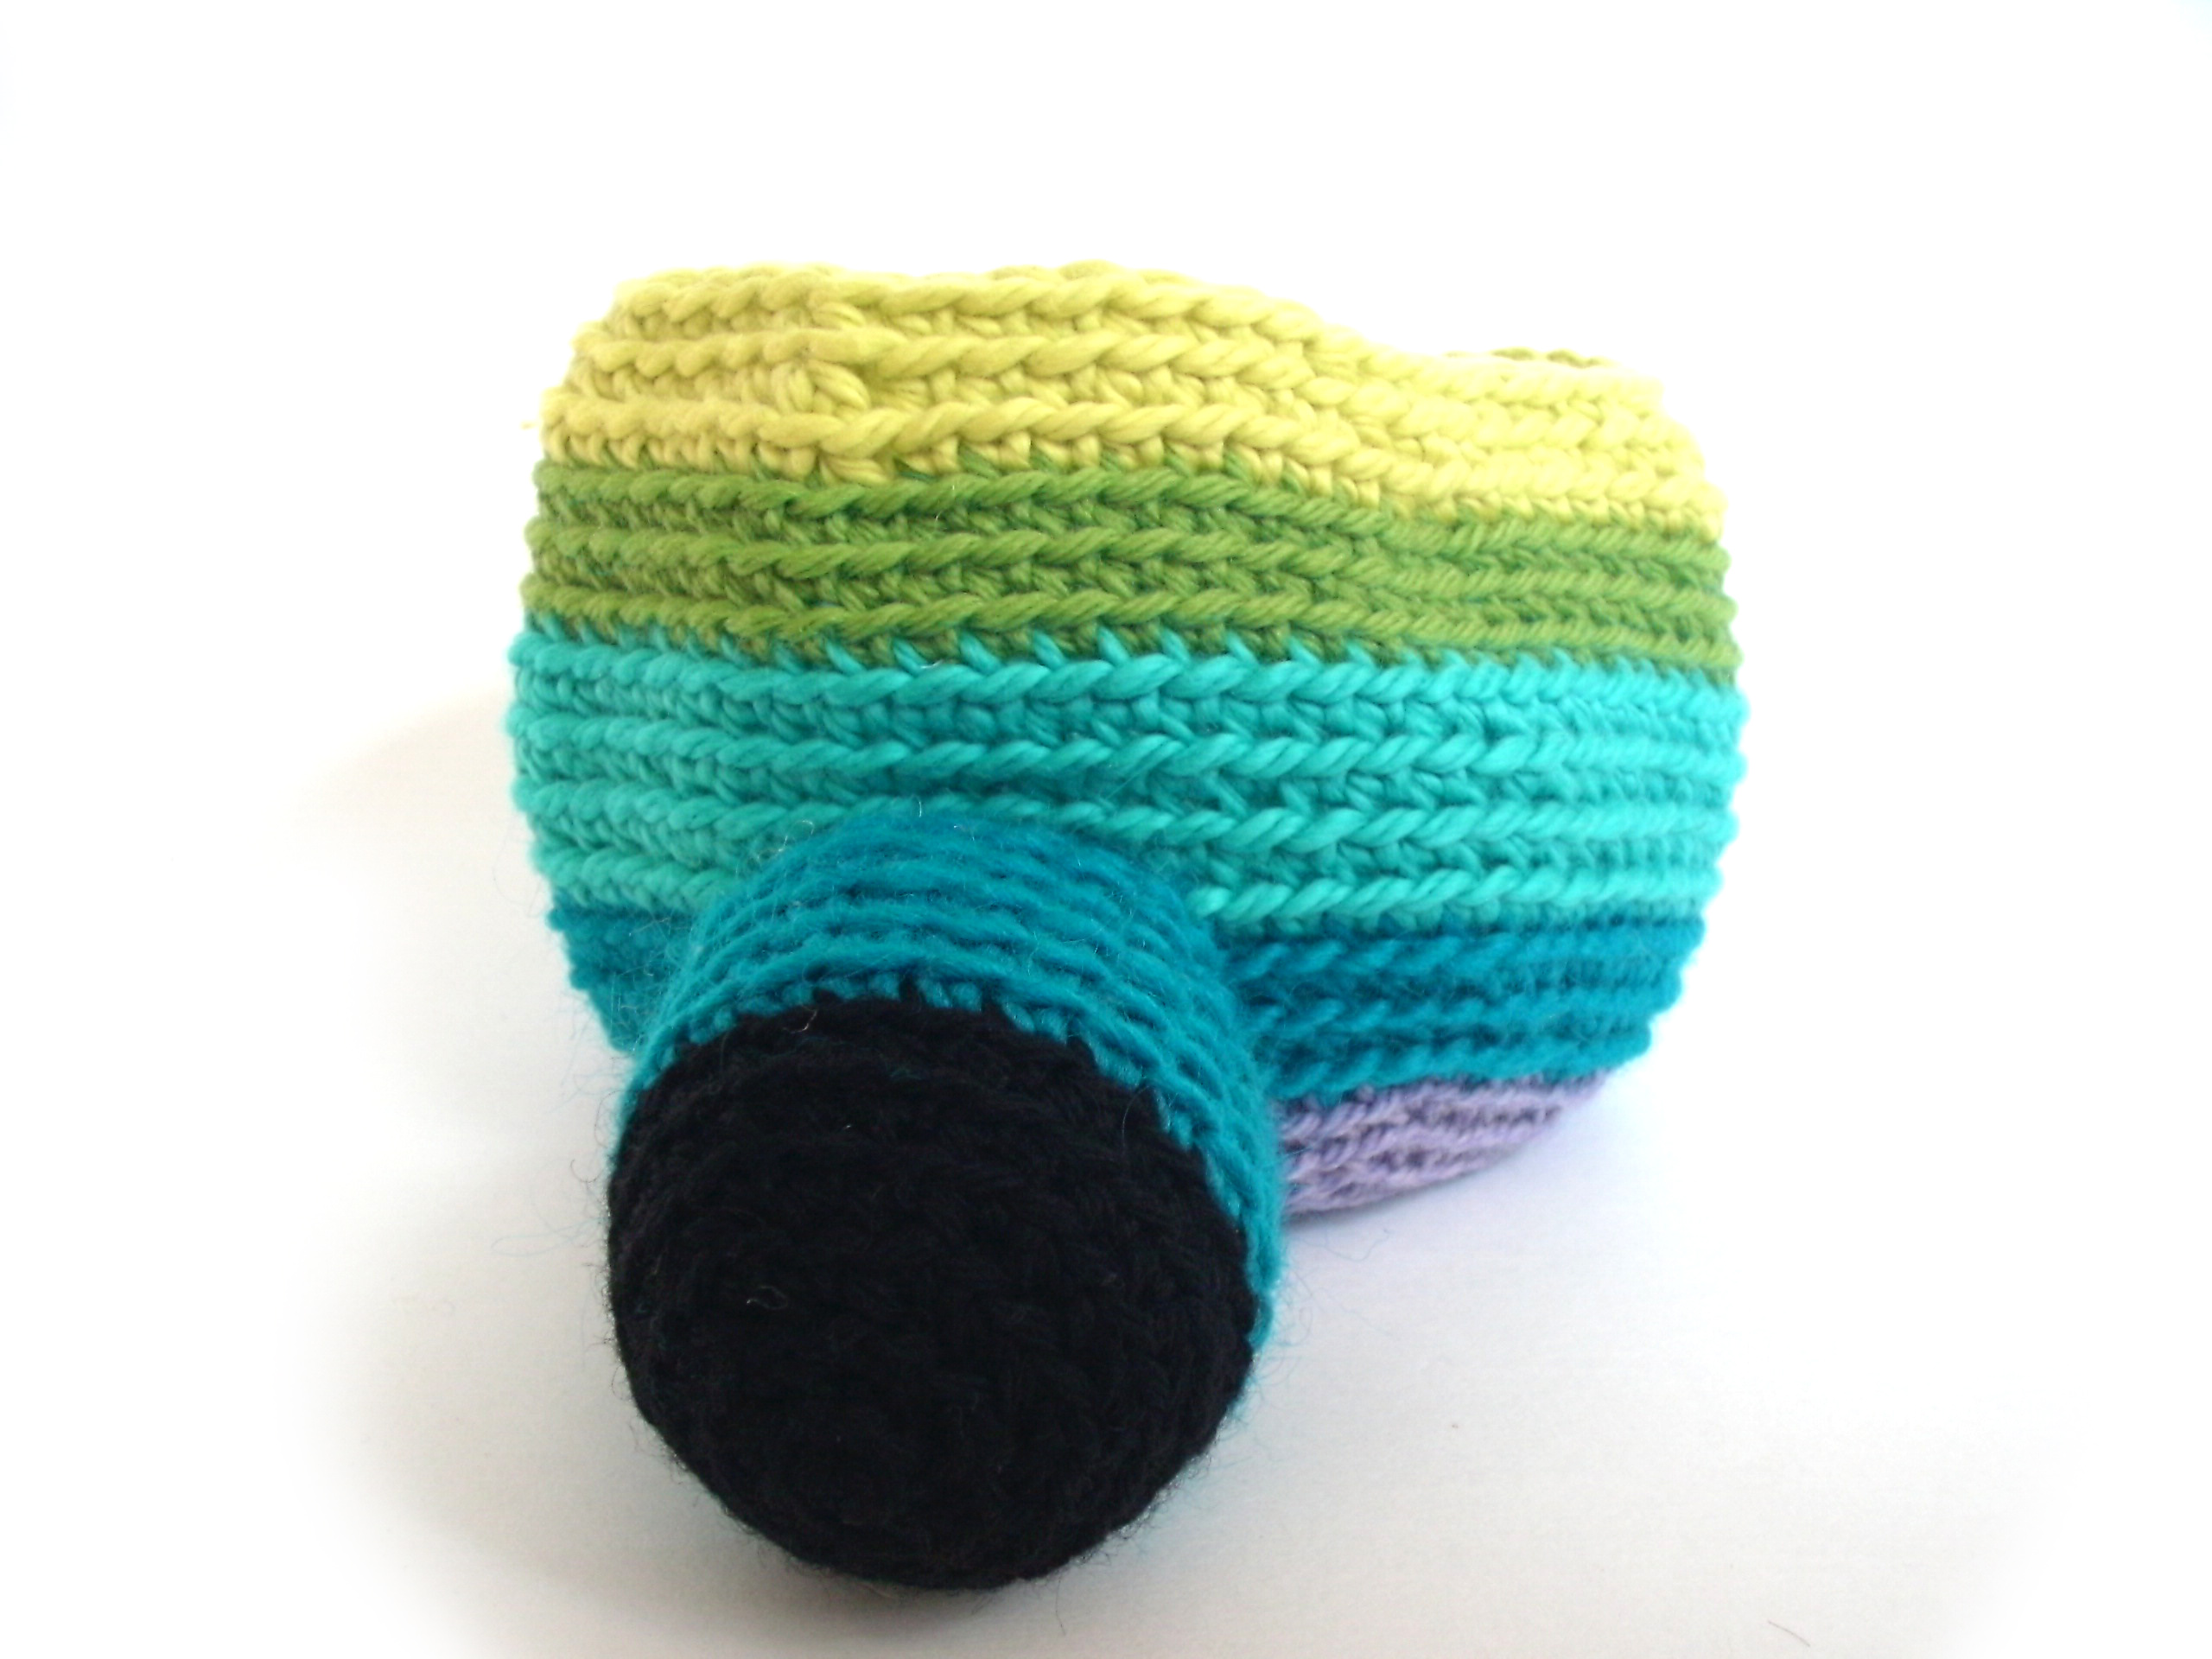
I like to stuff both legs at once, so I can be sure they are the same size:
Sewing!
It’s not as hard as you think… I promise! We’re going to use a simple whipstitch to attach the limbs… the important thing is to let your guides (the rows and stitch markers) do all the fancy work!
Thread the needle
To begin: thread a tapestry needle with the long tail of a leg. As the first step, I like to hide the knot… so I run my needle through the first stitch on the leg:

This hides the knot beautifully! See?
Whipstitch!
The leg that we’re attaching has 24 stitches. So, if we attach along 6 stitches to round 9, 6 stitches going up to round 14, 6 stitches on round 14, and then 6 stitches going back down to round 9… the leg will be attached evenly! So, begin by threading the needle through one stitch on the body and one stitch on the leg:

That’s it! You did a whipstitch! Check out this little video if you want to see it in action:
Continue to do 6 stitches on round 9… and then continue stitching (sorta turning 90 degrees) to get to round 14. See? You’re using the stitches on the body to guide you! Easy!
As long as you keep attaching one stitch of the body to one stitch of the leg, you’ll stay on track!
Continue all the way around, and tie a knot on the inside of your work.
Ta da!
Repeat for second leg
Now, at this point, you may want to get picky. See how there’s a jog in the leg where the colors changed?
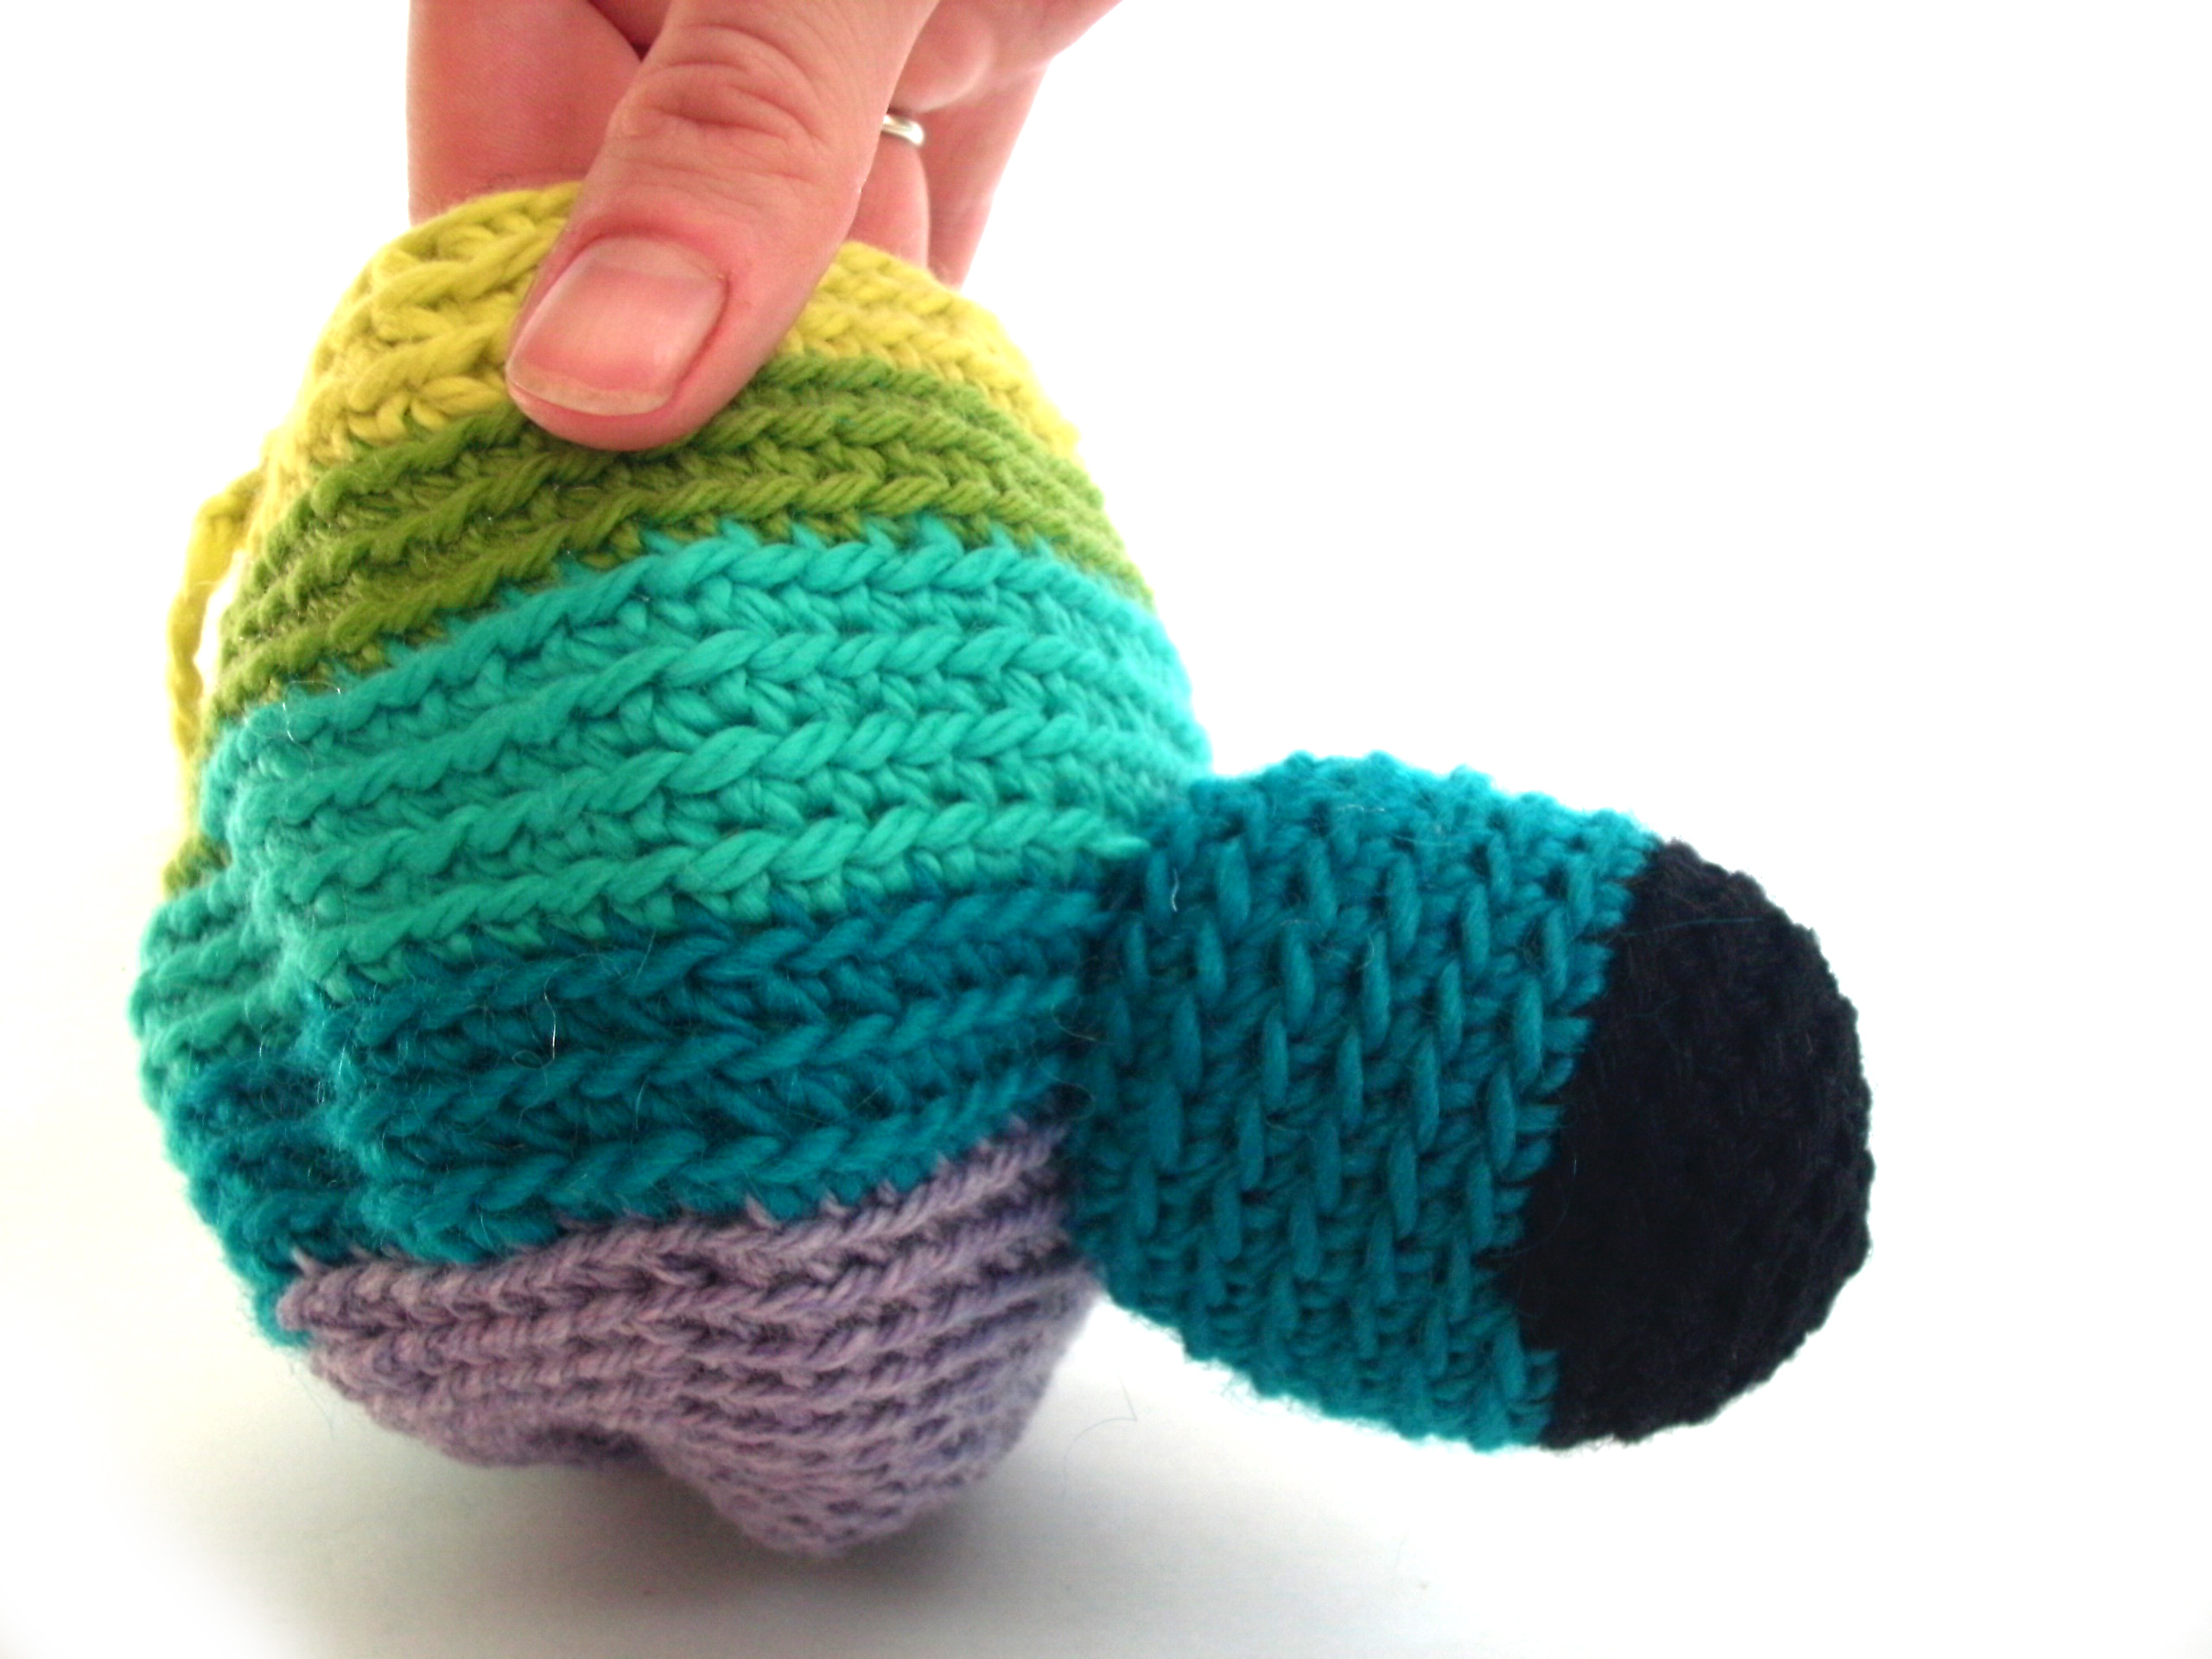
If that jog bothers you… no problem! Just decide where to place your second leg so that the jog ends up at the back of the cow! See… I’m going to put my second leg over here (on the other side of the jog), leaving the color change nearly invisible:

Now attach the second leg… same as the first! Don’t forget to place your helpful markers if you need them!
Repeat for arms!
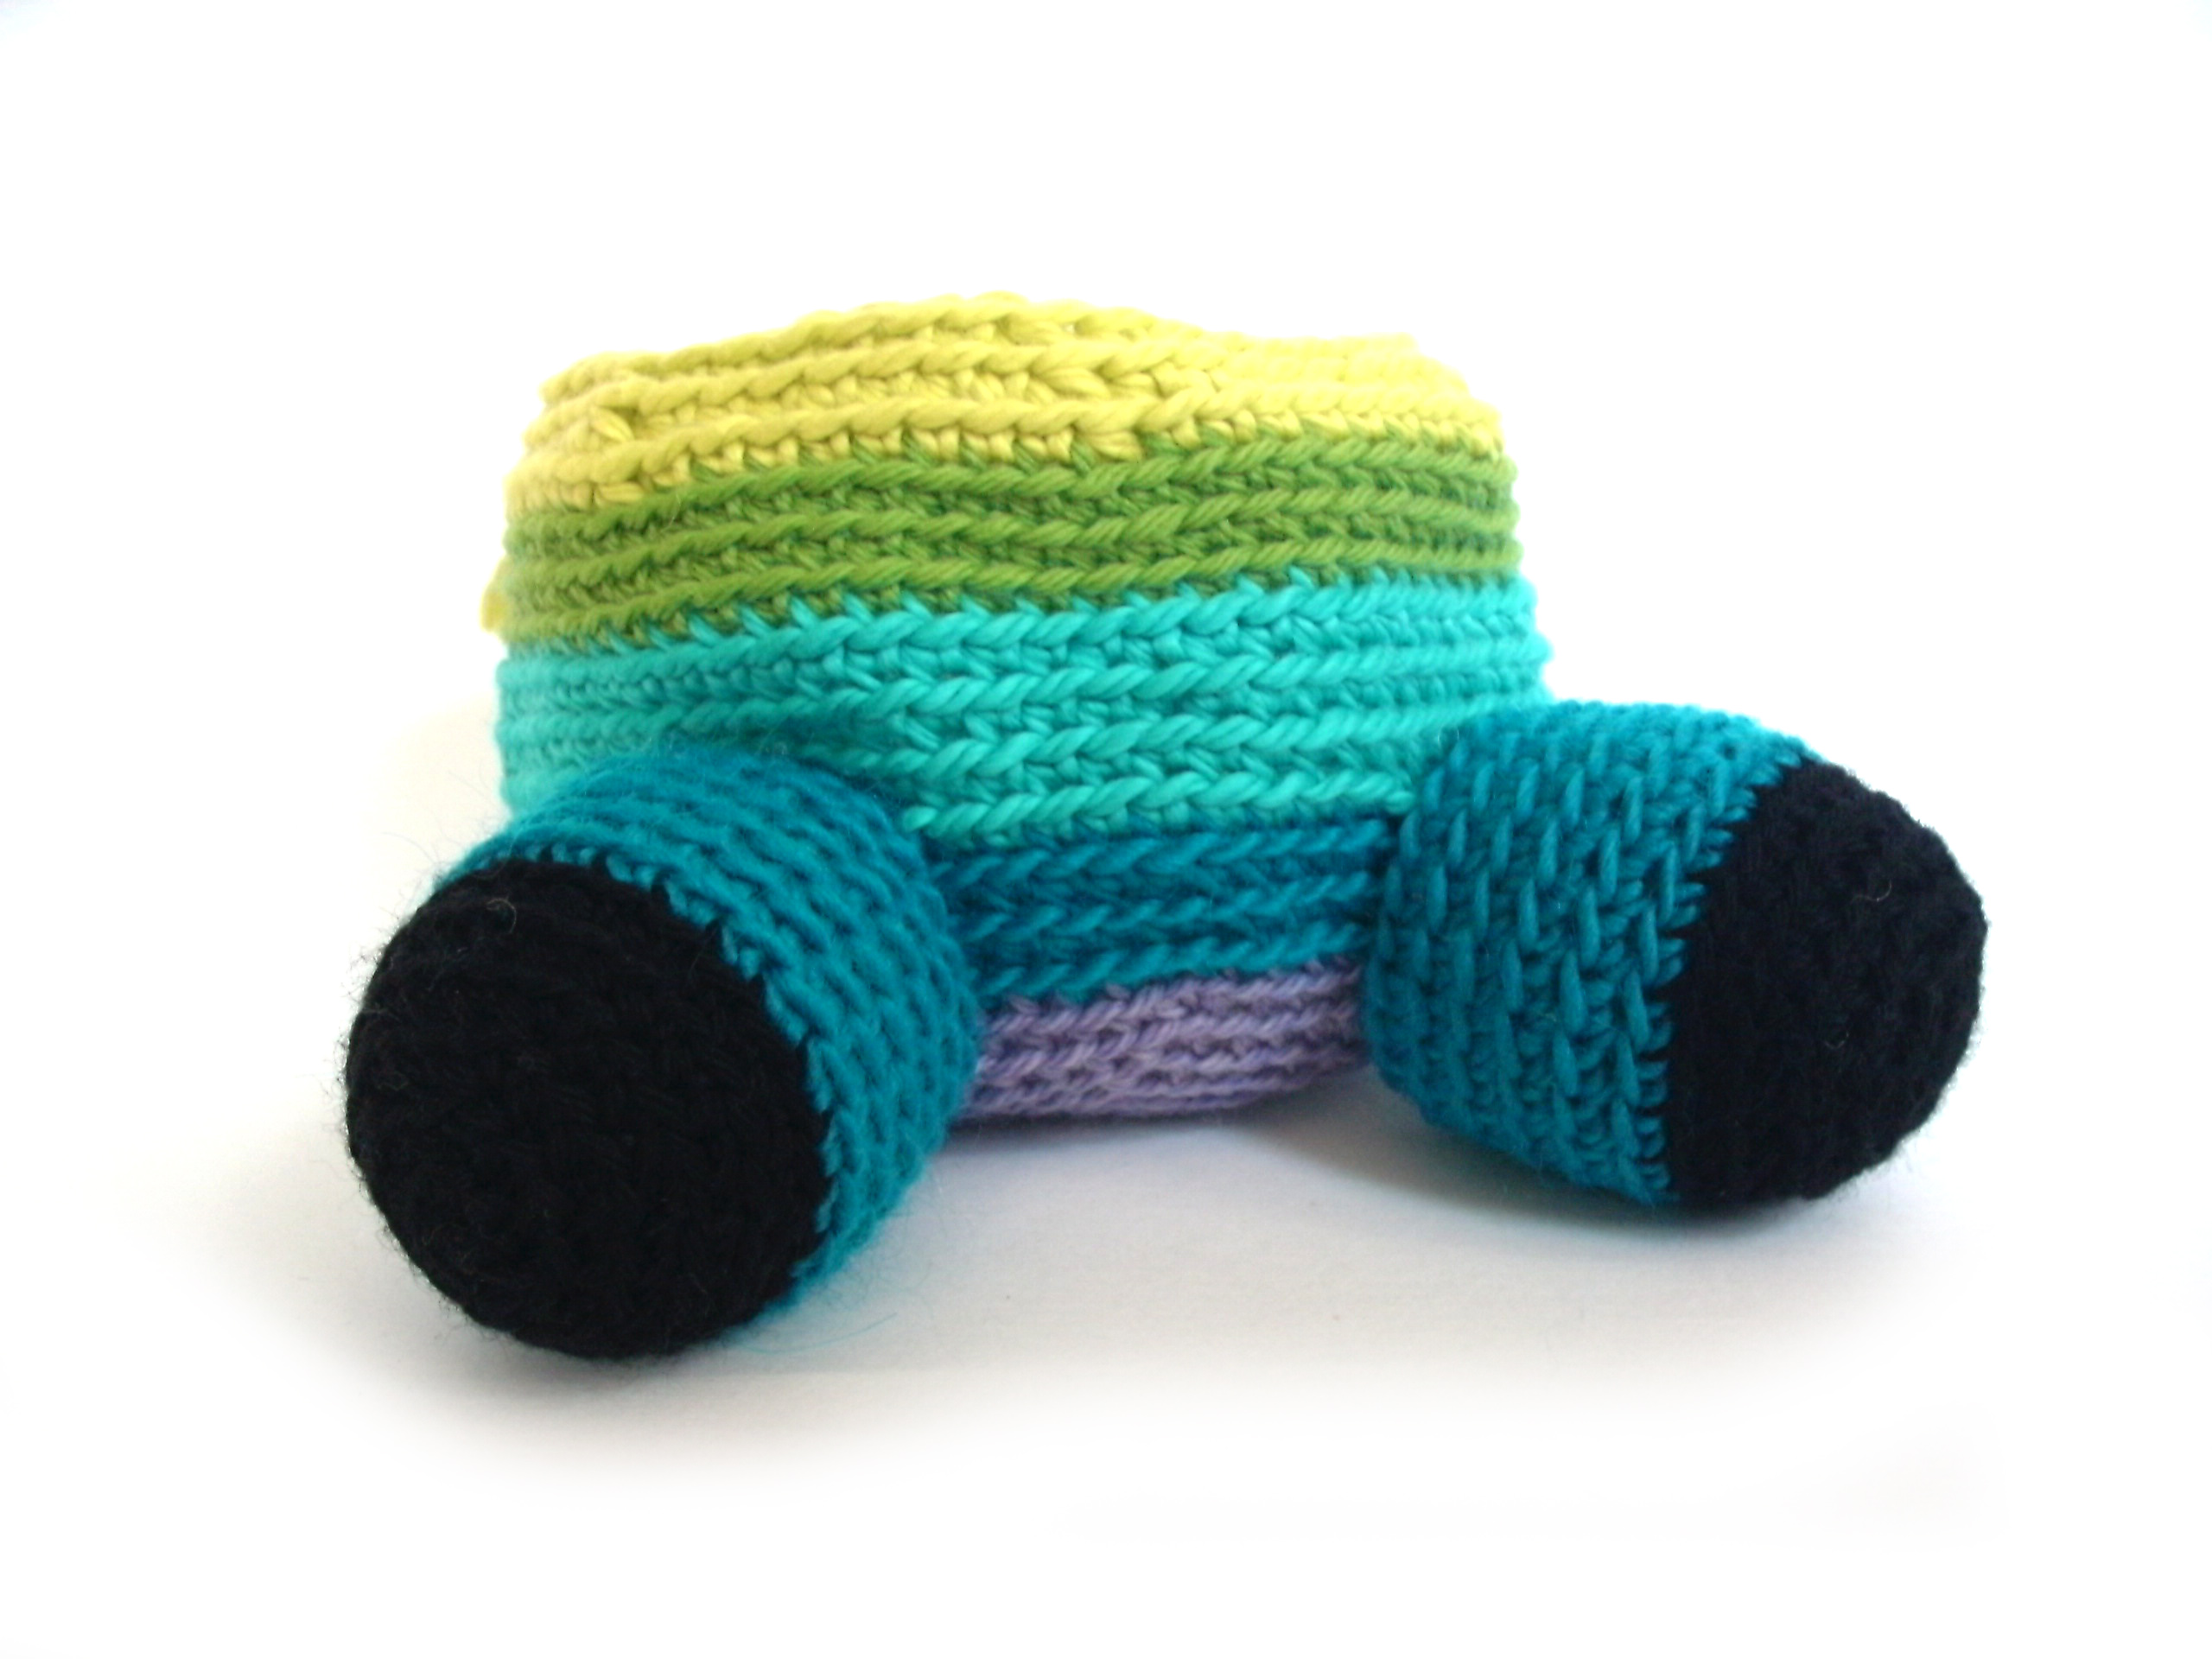
You’ve got it down, now! Attach the arms using the same method!

You did it!
That wasn’t so bad, was it?
Other Ways to Attach Limbs
There are a few other ways to attach limbs to crocheted softies – each gives a different look.
Does your pattern tell you the flatten the piece and then attach it? Then click over here for this tutorial. 🙂
Does your pattern tell you to attach the piece with single crochet as you stitch? That’s my favorite way to attach limbs. The pattern will say sc-attach and you can find a video tutorial for that method here. This method works great for flopp[y limbs that are attached along a single row of the design.

Here are handy links to all the posts about attaching parts. . .
- How to Attach Limbs to Amigurumi
- How to Attach Amigurumi Arms and Legs with Single Crochet
- Tips for Attaching Amigurumi Features
- Which Loop Do You Use When Attaching Pieces?
- How to Attach Nicely Rounded Amigurumi Pieces
- How to Give Your Amigurumi a Shapely Neck
- How to Attach a Flattened Piece to Amigurumi
- How to Attach a Folded Ear to Amigurumi
- How to Attach a Folded Ear to Two Rounds
- How to Attach Flat Spots Using Running Stitch
- How to Attach with Single Crochet
- Tips for Attaching a Dress to Your Doll
Return to the main table of contents for Let’s Learn to Crochet Amigurumi.
Move on to the lessons about faces and details.
Happy stitching!


This post taught me so much! I love how the rainbow cow is looking, he is going to be super cute!
Hi, I’m curious what kind of stitch you’re using because it looks different than the other amigurumi Stitches. Thank you
It’s just single crochet – but I do it in the back loop only, leaving the front loop showing for easy counting of rows and for easy attaching other parts.
Looks to me as if your sewing on the legs BEFORE stuffing the body, do you have any tricks to make it easier when all parts a stuffed and fastened off ?
Waiting hopefully
Cindy
I do all of my attaching before stuffing the body, since it makes hiding the ends much easier!
I have attached both ways. To hide the knot after stuffing, push needle through the opposite side of the body and gentle pull. It will catch in the stuffing and you can continue to stitch from there.
Great tutorial, but I still have trouble with angiogram smaller than 4″ 🙁
I had to look up the word ‘angiogram’! Do you mean when the piece is that small?
Staci, that was probably an autocorrect of amigurumi
I have trouble putting on the head, making sure it stays straight. Any suggestions?
I would recommend using locking stitch markers (or safety pins) to pin the head in place before you start attaching… that will help you position it!
I’m so glad I’m not the only one who uses stitch markers to place my limbs! c:
Awesome tutorial! Thanks for sharing!
Quisiera aprender a hacer todos los amigurumi me encantan.
Gracias por compartir estos modelo.
Thank you so much for this. I’ve bookmarked it on my desktop so I can refer back to it easily. I’m addicted to amigirumi but have always had trouble sewing the limbs on. Thanks again. Your talent is awesome!
Thank you so much, Monica!
I love making amigurumi but attaching limbs is not my favourite thing to do. This is a great tip/tutorial, makes the task seem less daunting so thank you for sharing!
So happy to hear it!
I just strated out making Amigurumi and in my first project, i wanted to throw the pieces away! So difficult not to mention frustrating having to put them together. But after reading your suggestins, yes, it might make it more enjoyable though i hate sewing…! Lol but thanks so much!
I’m so sorry to hear you are having trouble… but I think you can do it! At least now 🙂
This is a great tip for attaching limbs, Stacey. These tips have made it so much easier for me. Thank you.
Can you explain how to tie a knot on the inside? A video would also be helpful. Thank you!
Here’s a blog post! http://www.freshstitches.com/how-to-tie-a-knot-in-amigurumi-croche/
How far apart are the legs usually?
It depends on the pattern. Sometimes they’re touching, and sometimes they’ll be further apart. The pattern should give you some indication – sometimes saying how many stitches are between them.
Thanks for this, I only used these markers for row markers, how useful with this be now, always struggles with pins. can’t wait to try them on this
I hate sewing on the parts also! I make the body and head as one continuous piece so I only have to sew on the legs and arms. I made one where I joined the legs together with a “bridge” of single crochet and tacked it centered on the nose and it kept all the guesswork on placement. It seems to me that something this simple could even be made as one piece — that’s what I’m after. I’ve got the head and body down, now for the arms . . .
Oh my gosh! I’ve been stuffing all my pieces and then trying to attach! Can’t wait to try it this way!
I sure like the idea of attaching before stuffing the body. Seems easier and more accurate too. Thanks for taking the time to this.
My problem is pushing the needle through the yarn after everything is filled. Since the stuffing is so dense and my stitches are tight I just keep ending up breaking me needles. Any tips??
Wow! I’ve never had that happen – or even heard of that happening. You must be stuffing REALLY tight. Maybe try a larger needle? Or a metal needle if you’re using plastic.