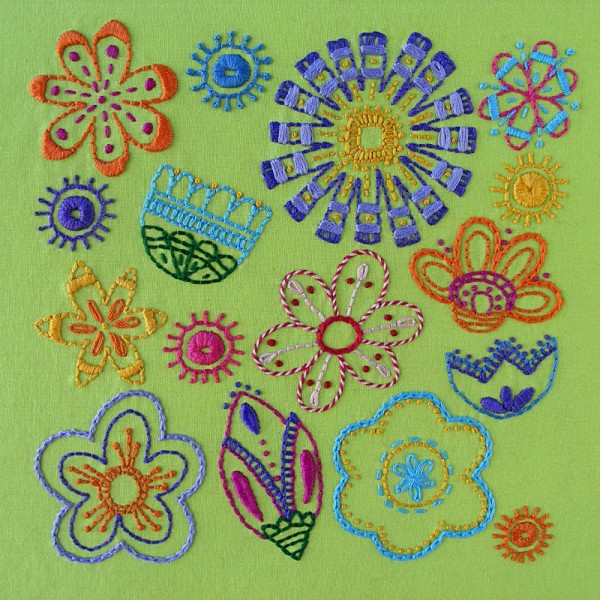
This is a handy little stitch with lots of different names. One of the names is Pistil Stitch – and it is perfect for stitching little pistils inside detailed flowers. It’s also good for teeny little flowers and grasses – and also antennae on bugs and aliens. Such a versatile stitch!
Sometimes it’s called an elongated French knot – and that makes sense. If you can make a French knot – you can stitch this French knot with a stem. It’s almost exactly the same thing!
I wish it was called Lollipop Stitch. Wouldn’t that be adorable?
I don’t use pistil stitch very often – but sometimes it’s absolutely perfect. Especially for flowers!
Hello all! It’s time for another fill stitch! This one is related to satin stitch – so it will look familiar.
You can use it to fill in large areas where satin stitch wouldn’t work.
You can use it to make the coat on furry critters like bunnies and dogs.
But one of the best things about it is that you can use it to shade from one color to another. In the video I show shading from dark to light, but you could also go from one color to another – or even fill with a whole rainbow of shading. This is one to have fun with!
Happy stitching!
Here are all my lessons for fill stitches (besides satin stitch).
Seed stitch is one of my favorite fill stitches. It’s really easy to do and it makes a great texture – perfect for grassy fields and shaggy critters.
But there’s a trick to getting all the texture – and that trick is in choosing the right colors – and choosing enough of them.
Everyone who’s ever read a fairy tale – or listened to Schoolhouse Rock – already knows the secret. . .
Three is a magic number.
It’s that simple!
Here I’m going to show you some seed stitch-in-progress so you can see what adding the additional colors does.
I always start with the darkest shade and lay down a nice, dense bunch of stitching. The background fabric isn’t completely covered – but it’s pretty close.
It’s not bad. Kind of shaggy and pebbly looking – fun.
But look what happens when I layer a lighter shade over the dark one.
Oooh! Depth!
Note that the stitching with the second layer of color isn’t nearly as dense. Lots of the dark is showing through, and the background fabric is now almost completely covered.
I’m always kind of tempted to stop with the second color – because at this point I’m always really happy with how it’s looking. But I know from experience that THREE is the magic number. Not two.
Wow! Look at those highlights!
I shot this photo after HURRIER had gotten its third color, but before BEHINDER got it so you could really see the difference in them.
If you look closely you can see that there are actually very few of the lightest stitches, but they make the whole thing look so much fuller and more textured.
Want to learn the basics of hand embroidery with an easy online workshop – totally free?
Sign up for Embroidery 101 here. You’ll learn how to get started, the tools and supplies you’ll need, the four most basic stitches, how to transfer your pattern and how to display your work.
If you already know the basics – sign up for Embroidery 201. It’s also free! You’ll learn how to stitch on specialty fabrics like felt and stretchy T-shirts. Plus you’ll learn lots and lots and LOTS more stitches – all my favorites!
Last week I showed you how you could quickly add some color to your embroidery using colored pencils or crayons instead of fill stitches. Today I want to show you how you can do the same thing by combining applique and embroidery.
I have two different approaches to this technique. I think of the first one as my “color outside the lines” technique and the other as my “color inside the lines” technique. We’ll do outside the lines first.
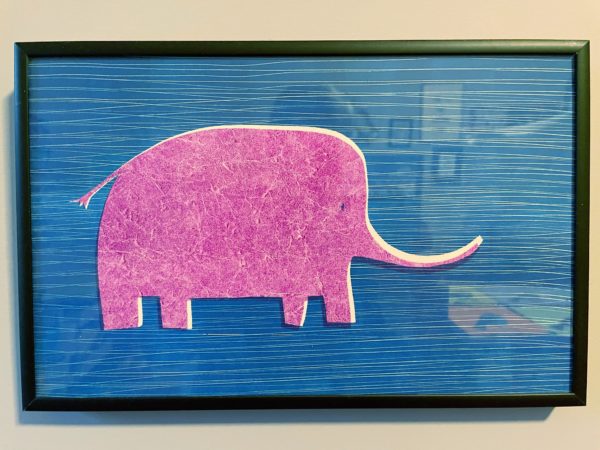
I really like screen prints when the colors don’t exactly register. It’s usually considered a mistake, but I love it. Here’s a little elephant print I made several years ago. . .
See how the magenta elephant doesn’t exactly match up with the space I left for him in the blue background? That’s the look I’m trying to achieve with this technique. Here’s how you do it. . .
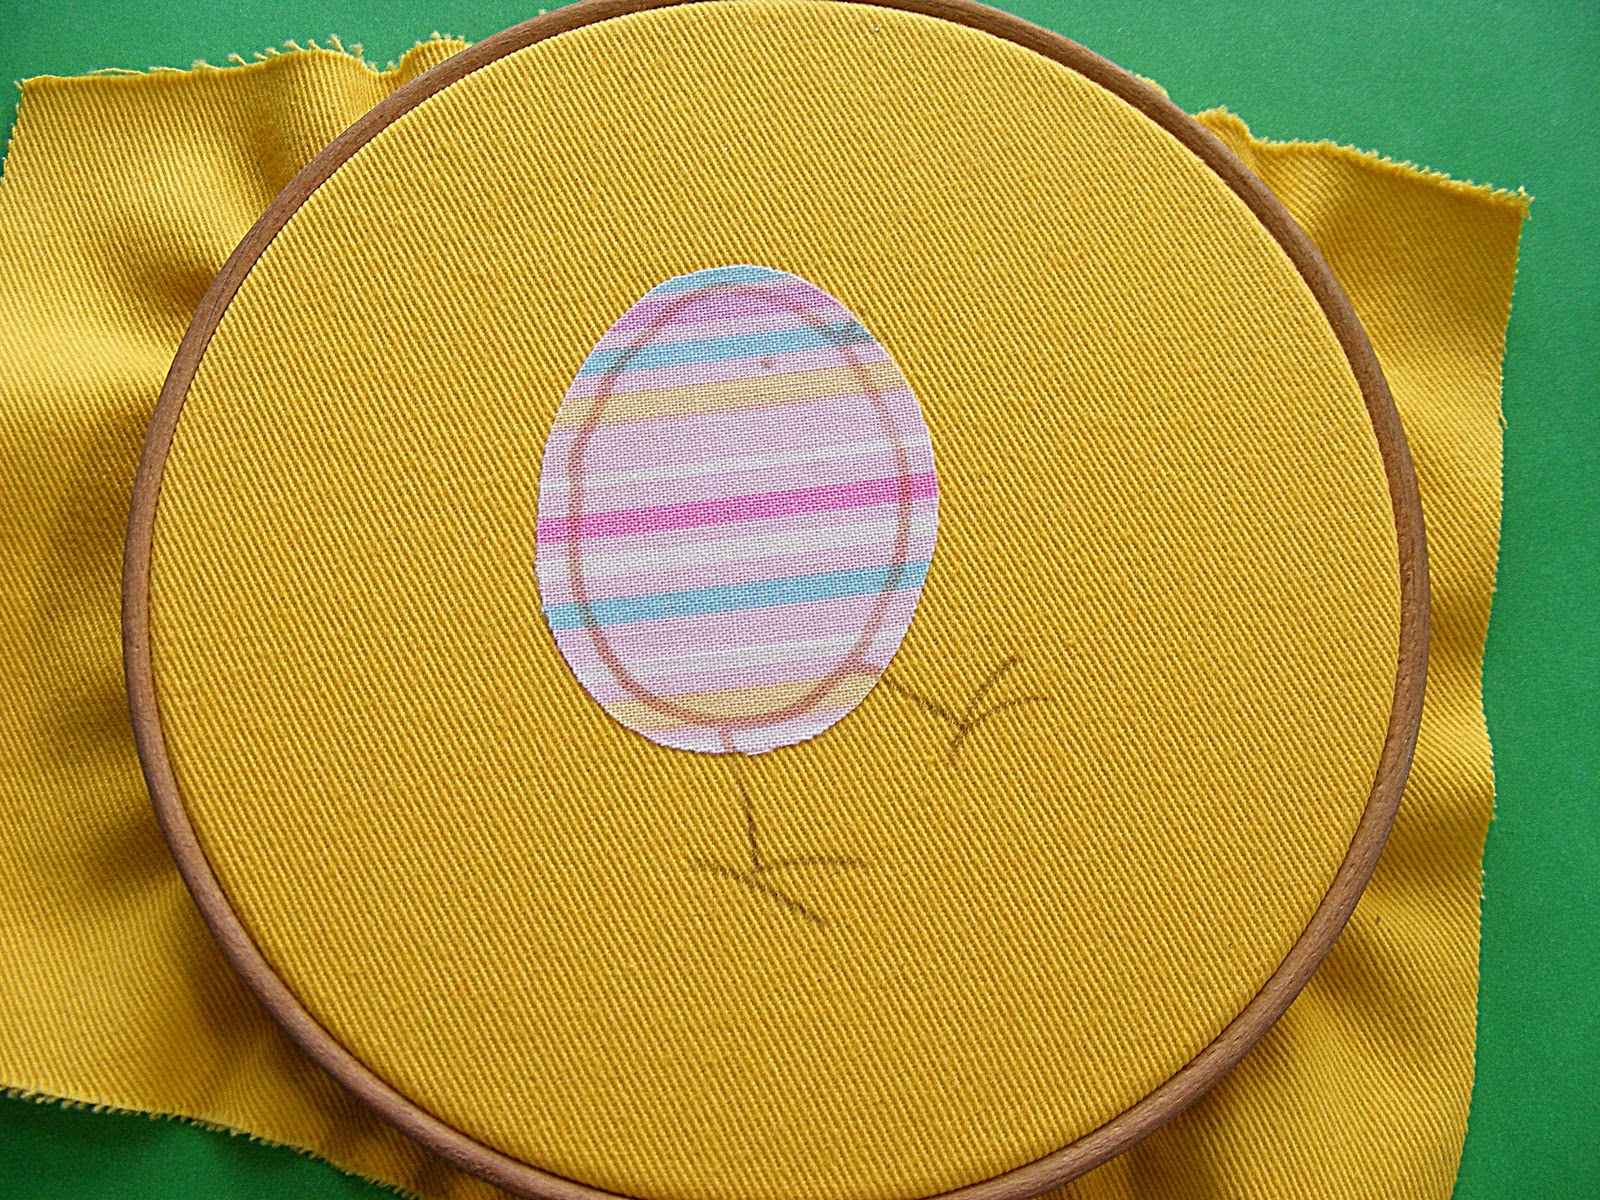
Step 2 Cut out the applique shape, leaving a little space around the edge of your stitching line. It’s ok if you cut off the legs and beak – we’re going to fix that. Fuse it to your background fabric.
Re-transfer the lines you cut off. For this step I usually trace in front of a window – it makes it easy to get everything lined up.
Step 4 Hoop it up and stitch. When I do this technique I usually stitch everything in very dark brown (DMC #3371). I think it contributes to the overall playful and cartoony effect.
Step 5 Done! See how well the applique and embroidery work together?
I think it’s especially fun to use this technique with patterned fabric. You get stripes or dots or flowers without having to stitch them!
But maybe you’re not a color outside the lines kind of person? Maybe that extra fabric around the edge really bugs you. Then you’ll want to use the “color inside the lines” technique. Follow all the steps outlined above except. . .
Use the instructions in the fusible applique video to transfer your applique shape to the paper backing of your fusible adhesive.
Cut your shape out exactly on the lines.
Stitch inside the edges of the shape with matching thread. I usually use a running stitch. You do not want to use contrasting thread with this technique – it will make the eye read the line instead of the shapes and you want the line to disappear.
You can see an example where I used a combination of both techniques here.
I wanted the hat and the skin to be shapes without strong outlining, so I cut them out exactly the size I wanted and I did the stitching in a matching color. I wanted the hair to look looser, so I cut its shape out a little bit outside the lines and I stitched the curls in a darker color.
I started using this technique of combining applique and embroidery to get skin color without having my ladies look hairy from the texture of the fill stitching. Now I use it for lots of different things! You can use it on any embroidery pattern.
In a newsletter a couple of weeks ago, I showed you all how I organize my embroidery thread. It’s not perfect, and I asked you to tell me your methods. Wendi (not me, though I admire her spelling flair) from SewCatSew shared her method and I’ve decided that she is a genius. I’m going to adopt her method as soon as I get some of these little baggies. Here’s what she had to say. . .
Here’s a picture of my “system”. I bought a 100-pack of Floss-A-Way bags YEARS ago. Recently I took it up a notch by getting colored rings and sorting all my floss by color family. I now have a ring for each color range in order from light to dark (for the most part). I can toss them in my basket and easily pull out the group I need. I also have a ring for the colors that are custom matched to the felt I use from a particular supplier. The bags are labeled by DMC color number and the felt color name so I’m sure to get the right one when I want an exact match. When I’m working on a project with multiple colors I can also take the bags I need from their color group ring and put them on a ring of their own for the duration of the project rather than go back to the basket every time I want a different thread.
I’ve seen the bags sell for as little as $3.49 or 100 (JoAnn Fabric), I got the basket at the Target dollar section and probably paid $2-3 for the rings. So for about $7-8 I got a flexible, usable way to feel like I’m in control of SOMEthing 🙂
I LOVE this! The major drawback to my system is that it isn’t very portable. That’s especially irritating because one of the things I love about embroidery is its portability! Wendi was even kind enough to send a link to a few sources for the baggies (that’s an affiliate link) though I think I can do this same thing with some snack-sized ziplocks from my grocery store, a sharpie and a hole punch.
(Updated to note – the names and numbers were hard to read on the clear bags so I invested in the Floss-Away bags and they were worth every penny.)
I already have a bunch of the binder rings left over from a camp bookbinding project I taught last summer. I can’t wait! Organizing my craft supplies sometimes makes me giddy – in a good way. 🙂
I wrote up a new post about a year later showing a couple of small modifications to this system. Years later, this is still the system I use. You can read it here.
Want to play with a free embroidery pattern? Here’s one that’s great for beginners.
It’s super easy – just a bunch of backstitching and one lone French knot – which you can replace with a tiny straight stitch.
I colored the image in with colored pencils before stitching, but you could certainly fill with the fancy stitch of your choice.
If I were doing this again I would probably do all the outlining in DMC #3371 – I love that whimsical cartoony look. But I already showed you all an example of that here and I wanted to let you see the different look you get by outlining with matching thread.
Remember – one of the great things about embroidery is that you get the image – but you can make it look however you like with your choice of color and stitches.
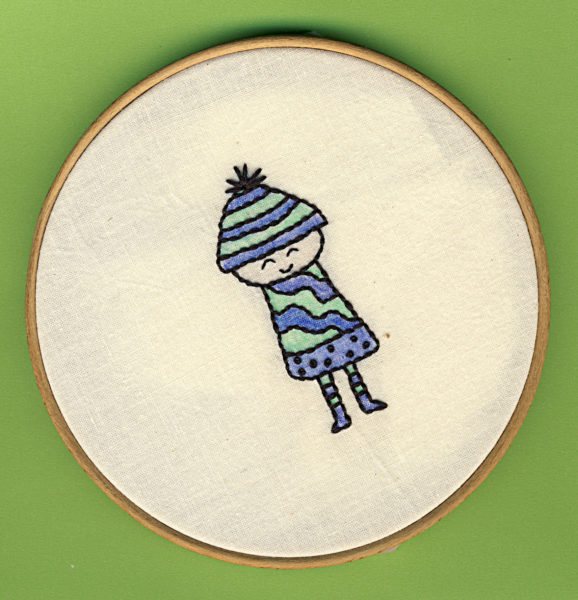
With hand embroidery, sometimes you’ll want to fill an area with color but you don’t want the texture of a stitched area – or you don’t want to take the time.
One possibility in those situations is to fill the area with colored pencils or crayons. In this video I show you how to stabilize the fabric for coloring, and how to heat set it after you’re done.
Here’s the finished piece I started in the video.
I really love to do an all-dark outline when I color the fill. To me it has a playful, cartoony look that suits my drawing style.
By the way – that dark outline looks like black, but it’s really DMC #3371. That’s a very dark brown and I use it a lot of places you’d expect to see black. I think black outlines and eyes can sometimes look a little harsh. Using this color takes the edge off.
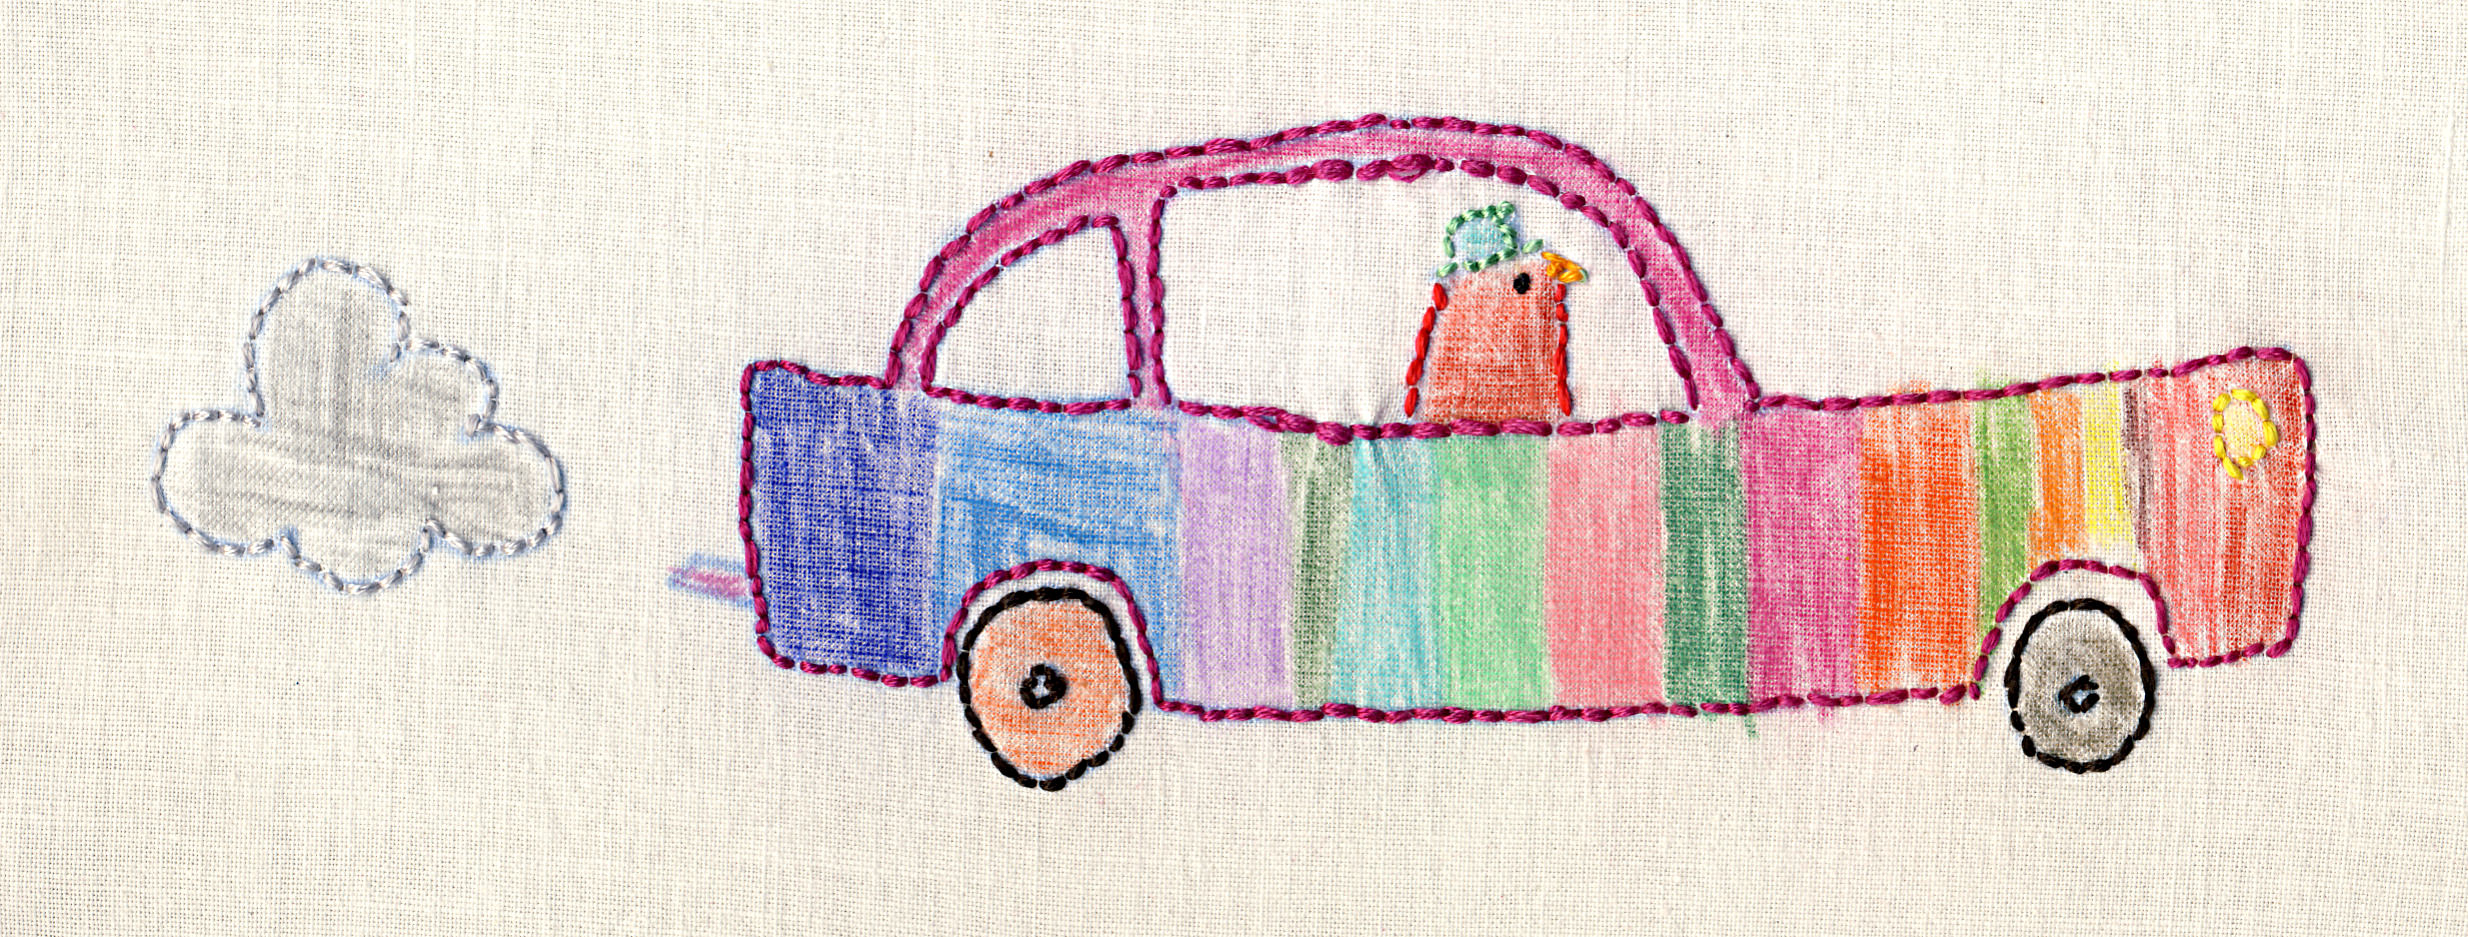
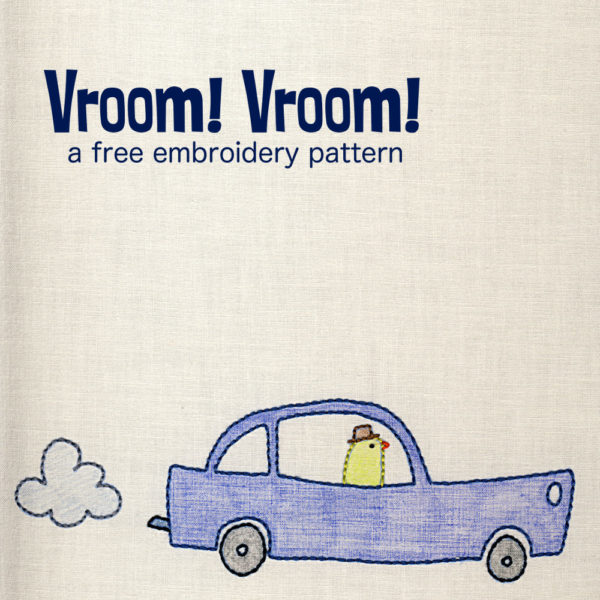
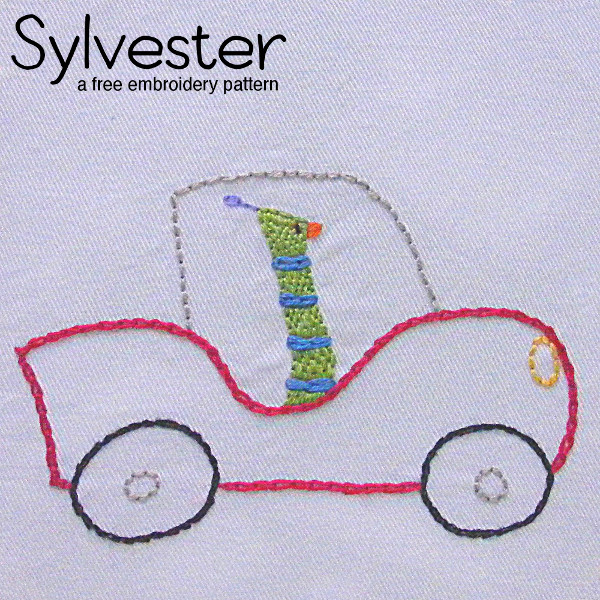
The free Vroom Vroom pattern uses the same coloring technique, but I match the outline thread to the fill color. It’s a different look and one you’ll also want to have in your tool basket.
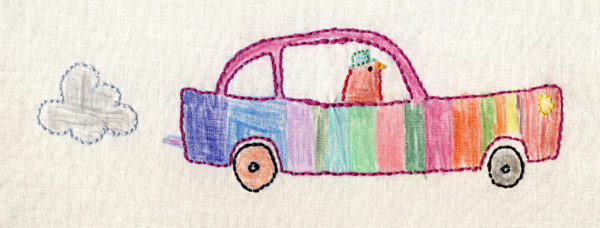
And here’s a totally different look on that same car – colored and stitched by my daughter.
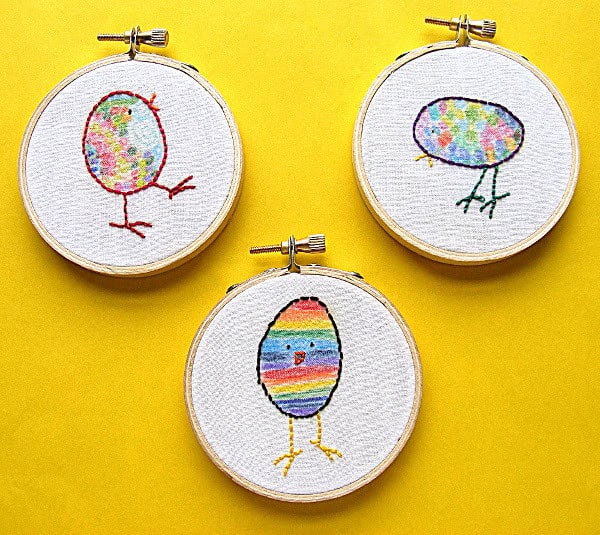
Finally, for just one more fun look, here’s a set of three Easter chicks colored by my daughter.
You could satin stitch a bird’s beak with a regular satin stitch, but I make a little tweak to the basic stitch that I think adds a nice dimension to birds’ beaks. It’s not any harder and it gives them just the shape I want. Watch the video to see how I do it.
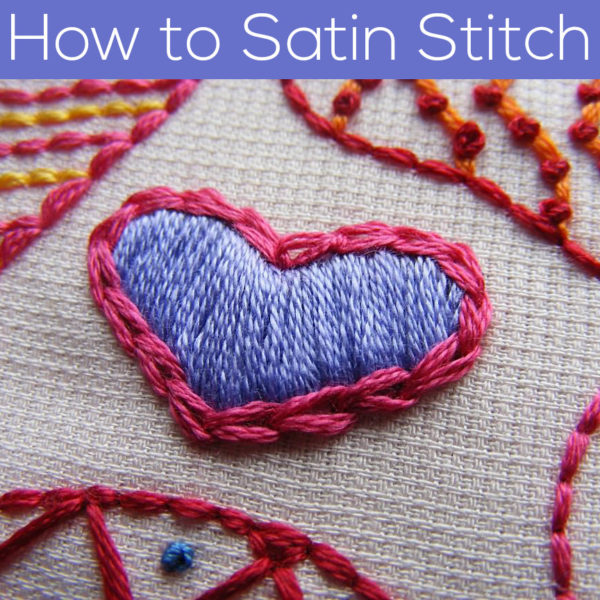
Satin stitch is one of my favorite fill stitches for small areas. It has a smooth (yes, satiny) surface and it’s a very effective way to make small areas pop. I like it when the satin stitched area is slightly raised above the surface of the fabric, and I’ll show you how to achieve that effect. It’s a nifty trick that also makes your stitching easier. I like that kind of trick!
See how easy? Satin stitch isn’t hard – it’s just slow. 🙂
If you’re filling a larger area, or just want to pad the entire shape, you can use split stitch as a fill stitch to completely fill the area before sating stitching over it.
Another option (which I occasionally use for doll or softie eyes) is to cut the shape out of felt (in a color to match the thread) and then satin stitch over the felt as the padding.
Want the effect you see in that heart in the top photo? After satin stitching the heart, I outlined the shape with chain stitch. Easy peasy and super fancy.
Oooh la la! French knots – so very fancy – and so very frustrating. When you don’t know the trick to them, that is.
For years I had a love/hate relationship with them. I loved the effect – there’s nothing quite like it for teeny polkadots and nubbly texture. But I hated their unpredictability. Sometimes they worked, but most of the time they didn’t. Every time I stitched one I held my breath to see if it would hold. If it did, I did a little happy dance. If it didn’t. . . well, let’s just say there was swearing while I picked out the bad stitch and rethreaded my needle.
For a long time I thought it was just a French knot thing. They have a reputation for being tricky. But then one day I had an epiphany. I realized the problem wasn’t the French knot – it was me. I blame it on my inability to read those cryptic stitch diagrams. You know – the ones with NO ACCOMPANYING TEXT to tell you about things to be careful of/look out for. All this time I simply had my needle pointed the wrong way during the thread-wrapping part of the knot. That’s it! Once I figured it out I was set and I haven’t had a failed French knot since.
Right now some of you are probably laughing at me because you’ve been successfully doing French knots since you were a kid. But I guarantee that some of you have a certain light in your eyes and you’re staring at the screen thinking, “Is it really that simple? Is that really what I’ve been doing wrong all this time?” And you’re itching to grab a hoop and see if it really works. I know this because that’s been the response in every class I’ve ever taught. Go grab your hoop, my friends. Watch the video. You’ll see. And you will LOVE French knots. There’s nothing else quite like them.
Want some practice?
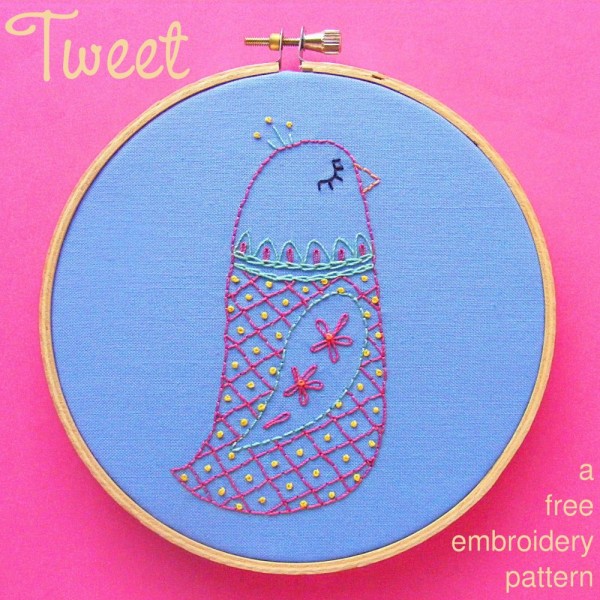
There are a few French knots decorating this pretty bird.