What’s Inside My Handwork Bag?

A peek at what's inside my handwork bag - from Wendi at Shiny Happy World

Want to learn the basics of hand embroidery with an easy online workshop – totally free?

Sign up for Embroidery 101 here. You’ll learn how to get started, the tools and supplies you’ll need, the four most basic stitches, how to transfer your pattern and how to display your work.

If you already know the basics – sign up for Embroidery 201. It’s also free! You’ll learn how to stitch on specialty fabrics like felt and stretchy T-shirts. Plus you’ll learn lots and lots and LOTS more stitches – all my favorites!

You know how I talk ALL THE TIME about how much I love handwork because it’s so portable?

Would you like to see just what I keep in my handwork bag? I’ll show you what tools are inside and how I keep everything organized so I can pull out my work whenever – and wherever – I have a few minutes to stitch.

All right then!

I’m currently working on two projects – hand quilting the Controlled Chaos quilt (not portable – I do this on the sofa)

Controlled Chaos handwork - big stitch quilting in progress

. . . and this little bit of thread therapy.

Thread Therapy handwork - a WIP from Shiny Happy World

My Handwork Bag

First let’s talk about the bag.

My Handwork Bag

I made it using the largest size option of the Stitch & Stash Project Bag (pattern from Betz White) with an added kitty applique from my Cats Quilt Pattern. You can read more about the bag and how I made it here.

The quilt won’t fit in it 🙂 but the 7 inch hoop does. I work on both projects on the sofa – but I also carry the hoop with me for random moments of handwork.

Here’s what’s in the bag with that hoop. . .

What's inside my handwork bag?

I’m using the Tutti Frutti embroidery thread bundle, so I pulled all of those colors off of my main embroidery ring and keep them together using a simple binder ring – available at any office supply store. (Here’s more info about how I organize my embroidery thread.) The last item in the bag is an Altoids-sized tool tin.

My Handwork Tool Tin

I love having a metal tin so I can store sharp objects inside without fear of them poking me or poking through my bag. Here’s what’s inside the tin. . .

What's inside my handwork tool tin?

My bag is always packed and sitting at my sofa spot, ready to grab and take along in case I’m going anywhere I might have a few extra minutes for some handwork.

Happy stitching!

Best,
Wendi
That's me!

Freezer Paper, Sulky Sticky Fabri-solvy or Fusible Adhesive? Which Stabilizer to Use When?

Freezer paper, Sulky Sticky Fabri-solvy or Fusible Adhesive? Which product do I use when?

I rely heavily on three products/stabilizers for the work I do.

  • Freezer paper
  • Sulky Sticky Fabri-solvy
  • Heat & Bond Fusible Adhesive

(You can find links to sources for all of these – and all my other favorite tools and supplies – here.)

I recently had someone ask when I use each one – and that’s a great question.

Here’s the rundown. . .

Freezer Paper

Freezer paper is an excellent stabilizer.

I use it most often to cut out felt pieces. I print the pattern pieces directly onto the freezer paper. (You can trace if you’re not as lazy as I am.) I iron the paper to the felt and then I cut the pieces out – cutting through the felt and the freezer paper at the same time. Since I label all my pieces it means I have a nice pile of labeled felt pieces, cut perfectly accurately, waiting for me to stitch them together. Awesome!

Freezer paper also works this way when cutting out regular fabric, but I only use it on fairly small pieces – so small that I can’t use pattern weights. I use it for ALL my felt cutting.

Freezer paper is also excellent for fusing to the back of any fabric that you’re going to draw or paint on. If you’ve ever tried to do that without a stabilizer, you know that the pen or marker will tend to drag the fabric along with it. It can be really hard to keep it flat and smooth. Freezer paper makes the fabric act like paper. Handy!

Finally, people use freezer paper for this appliqué method. That used to be my favorite method – until I tested some of the new fusible adhesives out on the market and found a new favorite. 🙂

In all cases – the freezer paper will peel right off when you’re done. It doesn’t leave any residue behind, and you can reuse it a LOT of times before it loses its ability to fuse.

You can find rolls of freezer paper in the grocery store, or shop for printable sheets.

Fusible Adhesive

Fusible adhesive is what I use in all my appliqué projects. That’s mostly quilts, but also T-shirts, tote bags, pillows and more. Unlike the freezer paper – which sticks temporarily to the fabric – the fusible adhesive is a permanent glue.

So the only time I use this product is when I want to permanently stick one piece of fabric to another.

I LOVE LOVE LOVE using Heat & Bond Lite fusible adhesive in printable sheets, as opposed to the stuff you can buy by the bolt. It’s more expensive – yes – but it lets me skip over the tedious tracing step and jump right to the fun part of my appliqué project. That’s worth money to me. 🙂

Sulky Sticky Fabri-solvy

The Magical Embroidery Stuff! This amazing invention has made every part of my crafting life easier and more fun. (I wrote a whole post about its awesomeness here.)

I use it to transfer embroidery patterns to EVERYTHING. There are other products you could use to transfer a pattern to light-colored, smooth, woven fabric – but Sulky Sticky Fabri-solvy makes embroidery on every surface possible. And it makes stitching on smooth woven cotton easier and better.

With this stuff you can embroider stretchy fabrics like T-shirts and baby onesies (no extra stabilizer needed). You can embroider dark fabrics. You can embroider nappy fabrics like velvet and terrycloth and fleece. You can embroider felt. Oh! How I love embroidering on felt!

I use it to stabilize stretchy fabrics when I appliqué on them. It just washes away – leaving no itchy stabilizer behind.

I freehand all my quilting designs – but if I did anything fancy I would print or draw it on this and stitch through it, then soak it away later.

Freezer paper vs. Sulky Sticky Fabri-solvy

I think this is where most people get confused, because I use both of them extensively when I work with felt.

If I’m just cutting the shape out – I use freezer paper. It’s cheaper and doesn’t require soaking to remove.

If I’m embroidering something on the shape and then cutting it out – I use the Sulky Sticky Fabri-solvy. Sometimes you’ll see me recommend both things in one project – like this snowman ornament.

Happy Snowman Felt Ornament Pattern

The hat, hat band, and carrot nose have no embroidery on them. Neither does the back of the ornament. I cut all of those pieces out with freezer paper.

The snowman front and the scarf both have embroidery on them, so for those I printed the pattern on Sulky Sticky Fabri-solvy, stuck it to the felt, embroidered the details, cut it out on the lines, and soaked off the stabilizer. (You can see how this works in this post.)

All of my patterns tell you which product to use where.

I hope that answers your questions about which product I use in which situation! Let me know if you have any other questions about any of them. I love them all and I’m always happy to share info about products that make your crafting easier and more fun. 🙂

These links go to all my posts about quilt supplies.

Finished with this topic?

Return to the Let’s Make a Quilt main Table of Contents.

Move on to the lessons about cutting and quilting your background blocks.

Happy stitching!
How to Care for your Craft Scissors

I have three pairs of scissors: a pair for cutting fabric, a pair for cutting tape and an all-purpose pair (that happen to be child-safe so I can use them for travel).

scissors

Having different pairs for different craft purposes allows you to keep them in tip-top-shape, and makes your crafting easier! Here are some tips I have for keeping your scissors healthy.

Mark your Scissors

Do you have a family member who might be tempted to use your fabric-only scissors for cutting construction paper? Add a label to them! And consider keeping your special scissors away with your fabric stash.

Clean Scissors with Rubbing Alcohol

I have a pair of scissors just for cutting packing tape. Because tape leaves a residue that makes scissors icky!

When mine get too icky, I use rubbing alcohol and a cotton ball to clean the blades. The sticky comes right off!

Get them Sharpened

Many craft stores have an occasional sharpening service. Just like nice knives, it pays to get your scissors sharpened!

Any tips to share?

How many scissors do you have? And what types are they?

Do you have any care tips you’d like to share?

Read about Wendi’s “Great Scissor Rotation” here.

Everything You Ever Wanted to Know about Sulky Sticky Fabri-Solvy

Everything You Need to Know about Sulky Sticky Fabri-solvy - one of my very favorite supplies

I call this The Magical Embroidery Stuff.

Why?

Well, partly because Sulky Sticky Fabri-Solvy is quite a mouthful. 🙂 But mostly because I use it for absolutely everything I stitch and it’s absolutely magical. It really is one of my favorite products ever.

(You can find links to sources for all my favorite supplies here.)

I’ve written a lot about it in a lot of different posts, so today I’m bringing all that info together in one handy-dandy place.

What is it?

It’s a printable wash-away embroidery pattern transfer and stabilizer. Yes – it does all of that in one easy product! In a nutshell. . .

  1. You print your pattern right on the sheets. You can print them with an inkjet or laser printer, or photocopy onto it. You can also trace onto it – but I hate tracing.
  2. Peel off the paper back and stick the stuff right to the surface of what you’re embroidering.
  3. Hoop it up and start stitching. You stitch right through the stuff.
  4. Soak it in water and the stuff dissolves away like magic.

Want to see all of that in action? Watch this video.

Problem fabrics

I use this on everything I embroider. EVERYTHING. But it’s especially useful on problem fabrics. You know what I’m talking about – the ones that are really hard to transfer an image to.

  • dark fabrics
  • napped fabrics like velvet, terry cloth and cuddle fleece
  • plasticy fuzzy fabrics like polar fleece
  • thick fabrics that you can’t see through to trace – like felt
  • stretchy fabrics like T-shirts

It’s awesome on everything!

Sulky Sticky Fabri-Solvy is great for transferring a face to cuddle fleece.

Look! You can stitch right through the stuff onto fluffy cuddle fleece.

Even felt?

YES! Felt gets its own category here because Sulky Sticky Fabri-Solvy is just so perfect for it. In fact – I wrote a whole post about using it with felt here.

I love it so much with felt that I include pattern pieces already printed on it in all my felt kits. It’s that awesome!

Using Sulky Sticky Fabri-Solvy - stitching and cutting

See? Beautiful stitching and nice, accurate cutting.

I’ve never run into shrinkage problems with it – but I know a couple of people have with projects that really needed to be very precisely cut. Larissa Holland came up with a great solution to that problem here.

What about stickiness?

I never ran into problems with stickiness until I left a project sitting in a hot car one summer afternoon. The next time I picked that project up (even though it wasn’t hot anymore) I found that I was getting a sticky residue on my needle. Not fun!

And then I discovered Thread Magic. I was using it to solve another problem and discovered by accident that it totally eliminated any sticky needle problems. Fantastic! Especially since I love to carry my embroidery around with me and there was an excellent chance it would get left in a hot car again. Now I don’t need to worry about that!

Does the ink bleed?

It depends on the ink. I usually photocopy my projects or print them on my laser printer and those have never been an issue for me. But a couple of people reported the ink from their inkjet printers bleeding a bit when they rinsed off the stabilizer. Every brand is different so test the ink from your printer if you want to be sure! If you run into bleeding, try printing it out in draft mode – that uses a lot less ink.

The good people at Sulky let me know that one person had an issue with her laser printer. She said it didn’t actually bleed when she rinsed it, but it left little black specks all over her work. Yikes! The good news is that she sprayed it with Shout, washed it on the gentle cycle of her washing machine, and it came out as good as new. So if you run into laser printer problems, there’s an easy fix. 🙂

This isn’t a bleeding-ink issue – but it’s related. One customer reported that the ink wasn’t coming out of the centers of flowers where the stitching was the most dense. It wasn’t bleeding, but it’s like it was stuck there. She has very hard water and reported that a second long soak in distilled water took it out.

T-shirts

I want to add a special note here about T-shirts. I love embroidering on T-shirts, but it can be kind of fussy. You have to stabilize the fabric so it doesn’t stretch while you’re stitching. With traditional stabilizers you have to remove it after stitching. And stretch knits aren’t a treat to transfer the pattern to. All of these issues magically go away with Sulky Sticky Fabri-Solvy. Since it’s a pattern transfer and stabilizer all in one, you take care of both of those steps. And since it rinses out after stitching, there’s no fussy (and potentially destructive) removal of the stabilizer afterwards. It’s perfect!

embroidered dog T-shirt

That’s embroidered! 🙂

Now you know why I call Sulky Sticky Fabri-Solvy The Magical Embroidery Stuff. I love it!

I’ve heard that people use it for all kinds of other things too – like transferring complex patterns to a pumpkin for carving! If you’ve come up with an unusual use for it – let me know. I’d love to hear!

Happy stitching!
The Perfect Match – just the right color thread for your felt embroidery

You all may have noticed that I love a little felt embroidery. 🙂

I love how portable it is. I love the way the thread looks on the wool felt. I love the way it feels in my hands. It’s all so yummy!

The only part of the whole process I don’t enjoy is choosing matching thread colors.

I’m not talking about choosing thread colors for the design. That part is fun!

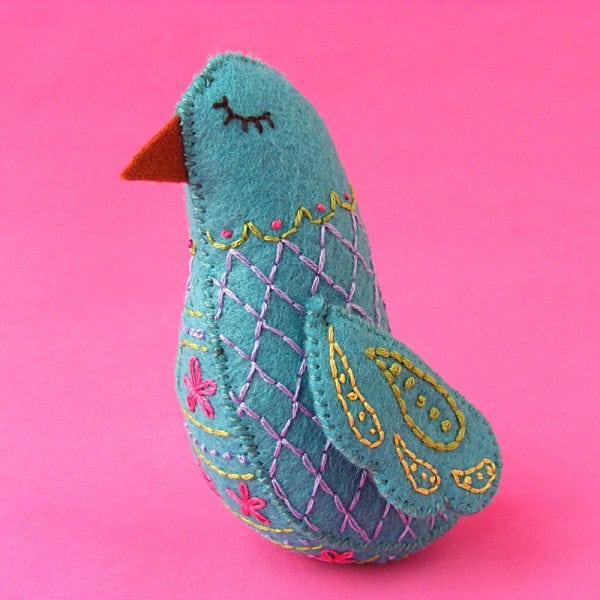
I’m talking about choosing embroidery thread that perfectly matches the felt color for sewing around the edges. Like sewing up this bird. (It’s a free pattern here.)

Flora - a free felt bird pattern from Shiny Happy World

It’s important to get a good match – but the process is boooring. Try this thread. Nope – but close. How about this one? Ugh – definitely not. This one? Yes. It’s not a creative decision in any way. It’s just finding the best match. *yawn*

Every single time I do it I think to myself that I ought to write it down when I find the perfect match – so I don’t have to do it again for that color.

Then I started thinking I should have a master list of all the thread colors that match all my felt colors. That would be handy!

Update! Ask and you shall receive. A few people asked for a printable list of the matching colors – so I made one! You can download it here.

Then I started thinking I should make that master list and actually carry the thread in my shop, so you can buy the matching thread when you buy your felt. Now that would be super handy!

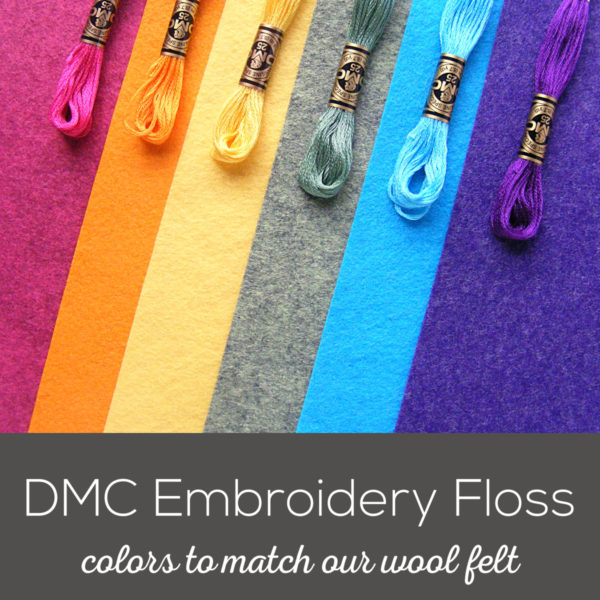
So I did it. I waited for one of those perfect-light days and pulled out all my felt and my DMC thread card and I found the perfect match for every color felt I carry. Then I ordered in all the thread and added it to the shop.

Get the felt here.

Get the matching thread here.

Enjoy! And have a fabulous weekend!

Best,
Wendi

Play with some felt! Try the Oddballs – a fun pattern for silly monsters.

New DMC Thread Colors – a Finished Stitches Prize!

DMC_Embroidery_ThreadJust in time to be one of the prizes in the Finished Stitches Challenge – DMC has released sixteen luscious new thread colors!

Want a quick recap of the prizes?

Gift certificates to TWO awesome embroidery pattern shops – Polka & Bloom and Wild Olive.

Beautiful embroidery books – the brand new Stitched Blooms and all three of Aimee Ray’s Doodle Stitching books.

And now – a pack of all the new thread colors from DMC. They’re so pretty!

new_DMC_thread_colorsHalf of them are brights. You all know I like the bright, clear colors. 🙂 I’m especially excited to see some turquoise in there! I love turquoise and I’ve always felt like they didn’t have just the right shade. Now they do! And there’s a dark and light that will work really well together. Nice!

DMC_new_embroidery_thread_colorsThe other half are these lovely rich natural shades. So beautiful! Especially the blue and the berry color. Wouldn’t they be pretty for some fall stitching on tea towels or napkins?

The whole thread bundle is one of the prizes. Woo hoo!

So get your photos in pronto! Email them to me at blockhead[at]wendigratz[dot]com and I’ll get them posted to the projects page. Or you can post them to the Shiny Happy World Facebook page and I can grab the images from there. Just do whatever’s easiest for you. 🙂 Edited to add: This contest is now closed. But you can still look here to see all the final entries, and get inspiration for how to finish your next embroidery project! Go take a look at all the entries!

Happy stitching!
Best,
Wendi
Wendi_Gratz_Shiny_Happy_World

Embroidery Thread Review – 12 wt. Sulky Cotton Petites

A review of Sulky Petites 12-weight thread

Remember when I said I found lots of great things at Quilt Market?

This is one of them.

You know I love Sulky products! I use Sulky Sticky Fabri-Solvy on almost every single embroidery project.

So, of course, I had to pop by the Sulky booth to see what was new. 🙂

These were new.

Sulky makes thread for hand embroidery!

Now – in spite of my love for Sulky stabilizers and pattern transfer tools, I’ve never tried their thread. I thought it was for just machine embroidery and I don’t do that.

But these are for hand embroidery!

It doesn’t snag!

Tweet - a free bird embroidery pattern

I took away a little sample and tried it. I tried it in the early summer when my hands were all gnarly from putting in my garden – a time when I rarely embroider because I hate snagging individual strands of thread on my gnarly hands.

I did not snag any threads!

A single strand of the Sulky 12 wt. is the same thickness as two strands of regular 6-stranded floss. I think that gave it just enough extra weight not to snag and pull individual strands loose. Plus it’s very smooth, which helped a lot.

Nice!

It’s very round and has a nice sheen

Blossom free embroidery pattern

I told the folks at Sulky that I liked my sample. They offered to send me more so I could put it to a real test – a whole embroidery project.

Here’s why it took so long to get this review to you. After all – Quilt Market was back in May!

I figured as long as I was going to do some test stitching, I might as well design some new patterns. Small patterns that would let me test out a few different things – bigger stitching, tiny stitching, fill stitching, etc. Ooh – and I could make them free patterns!

So I stitched up some samples. And I loved it even more! It has a beautiful sheen to it. Not shiny – but sheeny (if that makes any sense).

And it’s rounder than regular 6-stranded floss. That makes it sit up nicely on the surface of the fabric, which I really like. It’s subtle, but I definitely noticed the difference in the finished work.

No more tangled mass of embroidery thread!

Jackie cover 1000 px

Ok – I know this may sound dorky – but love the little spools! It keeps everything so neat and tidy! And since there are no strands to separate I don’t have itty bitty bits of leftover floss that I need to store. And the color numbers are right on the spool so they don’t get separated from the floss (unlike the little bands that slide so easily off an almost-done skein of thread). And there are no kinks like you get from winding on bobbins or cards. It’s pure awesome.

Excellent price

The price for each spool is $1.69. That seems expensive at first – but each spool has 50 yards on it – as opposed to 8.7 yards in a skein. Even when you account for the fact that the thread skeins are thicker you’re still getting about twice as much thread on the spool as you get in a skein. And I found that I have much less waste working with the spools.

Lovely colors!

Right now they have 66 solids and 14 Blendables or variegated threads. Plenty to choose from – and they have plans to add more!

So I give the Sulky 12 wt. Cotton Petites Thread a big thumbs up! You can find it here.

All the embroidery patterns you see in this post are FREE! Click here to get the patterns for them – plus one more.

Update – a couple of years after writing this review I found another great use for this thread. It’s absolutely perfect for Big Stitch quilting! That link goes to a video showing how.

Here are links to all my posts about embroidery tools and supplies.

For Beginners

Specialty Fabrics

Threads

Stabilizers and Pattern Transfer Tools

Return to the Learn to Embroider main Table of Contents.

Move on to the posts about working with patterns.

How to Use Pendant Frames for Embroidery – video

Make a Pretty Pendant with these Easy to Use Frames - a video tutorial

Want to learn the basics of hand embroidery with an easy online workshop – totally free?

Sign up for Embroidery 101 here. You’ll learn how to get started, the tools and supplies you’ll need, the four most basic stitches, how to transfer your pattern and how to display your work.

If you already know the basics – sign up for Embroidery 201. It’s also free! You’ll learn how to stitch on specialty fabrics like felt and stretchy T-shirts. Plus you’ll learn lots and lots and LOTS more stitches – all my favorites!

The Kiddie Cameo pattern was made for the pendant frames in the shop. I decided to also record this video showing just how to assemble the pendants – and it also gives a sense of the size because you see them in my hands.

You can shop for pendant frames here.

That flower image in the video is from a new pattern called Bitty Blooms – 30 tiny little flower patterns sized especially to fit in the pendants as well.

I’ll be adding more patterns especially for these frames – all will show the images in the frames on the pattern cover so they’ll be easy to spot among all the embroidery patterns. 🙂

Are any of you stitching these up for Mother’s Day? I’d love to see them!

Happy stitching!

Best,
Wendi
applique wendi

Why the Right Stabilizer is Like a Good Bra :-)

Why the right embroidery stabilizer is like a good bra - plus help choosing the right thing for your needs

When it comes to embroidery, the thread is like the gorgeous silk blouse hanging in your closet. It’s pretty. It’s colorful. It’s touchable. It’s lovely.

But try wearing that silk blouse without the right undergarment and – unless you’re a very lucky woman – the results will be. . . not so lovely. 🙂

Stabilizers are the undergarments of the embroidery world.

Different outfits require different undergarments. Sometimes a little chemise or a slip are all you want. Sometimes you need a supportive bra. Some outfits call for head-to-toe Spanx. 🙂 It all depends on what you’re wearing and the look you’re trying to achieve.

Same with stabilizers, so here’s a little overview of which stabilizers serve what purpose.

Let’s start with my favorite, shall we?

sulky sticky

It’s Sulky Sticky Fabri-Solvy – which is quite an unwieldy mouthful. Sulky also offers it as Stick & Stitch, so you’ll find both names in shops.

It’s my everyday bra – good for just about any situation. 🙂

It’s a pattern transfer and stabilizer all in one – and you can print directly on it, which is awesome for all of us who use a lot of digital patterns. I recorded a whole video showing it in action and what’s so great about it, but here’s how I use it. . .

  • To transfer a pattern to any fabric. That includes fleece, felt, and dark colors – all the tricky little buggers.
  • To stabilize stretchy fabric for stitching. That’s mostly T-shirts, but could be any stretchy fabric.

It’s my go-to stabilizer. I’ll tell you right now – I rarely use anything else. But I admit it’s a little pricey. It costs a little bit more than $1 a sheet. I’m totally ok with spending that – just like I’m happy to spend $40 on a bra that’s well made, won’t fall apart in the wash, fits right, doesn’t pinch, doesn’t itch, and will work under almost everything I wear. Heck – I’d happily pay $100 if I could find all that.

But maybe you want some less expensive (though also less all-purpose) alternatives?

Sulky Totally Stable

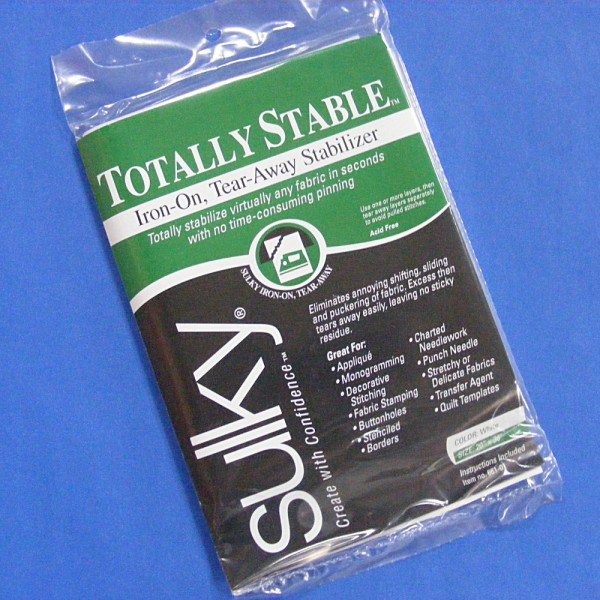
Sulky Totally Stable is great for stabilizing stretchy knits and only costs $5 for a pack. You can see it in use in this video.

This is the girdle of the bunch – all about control and not really meant to be seen.

You’ll need to transfer the pattern separately – this is a stabilizer only. It goes on the inside of the shirt. You stitch right through it and then tear away the excess after you’re done stitching. It works very well and I used it on lots of T-shirts before I fell hard for The Magical Embroidery Stuff.

Sulky Solvy

Sulky Solvy is technically a stabilizer, but I’ve always used it for pattern transfers. (It’s also a great deal at $5 a pack.) Like a slip under a sheer skirt, this can help you with tricky fabrics.

It’s a clear film – not sticky.

You can easily trace your design onto it, then hoop it right over the surface of your fabric.

You stitch through it, then rinse it away. I used it on all dark-colored T-shirts (in combination with the Sulky Totally Stable) and also on fleece and felt if I didn’t want to use iron-on transfer pens. You can see it in use in this video.

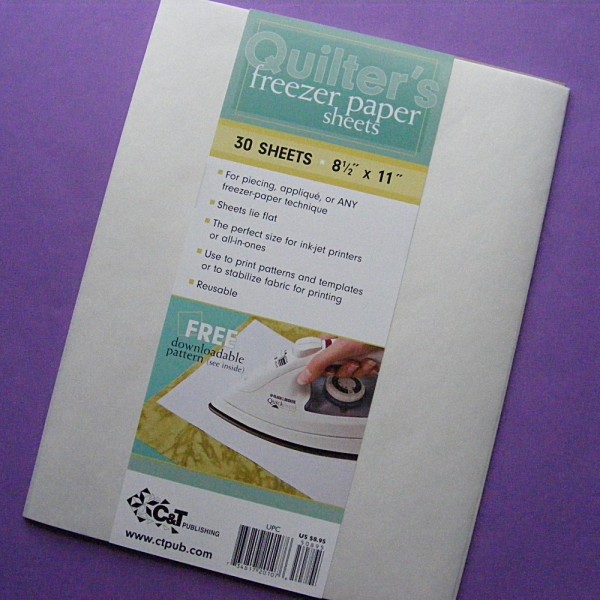
Printable Freezer Paper Sheets

Printable Freezer Paper does replace my Magical Embroidery Stuff sometimes.

It’s like a chemise or tank that you can wear under your most casual clothes instead of a bra. You’re not asking it for much – it just makes your day a little more comfortable. 🙂

I use this occasionally for freezer paper applique and all the time for cutting out felt pieces that don’t require any embroidery.

Easy. Fast. Accurate.

And no tracing! You can see it in a video here.
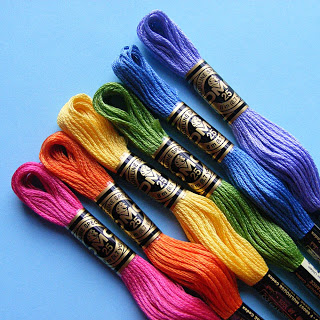
I’m also throwing hoops into the list.

I don’t think they’re what most people think of when they talk about stabilizers, but they certainly stabilize your work and improve the look of your stitching.

I can’t imagine stitching without them – does that make them the underpants of the embroidery world? 🙂

So there you have it! A rundown of all my favorite stabilizers – and probably too much information about my underwear. 🙂
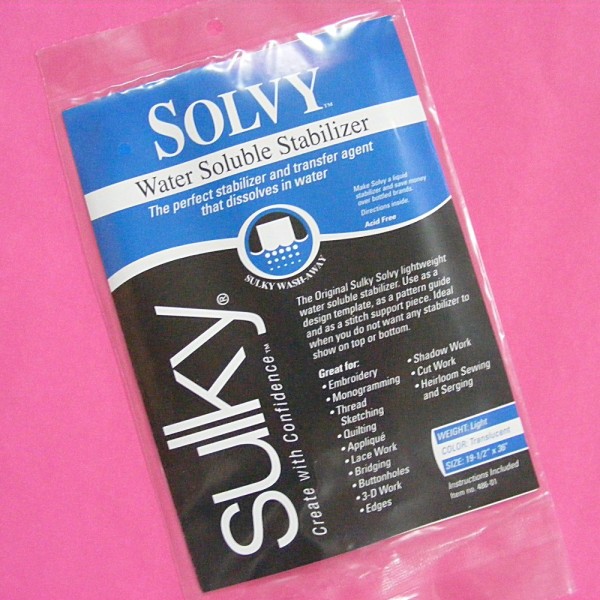
Here are links to all my posts about embroidery tools and supplies.

For Beginners

Specialty Fabrics

Threads

Stabilizers and Pattern Transfer Tools

Return to the Learn to Embroider main Table of Contents.

Move on to the posts about working with patterns.

How many strands of embroidery thread should I use?

How Many Strands of Embroidery Thread Should I Use?

I’ve gotten several emails lately from people asking how many strands of embroidery thread they should be using – and how to separate the strands.

How Many Strands of Embroidery Thread to Use

First let’s tackle the question of how many strands to use. It all depends on your project! Think of it like choosing a fat marker or a thin marker. If you’re drawing something pretty small, with lots of fine details, you’re going to use a thin marker/fewer strands of thread.

If you’re drawing something big and bold without a lot of fussy details, you’d choose a fat marker/more strands of thread.

But how do you know how many strands? Well – that involves a bit of trial and error, and a willingness to pick out your stitches if needed. Take your best guess. Stitch an inch or two and then take a look. If I think it needs to be fatter, I’ll unpick, add an extra strand, and try again. If I think it needs to be thinner I’ll unpick, take away a strand, and try again.

Note: I tell you how many strands to use in the color and stitch guide of all my embroidery patterns. 🙂

Of course – save all the strands you separated out! You can still use them.

How Do You Separate Out Just a Few Strands of Floss?

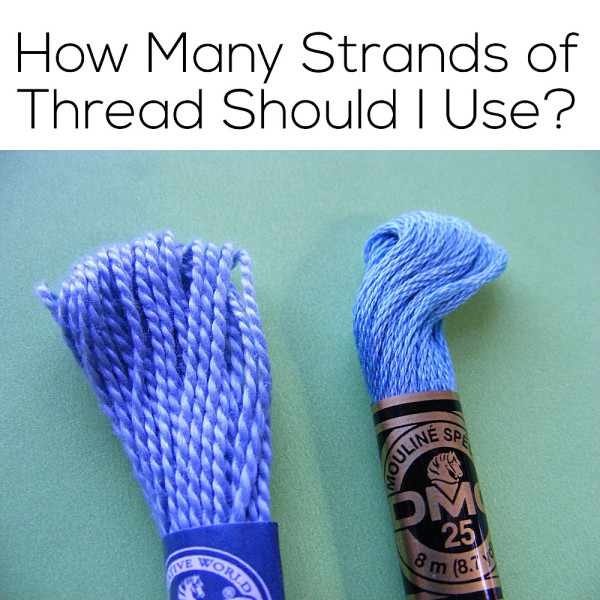
Now – about separating those strands.  First make sure you’re using the right kind of embroidery thread. Click on the picture at the top of the post. I loaded up a large file so it should fill the whole screen when you click and let you look very closely.

The thread on the right is called embroidery floss (or thread) – or sometimes stranded cotton. It’s what I usually use. It’s 6 strands of thread that you can separate into as many as you need.

The thread on the left is called perle cotton, pearl cotton, or sometimes craft thread. See how it’s twisted together? You can’t undo that – not without making an unholy mess. It’s lovely to stitch with – and you can buy it in several different thicknesses – but you can’t alter the thickness yourself. My favorite is Sulky 12 wt Petites – the equivalent thickness of 2 strands of regular DMC embroidery floss.

The tricky thing is that these two kinds of thread are often displayed together in the same section of the store. Luckily, it’s easy enough to tell the difference if you know what you’re looking for.

So – now that you have the right kind of thread – how do you separate it without ending up with a snarl?

Don’t cut your thread too long. The experts say it should be no longer than the distance from the tips of your fingers to your elbow – but I confess to cutting mine a bit longer than that.

Now – hold it up in the air so that the whole length of thread is freely dangling down. Tease out the number of strands you want and slowly pull them away from the mother strand. The strands are very lightly twisted together so there will be a bit of untwisting as you pull, but if you pull slowly it shouldn’t tangle.

Stitch away!

Here are all my posts about knots.

Before you knot that thread you need to know how much to use, so here’s one more post that doesn’t really have a better place to live. 🙂 How Many Strands of Thread Should I Use?

Return to the Learn to Embroider main Table of Contents.

Move on to the lessons for the four most basic embroidery stitches.