How to Read a Bead Crochet Pattern

I love bead crochet!

I learned loads of techniques from the book Bead Crochet Jewelry, and I highly recommend it as a starting place for learning!

But what if you want to do more? Today I’m going to show you how to read bead crochet patterns, of the type you’ll find on Pinterest and online!
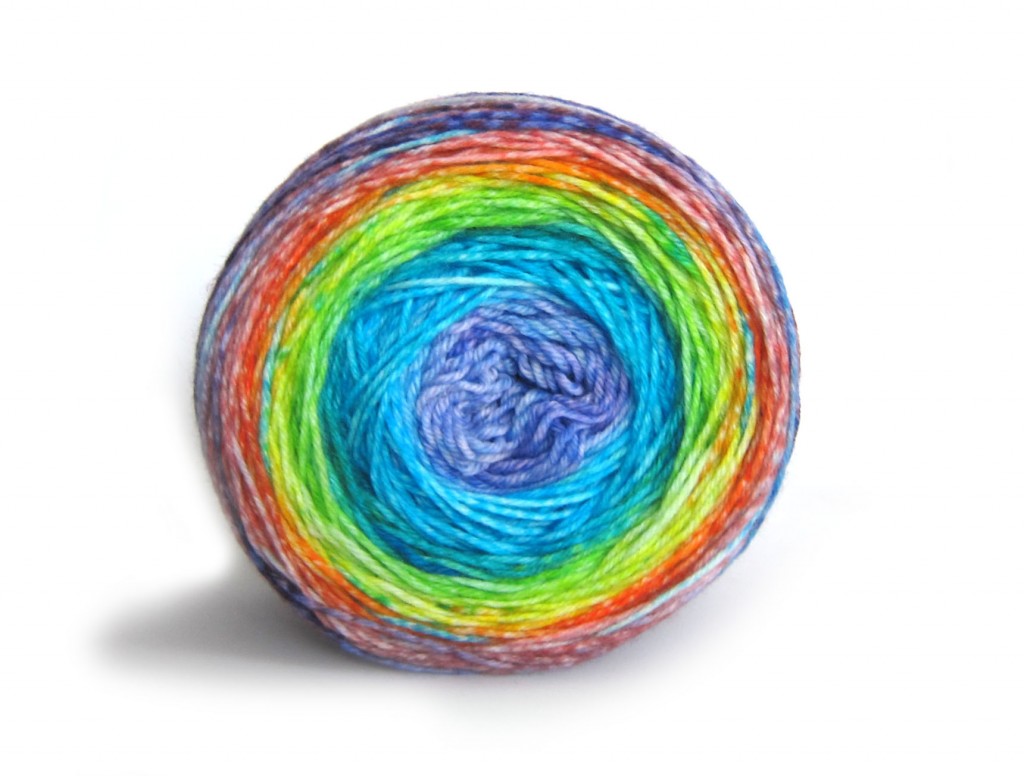
Chevron Bead Crochet necklace

Finding a Bead Crochet Pattern

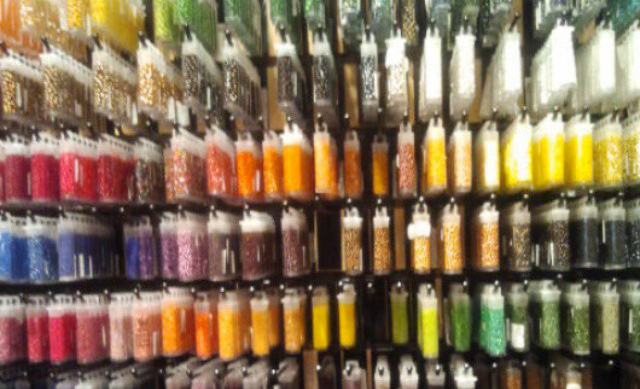
Much of the bead crocheting comes out of Eastern Europe, so it’s a good thing that patterns don’t use a lot of words! If you search Pinterest for ‘bead crochet pattern’, you’ll find oodles! You can also search Etsy and you’ll discover a number of patterns.

They vary greatly in complexity and size, but don’t worry… I’ll talk about all of that!

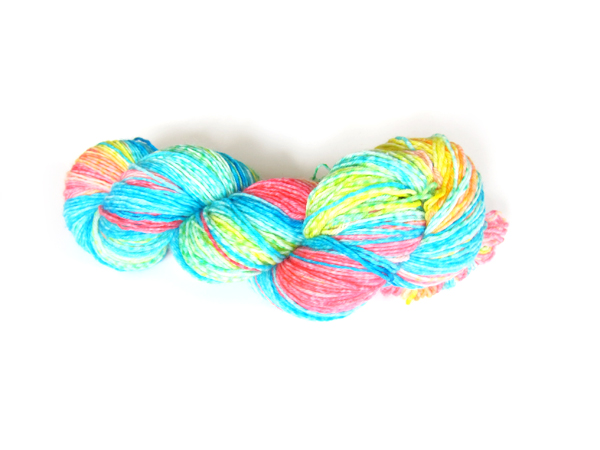
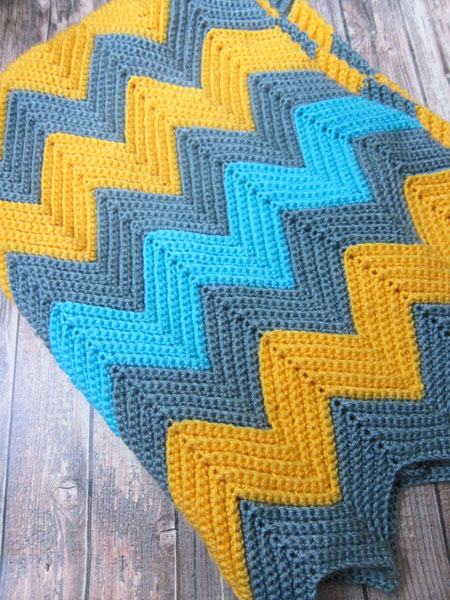
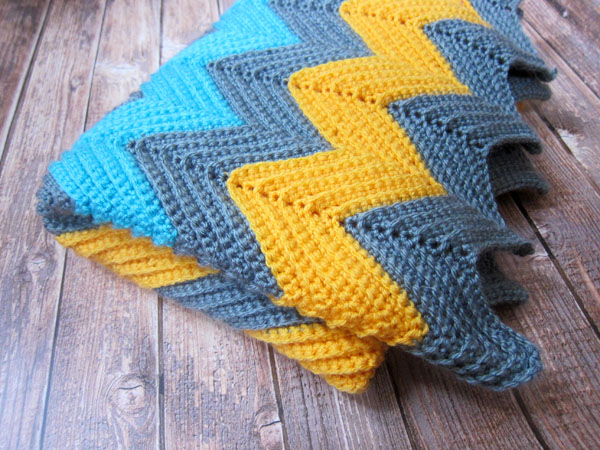
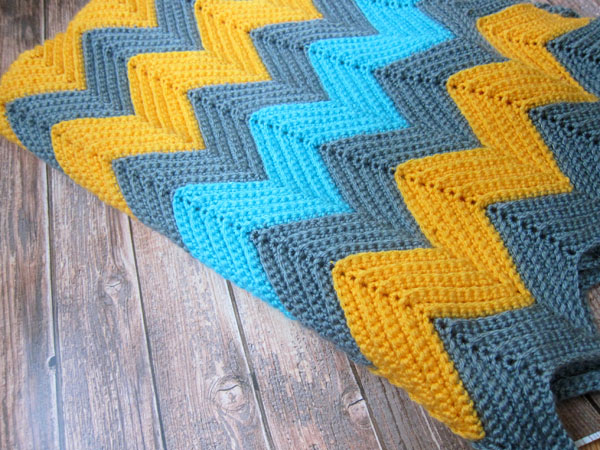
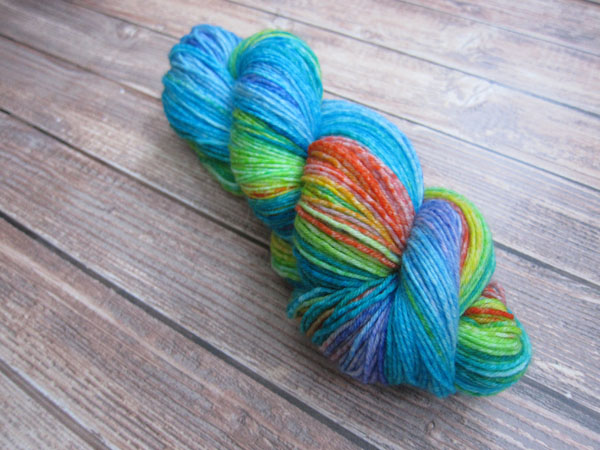
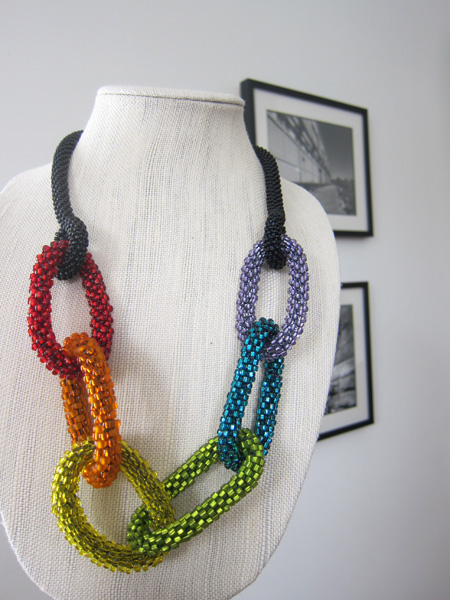
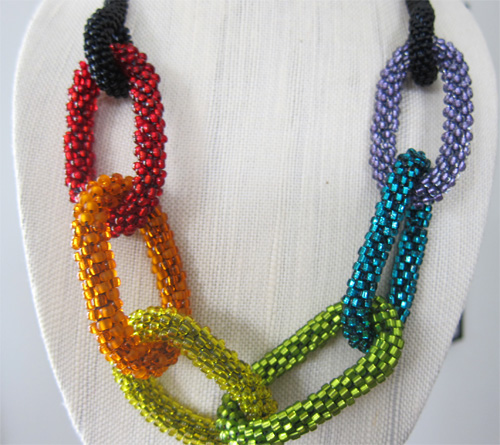
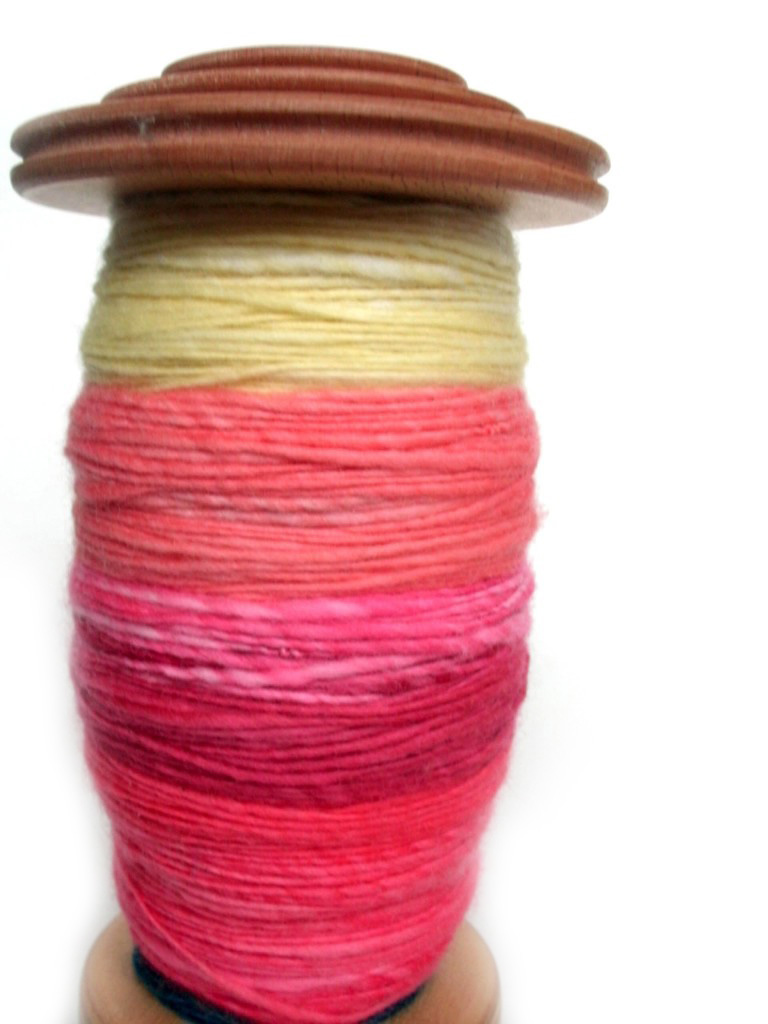
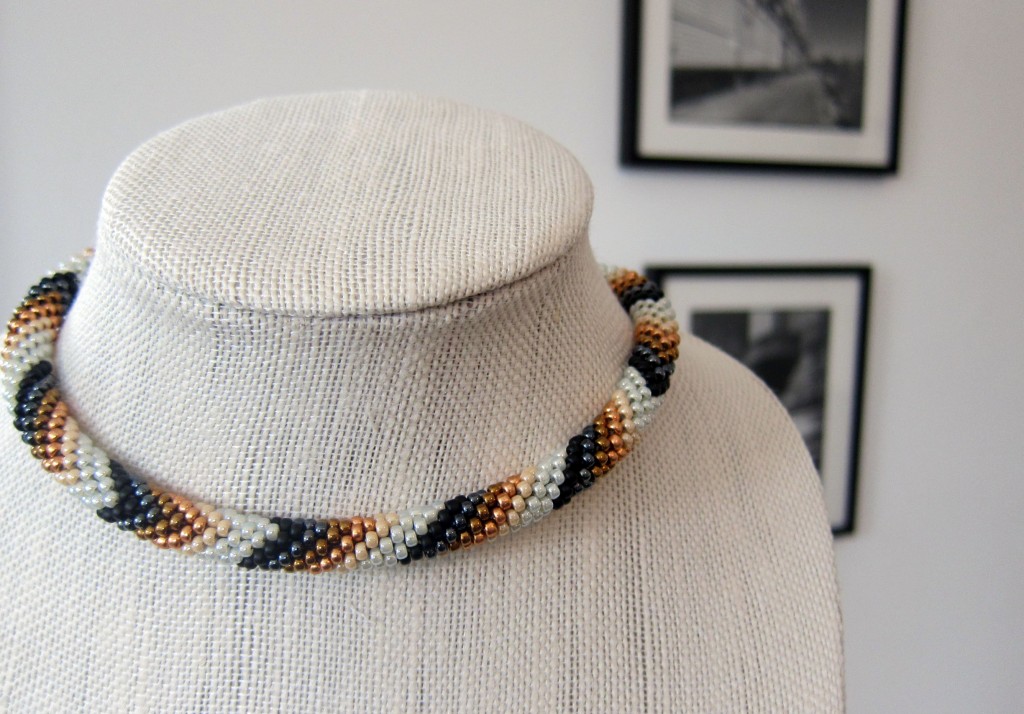
Today, I’ll be using this pattern by Snow Mirna that I found on Pinterest. It’s the pattern I used to make this ombre chevron necklace:

ombre chevron bead crochet necklace by FreshStitches

The Anatomy of a Bead Crochet Pattern

If you’re familiar with regular crochet patterns, you’ll find a bead crochet pattern very short! They’re about a half of a page and look like this:

bead crochet overview

There are essentially 4 parts:

  1. A description of the pattern (top right)
  2. A list of the materials you will need (middle right)
  3. A sequence instructing how to place the beads on the string (bottom right)
  4. A view of how the pattern will look when crocheted (left)

I’ll explain each of these sections in turn!

How to select a pattern

All of the information you need about selecting a pattern is in the upper right hand corner:

bead crochet 1

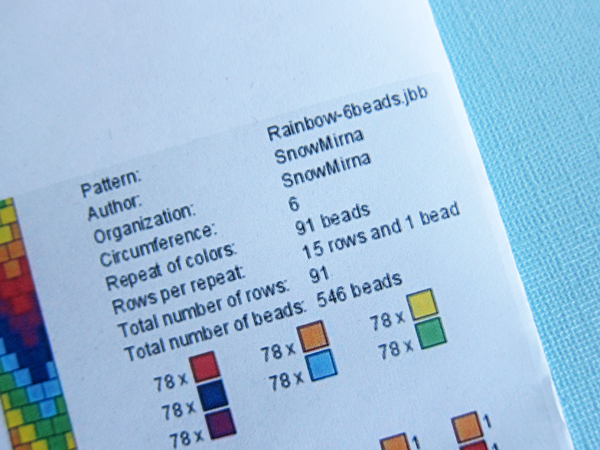
One of the most important dimensions is the circumference. This tells you how many beads need to be in the circumference to get the required pattern. You’ll see that this pattern has 6. I personally like patterns with 4 or 6 beads. The larger the circumference, the larger thickness your finished piece will be. A larger circumference will give you more pattern options, but will produce that a thicker piece that may be difficult to find notions and findings for.

Purchasing Materials

Now, have a look at the middle right:

bead crochet 2

This tells you not only how many beads you need, but how many you need of each color.

This particular pattern uses equal amounts of beads, but other patterns will vary.

seed beads

You often purchase beads by the gram.

Stringing beads

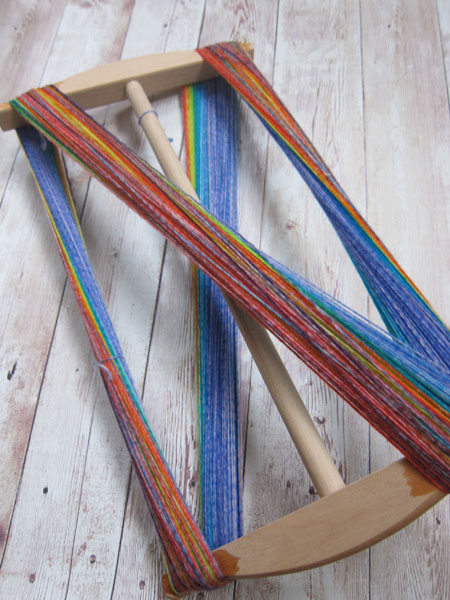
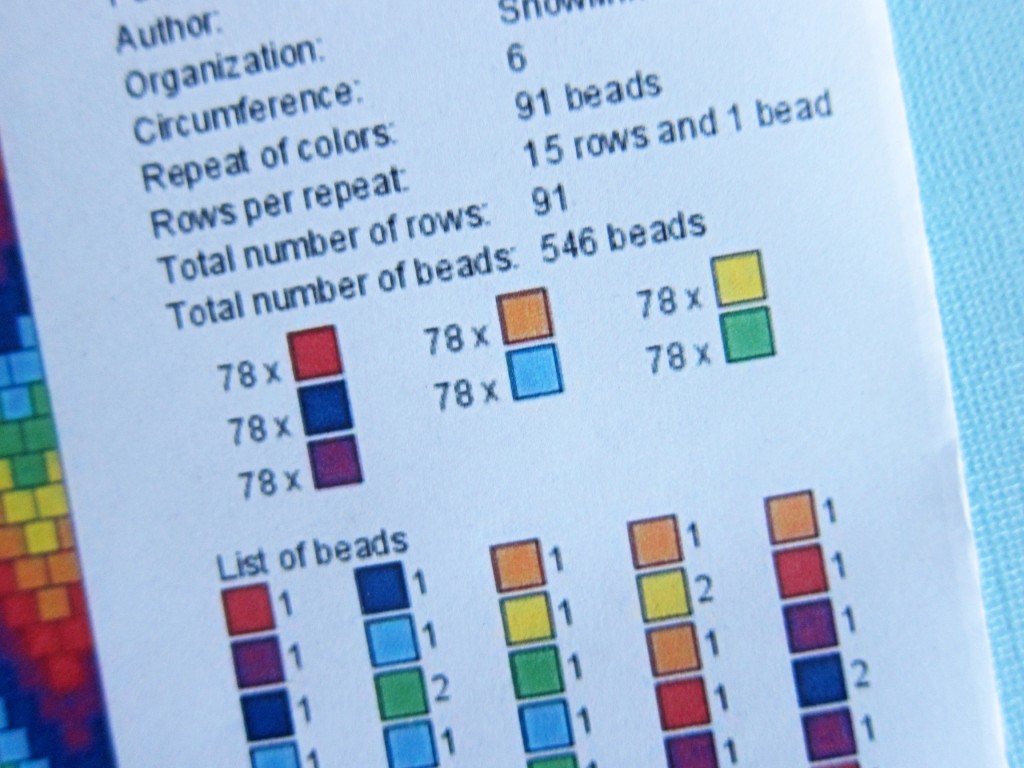
The hardest part of following a pattern is stringing the beads in order!

bead crochet 3

Begin at the top left, and work your way down, stringing the number of specified beads for each color. You’ll see that this chart mostly instructs you to string one or two beads of each color, but that too, can vary.

You will repeat this chart according to how long you want your finished piece to be!

Then, crochet!

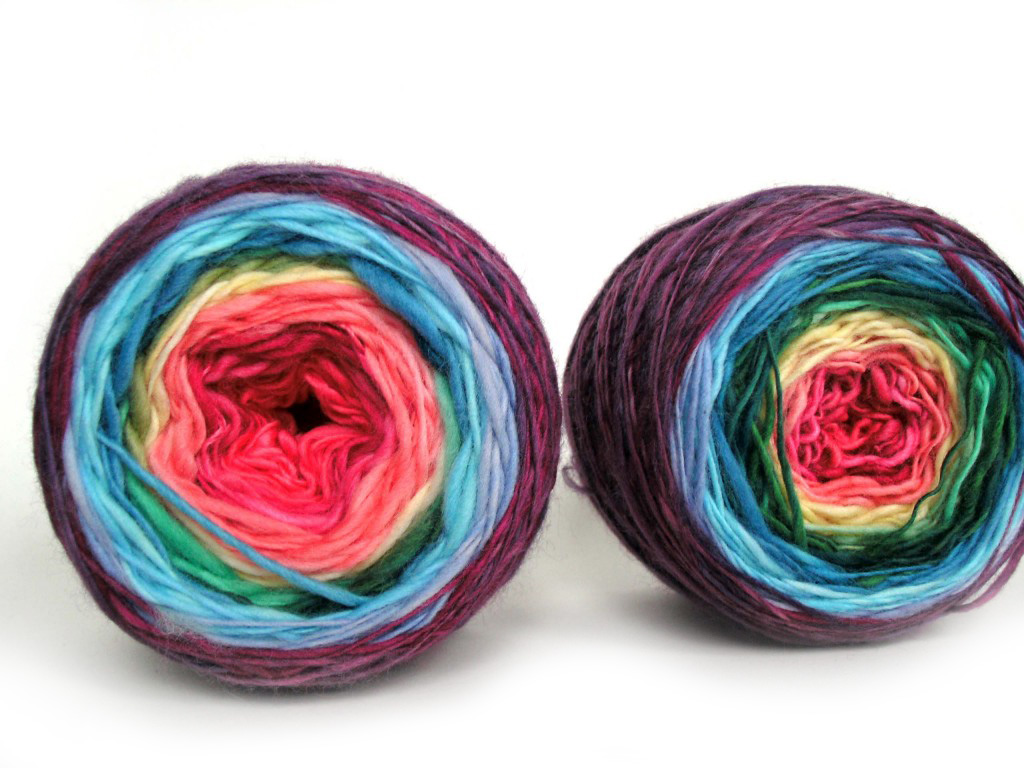
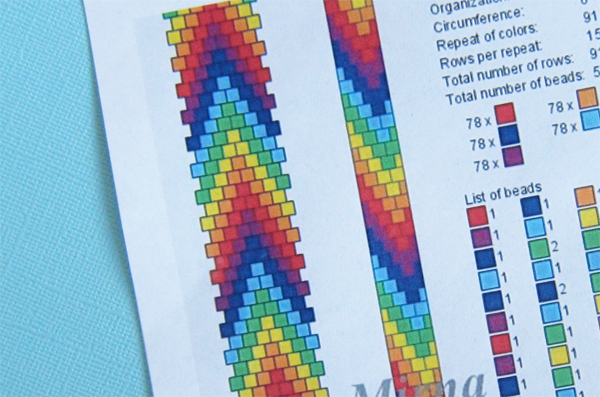
Once your beads are strung, the crocheting is the same no matter which pattern you’ve chosen to follow. The chart on the left will show you what your finished piece will look like:

bead crochet 4

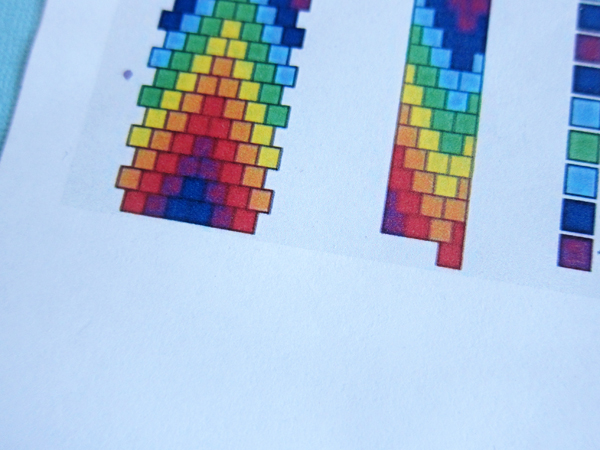
The leftmost view is what the piece would look like flat, and the one on the right (which is optional) gives an idea of how the piece will look in the round.

Ready to try?

With such a variety of patterns, these simple tips will open up a whole new world of bead crochet to you!

bead crochet necklace by FreshStitches

Have fun!

Do I need to weave in ends on a stuffed animal?

Okay, so here’s a question I get often: when making a stuffed animal, is it important to weave in ends?

I’ll tell you!

Weaving in ends

What is weaving in ends? When you change colors (or start a new skein of yarn), you’ll have little tails left behind. Those are called ‘ends’. Weaving in ends just means using a tapestry needle to hide those ends.

What about stuffed animals?

Are you ready for some good news? Because the ends of a stuffed animal are on the inside of the body, you don’t need to weave the ends in!

weaving in ends in crochet

That means, no matter how many messy tails there are on the inside of the stuffed animal, you’ll never see them!

How to Dye a Gradient Yarn using a Spray Bottle

How to Dye a Gradient Yarn Using a Spray Bottle - tutorial from FreshStitches and Shiny Happy World

Remember when I told you how to dye a gradient yarn with a sock blank? Well, today I’m going to go a step further and show you how to get an even more gentle gradient using a *spray bottle.

When I made this skein of yarn, I was feeling Easter-y, so I picked yellow, blue and pink:

wilton dye for dyeing yarn

Click this post to see what the Wilton Icing Colors look like on yarn.

wilton colors 2

Okay, now here’s the technique: I rolled out my sock blank and dunked each end and the center in one color, leaving a lot of white space in between. See?

dyeing a gradient yarn tutorial

Ignore my ugly cooking sheet in the background. Actually, don’t ignore it (it’s crucial for keeping your counters clean in this project!)… just pretend it’s prettier!

Now, load up your spray bottle with the dye.

spray bottle 4

You want to use the spray bottle to direct your dye exactly where you want it. With this blue, I’m going to spray more towards the blue dyed portion of the yarn, and then spritz less to blend it into the yellow.

how to dye a gradient yarn

Now wash your bottle really well and repeat with the other two colors. You’ll get a very blended effect!

See how the colors blend? Because the dye is wet when you’re spraying, the blue mixes with the yellow and makes green… it’s an effect that’s hard to get if you’re just dipping the blank in dye.

dyeing a gradient yarn

I let it dry, and then wound it on a niddy noddy. Here’s the hank:

skein of yarn dyed by FreshStitches

The gradient-ness doesn’t show up too well in a hank. But no worries, I’ll show you what I’m knitting. Here’s a little shawl I’m working on:

shawl knit and dyed by FreshStitches

Isn’t the gradient fantastic? I can’t wait to wear this one!

Is the Invisible Decrease right for you?

What is the Invisible Decrease?

If you crochet amigurumi, you have probably heard of the Invisible Decrease. The Invisible Decrease is another name for slip stitching 2 together through the front loop.

The result is a decrease that is thinner (and less bumpy) than a regular decrease.

Is it right for you?

I often get asked if I recommend the Invisible Decrease. And my answer is, “it depends”.

The Invisible Decrease is designed to reduce the thickness in fabric when you’re crocheting through both loops.

As you may know, I prefer crocheting through the back loop only. This creates a less-dense fabric than crocheting through both loops.

Crocheting through the back loop

When you crochet through the back loop, the ‘extra bulk’ of the decrease isn’t a problem! You should happily do your normal decrease!

single crochet 2 together from FreshStitches

Alternatives

If you’re still looking to cut down on bulk while crocheting through the back loop, you can slip stitch 2 together as your decrease, but just don’t do it through the front loop.

Just be aware that because the Sl St2tog is ‘smaller’ than a normal Sc2tog, this could change the appearance of your final piece if your decreases are stacked.

Best,
Stacey

Crochet Ripple Afghan

Have I shown you the beautiful afghan that my mom made Maddie?

orange and aqua crochet ripple afghan freshstitches

I just love it! It’s in my favorite colors!

freshstitches chevron afghan

She used Knit Picks (either Brava or Comfy Worsted… I can’t tell because it looks like the aqua color has been discontinued!) and a size I hook. I bought her a Caspian Crochet hook (because she was wearing the paint off of her aluminum hook) and she loved it!

freshstitches aqua and orange afghan

My mom doesn’t read crochet patterns (yes, I fully appreciate the irony in that- given that my job is to teach people to read crochet patterns!), but the stitch she used is very similar to the classic back loop ripple stitch.

There are lots more inspirational chevron photos on my Crochet Afghan Pinterest board… so many color combinations you can do with this stitch to get a great blanket!

Best,
Stacey

How to Count the Number of Stitches in a Round (crochet)

How to Count the Number of Stitches in a Round of Crochet - a tutorial from FreshStitches and Shiny Happy World

When you crochet in the round, it can be tricky to count your stitches. But counting is important to make sure that you’re on track for following your pattern.

Today, I’ll show you how to count your stitches!

The loop on the hook doesn’t count!

Here’s a photo of my work:

crocheted circle counting tutorial

Do you see the loop that’s on my hook? (I’ll be highlighting all the stitches I’m chatting about in dark blue):

does not count

This loop does not count as a stitch! This might come as a surprise, especially if you’re a knitter.

Look for the ‘V’s

So what does count? You want to look for the ‘V’s. I like to start at the hook and work my way around. Here, I’ve highlighted the first V:

one

Let’s do another:

two

Now it’s your turn. Have a look at this picture and count the Vs:

crocheted circle counting tutorial

Keep counting until you’ve finished the round. If a stitch has been ‘stitched into’, that means it’s part of the previous round, so don’t count it!

How many did you get?

Did you find 12?

twelve

Hope that helps!

Here are handy links to all the crochet troubleshooting posts. . .

Return to the main table of contents for Let’s Learn to Crochet Amigurumi.

Happy stitching!

How to Dye a Rainbow Gradient Yarn (using a sock blank!)

Today I’m going to show you how I dyed this beautiful skein of yarn:

Gradient Rainbow yarn dyed with Wilton Icing Dyes by FreshStitches

I’ve talked about how to dye a gradient before, but today’s technique is a bit easier (but costs a little more). For this project, I used a sock blank.

What is a sock blank?

A sock blank is basically length of undyed yarn knitted up using the stockinette stitch. I purchased mine from Knit Picks. It’s more expensive than buying yarn in a skein, but having the yarn already knitted up makes it easier to dye a gradient.

How to dye

You can dye yarn lots of different ways (check this post for how to use Kool-Aid), but for this project, I used Wilton Icing Dye. (check this post for a tutorial on how to dye with Wilton Icing Dye).

color card for wilton icing dye on yarn, freshstitches

Once you’ve set up your dye, you’ll want to apply a little bit to the sock blank… basically making rainbow stripes. You want the stripes to be horizontal (along with the direction of the stitches) in order to get a gradient.

gradient rainbow yarn by freshstitches 2

I used a silicone pastry brush to apply the dye and put the blank on a big cookie sheet (you don’t want that dye getting on anything else!

gradient rainbow sock blank freshstitches

To get the best gradient effect, overlap the colors a little bit (that is, you want a little green over top of the edge of the blue stripe… otherwise, you’ll get very definite stripes)

How to finish the yarn

You just let the yarn dry, and it’s dyed! But, you’ll want to wash and unravel the yarn before knitting with it, or else it will be all kinky (just like when you frog a project).

I washed the yarn (I guess it’s not a blank anymore!), and then unraveled it and wound it onto a niddy noddy. This makes a nice skein (and has the benefit of allowing the yarn to dry well).

niddy noddy freshstitches

Pop it off, and you have a skein!

gradient rainbow yarn by freshstitches 1

You can see the true beauty of the yarn when it’s wound into a cake:

Gradient Rainbow yarn dyed with Wilton Icing Dyes by FreshStitches

Amazing, right?

Tips and Tricks

  • If you’re not sure how a particular color will come out, do a test swatch! You don’t want to mess up an entire skein because one color comes out different than you wanted!
  • The disadvantage to a sock blank is that the bits of yarn that are tucked inside the stitches are a little harder to soak with dye, so a light application of dye may result in splotchy yarn. (although… it’s a cool look, so experiment. You may want that on purpose!)
  • Be careful what you put your blank on. Keep in mind that excess dye will be carried along with the liquid… and if it touches other parts of your yarn, it’ll dye that, too!
  • You can make your own blank, particularly if you have a knitting machine!
  • This same technique works with any kind of dye!

Happy stitching!

Best,
Stacey

Finished Rainbow Bead Crochet Necklace

I’ve been working on this project for a while: I started it in December, but got derailed until I found this nifty bead spinner to help me get that long strand done… and here it is!

rainbow bead crochet necklace

You can see how long that black strand is around the back. That’s a lot of beads!

I just love it! It’s a project from Bead Crochet Jewelry (a book I highly recommend!

rainbow bead crochet

I used size 6 beads for the rainbow links, and size 8 beads (slightly smaller) for the black chain around the back. That difference accentuates the rainbow, I think!

It’s a real statement piece, and I’m planning on wearing it while teaching at Stitches South. Am I going to see you there?

Best,
Stacey

Have you tried these ways of making yarn?

This post contains affiliate links. That means I make a little commission if you buy something after clicking through. All affiliate links are marked with an *.

Of course you can go to the store and purchase a skein of yarn.

But you can also make the yarn yourself!

Some of these are fabulous options if you’re on a budget, or maybe just looking for a way to get creative!

Spin Yarn

Spinning is using either a spindle or a spinning wheel to create yarn from fiber. You can make it as complicated as you want… you can sheer the sheep, wash and card (organize) the fiber yourself (free if you own a sheep or are friendly with a farmer!) or purchase some roving online.


spinning yarn on bobin yellow red


Tips

  • If you’re giving spinning with a spindle a try, I highly recommend one with a notch. You can find one for less than $20 on Etsy.
  • If you’d like to take a class, check out Ply to Knit: Spin the Yarn you really want* on Craftsy
  • Before investing in a wheel, shop around. Try borrowing one from a local spinning guild or renting one from a yarn shop so you can see if it really suits you.
  • Shopping for fiber is as much fun as shopping for yarn! Search for ‘hand dyed roving’ on Etsy to get started!

Make t-shirt Yarn


T-shirt yarn is yarn made from t-shirts!

t-shirts for tshirt yarn


I made some t-shirt yarn a little while ago and crocheted a bath mat. So much fun!

I absolutely love this tutorial on how to make it.

Make a Magic Ball!

Do you have lots of scraps laying around? Join them together to make a magic ball! Here is a tutorial.

rainbow spinning


Tips:

  • Select yarns that are the same weight to join together
  • Yarns with plies work best
  • Wind the ball as you go to keep it tidy!

Once you’ve finished, you have a fun rainbow-y yarn that you can use to knit or crochet anything!

Unravel a Sweater

Some beautiful yarn in the world has been knit up into really ugly sweaters.

If you find one of these gems in the thrift store, you can unravel the yarn and put it to good use! I once retrieved skeins of cashmere yarn from one lucky find!

And more…

This Mollie Makes post has links to even more techniques for making yarn that I haven’t tried yet. Newspaper yarn? Whoa!

How many of these have you tried?

Are any of these ways of making yarn new to you?

Or have you done them before? Let me know your experiences!

Best,
Stacey

How to string seed beads quickly and easily!

It’s a new Coffee with Stacey!

I got a really fun new toy: the Darice Bead Spinner*, which promises to speed up the stringing of seed beads.

review of the darice bead spinner by FreshStitches

I string a lot of beads for bead crocheting, so I just had to give it a try!

review of the darice bead spinner by FreshStitches

Watch the video to see me using it in action, as well as a little update about my current bead crochet project!

Other Links you might Love:

Best,
Stacey