I get a lot of questions about what stuffed animal eyes are safe for babies.
Even though craft eyes are often called safety eyes – they are not recommended for use in toys for children under the age of three.
I’m often asked, “can I use buttons instead”?
In short, the answer is no.
To explain why, let’s talk about why craft eyes aren’t baby safe for stuffed animals. It’s incredibly unlikely that the washer will accidentally come off of the back of the eye. (In fact, it’s pretty difficult to remove the washer from an eye with plastic ridges, as I showed in this blog post on how to remove craft eyes.)
The danger with craft eyes is that a baby (or dog) could chew through the fabric that the eye is attached to, dislodging the eye. A plastic eye securely attached to a scrap of shredded fabric is still a choking hazard.
Now what about buttons? Many people assume that since they’re sewn on, they’re more secure. But it’s not true. A baby can use their set of chompers to chew through the thread attaching it to the piece. It’s actually easier for a abby to chew through the threads holding a button eye in place than it is to chew through the fabric surrounding a craft eye.
Baby-safe stuffed animal eyes
For completely baby-safe stuffed animal eyes you have a few different options.
For crocheted stuffed animals, the easiest solution is to crochet the eye.
One more option for baby-safe softie eyes is to embroider them! This also works on both crocheted and sewn stuffed animals. On small stuffed animals you can use this stitch, and for larger eyes I recommend satin stitch or split stitch as fill stitch.
So many options- and all baby safe. Choose the one you like the look of best!
Maddie decided that she wanted to be a gnome for Halloween… and I thought it was a good excuse to put my craftiness to good use. This is a great costume to make! It’s adorable, and you only need to make a few components. Combined with store-bought clothes, it looks amazing!
If you’re wondering why these photos are so cropped, it’s because I let Maddie play with the November Kit Club sample- she just loves it! But, it means that I needed to crop it out to avoid a major spoiler!
Let me give you a quick run-through all of the components!
Knitted Hat
There are loads of pixie-style patterns on Ravelry. You can follow one of those, or modify a normal hat pattern. To do this, work two plain rounds in between every decrease round of the crown. That’s how you make the point! This technique works for knitting or crochet!
To make the belt, I cut a piece of belting (yes, that’s actually what it’s called! You can find it by the yard in the notions section of a craft/sewing store) to length. I sewed snaps to each end to fasten it on. I cut a square of felt (about 2″ longer in each dimension than the width of the belting) and cut two slits in it so I could run the belting through. Easy!
Clothing
I bought red pants and a blue cardigan from Primary (the Baby Pants in Cherry and the Baby Snap Cardi in Pool). I bought the cardigan one size too big, which gives the outfit a cute, oversized gnome look!
Happy Halloween!
I hope you have a blast today! And you might want to download my free pumpkin pattern for a fun little project! Or crochet a sweet gnome!
I absolutely love knitting socks on 9 inch circular needles.
Most people think I’m crazy when I say that my favorite knitting needle is a 9″ circular. But I can’t help it. I’m in love.
When you knit with other techniques (double point needles, two circulars or magic loop), there’s always a join that creates the potential for laddering (those icky loose stitches) as well as costs you some time maneuvering them around.
With the 9″ circular, there’s none of that! You just knit around and around!
A little video for you!
Are you a bit nervous about knitting with 9″ circulars? Don’t be!
I made this video a little while ago:
And it’s pretty good, but felt like I could give you a better idea of what to do my knitting a miniature heel flap, where I could also show you how to pick up stitches. So, I made you this one:
(sorry, the manicure isn’t as nice… but that’s okay, right? I filmed the first one while I still had fancy nails from filming my Craftsy course!)
The heel flap is what most people think is the scariest part of knitting on a 9 inch circular… and I hope you can see that it’s really not hard!
Don’t you feel like giving it a try?
Pick your favorite pattern!
Almost any pattern can be converted to 9″ circulars!
There are no patterns that I know of that specifically call for 9 inch circular needles. So, you should feel comfortable with knitting on a circular needle before beginning a pair of socks, as you will need to do some ‘translating’ in terminology.
Give ’em a try!
I’ll be honest, if you have big hands or like a lot of ‘space’ when you knit… the 9″ probably isn’t for you.
But if you like to knit socks, and are tired of losing a double point, getting ladders in your work or having trouble tossing your knitting into your bag and going… then you might love these guys! Try them!
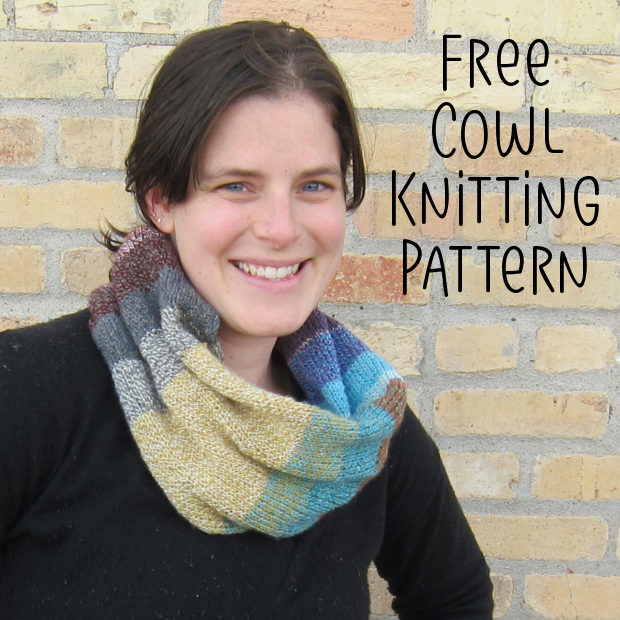
I used to carry some awesome Shepherds Wool Crazy Skein yarn and I got a lot of questions about what would be the best thing to make with it. I’ve used it for lots of things – hats, shawls, scarves and and awesome cowl.
I wrote up a quickie pattern for you that shows off the wonderful texture and colors in this yarn.
Why is it called ‘Either Way Cowl’? Because I’m showing you two different ways to knit a cowl! Try the ‘easiest way’ if you’re new to knitting or want a really simple project! If you have some knitting experience under you’re belt, then ‘try this way’ and watch my provisional cast-on video for help!
You can get craft eyes in lots of fun colors, and I show you how to use them here. But, what do you do if you want something you can’t find in a shop? Like pink eyes? Or glitter eyes? Or polka dot eyes? Hmm… those would be hard to find.
You can paint them yourself! Today, I’ll show you how to paint your own craft eyes! All you need is clear craft eyes and some paint. And since there are oh, about a thousand, colors of paint available… the possibilities are endless!
Scroll down for the video!
Glitter eyes!
Have you seen Beanie Boos? They’re a group of Beanie Babies with glitter eyes!
I’ve been getting lots of requests for glitter eyes, because you want to add this awesome touch to your own stuffed animal creations. I can’t find anywhere where they are commercially available… but, I have found the perfect glitter paint!
Aren’t these amazing? And they’re even more sparkly in person!
Painting your own craft eyes is easy! All you need is some acrylic paint and clear craft eyes.
You’ll get more details in the video below, but here are the basic steps:
Apply a thin coat of acrylic paint to the back of the craft eye
Allow paint to dry
Repeat. I’ve applied 2-3 thin coats for maximum glitter
Video Tutorial
I filmed this tutorial before I got the fancy palettes, and I realize my thumb is often in the way… oops! But, I think you get the idea!
Isn’t that easy? And here’s the result!
Of course, you don’t have to use glitter paint. Any acrylic paint will work! And you don’t have to paint them all one color. Try painting little polkadots before you lay down a solid background color. Or maybe stripes! Or a starburst effect! The only limit is your imagination!
Ombre Glitter Eyes
An ombre effect is a little more tricky than simple stripes, so here’s some more info on that.
Aren’t these amazing?
This ombre effect is super-easy to achieve with glitter paint because the paint is actually clear with specks of glitter. That means that one coat leaves little gaps for another color to shine through!
TUTORIAL
Here’s how to do it in three easy steps!
I’m so excited about the possibilities… I’m thinking my next ones will be white and pink ombre.
What color combinations do you think would be amazing?
Get glittery! 🙂
Here are handy links to all the posts about amigurumi eyes. . .
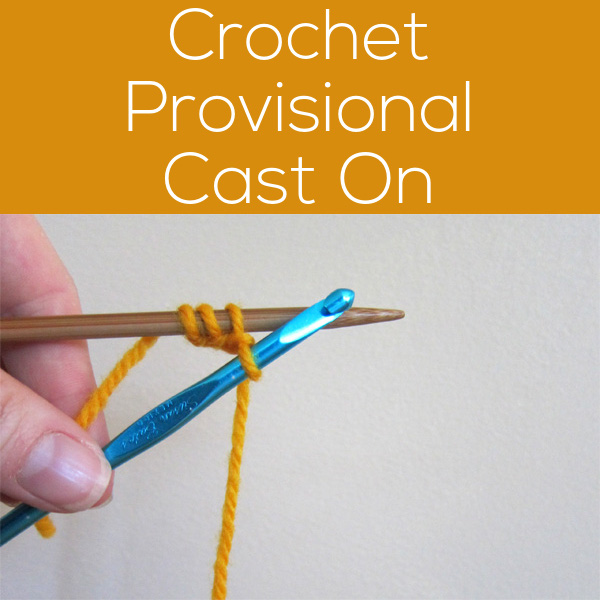
The crochet cast on is a fabulous cast on to have in your knitting tool kit. And I’ve made you a video to show you how to do it!
It uses a ‘waste’ piece of yarn that you’ll pull out when you’re finished knitting: leaving a row of live stitches on the first row! It’s like magic!
It’s a technique you may see in cases where you’ll want to continue knitting from the first row. For example, I’ve seen it used to cast on for the neck of the sweater (when you’ll come back later to knit the collar). It’s absolutely seamless, so it’s a cleaner look than coming back and picking up the stitches later on.
Here’s the Video!
This is the sort of technique where a video is worth a million words. I’ve made a short (4 minute) video showing you:
How to cast on with waste yarn
How to mark your cast on so it pulls out easily every time!
How to count your cast on stitches
How to be sure you’re knitting the stitches in the right direction
How to pull out your waste yarn
I encourage you to watch and try it out for yourself!
Neat, huh?
Ready to try it out? Hang on to your hats!
I’ll be making a pattern available soon that’ll let you put this technique to use!
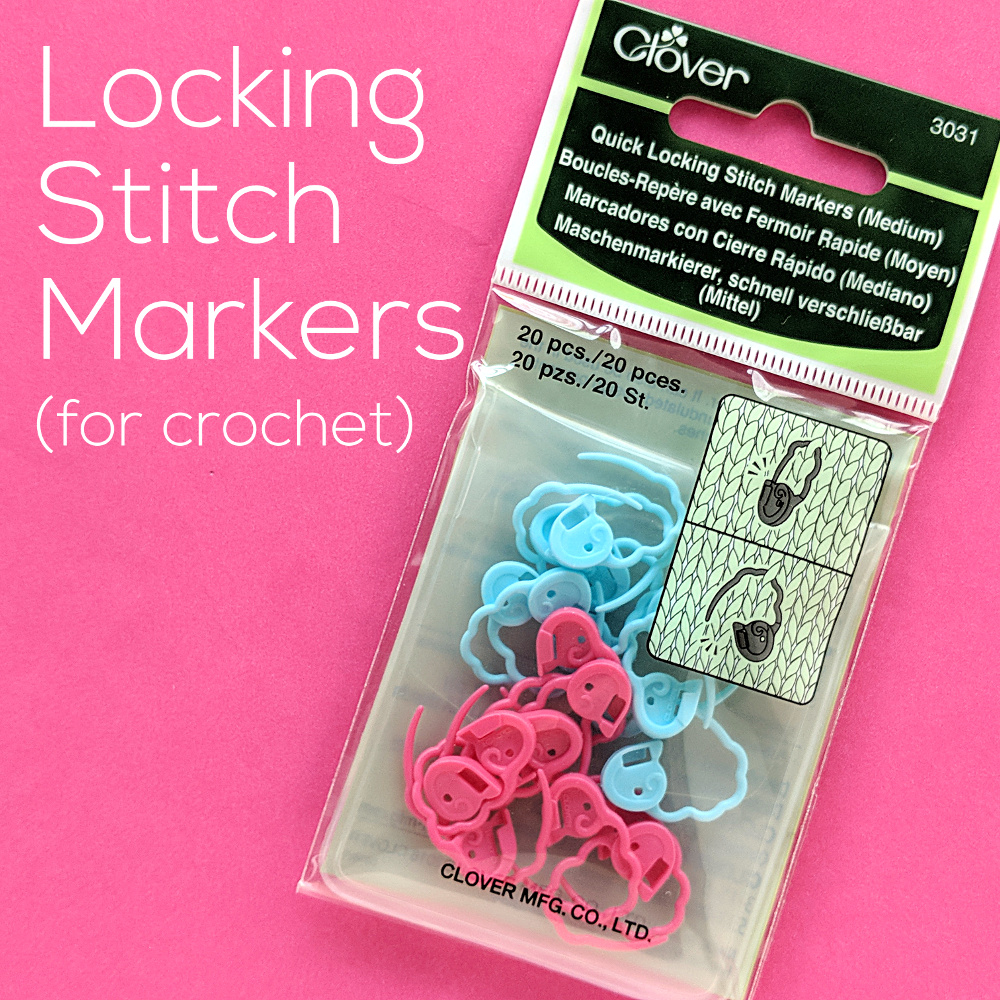
Besides your hook and yarn, a crochet stitch marker is your best buddy and most useful tool!
You want to look for a locking stitch marker, which is a lot like a fancy safety pin.
Locking stitch markers come in a few varieties, but the most important thing is that they open and close! Don’t get fooled into buying those ordinary ring markers that are for knitting needles. . . they don’t work for crochet.
Do you have your stitch markers ready? Let me get you and your new best friend acquainted!
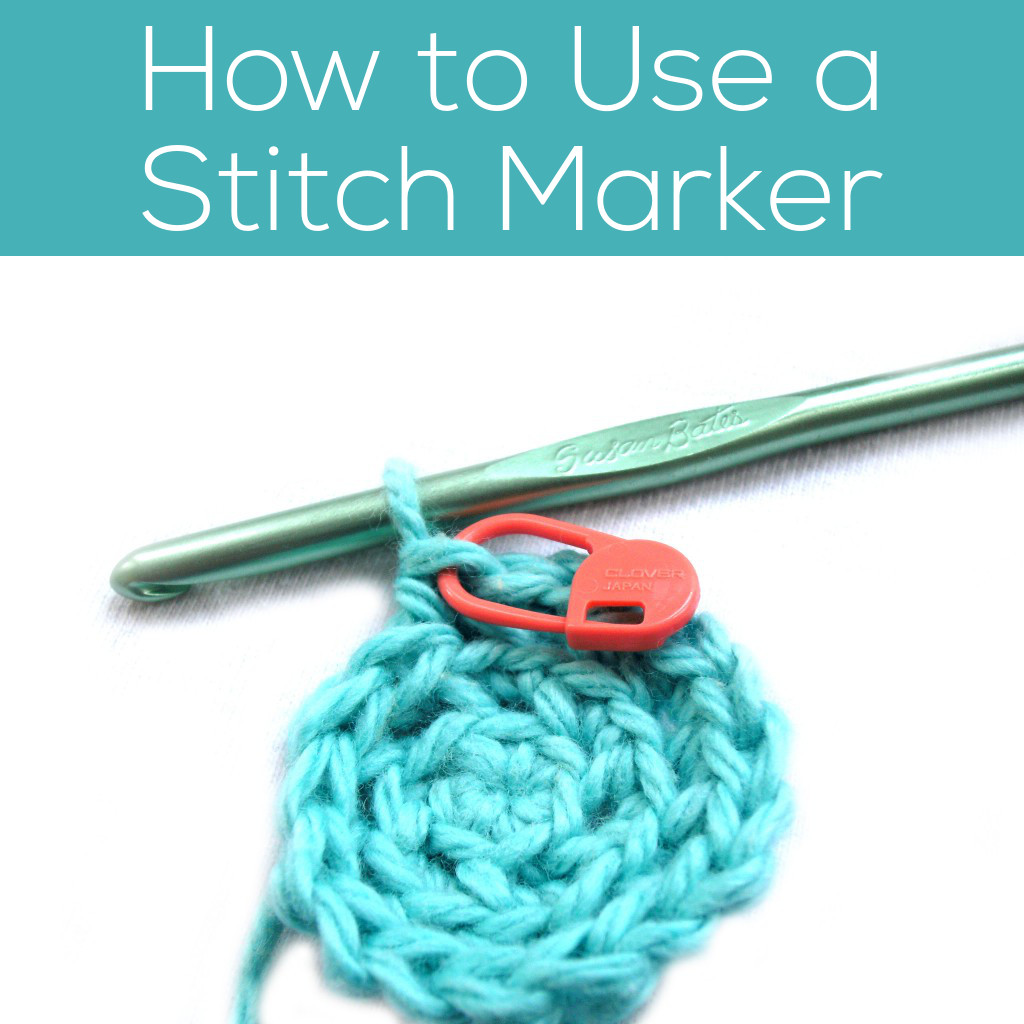
Handy Use #1: Mark the End of the Round
The most common problem crocheters have when crocheting in the round is losing track of where the round starts and ends – which leads to an incorrect stitch count and mayhem! So, I’ll show you how to use a locking stitch marker to mark the end of a round.
I don’t tend to use a stitch marker for the first couple of rounds (because there are so few stitches per round), but I usually start at the end of the third round. Here I’m crocheting the snout of the cow, but many circles begin the same way.
Since I crochet through the back loop only the front loop is available to hold a locking stitch marker.
Slip the stitch marker into the front loop of the last stitch in the round, close it up, and keep crocheting!
I know I’m finished with my next round when I’m just above the stitch marker, like this:
Then I can move the marker and start my next round. No confusion!
Handy Use #2: Counting How Many Rounds You’ve Done
A lot of amigurumi are made by crocheting in the round. When teaching classes, I’ve noticed that counting rounds is something that gives a lot of crocheters trouble… I mean, who wants to count every stitch? I’ll show you how a crochet stitch marker can help you in counting rounds.
Let’s do a little example.
I’ve been following my pattern instructions for the first three rounds, and now my pattern says:
Rounds 4-6: sc in each st (18)
How can we do this without counting?
I take a crochet stitch marker (the orange thing in the photo above), and lock it onto the last stitch of the round. Then, I’m just going to keep crocheting around and around until I’m exactly 3 rounds above my marker!
Check out the photo above… and you’ll also see why I prefer crocheting through the back loops- each round leaves behind a little horizontal ridge that makes each round super-easy to count!
Handy Use #3: Position Your Pieces for Attaching
Attaching pieces can be a little tricky, too… but stitch markers can help! So, let’s look at some instructions that say, ‘attach legs to rounds 9-14’.
What you want to do is find out where round 9 is, and place a locking stitch marker there. Start counting (see the ridges?) from the center:
Count until you’re at round 9, and place a marker. Place another at round 14. Now you know where your leg should be located on the body!
Handy Use #4: Use Crochet Stitch Markers to Hold Pieces While Seaming
So now you’ve marked where your pieces should go… but locking stitch markers have one more great use. I use crochet stitch markers to hold my pieces in place while I’m sewing pieces together. It’s like having a few extra hands!
They’re big enough to go through a couple layers of crochet fabric, and by placing a couple around the piece that you’re attaching it’ll be held in place – making your sewing even easier. Yay!
I’ve been showing you lots of examples of circles… but this exact same trick can be used when assembling a sweater or afghan blocks! It keeps everything nice and even!
Handy Use #5: Keep Your Work from Unraveling When You Travel
Throw your crochet into your bag, and you’re just one snag away from all of your work coming undone. Eep! But not with a stitch marker!
Put your locking stitch marker through the loop when you’re done… and it can’t unravel even one stitch! Fabulous!
Caring for Your Crochet Stitch Markers
I bet you didn’t think these handy tools needed any special care, but there’s one little trick that will make them even easier to use.
Store them open!
That’s it! That’s the key to a healthy and long-lasting locking stitch marker.
Why? If you store your marker closed, the plastic slowly bends until the ‘open position’ isn’t very open anymore.
It’s not a huge deal, but it makes the marker just a little bit harder to slip onto your crochet piece. Store them open and there’s no problem!
There you go – lots of handy ways to use your crochet stitch markers to make your projects just a little easier and more fun.
Here are handy links to all the posts about crochet tools and supplies.
In fact, one of my most popular blog posts is this one where I talk about putting colors together.
But maybe you’re not into wearing lots of different colors. I have another great color combo for you: a neutral + a pop of color!
How to do it
My philosophy for mixing neutrals and color is to mix warmth, but keep the darkness the same. For example, I mix a warm color with a cool neutral… but keep them about the same lightness.
Here’s a little chart showing some ideas:
See it in action!
I just finished knitting Dromos (well… actually, I finished knitting it a long time ago, but I just finished weaving in the ends!), and I just love it. It combines a medium brown with a soft blue.
Here’s a close up:
Yummy, right? It’s a warm brown mixed with a cool blue, and they’re both similar darkness and a similar muted tone.
And do you remember Phi?
A cool grey plus a warm orange… both fairly dark. Delicious!
Dark grey and lime green? Oh, yeah. Bonus: whenever you use different colors in a project, it’s an opportunity to stash-bust and use up some odd skeins you might have on hand! Stripes are a stash-busters best friend!
Have you done this before? What’s your favorite color combination?
When I’m teaching new knitters, I notice that a lot of them get caught up in the terms for the different styles of knitting. What is continental knitting? What is throwing? And which one is better?
Do what’s most comfortable
When I teach beginning knitters, I don’t tell them anything about how to hold the yarn. I let them do what’s most comfortable. Most folks intuitively grab the needles and yarn in the way that works best for them!
What is Continental Knitting?
‘Continental Knitting’ refers to holding your yarn in your non-dominant hand. For right-handers, that means holding (and tensioning) the yarn with your left hand.
It’s called this because it’s thought to be the style of knitting most popular on ‘the continent’ of Europe (as opposed to England), but I’ve spoken to a number of international knitters that reveal this generalization isn’t completely accurate. The finer-grained truth is that there are a variety of knitting cultures (with their preferred yarn-holding styles) within Europe… but that’s a whole ‘nother blog post!
I made you a video so that you can see me knitting ‘Continental’:
Most crocheters knit this way, as they are used to tensioning their yarn in their non-dominant hand.
What is Throwing?
Throwing refers to the action of moving the hand holding the yarn around your dominant knitting needle. It is most commonly used with ‘English’ knitting (where you hold your yarn in your dominant hand), but not necessarily.
Most people consider this to be a slower method of knitting… but let me tell you, I know some throwers who make my continental knitting look like it’s happening at a snail’s pace!
I made a little video of me throwing. I’m a bit slower at it because it’s not my usual style!
And more…
There are all kinds of styles of knitting that describe how you hold your hands and where you hold your yarn. We’ve only scratched the surface!
And there is no ‘best’ technique! Each style takes practice and suits different knitters!
However, if you want to do stranded knitting (colorwork), then you’ll probably want to learn both of these techniques for faster two-handed knitting.
I hear you. Doing a gauge swatch is boring. You have a lovely ball of yarn in your hands and you just want to get started!
But did you know that if your gauge is off, you may end up using more yarn than is recommended? And if you’ve purchased a kit, that may mean you run out!
eep!
What does gauge have to do with yarn usage?
We’re used to thinking about gauge as telling you how big your finished product is going to be. If you’re crocheting a stuffed animal, you may not mind if the result is 1/2 inch bigger… but that doesn’t mean you can skip the gauge swatch!
When you measure gauge, you measure the height and width of the stitch.
But a stitch is made by wrapping the yarn around your hook or needle. And bigger stitches are made with bigger loops.
A bigger loop on your hook or needle uses more yarn!
If you’re a loose crocheter or knitter, that means that your loops are a bit bigger than standard… and you’ll use up a bit more yarn!
What to do
First of all, do a gauge swatch! It’s the only way to know if you’re really on target with your stitches.
Finally… this is only tangentially related to the issue of gauge, but it’s a great chart, so I want to share! There are more tidbits about calculating yardage in this blog post.